Hi everyone, this Rana and I’m so happy to be back with a new light up card featuring Chibitronics products and some of Magengo designs products.
My today’s card is a shutter card, and the lights are inside the card.

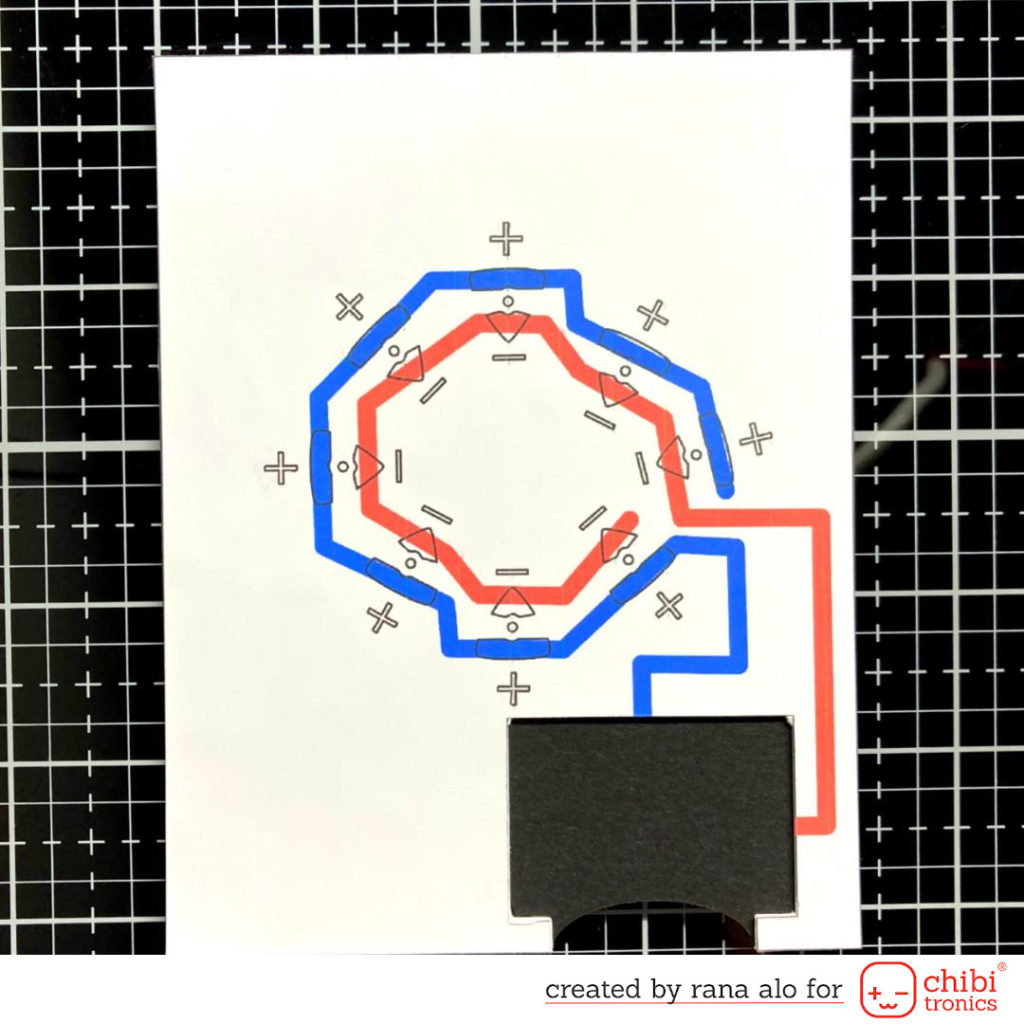
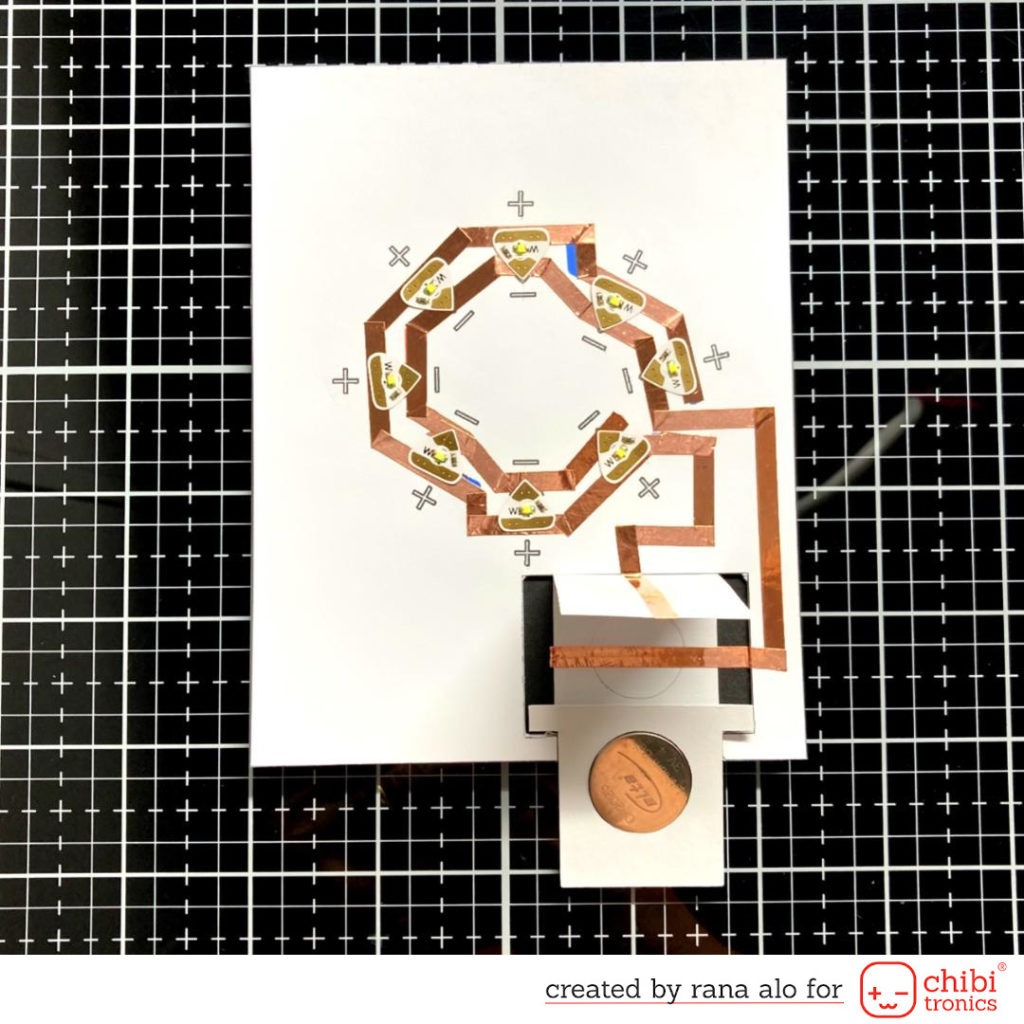
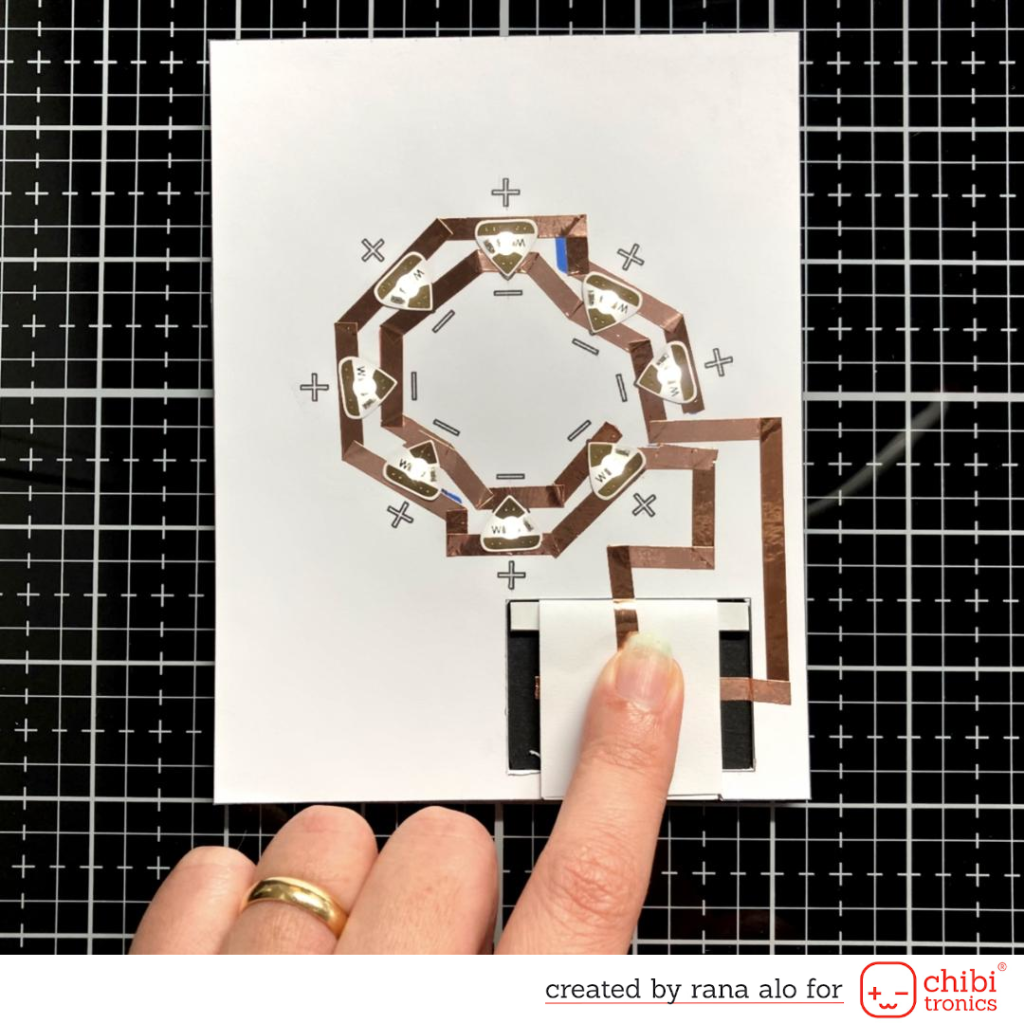
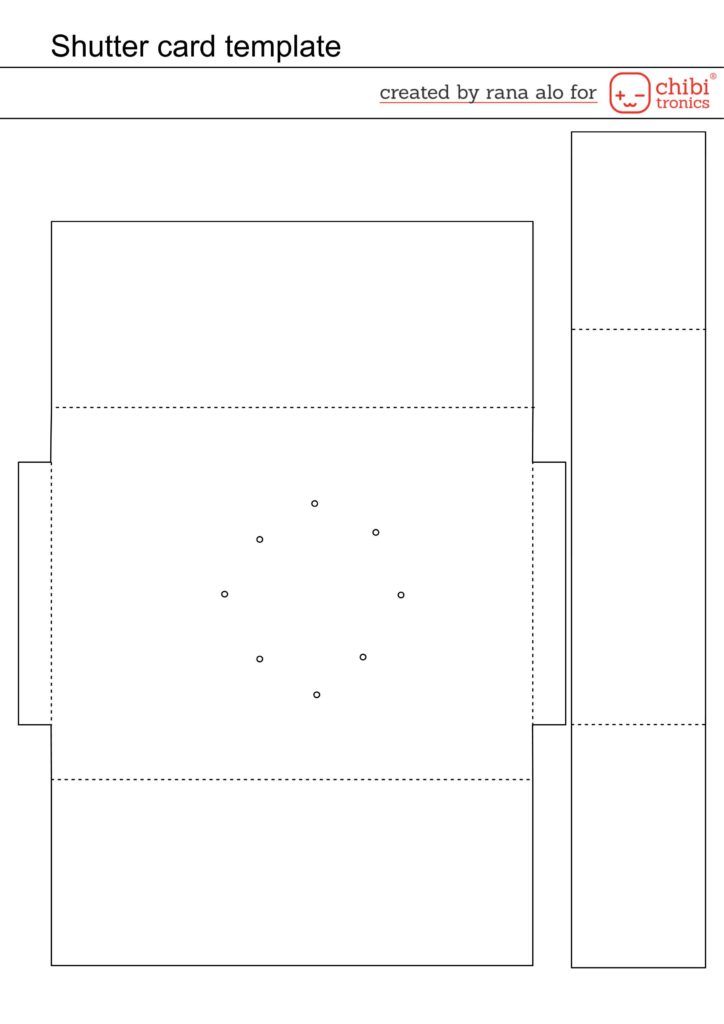
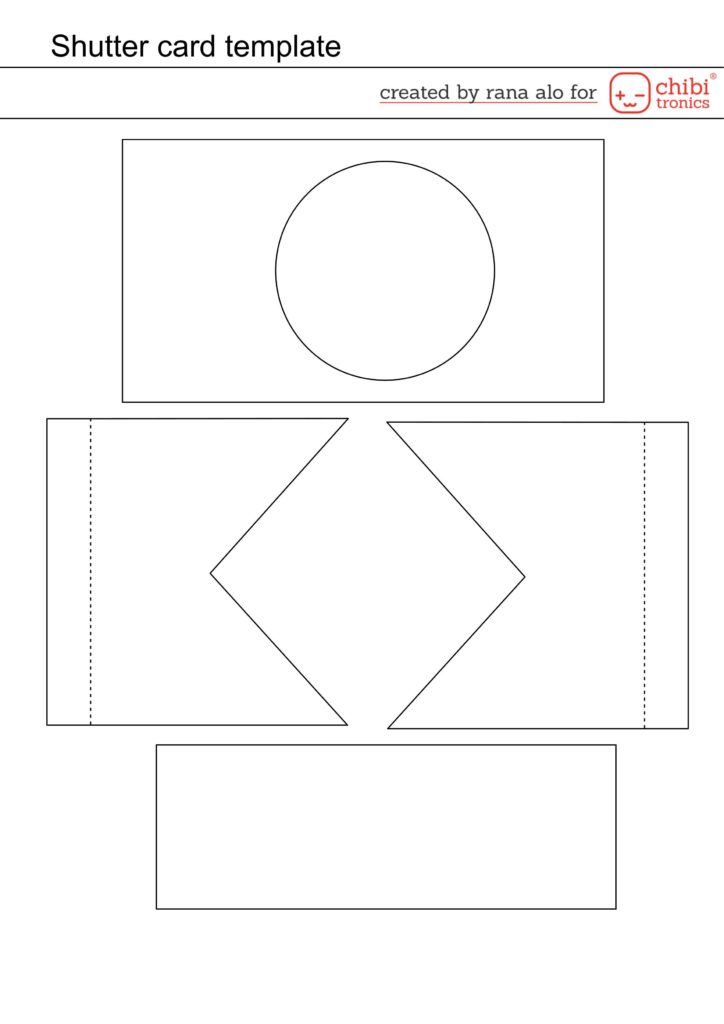
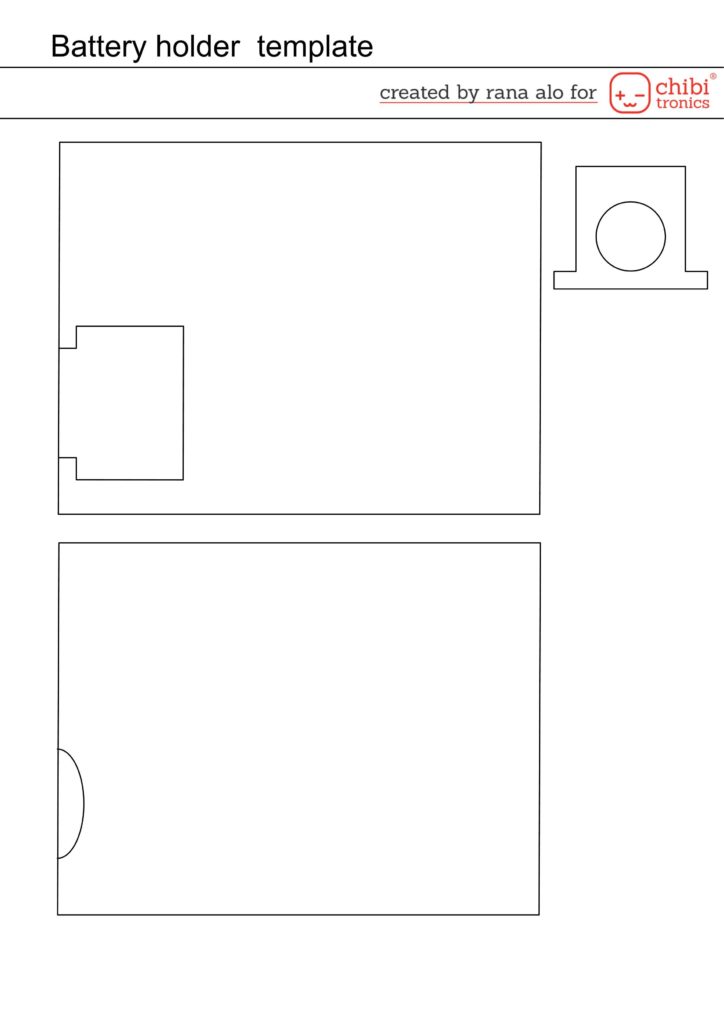
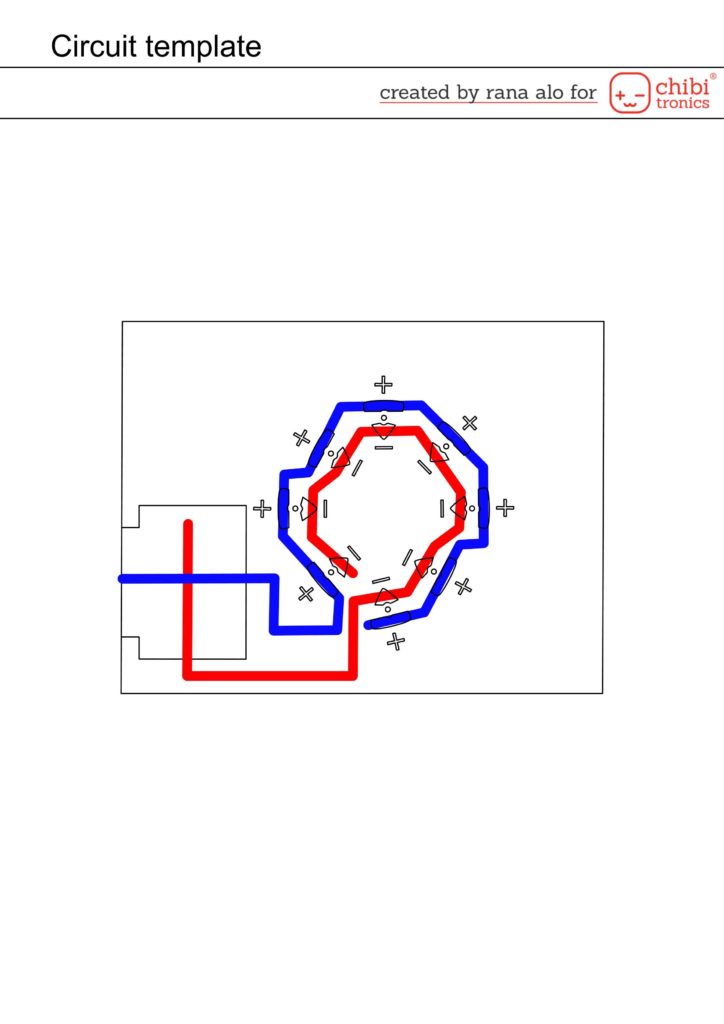
I designed my card and the circuit in my silhoutte software and then I cut the templates using my silhoutte portrait machine, after that I printed my circuit template and built it using Copper tape and a few of sticker lights.
Then I started to work on the black card base and I used for that a clouds stencil and yeti ink from lawn fawn to add the clouds using a blending brush.
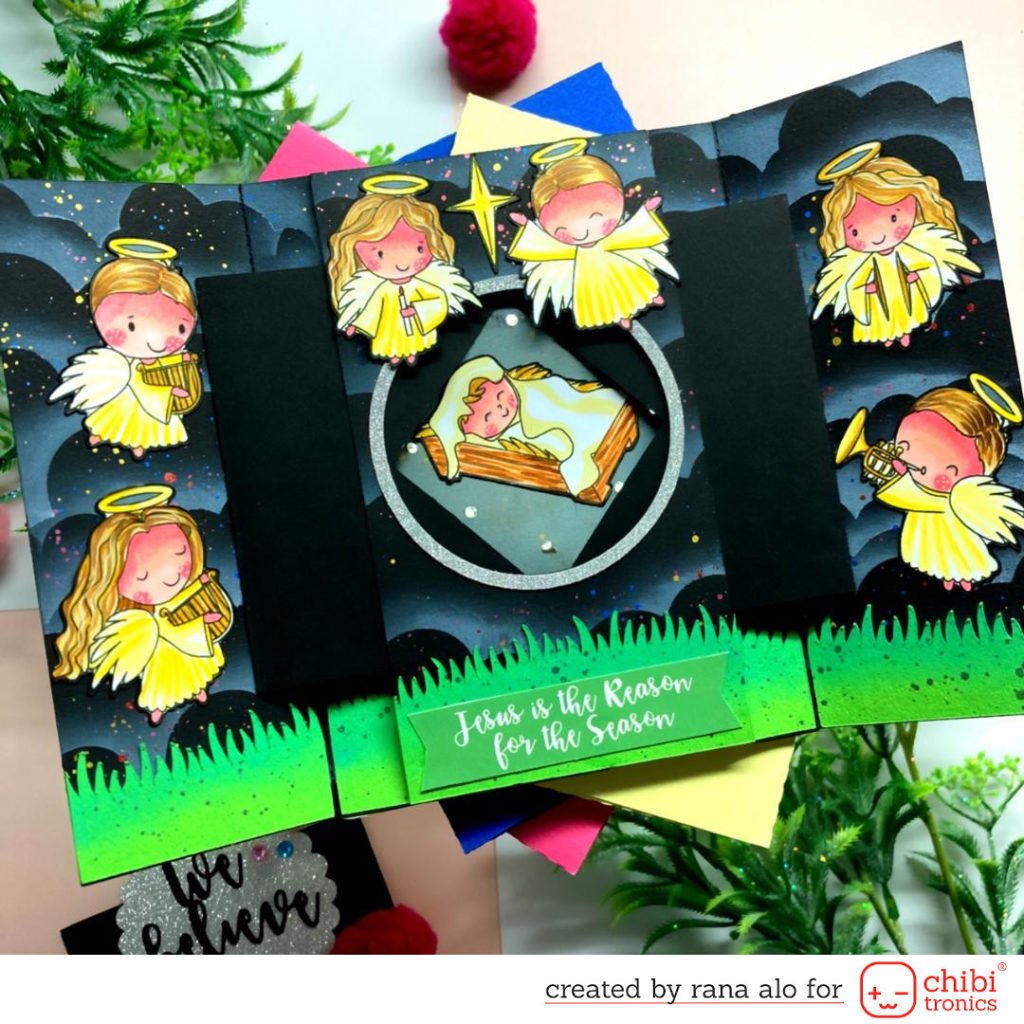
After inking the background I splattered it with some watercoolers to add more details on the background.
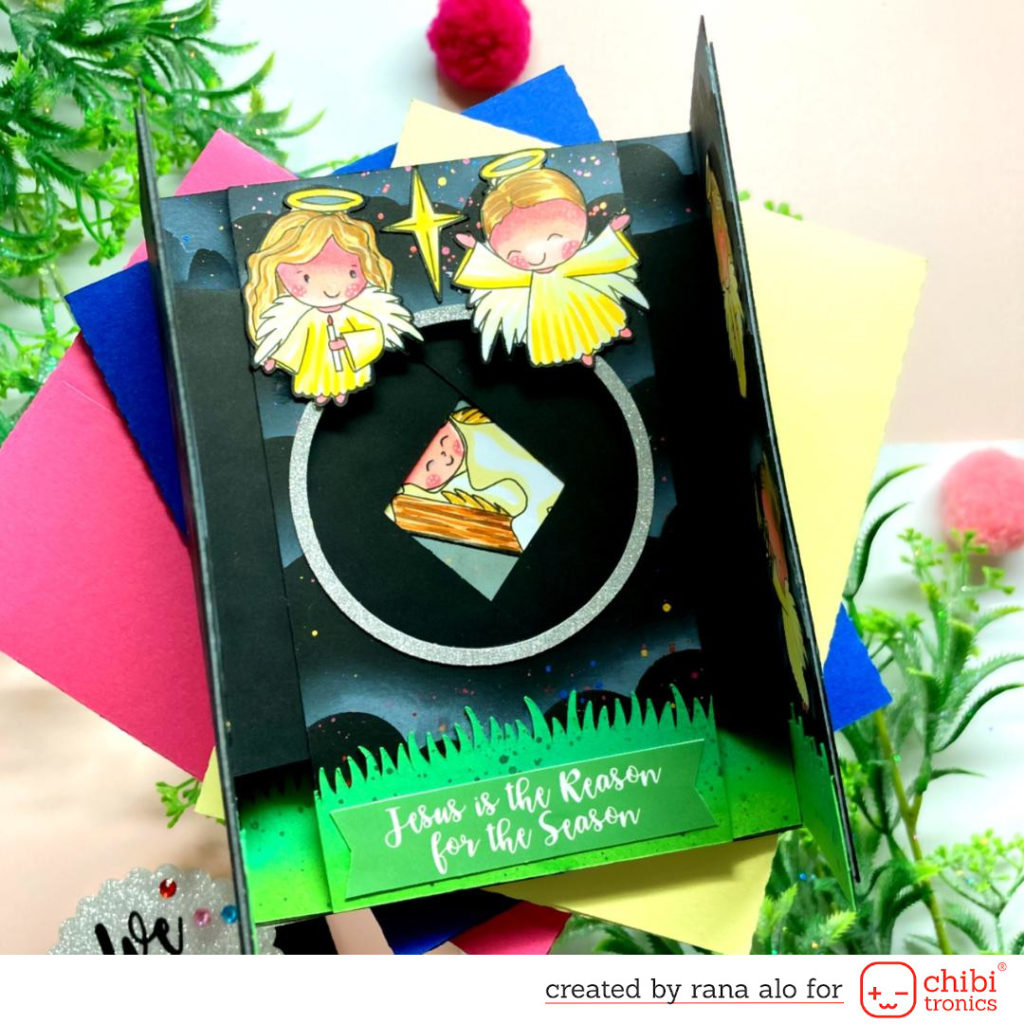
After finishing the card base and the background I started to work on my images, I sketched them using my silhoutte portrait machine then I coloured them using Ohuhu brush markers, to add more dimensions I just added some with lines and dots using white gel pen.
Here is the colouring plan and the markers that I used:
*The hair of the angels: E220, E210, E280, BR1, BR2
*The dresses of the angels: Y2, Y3, Y030
*The instruments: YR1, BR2
you can also download the card and circuit template and cut them using a pair of scissors :
I also designed my sentiments simply by writing them and in the silhoutte software and cut (we believe) using my silhoutte portrait machine and print (Jesus is the reason of the season).
Here are also a few photos showing more details of the card:
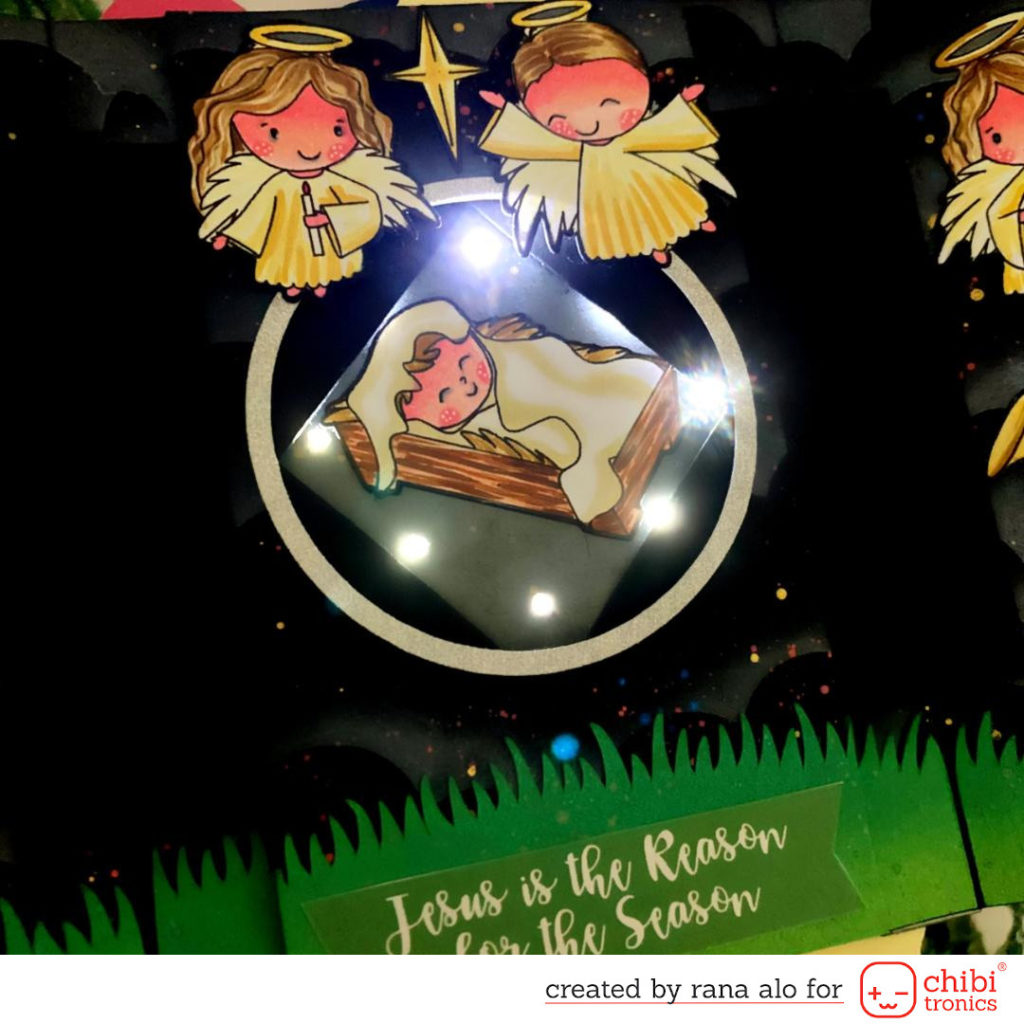
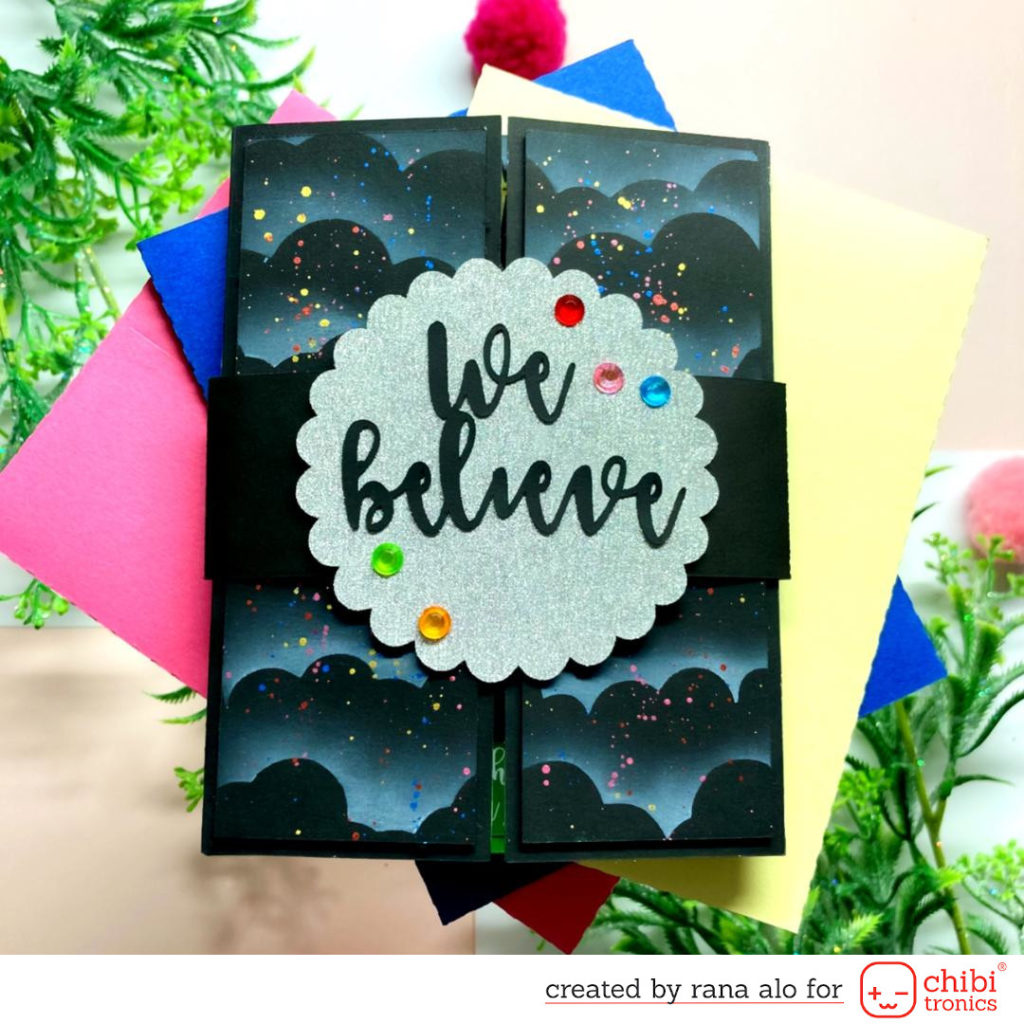
To decorate the card from the outside, I added some self adhesive gem stones.
Stamps and circuit materials that I used to create my card:
- Chibitronics white LED stickers.
- Chibitronics copper tape.
- Magengo designs Joy to the world digital stamp set.
- Elta 3V battery.
Tools that I used to create my card:
- Folia black cardstock.
- Folia white cardstock.
- Silver glitter cardstock.
- Yeti white ink by lawn fawn.
- silhoutte portrait machine.
- Liquid adhesive.
- Double sided tape.
- Foam tape.
- Ohuhu brush markers.
- White gel pen.