Hi Everyone, Melissa here.
Today I am sharing a simple circuit featuring the ‘Craft with Light Kit‘ from Chibitronics. This card also features the ‘Prehistoric Party‘ stamp set from Tracey Hey. For more details, please keep reading …..
1. Card Front
Firstly, I stamped the image onto X-Press It Blending Card and coloured it with Copic Markers. Draw a border around the edge of the card with Black Copic Multi Liner Pen. I added white accents to the image using a Sakura White Gelly 08 Pen. I have also added Shimmer Pen & Glossy Accents to the balloon. Set aside and allow this to dry.
The sentiment has been stamp and embossed with white onto Black card. Trim and set aside.

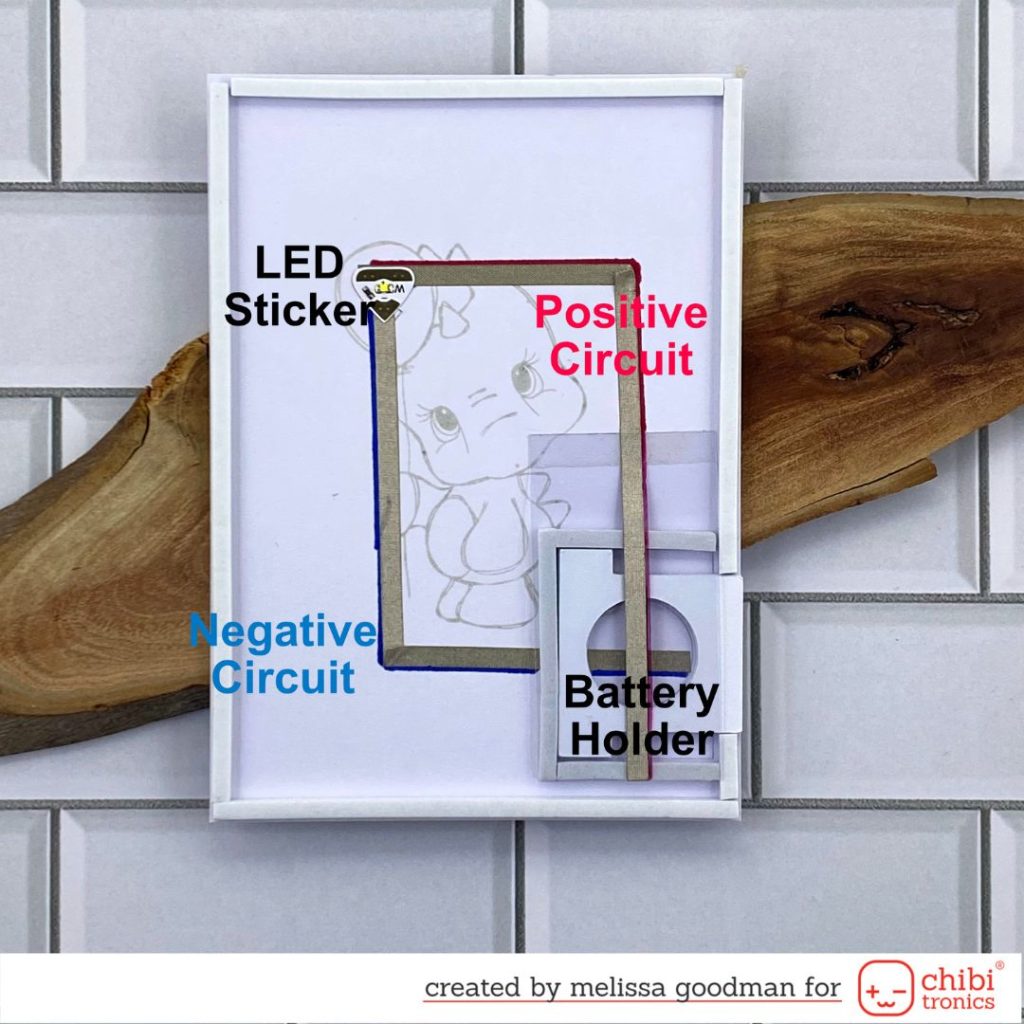
2. Circuit
The Circuit has been designed on a piece of 350gsm white card stock.
I have stamped the image onto this card to make it easier for me to design the circuit. I then mapped where I want the circuit to go in pencil. This makes it easier for me to complete the circuit.

3. Completing the Circuit
The Circuit has been completed using the ‘Craft with Light Kit’. This is such a great kit, everything you need altogether.
The card works by pressing the battery (just one the black strip to the right of the ‘birthday’ sentiment). The positive will connect with the battery, turning on the lights.
4. Adhere the card front.
It is time to adhere the card front I prepared earlier. I have used foam tape to do this.
I have also finished stamping the sentiment.

5. Let’s light this card up!
This circuit used the 2016 battery included in the kit to power the light.
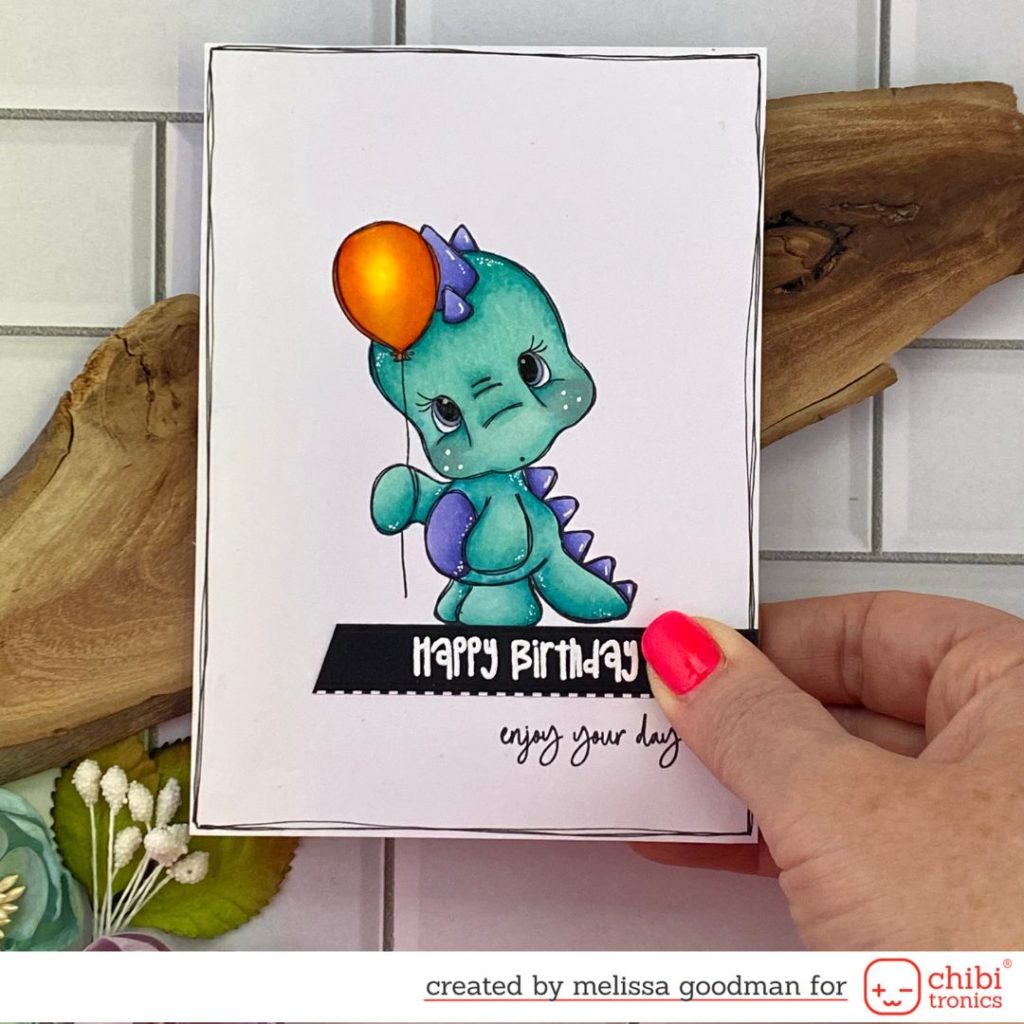
I hope I have inspired you to give a light up card a go.
Melissa xxxxx
Supplies
Chibitronics ‘Craft with Light Kit’
Stamp Set: Prehistoric Party