Happy Monday! Today, I’m Allison Cope here to share a fun light up card featuring the Chibitronic BLINK “Craft Effects Stickers” to make our lights blink on and off.
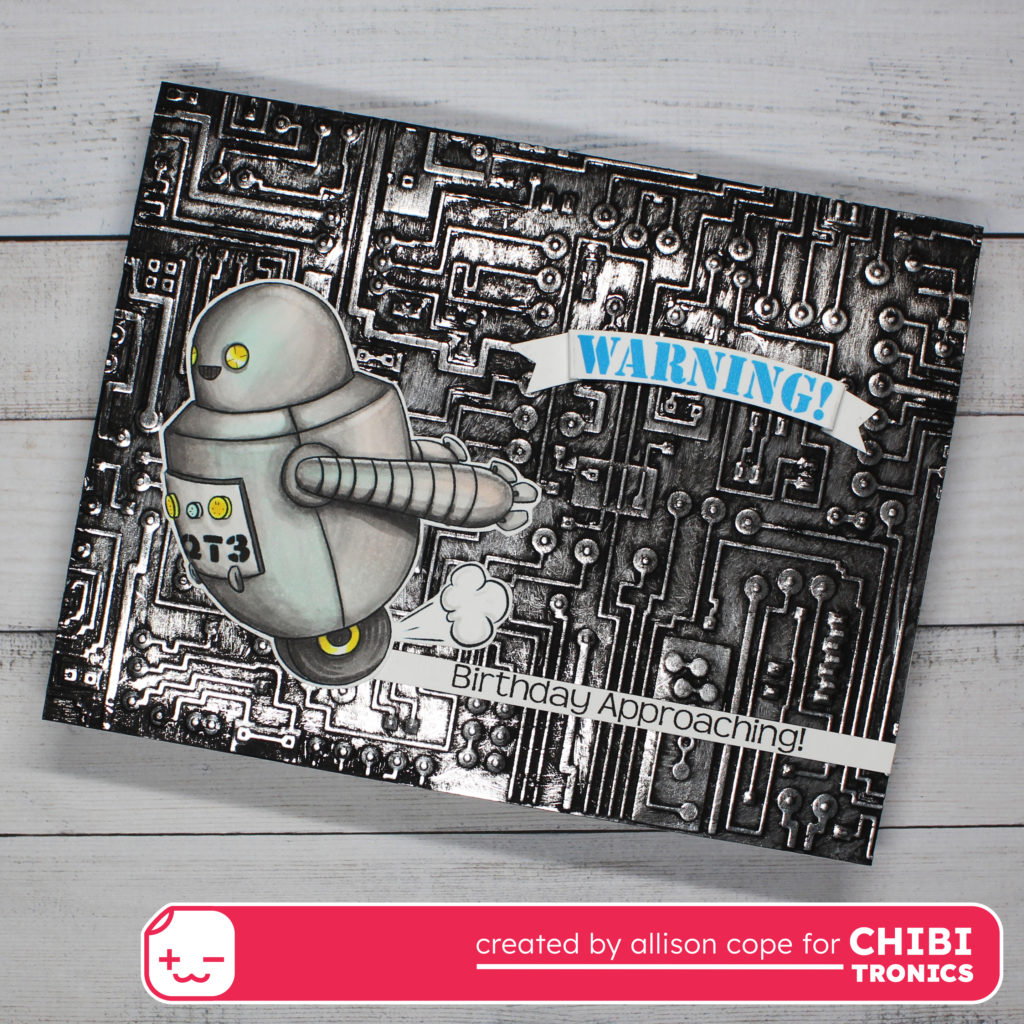
For today’s card creation, I first embossed my fun “circuits” embossing folder on some silver foiled cardstock and distressed it with some black acrylic paint. Then I printed out and colored up my sweet little robot from Sweet November Stamps and fussy cut him out.
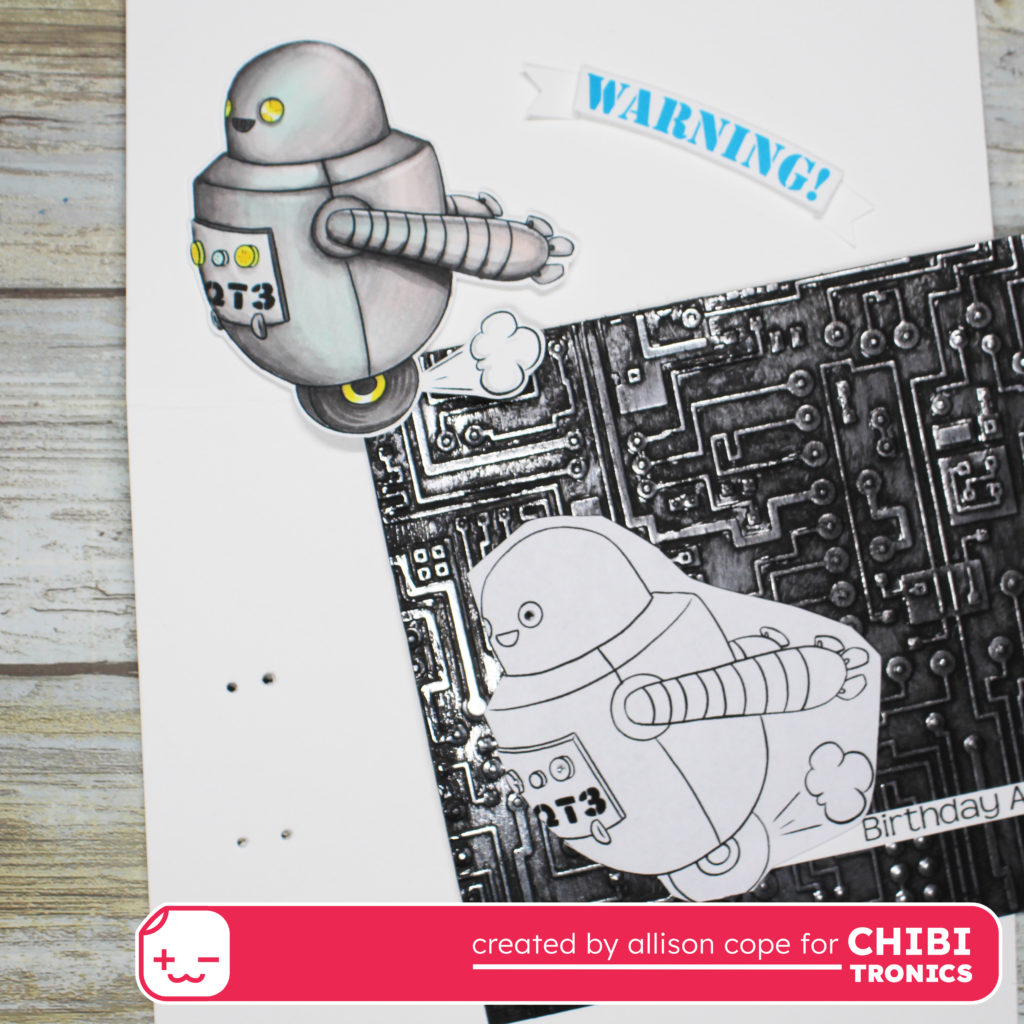
Next I took a copy of the robot and found the position of him on the card front panel and poked holes in the areas I wanted to light up. I chose his eyes and his 2 largest buttons on his chest.
I used a pencil and put marks through the 4 holes to transpose those spots to the surface of my circuit.
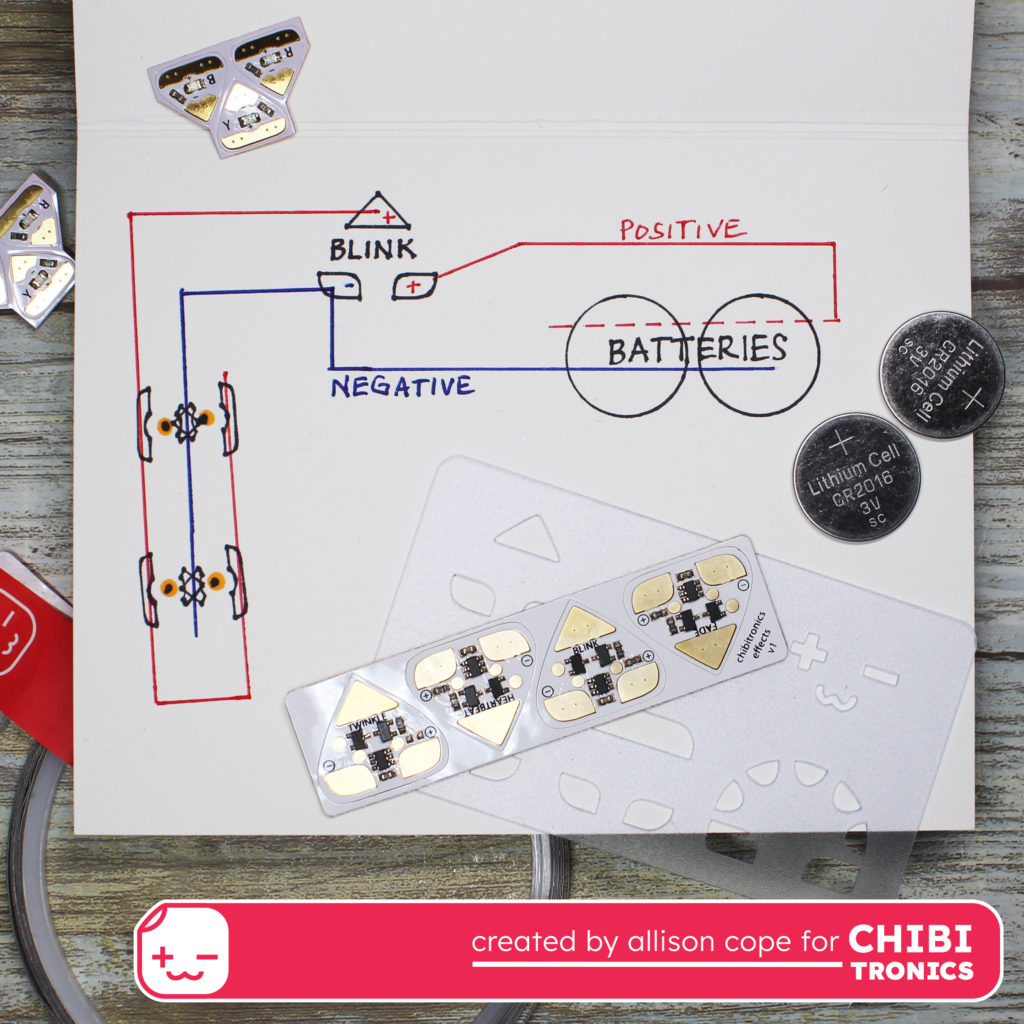
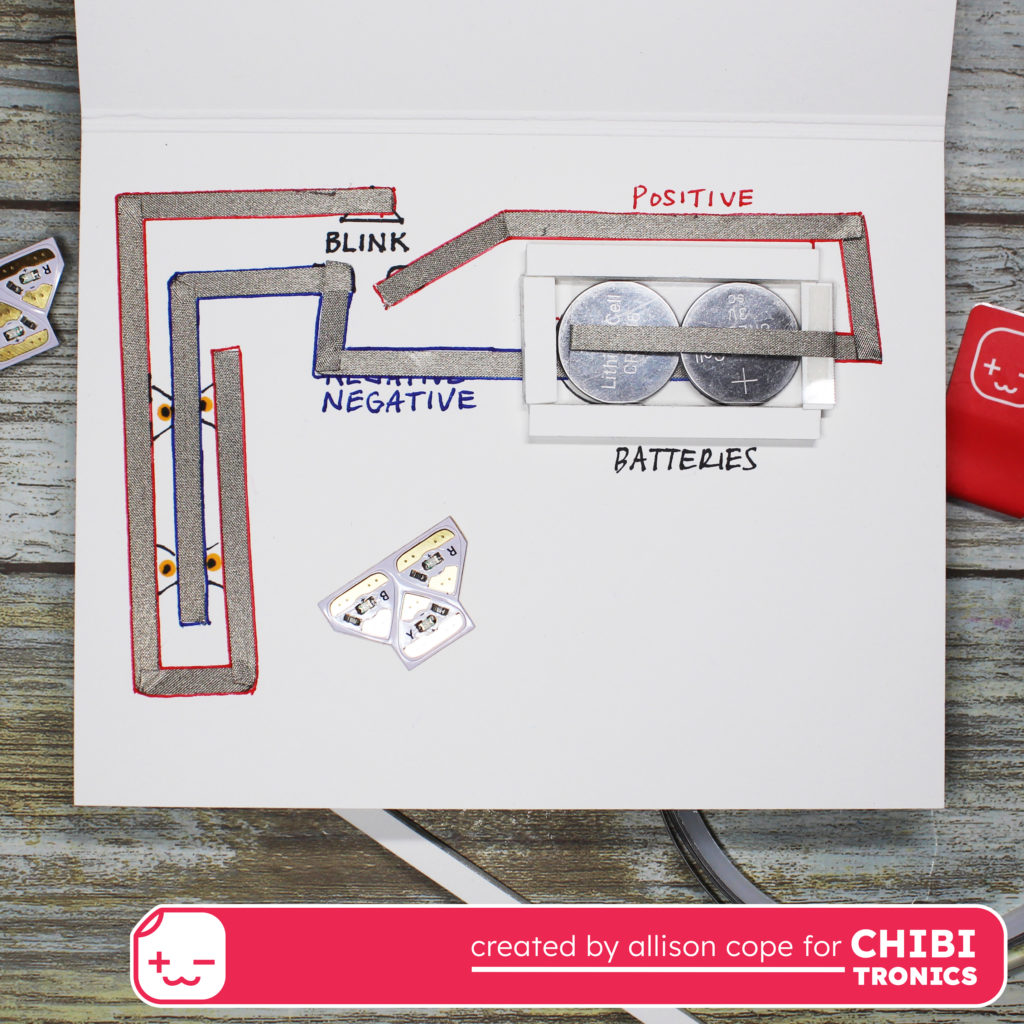
Next I planned out where everything would go on my circuit. I knew I wanted my batteries to be underneath my “Warning!” message so I placed them there. I knew where all 4 LED Light Stickers were going to go and that I could overlap the negative points of the stickers. So that left me the perfect place to location my Craft Effect Sticker. I made sure to plan out all of the positive (seen in red) and negative (seen in blue) lines of my circuit too. I used the Craft Stencil to plan out all my sticker locations – a handy tool to have!
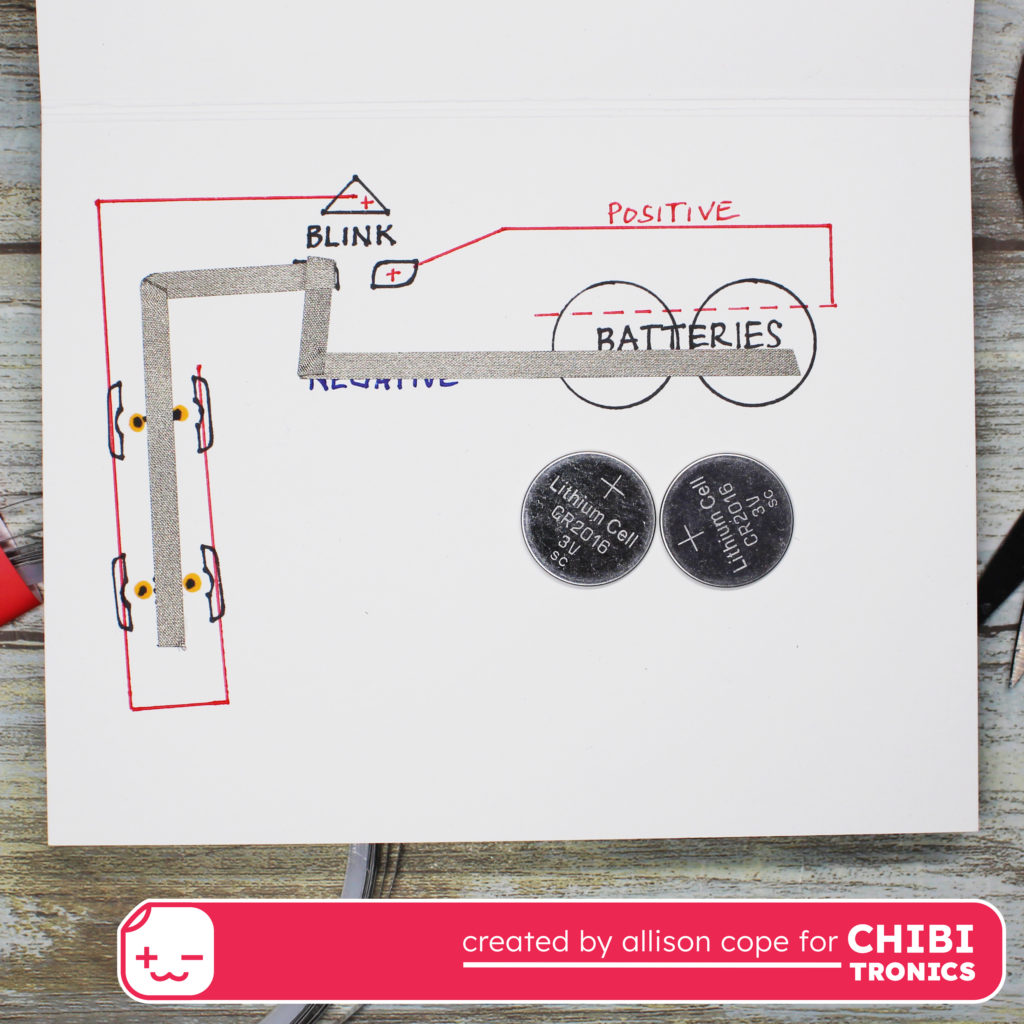
Next I laid down the Conductive Fabric Tape for the negative side of the circuit. This circuit starts underneath the batteries so I always start here first.
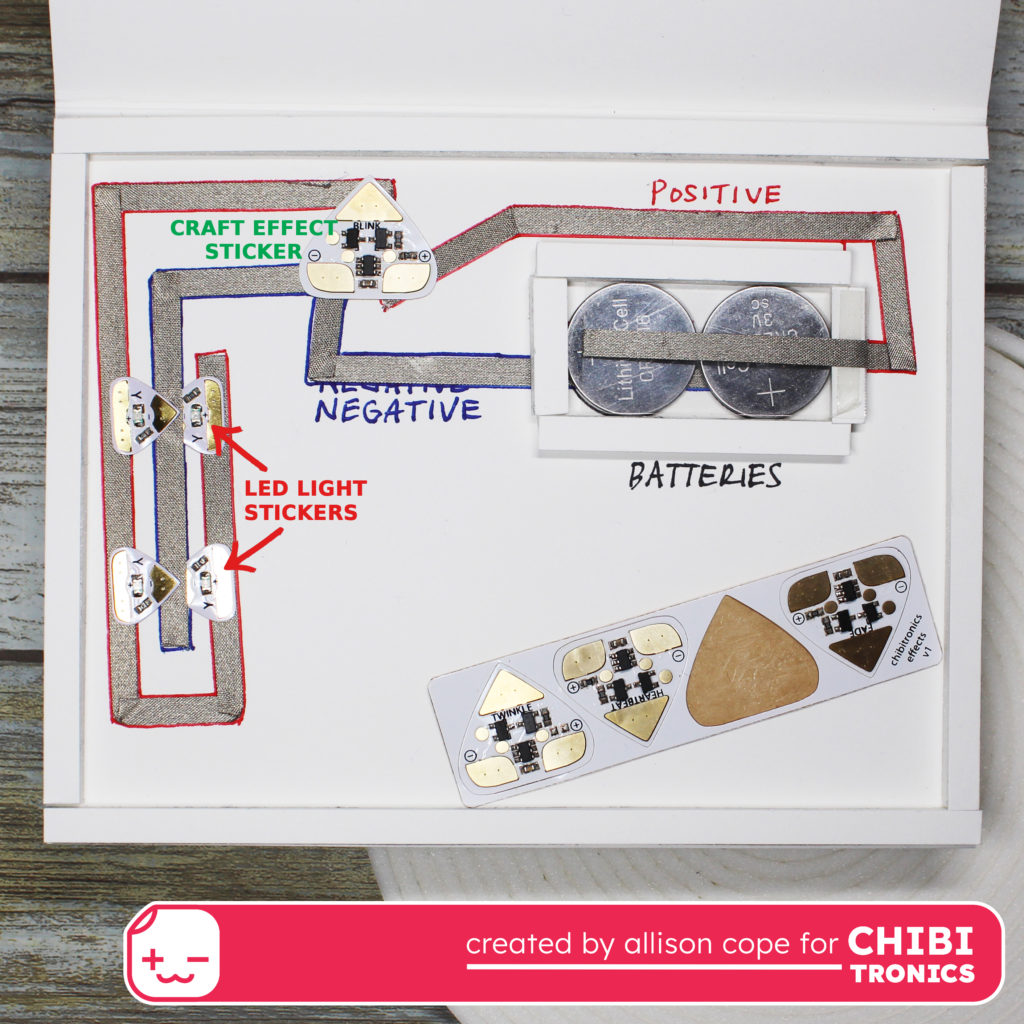
Then I created my batteries housing. I used 4 pieces of 3D foam tape to block off and hold my 2 batteries. Then I created a flap to start off the positive side of my circuit. I used a skinny piece of acetate so you could see through to the batteries but any non-conductive material will work for this. I proceeded to wrap my Conductive Fabric Tape from the underside of the acetate around to the top and continued it on to the lower right hand corner of the Blink “Craft Effects Sticker“. I then took my Conductive Fabric Tape from the top of the Blink “Craft Effects Sticker” and continued it the remainder of the positive side of my planned out circuit and across my 4 LED Light Stickers.
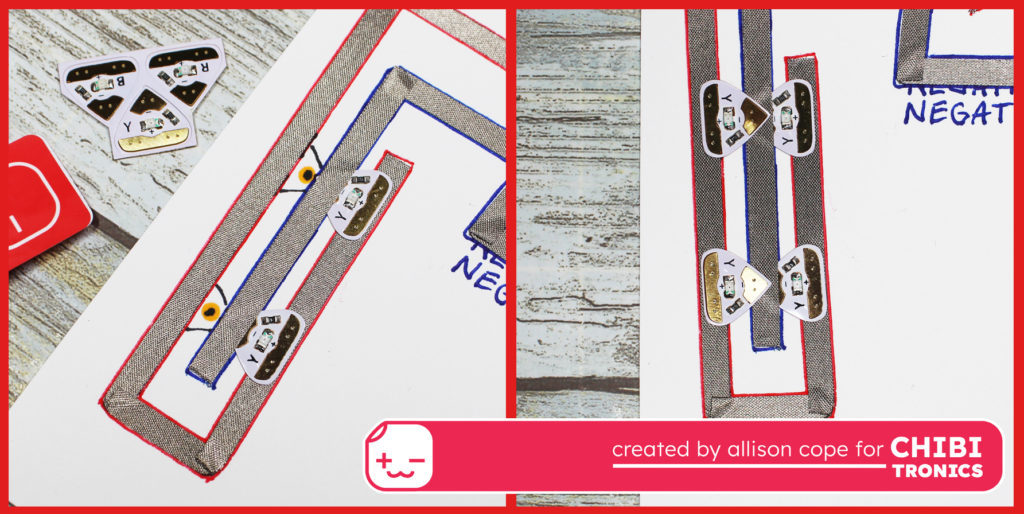
Next I laid down one side of my Yellow LED Light Stickers (also found in the Lights Sample MegaPack). To ensure that everything was secure, I laid another strip of the Conductive Fabric Tape across the negative ends of my light stickers. Then I laid down the remainder of my Yellow LED Light Stickers.
To complete my circuit I added the Blink “Craft Effects Sticker” to the circuit and gave the circuit it a test run by pressing the top of the battery housing.
And voila… my little robot has blinking light up eyes and buttons…
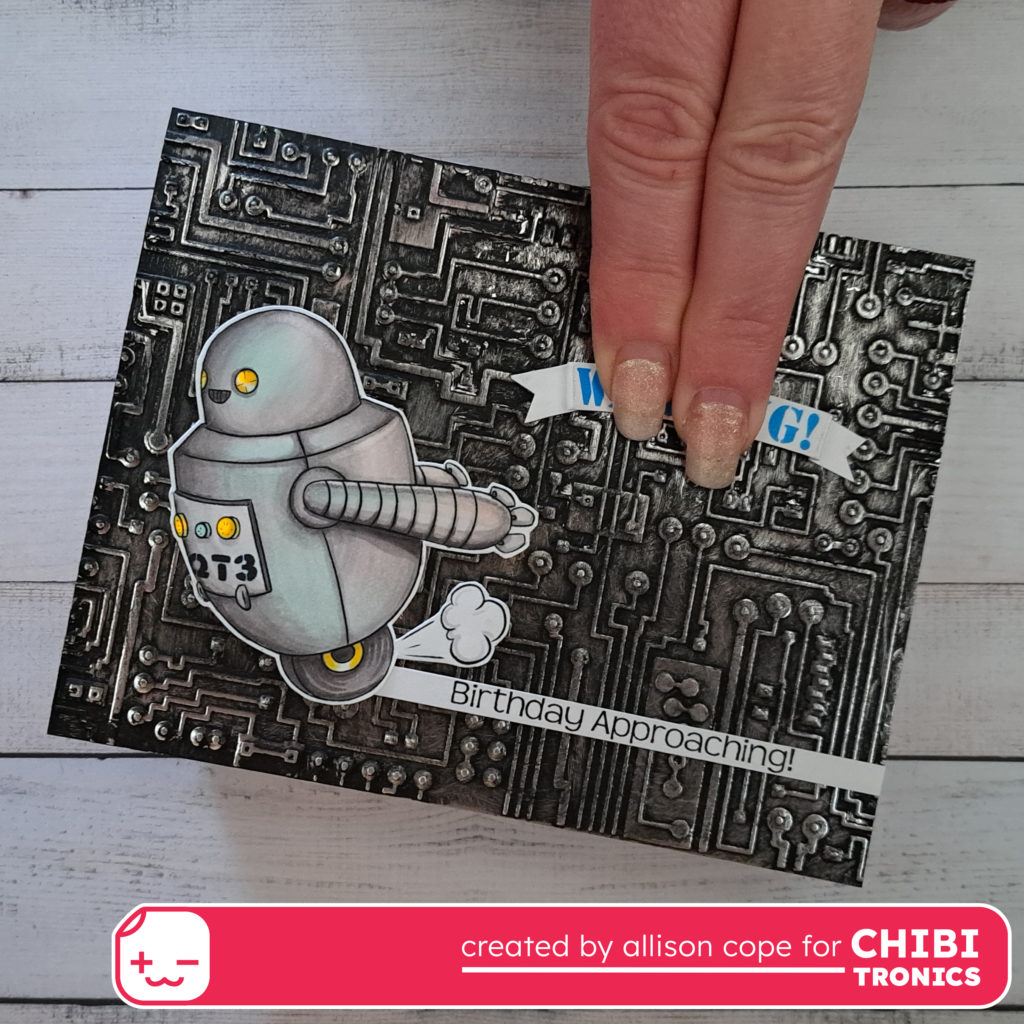
To see my card in action, CLICK HERE!
Thanks for coming by and checking out my card today! Hope you are inspired to make some light up creations yourself!
