Hi Everyone, Melissa here.
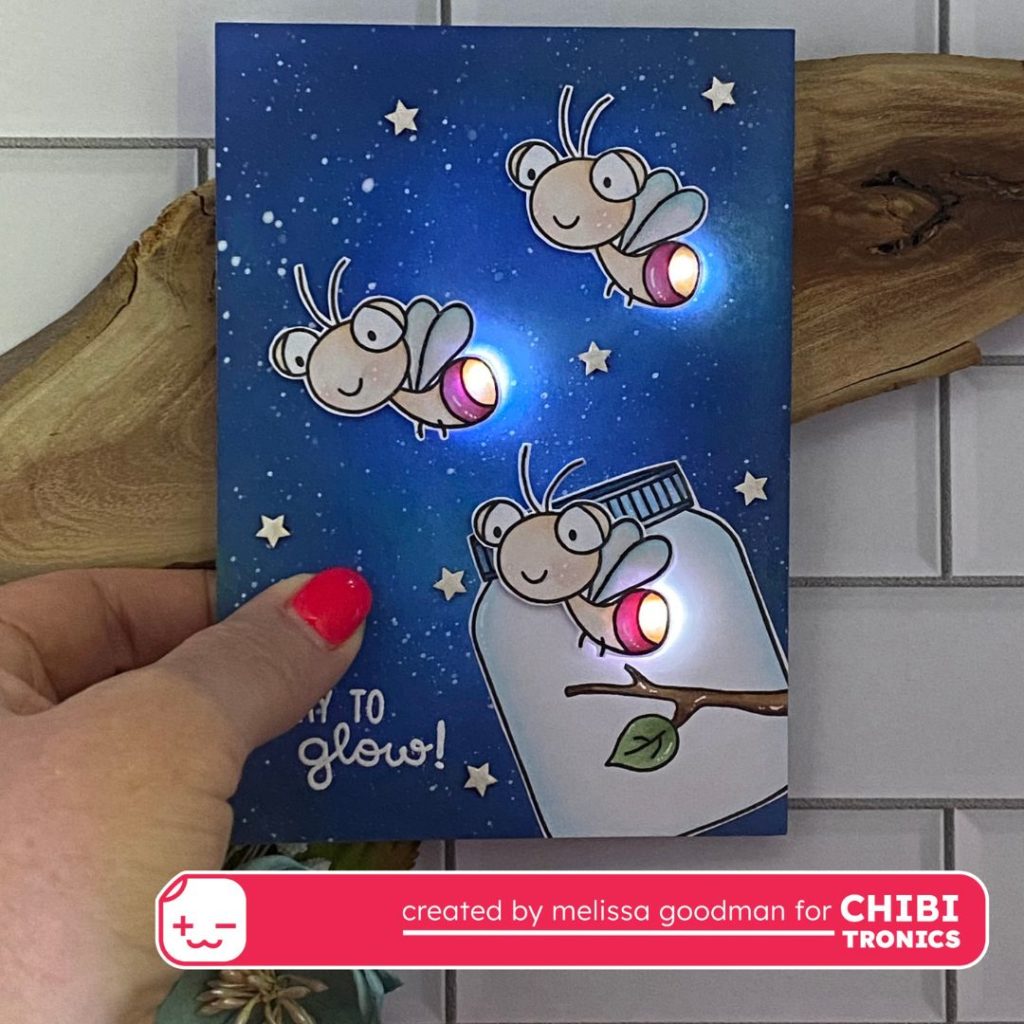
Today I am sharing a 3 light circuit which uses a ‘Push’ feature to light up the Fireflies. I have used the ‘Craft with Lights Kit‘ from Chibitronics. This card also features the ‘Winging It‘ stamp set from Ink Blot Shop.
For more details, please keep reading …..
- Create Background & Colour Images
I have created the background using Distress Oxide Inks and Blending Brushes. I have added white splatters with Amsterdam White Ink. The main stars are chipboard adhered with Liquid Glue.
I have also stamped the images onto X-Press It Blending Card and coloured them with Copic Markers. I fussy cut them, leaving a small white border.
Set all aside to dry.
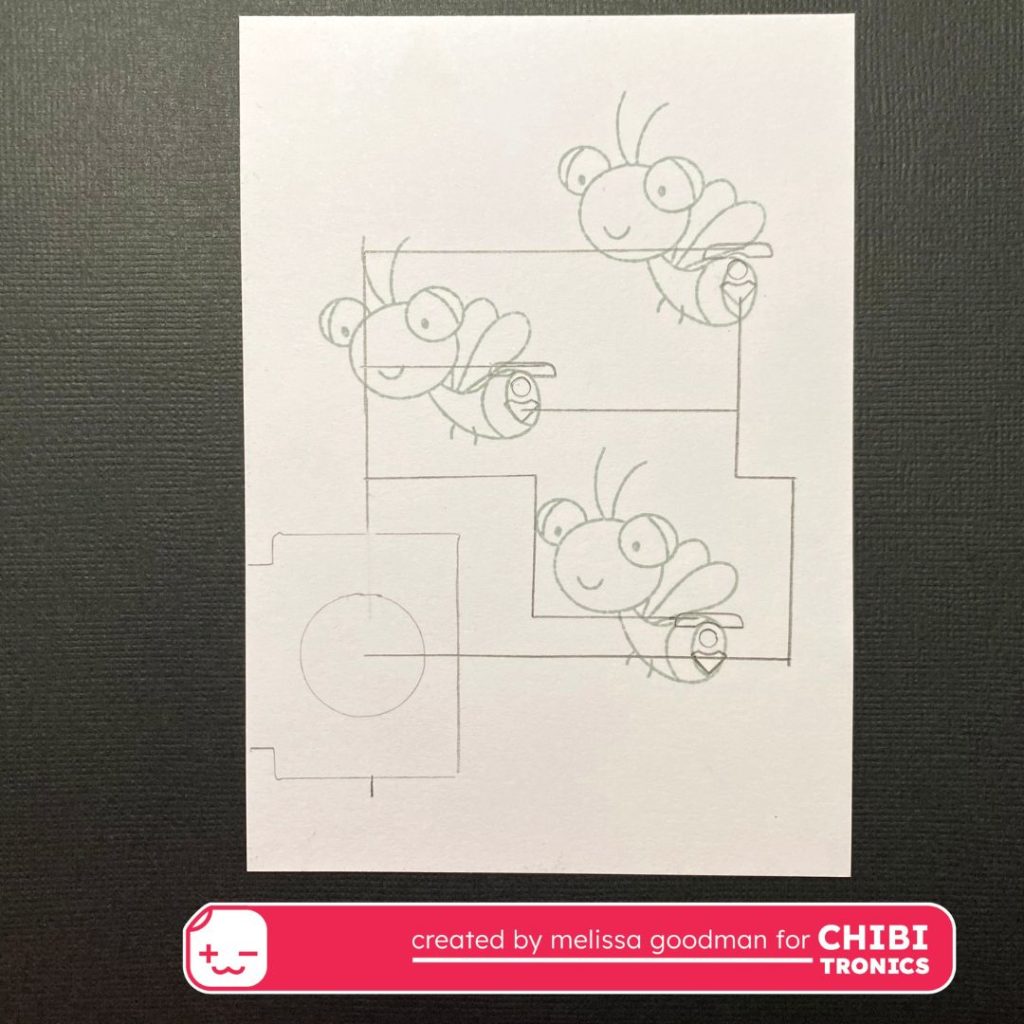
2. Circuit
I have stamped the image onto another piece of white card. this is exactly the same as the card front. This allows me to easily map the circuit.
I have drawn the circuit in pencil, just so I know exactly where the circuit will go.
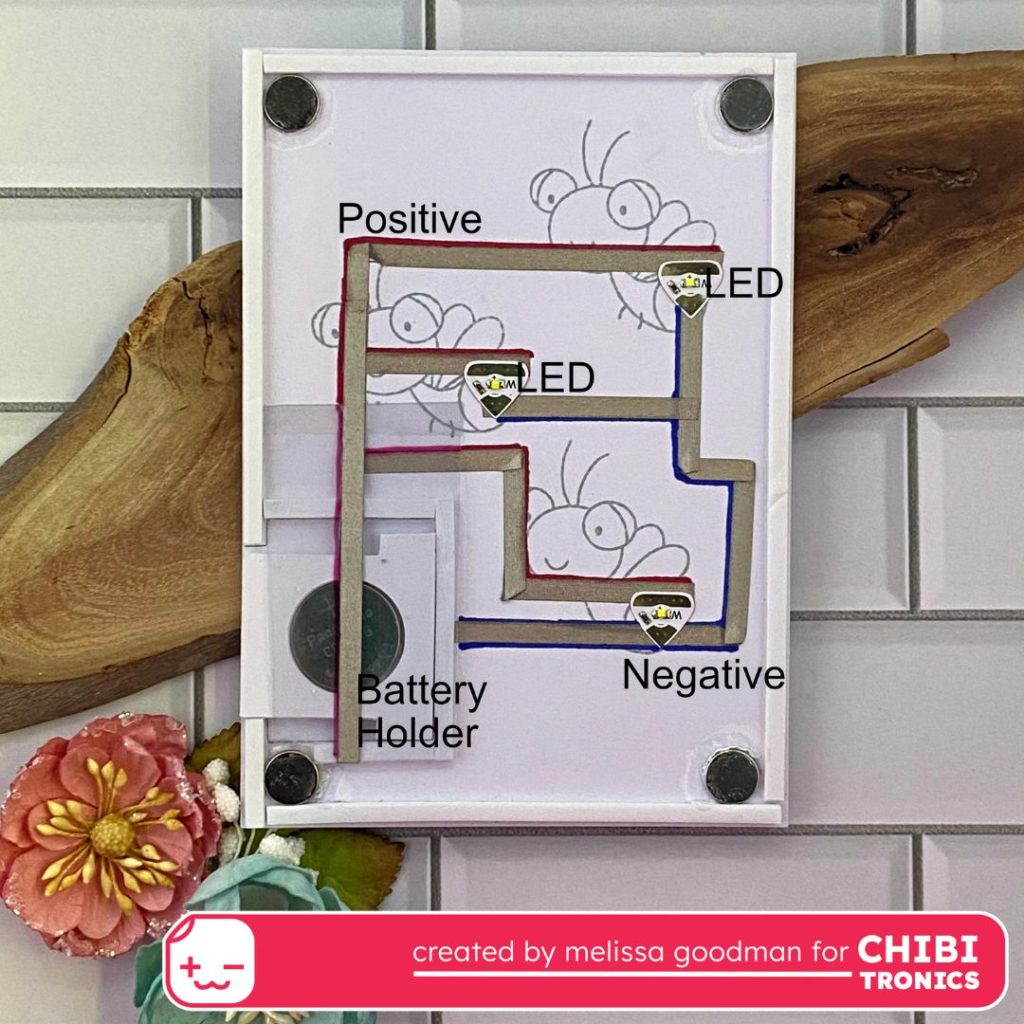
3. Completing the Circuit.
I have used the Chibitronics ‘Craft with Light Kit’ to complete the circuit.
I love this Kit! Exactly what you need all in one place/kit!!
4. Adhere card front.
Attach the card front to the base card.
For this, I have used magnets so the circuit can be shown easily, however you can use foam tape.
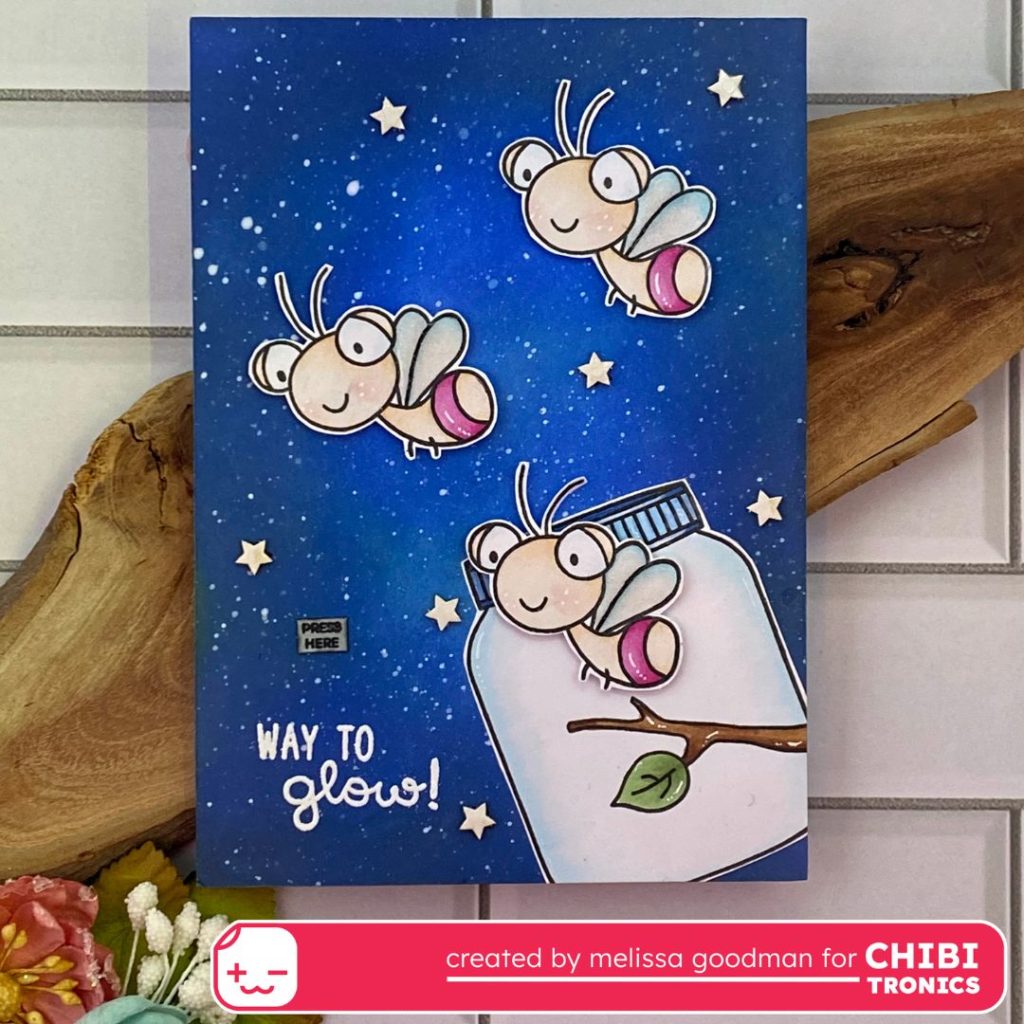
5. Let’s light this card up!
I have used the 2016 battery included in the kit.
Press the battery holder to light up the card (the ‘Press here’).
The positive will connect with the battery allowing the lights to shine.

I hope I have inspired you to have a go at a light up card.
Melissa xxxxx
SUPPLIES
Chibitronics Craft with Light Kit
Stamp Set: Winging It by Ink Blot Shop