Celebrate Oktoberfest with a Chandelier, Chibitronics Sticker LEDs, & a Reed Switch

In my latest tutorial, Paper Circuit Chandelier, I’ll show you how to create a glowing, customizable light fixture that you can suspend from a hook, ceiling, or even a tree branch!

This glowing wreath, adorned with blue and white ribbon, has a branching circuit around its outer perimeter that lights up when a magnetic pretzel comes into contact with a hidden reed switch.

Inspired by the German tradition of Oktoberfest, which takes place each September, I’ve created a festive wreath light that is perfect for a porch-sized celebration.

A wreath wrapped in pine garland, with glowing ribbons attached to its outside perimeter hangs from a ceiling.

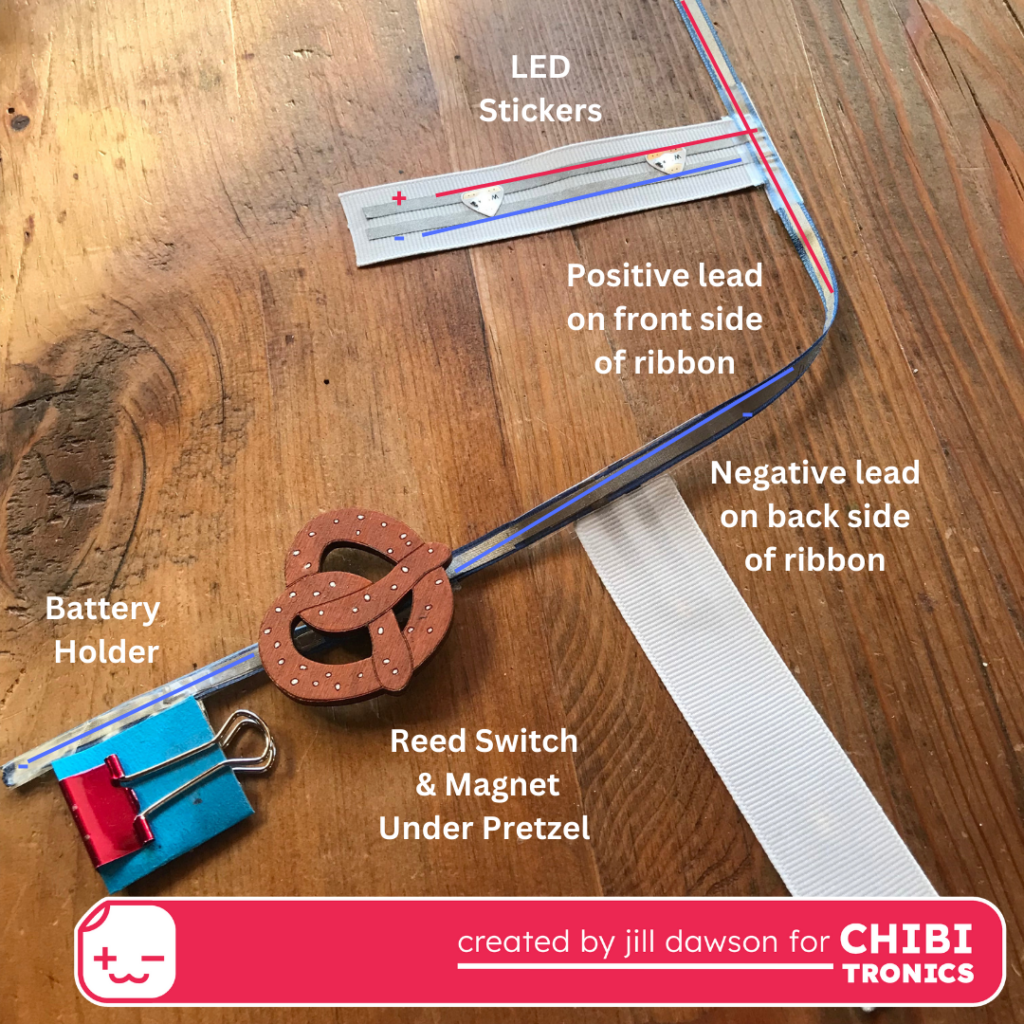
Then for a bit of drama (and to conserve the battery) I’ve added a reed switch (magnet on), which is triggered by an adorable magnetic pretzel.

When the magnetic pretzel comes into contact with the reed switch hidden under the ribbon, branches of LEDs light up around the perimeter of this decorative paper circuit chandelier.

To build your own, you’ll need to construct a branching circuit that takes advantage of both sides of a ribbon.
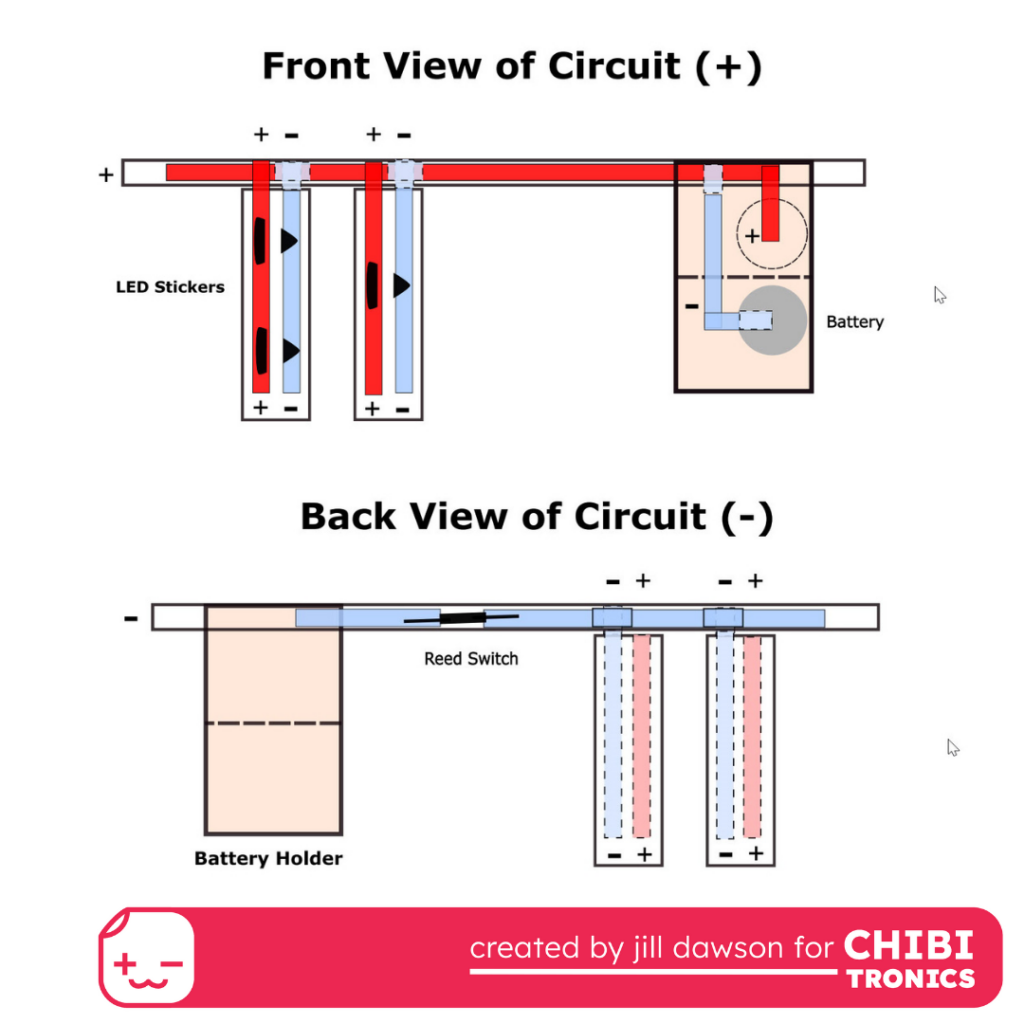
This image has two circuit diagrams stacked on top of one another. Top: The top front view shows the red, positive lead of a ribbon "rail" with two ribbon flags hanging from it. Red positive leads run down the left side of each flag and are attached to the red positive rail. Blue negative leads on the flags run parallel to the red ones, and are attached to the back, negative side of the ribbon rail. Circuit sticker LEDs are placed between the two parallel leads on each flag, with the pointy end touching the negative lead and the broad side touching the positive lead. At the right of the figure, a paper battery holder connects to the negative and positive ribbon rails. Bottom: The bottom, back view is reversed. This is the back view of a Circuit Diagram that shows the negative lead, in blue, on the back side of a ribbon "rail." The left side of the figure shows the location for a paper battery holder. A reed switch is placed in a gap in the negative lead. To the right of the reed switch are two ribbon flags. Each has two parallel lines, a blue one on the left marked with a negative sign, and red one of the right marked with a positive sign.

The circuit, which will have a series of LED flags attached, will then attach to the outer permitter of a wreath form.
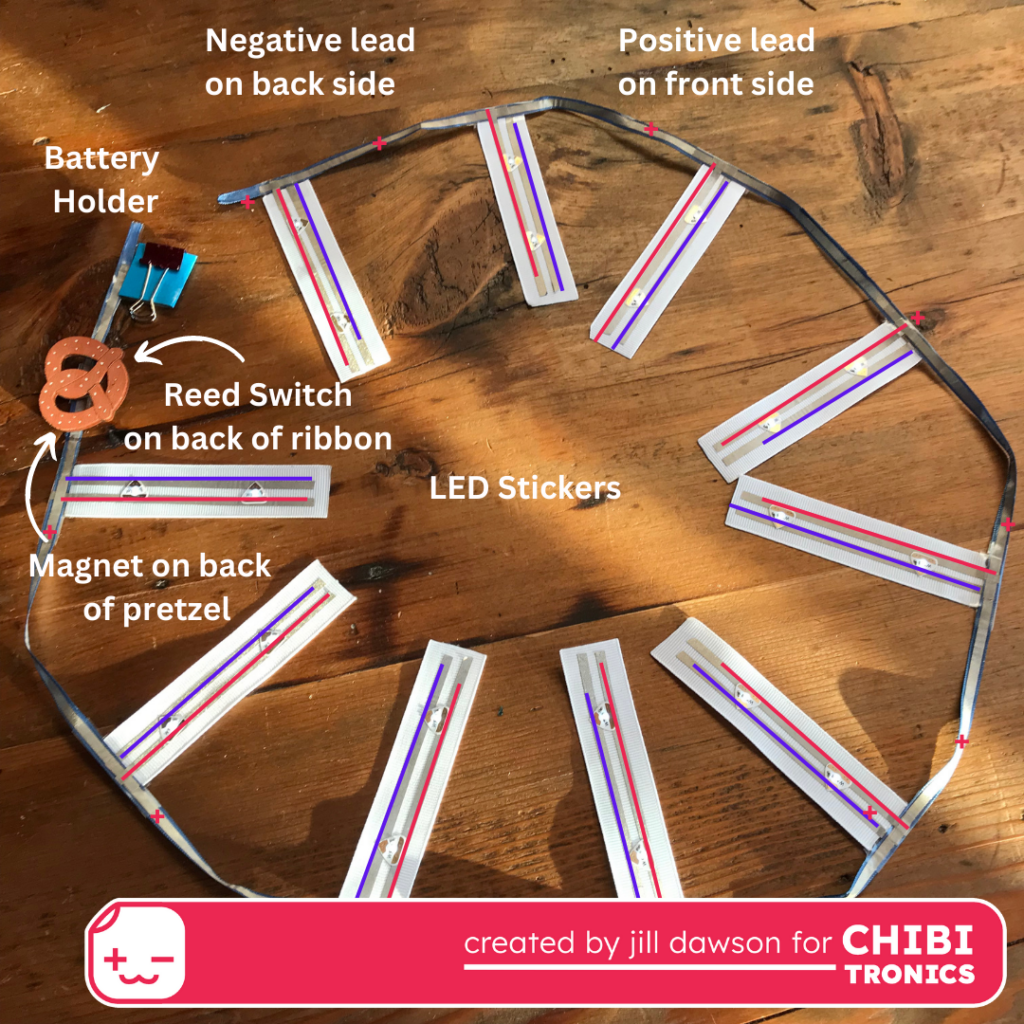
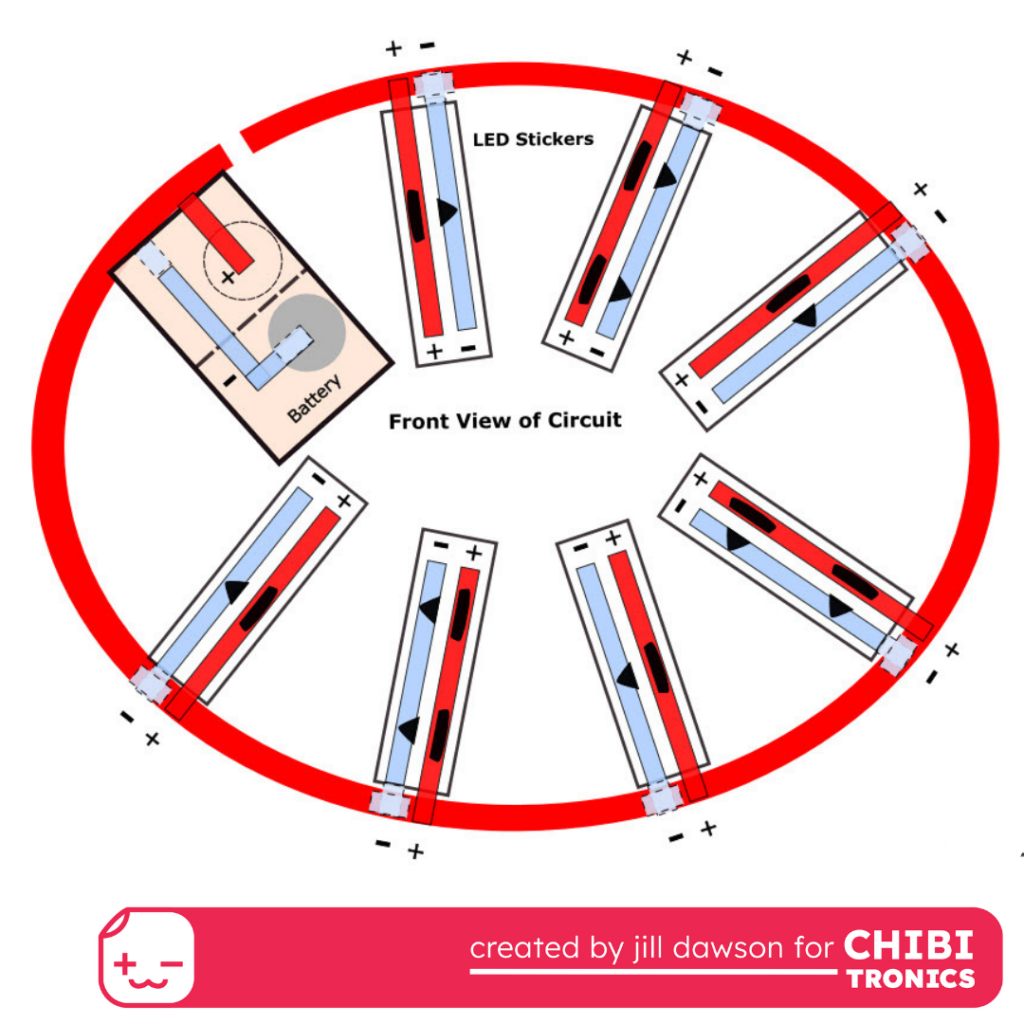
This is a branching circuit, with LED flags adhered to the positive and negative leads on two sides of a ribbon.
This circuit diagram denotes the positive lead in red and the negative lead in blue.

To learn how to build your own Paper Circuit Chandelier, and to access the free downloadable circuit diagrams, please visit the tutorial.

Celebrate Oktoberfest with a Chandelier, Chibitronics Sticker LEDs, & a Reed Switch
Scroll to top