Hi, crafty friends!
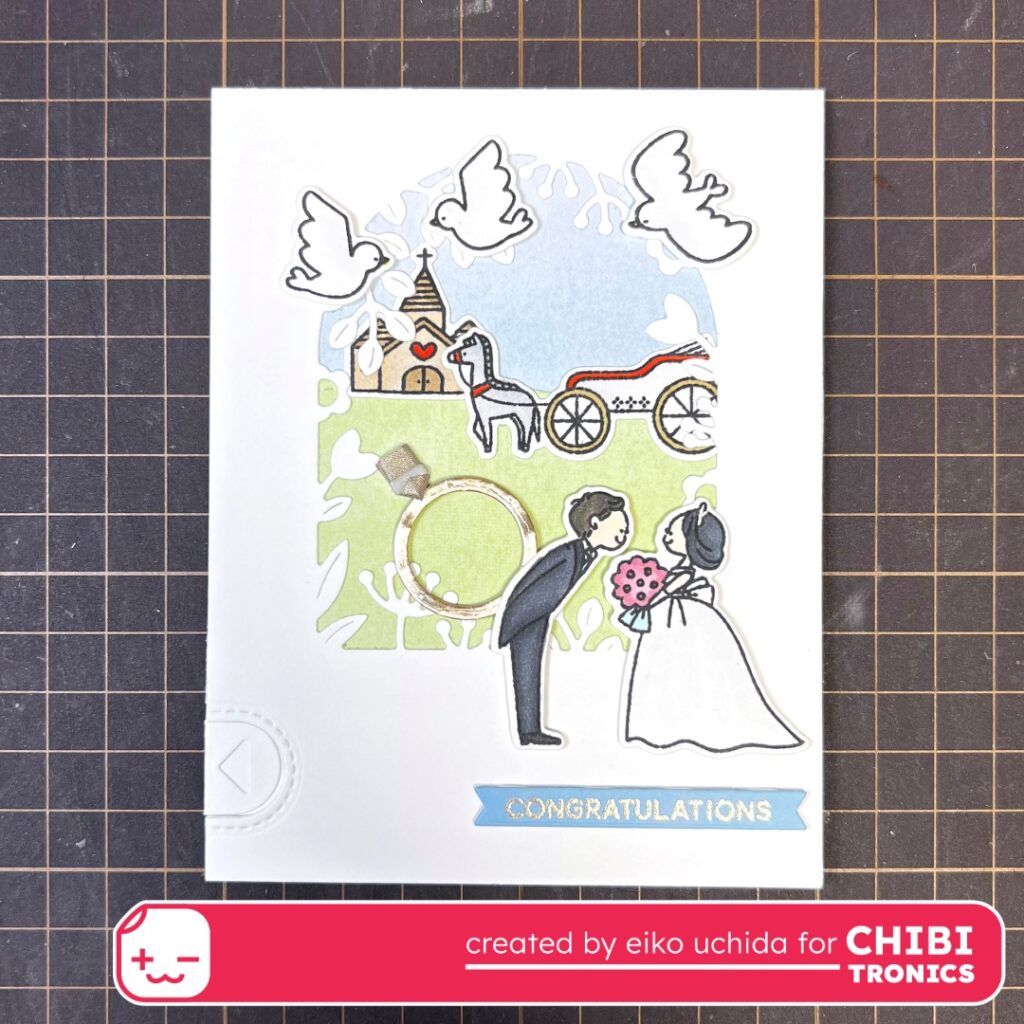
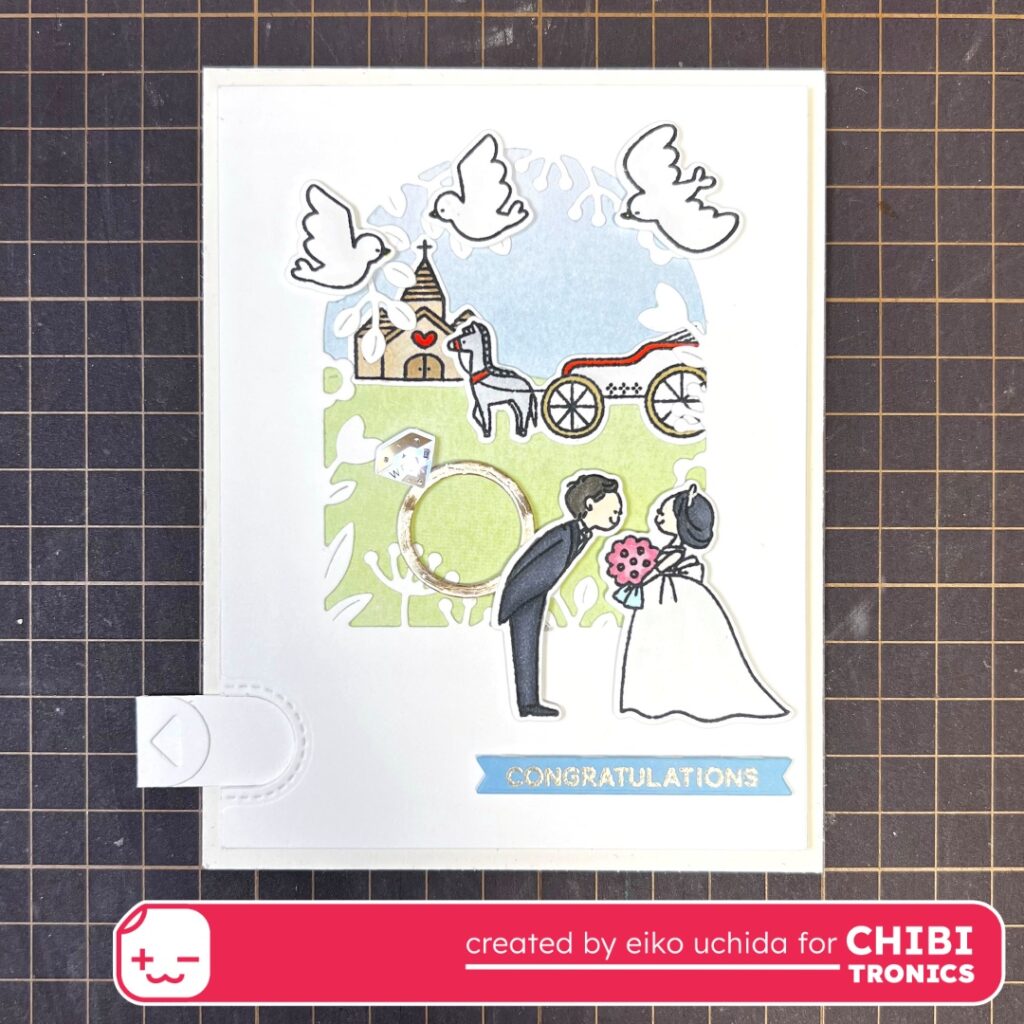
This is Eiko. Around the summer of 2023, Chibitronics will release three new animating LEDs. Gem-shaped blink type, Heart-shaped fade type, and Flower-shaped rainbow fade type. So today I make light up wedding card using Chibitronics new animating LED and Waffle flower crafts stamps and dies.
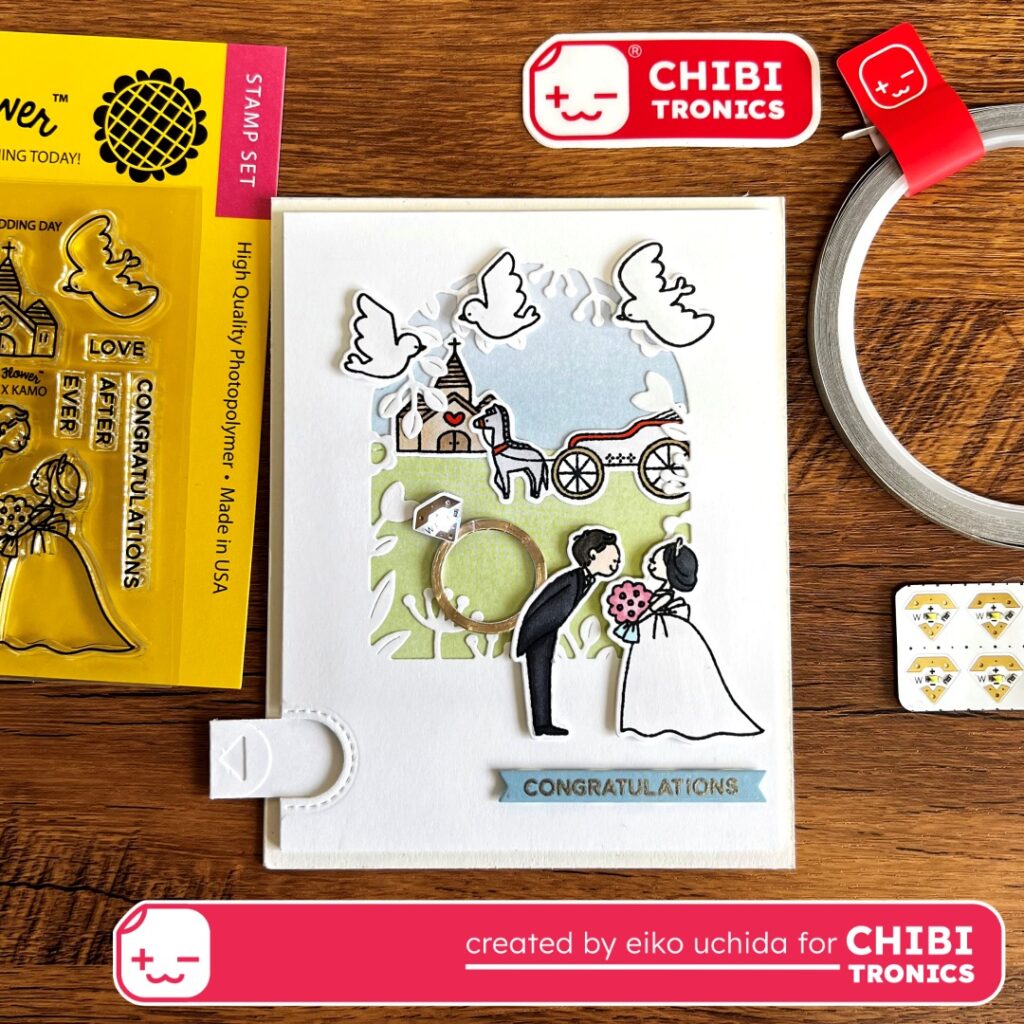
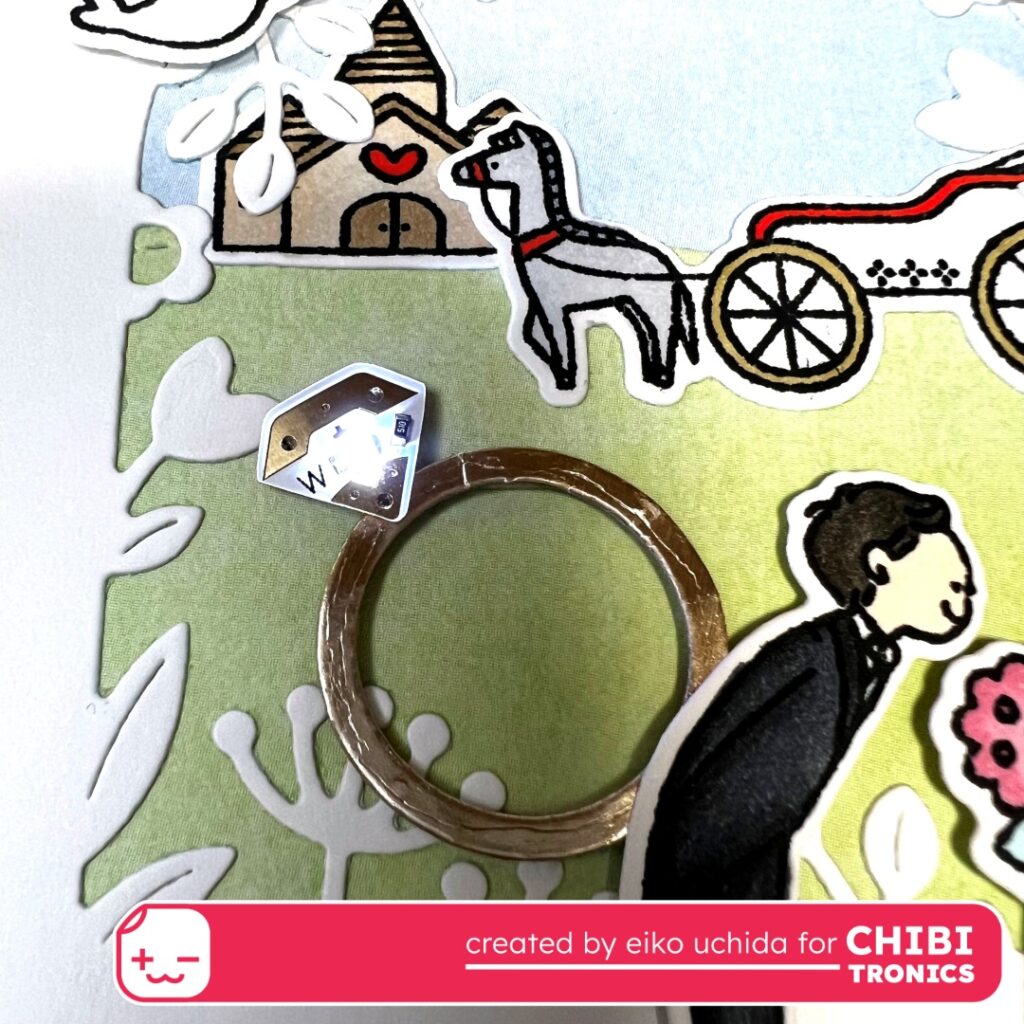
When you pull the tab, the Gem blinks.
I will make the parts referring to the picture below.
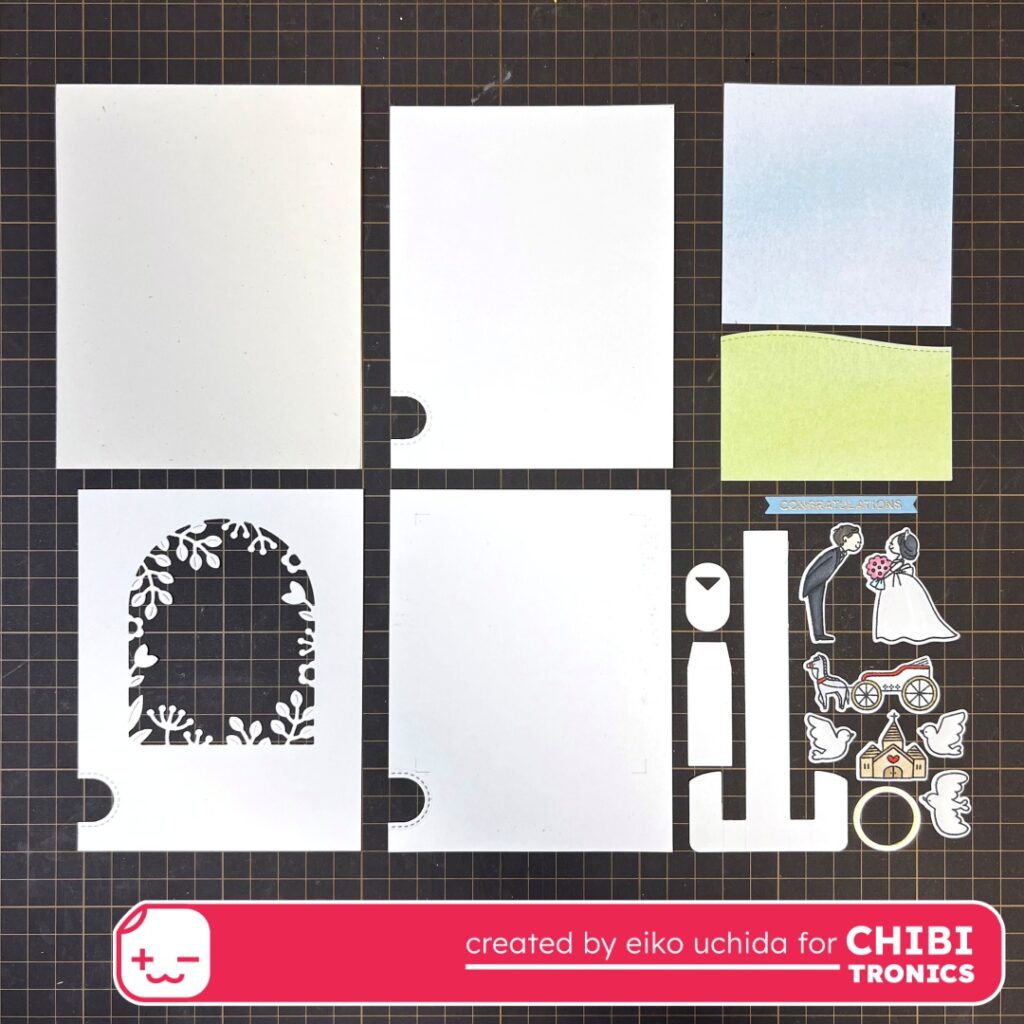
- Cut speckled eggshell cardstock to 4 1/4 x 5 1/2 inches.
- Cut three white cardstocks to 4 x 5 1/4 inches and die cut with notch making die.
- Die cut one of the white cardstocks with secret garden window die.
- Cut light blue pattern paper to 3 x 3 1/2 inches.
- Cut light green pattern paper to 3 x 2 inches and die cut with stitched hillside borders die.
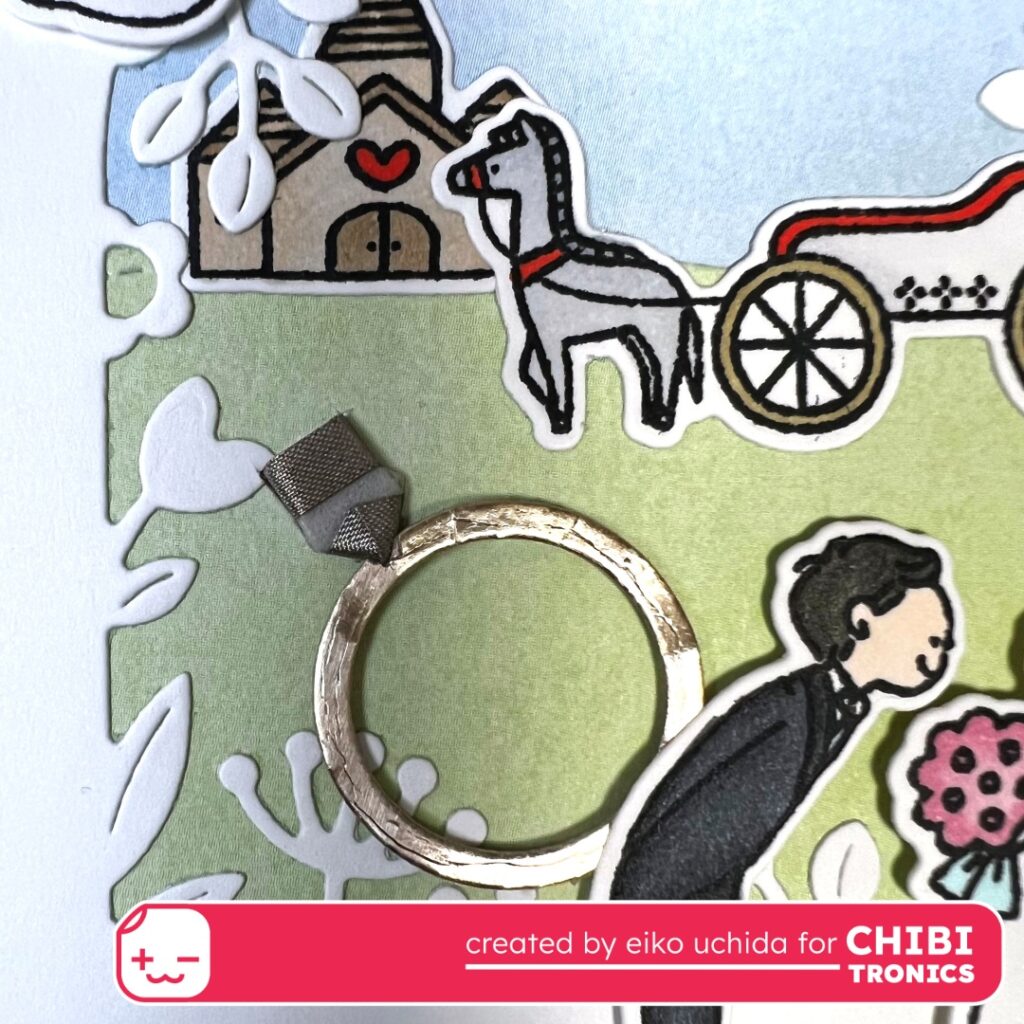
- Stamp bride, groom, church, horse and carriage and doves on white cardstock and color with Copic markers. Then die cut with the coordinating dies.
- Stamp the sentiment on the light blue cardstock and heat emboss with platinum embossing powder. And die cut the sentiment banner die.
- Die cut white cardstock with pull tab, tab topper and sleeve dies.
- Die cut gold cardstock with ring die.
- One small pieces of foam sheet 3mm thick.
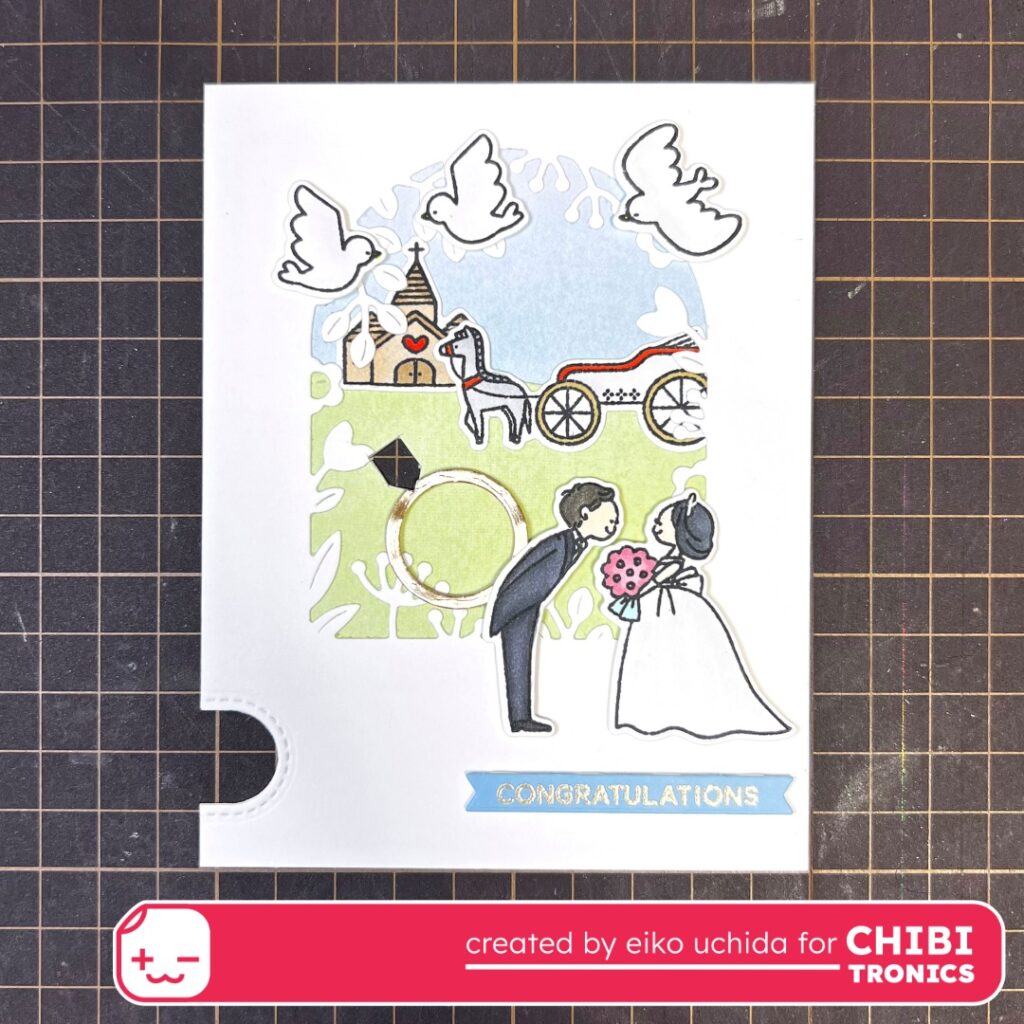
- Assemble the cover panel.
- Put the die cut parts on the white cardstock and make a pentagon hole on the ring.
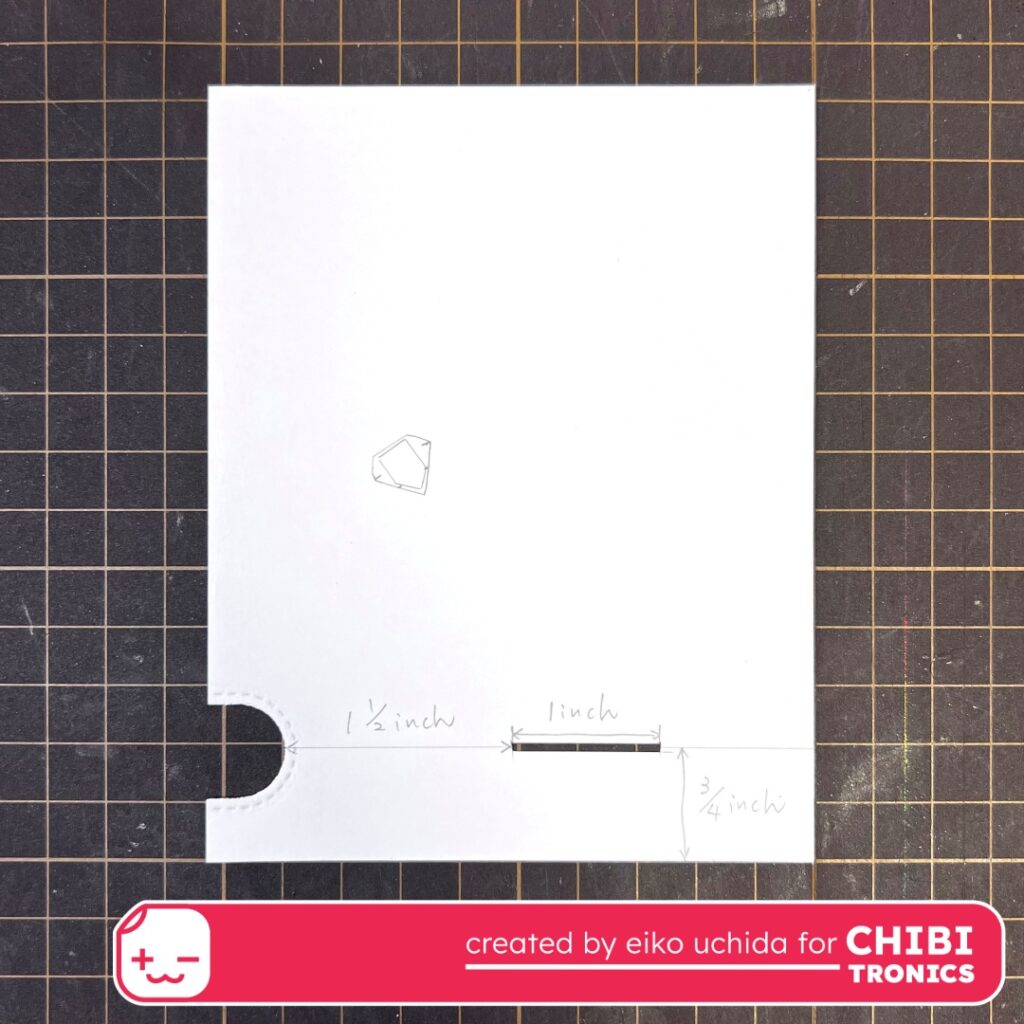
Make a slit by referring to the picture.
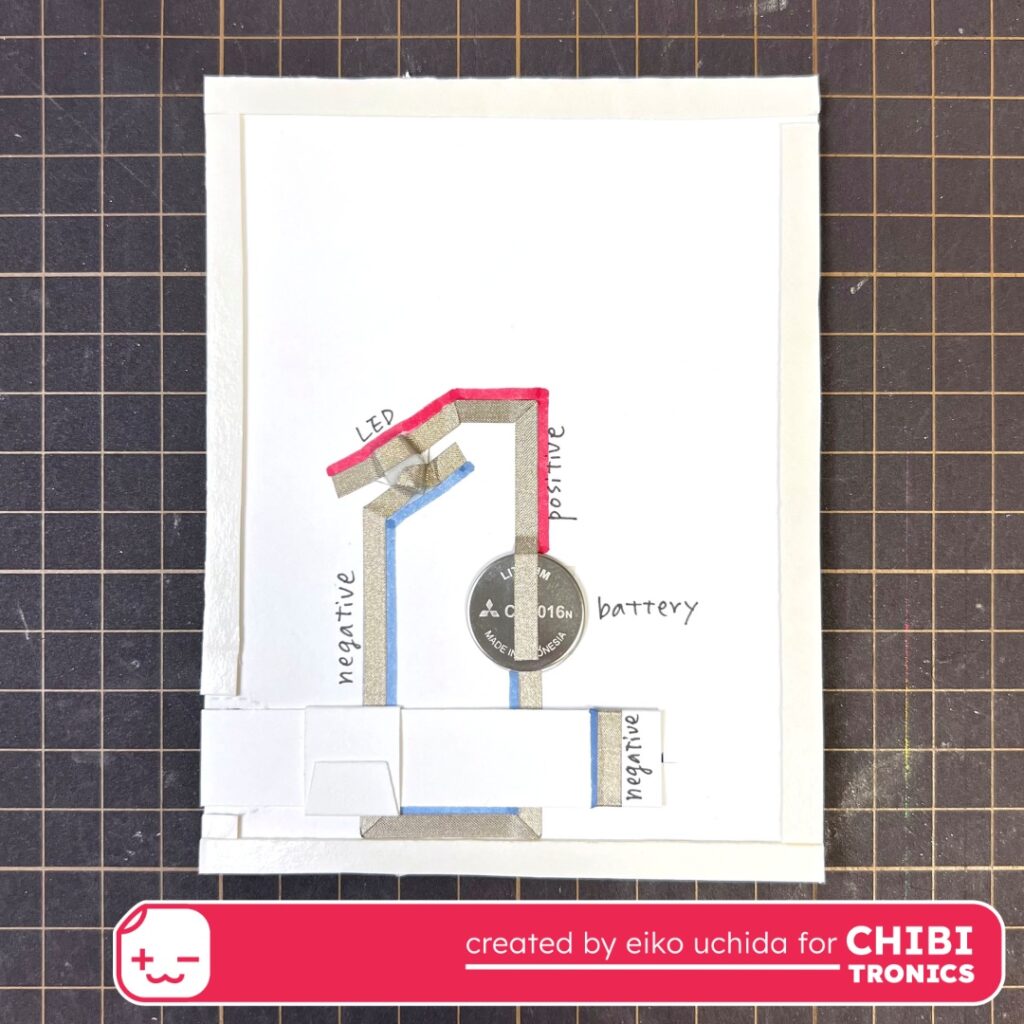
- Put the cover panel on white cardstock and mark the pentagonal hole with a pencil.
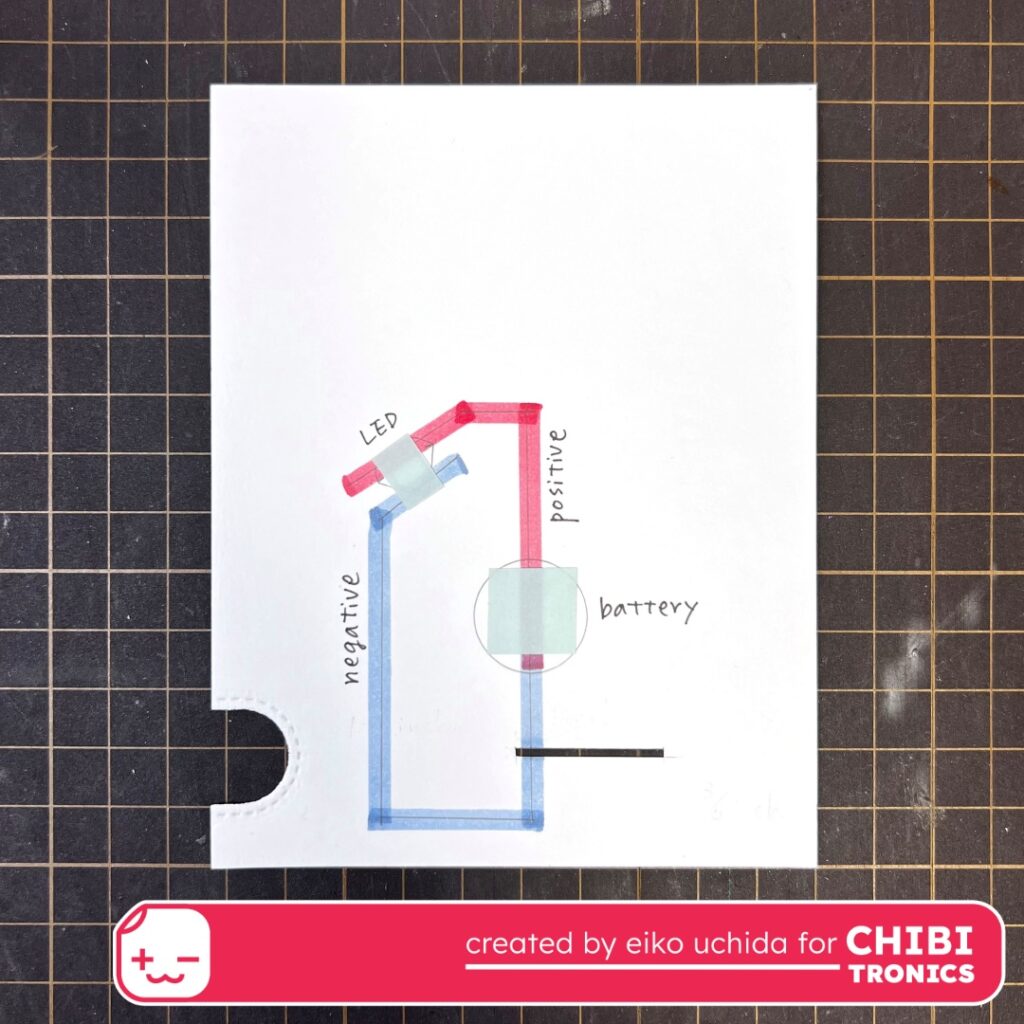
- Mark the position of the battery.
- Draw the circuit with a pencil.
- I colored the positive side red and the negative side blue.
- Apply the double-sided tape on the battery place and pentagonal hole.
- Apply a small piece of foam sheet to the pentagonal hole area.
- Peel off the release paper, stick the foam piece on the double-sided tape.
- Put the one more double-sided tape on the foam piece.
- Peel off the release paper on the foam piece.
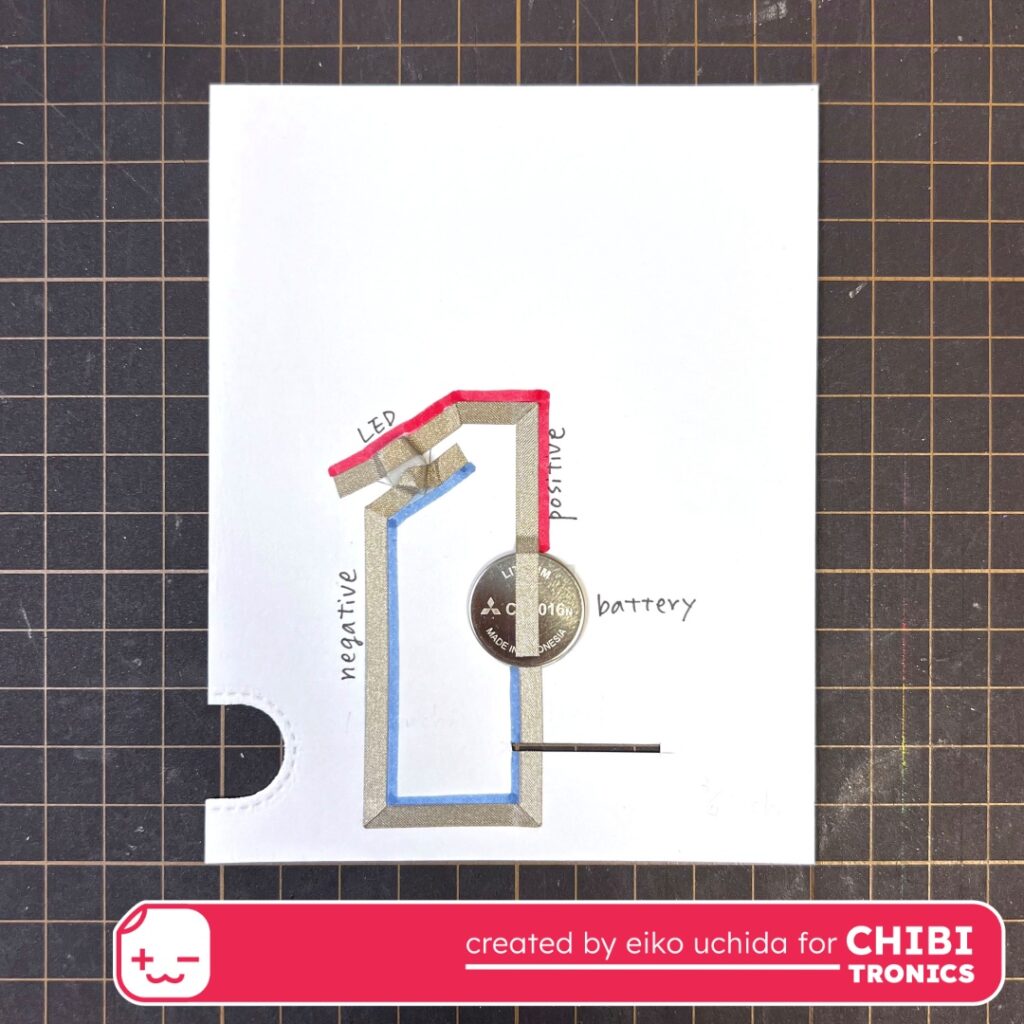
- Stick the conductive fabric tape on the pre-drawn path.
- At the battery place, peel off the release paper, stick the negative side fabric tape, fold it back and cut it.
- Stick the positive side fabric tape.
- At the position of the battery leave the positive side fabric tape about 1 inch and cut it.
- Place the battery on the fabric tape with positive side facing up and stick the positive side fabric tape on the battery.
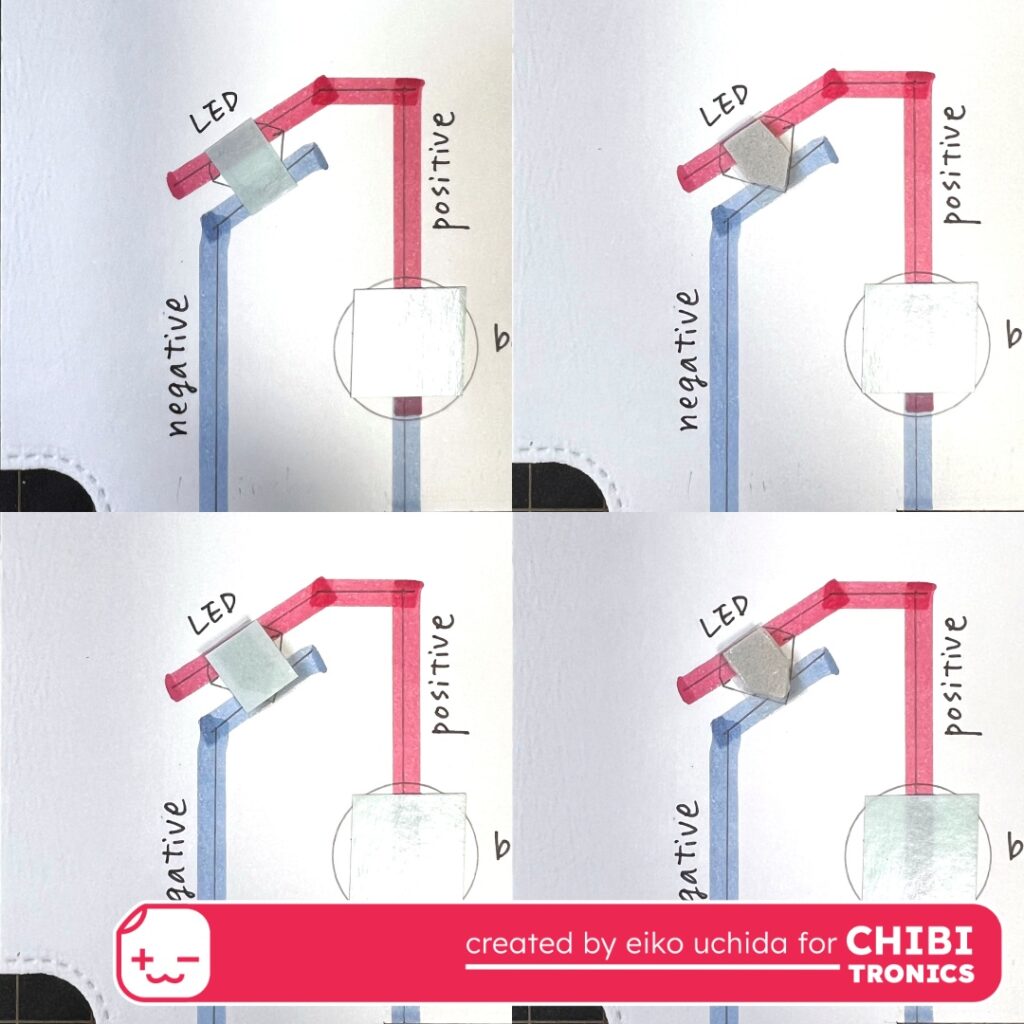
- For the foam piece, apply fabric tape on the foam piece.
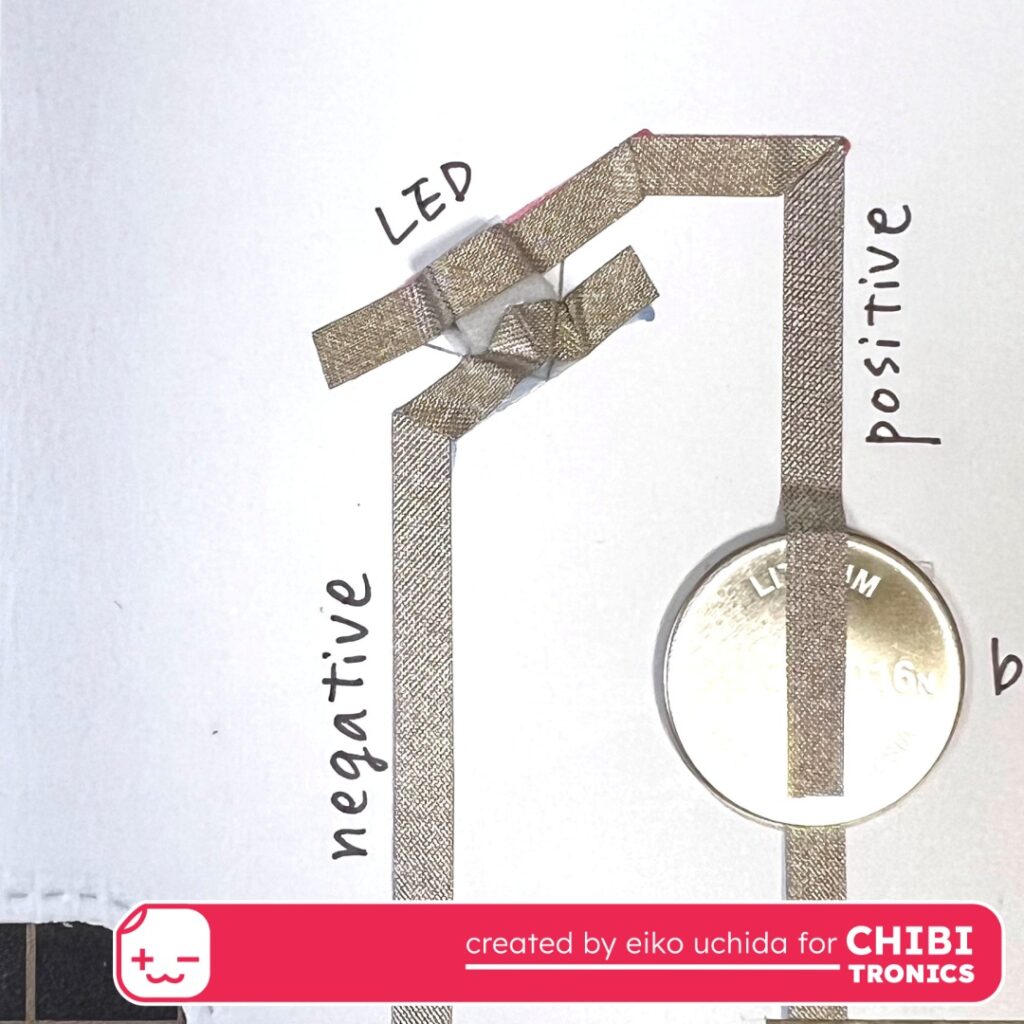
Here’s an enlarged view of the foam piece.
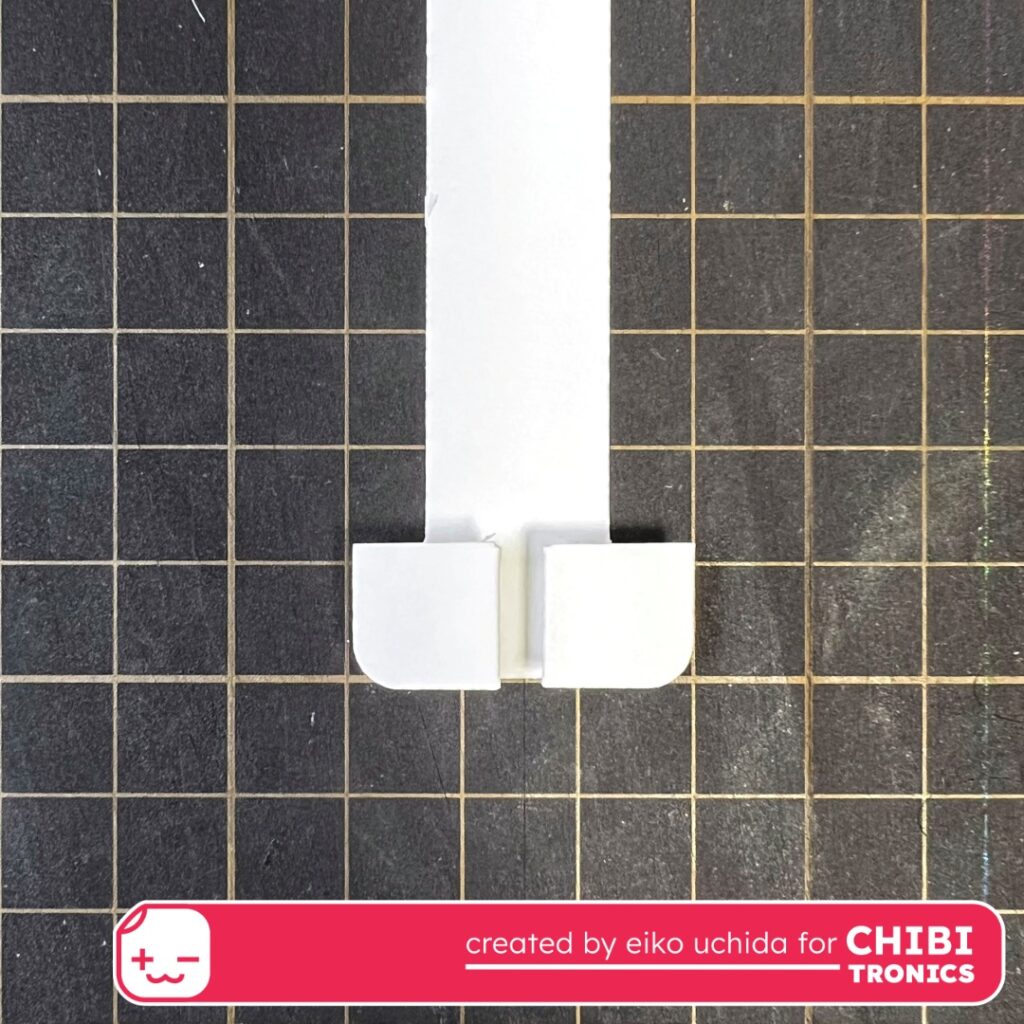
Make the pull tab. Fold the pull tab along the crease.

- Insert the flap into the slit and place the switch at the left end of the slit.
- Mark the position of the fabric tape.
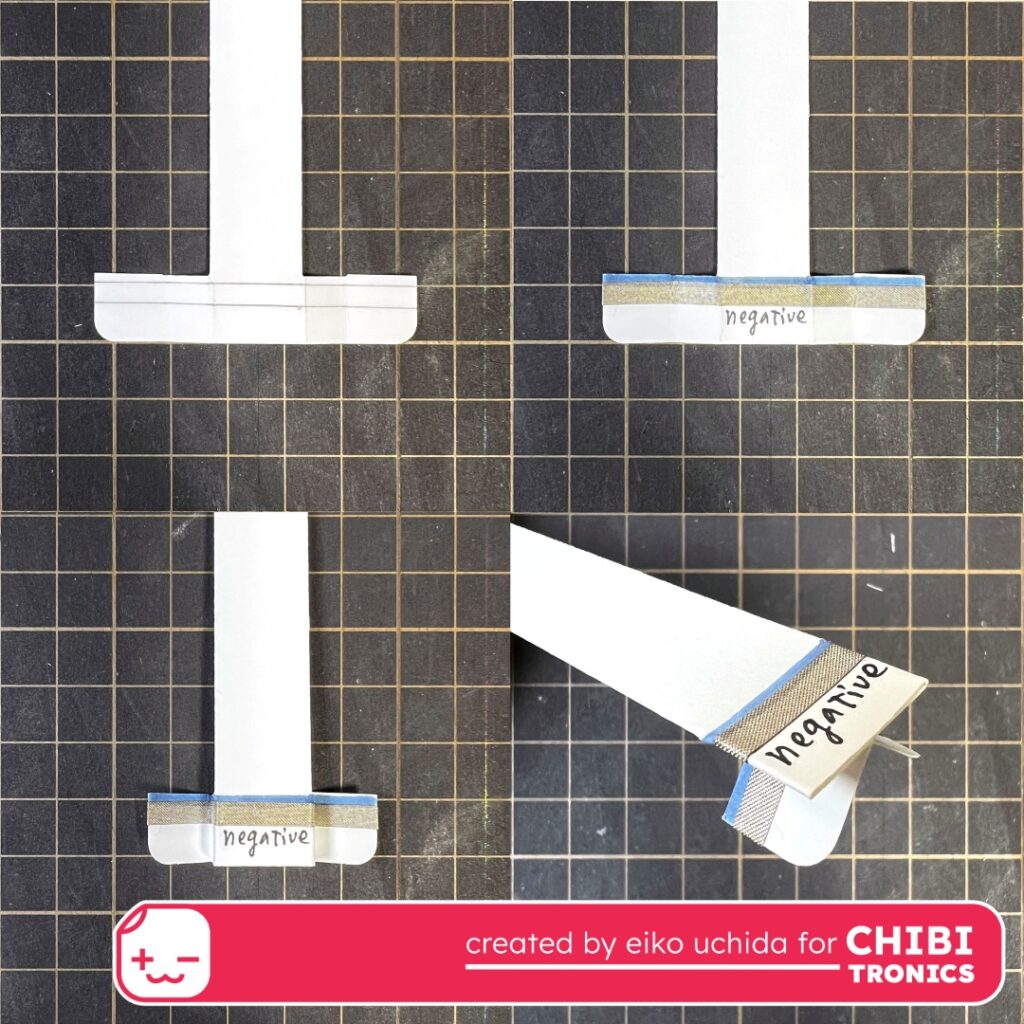
- Remove the switch part from the slit and stick the fabric tape on the mark.
- Fold the flap along the crease.
- Put the wrap part on the pull tab part.
- Put the foam tape around the entire edge of the circuit card base.
Stick the cover panel on the circuit card base.
Here’s an enlarged view of the foam piece.
- Stick the finished parts on the speckled eggshell cardstock.
- Stick the animating LED on the foam piece.
I finished it!
When you pull the tab, the Gem blinks.
Thank you for stopping by!
Eiko Uchida
~Supplies List~
- Chibitronics animating LED
- 3V coin cell battery (CR2016)
- Conductive fabric tape
- Waffle flower crafts wedding day
- Waffle flower crafts wedding day matching die
- Lawn Fawn secret garden window
- Lawn Fawn extra sentiment banners
- Lawn Fawn Let’s toast pull tab add-on
- Lawn Fawn stitched hillside borders
- Taylored expressions wedding ring
- Lawn Fawn speckled eggshell cardstock
- Lawn Fawn moonstone cardstock
- Lawn Fawn wishing well pattern paper
- Lawn Fawn four-leaf-clover pattern paper
- Tim Holtz metallic kraft stock
- Hero arts platinum embossing powder
- Neenah 80lb smooth solar white paper
- Copic markers
- 3mm thick foam sheet
How to make light up wedding card with animating LED.