Howdy all! I’m Allison Cope and today we’re going to make a silhouetted spooky Halloween card featuring some eerie Chibitronics LED light stickers!
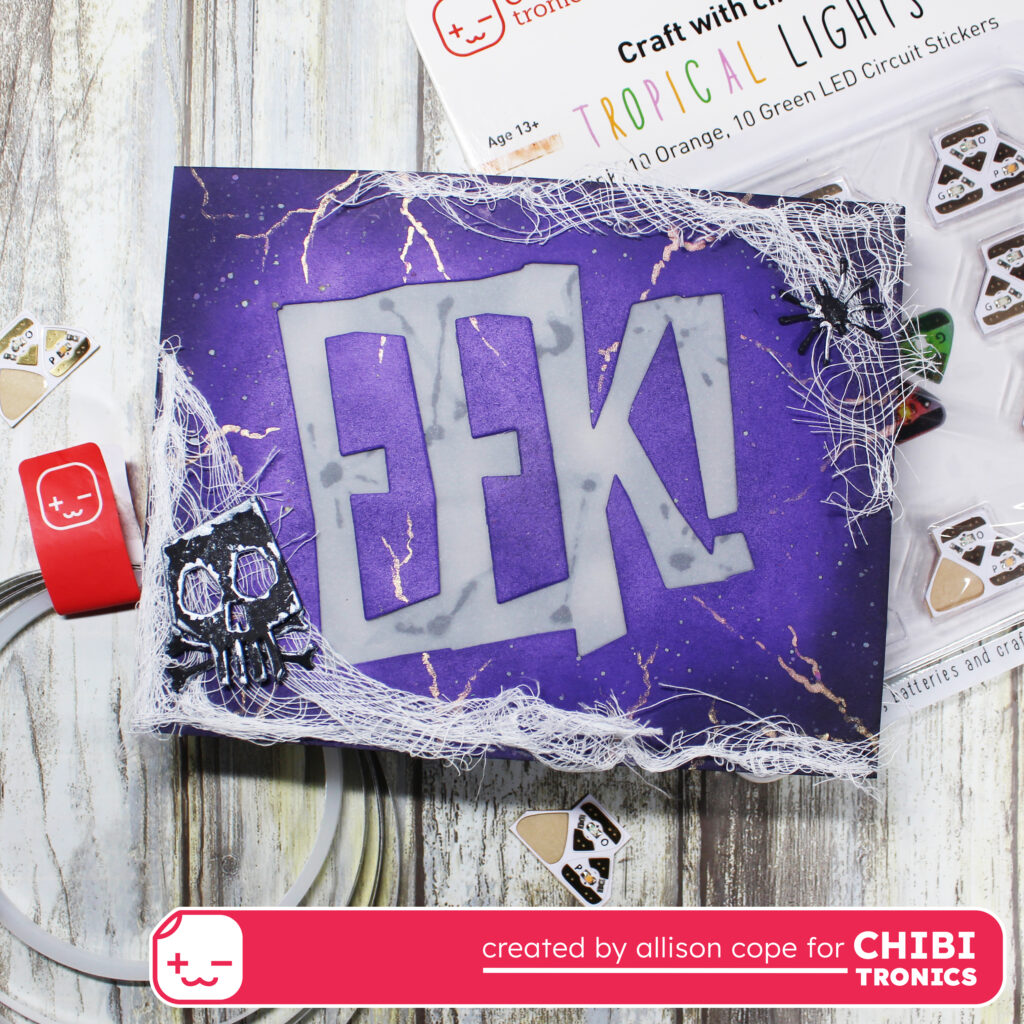
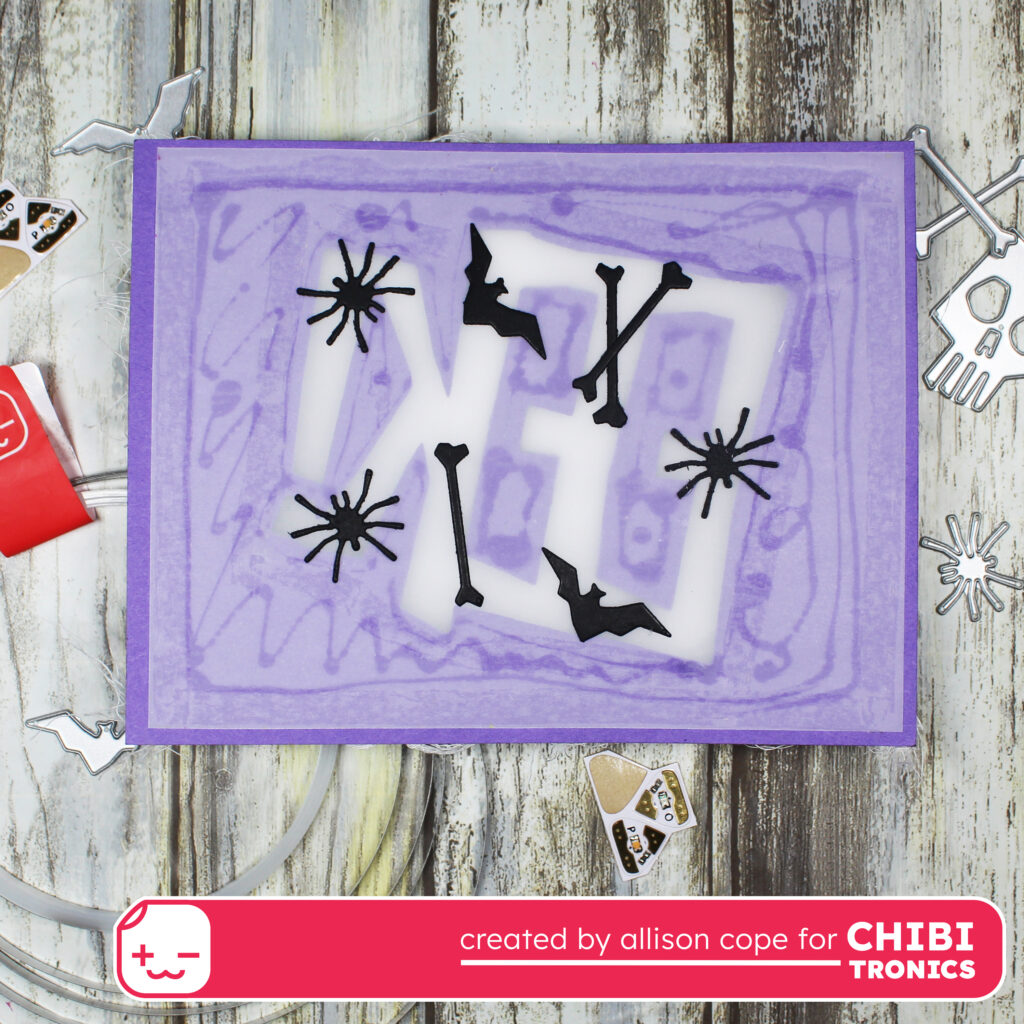
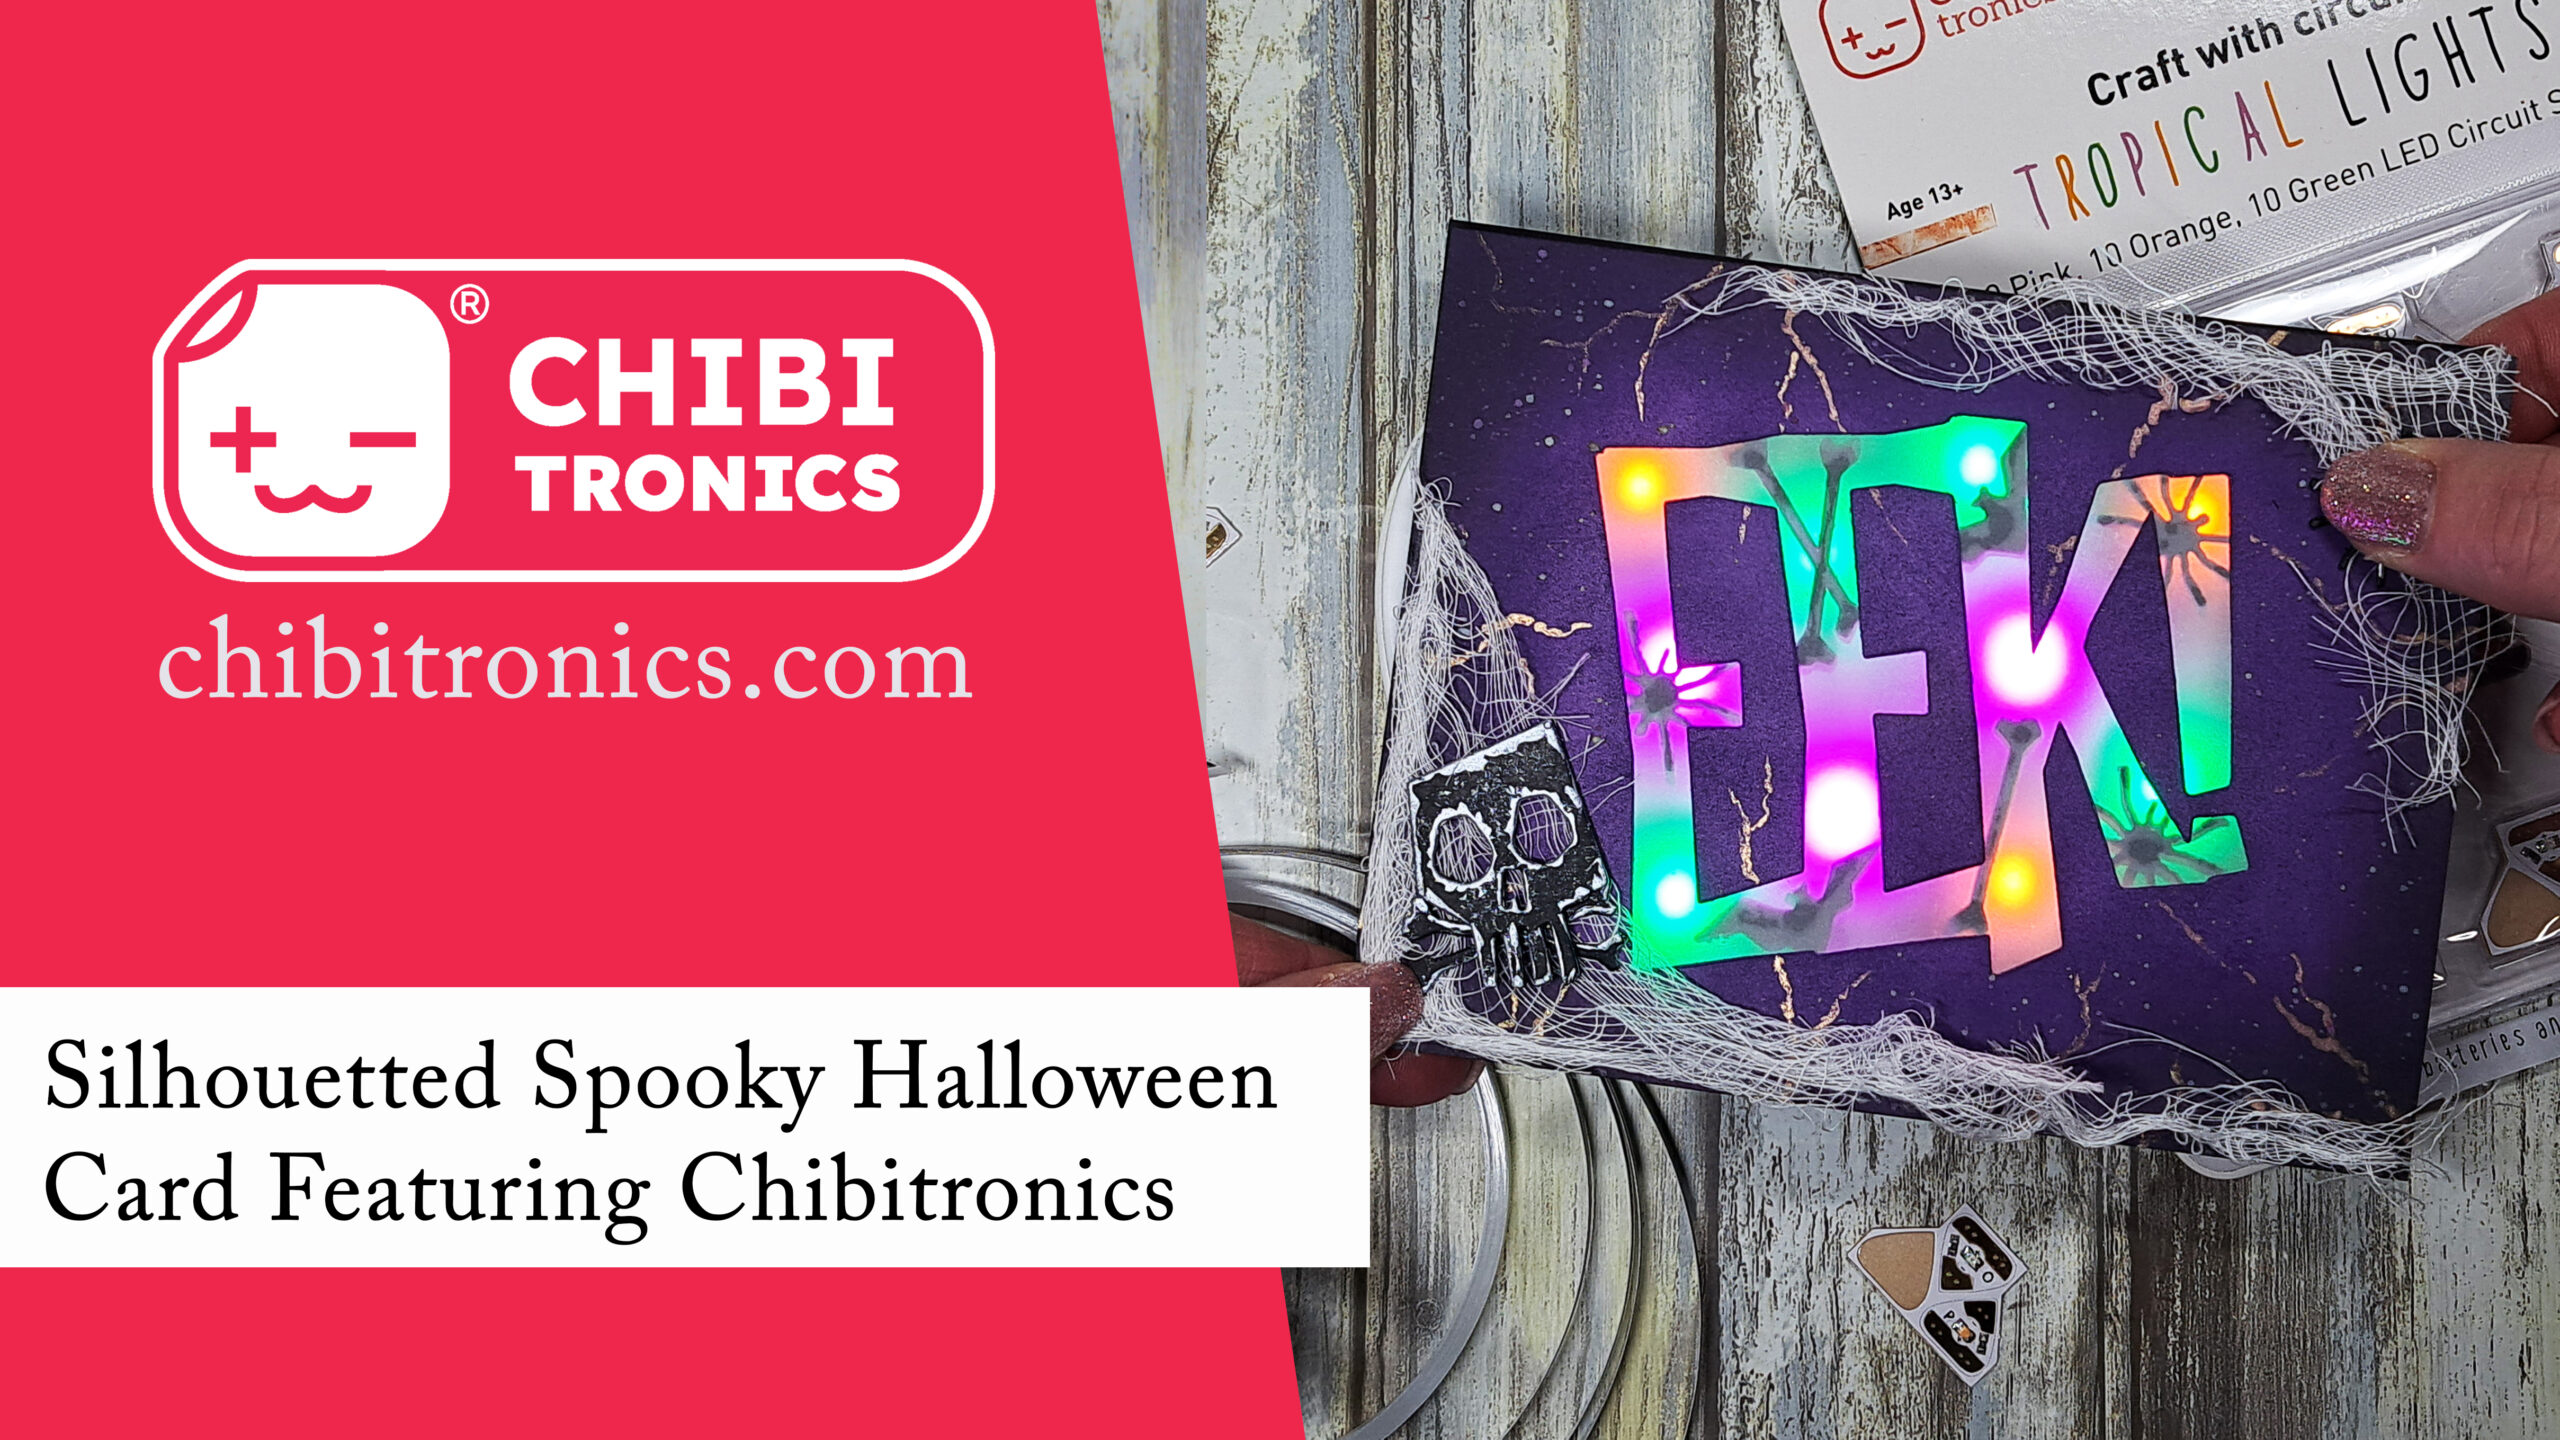
To begin creating today’s card, I first created my card front. I die cut the word “Eek” using the Tim Holtz “Big Fright Dies” from purple cardstock. I inked up the edges with Villainous Potion & Black Soot Distress Oxide ink. I added some splatters of Seedless Preserves and Twisted Citron Distress Oxide inks and hand painted on some “lightening bolts” with gold paint. I adhered some torn cheese cloth and backed the panel with 2 layers of vellum. Then I adhered some black cardstock die cut bats, spiders and crossbones from the Tim Holtz “Big Fright Dies” to the back of the voids of the word “Eek” on the back of the vellum.
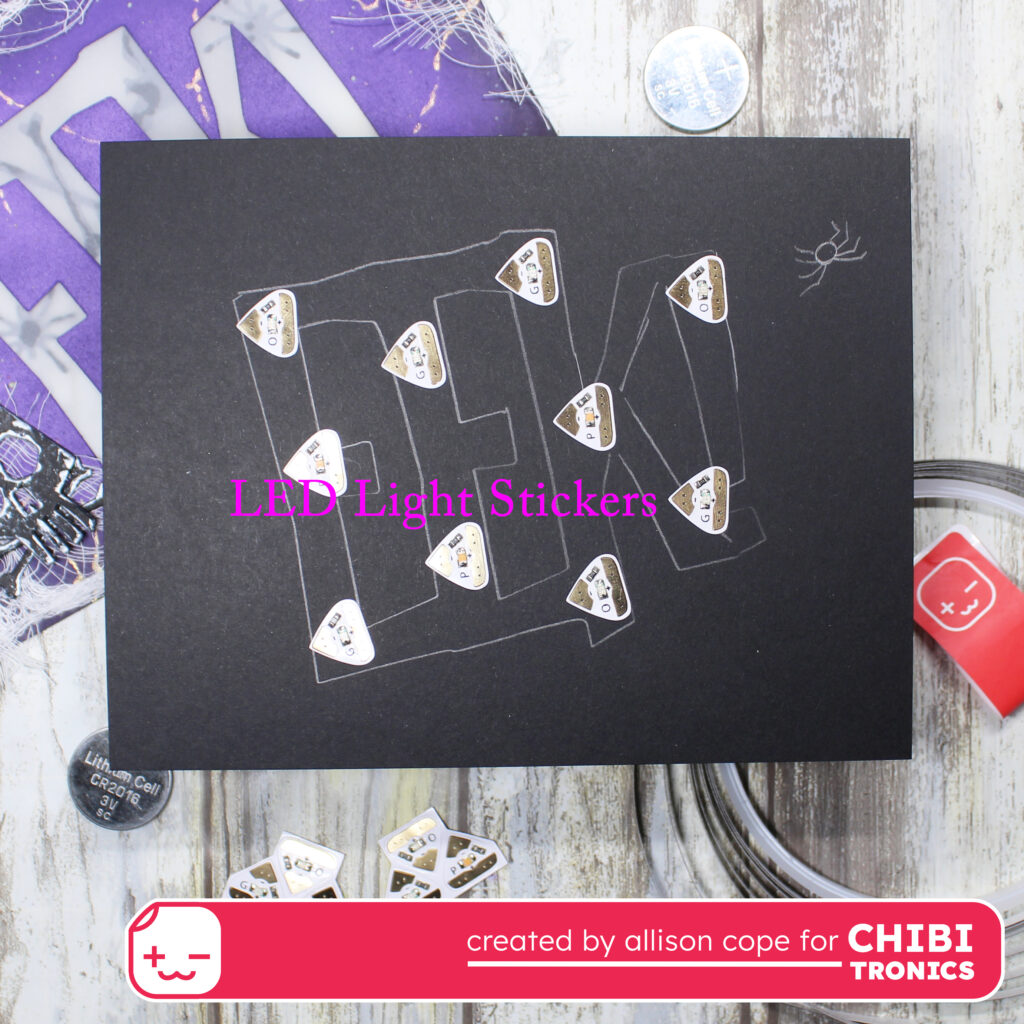
I had traced the outline of the word “Eek” onto my black cardstock backer panel so I knew where to place my LED light stickers. I carefully placed 10 LED Light Stickers in Pink, Orange and Green found in the Tropical Lights package (also found in the Lights Sampler package) in all the spaces of the word.
Next I mapped out where my battery was going to be located: the little spider on the front of my card is going to be my switch. Then I laid down the Conductive Fabric Tape across all the negative sides of all 10 of my stickers.
All of our stickers are conductive from either side of the sticker so you can lay your Conductive Fabric Tape on the bottom or over the tops of the stickers.

Next I created a little house for my 2 batteries. To create the battery housing, I used some 3D foam to build 4 walls to hold the batteries tightly.
Next I used a slender piece of cardstock to create a flap to go over the batteries. I wrapped this piece of cardstock with the Fabric Conductive Tape to ensure that the tape makes contact with the top of the batteries. Then I proceeded to lay my Fabric Conductive Tape over all the positive sides of my LED Light Stickers and finish off the remainder of the positive side of the circuit.

To finish off the interior of the card, I added 3D foam around the parameter of the card.
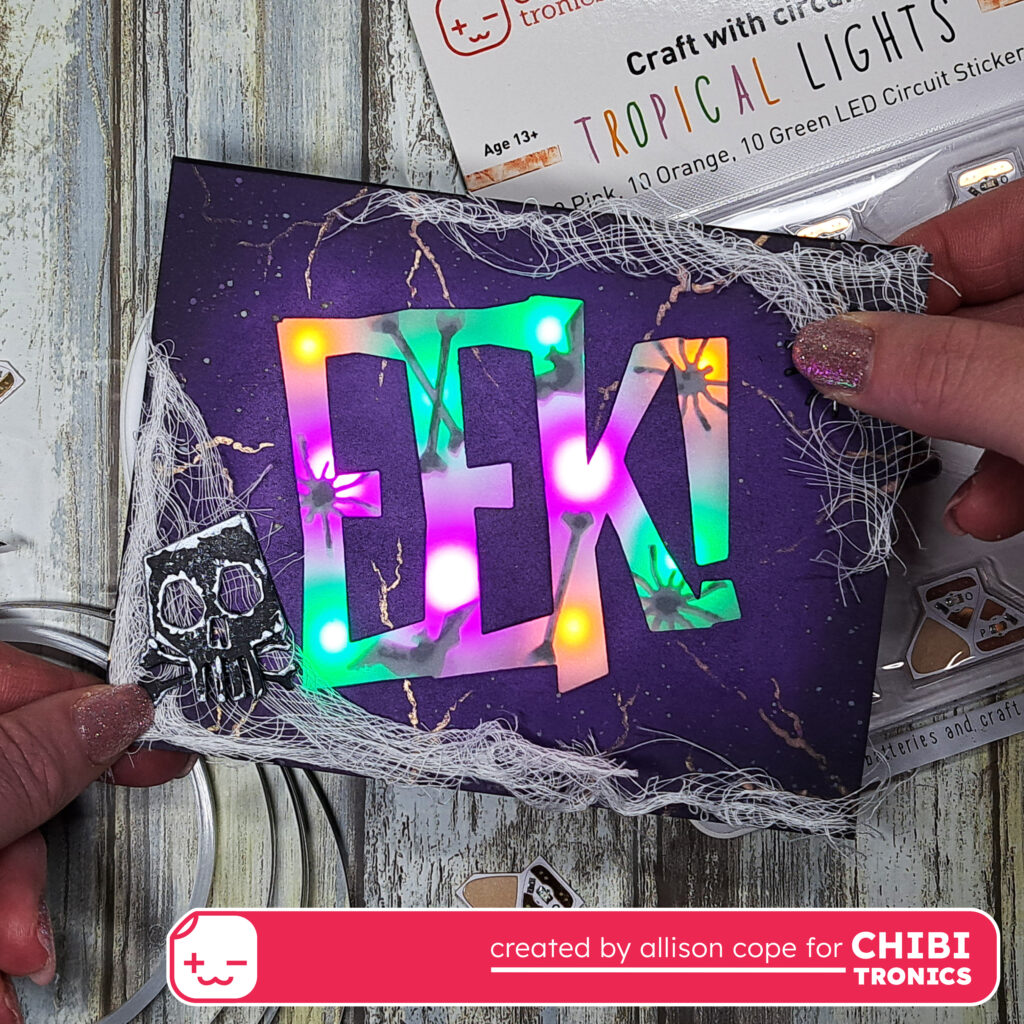
And volia! Just press the little spider on the top right corner of the card and the lights reveal the silhouetted spooky images…
If you’d like to see exactly how I created the circuit was make, please check out my VIDEO TUTORIAL:
Thanks for joining me today! I hope I’ve inspired you to light up your next spook-tacular card!