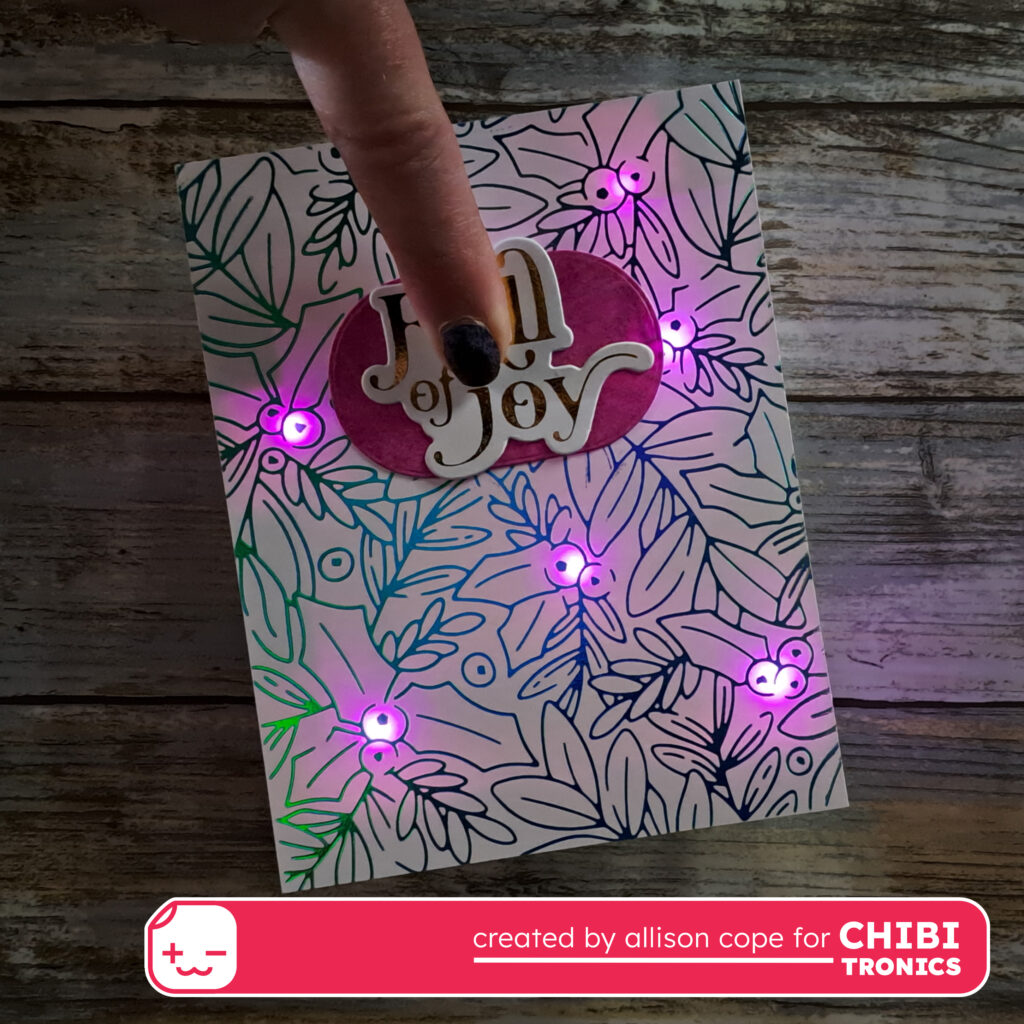
Happy Wednesday! I’m Allison Cope and today I’m sharing my latest light up creation featuring products from Chibitronics. Today’s card features the beautiful Spellbinder’s Glimmer foiling plate, “Holly Background”.
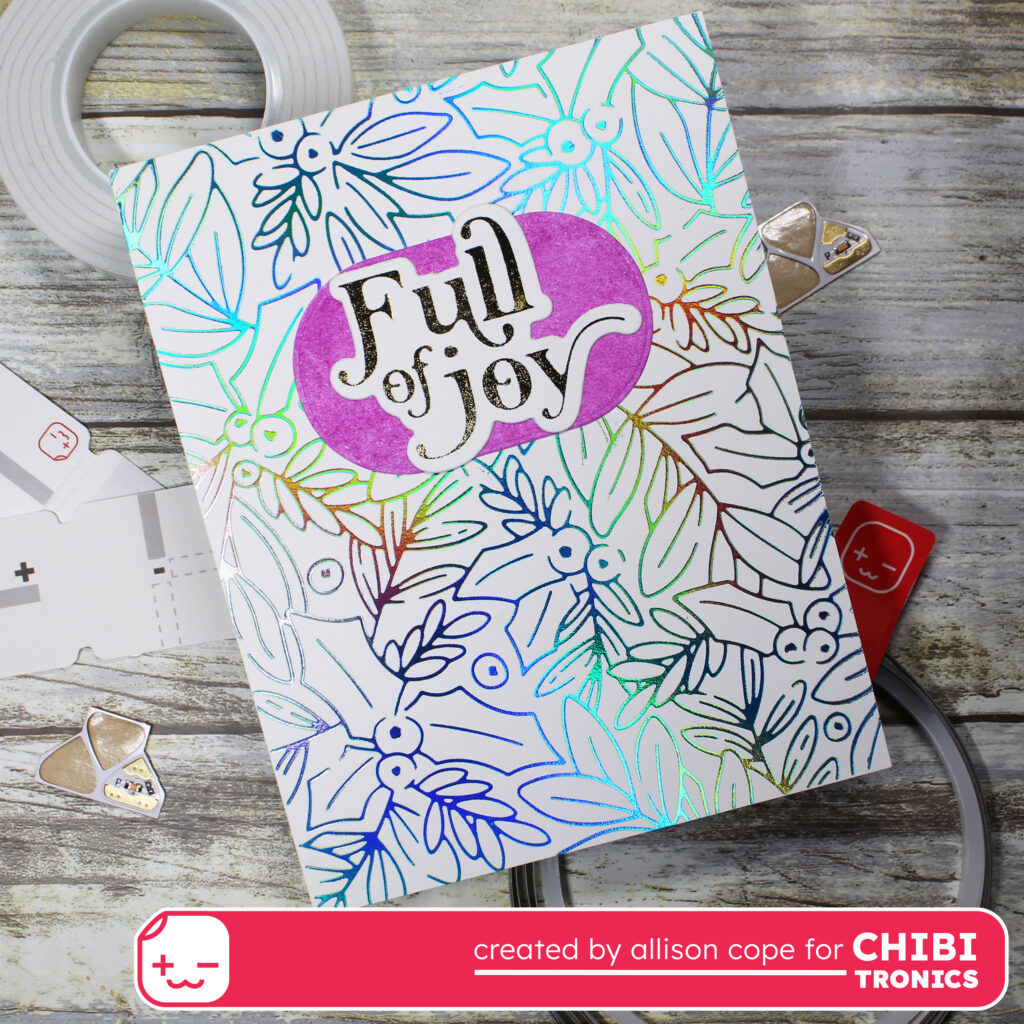
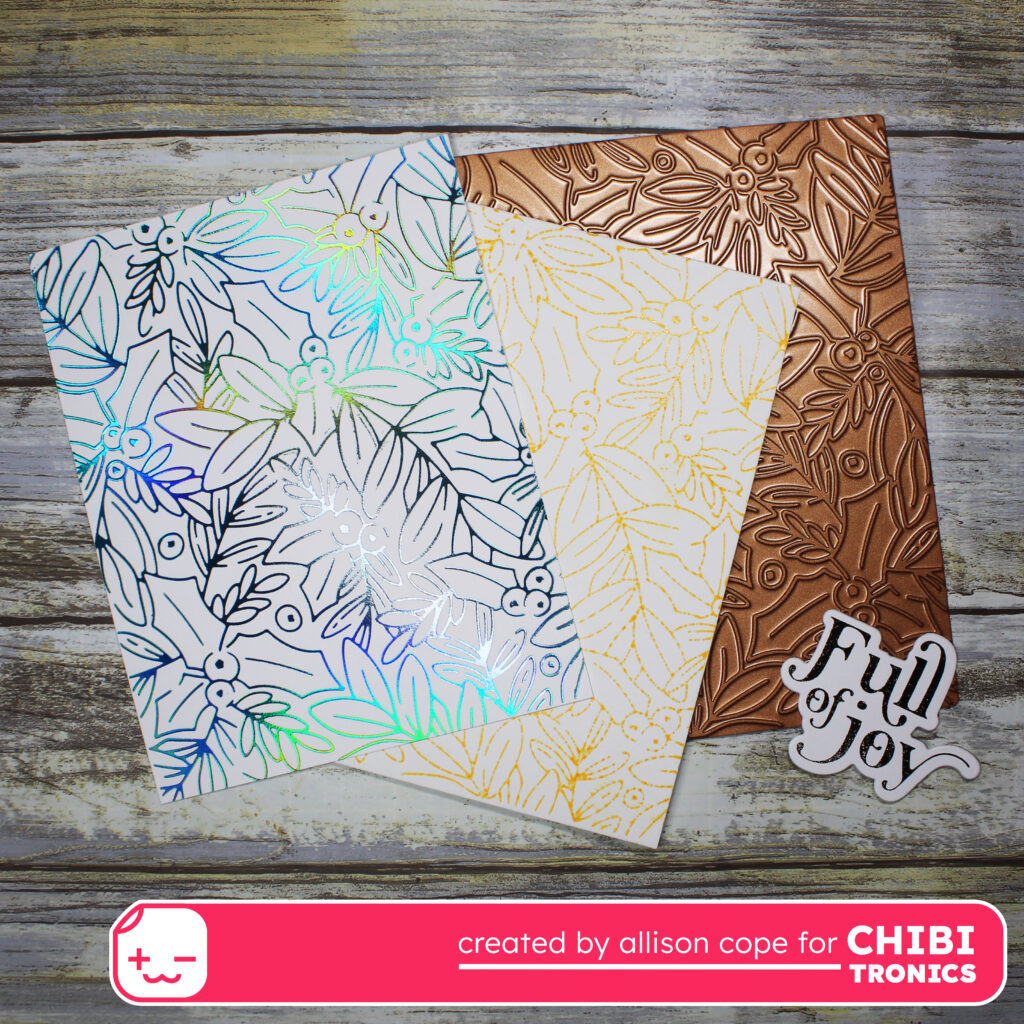
I began my card by foiling the large holly background plate and the sentiment greeting from Catherine Pooler. I took the same holly plate, inked it up and “stamped” it on to my card base. I will use this as a quide to placing all of my light stickers.
Next I used my Craft Stencil and identified the location of all of my LED lights. I chose to light up a series of different berry clusters on the card front.
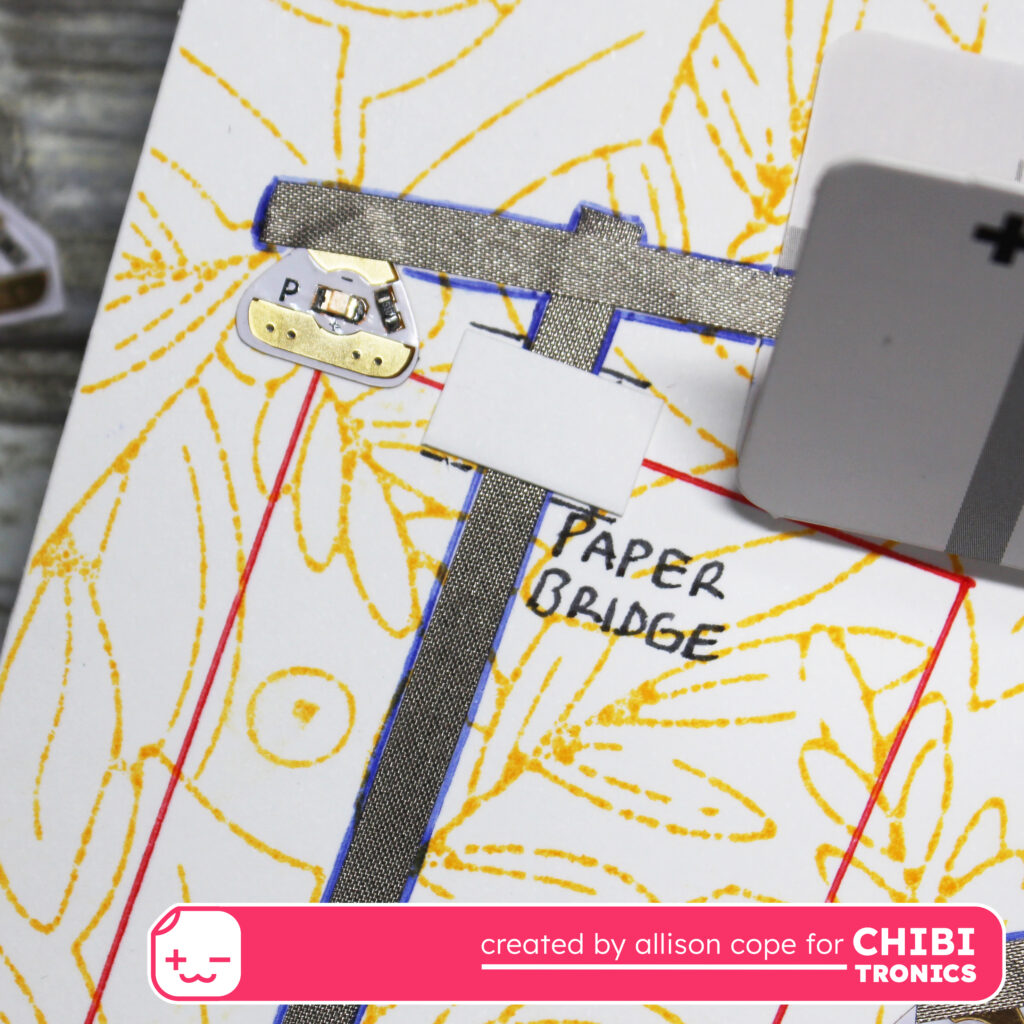
Next I located my battery location. Then I connected all of the “tips” or “negative” ends of the stickers. I drew these negative aspects of my circuit with blue pen. Then I created the positive sides of the circuit. I drew the positive side of the circuit using red pen. Note that some of the blue lines intersect the red lines. In order to not cross my tape lines, I will create paper bridges for these 2 locations.
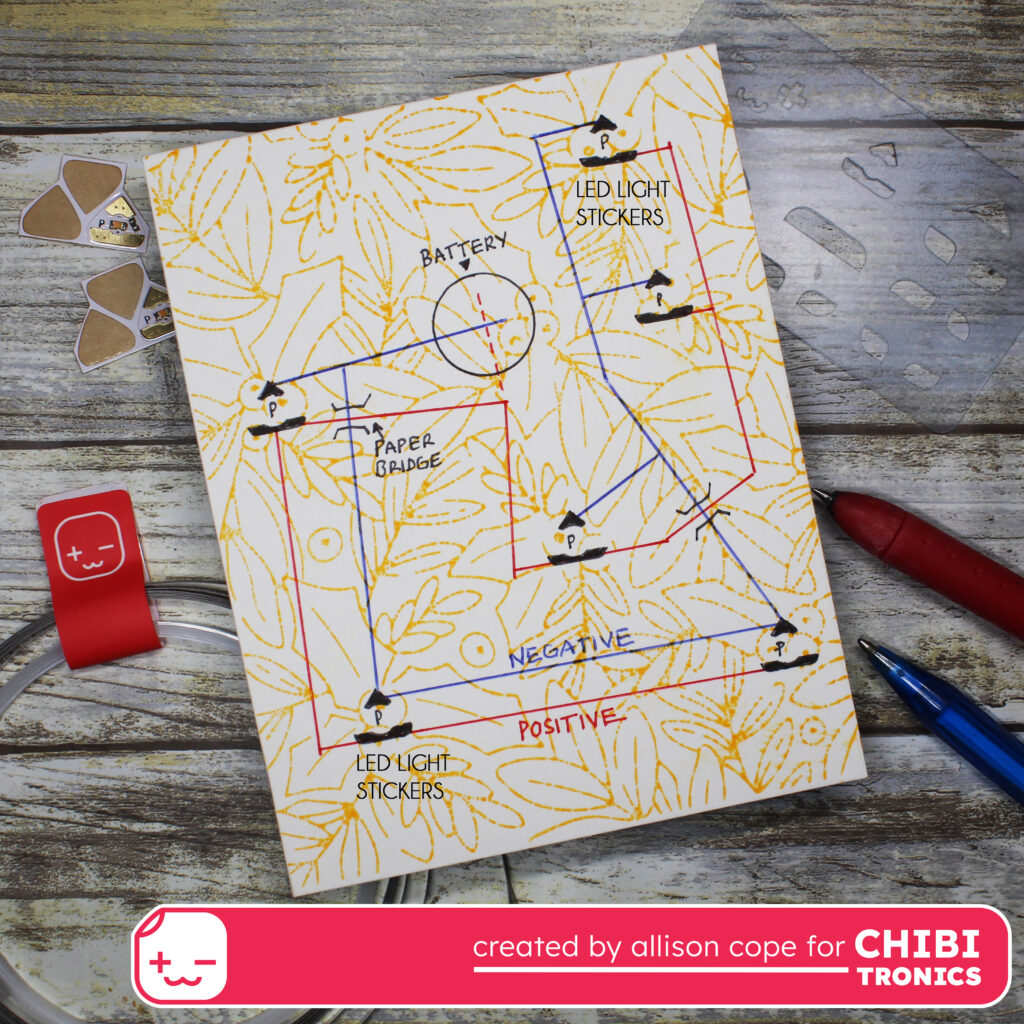
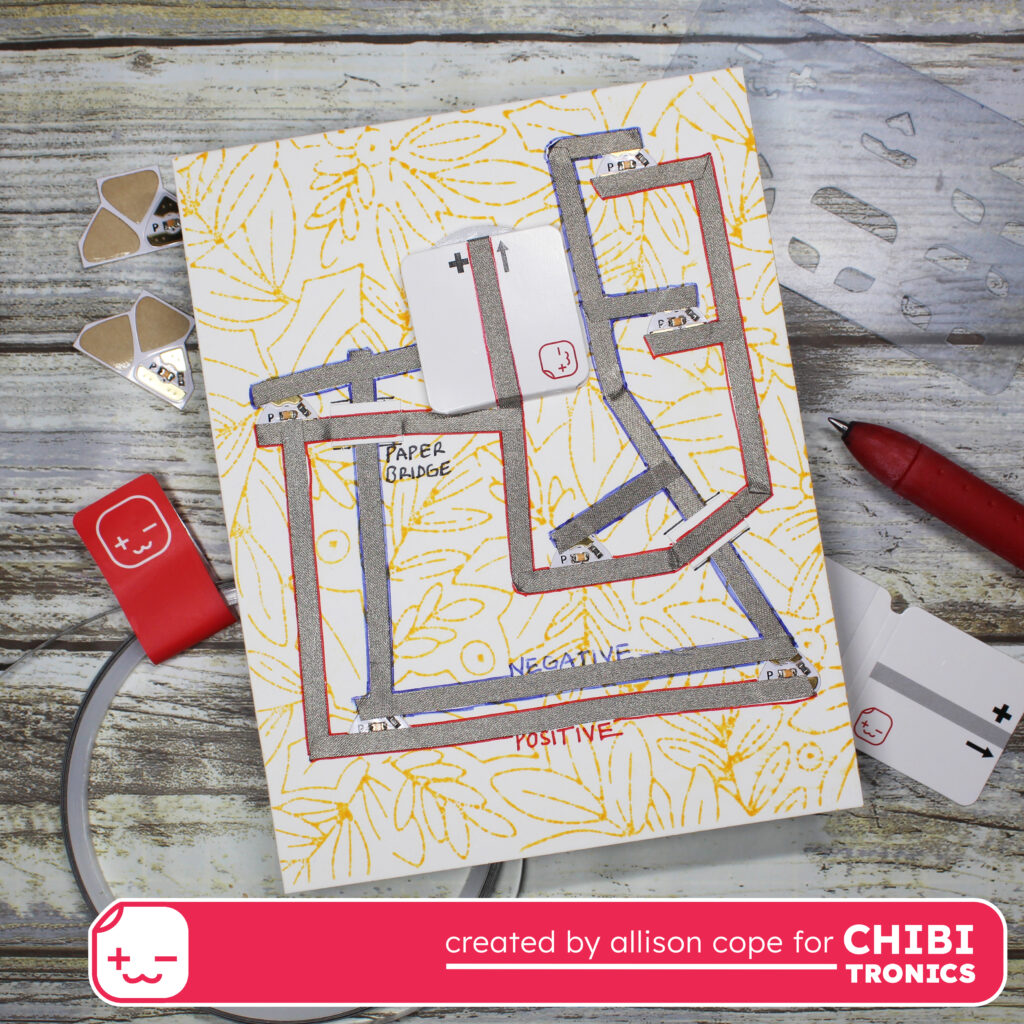
Next I added my Battery Holder to the battery location on my circuit. They can be found in the new We R Makers “Foam Adhesive & Battery Holders Pack“.
I added Pink LED Light Stickers to each of the 6 sticker locations on the card base.
Then I used the Conductive Fabric Tape and laid it down over top of all the blue lines in the circuit. This will be the negative side of the circuit.
I also laid down the little paper bridges where the blue negative tape crosses the red or positive sides of the circuit.
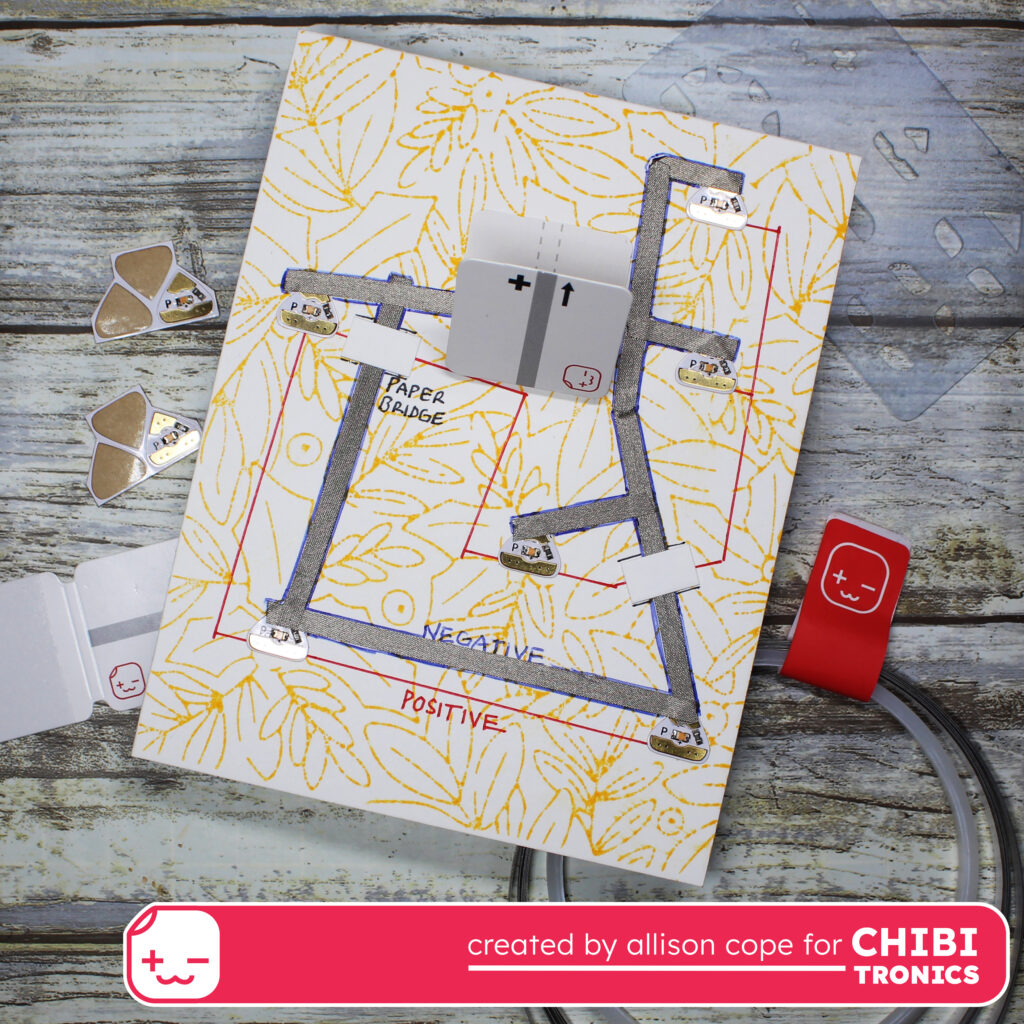
Here you can see a close up of one of the paper bridges. This barrier keeps the circuit from short circuiting.
Next I laid down the Conductive Fabric Tape on the positive side of the circuit. I made sure to begin my circuit on the inside flap of the Battery Holder to allow the tape to touch the top of the 3V battery. All of the lines shown drawn around with red ink are the positive side of the circuit.
I placed the foam “C” shaped sticker from the We R Makers “Foam Adhesive & Battery Holders Pack” inside the Battery Holder, peeling off only one side of the double sided sticker. I popped in a coin battery and tested my circuit to ensure all of LED Light Sticker lit up.
Once that was confirmed, I peeled off the top of the “C” shaped foam sticker and closed the Battery Holder for good.
I laid 3D foam from the “Foam Adhesive & Battery Holders Pack” all along the edges of the card’s circuit, peeled off the foam backers and adhered my card front down.
And voila… out light up bright pink and shiny holiday card is complete…
Thanks for joining me today! I hope this inspires you to create with some cool foiled backgrounds!