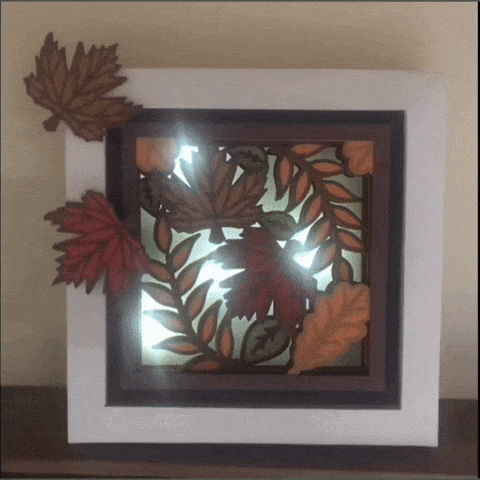
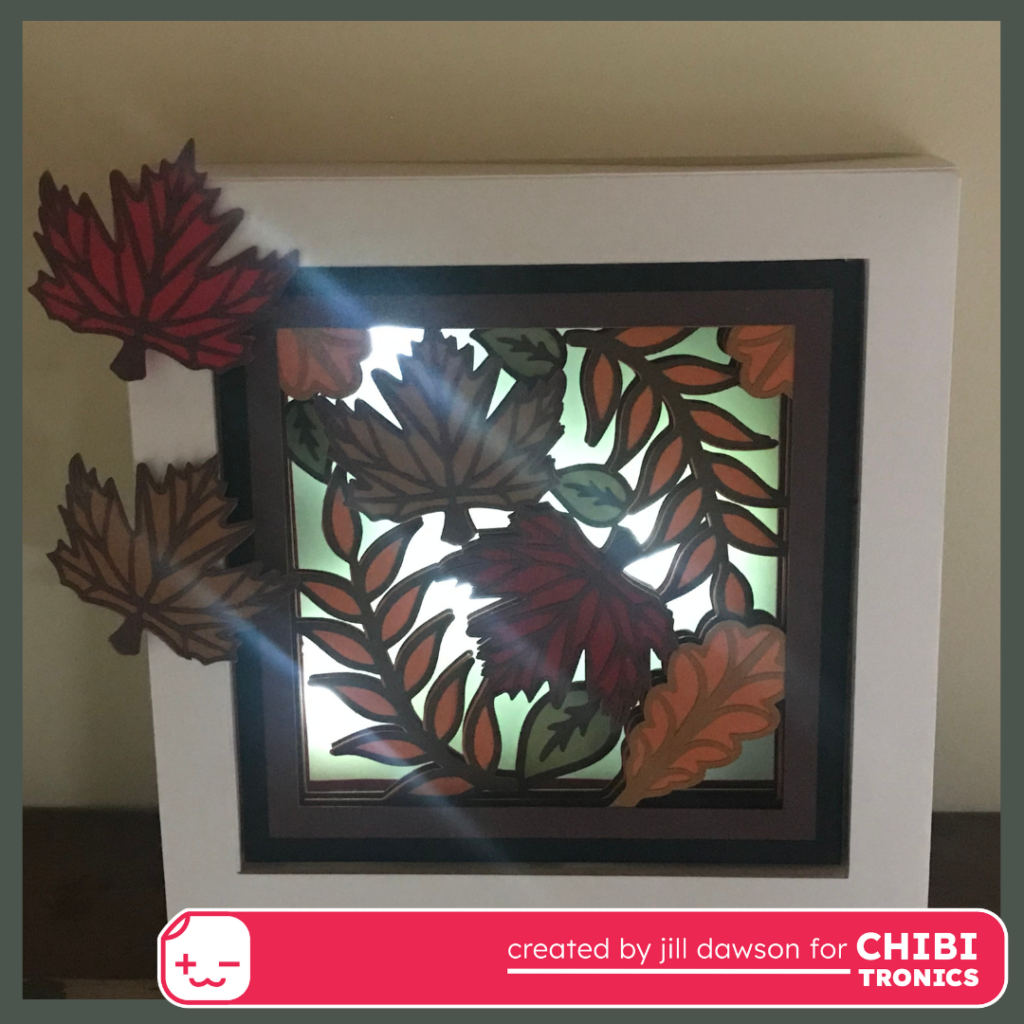
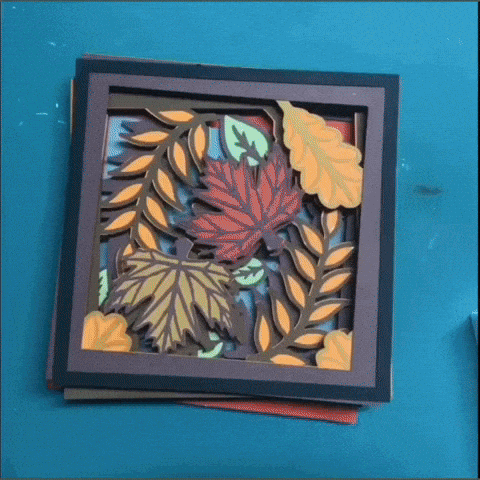
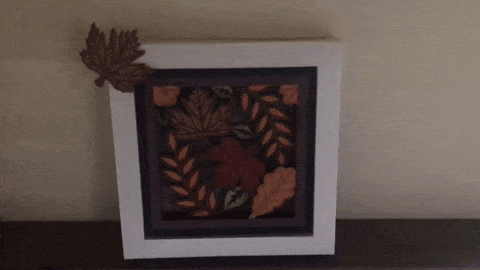
While most of the trees where I live have shed their vibrant leaves in preparation for winter, I am not quite ready to let them go! Thanks to my latest creation, a seasonal shadow box (designed by Bearly Art), I won’t have to!
In this tutorial, I’ll show you how to make your own interactive, light-up shadow box!
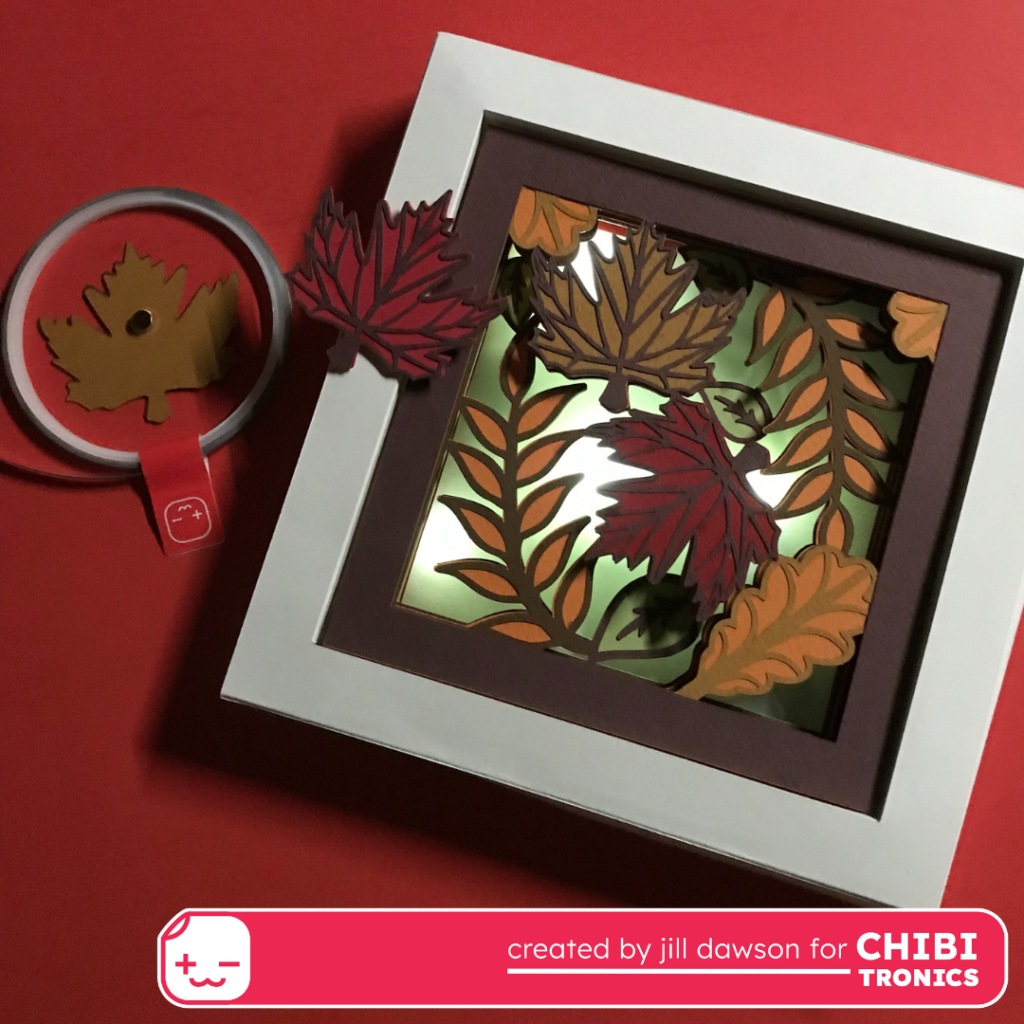
To make this project my own, I added Chibitronics White Fade Animating LEDs and a concealed reed switch (magnet-on), triggered by a magnetic maple leaf!
Steps to Build Your Own Shadow Box:
1. Download Cut Files & Assemble Tools & Supplies
The first step to make this interactive, autumn-inspired decoration, is to download two free files from the Bearly Art website. You’ll need the Polar Bear Shadow Box (containing the cut file for an interchangeable shadow box frame) and the Fall Shadow Box (a leafy, layered shadow box insert).
You will find a list of useful tools and supplies listed below.


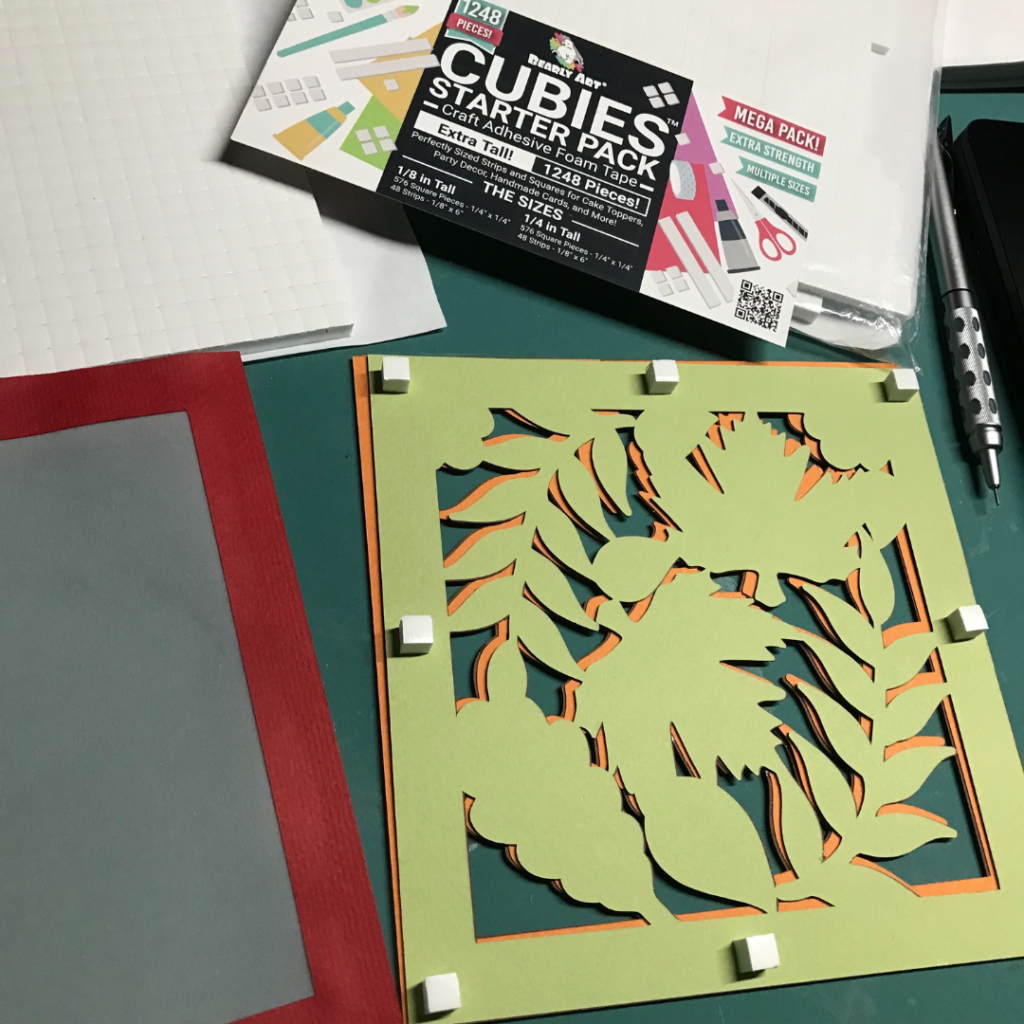
2. Cut & Assemble Pieces
The next step is to cut the pieces you’ll need in colors of your choice. Following the directions that accompany the cut files, assemble the pieces using a combination of Bearly Art Precision Craft Glue and 1/4″ tall foam Cubies.
3. Mark LEDs & Back Insert Block with Vellum
To make it easier to create your circuit in a future step, mark potential locations for your LEDs on the inside of the shadow box frame with a pencil. I did this by positioning the leafy insert into the shadow box and looking for places where the light would not be blocked by too many layers.
Next, it’s helpful to back the insert with a square of translucent vellum cut to the same size as the insert block. Doing so will help to conceal the LEDs, while diffusing the light.

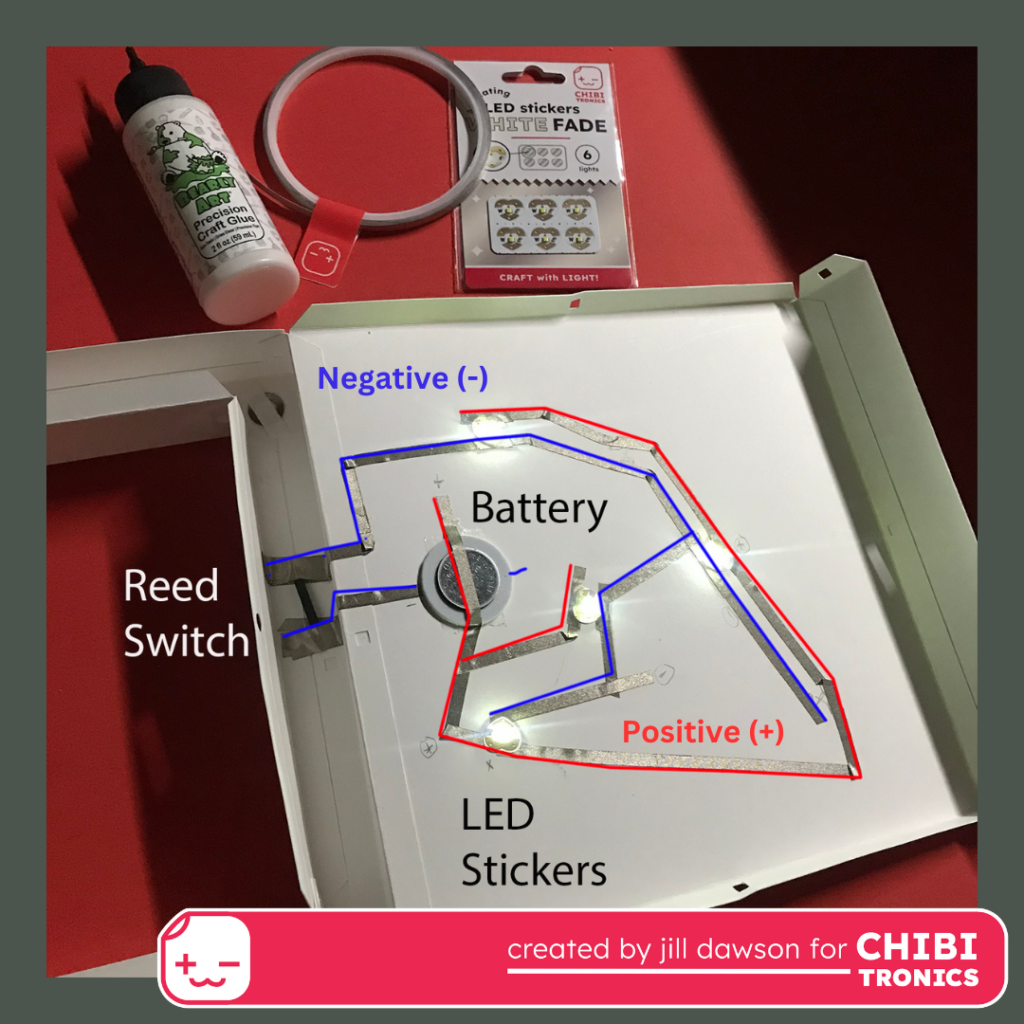
4. Build Circuit
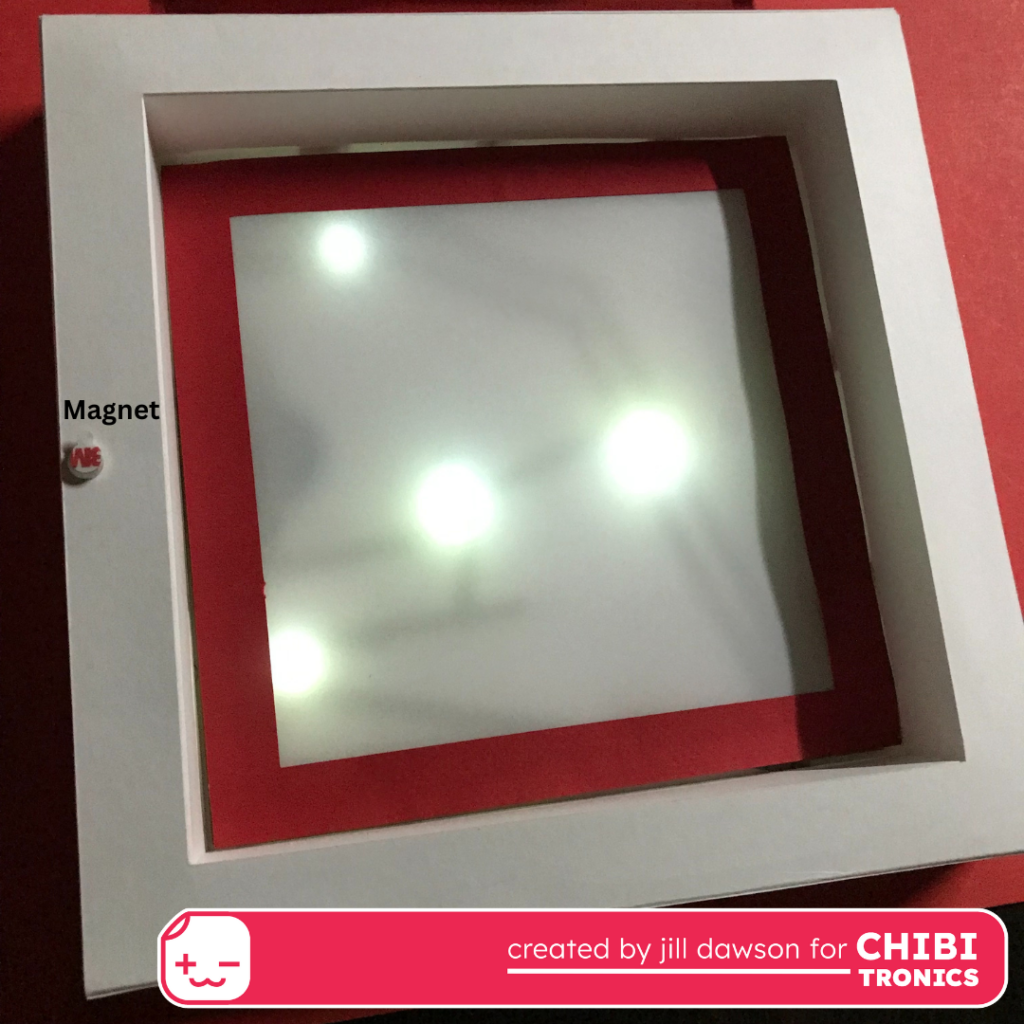
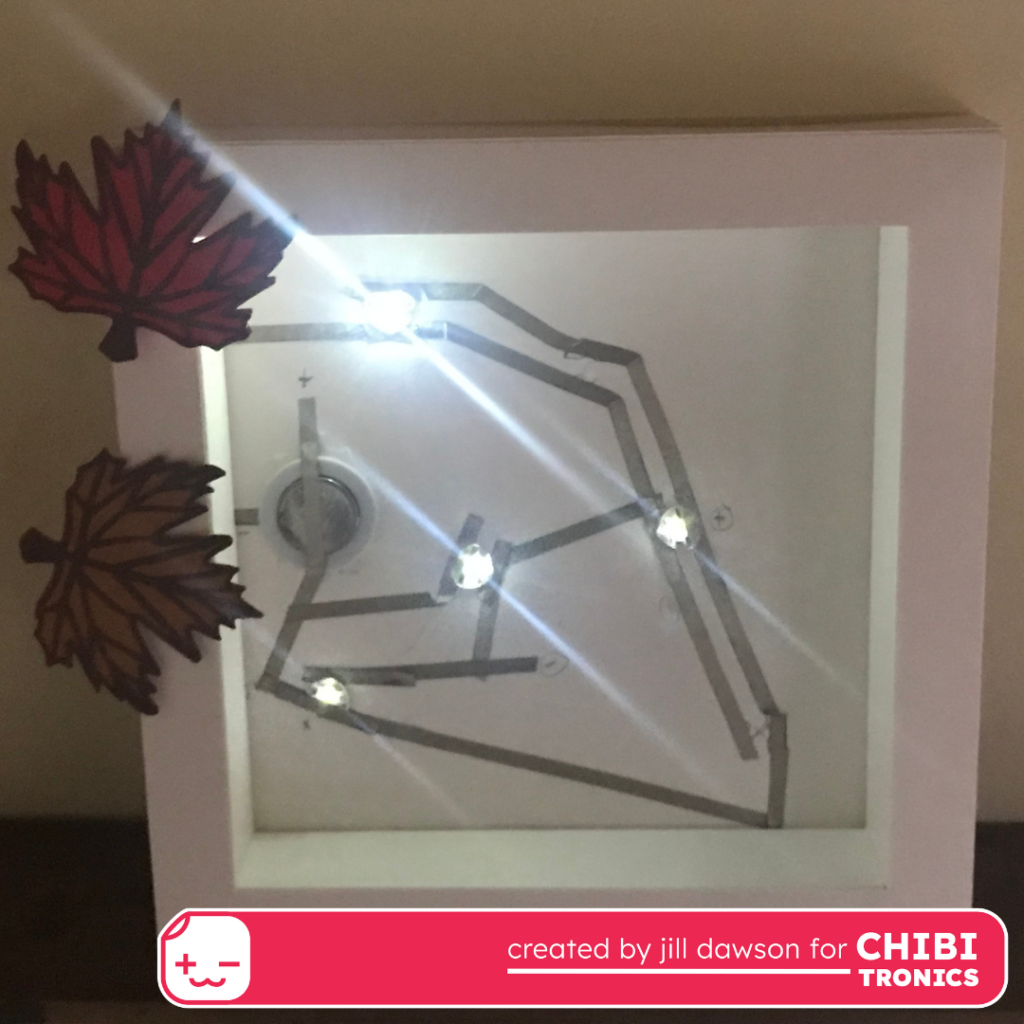
The next step is to build your circuit. To conserve battery power and add interactivity to your project, you may wish to include a reed switch (magnet on). I concealed mine in the hollow, left side of the frame (depicted below).
To create a discreet place for the magnetic leaf to rest whenever the frame is not being used, it’s helpful to adhere a thin piece of scrap metal (such as a washer) in the left corner of the frame with a piece of tape.
5. Assemble
The last step is to place the layered shadow box insert inside of the frame. To make it easier to access your battery, it’s advisable to do this without using adhesive on the back side of the insert.
To add visual interest, you might place more than one magnetic leaf upon your frame: one to trigger LEDs and another as decoration.

Suggested Tools & Supplies
- 1 CR2032 or CR2016 Coin Cell Battery (3V)
- 1 Chibitronics Reed Switch (Magnet On)
- 1 Magnet
- Conductive Fabric Tape
- 4 Chibitronics White Fade Animating LEDs
- White cardstock (for the frame)
- Decorative Paper (I am using Fabriano Tiziano in a fall pallet)
- Translucent Vellum (to diffuse the light)
- 1 Small Metal Ring (to secure your magnetic leaf when it’s not in use)
- Bearly Art Precision Craft Glue
- Bearly Art Cubies: The Polar Edition
- Scissors
- Pencil
- Cricut or Silhouette
- Optional (Chibitronics + We R Makers foam ring)