
Making a light-up pin (or magnet) is a fun and easy way to let someone know you are thinking about them. In this tutorial, I’ll show you how to make a glowing, heart-shaped pin that turns on and off with help from a Red Fade Animating LED and a DIY rotating switch.
Video Tutorial
Directions:
Step 1: Cut Out the Shapes
The first step is to use dies or scissors to cut out your desired shapes and decorative elements.

Step 2: Plan the Circuit
The next step is to plan your circuit. When planning your circuit, it’s important to consider where you want the LED and metal brad to be visible on the outside of your pin, so that they are integrated into your overall design. Ideally, you need to leave enough room between the LED and the battery for the legs of the metal brad to be able to rotate, without getting stuck or accidentally coming into contact with the edge of the battery.
Once you know how you want your design to look, use a screw punch to make a hole through the decorative layer. Then, hold the piece in place to mark precise locations for the LED and the metal brad on the circuit layer. To make it easier to know precisely where the switch gap will be, poke the hole for the metal brad so that it goes through both of the layers of your project (including the decorative backing).

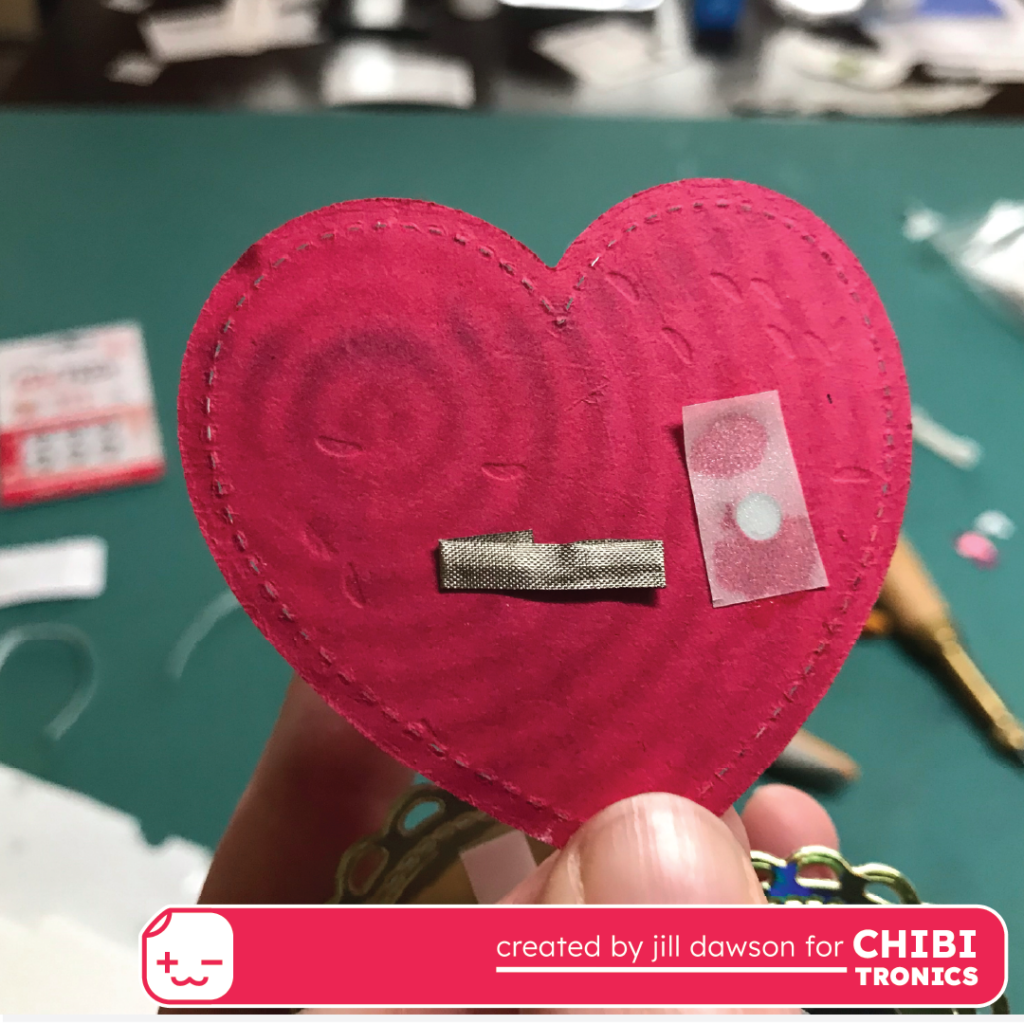
Step 3: Prep the Top Layer & Switch Legs
The next step is to prepare the decorative layer and the legs of the metal brad, to help them serve as a reliable switch. Assemble the decorative elements of the top layer with glue. Then, if desired, cover the back of the hole for the LED with a scrap of vellum to help diffuse the light.
To prep the switch legs, place the brad through from the front side of your project and flatten one of the legs on the back side, leaving the second leg alone for now. Then, starting under the flattened leg, adhere a piece of Conductive Fabric Tape that wraps all the way around it, extending over the edge and around the back of the second leg. Trim off the excess tape before flattening the second leg. Adding this tape will increase the surface tension in the circuit and cover up any insulating paint on the brad.
Step 4: Sketch the Circuit & Prep the Switch Gap
Before you start building the circuit, trace the outline for your battery and sketch the path of your circuit, leaving a gap in the negative lead where the brad went through. The negative lead should connect with the pointy, negative end of the LED and sticker. The positive lead should connect with the broad, positive end of the LED sticker and the top of the battery.
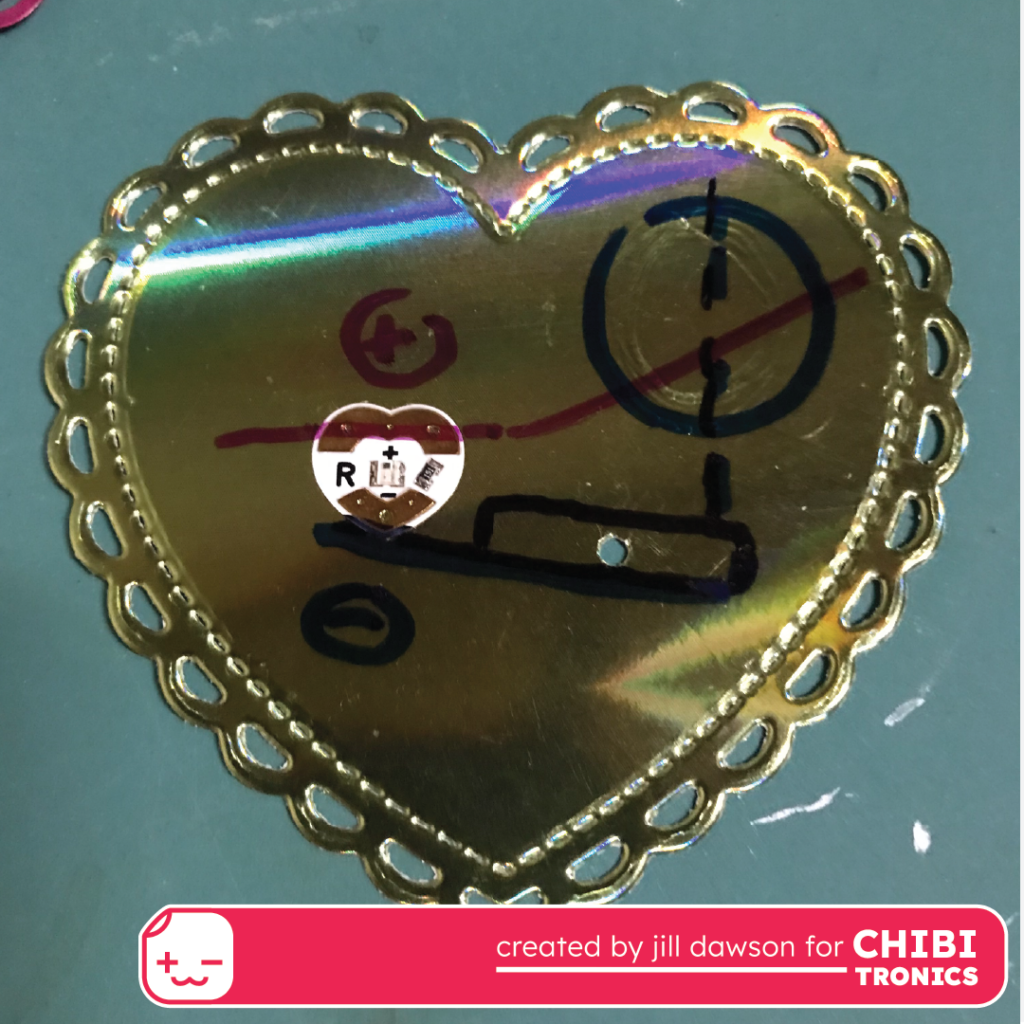
Next, place adhesive foam squares on both sides of the hole, leaving a gap between them that is slightly wider than the taped legs of the brad.
Then, to help keep the battery secure, place a piece of double-sided tape within the battery outline.
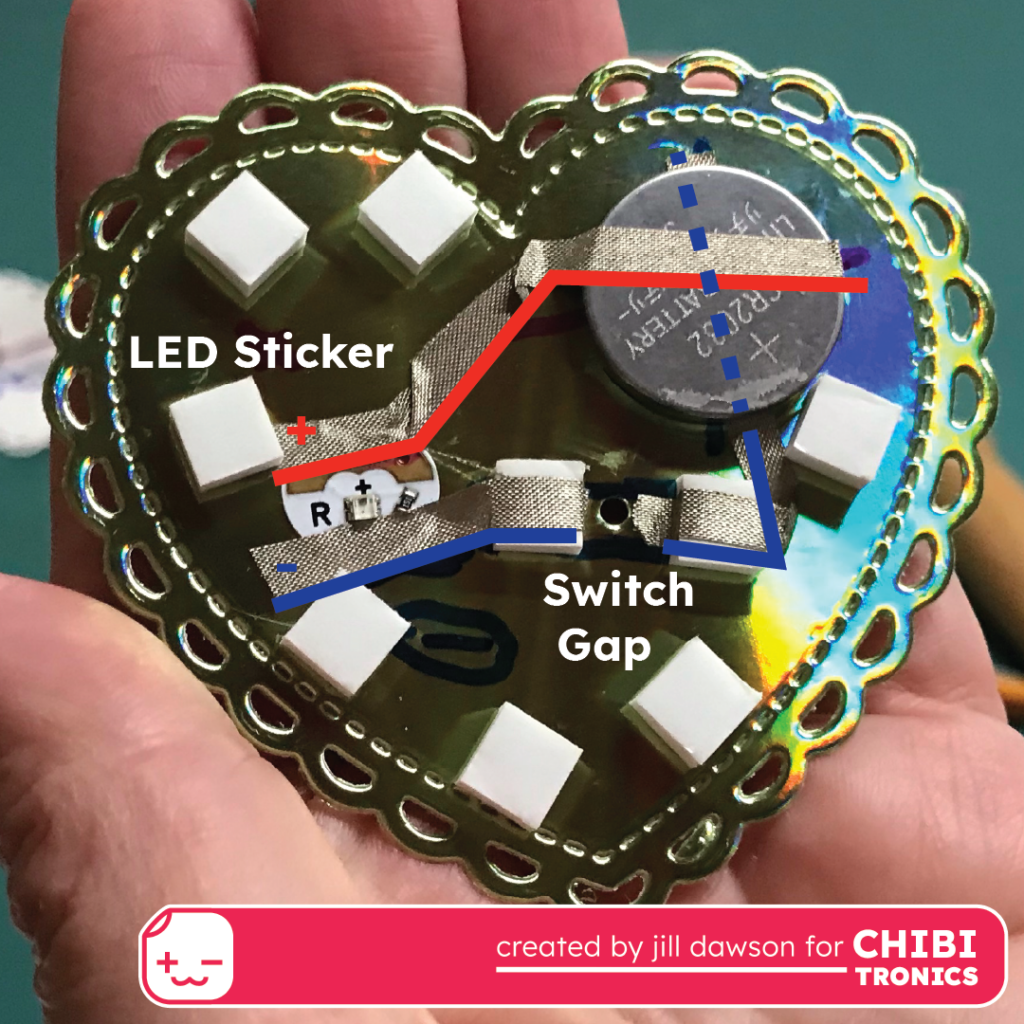
Step 5: Build the Circuit
Once the double-sided tape has been adhered to the battery outline, it’s time to build the circuit using Conductive Fabric Tape.
The first part of the negative lead should begin under the battery and wrap around the nearest foam square. Leave a gap! Start a second piece of conductive tape along the edge of the second foam square, wrapping around it and over the pointy, negative end of the LED Sticker. Be sure that the two pieces of tape do not overlap; it’s important to leave a gap in order to create the switch.
Insert the battery. Then, lay down the positive lead. It should begin over the broad, positive end of the LED Sticker and end by wrapping around the top, positive side of the battery.
To hold the two layers together, add foam tape to the circuit layer, avoiding the area where the legs of the brad will be rotating. Leave the protective backing on while you test the switch.
Step 6: Test Switch
The last step is to assemble the pieces and test the switch.
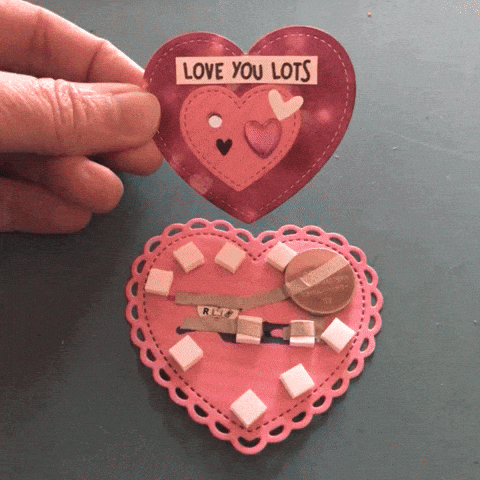
To test the switch, hold the decorative layer in place over the circuit layer with the switch legs turned parallel with the switch gap to ensure that it lights up as expected. Then, twist the brad’s legs to the perpendicular position to ensure that the switch remains off.
If all works as expected, remove the protective backing from the foam tape and secure the layers.
If not, ensure that the legs of the brad are moving smoothly and make contact with the foam tape on each side of the switch gap, without coming into contact with the battery.
Adaptation
If you’d prefer to create a festive decoration for a filing cabinet or a refrigerator, rather than a wearable, it’s possible to substitute a magnet for the a pin-back.
Suggested Tools & Supplies

- Red Fade Animating LEDs
- Conductive Fabric Tape
- Bearly Art Cubies- (The Polar Edition)
- Bearly Art Precision Craft Glue-the MINI
- CR2032 or CR2016 Coin Cell Battery
- Cardstock
- Heart-shaped metal brads
- Screw punch
- Scissors
- Pencil
- Optional: Double-sided Tape
- Self-adhesive pin backs or cuttable magnetic sheet
- Vellum scraps
For convenience, I used the following dies to make the heart shapes.
- Just Stitching Hearts Lawn Fawn
- Lacy Heart Stackables Lawn Fawn
- Giant Outlined Love Ya Lawn Fawn
- Flippin’ Awesome Lawn Fawn