By Hello Play! for Chibitronics
As a collective with a passion for creative learning, we (Andrea, Celeste, and Mariana) wanted to explore how to create playful experiences around the theme of circuit switches.
“How can we augment found art (a story, a painting, a song etc.) with LED Switches?” was the prompt we used to guide our switch explorations. Because we wanted to focus on how to creatively use switches, we thought using found art would help us concentrate on the circuit design. We also decided to focus on three types of the switches: pressure, magnetic, and mechanical.
As such, we each started our exploration by finding an image or piece of artwork we wanted to augment. Since this blog post is shared more widely, we intentionally chose to only use open source and public domain images. However, if you are recreating this exploration at home, please feel free to augment whatever artwork you find!
Ultimately, our explorations fell into three categories – storytelling, interactive painting, and STEAM exploration – which are detailed below.
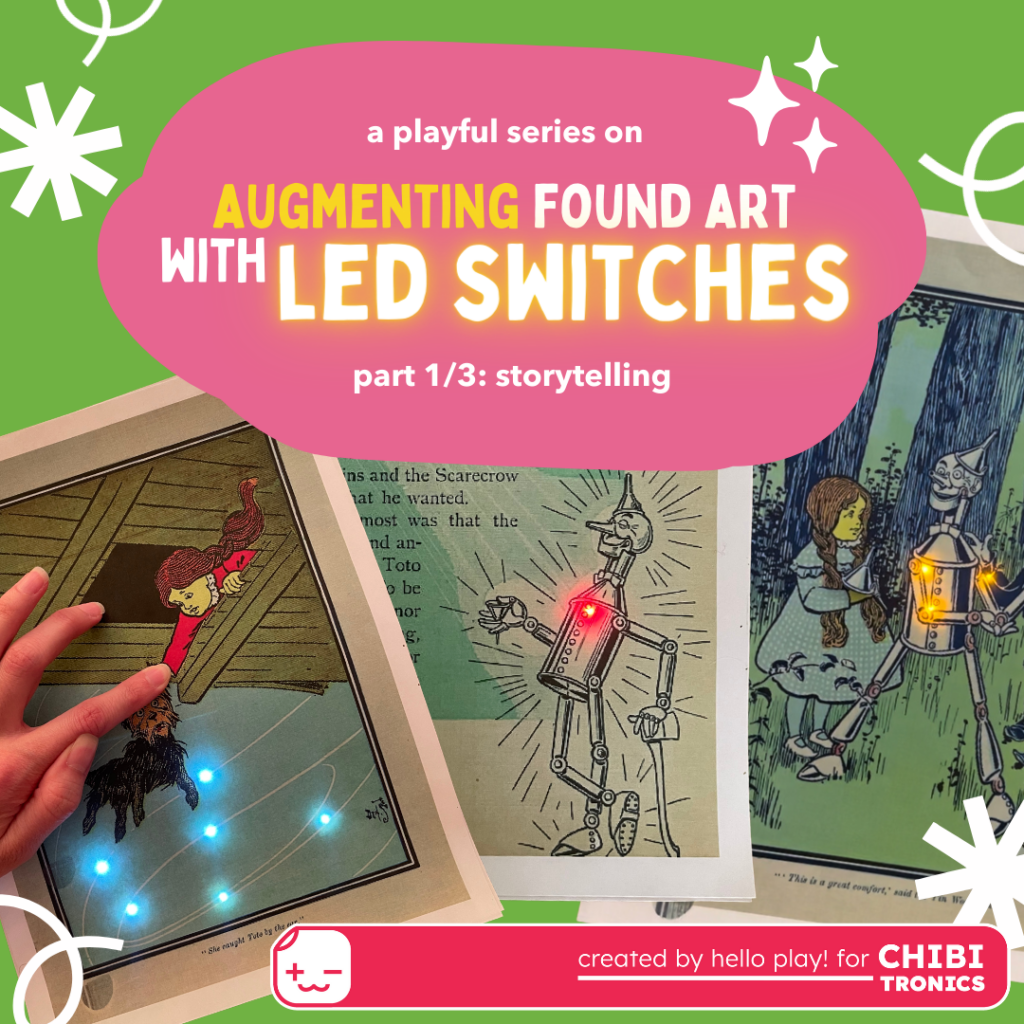
Storytelling
- Wonderful Wizard of Oz art from the Public Domain Review
- Conductive Fabric Tape
- Chibitronics LED Lights
- Chibitronics Stickers Effects
- Pressure Sensitive Conductive Plastic
- Reed Switch – Magnet On
- Magnet
- Coin cell battery
Inspiration
Inspired by her love of classic American fairy tales, Andrea wanted to bring a storybook to life using lights and switches. Because the Public Domain Review contains troves of public domain artwork, Andrea started by sifting through their image catalog. When she came across the Wonderful Wizard of Oz illustrations in their catalog, she immediately knew this whimsical story would be a perfect fit for the prompt.
Because this was Andrea’s first time using both the pressure sensor and magnetic reed materials with paper circuits, learning how to properly wire the circuits was her biggest challenge.
Circuit Design Process
Check out this instagram post to see videos of these circuits in action!
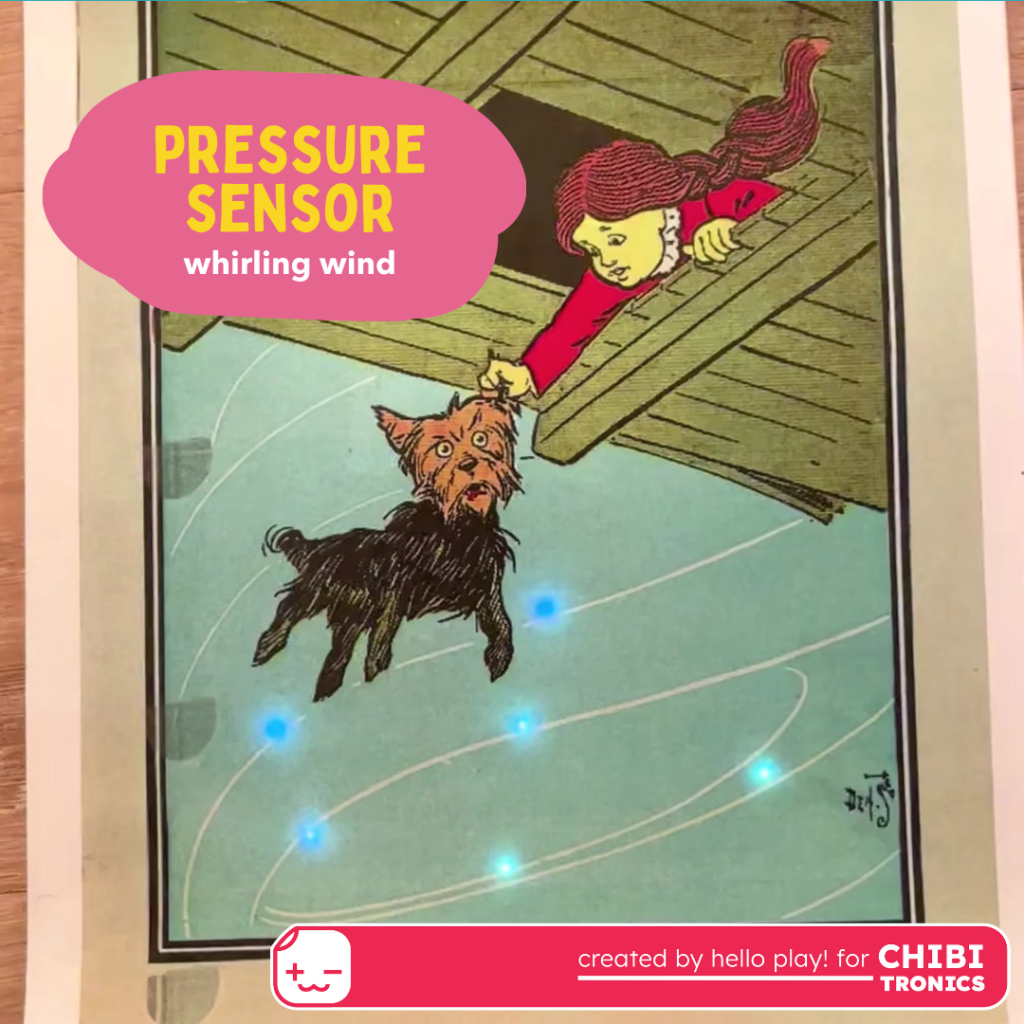
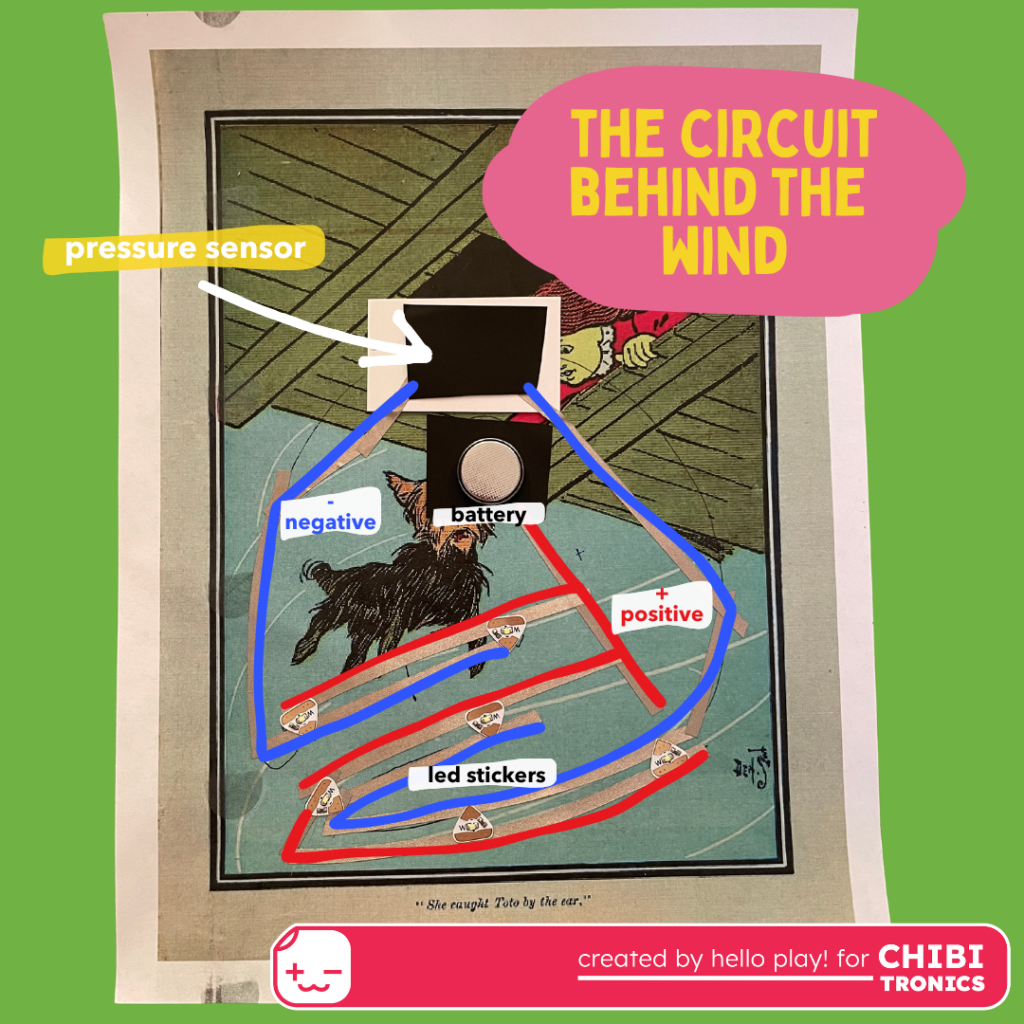
Switch 1: Pressure Sensor
The tornado windstorm whisking Dorthy’s house away is one of the classic moments in the Wonderful Wizard of Oz. Andreaw wanted to use a pressure sensor to bring the wind to life. Before jumping into making, Andrea followed this tutorial video from Chibitronics to better understand how to incorporate a pressure sensor into her circuit design. Her circuit design resulted in pushing harder on Toto’s ear (or Dorthy’s hand) to increase the LED brightness, depicting the ferocity of the whirling wind.
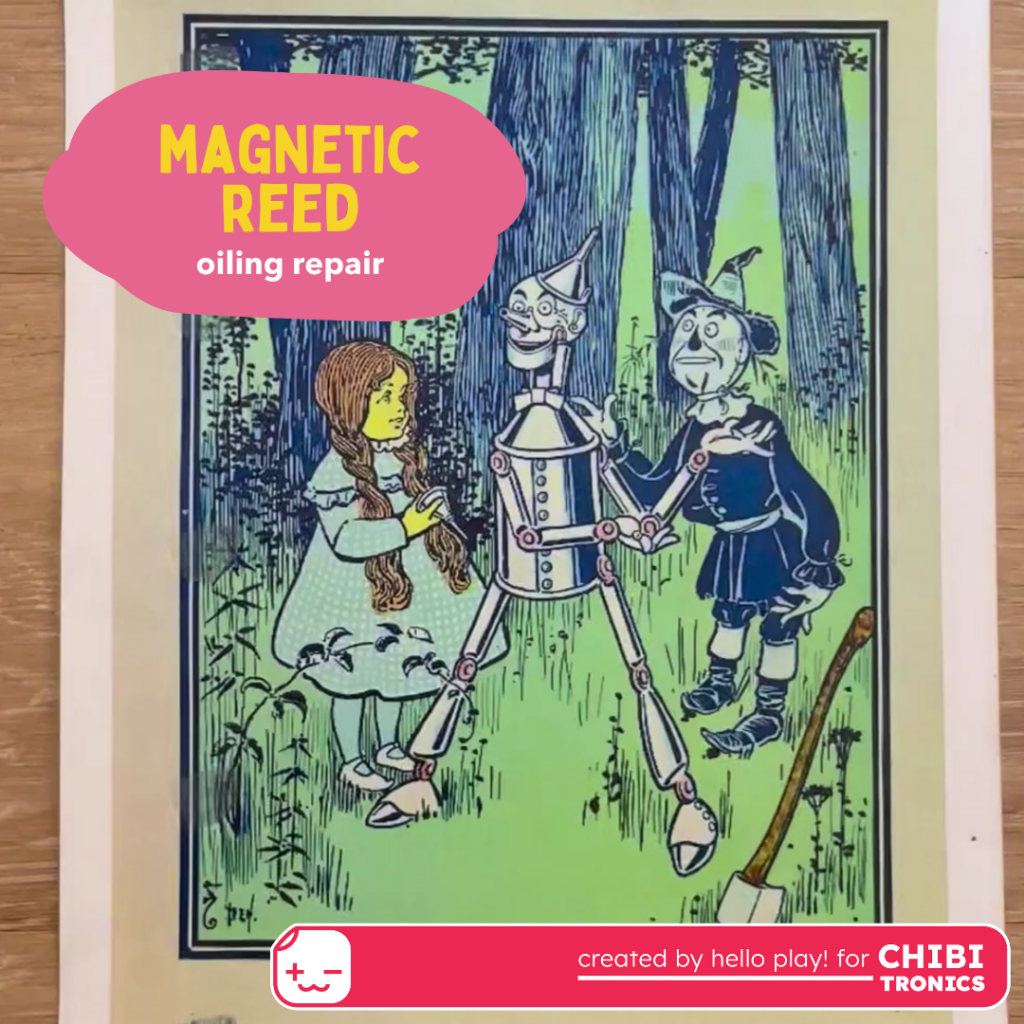
Switch 2: Reed Switch
When Dorothy meets the Tin Man with the Scarecrow, she revitalizes him by oiling his joints. Wanting to use the magnet with the reed switch to illuminate this exchange, Andrea followed this tutorial from Chibitronics to learn how to use a reed switch. In the final design, you place an oiling can (covering a magnet) on Dorthy’s hand (covering a reed) to see what joints the Tin Man needs oiled.

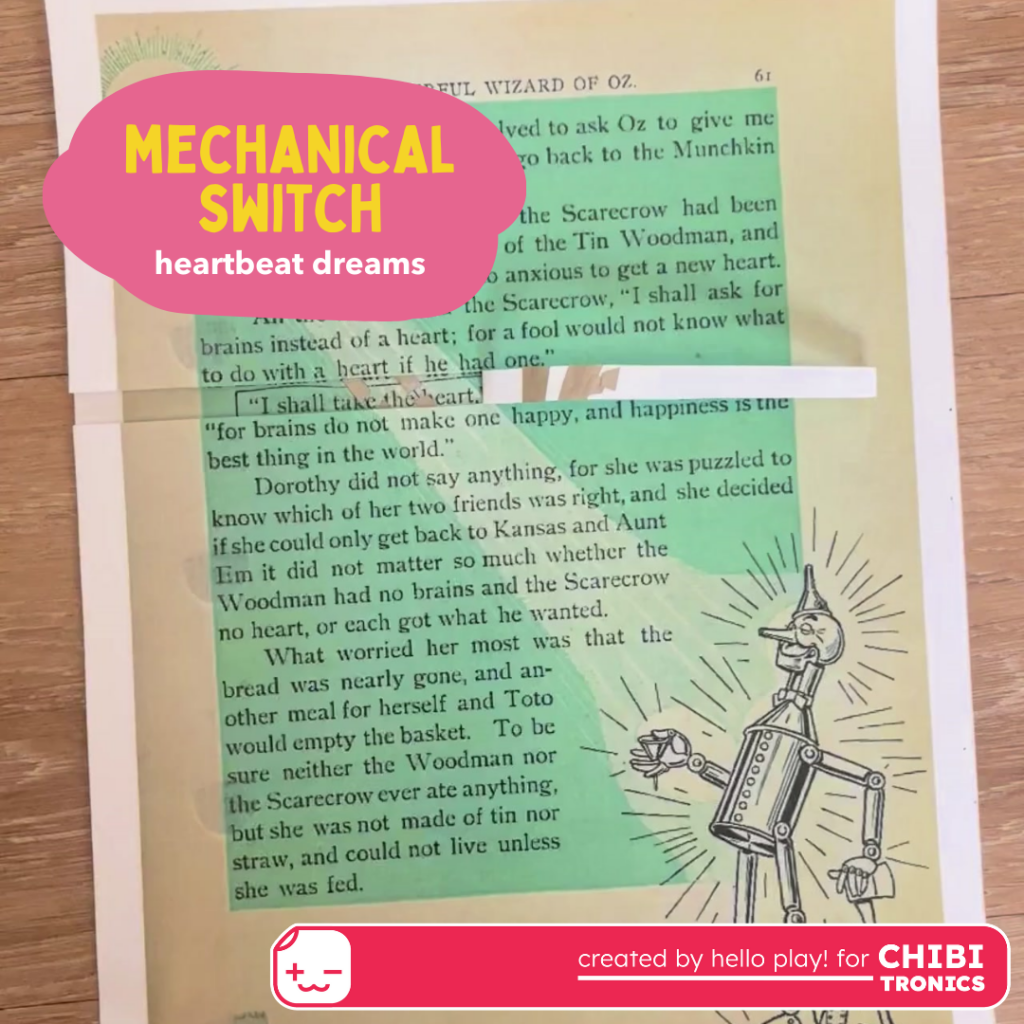
Switch 3: Mechanical
Throughout the Wizard of Oz, the Tin Man longs for a heart. Drawn to the page with both illustrations and words, Andrea wanted to depict the interplay between the description and the depiction of the Tin Man’s desire. By using the heartbeat effect sticker, a red LED sticker, and a classic mechanical switch, Andrea strived to bring the Tin Man’s dreams to life. Following this instructional video from Chibitronics helped her learn how to properly wire the circuit with an effects sticker.

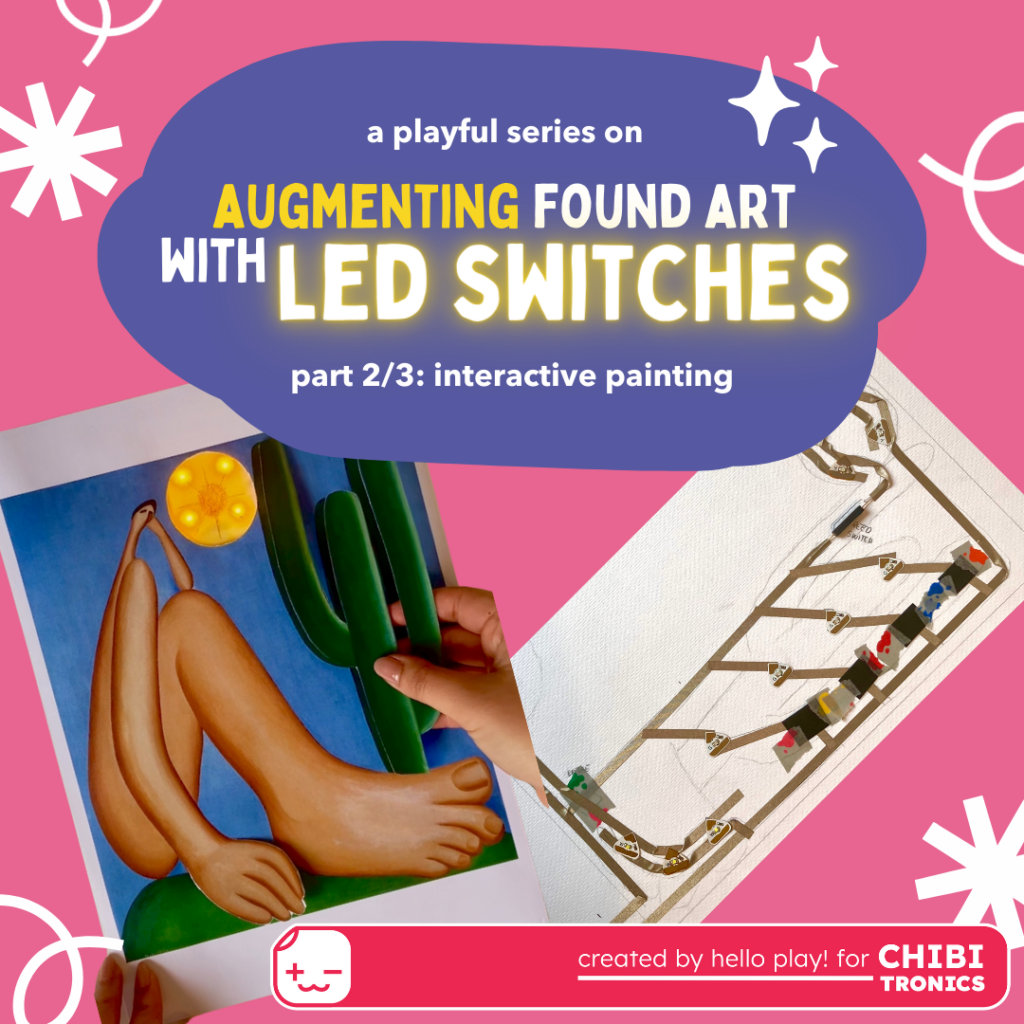
Interactive Painting
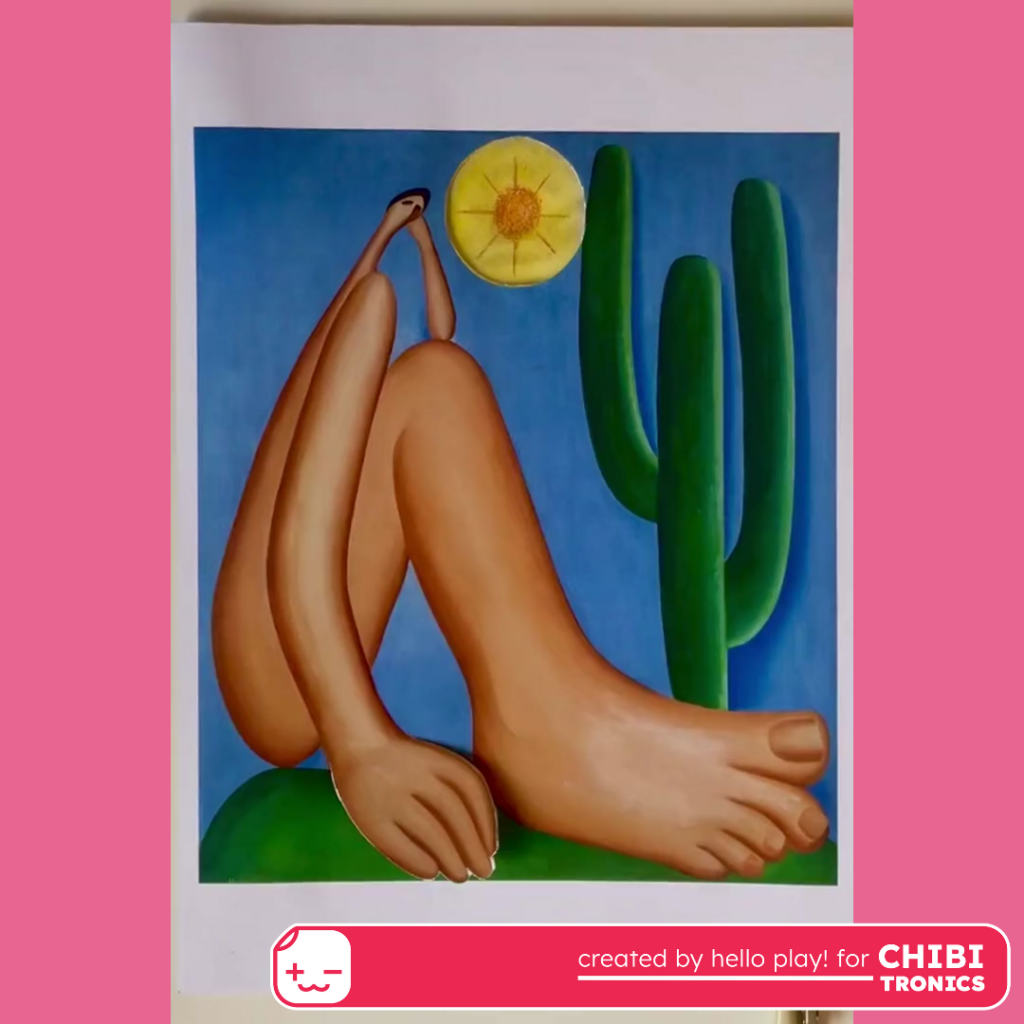
- “Abaporu” painting by Tarsila do Amaral
- Conductive Fabric Tape
- Chibitronics LED Lights
- Pressure Sensitive Conductive Plastic
- Reed Switch – Magnet On
- Magnet
- Alligator clips
- Power source (USB port connection to alligator clips)
Inspiration
Inspired by her Brazilian heritage and upbringing, Mariana used the famous Brazilian painting “Abapor” as the medium for her switch exploration. In particular, her fascination with the bold and distinctive shapes in the painting guided her circuit design.
During her design process, Mariana sought to simply augment rather than completely transform the painting. As such, she intentionally hid the LEDs behind the painting. Through novel interactions with switches, Mariana hoped to reveal its glowing “secrets” (the LEDs).
Circuit Design Process
Because Mariana incorporated all three switches with multiple LEDs into one circuit, she connected a larger 5V power supply. (Often, paper circuits are depicted with a 1.5V coin cell battery.) She followed this blog post to help her properly connect the power to the circuit.
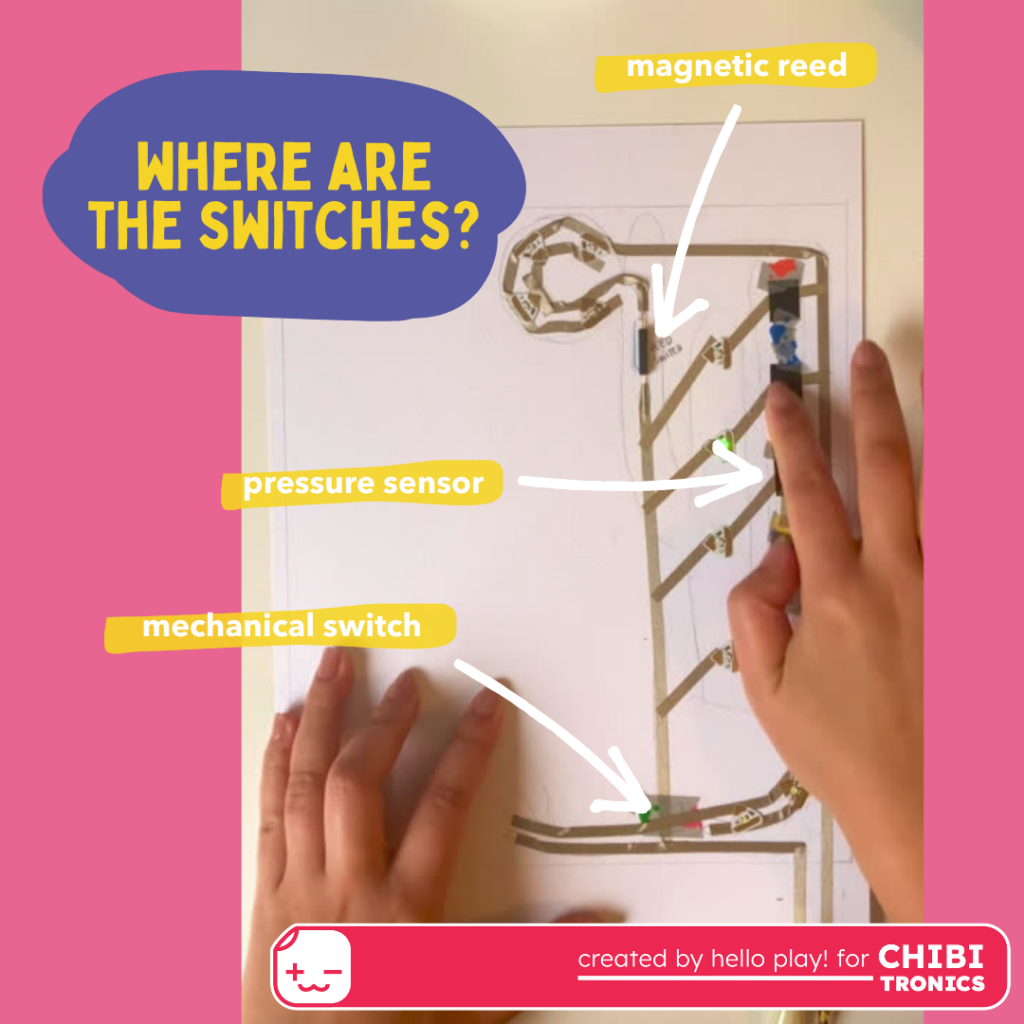
While making, her biggest surprise was the amount of circuit planning/sketching in the design process. She considered both the type of interaction in each part of the painting as well as how to functionally make the circuit work.

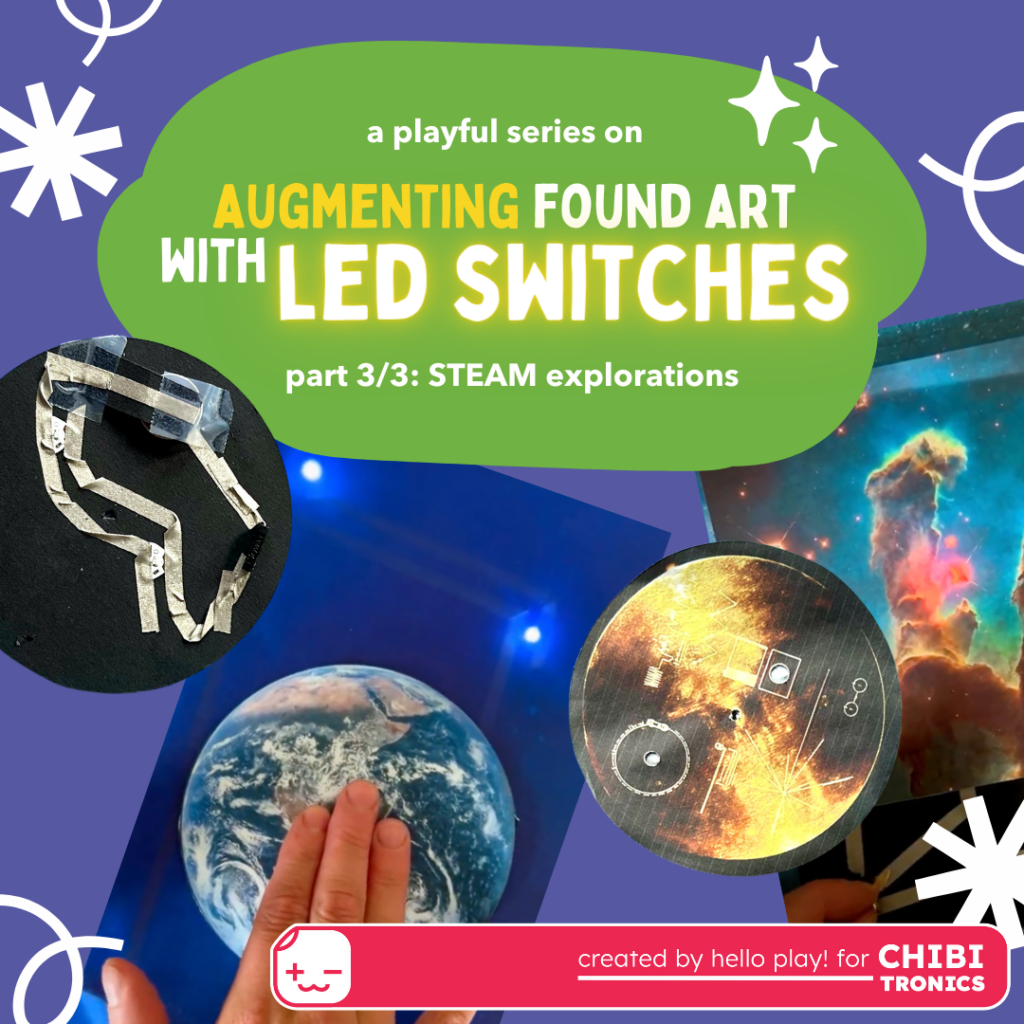
STEAM Explorations
- Printed NASA photos
- Conductive Fabric Tape
- Chibitronics LED Lights
- Pressure Sensitive Conductive Plastic
- Reed Switch – Magnet On
- Space themed scrapbooking paper
- Magnet
- Brass tack
- Coin cell battery
Inspiration
Excited by the artistic possibilities of augmenting the night sky with LED lights, Celeste explored the treasure trove of open source NASA photos. Ultimately, she chose photos which she thought were particularly beautiful or would work well with paper circuit-crafting.
Circuit Design Process
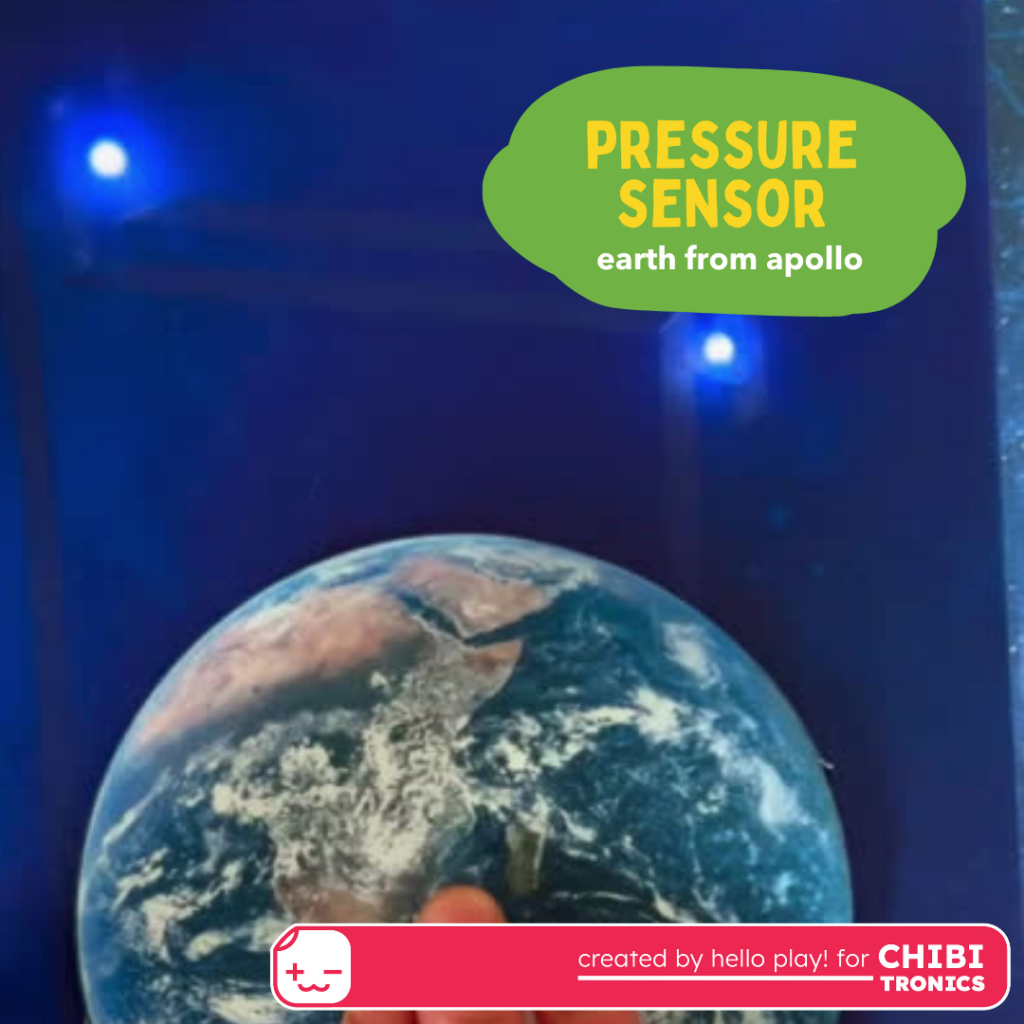
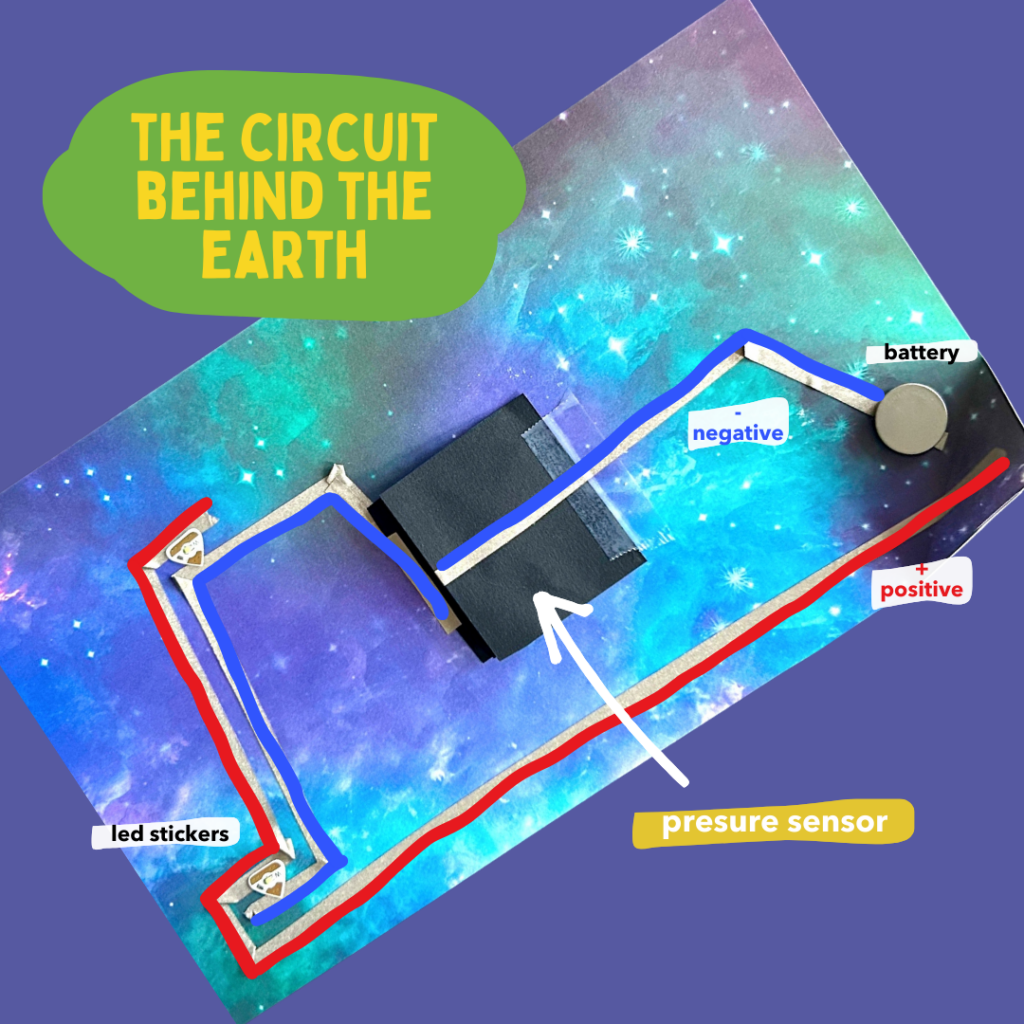
Switch 1: Pressure
In “Earth from Apollo,” Celeste illuminates two LEDs in the night sky to create the illusion of stars in the background of the image. She used a pressure sensor underneath an image of the Earth to control the brightness of the stars by pressing the image of the Earth.
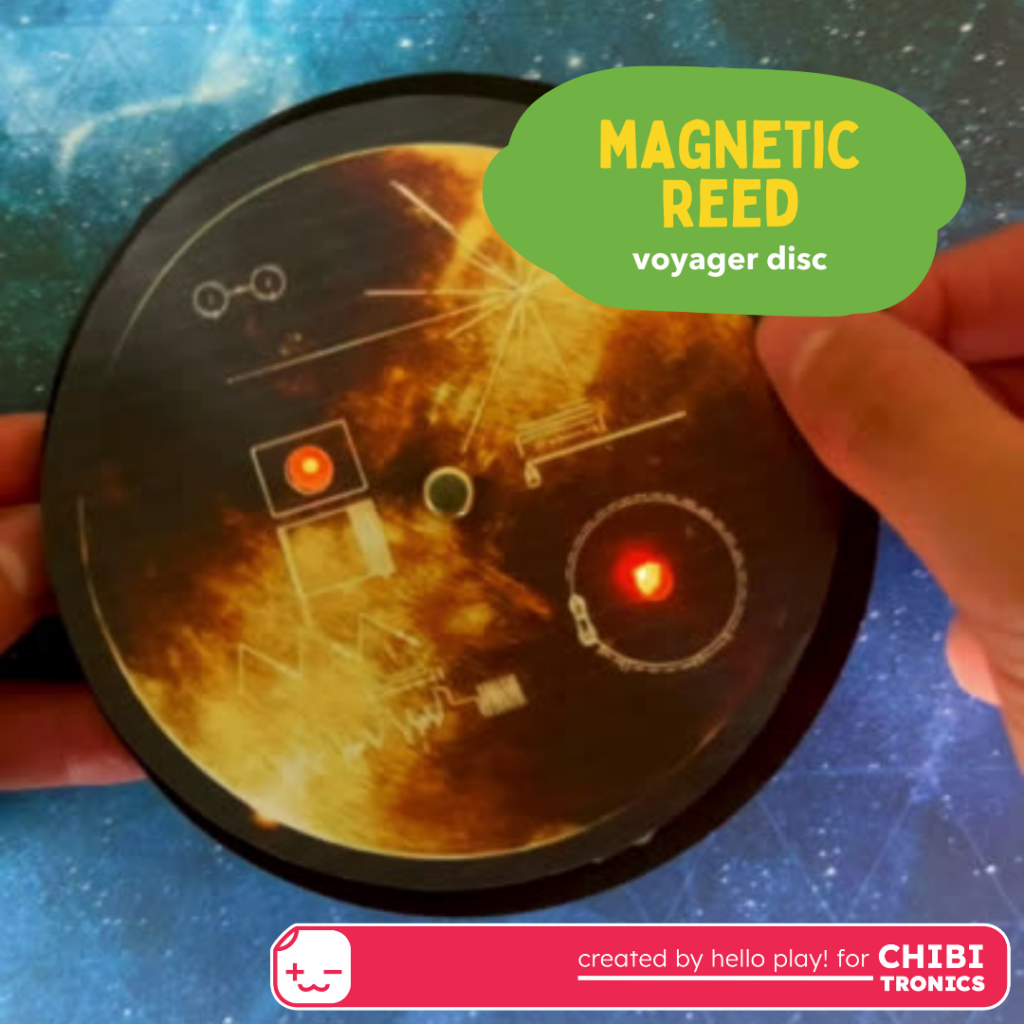
Switch 2: Magnetic Reed
In the “Voyager Disc” exploration, Celeste spins an image of the golden records that were launched along with the Voyager 1 and 2 spacecraft. Celeste chose the “spinning” interaction to connect to the way that records spin. When the circuit with the reed switch on the top passes over the magnet on the bottom, two LEDs in the circuit light up.

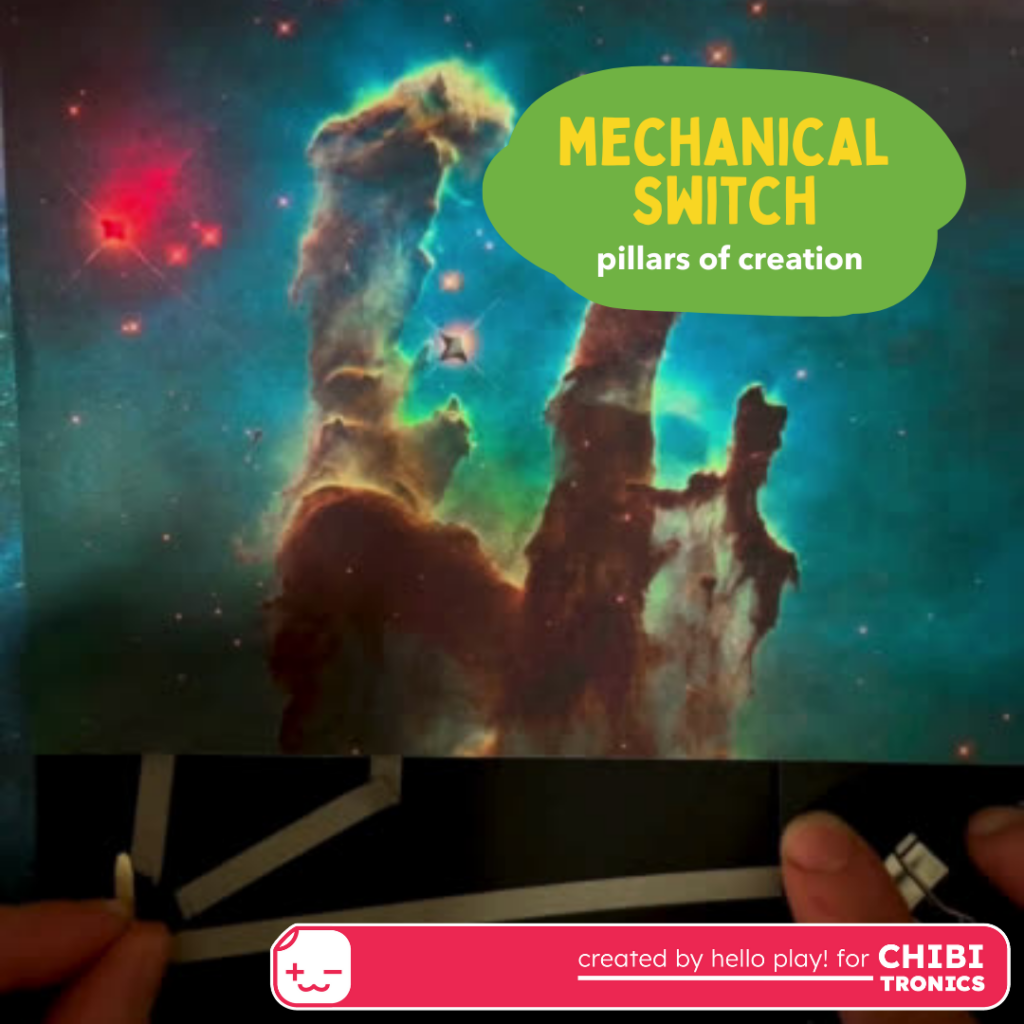
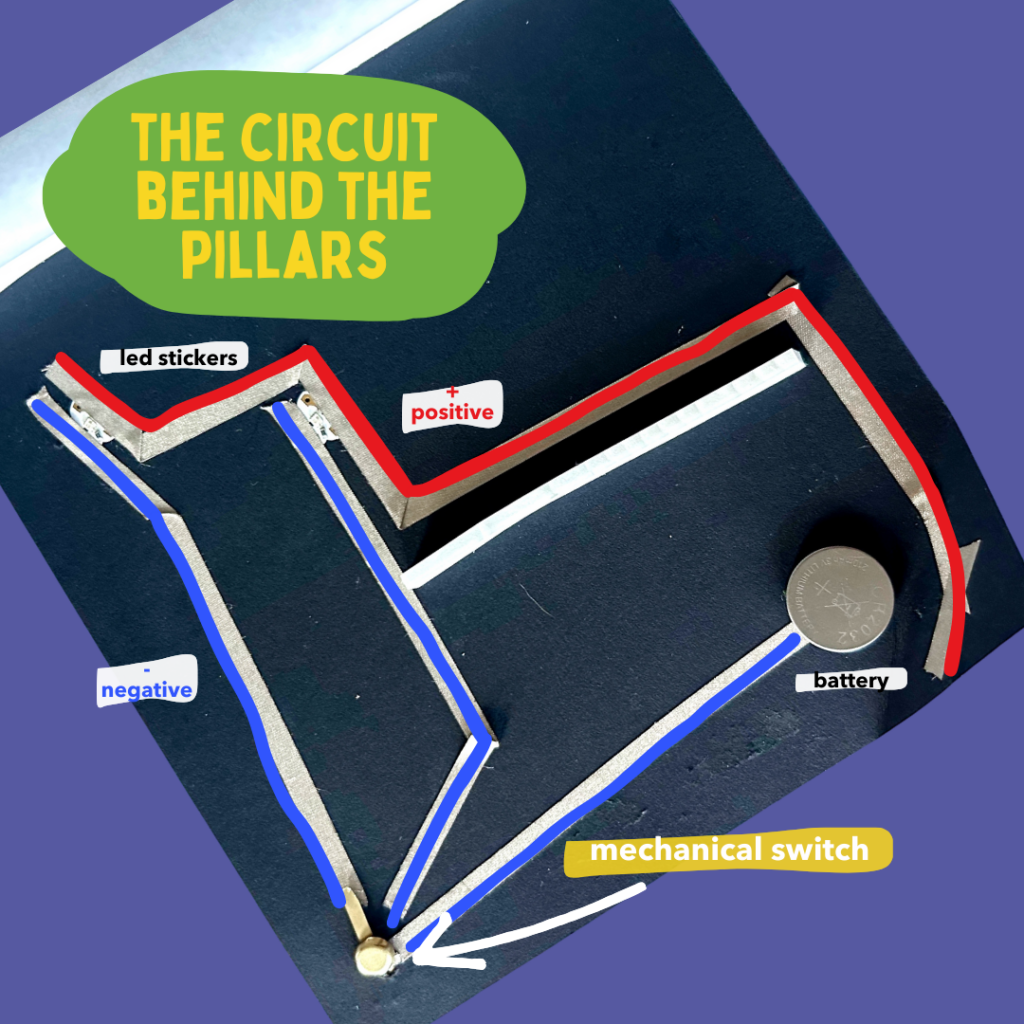
Switch 3: Mechanical
In this “Pillars of Creation” exploration, Celeste uses a brass fastener to mechanically switch between two different circuits. By rotating the fastener, Celeste is able to selectively light up different areas in the background of the image. While Celeste liked the idea of this switch, in reality it was a little tricky to get the switch to work consistently because the brass fastener often came loose and didn’t make good contact with the conductive tape.
Reflection
In our explorations, this prompt was thought-provoking, lending itself well to creative explorations. In particular, we found printing several copies of the art piece made it less “scary” to try something since we had several back-ups. Having the switch constraints also helped guide our explorations. Incorporating switches, especially pressure and magnetic reeds, into your circuit is a fun way to “level-up” your circuits. Want a bigger challenge? Try adding multiple switches to one circuit like Mariana!
If we were to repeat this prompt, there are a few things we would each like to further explore or try. Mariana would like to try to create a story next time; Andrea and Celeste wonder how they could’ve simplified their circuit design. While there are always things which could be “better,” we enjoyed the process of creating interesting circuits to augment found art!
Your Turn!
We hope you were inspired by our prompt, “How can we augment found art (a story, a painting, a song etc.) with LED Switches?”, to make your own creations. Maybe you choose a story, a painting, a scientific concept, or another medium to augment. Please tag us on social media @helloplay and @chibitronics if you try this exploration!