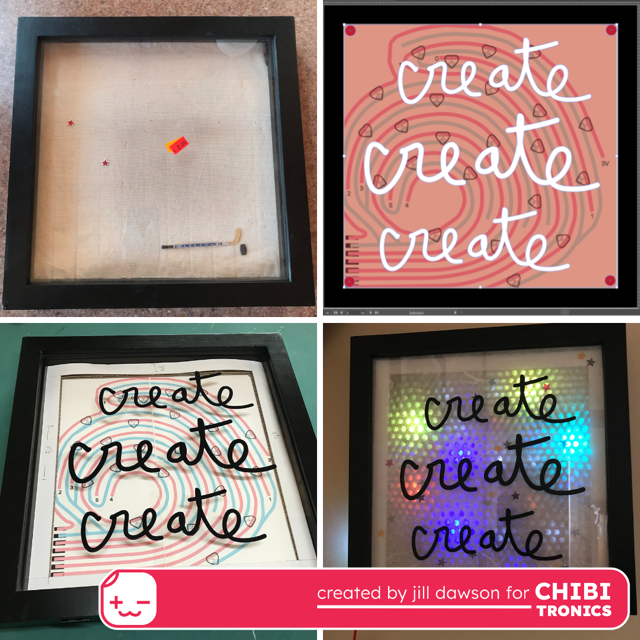
In this tutorial, I’ll share my process for transforming a thrift store find—a hinged box frame (13 X 13 inch) purchased for 2 dollars—into a dynamic wall decoration. Using a Chibitronics Chibi Chip and LED Stickers of your choice, you can create an inspiring poster for your wall, with beautifully colored lights and changeable effects!
Useful Tools & Supplies
- Chibi Chip or Love to Code Premounted Chibi Chip/ Clip (with cable)
- Access to Microsoft Make Code
- Circuit Sticker LEDs of your choice
- Conductive Fabric Tape
- Hinged box frame (deep enough to conceal or adhere a Chibi Chip to)
- Cricut Maker & craft vinyl
- Decorative paper (to diffuse the light)
- Foam adhesive, such as Bearly Art Cubies
- Double sided Tape
- Alligator clips (helpful for prototyping)
- Portable power bank (to plug your project into)
- Multimeter (useful for debugging)
Steps:
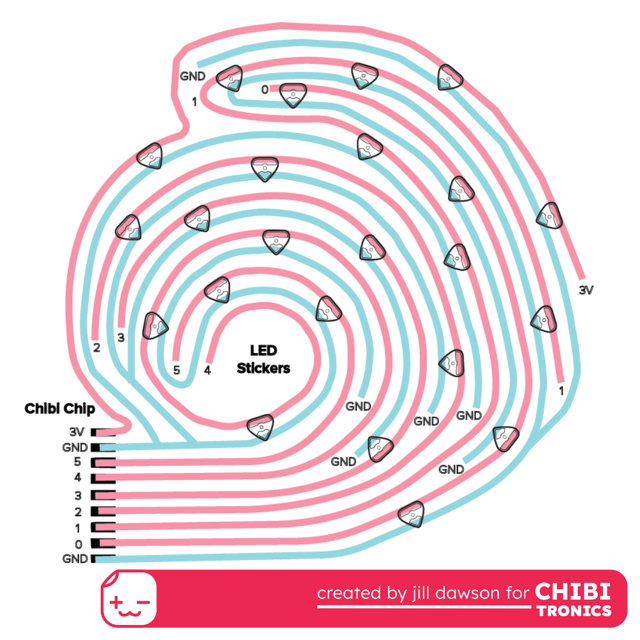
1. Measure the Frame Opening & Design Your Circuit
After cleaning the box frame, I measured the opening to determine how wide my circuit needed to be and used Adobe Illustrator to design it.
I then used Adobe Acrobat to print the circuit diagram—using the poster option in the print settings—to make a paper template at the correct scale.
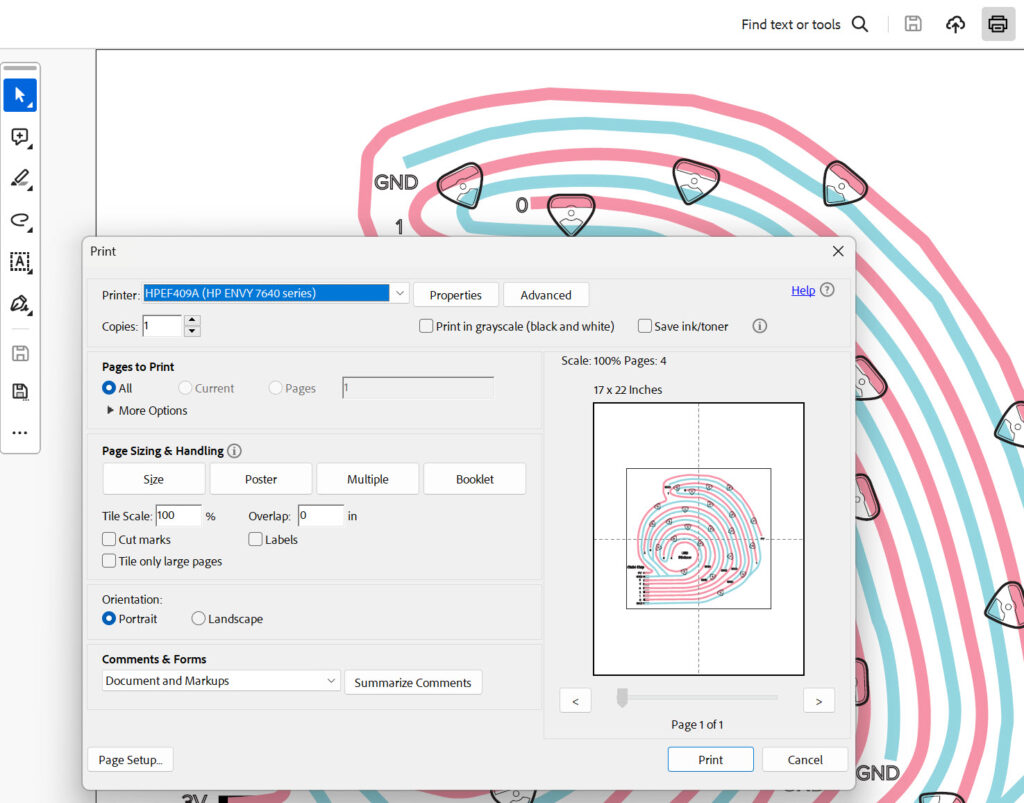
This required me to tape four pieces of printer paper together to make a template the right size. Afterward, I cut the template and a cardboard backing piece to fit the inner dimensions of the frame.
After making sure that they fit, I removed the template and cardboard from the frame to begin assembling the circuit using conductive fabric tape and LED stickers.
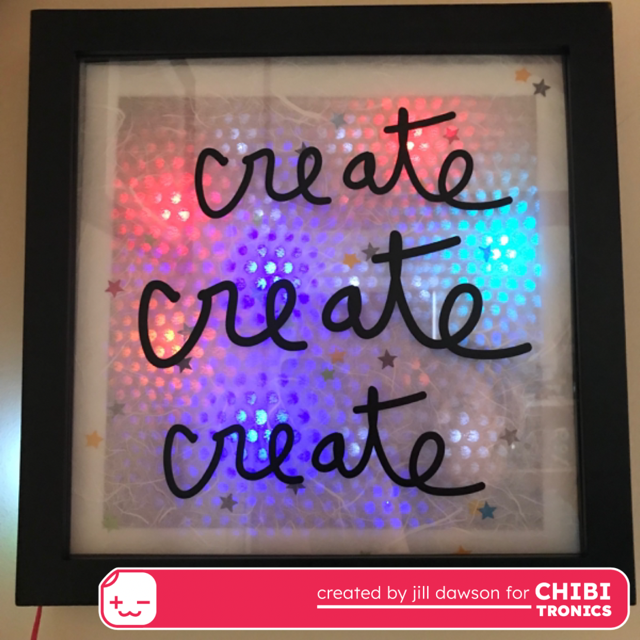
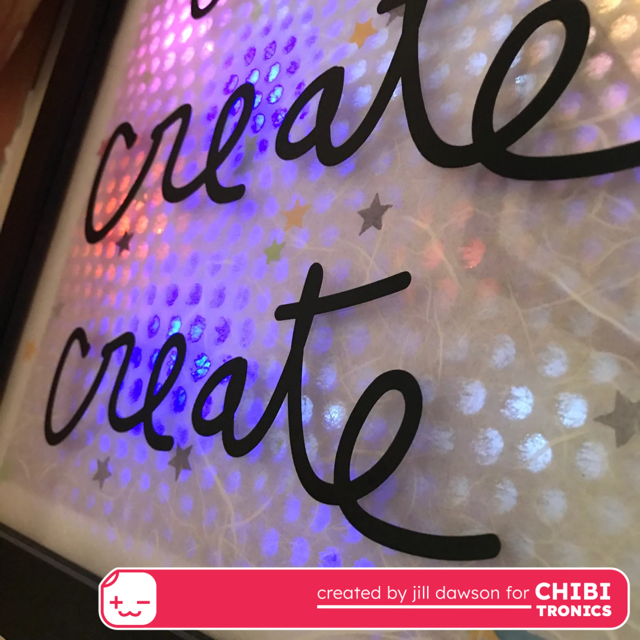
I also used Illustrator to design a decorative overlay to place on top of the glass. I exported it as an SVG for cutting with a Cricut Maker.
2. Add the Overlay to the Glass
To add the overlay to the front of the box frame, I imported the SVG into Cricut Design Space and cut it out of black adhesive vinyl. Then, I transferred the words onto the top of the glass.

3. Build the Circuit
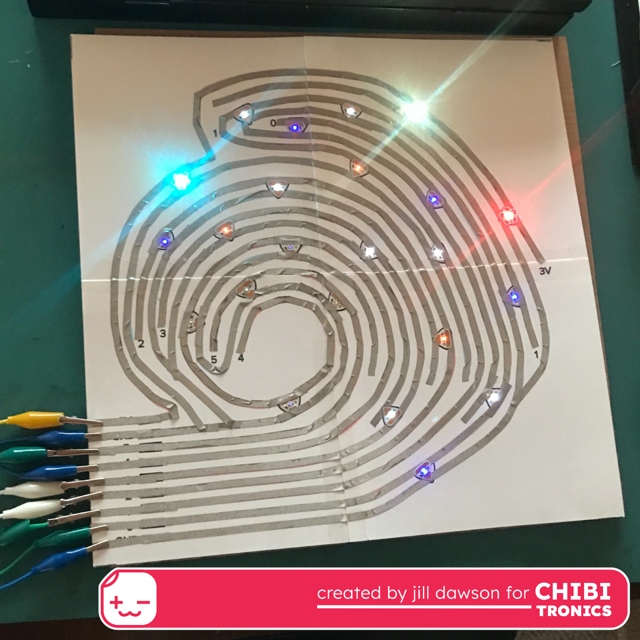
To help get a better idea of what colors of LED Stickers I wanted to use in my project, I connected my Chibi Chip to the paper template using alligator clips, and then to my computer. This allowed me to experiment with colors and code (using Microsoft Make Code) to come up with an interesting light effect.
I ended up using three Rainbow Fade Animating LEDs on the 3V trace, since it would be receiving power continuously. The rest of the LEDs responded to programming from the Chibi Chip.
After I finished building the circuit, I returned it (and the cardboard support) to the inside of the shadow box and secured the backing to the frame.
4. Adhere Chibi Chip
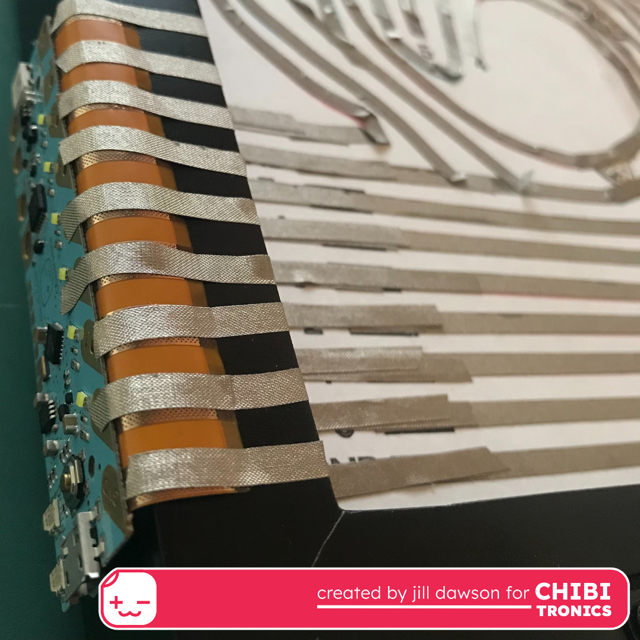
Once the circuit and overlay were complete, I attached the Chibi Chip to the outer left side of the box frame with a piece of foam tape. When designing my circuit, I thought about where the Chibi Chip would need to be placed in order for the power cable to easily connect with it. Because the Chibi Chip has a flexible hinge, I was able to wrap it around the edge of the frame, allowing the lid of the box frame to close securely over it.
Then, I connected the conductive contacts of the Chibi Chip with those matching the circuit template using Conductive Fabric Tape. For added support on these connections, I reinforced the entire area with washi tape (view the video above for details).
5. Add Decorative Paper for Light Diffusion
The last part of making this project was adding a couple of pieces of decorative paper to the inside of the box frame to help diffuse the light. To lift the paper away from the circuit, in order to increase the amount of space between it and the decorative paper, I made three identical cardboard frames. Each cardboard frame was cut to the inner dimensions of the box frame, so that I could easily remove them.
I placed the first frame directly over the circuit and adhered several ¼” tall pieces of foam tape (Bearly Art Cubies) to the top of it, to help create an additional buffer.
Then I used the remaining two frames, and some double sided tape, to sandwich a piece of decorative paper between them. I placed this laminated frame layer on top of the foam cubes.
Finally, I added a second piece of decorative paper on top of the entire frame opening and closed the lid.
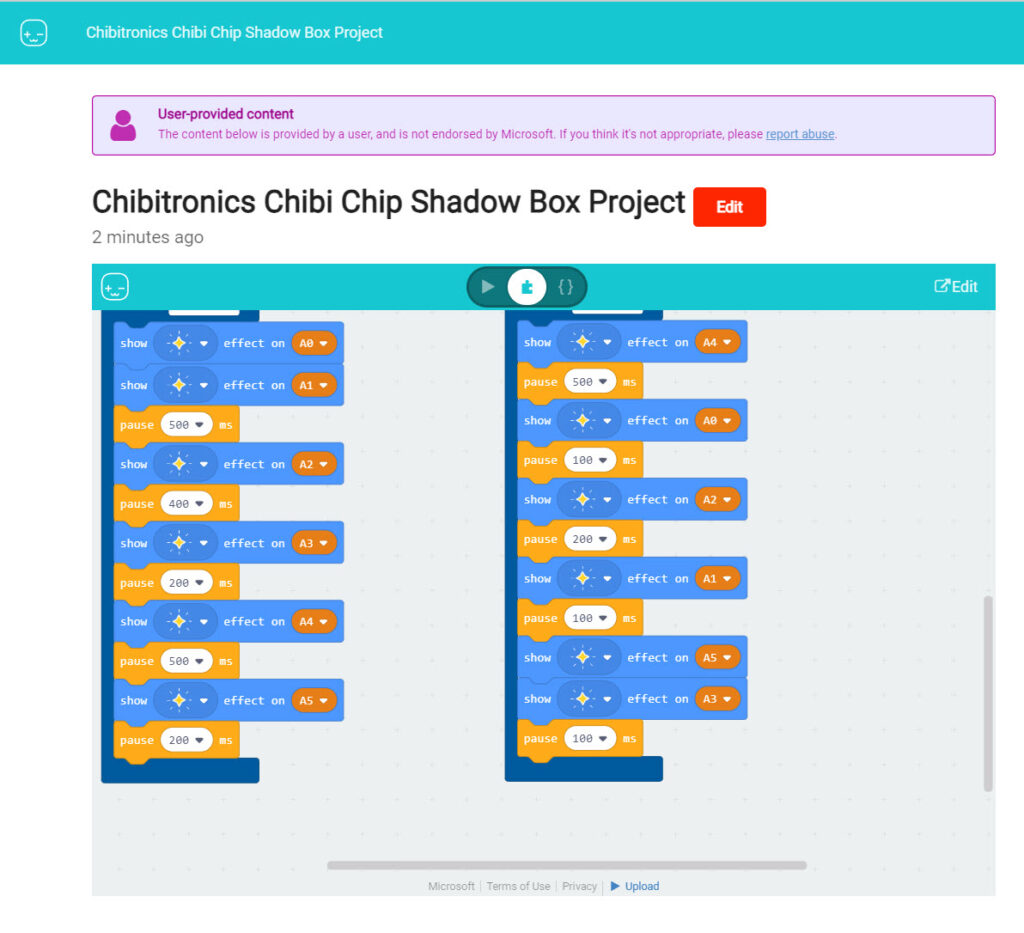
6. Program Your Light Show
Microsoft Make Code for the Chibi Chip is a fun and friendly way to play with programming. I used Microsoft Make Code to drag and drop different lighting effects into a program that I uploaded to my Chibi Chip.
In case you are curious, I’m sharing a link to one of the programs I came up with. Feel free to use or adapt it. If you use this link, it will take you to a screen that advises you that the content you are about to see is “User-provided content.” Next to the title, you’ll have the option to edit and view the code by clicking the red “Edit” button. Or, if you wish to upload it directly, you may scroll down to the bottom of the page and click the small blue “Upload” option. Make sure that the power cable and audio jack of your Chibi Chip are both plugged in.
To learn more about the Chibi Chip, or how to get started with Microsoft Make Code, visit: A Closer Look at the Chibitronics Chibi Chip.