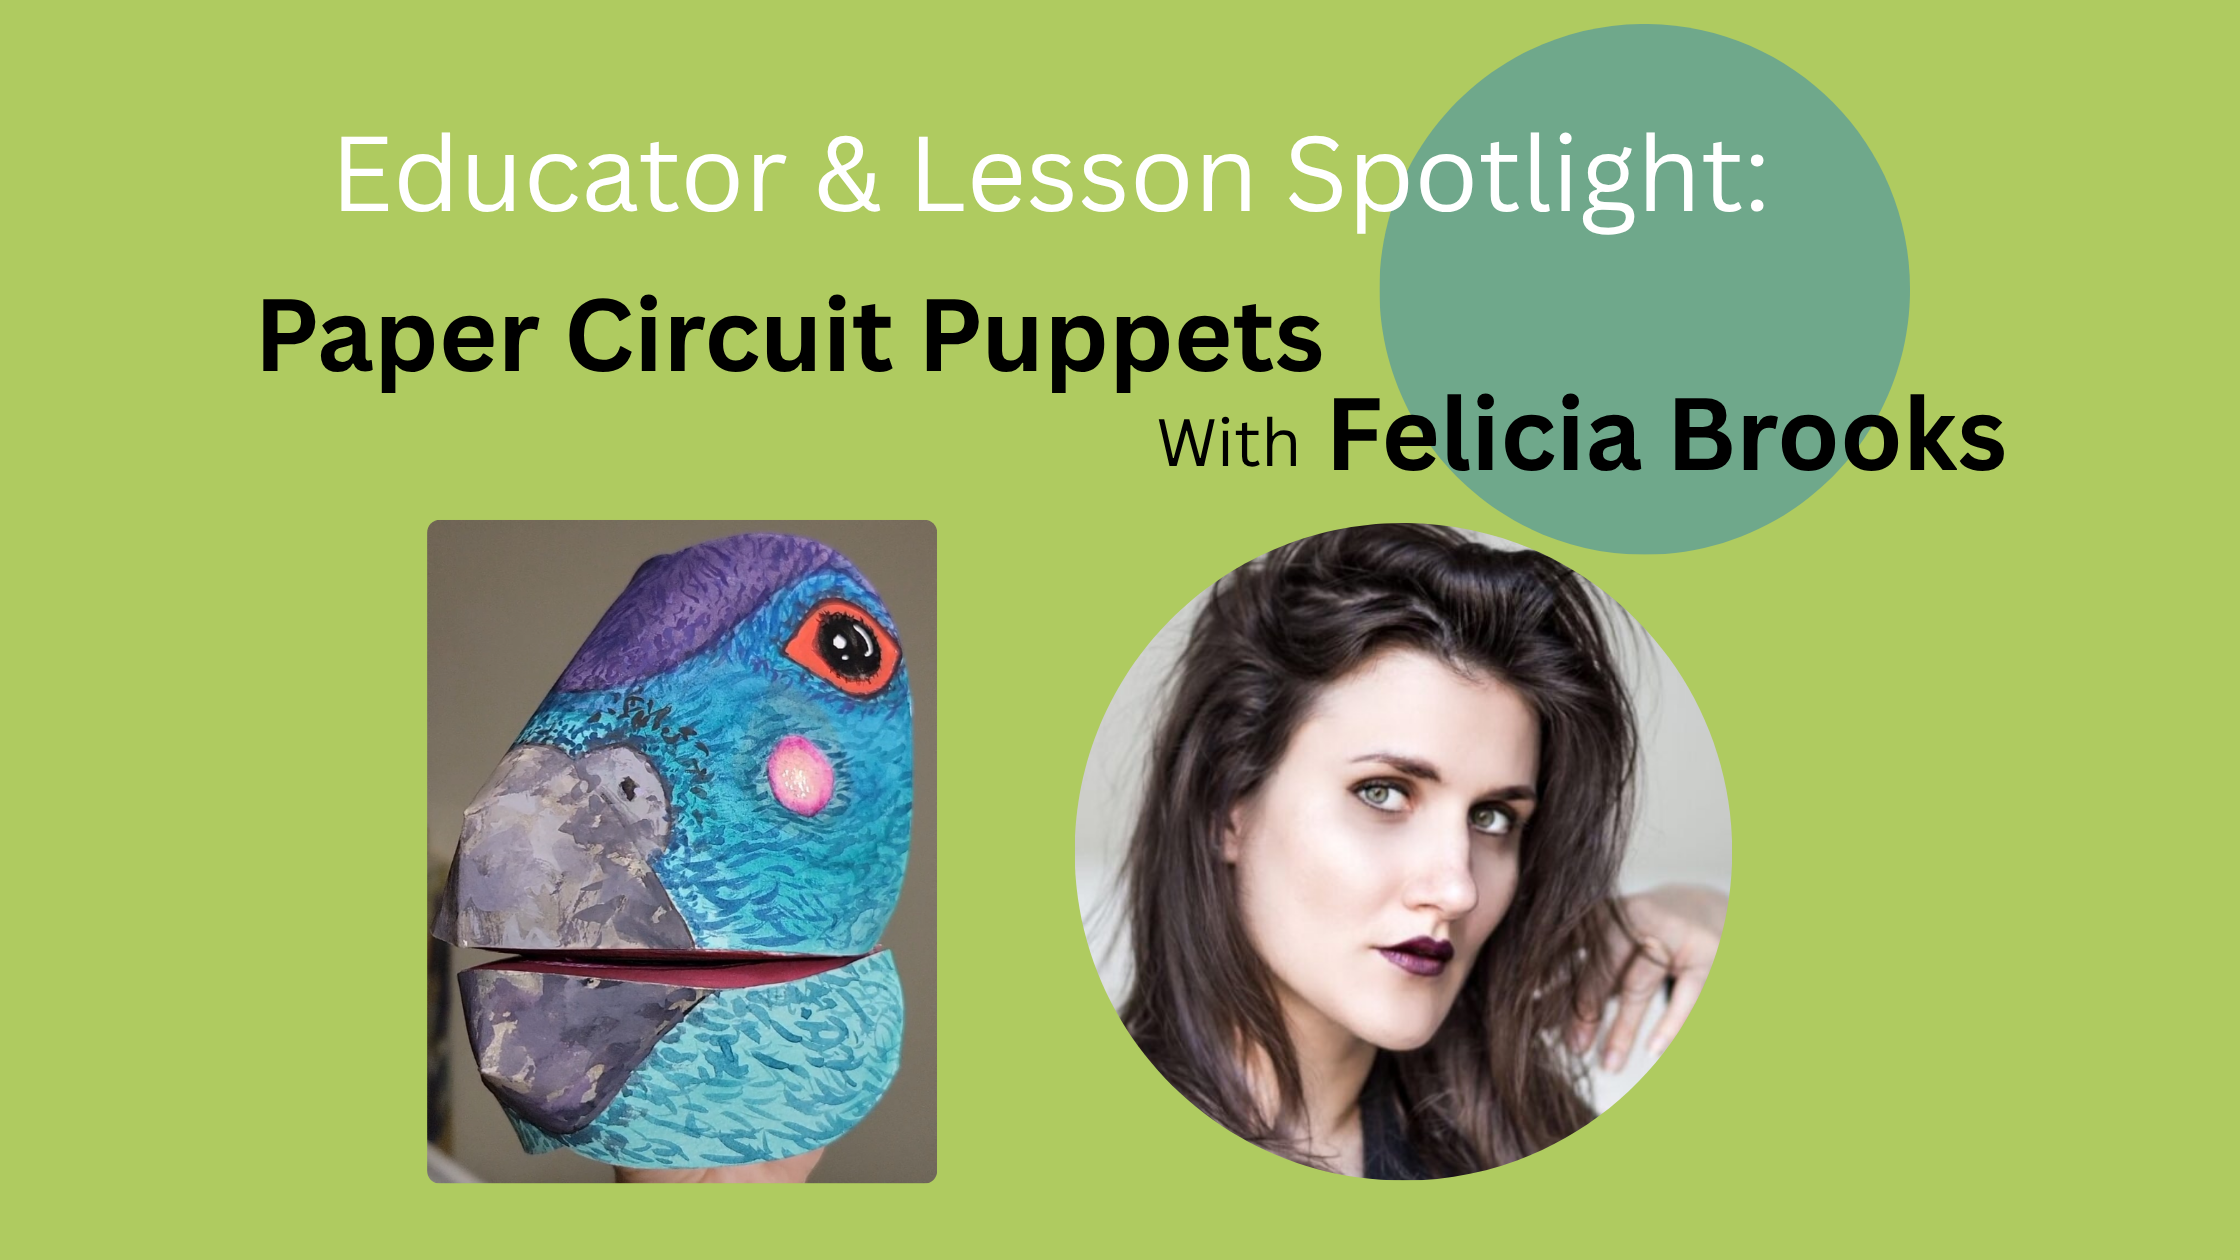
Spotlight on Felicia Brooks
Working in three dimensions — to create a puppet with students — would be a challenge any day of the week! But, in today’s post, you’ll meet a bold, innovative educator who is no stranger to a challenge!
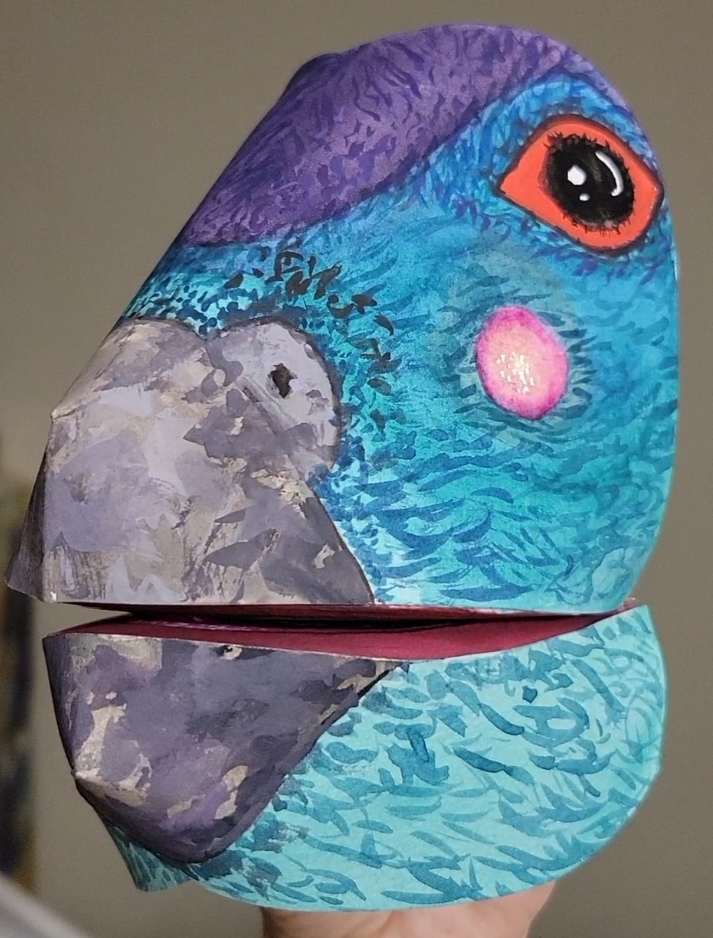
We met middle school art educator, Felicia Brooks, during our Summer Pathfinders course this past July! Her final project, a colorful light-up puppet with a pressure sensing mouth, prompted a collective gasp from viewers, and instant requests for more details.
Today, we’re featuring Felicia for having the courage to not only combine puppetry and paper circuits in her classroom, but to do so during the first weeks of school!
We are grateful to her for graciously accepting our invitation to showcase this inspiring project with you, and to share her learning as she teaches this exciting project in real time!
Teacher’s Corner
Lesson Goals
Project goals include students demonstrating computational thinking and design, an increase of student engagement, creating valuable memories of how to problem-solve, and applying grade school concepts in a real world activity.
Lesson Inspiration
This project was inspired by my favorite toy to play with that my son received for his 2nd birthday, a dinosaur puppet.
Somehow I found it in my car and in a moment of desperation, it came alive in my hands to entertain my child while we sat at a red light, probably.
Puppets have this way of allowing us to play outside of ourselves and have a sense of control and silliness. I walk around my middle school with my light up Paper Circuit Puppet and students and staff alike engage.
Lesson Summary
Target audience: Middle School Students, but may be used with Upper Elementary with circuit knowledge and High School students.
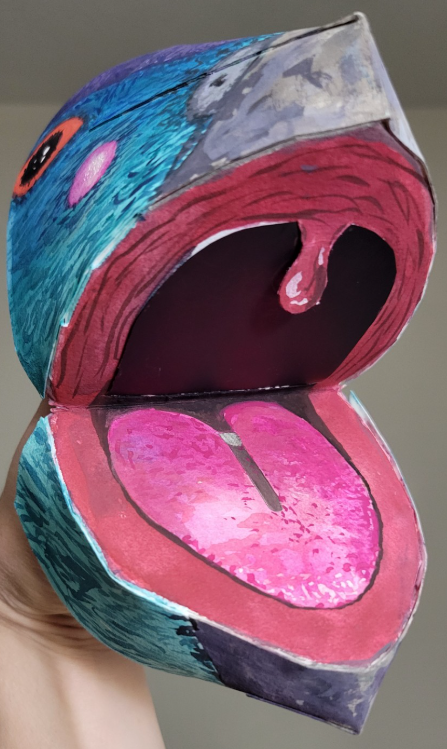
Students will be able to create a 3-dimensional circuit puppet using 2-dimensional paper materials. Students will light up their original puppet with LEDs activated by a pressure sensor when the mouth of the puppet closes. Students will have a basic understanding of how to complete a cut-and-fold switch circuit, with the mouth being the giant yap flap fold.
I anticipate students having difficulty following how the energy is transferred from the pressure sensor switch inside the mouth to activate when the mouth closes. There may be some issue navigating the conductive fabric from behind the puppet head to inside the puppet’s mouth, then back behind the puppet’s head. (I have to focus my descriptions to say “behind the puppet head” and “inside the mouth” that hopefully helps clarify)
Standards and Proficiencies Addressed
VA.68.S.2.2 Create artwork requiring sequentially ordered procedures and specified media to achieve intended results.
VA.68.S.3.5 Apply two-dimensional techniques and media to create or enhance three-dimensional artwork.
SC.6.PE.3.6 Evaluate the logical flow of a step-by-step program by acting it out through computer-free activities.
SC.8.PE.3.3 Evaluate the benefits and limitations of the use of models.
Lesson Plan/Activity
Step 1: Plan & Form the Puppet
Students will receive the following supplies:
- printed mouth template (on printer paper)
- glue
- head and jaw strips of paper
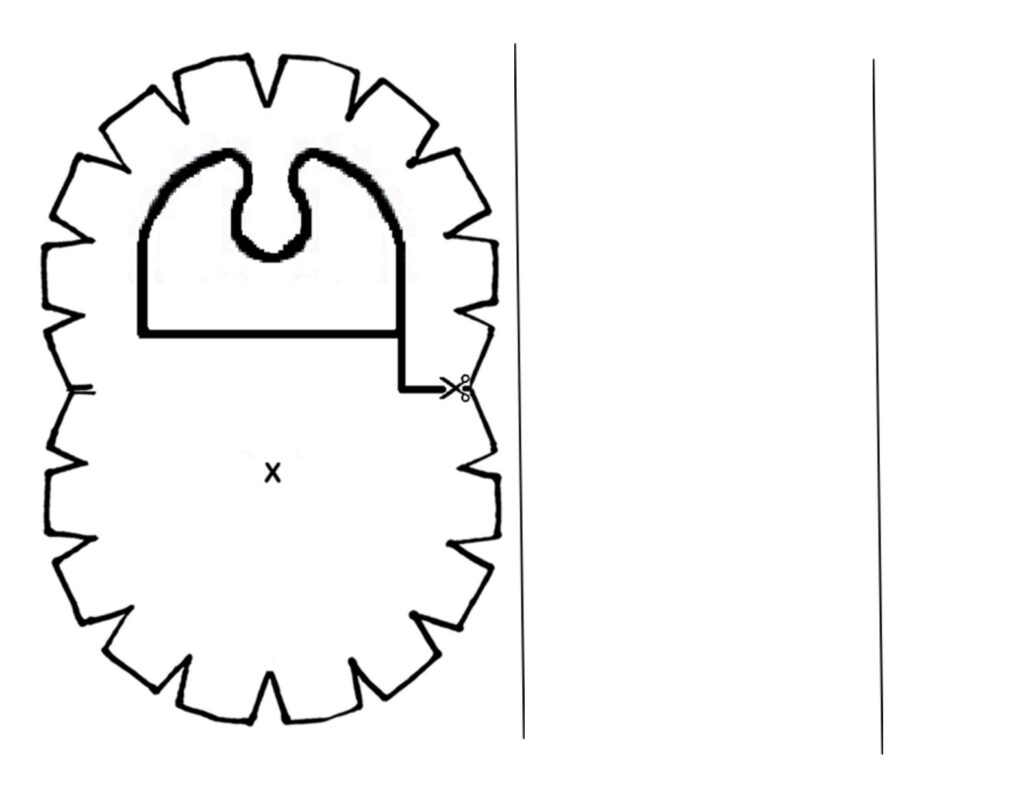
Students will start to plan their puppet with printer paper, cutting and forming, using the puppet mouth template provided on basic printer paper. We used printer paper to save on materials. I always start with the cheap stuff and then once students plan an idea, we move on to the more expensive materials for the final. Their mock-up should include where they would like their LED(s) located and how they would like to personalize their puppet’s facial features.
For this, you may choose to show students the final puppet video so they can get the idea of what it will become; but, at this stage they only need to understand how to fold the tabs and glue the mouth to the head and jaw paper strips. Make sure students are “chomping the desk” with the mouth fold all the way on the edge of the desk to aid in stability when gluing and wrapping around the head strip of paper to the “teeth tabs.” Then, flip the mouth upside-down, using the same “chomp the desk” technique to attach the jaw.
I allow students a break in between to see each other’s work because we have a 1 ½ hour class block. Students who finish first are asked to go around to help others (about 1.5 hours or 1-2 days).
Puppet Mouth Template
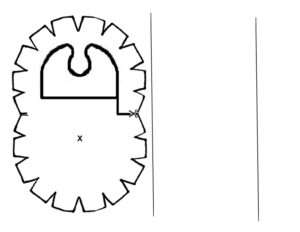
Note: The template will be the same for the play with printer paper in this step as with the final cardstock version in Step 3.
Step 2: Design the Circuit in Circuit Sketcher
After planning and assembling their puppet plan, students will upload a photo of their puppet (or use the general puppet photo provided here). I messaged the class a digital copy to use.

To help assist students with creating their circuits, have them log into Circuit Sketcher to design a circuit system.
First, I have them pull out a “Cut-and-Fold” switch, Launchpad battery, and LED lights. The “Cut-and-Fold” switch operates as the “mouth” and can only run positive or negative energy through it. It helps for students to click the fold closed [in the software] when applying the line connectors so [they] see the color passing through it. Then place the Launchpad battery, usually near the back of the jaw or else it may add too much weight when physically trying to talk with it. This step is important and may affect how the final puppet will need to be constructed to accommodate the form and circuit location (see note 2a below) (2 hours or about 2-3 Days).
a. For instance, a student wanted a narwhal horn and applied a pencil inside the paper to make it structurally sound. In order to make it light up at the top of the horn, we needed to plan in advance to attach the positive and negative conductive material of the circuit, without them touching, up the pencil to the LED and back down the pencil. This would need to be done in Step 3, alongside the building of the cardstock puppet, and cannot wait until the final circuit (Step 5); otherwise, the pencil may be glued in there and you would have to take it apart for the final circuit application.
b. Students are to attempt digitally planning their circuit individually, but if they cannot make it light up properly, I permit a student or myself to assist. Sometimes students tend to “do it for them,” so in order to assess if learning occurred, I use the trash tool to eat the connector lines and ask the original student to connect them back to the battery and LED and “Cut-and-Fold” switch without assistance.
c. Have them save and print out their designs to use a reference.
Step 3: Start Final Cardstock Versions
Now it is time for the final cardstock version of the puppet project. If you haven’t already done so, show students the video attached to reveal the process all the way through. You may work together and pause it step-by-step.
Note: The metal brad depicted in the video has been moved further back into the mouth on the revised Mouth, Head, and Jaw Template for better conductivity.
Students will receive the following supplies:
- final cardstock printed mouth
- head & jaw strips of paper
- 1 x 2.5″ X 2.5″ square of Conductive Pressure Sensor sheet
- 1 metal brad
- 1 strip of conductive copper or Conductive Fabric Tape
- scrap paper to make their final puppet
Some project designs will require additional circuit materials alongside building the paper form, like conductive fabric strips or paper clips, etc. (see note 2a above) (2 hours or 2-3 Days).
a. If you are choosing to use crayons or colored pencils instead of paint, invite students to color before they begin gluing the head together. It is harder to apply pressure for color saturation required for dry media once glued in the 3D form.
b. Some students took their original planned printer paper puppet home at this time as it was no longer needed, unless it was a complex design that would be needed for reference.
Step 4: Decorate
After their cardstock puppets are assembled, students will paint their puppets.
a. In case you jumped to the circuit building before painting, make sure the battery is not attached during the painting process as wet paint is conductive (1.5 hours 1-2 days).
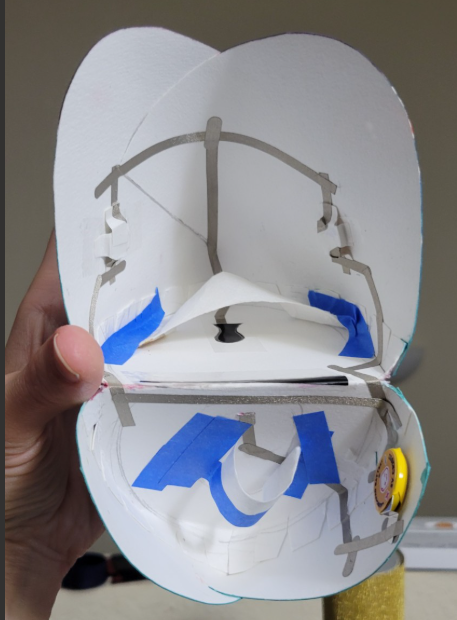
Step 5: Start Building Physical Circuits
The last step is to start building the circuits.
Students will receive the following supplies:
- 6-7 Conductive Fabric Tape Strips
- 1 or 2 LEDs
- Launchpad Battery
They’ll need time to light up their puppet and problem-solve any last features of their design (2 hours 2-3 days).
Tech Tip: If students are using Through-Hole LEDs, rather than Launchpad LEDs (which already have resistors), you may need to teach them how to use Resistor Stickers, depending upon the color combination that they choose. [To learn more, visit How to Use Chibitronics Through-Hole LEDs and Resistor Stickers.]
Extended Lesson: Students can create a background story for their puppet and present what it means to them when the LED(s) light up. For instance, the dinosaur bird lights up when she is feeling bashful, but inwardly excited.
Materials Per Student
- 1 Launchpad Battery (or 2 batteries attached side-by-side for brighter LEDs)
- 1 x 2.5″ X 2.5″ square of Conductive Pressure Sensor sheet
- Conductive Fabric Tape Strips (about 7)
- 2 LEDs (Launchpad or Through-Hole)
- [Note: If using Through-Hole LEDs, you may also need Conductive Resistor Stickers.]
- 1 sheet of 11”x 8 ½” Cardstock
- To print out the final version of the Puppet Mouth & Jaw Strip Template
- Scrap Paper for Puppet Modifications
- Scissors
- Elmer’s Glue or Glue Stick
- Painters Tape or Masking Tape
- Watercolor paint
Optional:
- Conductive Resistor Stickers
- X-acto blade
- Cutting mat
Reflection
What were some of the highlights in doing this project with students?
- Students light up when they see the circuit puppet work and instantly want to play.
- Students easily took to creating 3-D mock-ups with white printer paper instead of just drawing flat ideas, which helped me to prepare for how to advise students on where to place their circuits throughout the puppet head for the final cardstock version.
What are some lessons learned?
- I learned it was important to remind students the mouth can only be part of the positive or negative circuit strip. Walking around with my working puppet, as well as having students have their mock-ups beside them as they planned the circuit on the Sketcher simulator allowed them to physically plan it out as well.
- When applying the paper circuits in Step 5, I found that working in small groups helped the most. It was amazing to see the different avenues students took to light up their puppet’s and even my “not so creative” students took pride in the way their puppet lite up.
- In order to present these projects, you can clip the mouths closed and display for consistent light, invite students who come the the art show to walk around with their puppet on their hand, or even record a puppet show and present a short film.
Gallery
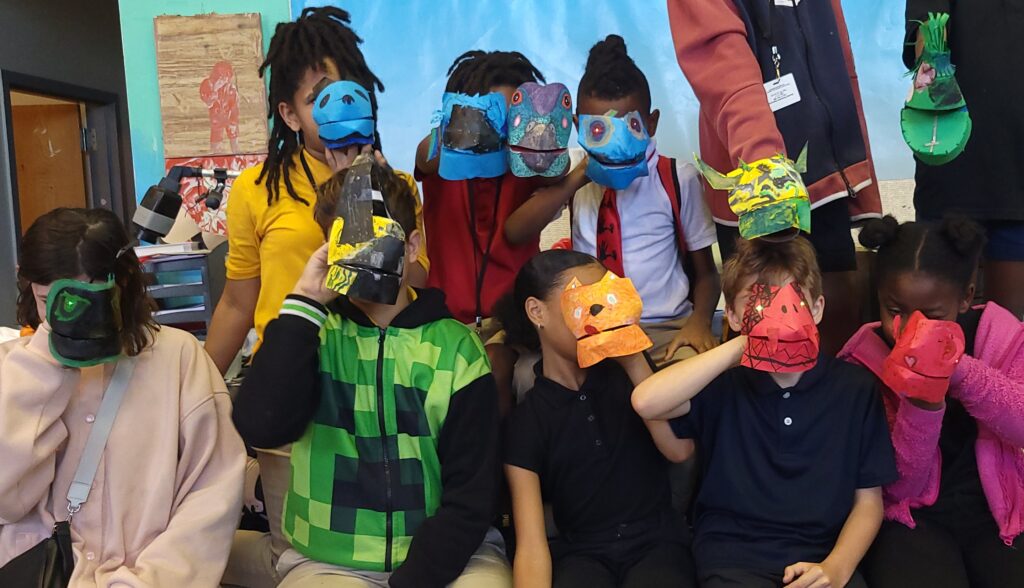
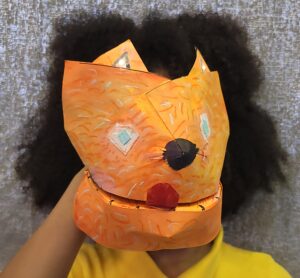
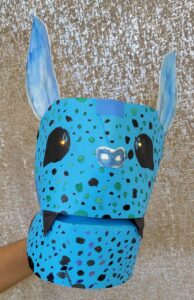
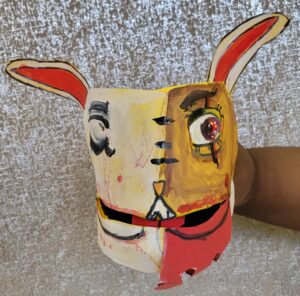
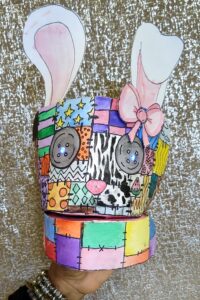
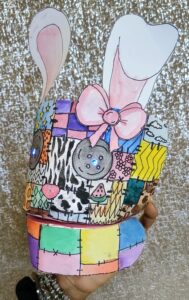
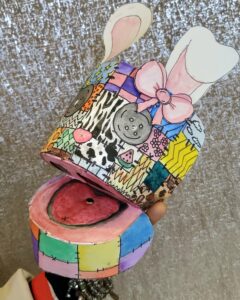
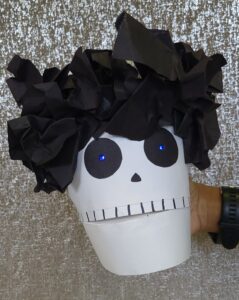
Most of the artwork showcased here was made by Magnet Art 8th graders from Parkway Middle School of the Arts, under the instruction of Felica Brooks.
About the Educator

Felicia Brooks is the Visual Arts Teacher at Parkway Middle School of the Arts in Fort Lauderdale, FL, where she guides children to discover their artistic voice for 8 years and counting. She owes much of her own artistic growth to the young artists that she mentors. To make traditional painting fun again, Brooks learned programs like coding in Scratch that connects to a Makey Makey and conductive elements to make interactive art, Micro:bit, TinkerCAD for 3D printing, and circuit sketcher, and IbisPaint to engage her students with rigorous, STEAM project-based learning, but now she is mastering these programs to create her own artwork. Felicia Brooks’ inquisitive disposition moves her artistic development into new territory. Brooks enjoys spending quality time with her husband and two sons. Every Sunday she can be found live painting at The Cross Church next to ArtsPark at Young Circle in Hollywood, FL.
Felicia Brooks holds a Bachelors of Art in Visual Arts with a minor in Psychology from Florida State University, 2013. She has worked under an art conservator, restored old maps, and catalogued over 2,000 works of art. Brooks has worked at Blick Art Materials, taught at Young at Art Children’s museum, created and ran programs in affordable housing communities, and taught for the City of Pembroke Pines. She has traveled to Mexico, Brazil, Cuba, and El Salvador on mission trips where she used her artistic skills to benefit the international community through murals, teaching, and promoting the value of the arts. Felicia Brooks continues to embark on new challenges and innovative ideas to artistically enrich the community through personal art work and collaborative initiatives.
Instagram: @Handsandeyes
Email: Felicia.Brooks@browardschools.com
About our Educator/Lesson Spotlights
Chibitronics is dedicated to sharing the work of our wonderful educator community. We enjoy showcasing ways that teachers capitalize upon their students’ creativity with circuits.
Are you an educator who would like to be featured? Or, do you know of an amazing educator who is integrating circuits with their lessons?
If so, reach out to us at education@chibitronics.com to be featured.