
Click here to download a printable version of this tutorial
Tutorial and instructions by: Alex Krasser
Topics Covered:
Circuit design
Scale modeling
Astronomy
Objectives: To understand that stars in a given constellation can be very different distances away from Earth. The night sky has depth! Also, to understand the concept of scale, of using a smaller unit of measurement to represent a larger one.
NGSS Standards that could be incorporated into this project:
Grades K-2
Engineering Design
- K-2-ETS1-1: Asking Questions and Defining Problems
- K-2-ETS1.A: Defining and Delimiting Engineering Problems
- K-2-ETS1.B: Developing Possible Solutions
- K-2-ETS1.C: Optimizing the Design Solution
- K-2-ETS1-2: Structure and Function
Grades 3-5:
Space Systems
- 3-5-ESS1.A: The Universe and Its Stars
- 3-5-ESS1-1: Scale, Proportion, and Quantity
- 3-5-ESS1-2: Analyzing and Interpreting Data
Engineering Design
- 3-5-ETS1-1: Asking Questions and Defining Problems
- 3-5-ETS1.A: Defining and Delimiting Engineering Problems
- 3-5-ETS1.B: Developing Possible Solutions
- 3-5-ETS1.C: Optimizing the Design Solution
- 3-5-ETS1-2: Structure and Function
Middle School:
Space Systems
- MS-ESS1.A: The Universe and Its Stars
- MS-ESS1-1, MS-ESS1-2: Developing and Using Models
- MS-ESS1-3: Scale, Proportion, and Quantity
Engineering Design
- MS-ETS1-1: Asking Questions and Defining Problems
- MS-ETS1.B: Developing Possible Solutions
- MS-ETS1.C: Optimizing the Design Solution
High School:
Space Systems
- HS-ESS1.A: The Universe and Its Stars
- HS-ESS1-1: Developing and Using Models
- HS-ESS1-3: Obtaining, Evaluating, and Communicating Information
- PS3.D: Energy in Chemical Processes and Everyday Life
- PS4.B: Electromagnetic Radiation
Engineering Design
- HS-ETS1.C: Optimizing the Design Solution
Materials:
A shoebox (or other solid base)
Thin cardboard (non-corrugated)
Copper tape (with conductive adhesive!)
LED stickers
A 3V battery (CR2032)
Printed image of constellation
Necessary tools:
White glue
Scissors
Ruler
Masking tape
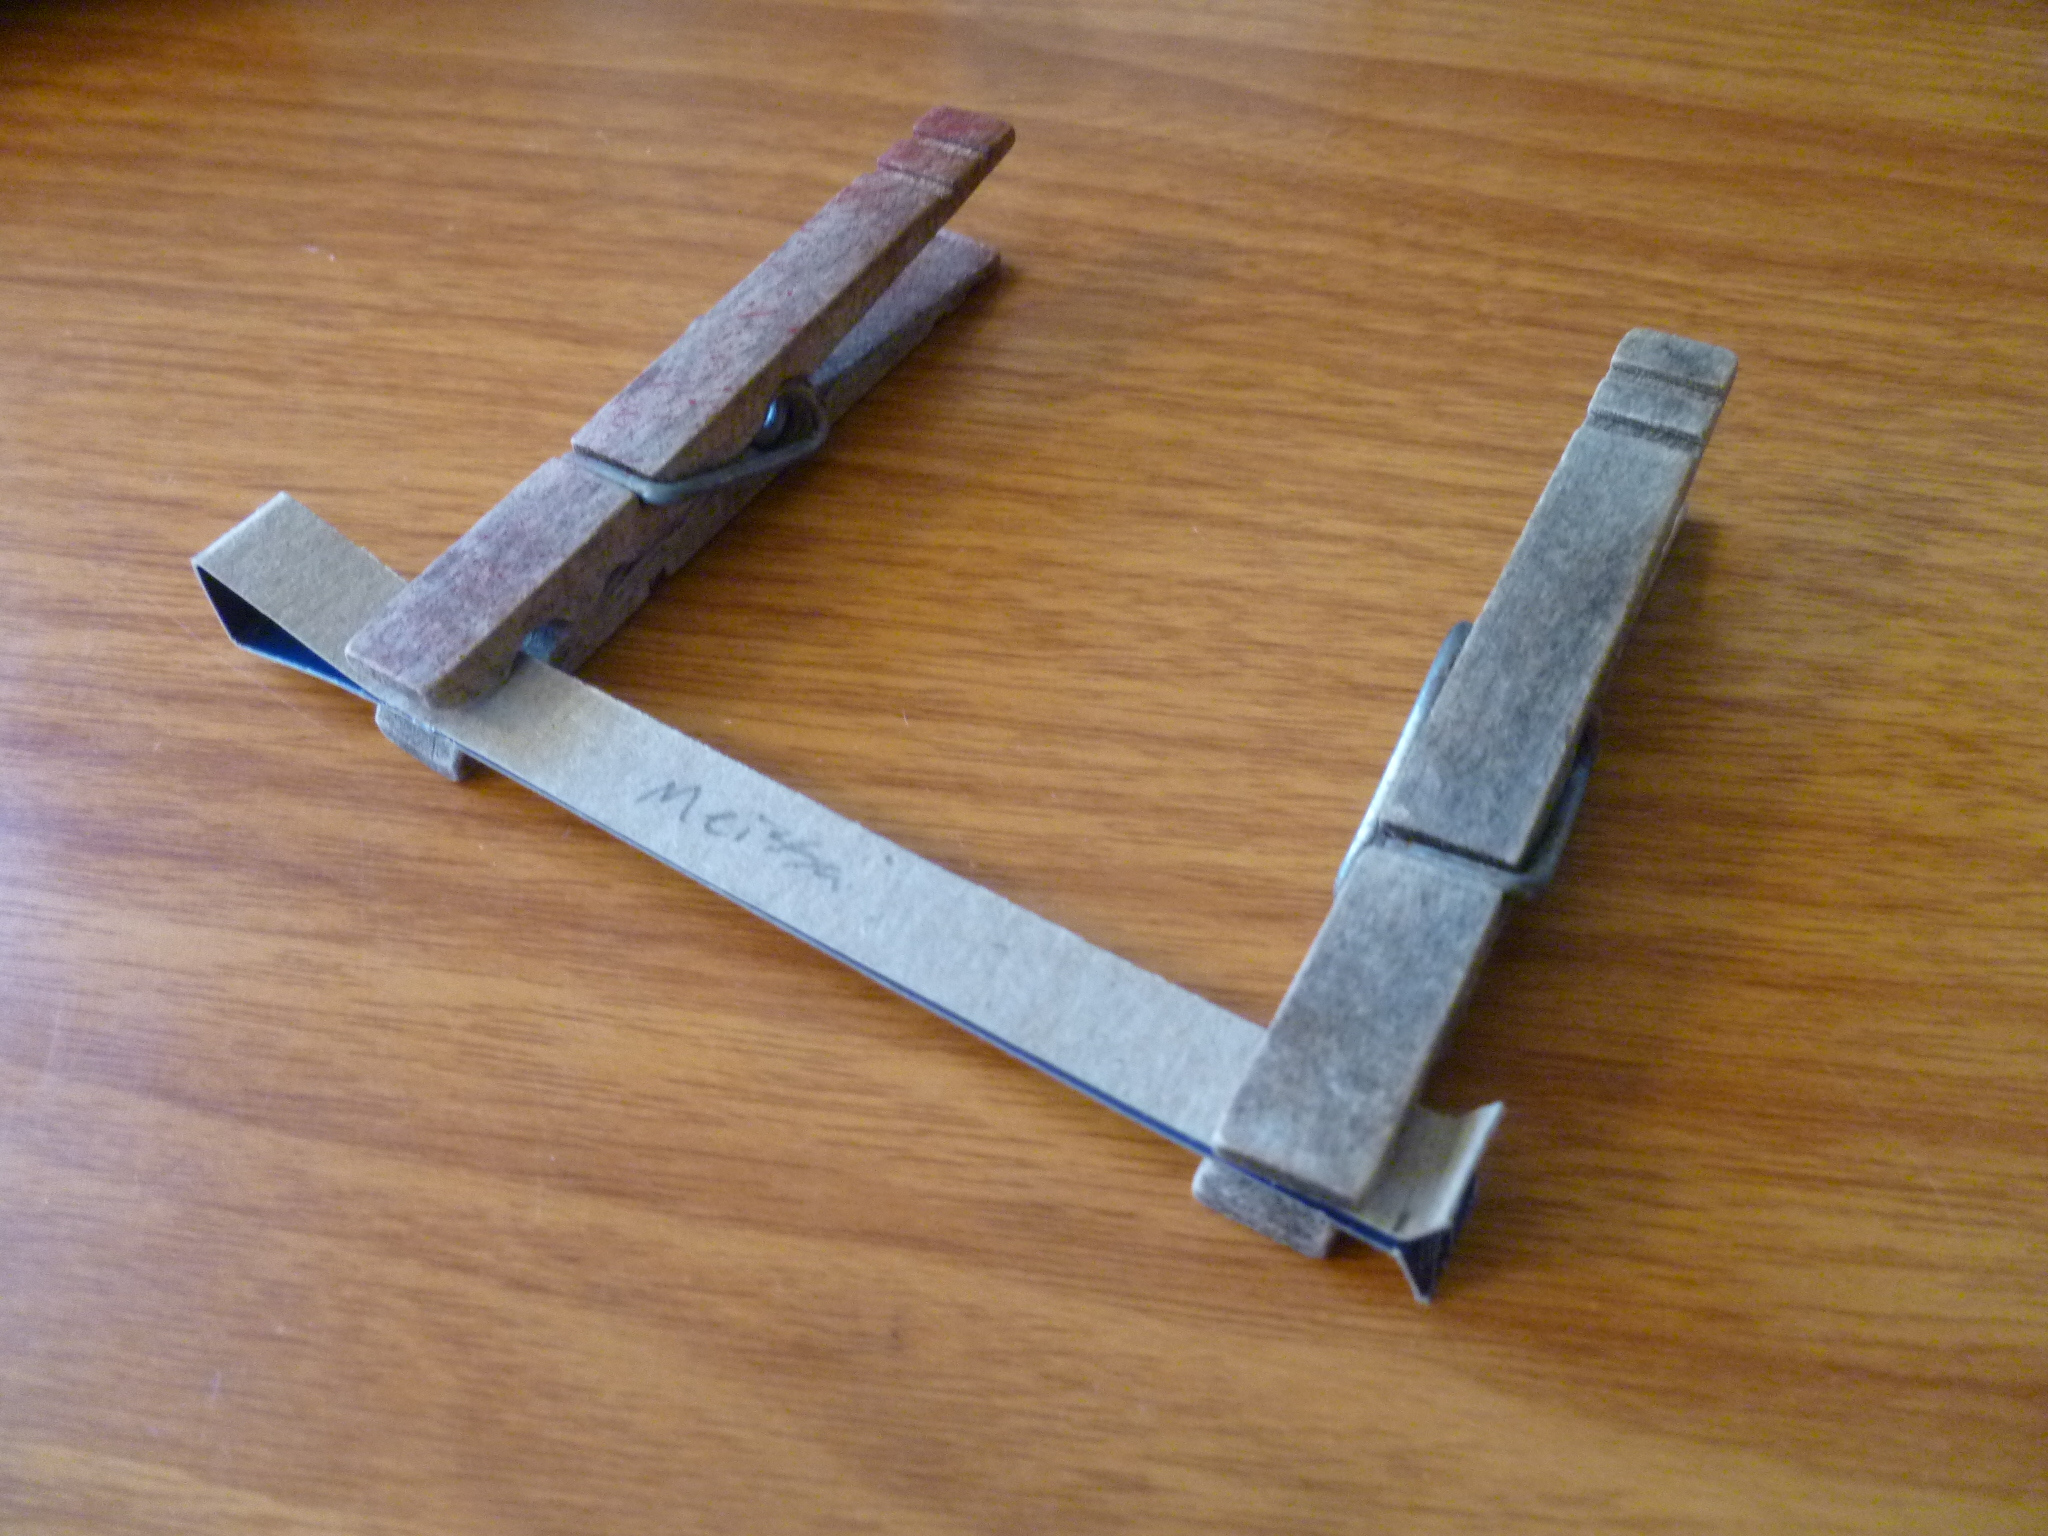
Helpful tools:
Toothpicks
Clothespins
Cotton swabs
Multimeter
Model knife
Conductive fabric patches or a soldering kit
Overview:
Map out a constellation in the bottom of your shoebox, and figure out how to run a positive and negative connection to each star.
Look up the distance of each star in your constellation from Earth, and translate it into a reasonable scale for your model (e.g. 1cm = 100 lightyears). Make a cardboard pedestal at the right height for each star.
Carefully assemble the circuit and pedestals, mounting an LED star at the top of each pedestal. Some of your stars may use different color LEDs.
Enjoy your 3-D constellation in a box!
Est. build time: 3 hours, plus time for glue to dry.
Note: This is not an easy build! For younger makers, simply plotting out and making a circuit that recreates a constellation in 2-D is a good alternative.
Detailed Instructions:
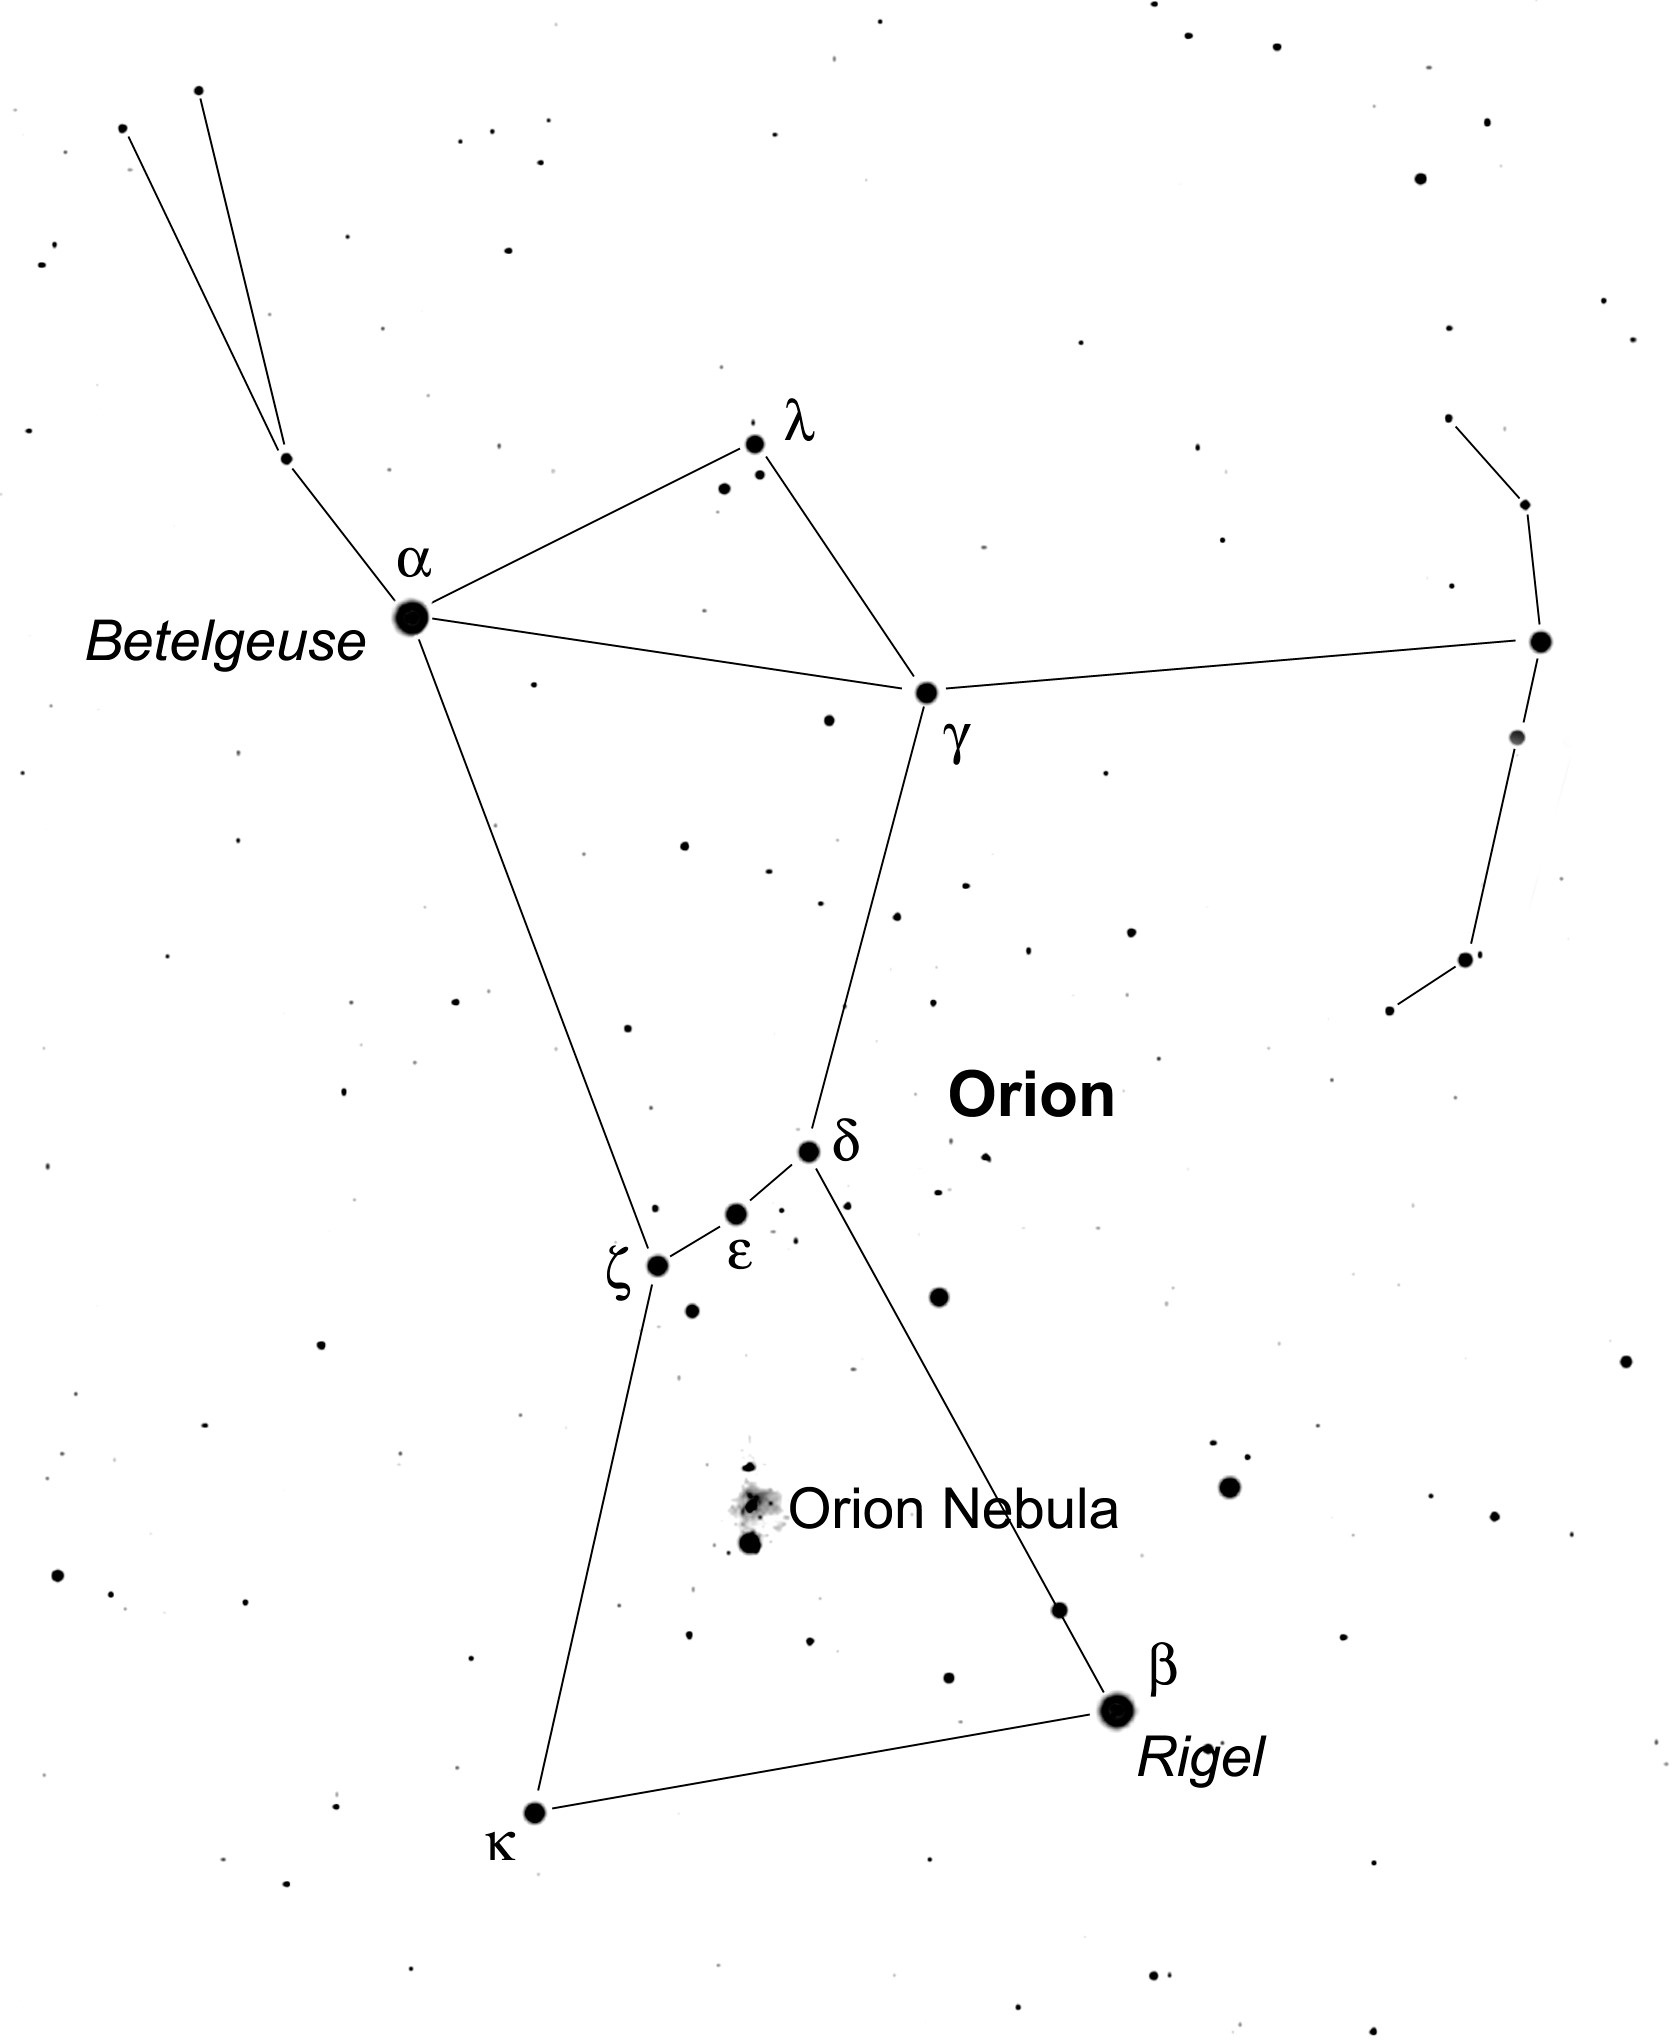
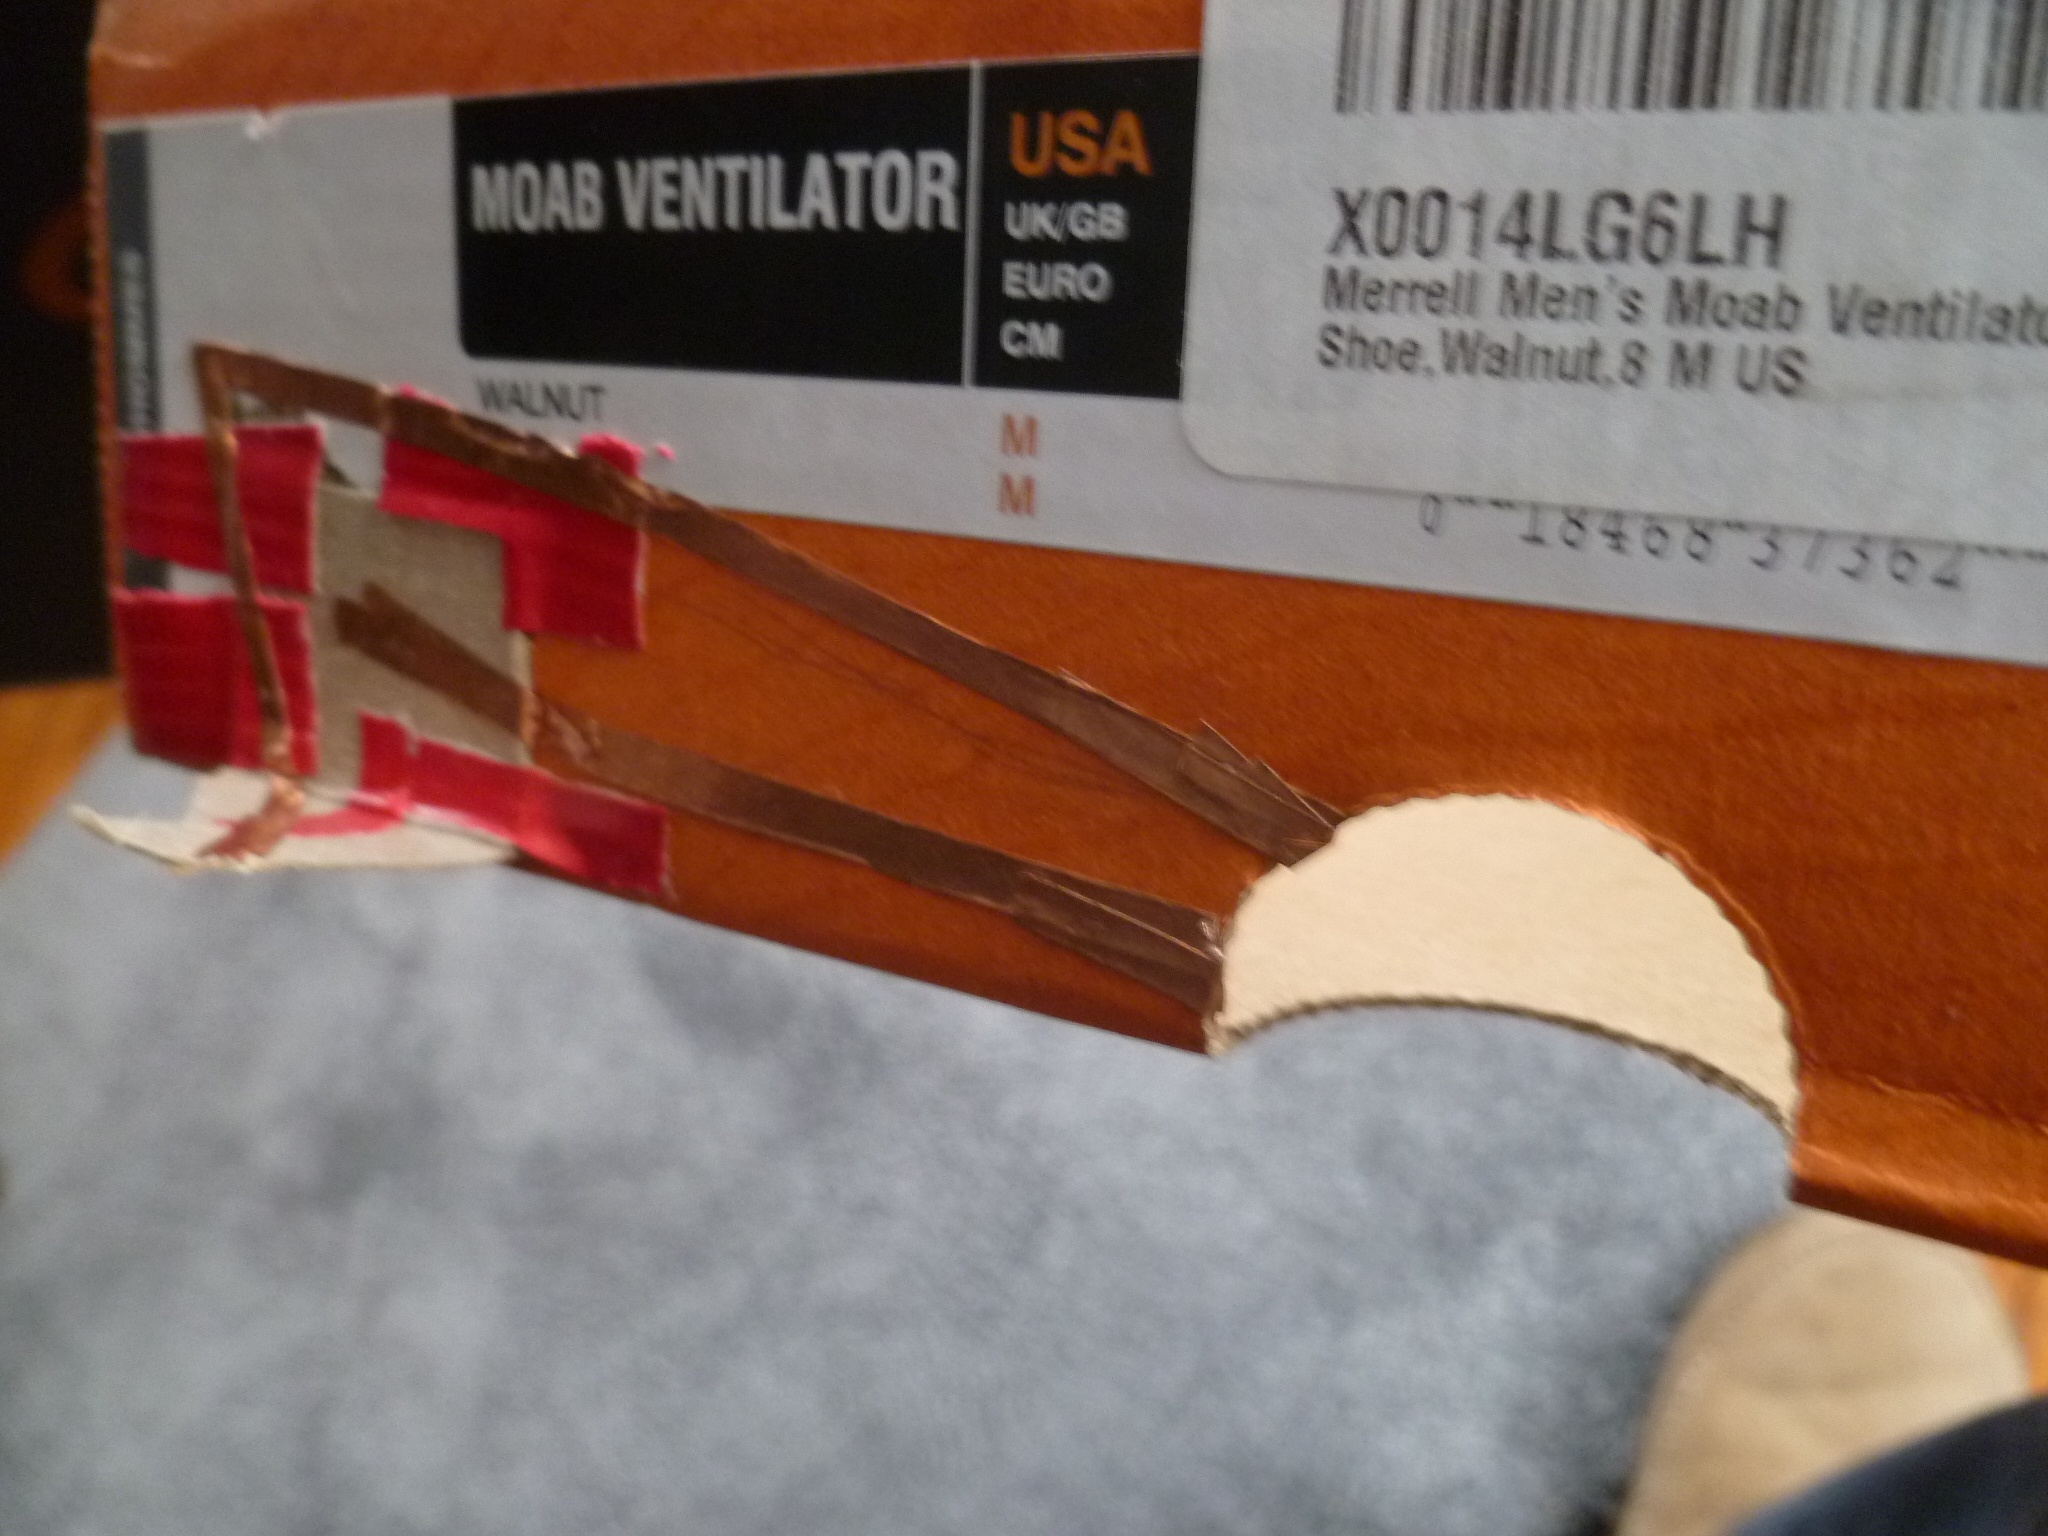
1. Choose a constellation. Find and download an image of the stars in that constellation. Resize it to as big as you can feasibly print it! (I did 8.5” x 11” on Powerpoint.)
2. Print out the image, and secure it to your building surface using masking tape.
3. Using something pointy (like a toothpick), poke through the major stars, transferring their locations onto the bottom of the box.

4. Create a battery-holder in a handy location on your box, using a piece of your thin cardboard. One side will be the positive side of the circuit (+), the other the negative (-). Make sure you keep track of which is which!
Pro tip:
Your battery holder should be in a location that will allow you to clamp it shut on the battery with a binder clip. (I forgot to do this!)
5. Route the positive and negative sides of the circuit from your switch around your constellation.
Make sure you leave a gap of a little more than 1 cm between the inner (negative on mine) and outer (positive on mine) pieces of copper tape. This will be important later on. Label (+) and (-) at each star location.
Note: The middle star in Orion’s belt poses an interesting circuit-routing challenge. See Step 12d for how I solved it, though there are other solutions!

Pro tip: Try to keep the copper tape as continuous as possible! When pressing the copper tape into corners, be careful about tearing the tape. If you do, you’ll need to patch it up with either conductive glue, solder, or another piece of copper tape. (This is why it’s essential to have copper tape with conductive adhesive.)
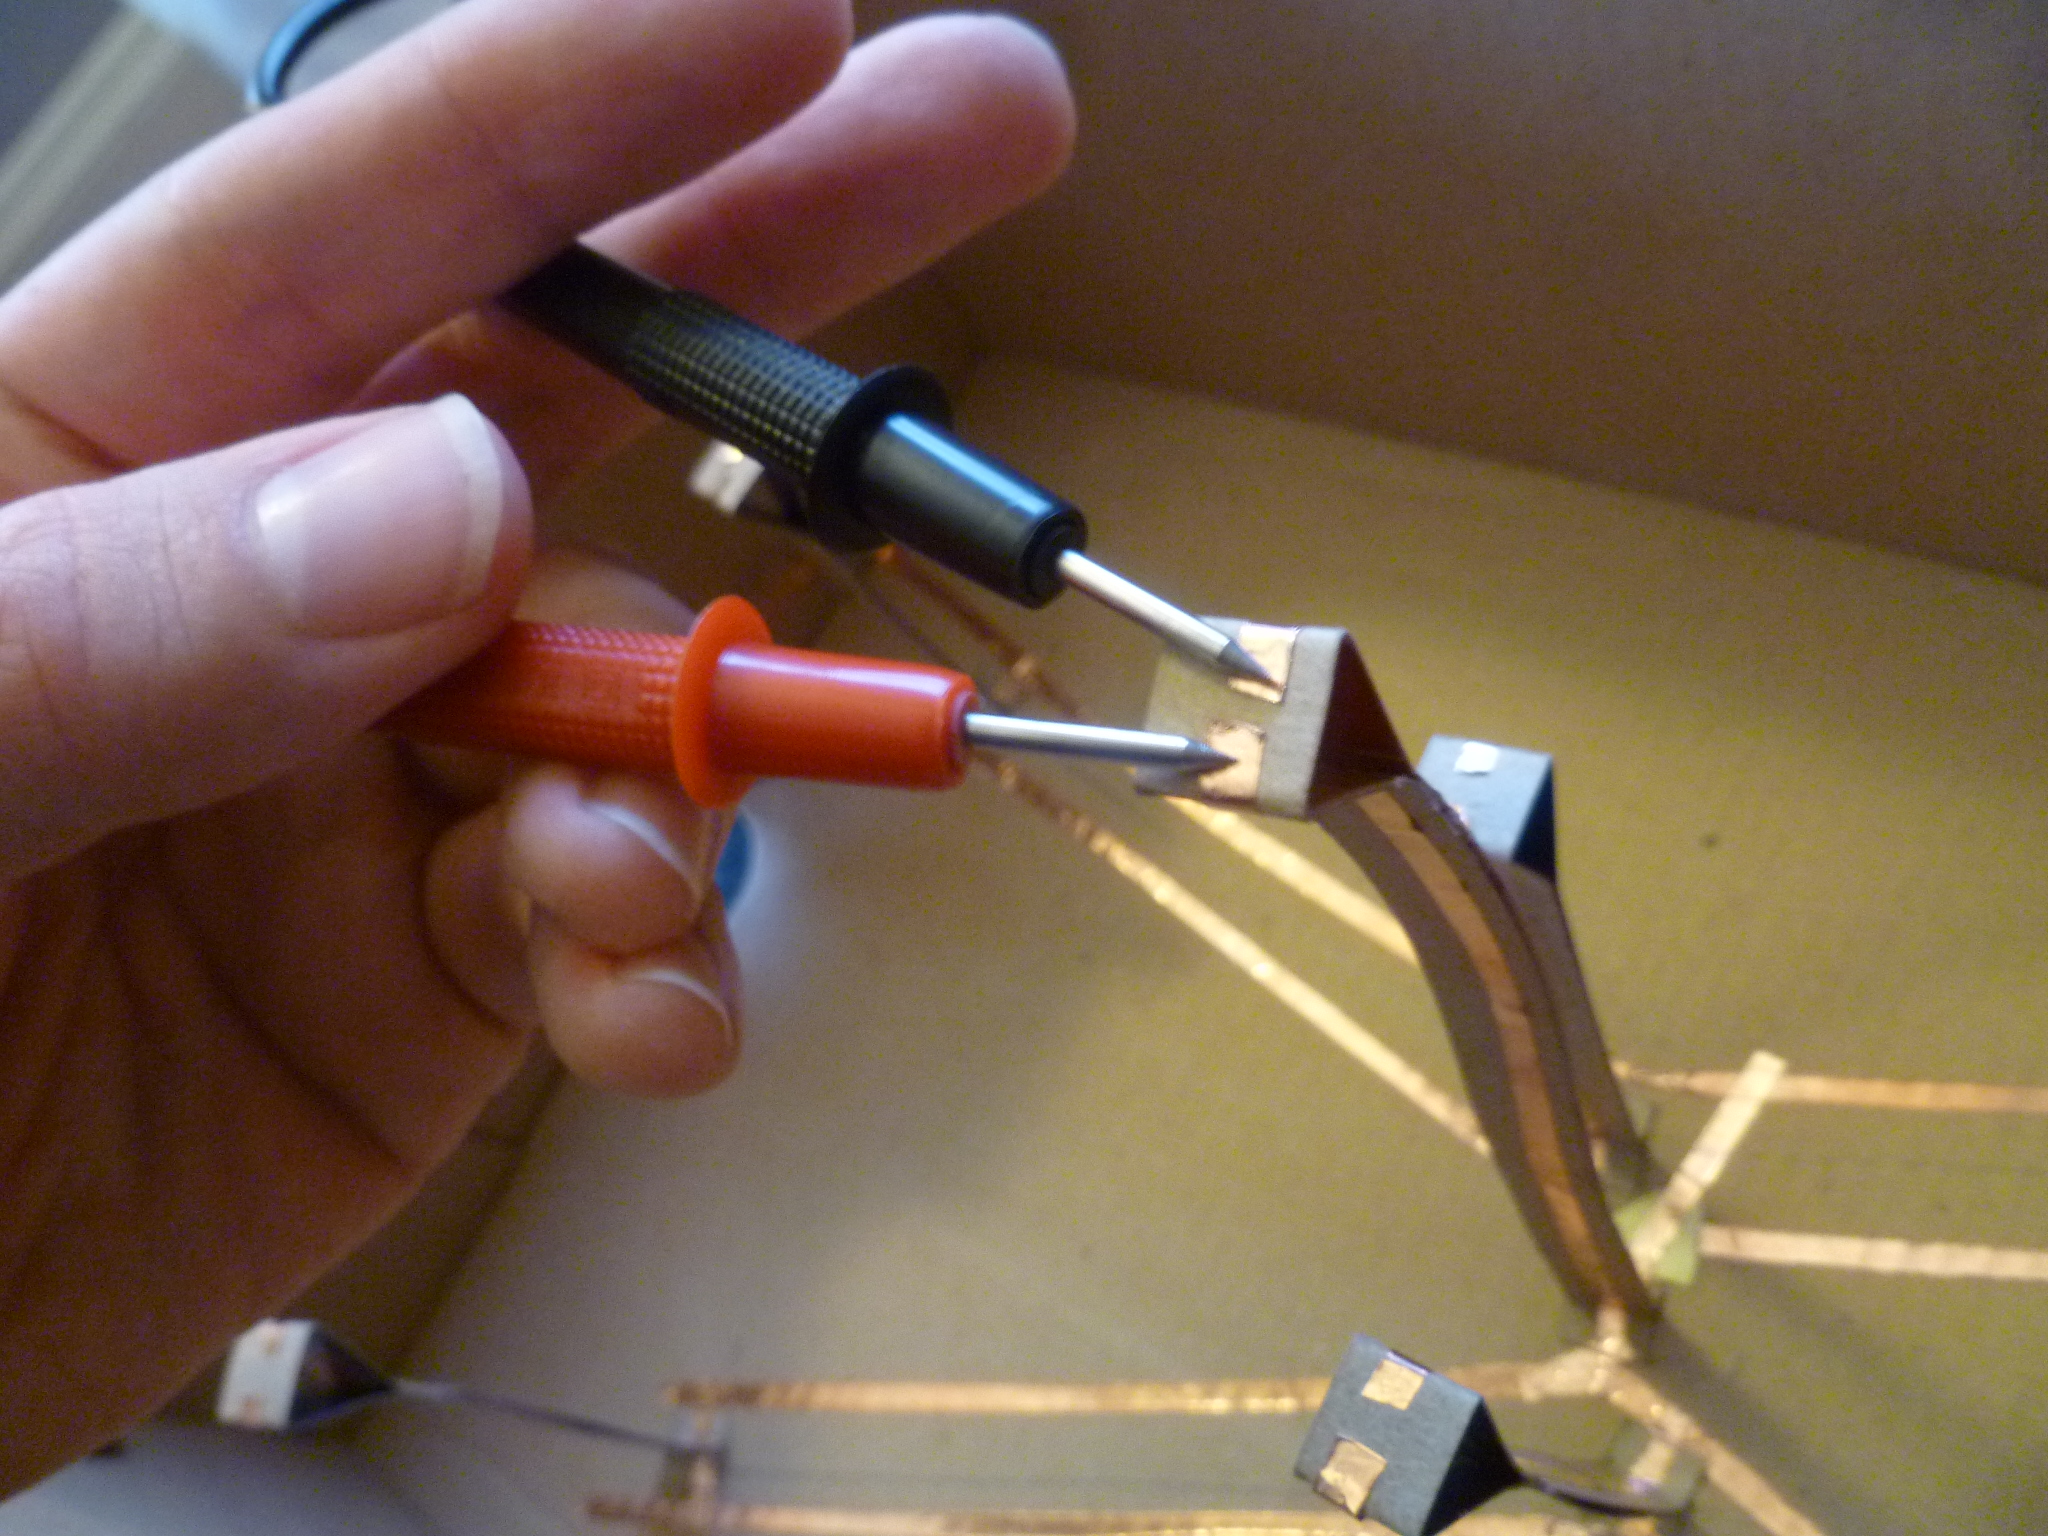
6. Now is a good time to check that every part of your circuit is getting power. Better to catch any issues and fix them now, rather than further down the road! You can use a multimeter if you have one.
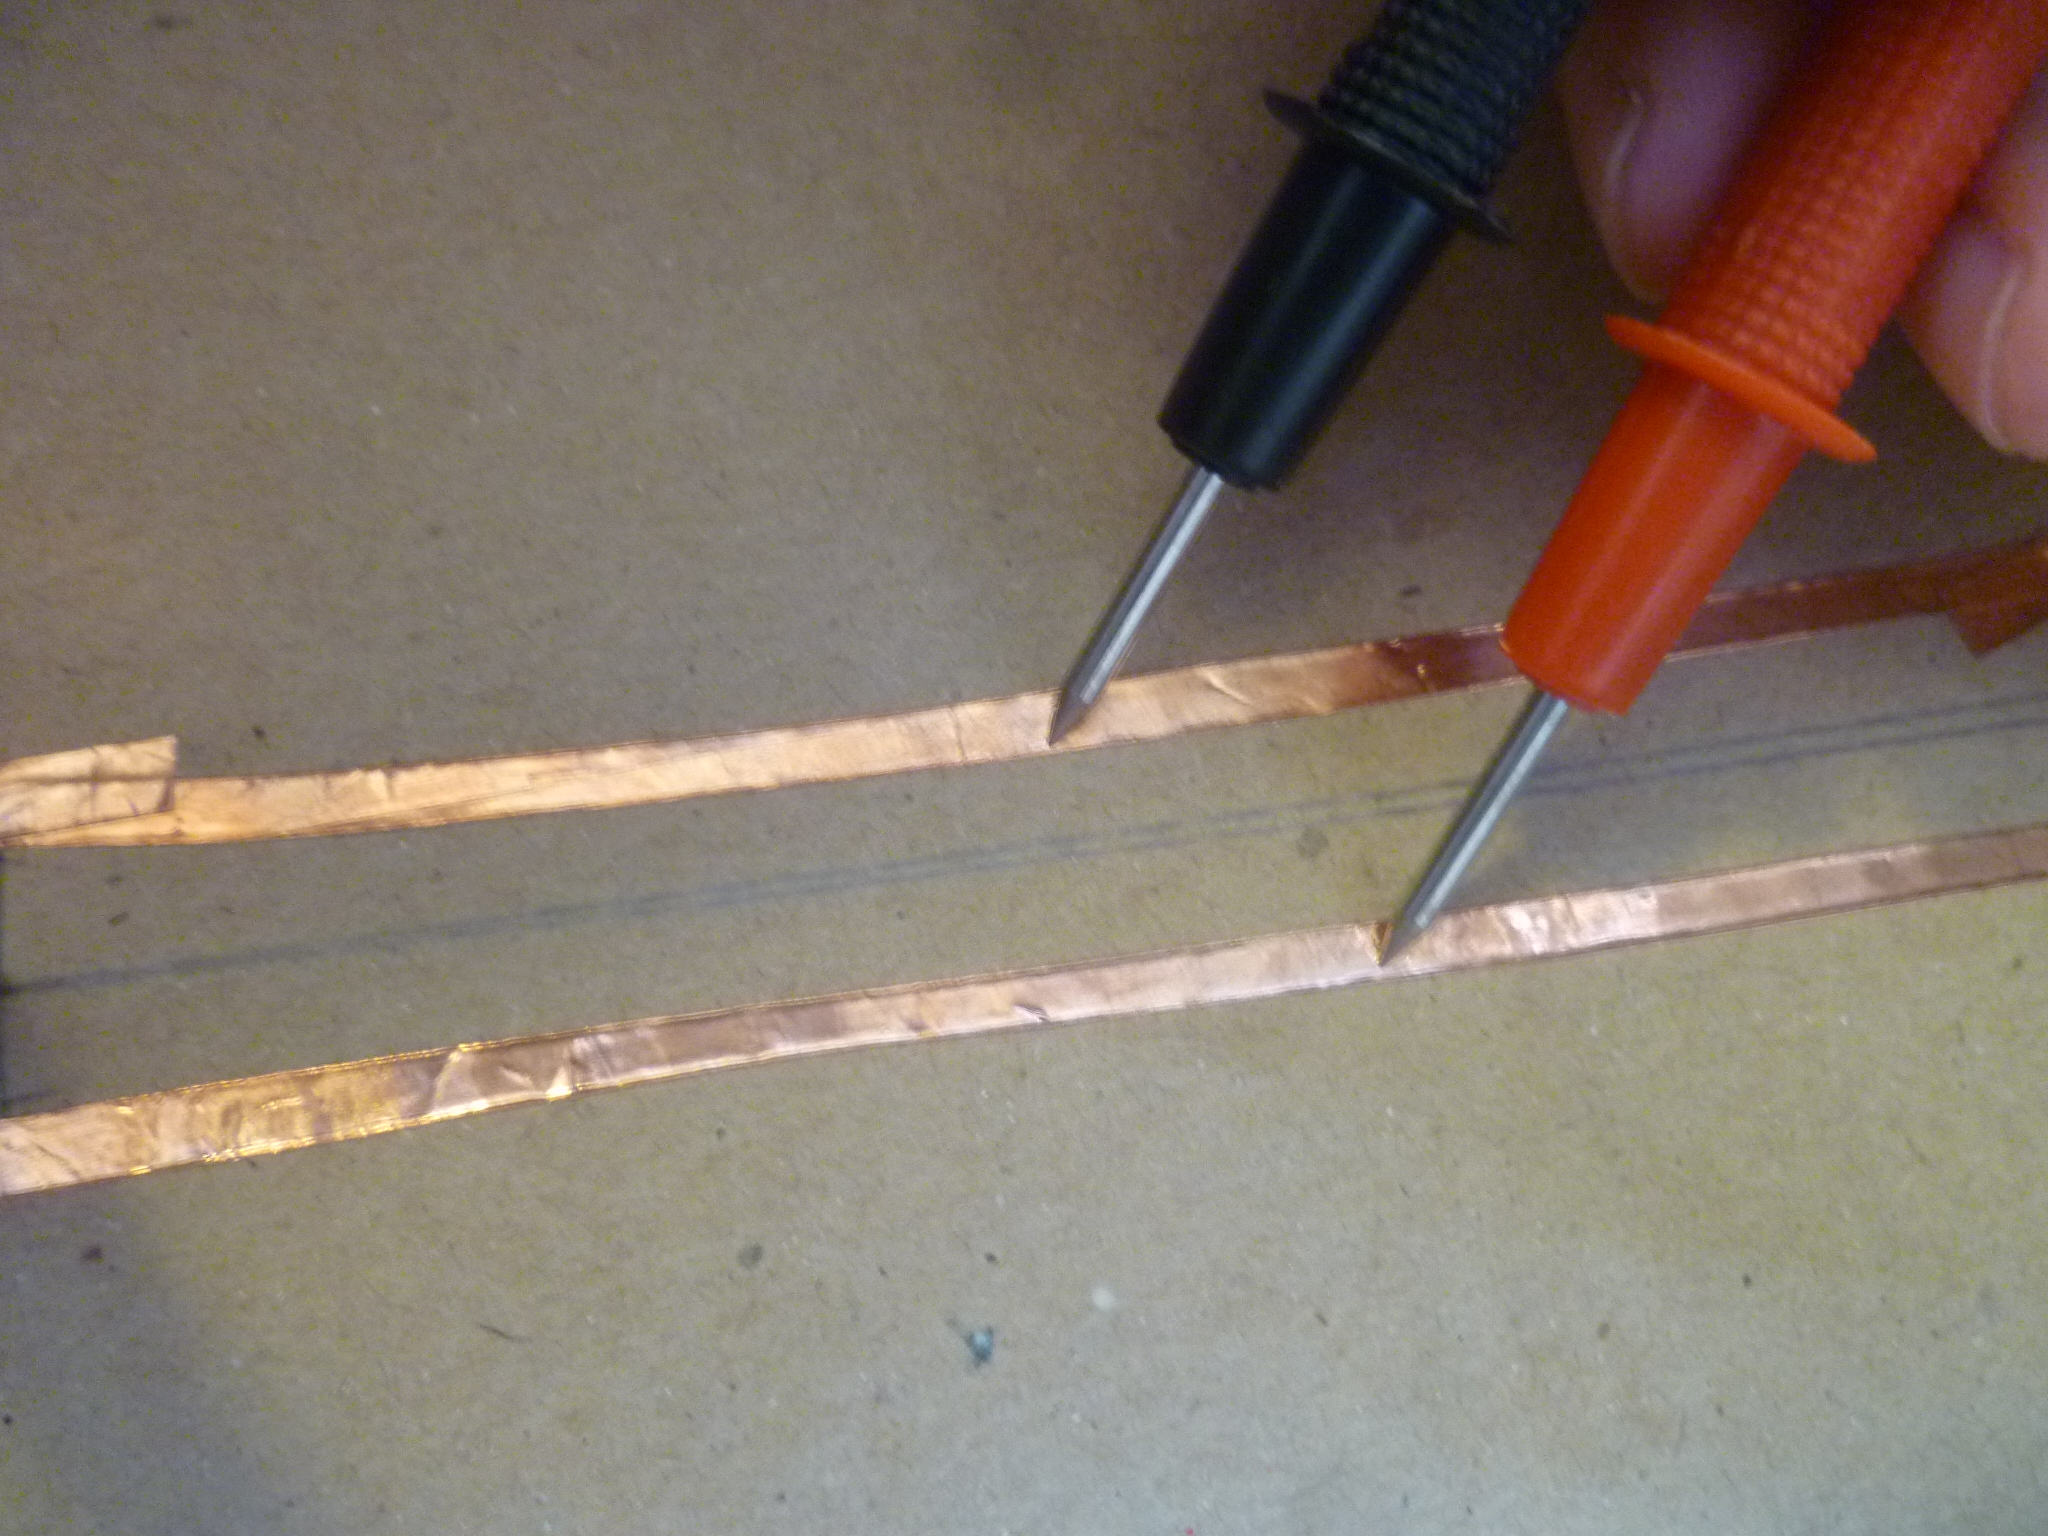
With the battery connected, measure the voltage across your (+) and (- copper lines). You should be getting 3 volts.
Click here [LINK TK] for a more detailed description of how to check your circuit with a multimeter.
7. Time to make the star pedestals! The below chart lists each of the major stars in Orion, and their distance from Earth. The third column translates the distance into cm, at a scale of 1 cm = 100 lightyears. Depending on the constellation you choose, another scale may be more feasible.
Orion – Stars, and distances from Earth
| Star Name | Distance from Earth | Distance @ 1cm = 100 lightyears |
| Betelgeuse | 640 lightyears | 6.4 cm |
| Bellatrix | 240 lightyears | 2.4 cm |
| Alnitak | 800 lightyears | 8 cm |
| Alnilam | 1340 lightyears | 13.4 cm |
| Mintaka | 915 lightyears | 9.2 cm |
| Saiph | 700 lightyears | 7 cm |
| Rigel | 800 lightyears | 8 cm |
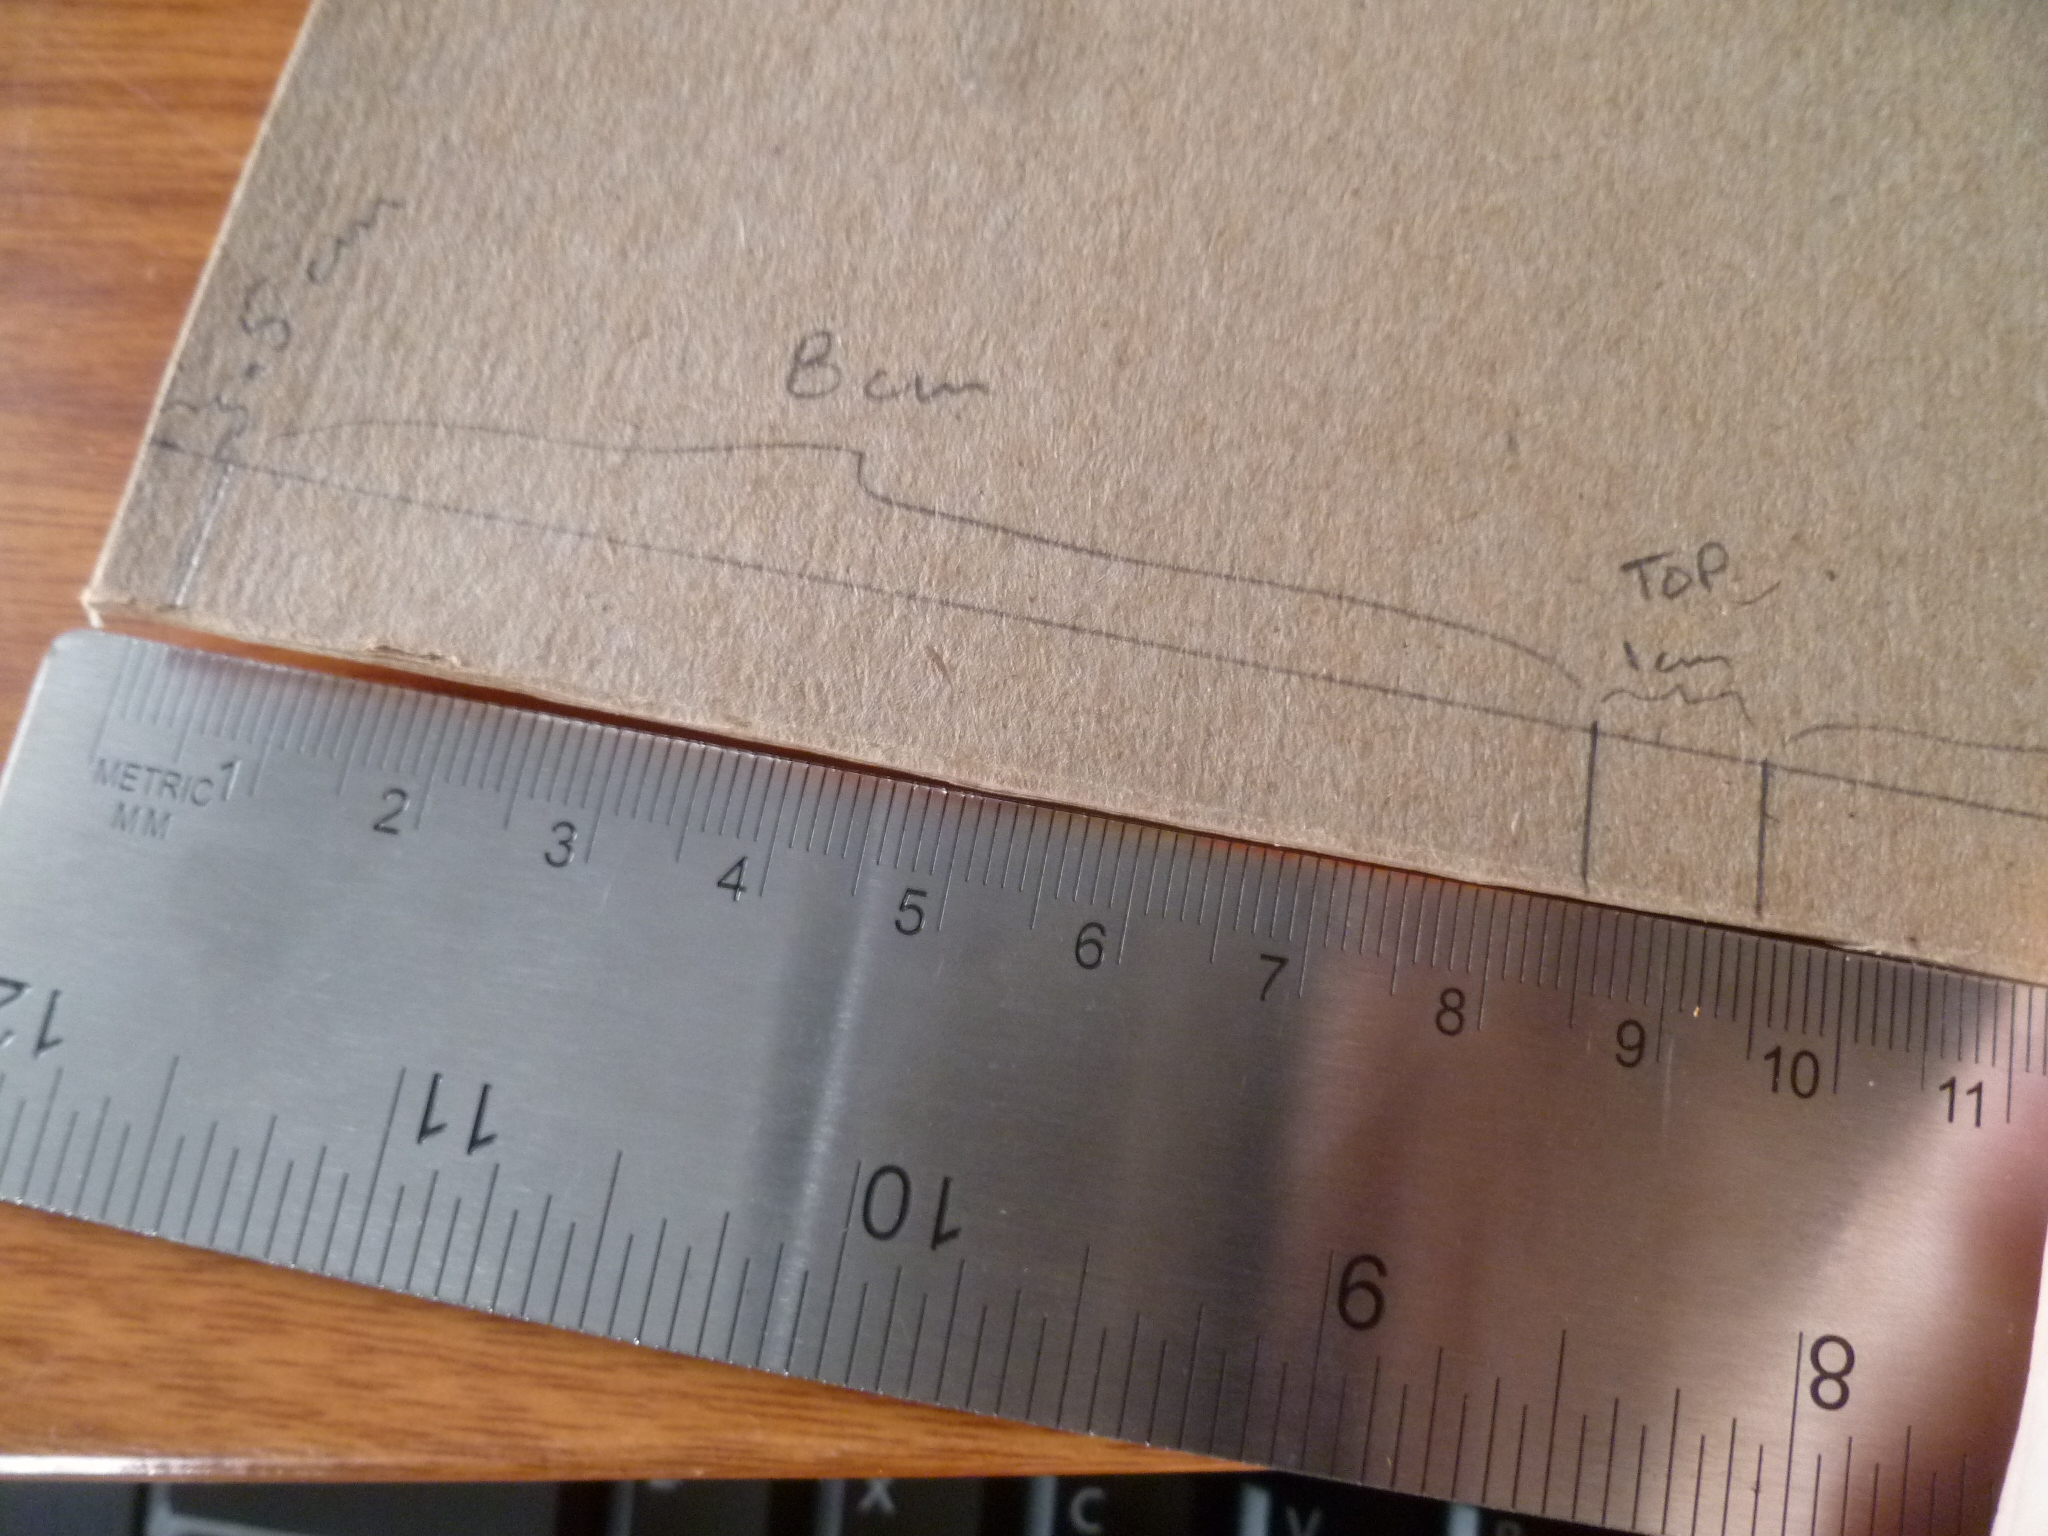
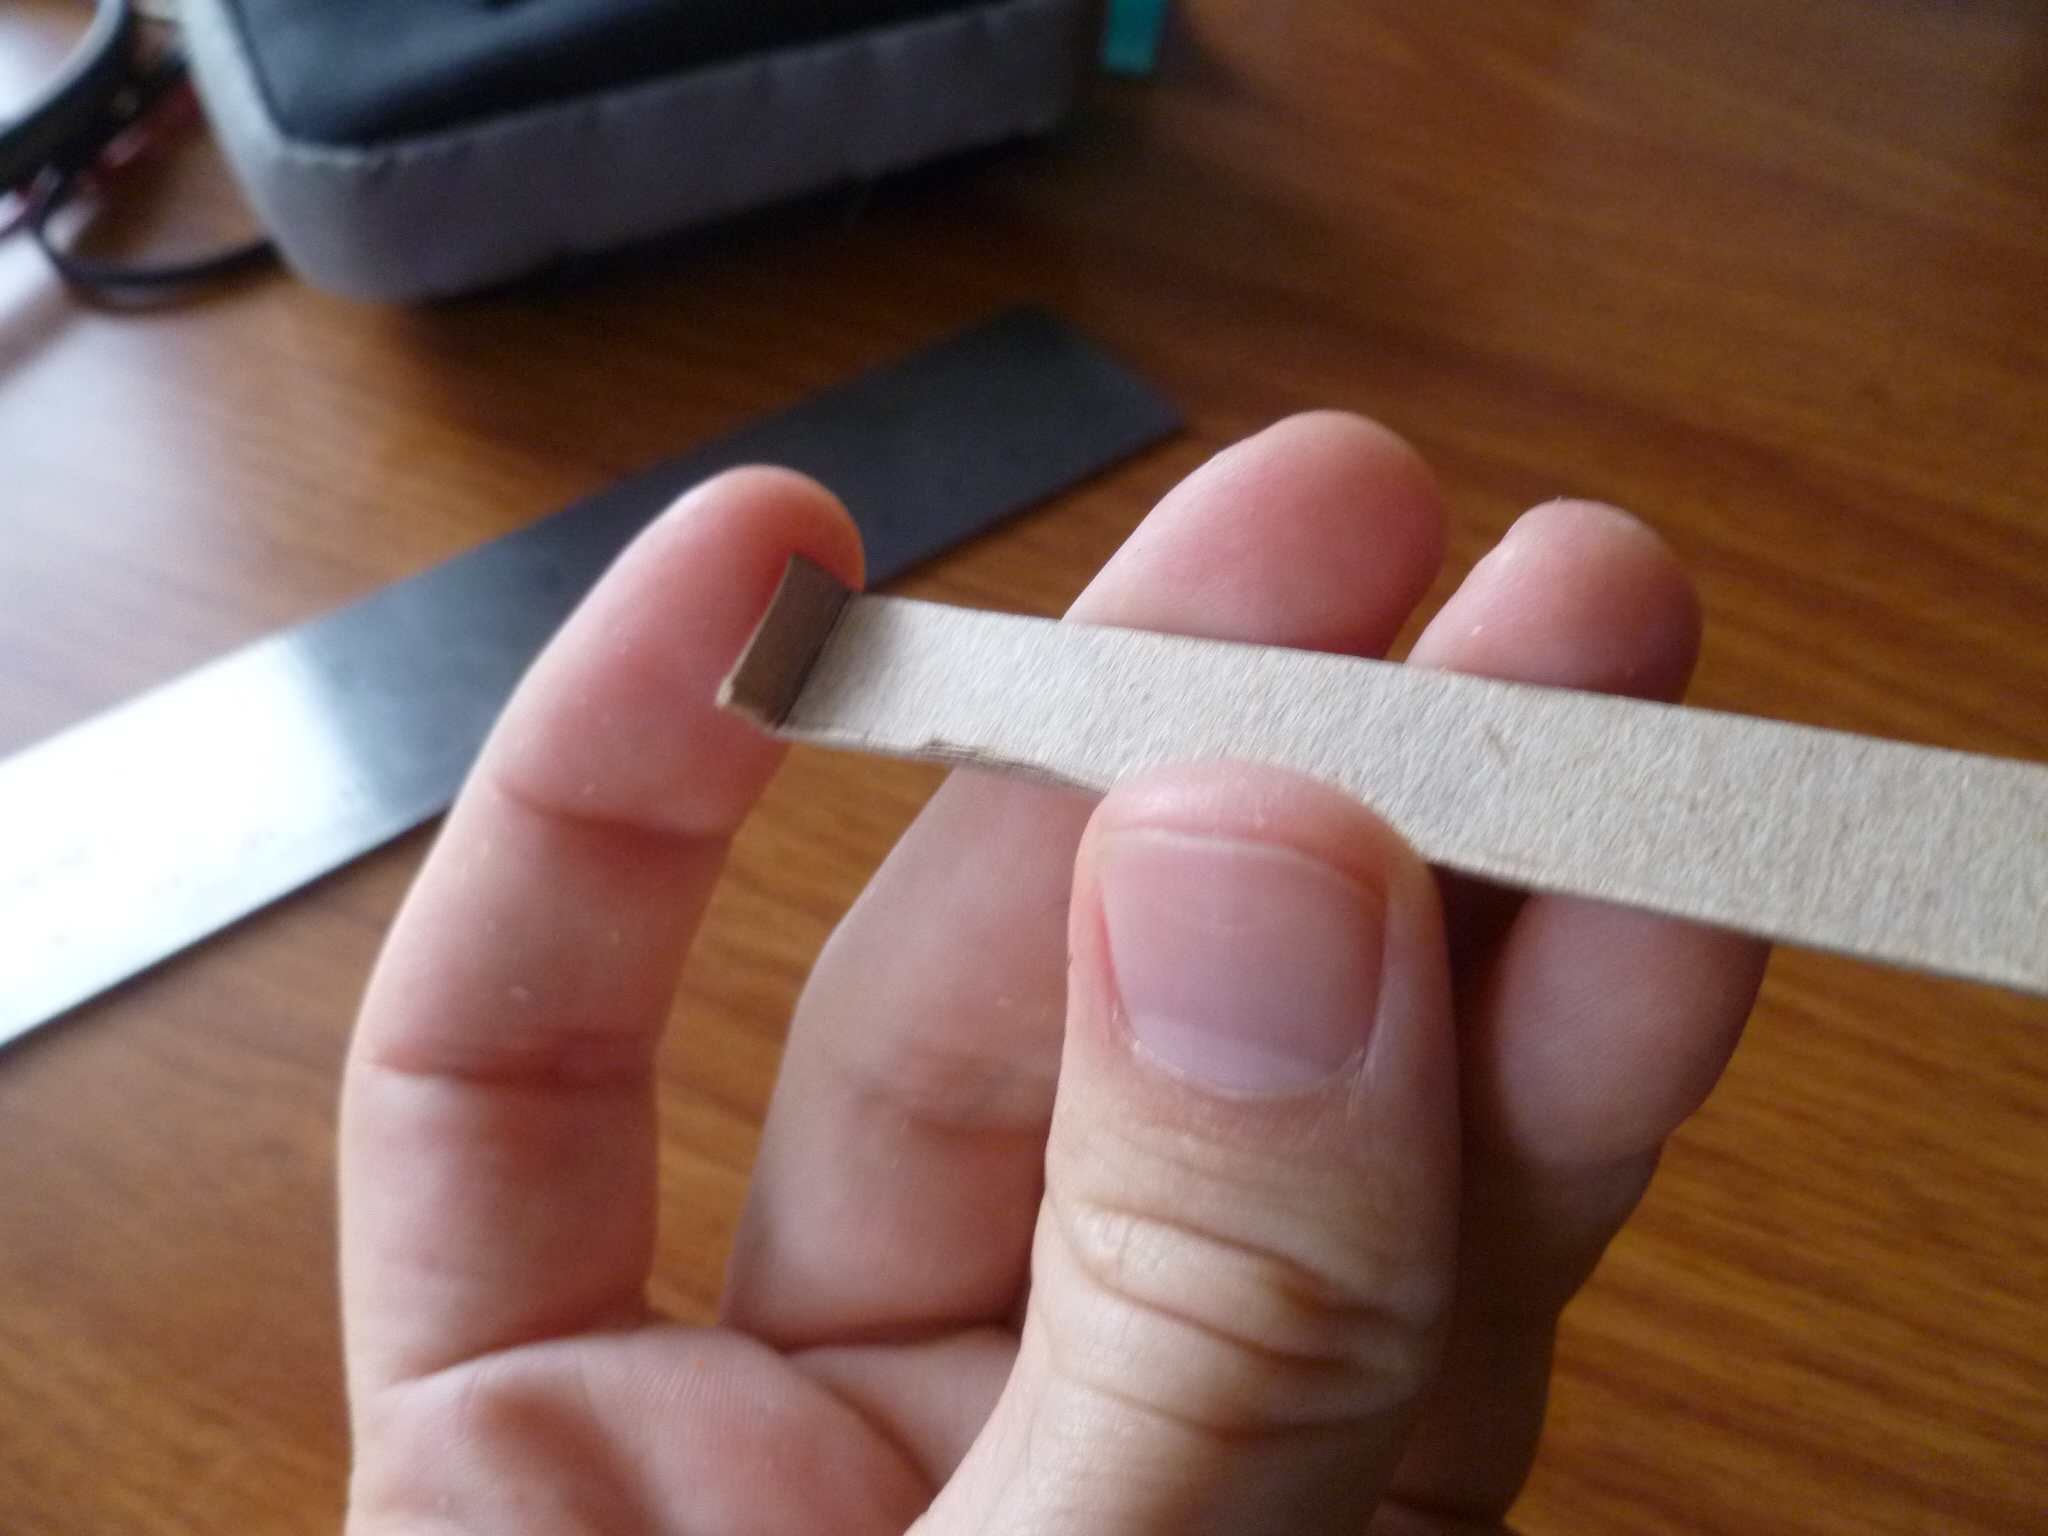
On your thin cardboard, measure and mark the following distances:
- The width of your strip should be 1 cm.
- 1/2 cm – This will become a foot at the bottom of the pedestal.
- The scale distance (in cm) of the star from Earth. (The below example is for Rigel, @ 8 cm)
- 1 cm – this will be the top of the pedestal, where you’ll stick your Chibitronics LED sticker.
- The distance of the star again (for the other side of the pedestal)
- 1/2 cm – for the pedestal’s foot on the other side
8. Write the name of the star on the strip (e.g. “Rigel”), and cut out the strip.
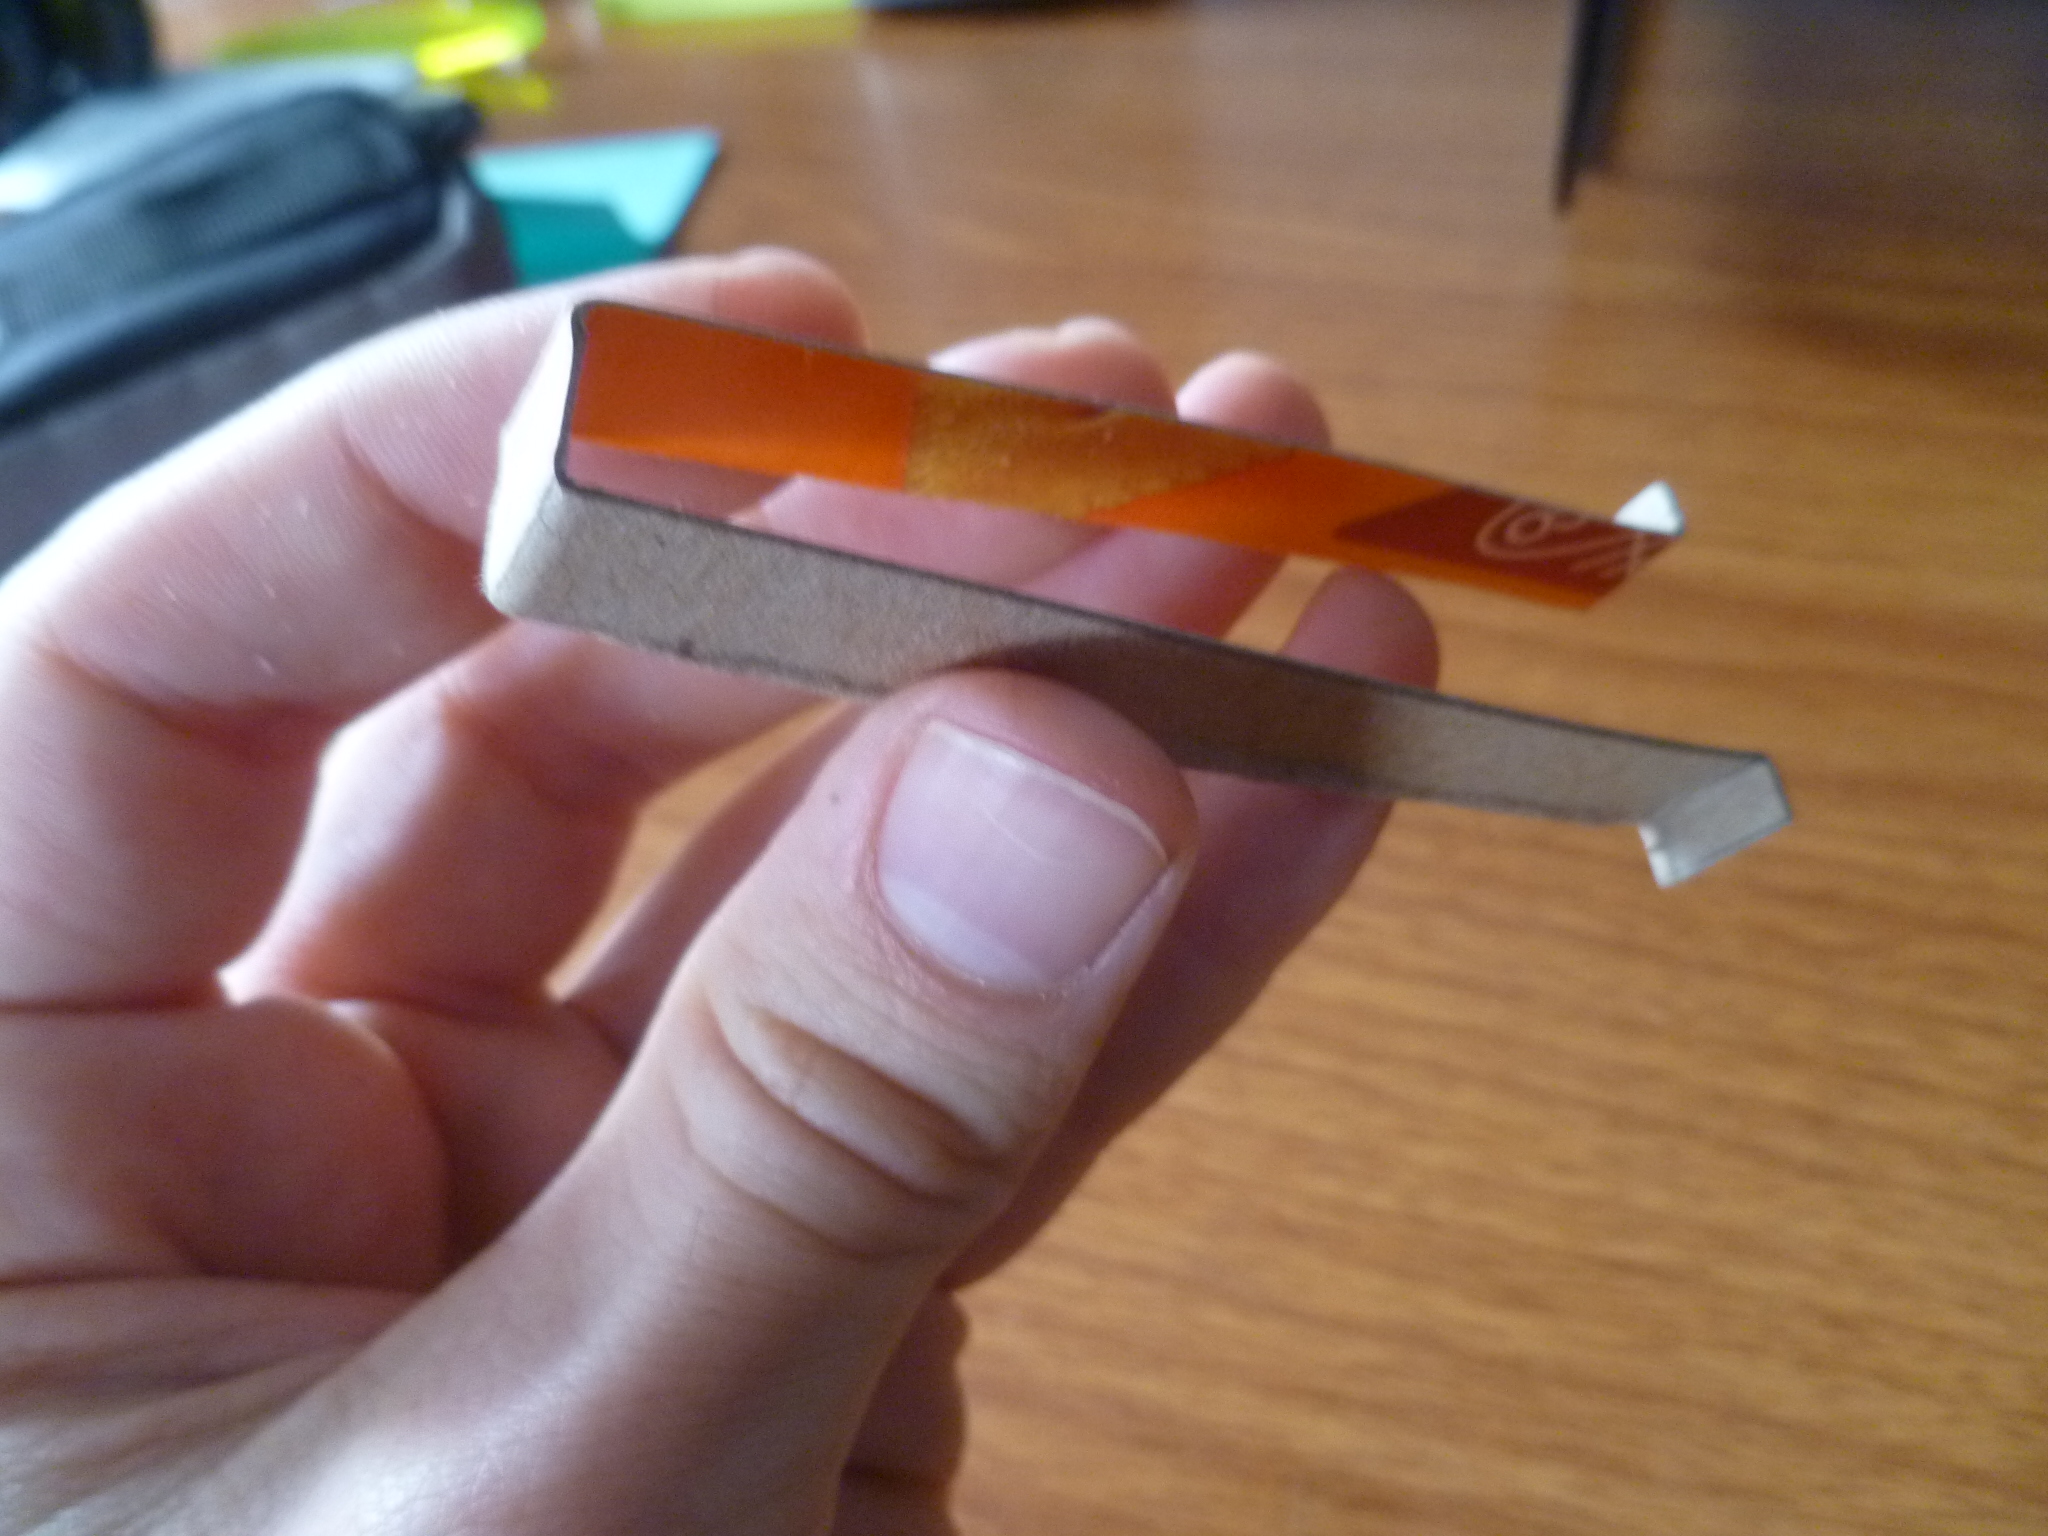
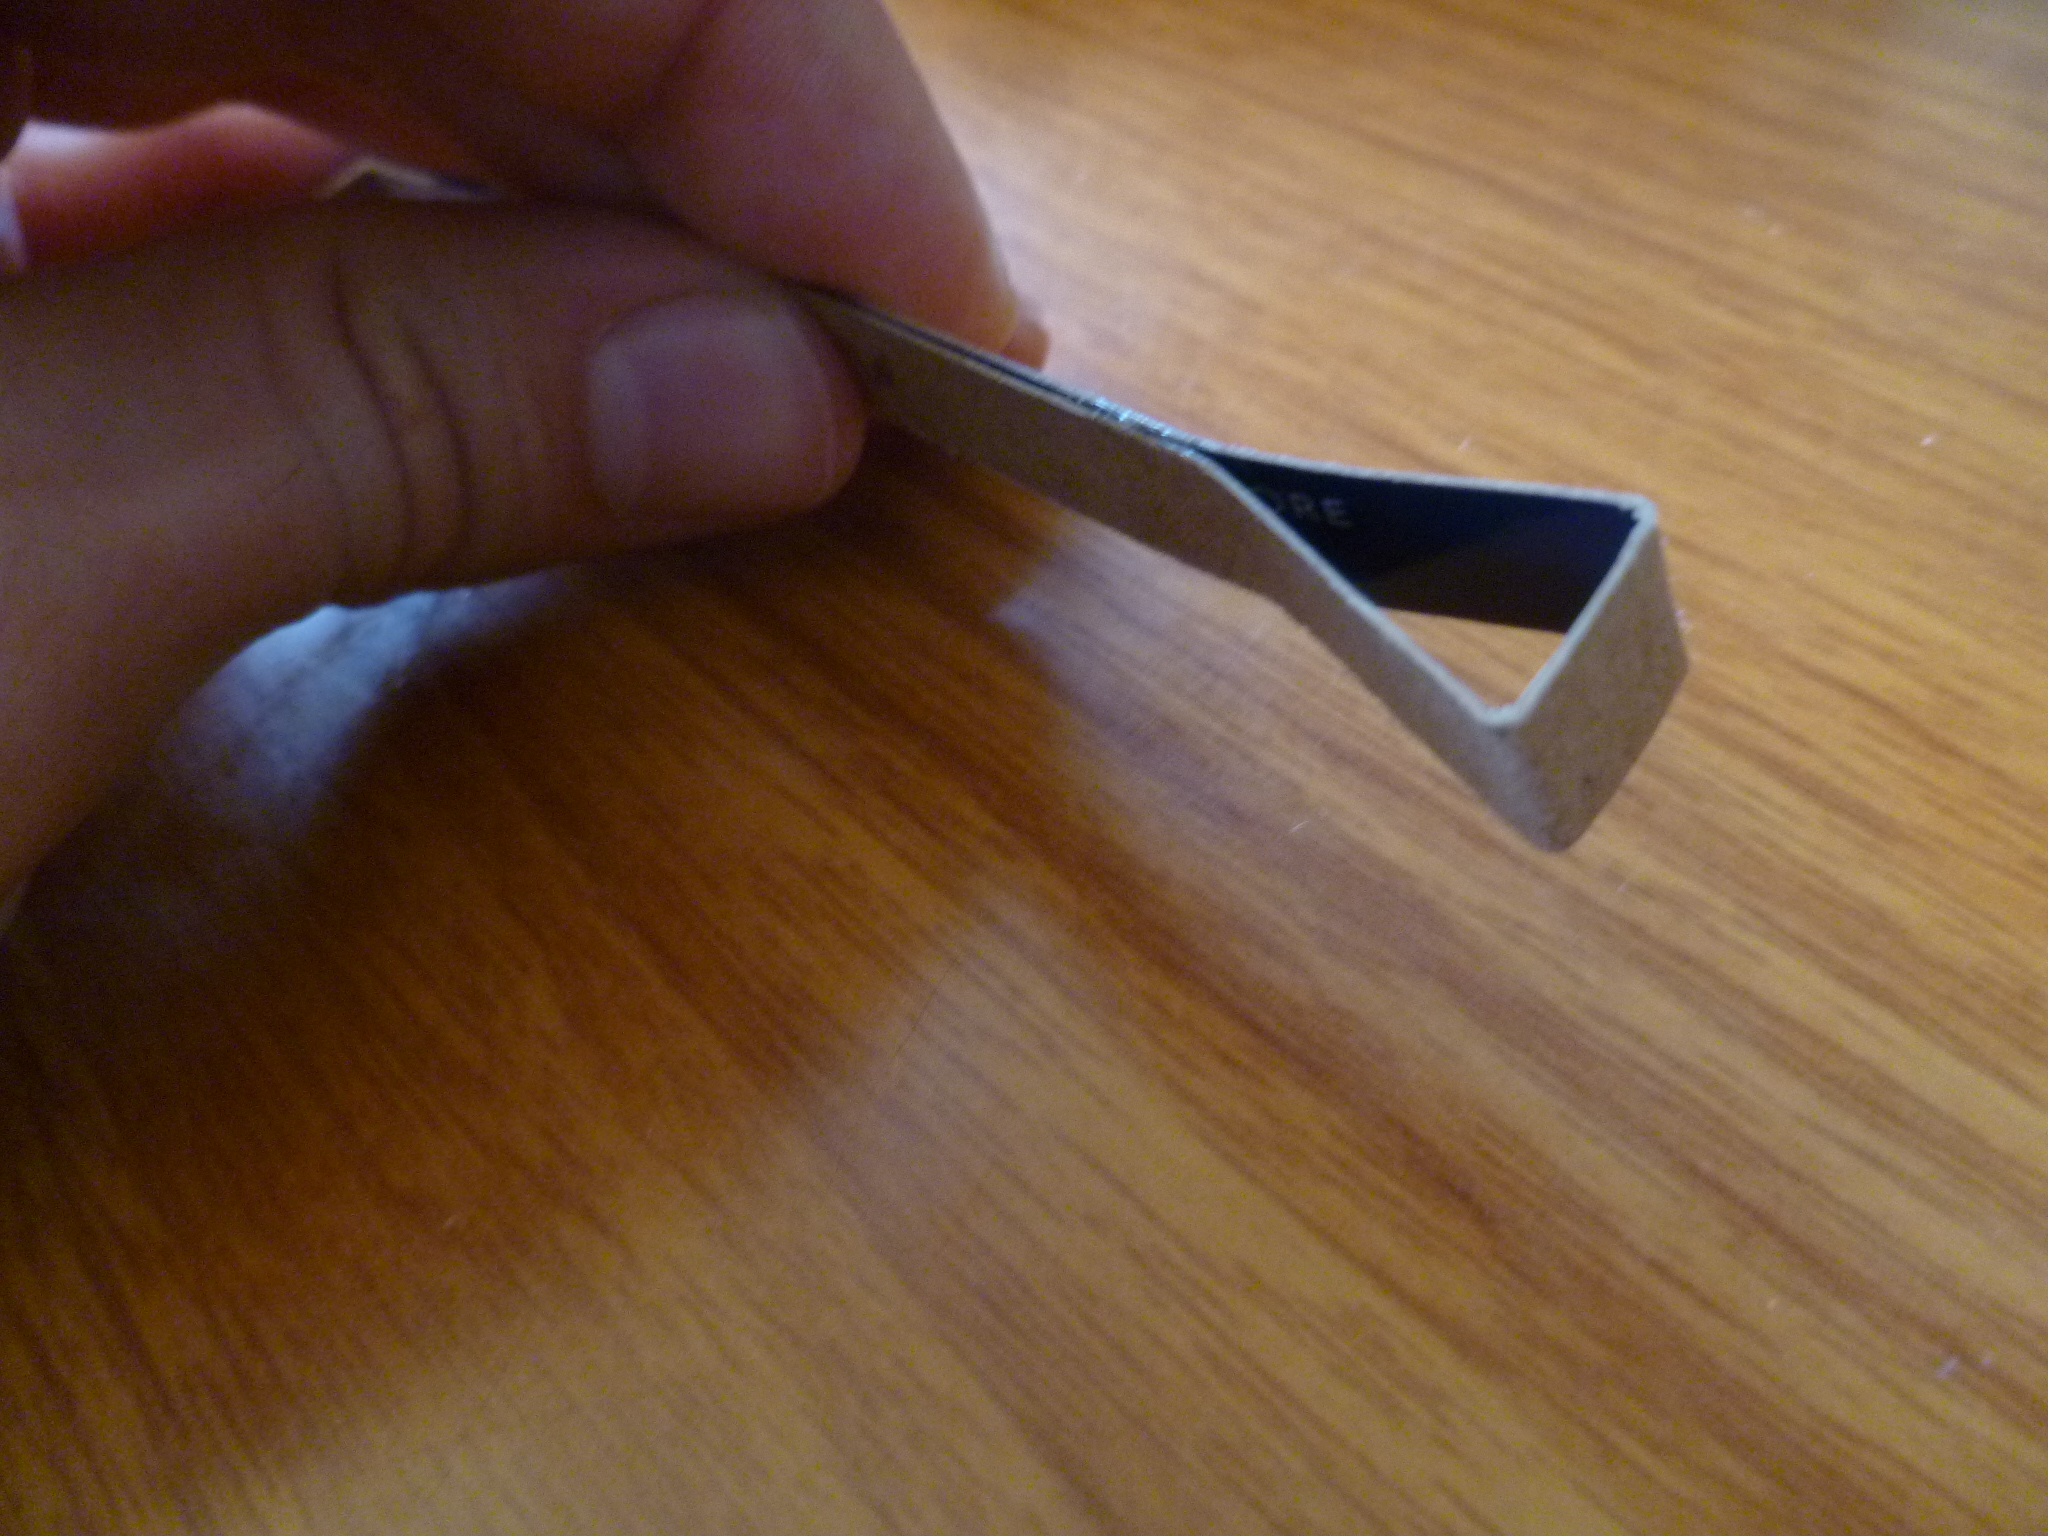
9. Fold the 1/2 cm marks on each side UP …
… and the center marks DOWN.

You should end up with something that looks like this:
10. Glue the two sides of the pedestal together near the feet, and as close as you can get to the top without warping the top of the pedestal.
a. If your cardboard is glossy on the inside (like mine is), score the surface with a model knife where your glue is going, to ensure the glue bites into the cardboard.
b. Make sure the feet line up as closely as you can, to ensure a flat connection with the ground!

c. Using clothespins or binder clips, clamp the two sides together. Make sure the pedestal is as straight as you can make it!
d. If glue has squirted out the sides (likely), use a cotton swab (or something similar) to wipe away excess glue. Wait for the pedestals to dry before moving on.
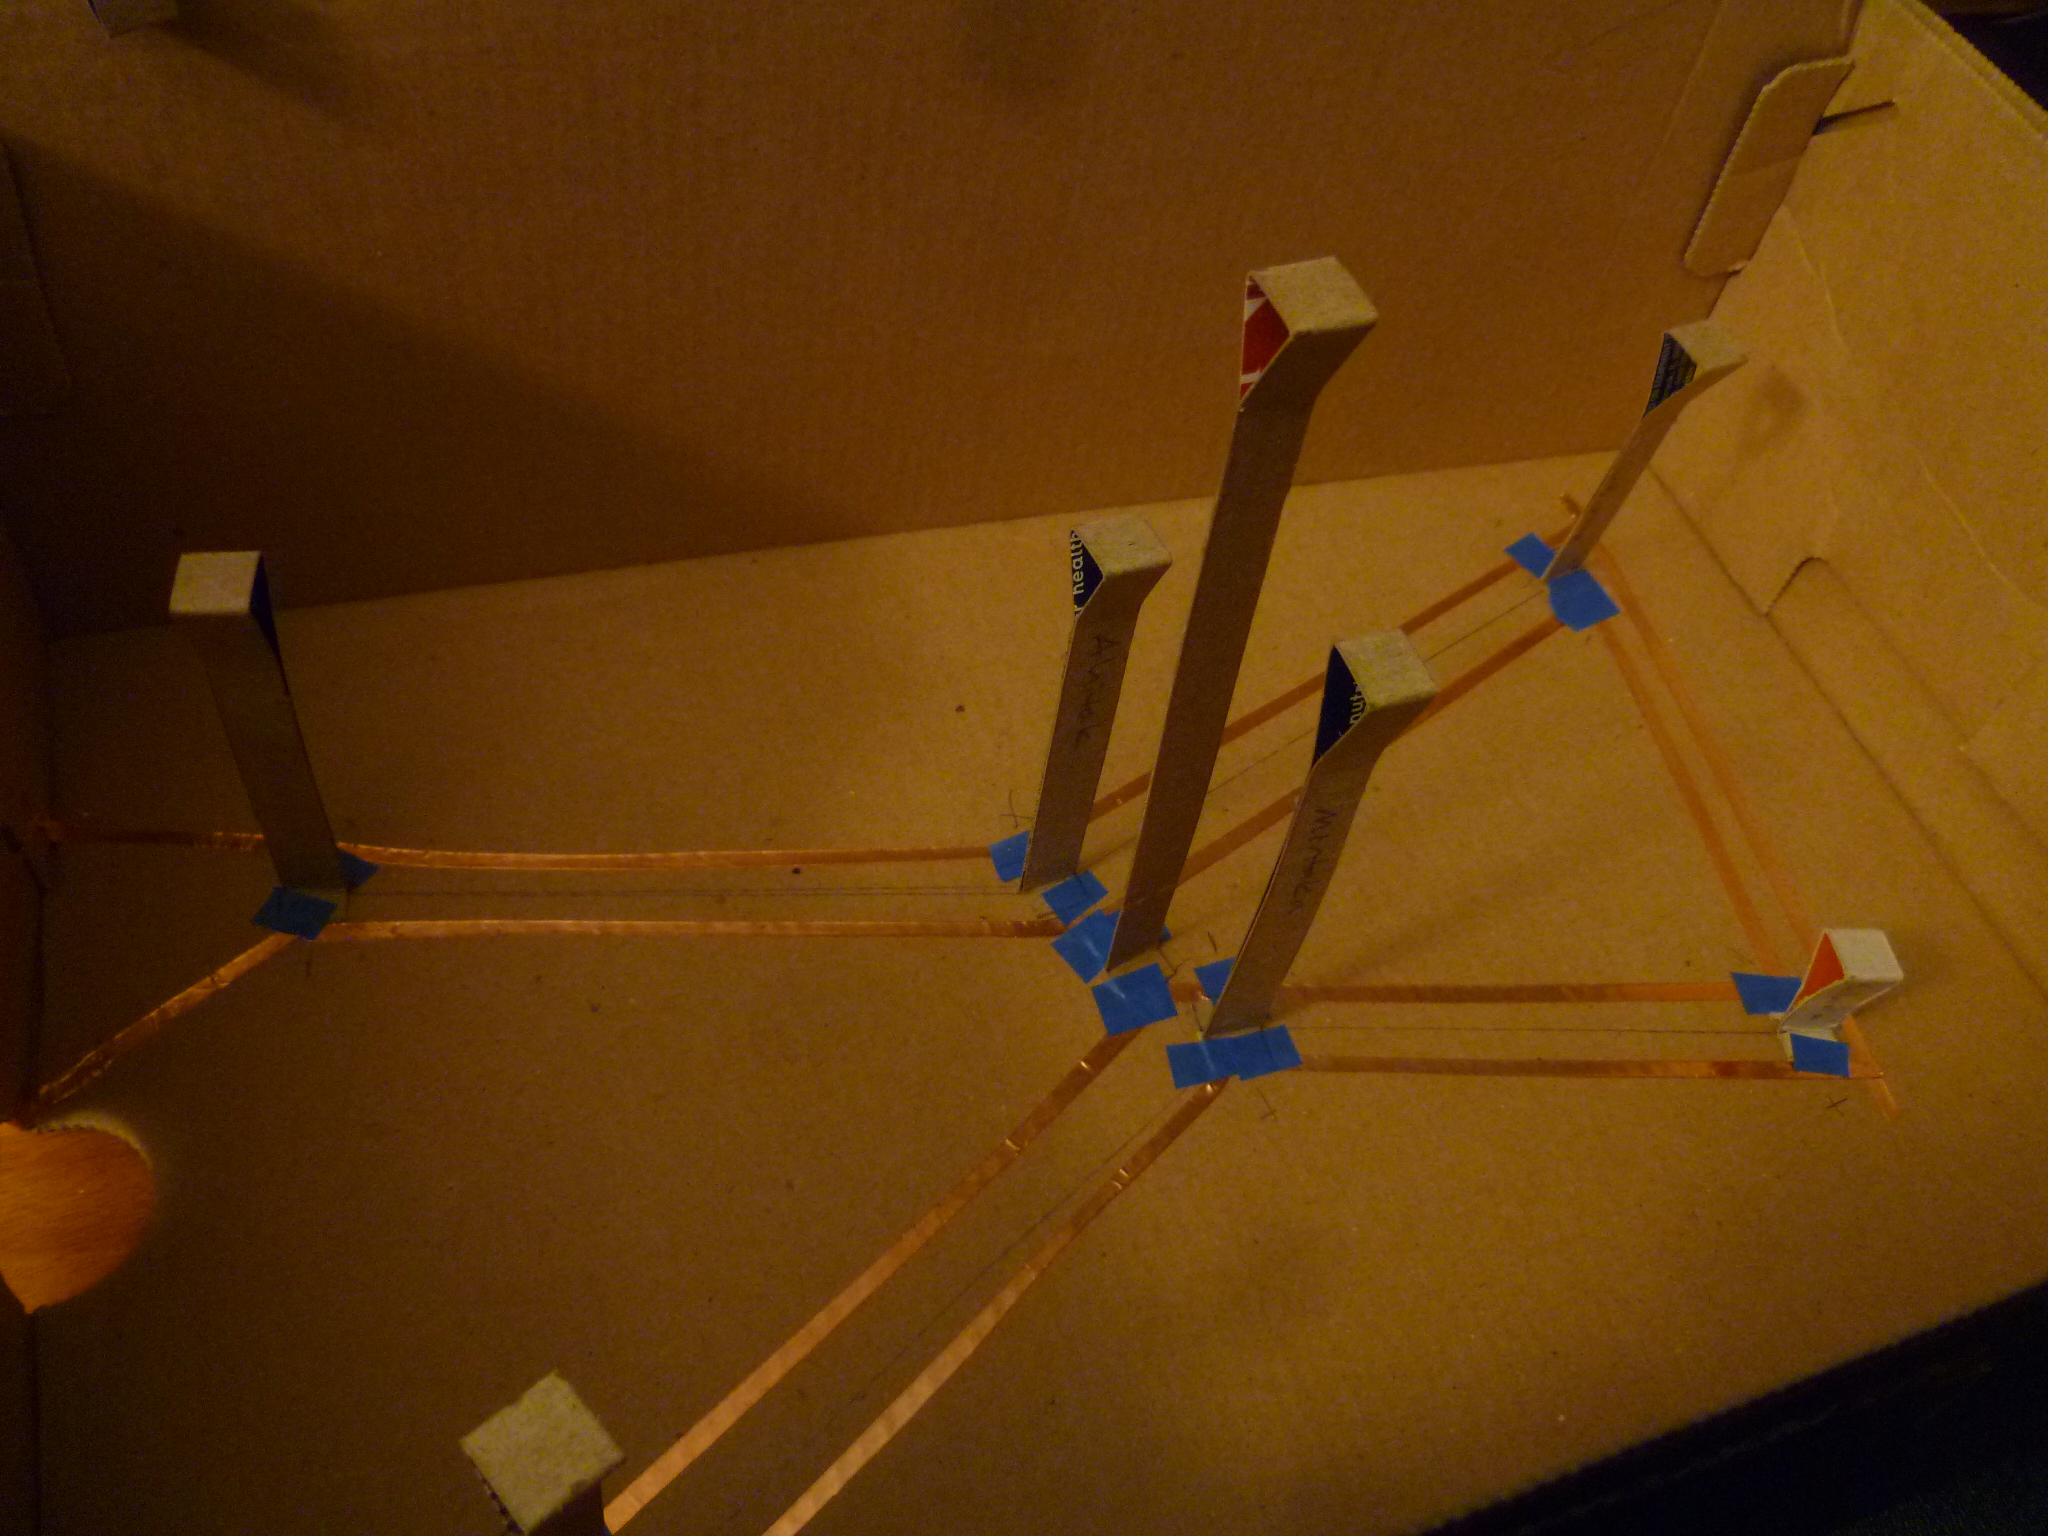
11. Glue each star’s pedestal to the corresponding location.
a. Again, score your glossy cardboard if necessary.
The slightly-bigger-than-1-cm gap you left between the positive and negative tape in Step 5 should perfectly accommodate the base of the pedestals.
IMPORTANT: Wipe any excess glue off of the copper tape!
b. Secure the pedestals with masking tape. They should be standing pretty much straight up.
c. Once the glue has dried, remove the masking tape. Now’s a good time to use your multimeter to double-check that the circuit still works!
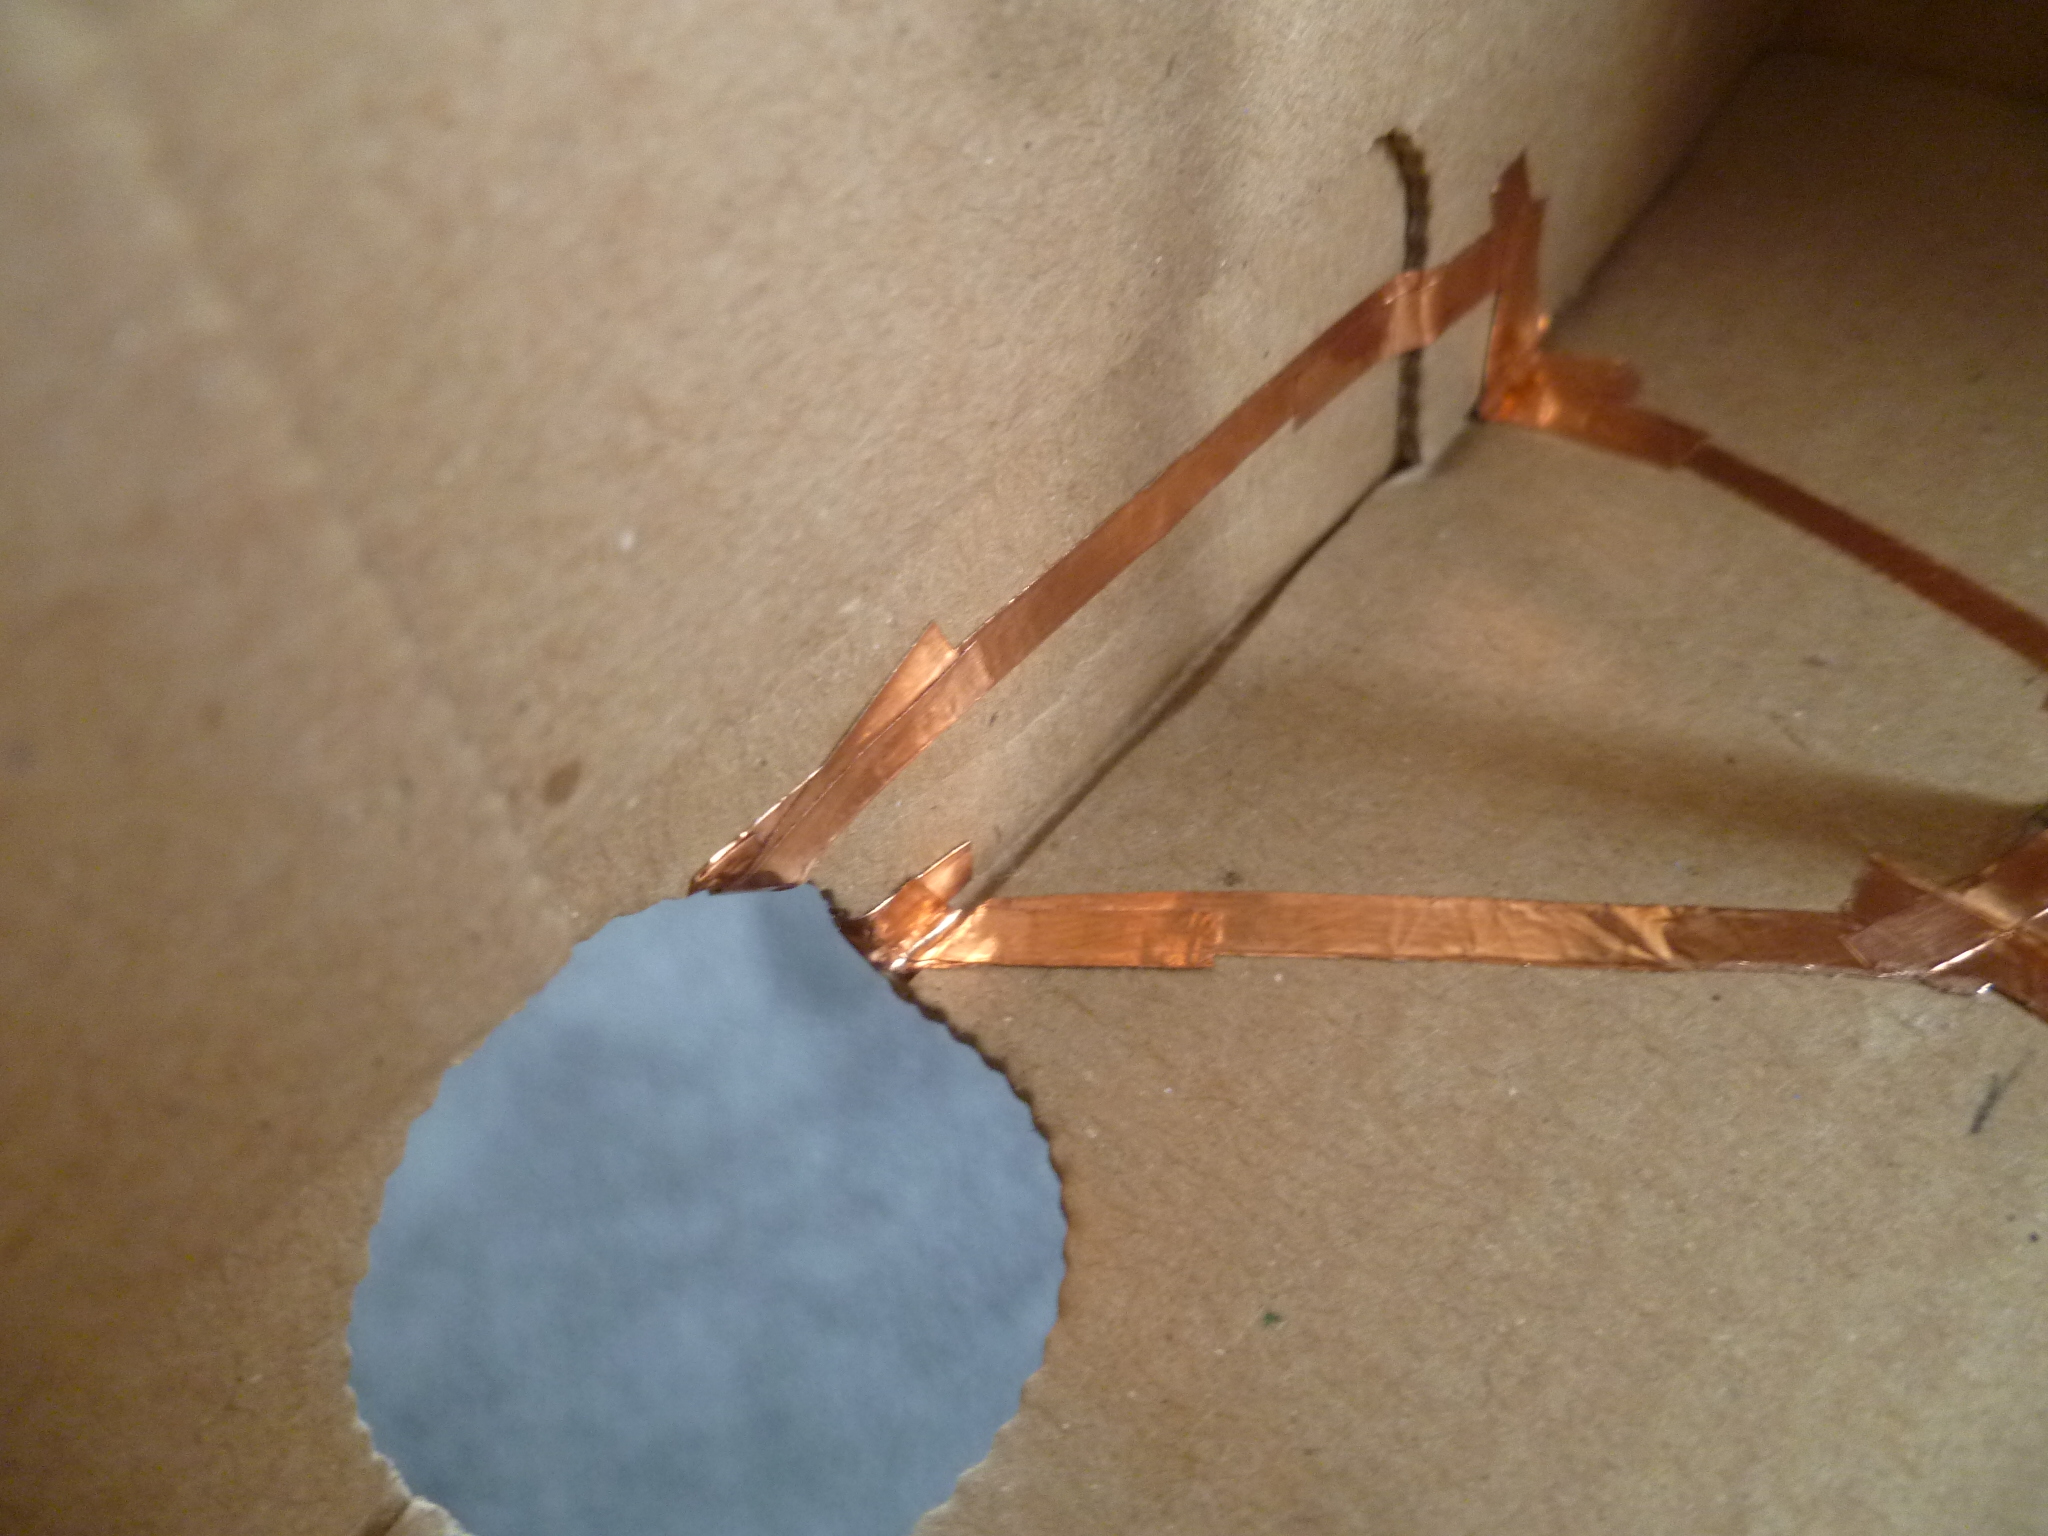
12. Run a piece of copper tape from the positive side of the circuit up on to the top of the pedestal, stopping just short of center on the top. Repeat the process for the negative side of the circuit.
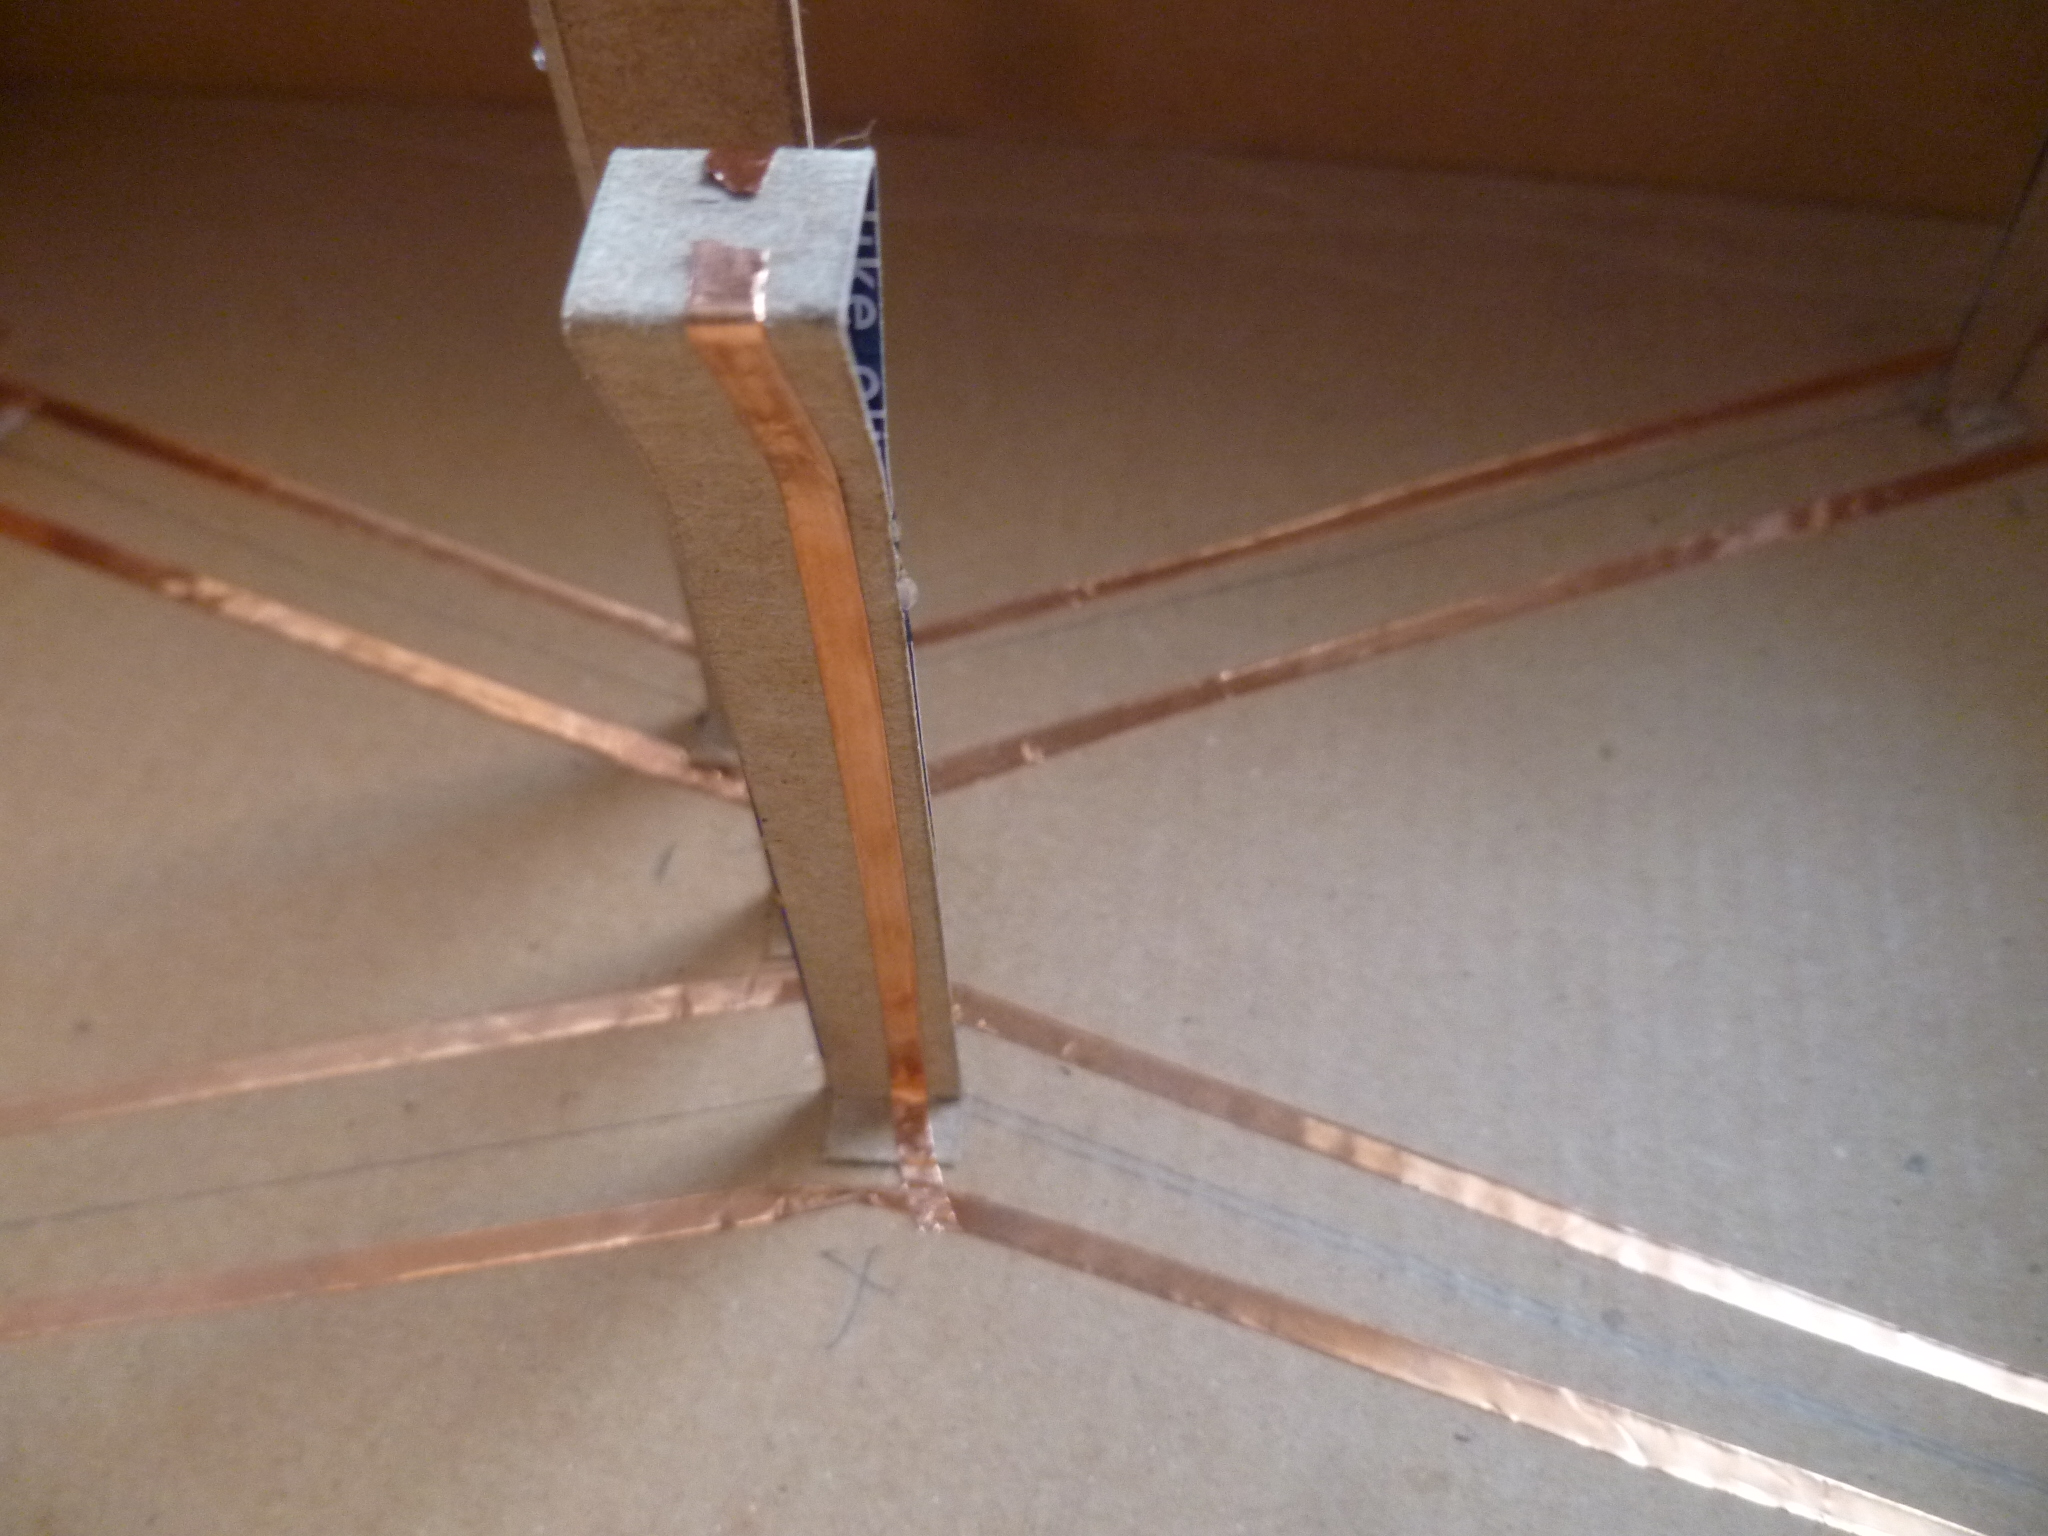
IMPORTANT: This step is a little tricky.
a. Be careful not to tear the tape while pressing it into the corners. If you do, you’ll need to patch it up.
b. Ensure there is a STRONG connection between the tape on the pedestal and the tape on your box. This is how the LEDs will get their power, and they will not glow at full strength without a solid connection to power! Again, this is why copper tape with conductive adhesive is essential.
c. It’ll be easy to bend or warp the pedestals while you’re sticking the copper to them. You may have to apply pressure on the opposite side of the pedestal to ensure solid adhesion. On the top, I held a toothpick underneath to press against. (See Step 14 for an image of this technique.)
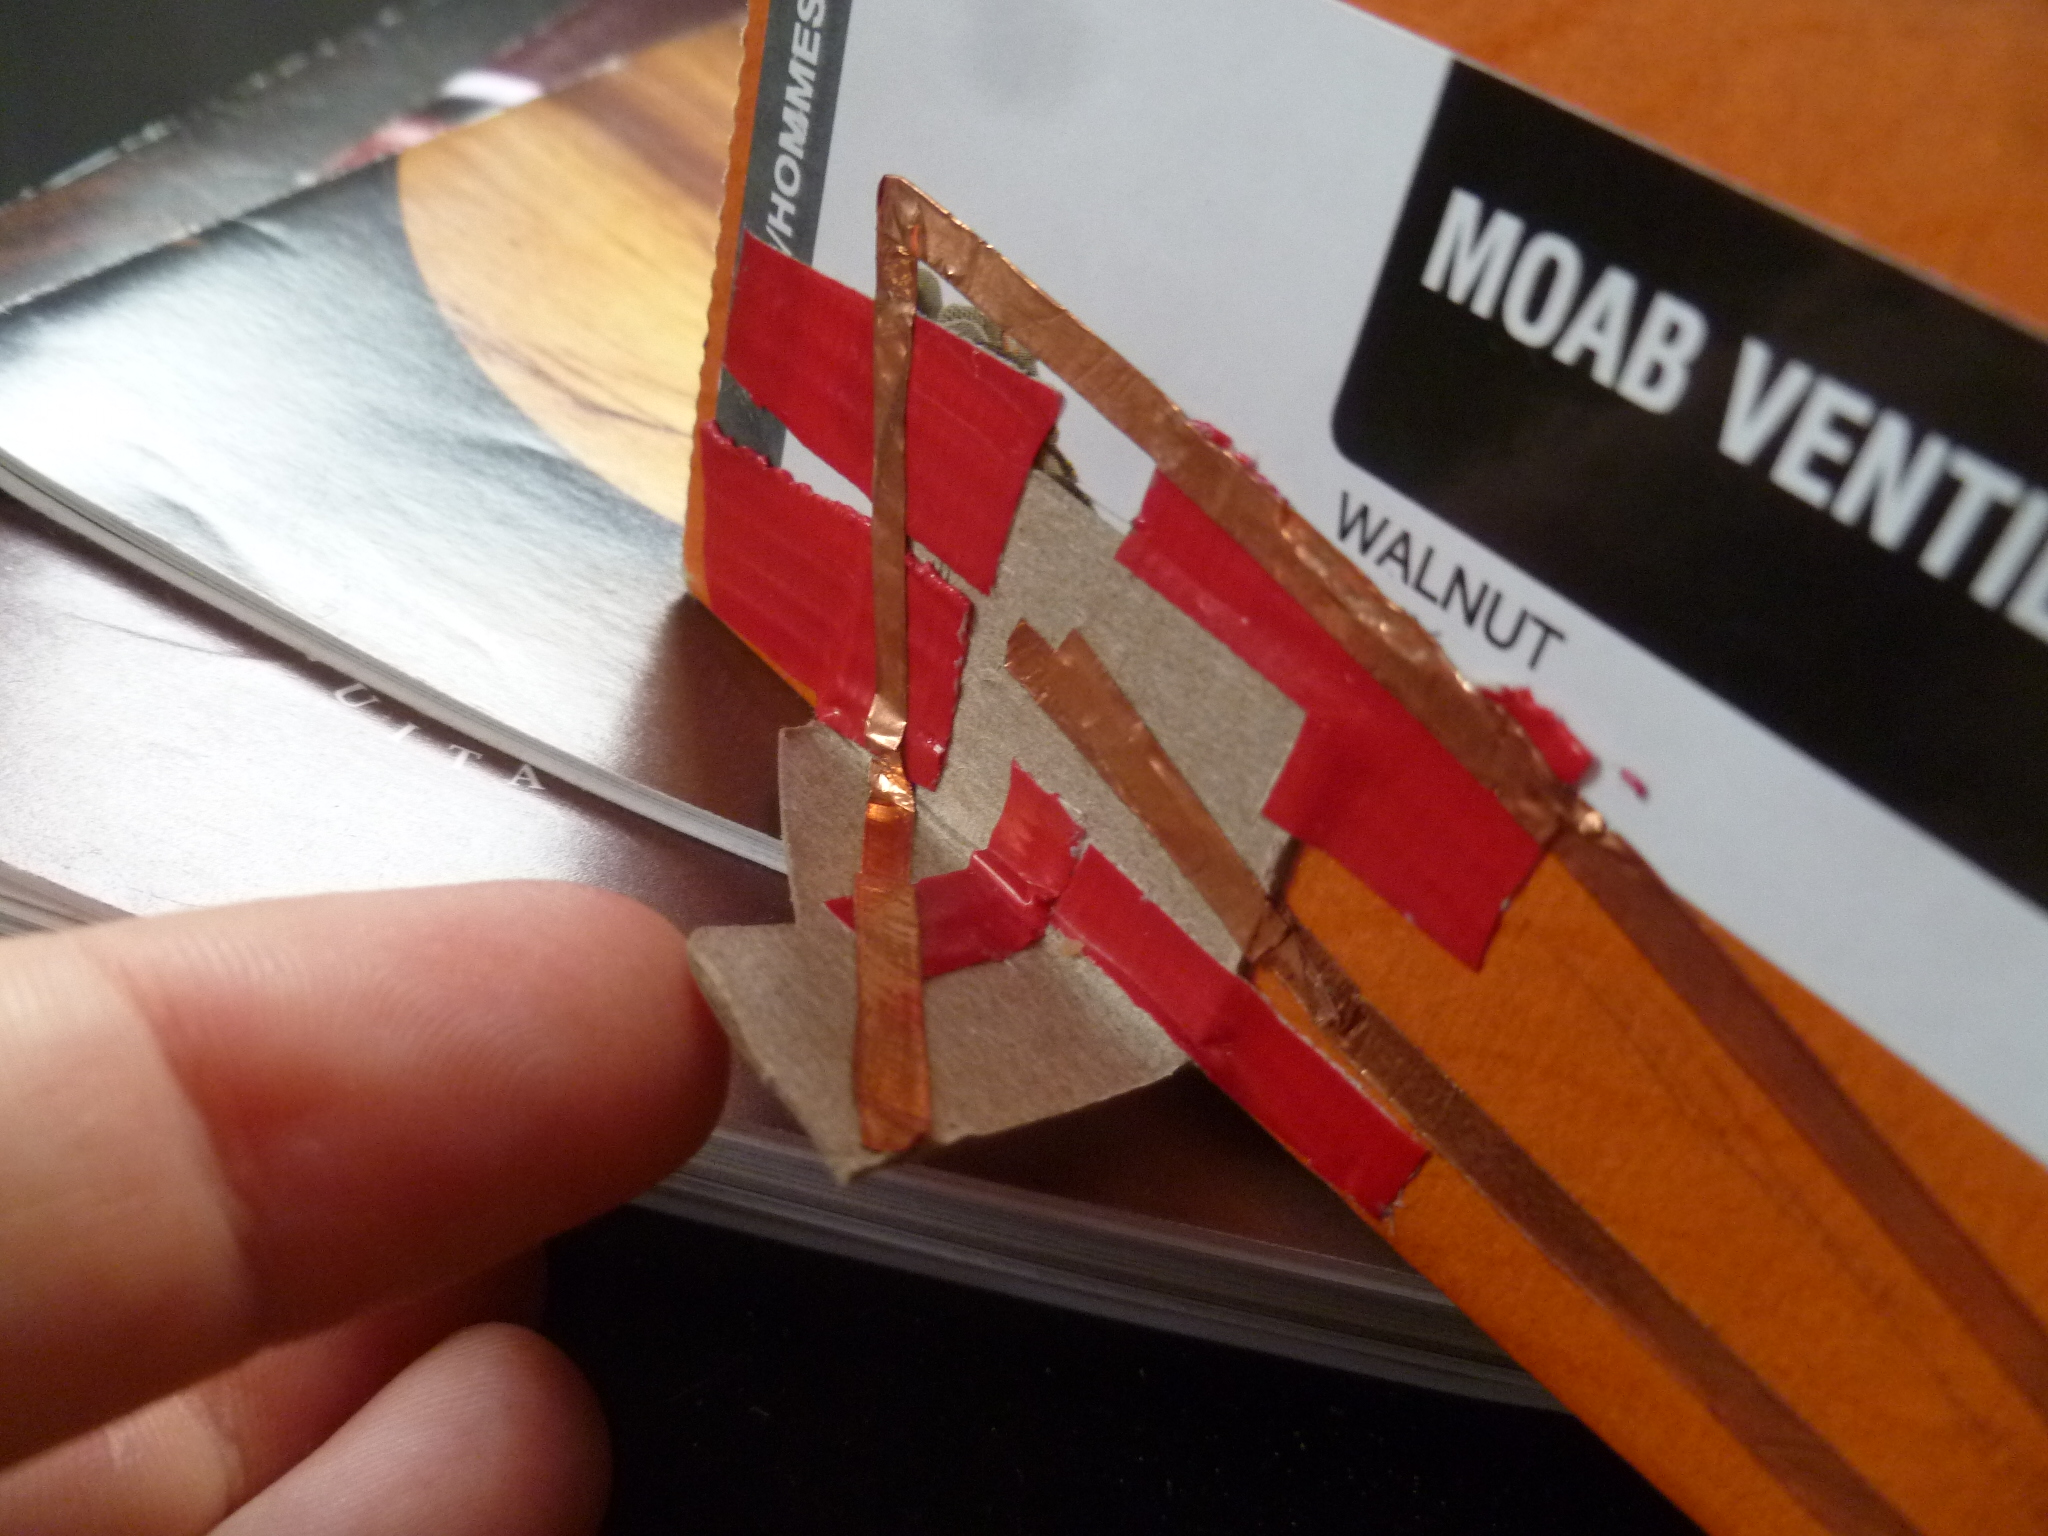
d. If you had a difficult star to route power to, e.g. the middle star in Orion’s belt, here’s a possible solution:
The inner circuit (negative on mine, seen below to the left of the center pedestal) is easy to connect to.
However, to connect to the outer circuit (positive on mine), you’ll need to create a little bridge out of paper, to ensure it doesn’t come in contact with the inner circuit as you cross it.

13. Now is another good time to use the multimeter, making sure there’s power at the top of each pedestal.
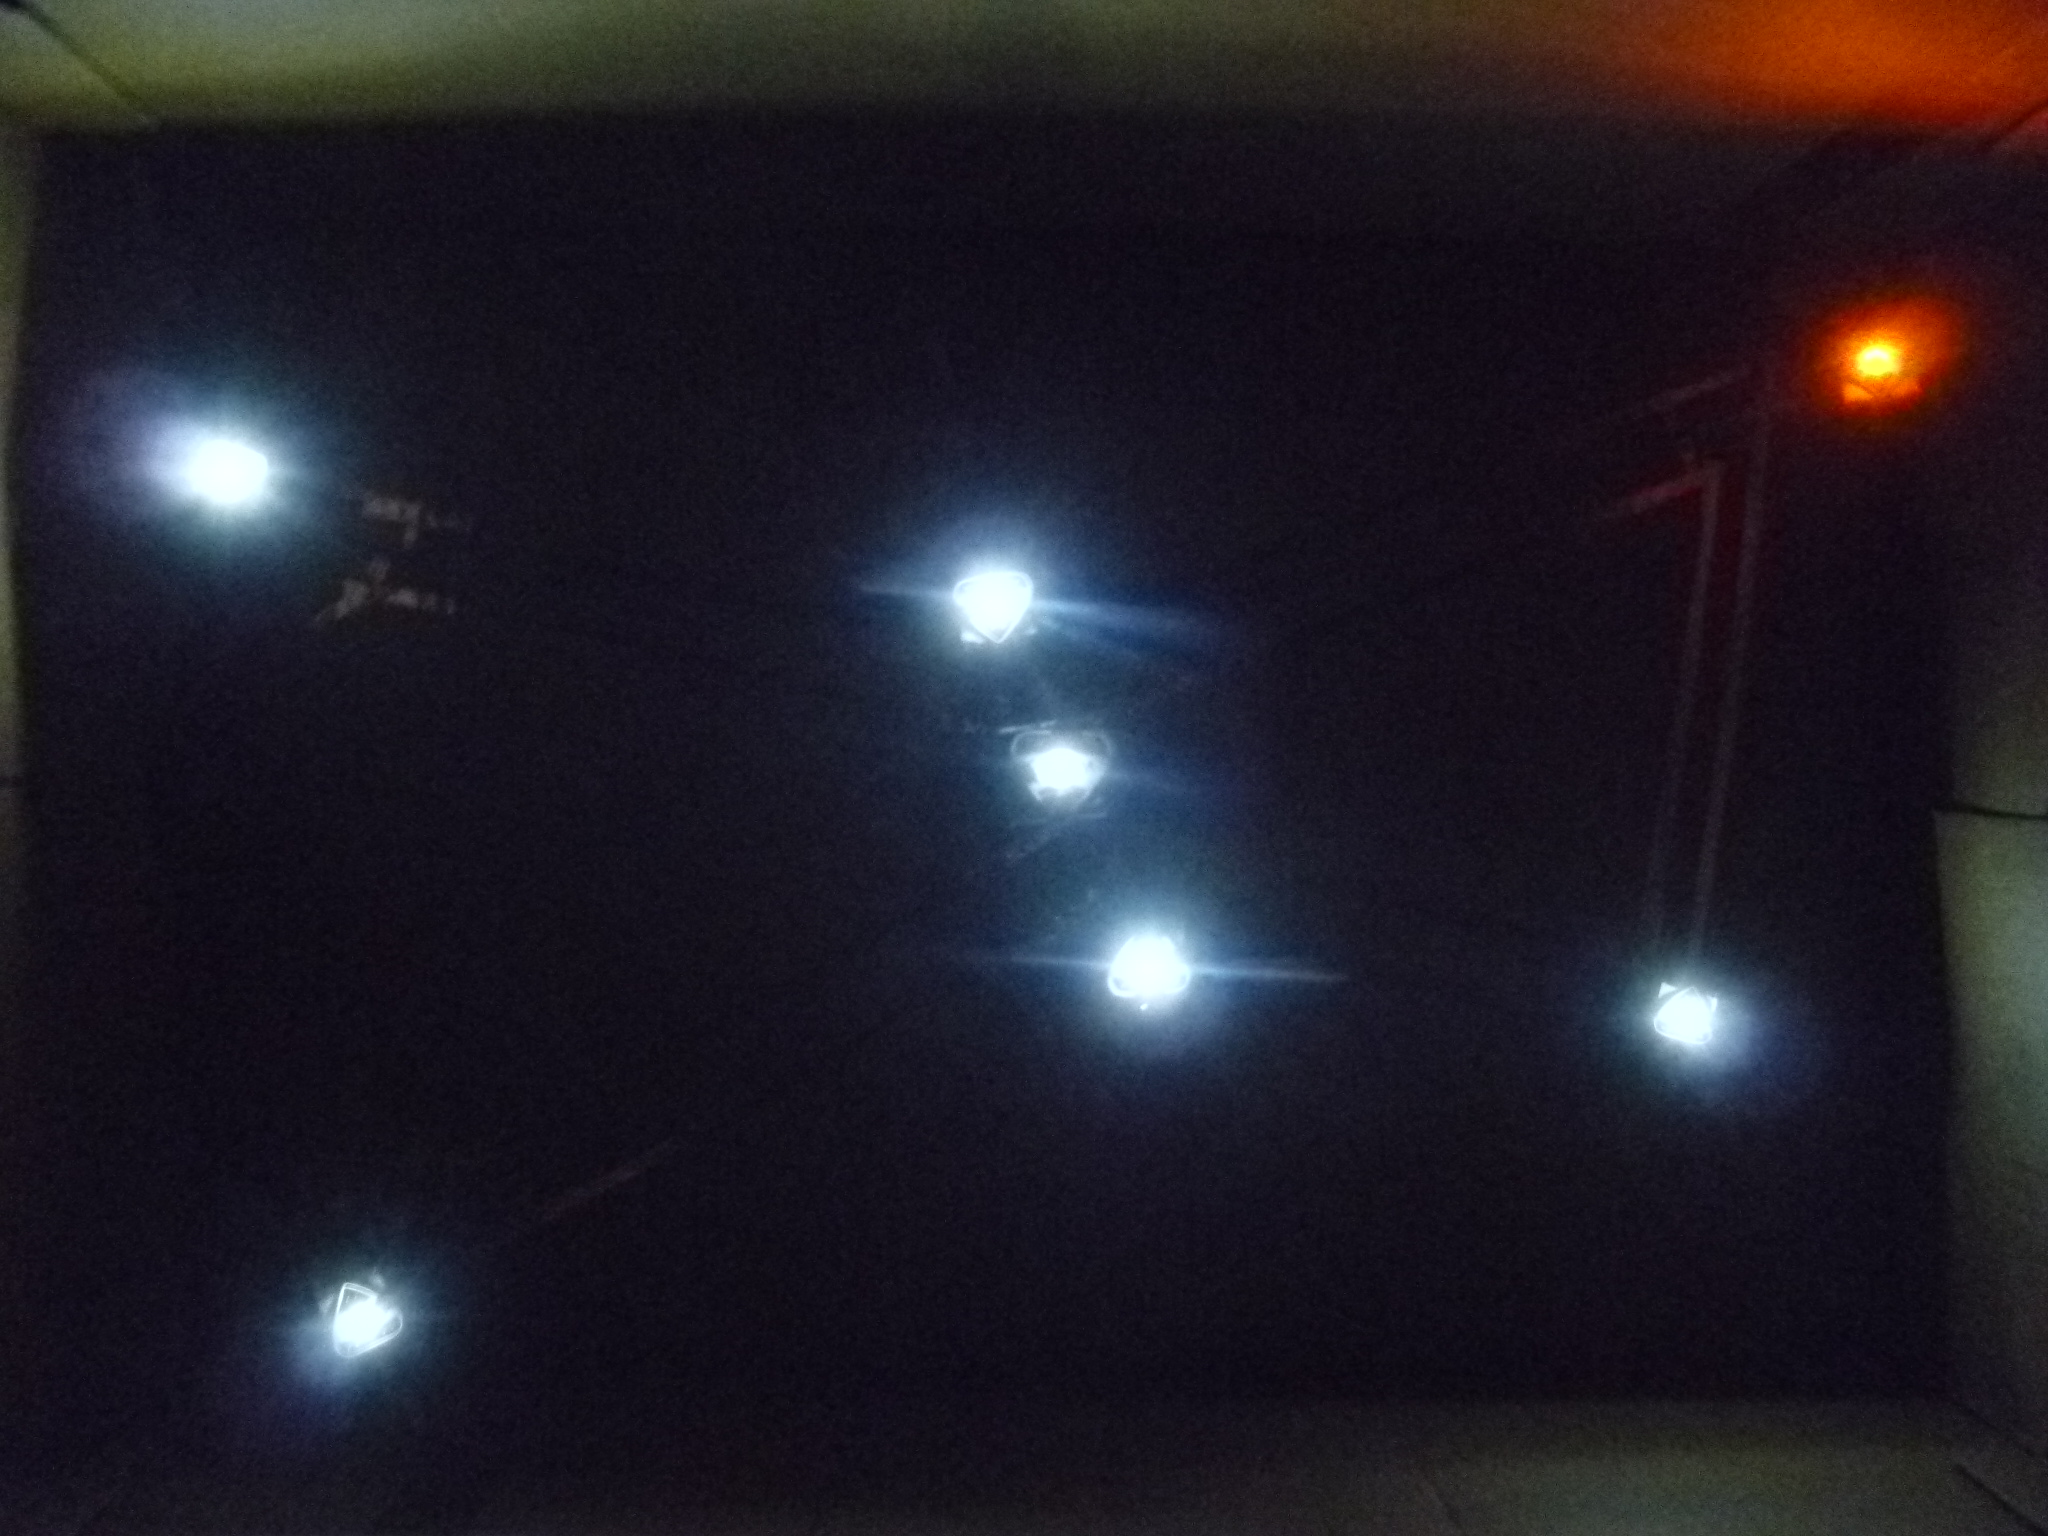
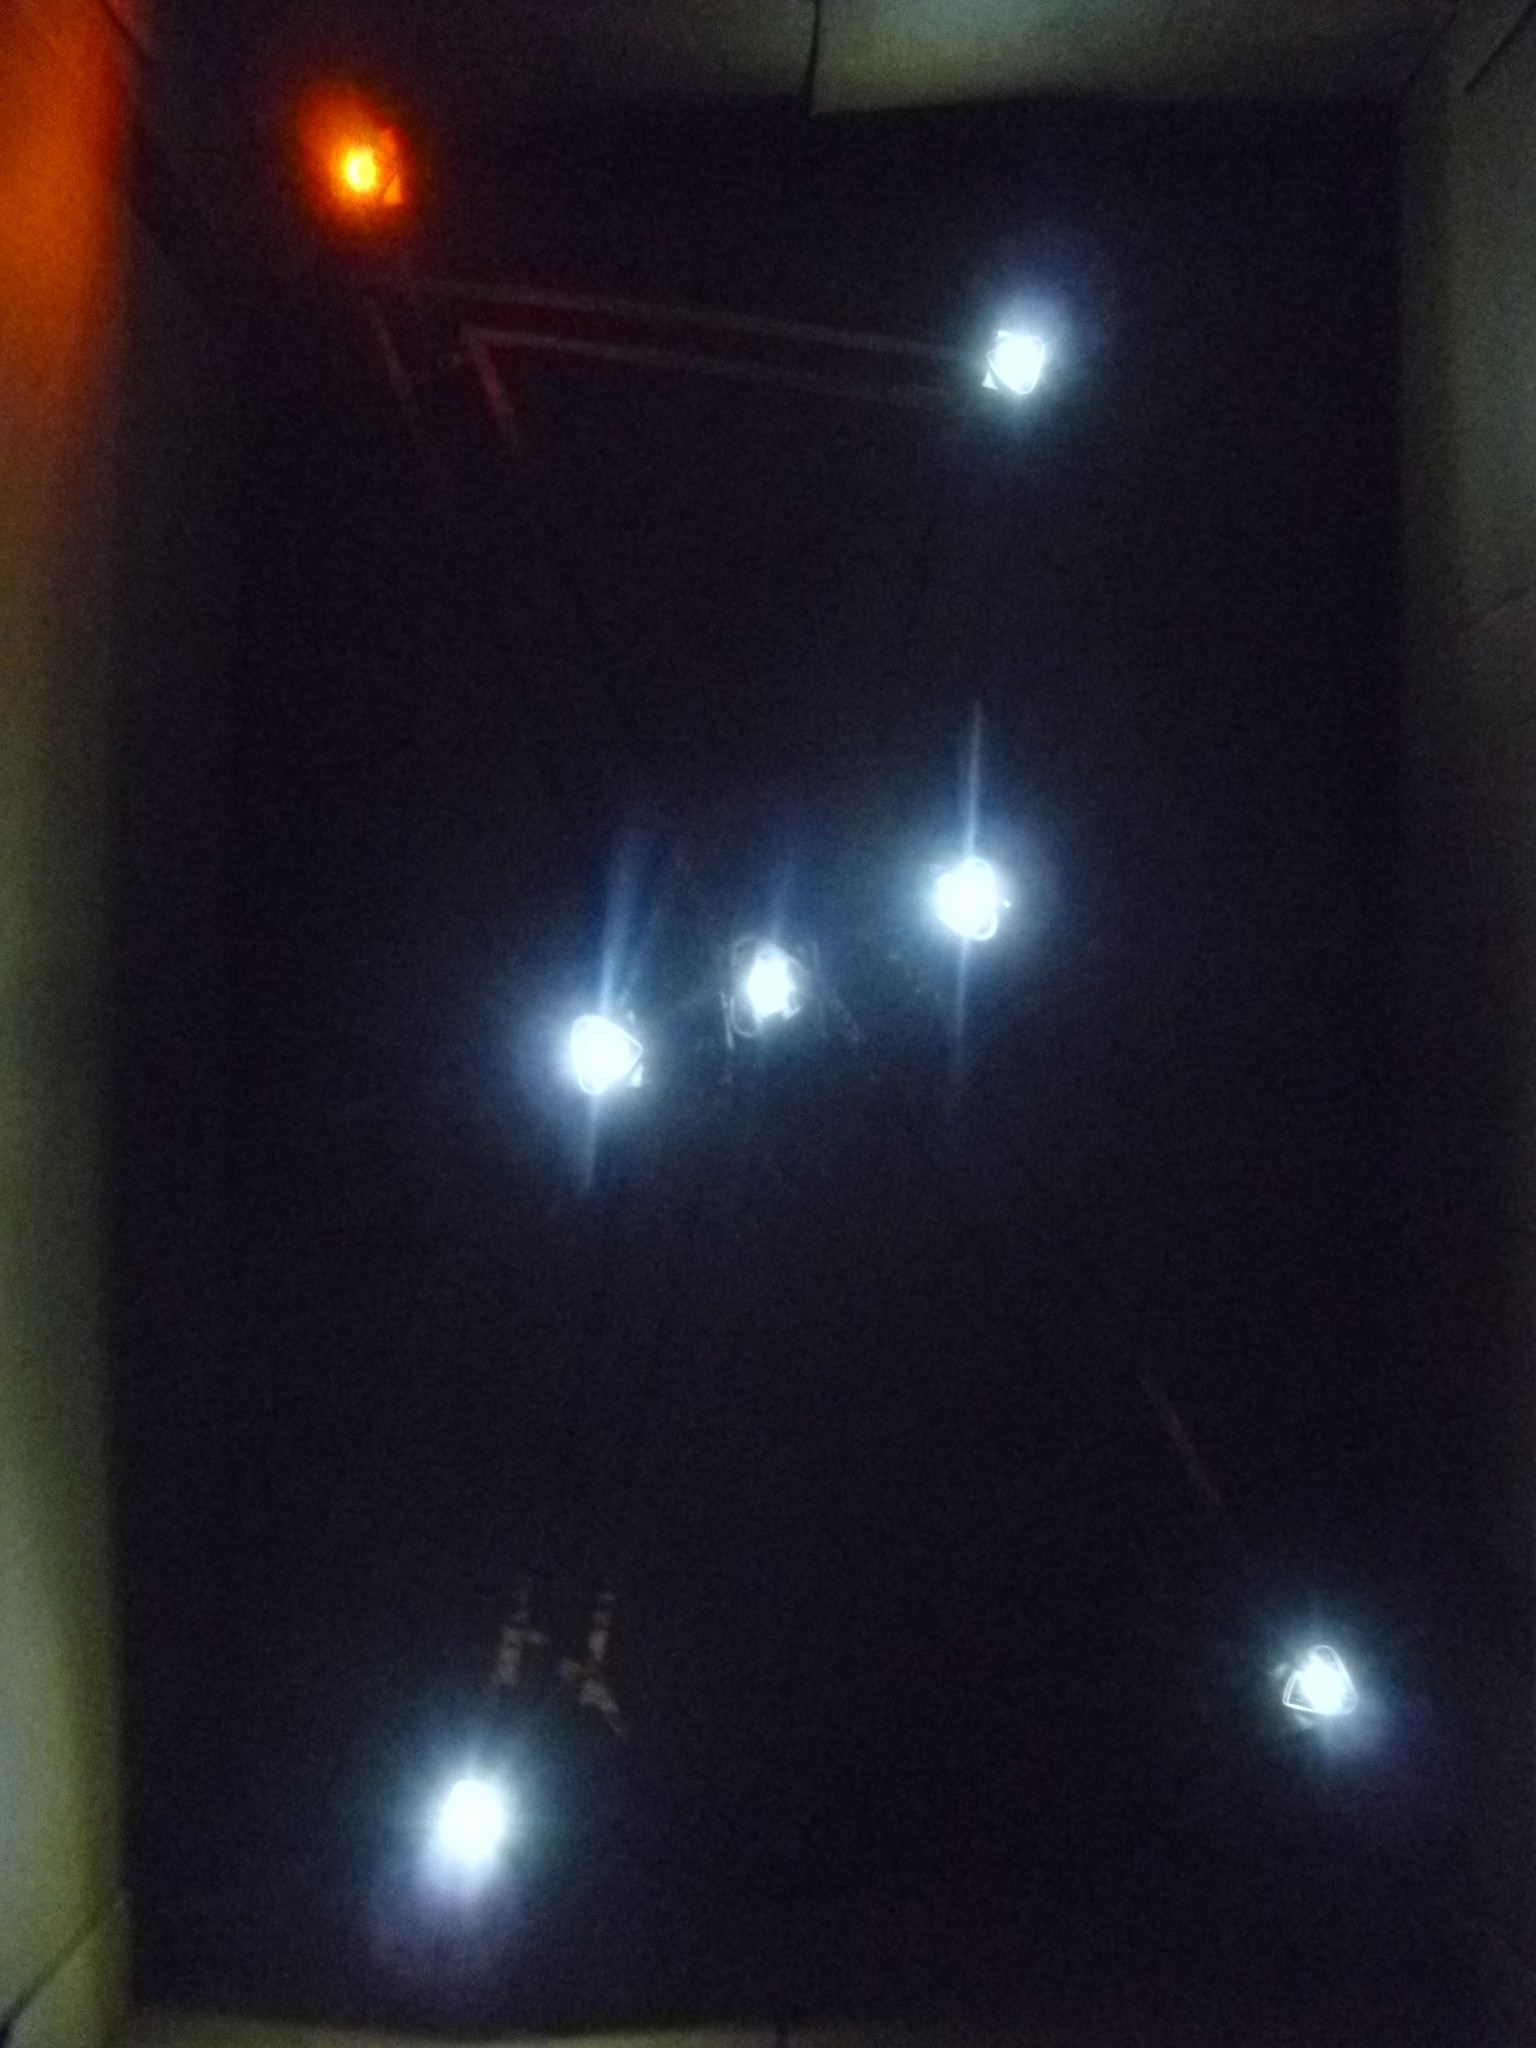
14. Time to place the stars! Making sure positive attaches to positive, and negative attaches to negative, stick the LED stickers on top of the pedestals. Betelgeuse, the star on the upper left, is orange. All the others are white.
IMPORTANT: There needs to be a SOLID connection between the LEDs and the copper tape. Again, I used a toothpick underneath the top to give me something to push against.

15. If all has gone well, you should be able to plop a battery into the switch, and illuminate your 3-D constellation!
Troubleshooting:
You’ll likely have some LEDs flickering, or dimmer than the others, or not lighting up at all. Using your multimeter, you can check to see where is getting voltage, and where isn’t. This is helpful for narrowing in on trouble spots. With the battery attached, you can also run your fingers over the circuits. When you get to a spot with a poor connection, the extra pressure from your finger will cause the LED in question to glow brighter / stop flickering.
Using additional copper tape, or conductive fabric patches, strengthen the connections as necessary. You could also flow some solder into the joints – the cardboard does surprisingly well with heat!