How To > Projects> Sensors & Switches> Tutorial
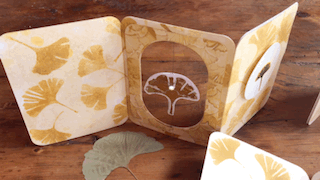
Electrified Spinner Card
Project Design & Tutorial by: Jill Dawson
A Card With a Twist
In this tutorial, you’ll learn how to make an Electrified Spinner Card that turns on and off with help from a magnet and concealed reed switch.
While the visuals in this tutorial feature leaves from my daughter’s favorite tree, the concept, circuit diagram, and cut files for this project may be applied to any theme!
Make a Card That Flutters and Spins

Related
- Flying Concertina Accordion Book
- Guide to Conductive Thread
- Magical Magnetism: Intro to Reed Switches
Categories
Book Arts, Reed Switch, Interactive Art, Night Light, Home Decor, Paper Engineering

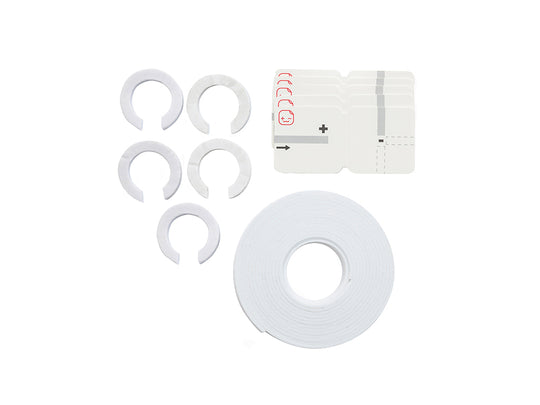
Materials & Tools
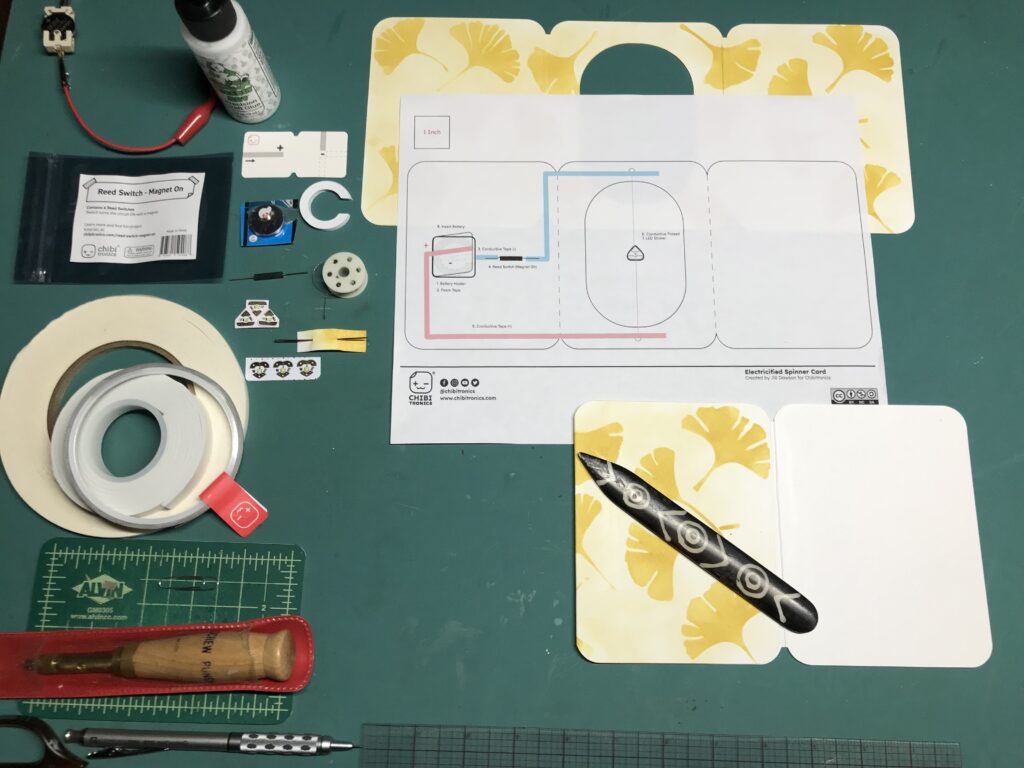
Electronic Supplies
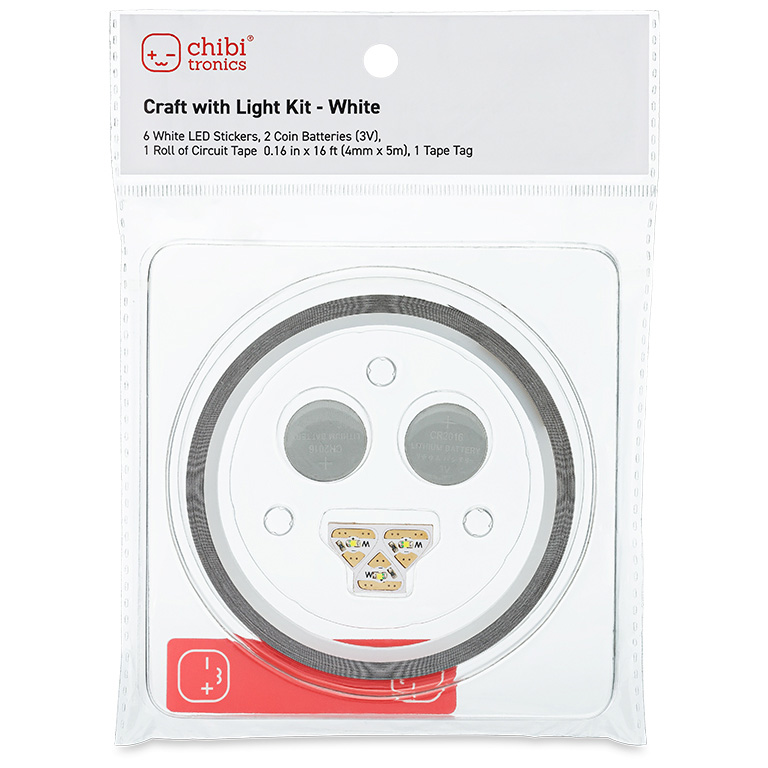
NOTE: A Chibitronics Craft with Light Kit contains many of the electrical components needed to make this project.
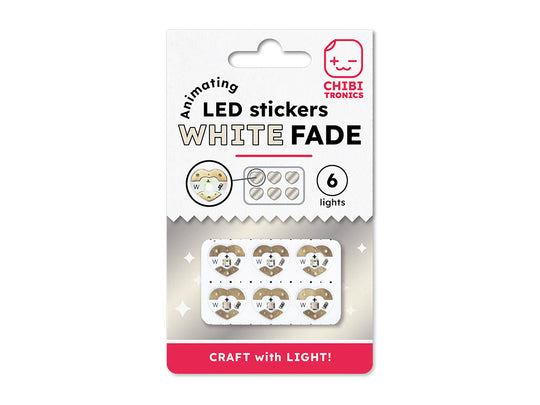
- 2 Circuit Sticker LEDs
- I used white LED stickers. White Fade Animating LEDs and classic white LED stickers both work well (and may even be mixed). If mixing colors, be sure that you do not mix LEDs with vastly different voltage requirements (such as a white and red LED).
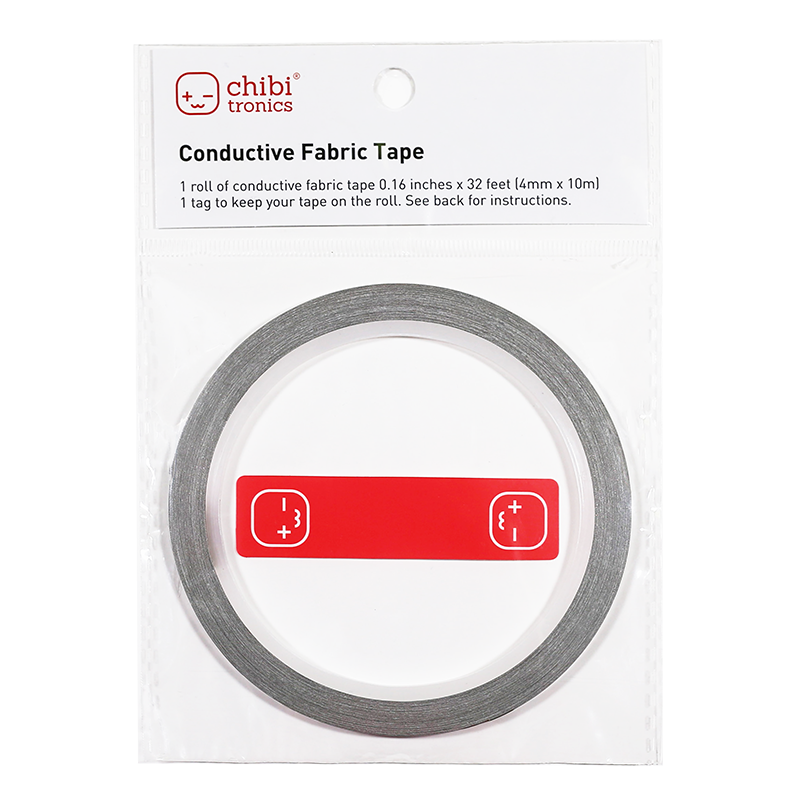
- Conductive Fabric Tape
- 2 X CR2016 coin cell batteries (or 1 CR2032)
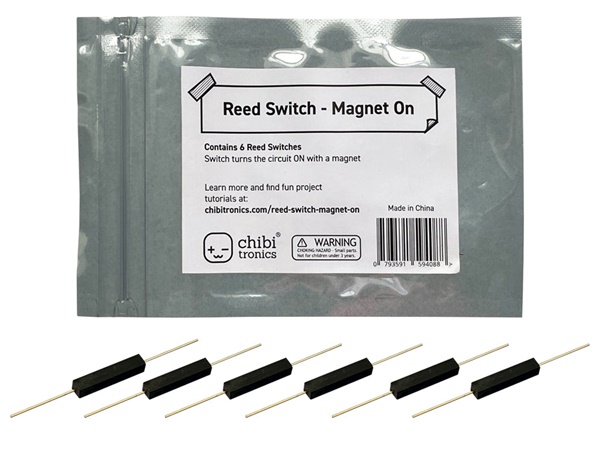
- Reed Switch (Magnet On)
- Spool of smooth, stainless steel, conductive thread. (Tip: Avoid using conductive yarn which is more likely to fray and break)
- 1 magnet (I’m using a self-adhesive one)
Other Tools & Supplies
- Cricut machine
- 2 X pieces of sturdy 11” H X 14 L” paper, such as Strathmore Bristol
- Foam Battery Holder (included in the Chibitronics + We R Makers foam adhesive pack or We R Makers Starter Pack)
- Foam Tape (included in the Chibitronics + We R Makers Foam Adhesive Pack or We R Makers Starter Pack)
- Scissors
- Bone folder
- Double-sided tape
- Needle with a tall, thin eye
- Bearly Art Precision Craft Glue (The Mini)
- Screw punch (if you wish to poke holes through the vellum)
- Small paper clip, nut, or steel washer
- Die cutter
- Art supplies of your choice (I used the following)
Circuit Diagram & Cut Files
Directions
To view a complete demonstration of how to make an Electrified Spinner Card, please visit the video tutorial up top.
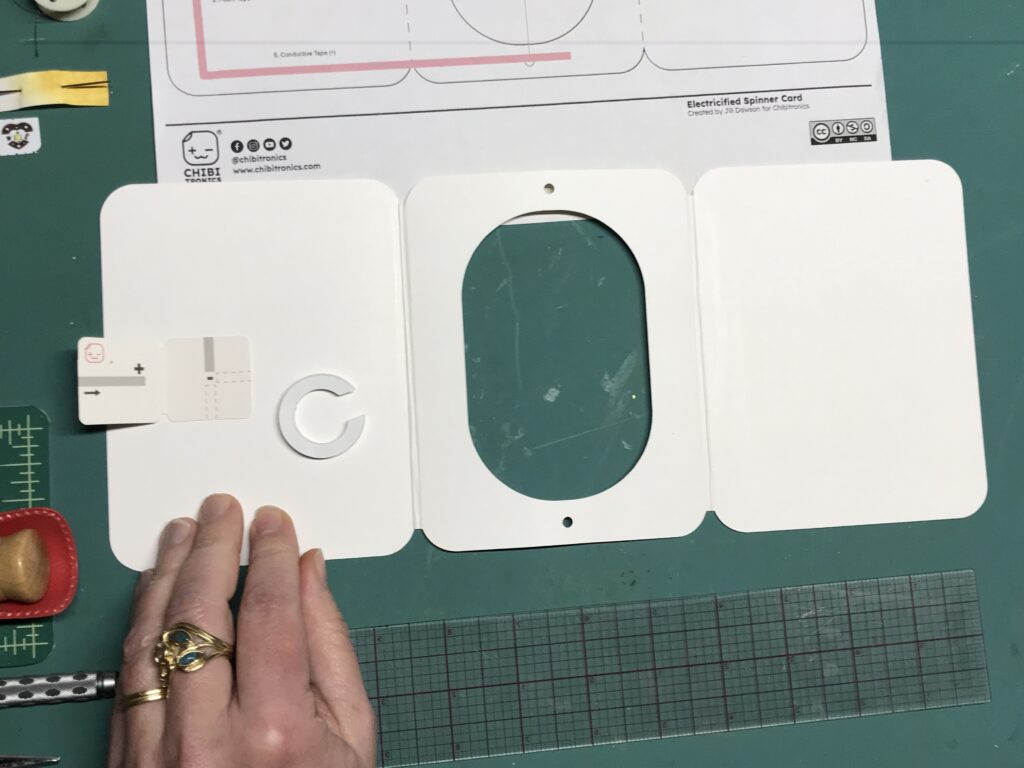
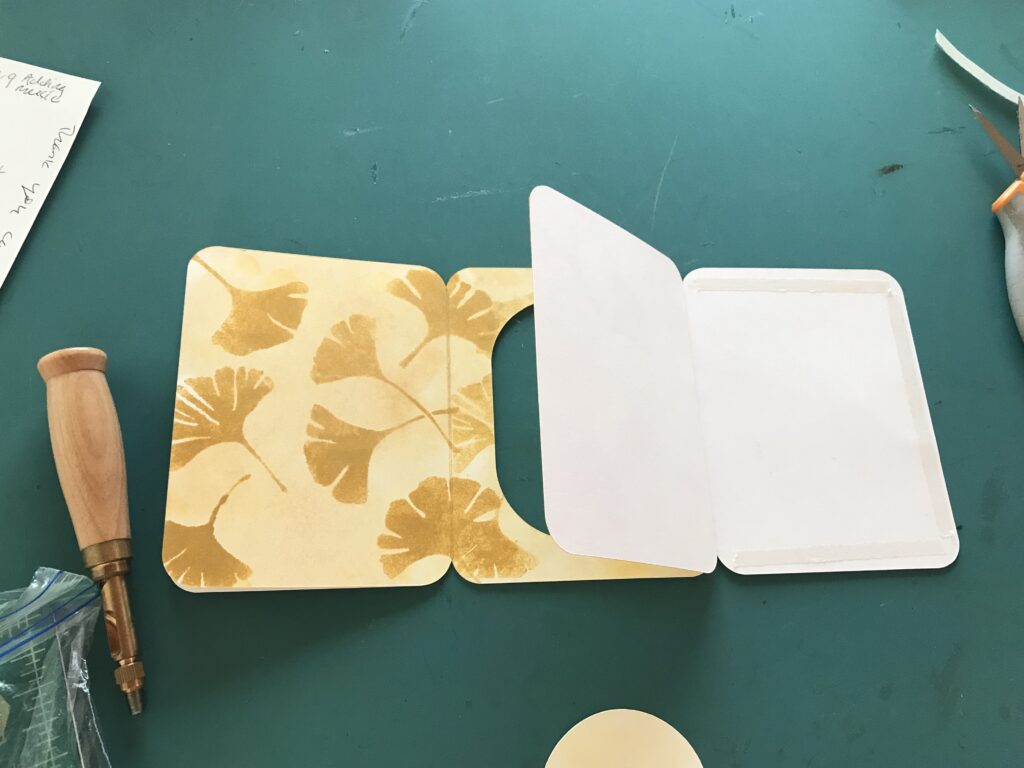
Step 1: Prepare the Pieces
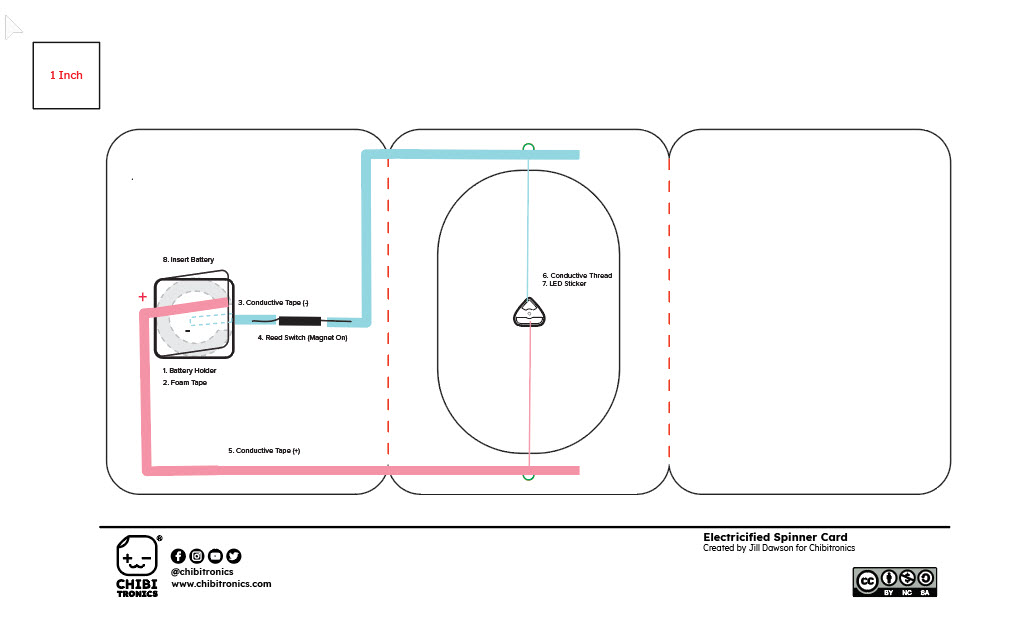
The first step in making your own Electrified Spinner Card is to download and print the circuit diagram. If you select “Fit to page” in your printer settings, the entire diagram will fit on a standard 8 ½ X 11 piece of paper. Of note, the circuit diagram is only for visual reference; it will not print to scale.
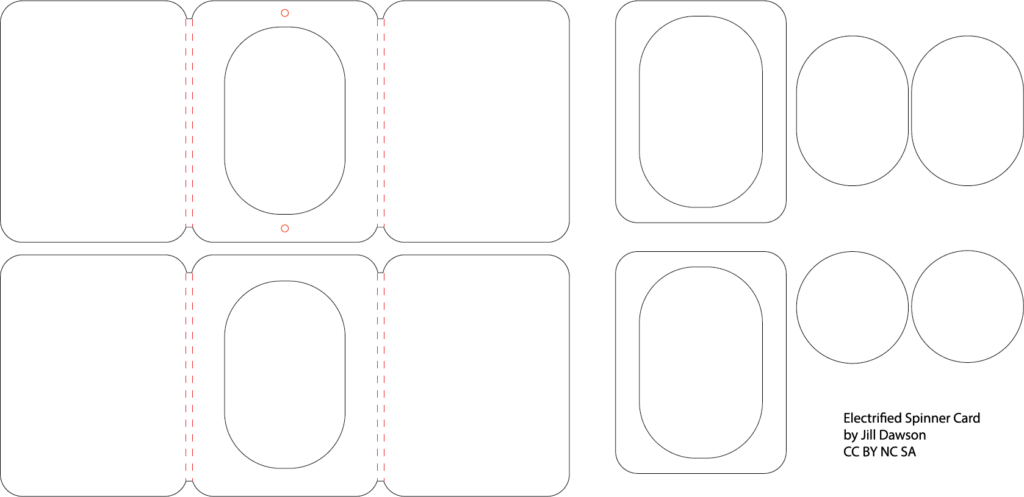
Next, download the SVG and import it into your cutting software. I used a Cricut, which can score as well as cut. If using a Cricut, ungroup everything. Then, select and change each of the red perpendicular lines into scored lines. Attach the scored lines and holes to your canvas before cutting.

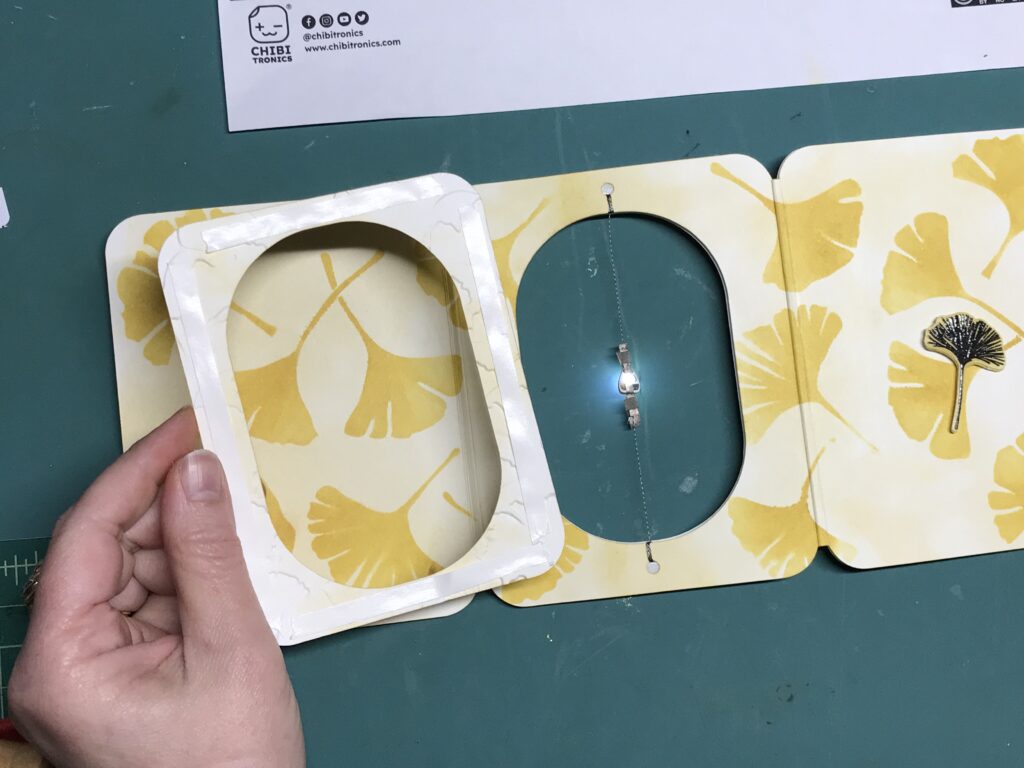
In addition to the main card pieces, the SVG also contains two frames that are designed to be adhered on top of the center panel of the card to disguise the conductive thread near the central holes.
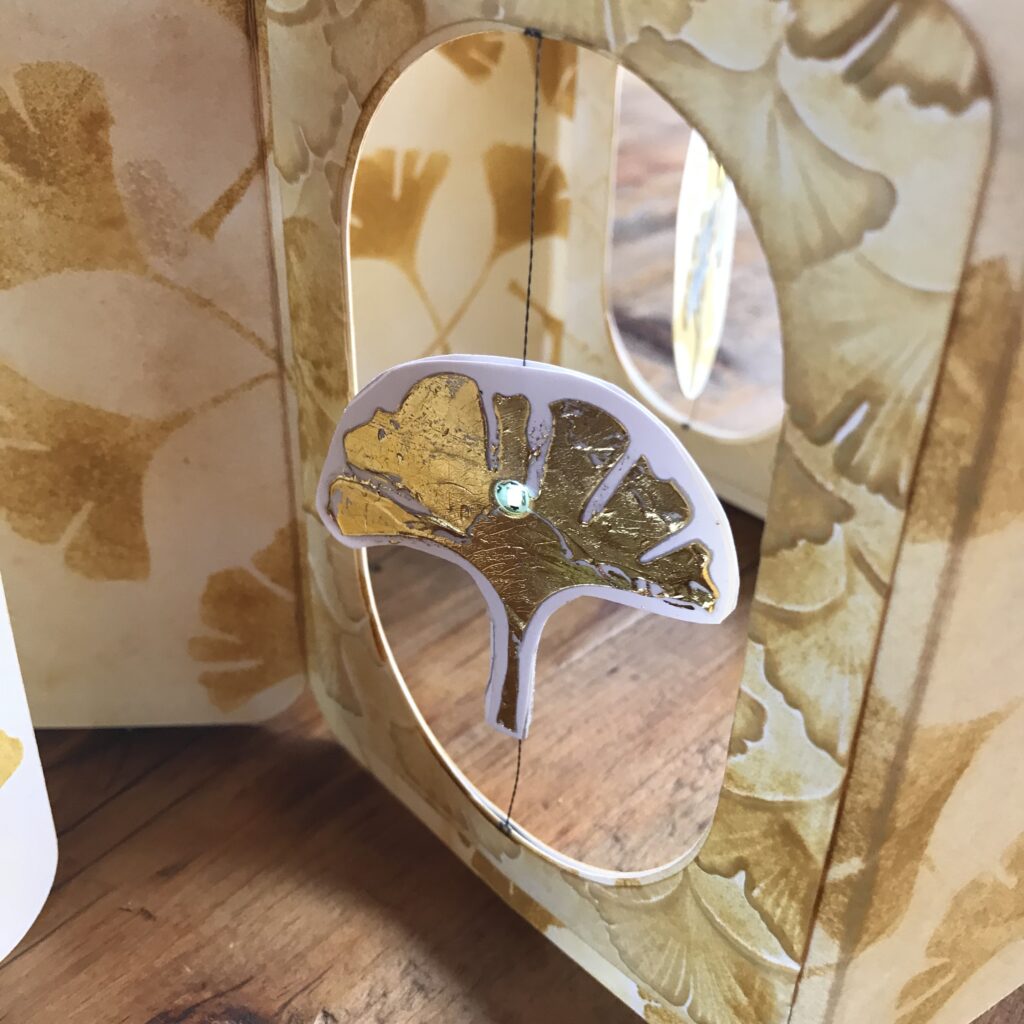
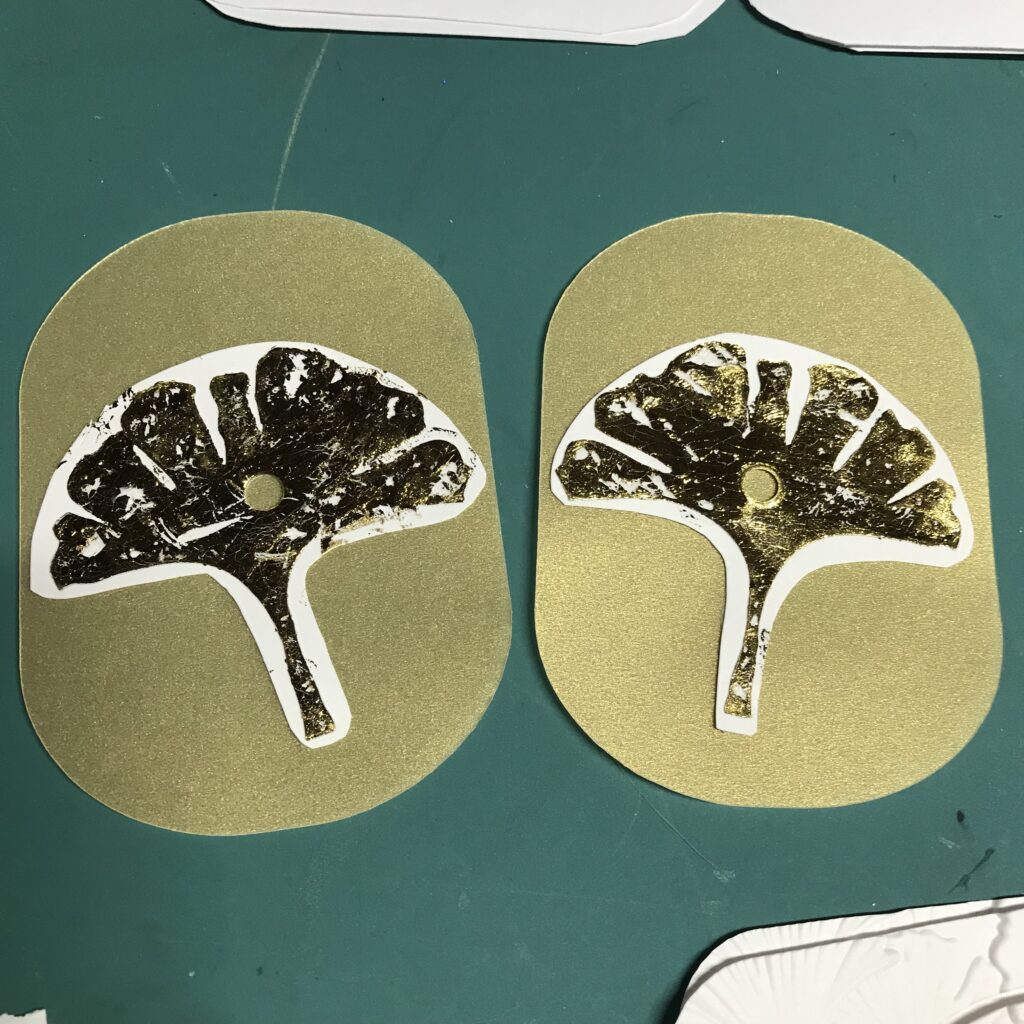
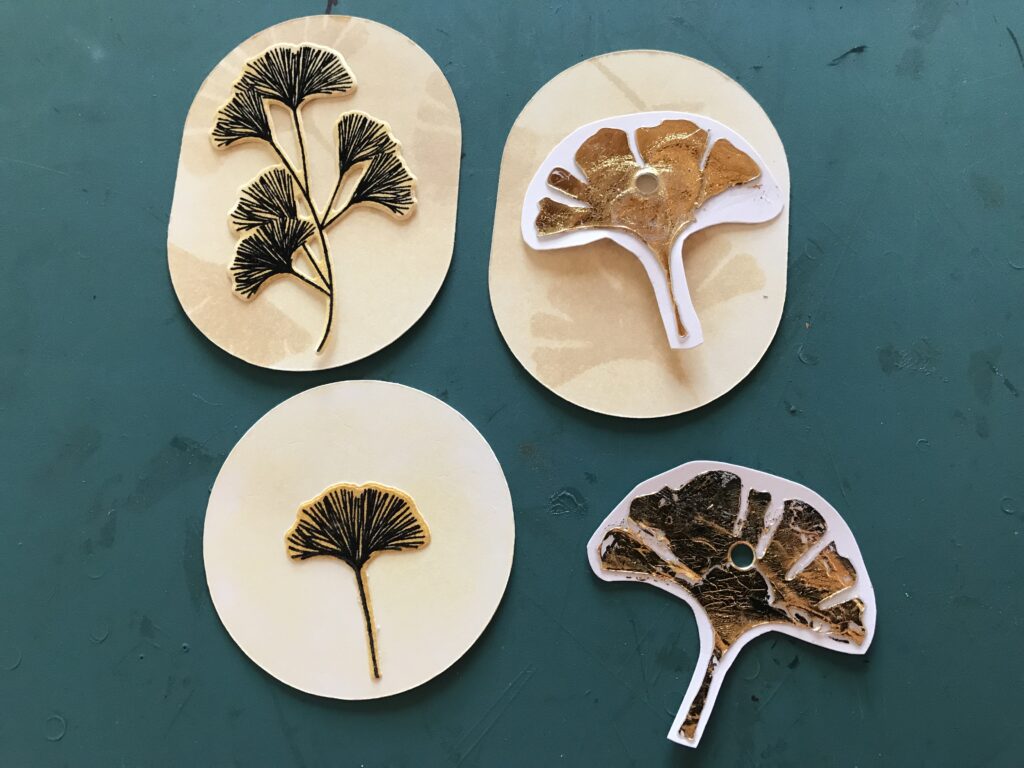
Two ovals and two circles are also provided, which may be used to build your spinner piece.
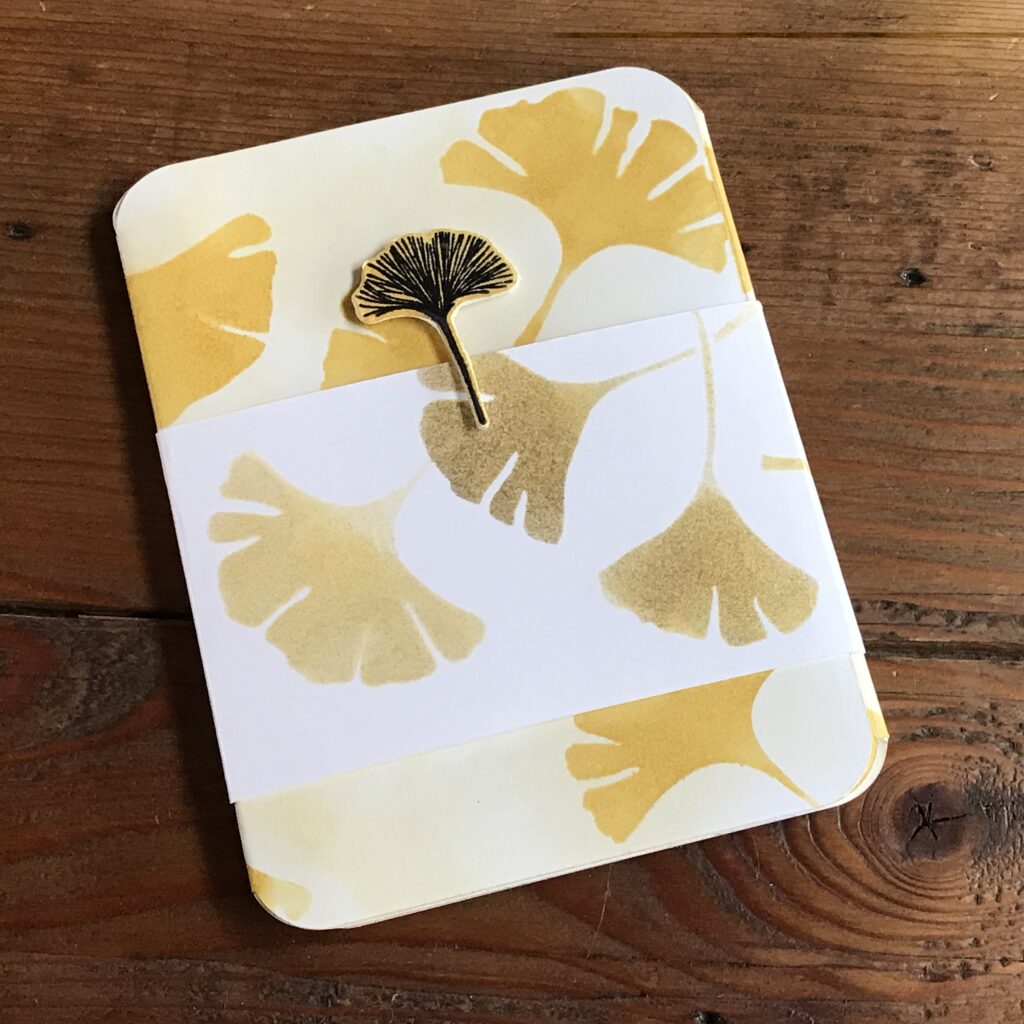
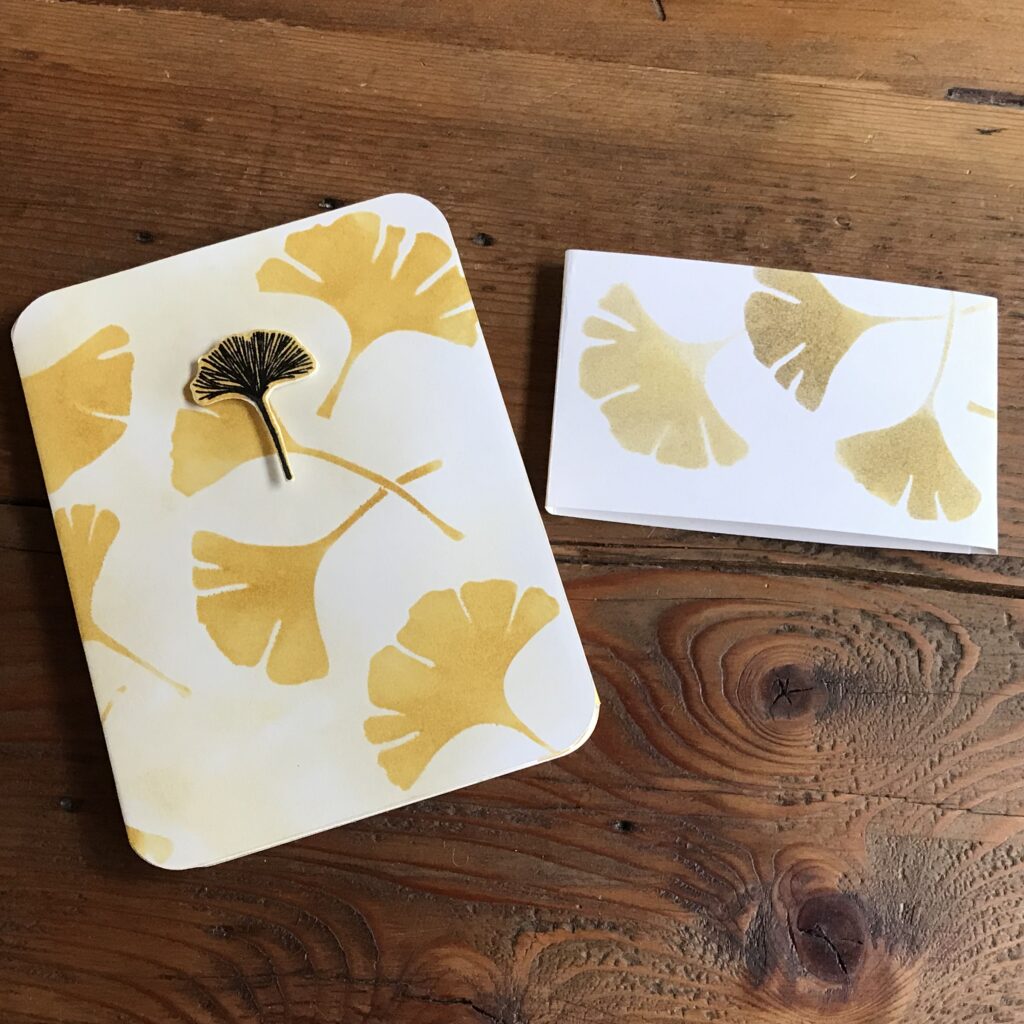
Step 2: Decorate
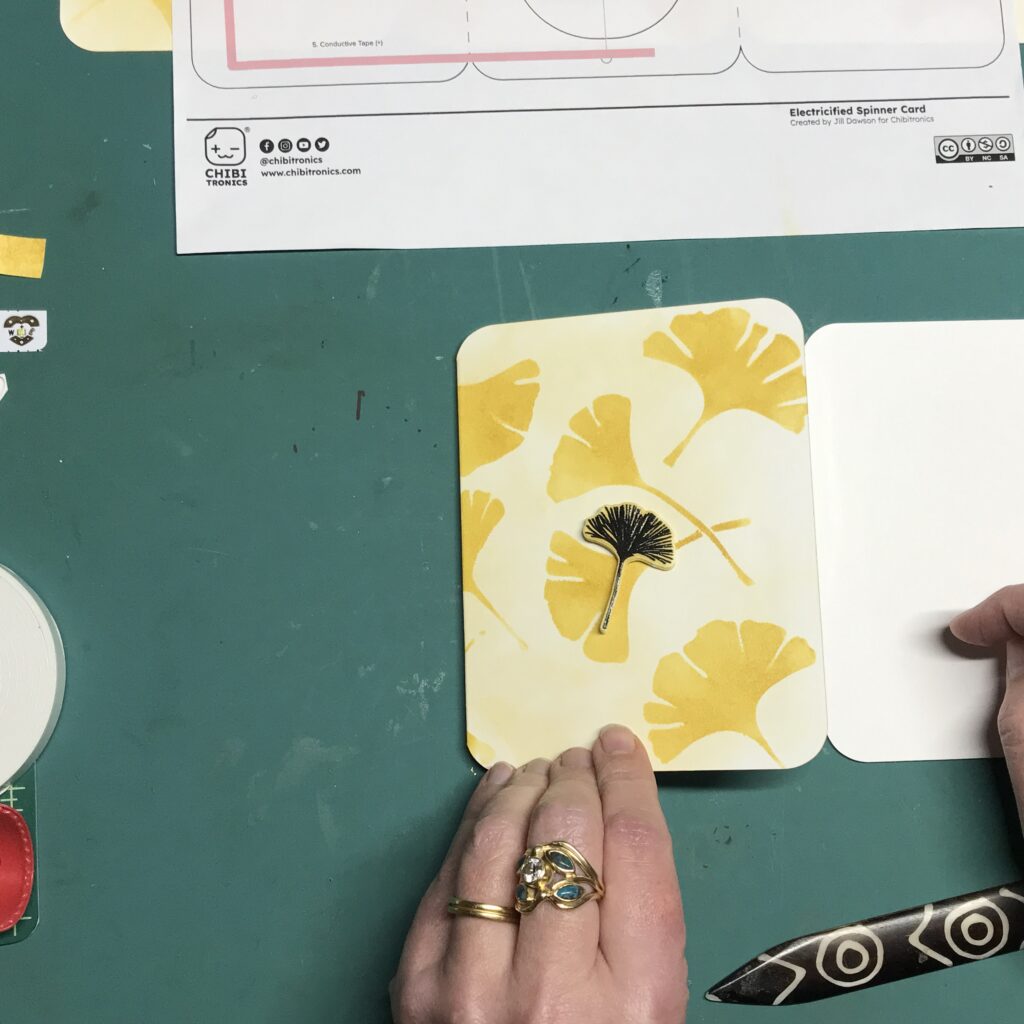
If desired, decorate the pieces with art supplies of your choice prior to folding them along their scored lines.
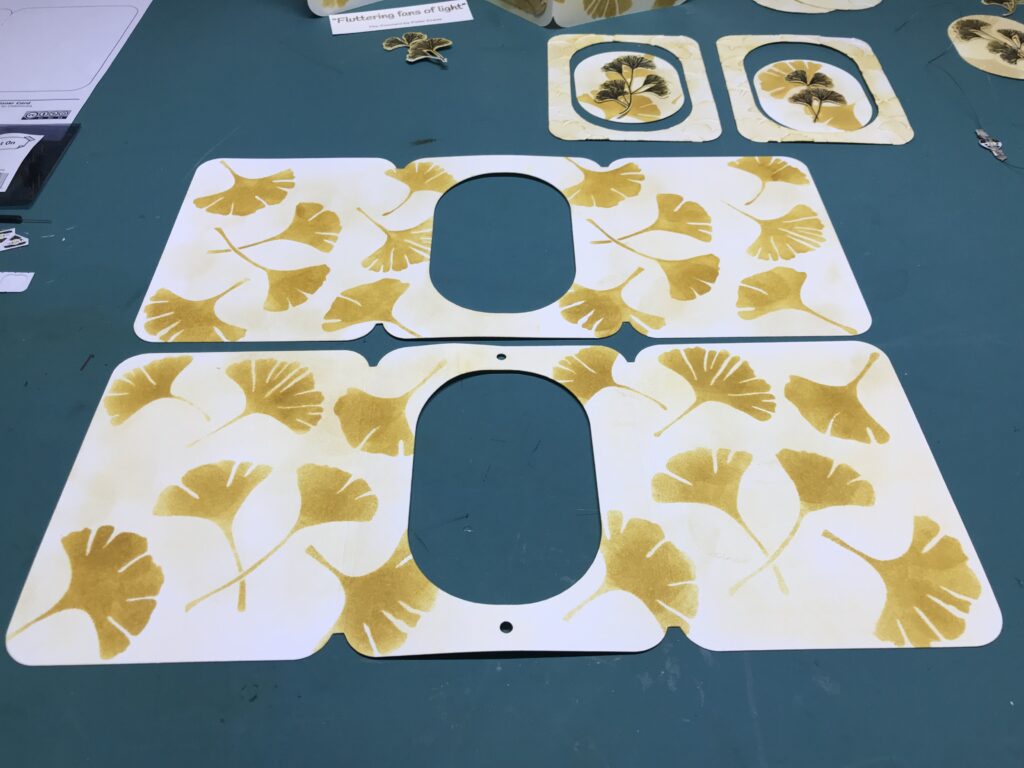
I used a stencil and ink to decorate the main pieces of card, and an embossing folder to make ginkgo leaf impressions on the frames. For decorative elements on the spinners (and to hide the magnets) I used a combination of rubber stamps, dies, and stenciling.
Tips, Tricks & Call-outs
When making an Electrified Spinner Card with one set of LEDs, stacking two CR2016 batteries will increase the brightness of the lights, but it is not necessary. Should you not wish to stack two CR2016s for the card, it is possible to substitute a single CR2032, which is twice the thickness of a CR2016. If you would prefer to use a single CR2016, you can make your own battery holder, rather than using the one depicted in this tutorial. To learn more, see Adaptations.
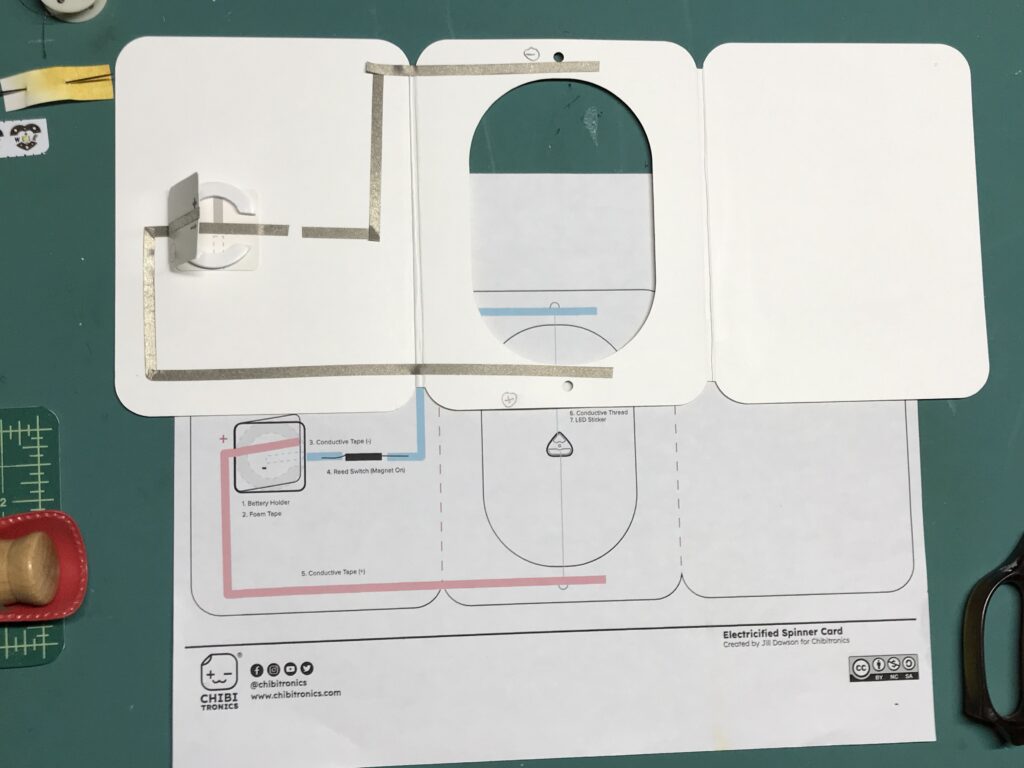
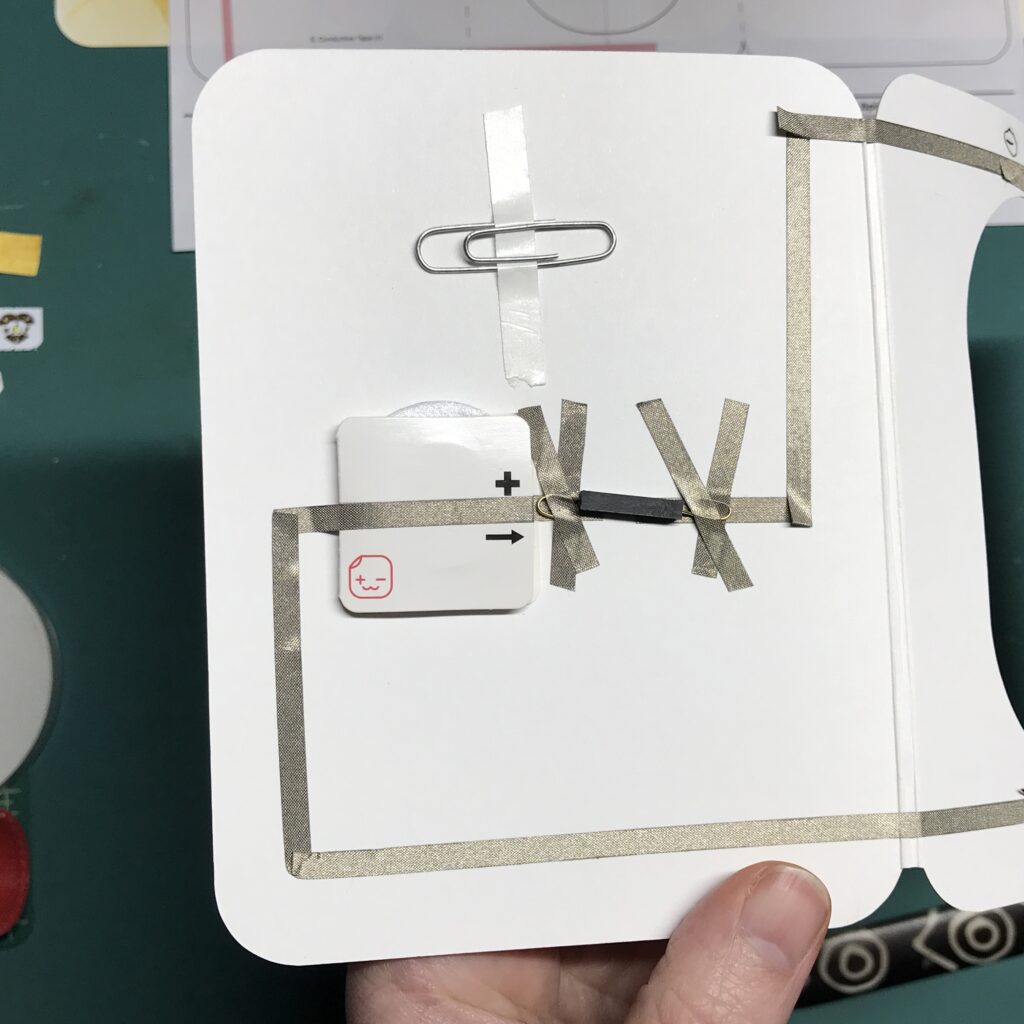
Step 3: Start Building Circuit
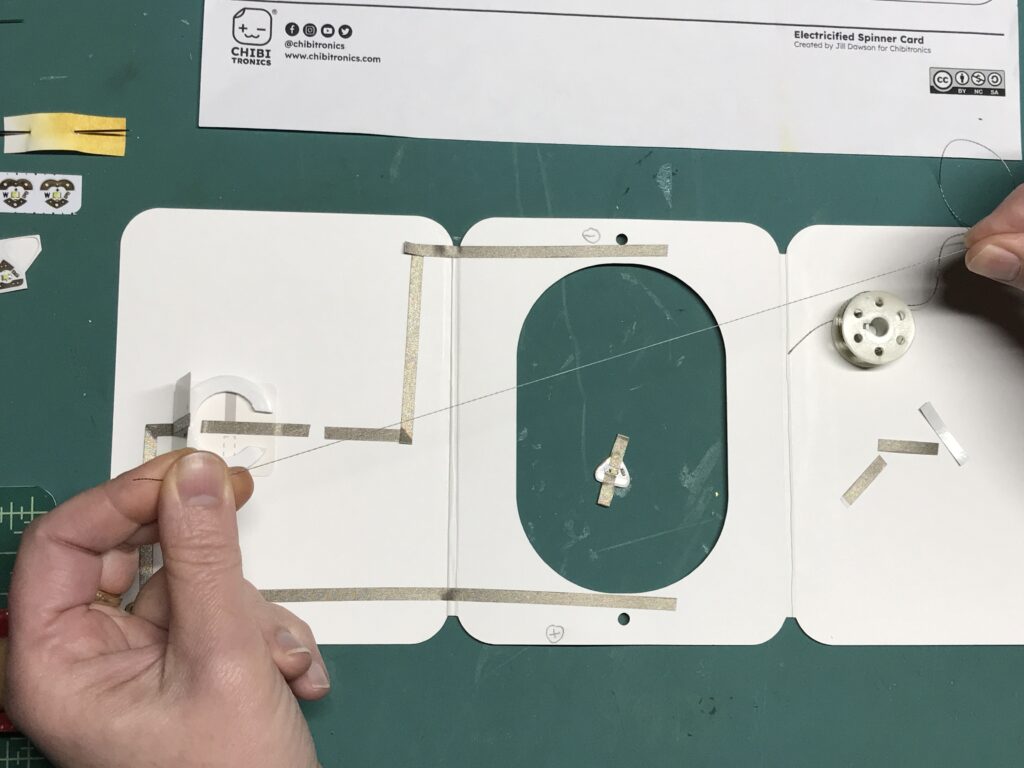
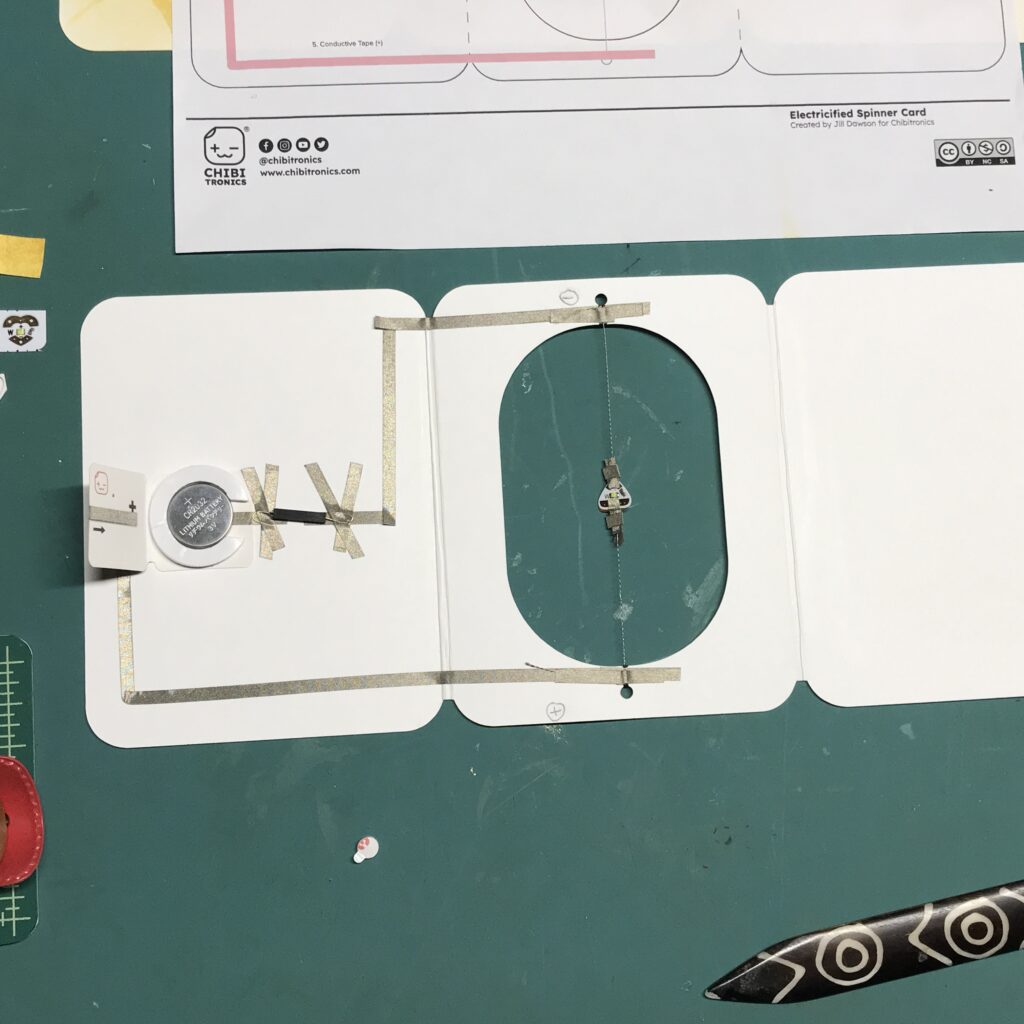
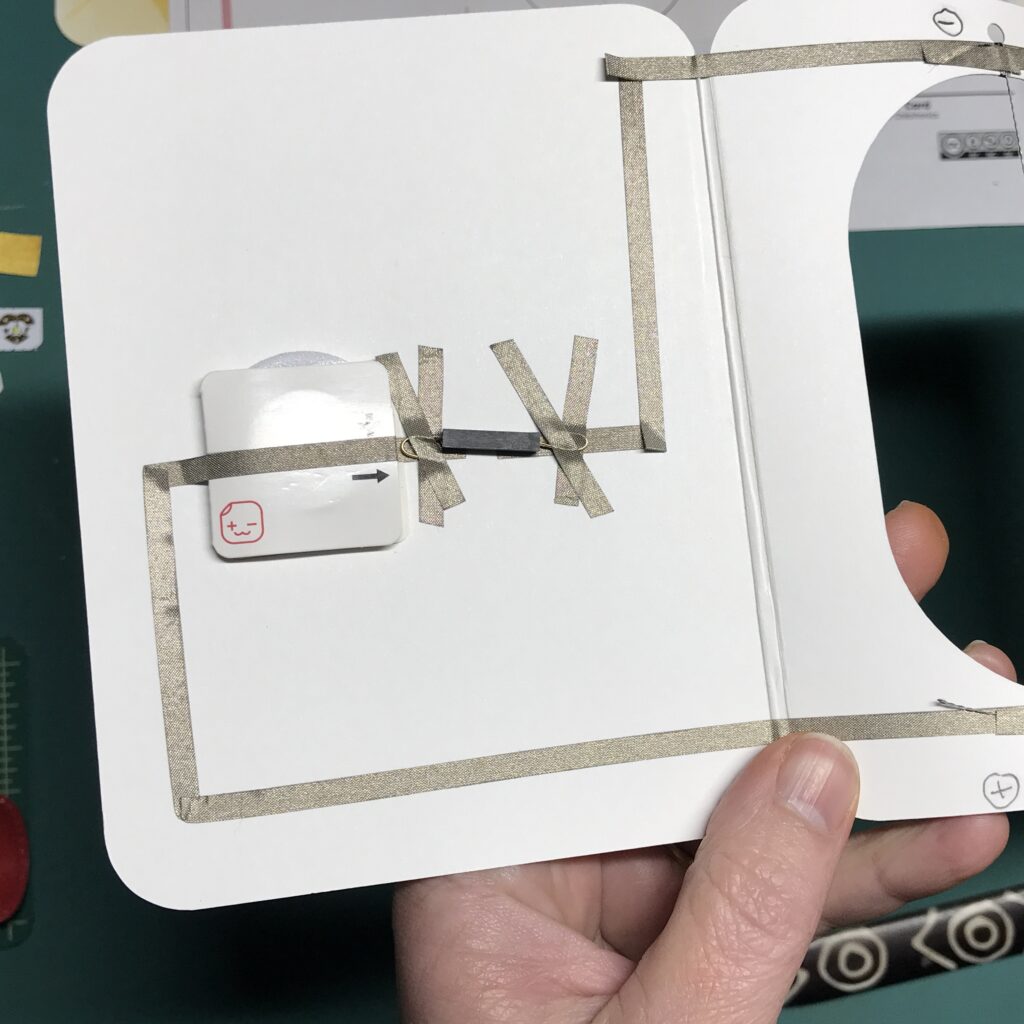
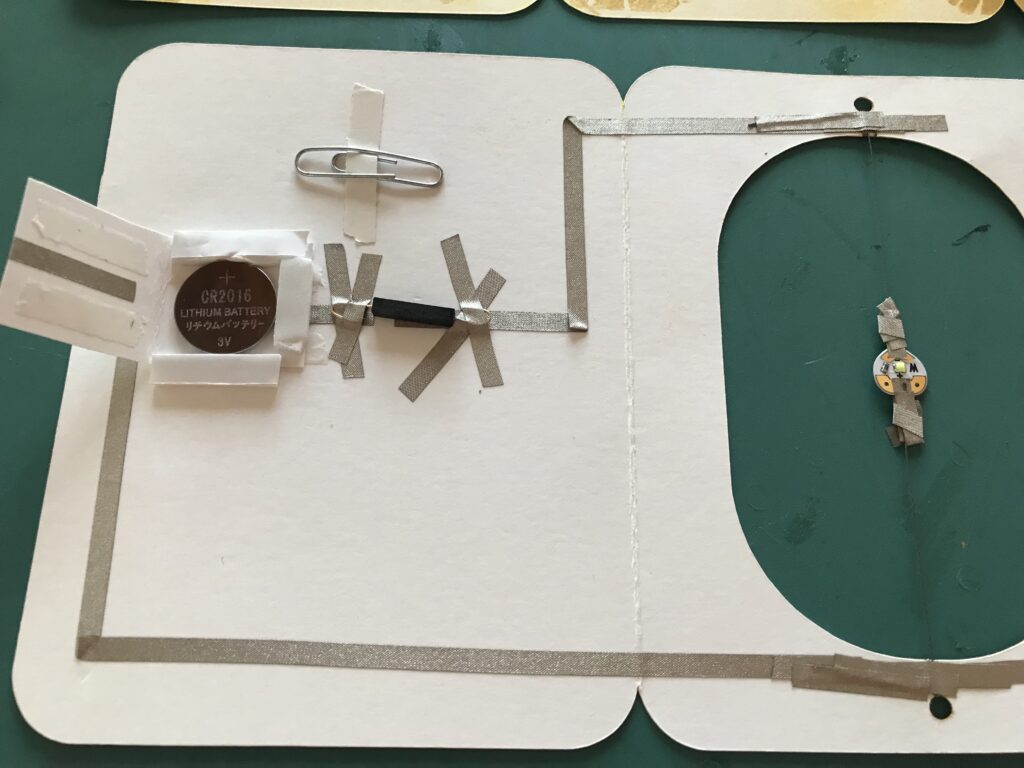
Using the circuit diagram as a guide, place your battery holder template near the left edge of the undecorated side of the circuit layer (the piece with the holes).
Make sure that you leave a bit of space between the battery holder and the left edge of the card for the conductive fabric traces and foam tape.
Start by laying down the negative trace, which will extend under your battery. Leave a gap in the center of the card for a reed switch (magnet on). You’ll be adding a reed switch (magnet on) in an upcoming step.
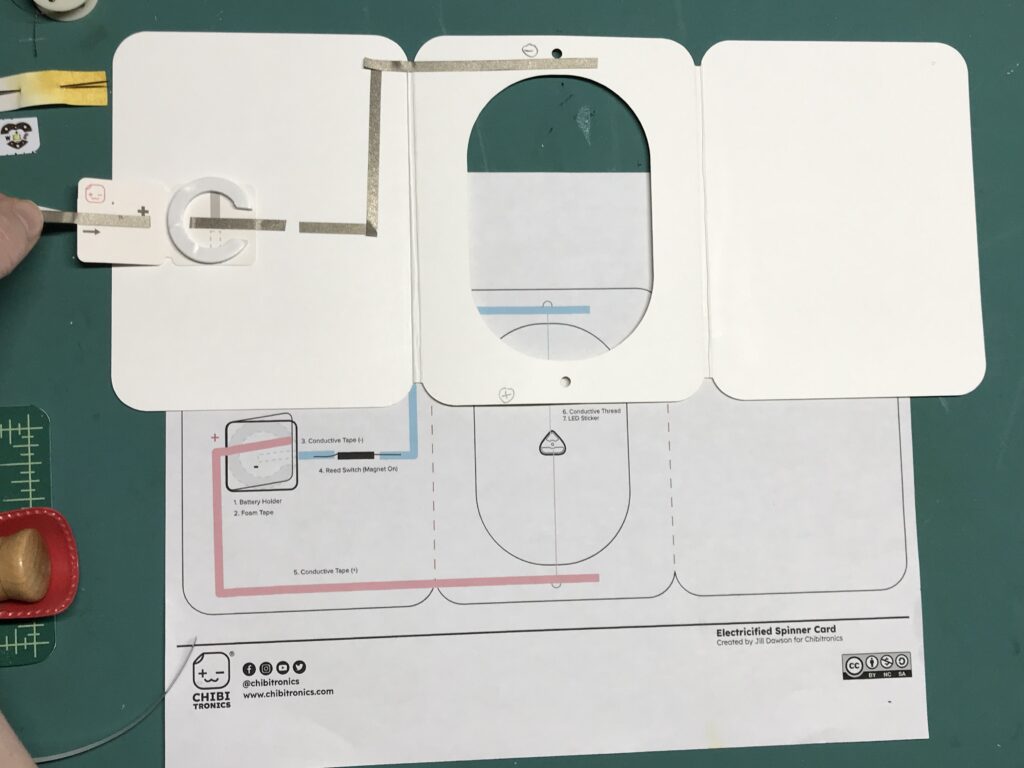
Then, lay down the positive trace, which will wrap around the battery holder and make contact with the top of the battery, once it’s placed inside.
Step 4: Prep & Attach LEDs
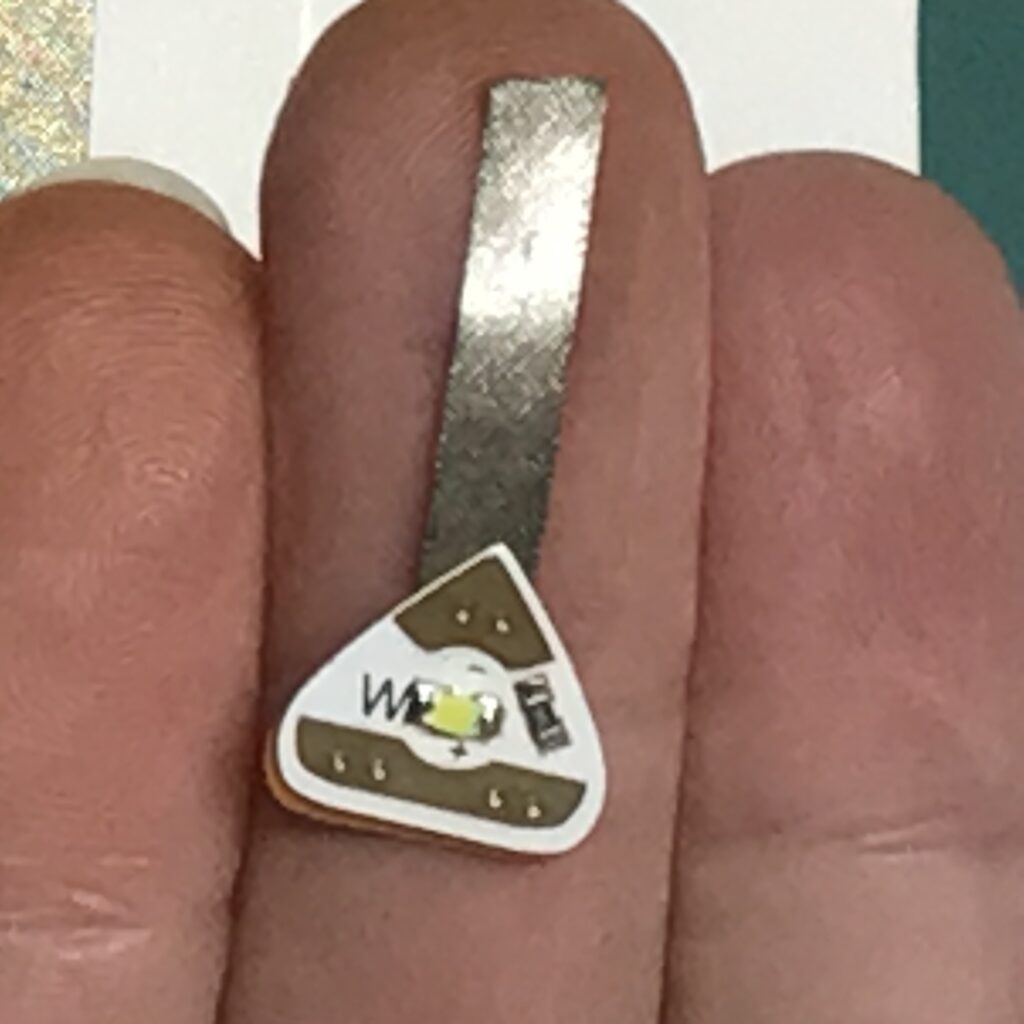
The next step is to prepare your LEDs.
If you wish for the light to be visible on both sides of the spinner, you’ll need two Circuit Sticker LEDs.
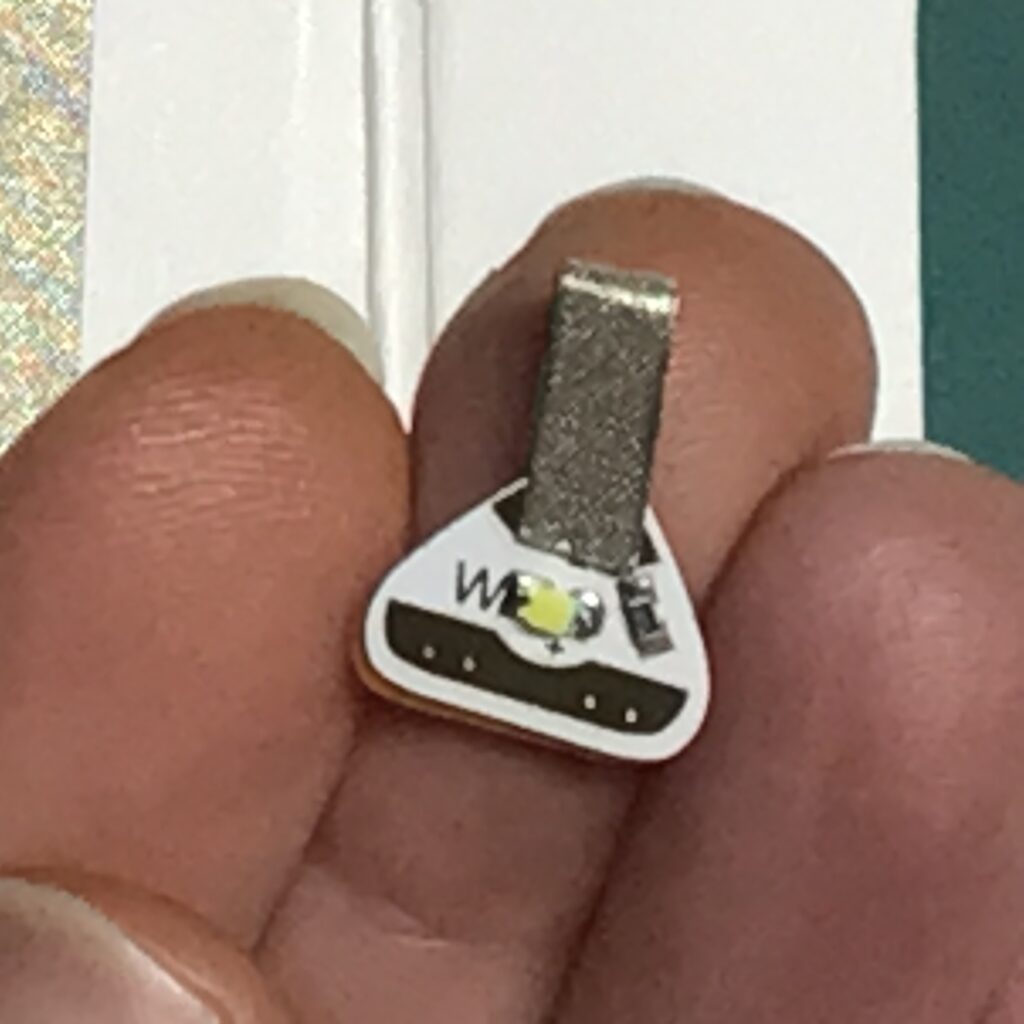
Apply two LEDs with similar voltage requirements back to back, carefully lining them up so that the polarities on each sticker match (positive to positive and negative to negative). Since I made several models, I used classic white LEDs for some and white fade Animating LEDs for others.

Next, adhere a folded tab of conductive fabric tape over the pads of each sticker pair, so that it wraps from the front to the back of each. Each sticker pair should have two tabs of tape extending from the positive and negative sides.
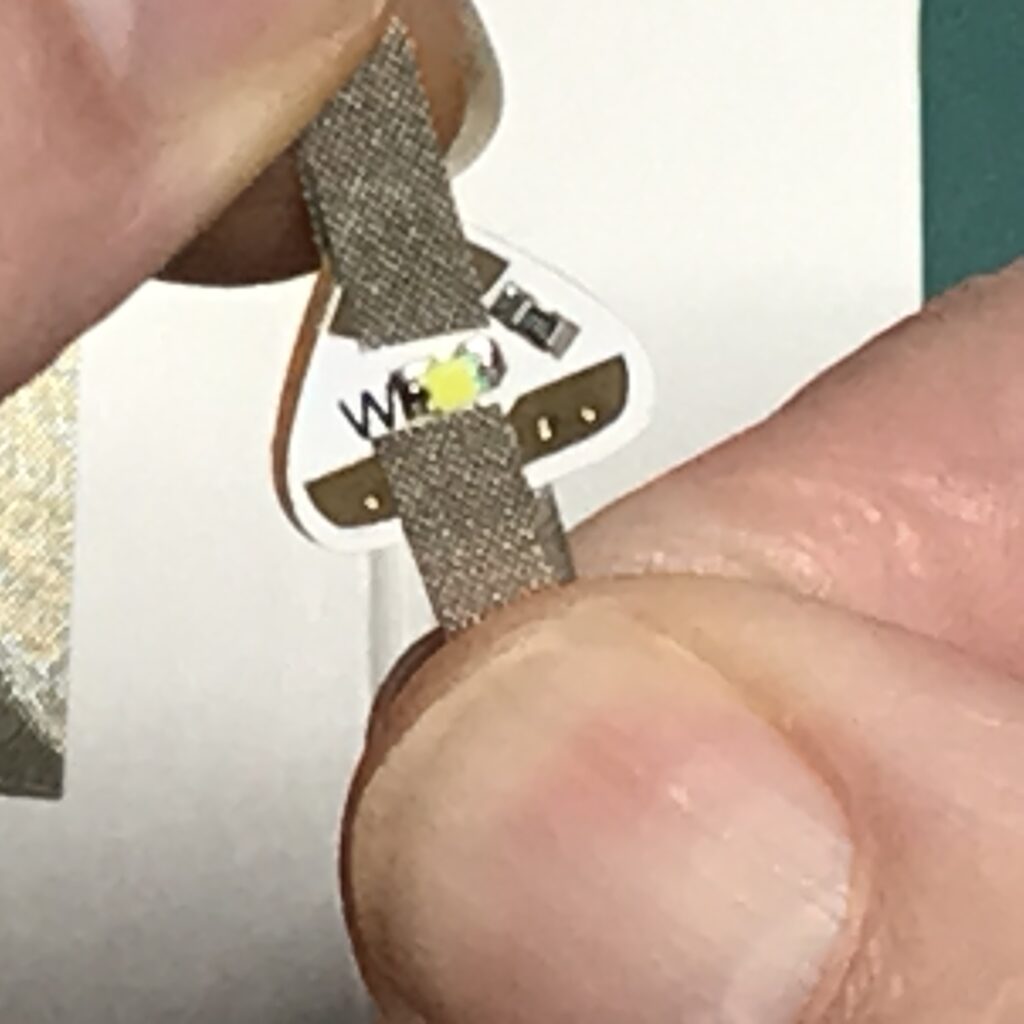
For each sticker pair, cut two pieces of smooth conductive thread that are approximately 6-7 inches long (enough to connect with the sticker and wrap around the card/book part at least two to three times).
Thread the needle with conductive thread and make a tight knot at one end of the thread; do not double the thread when you knot it.
Sew through each conductive fabric tab a couple of times to secure it in place. Then, rather than trimming the tails that might be extending from the knots you made, wrap a piece of conductive fabric tape around the threaded tabs to trap the tails underneath of it. This will keep the knots from coming loose over time; trim off any excess tape.
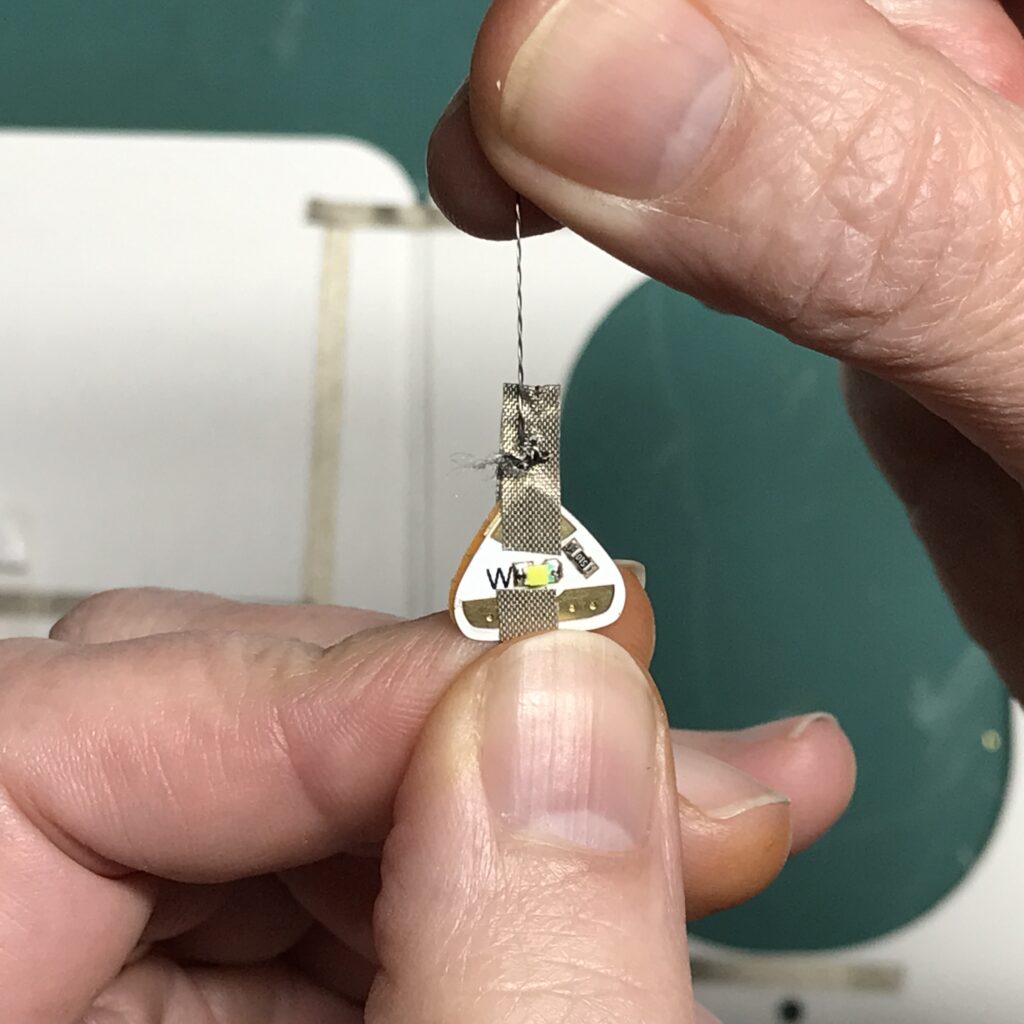
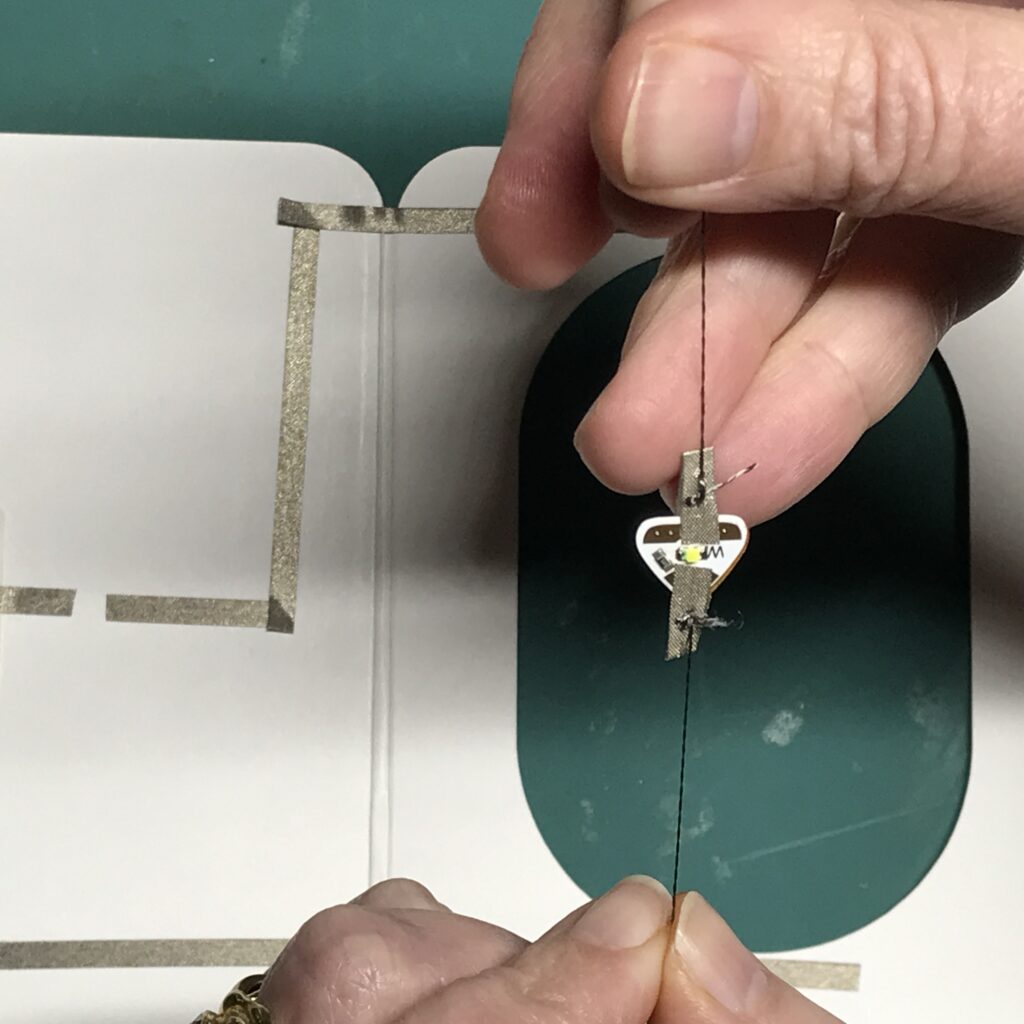
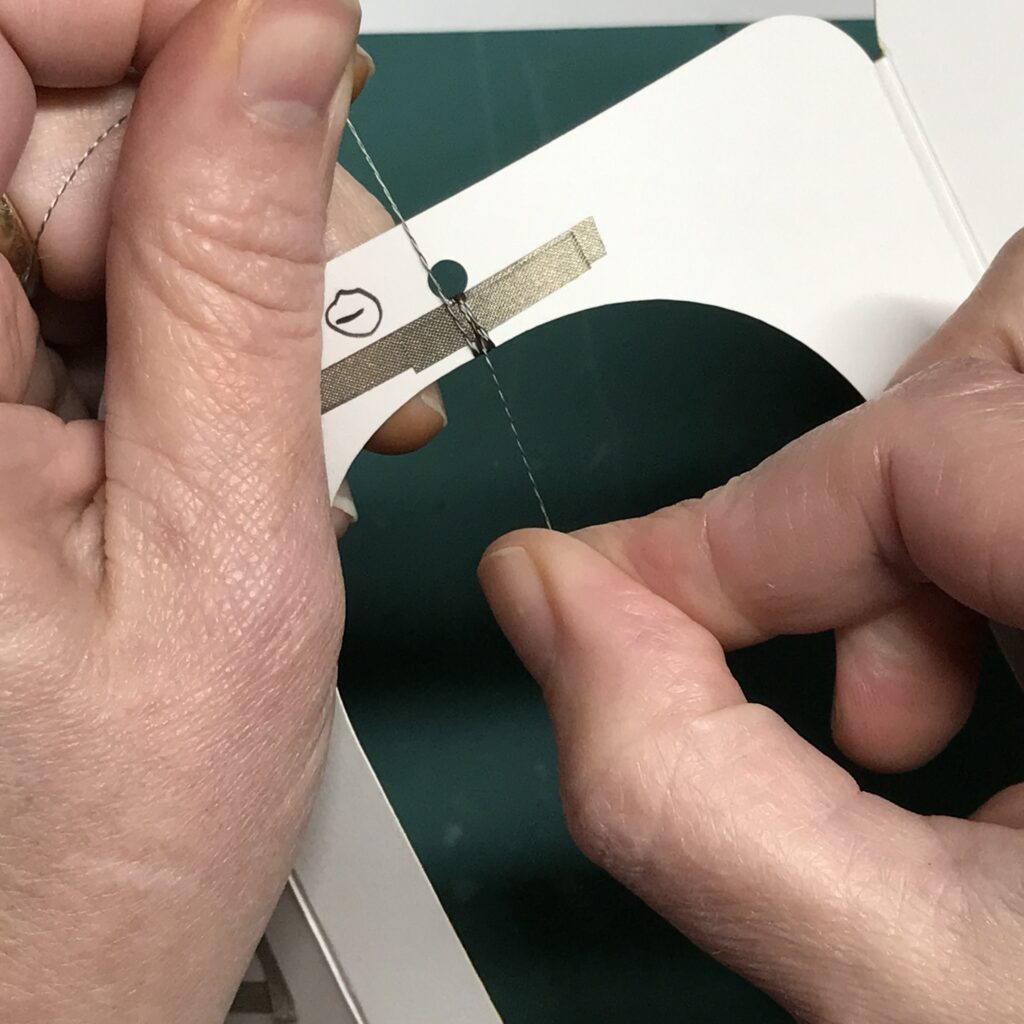
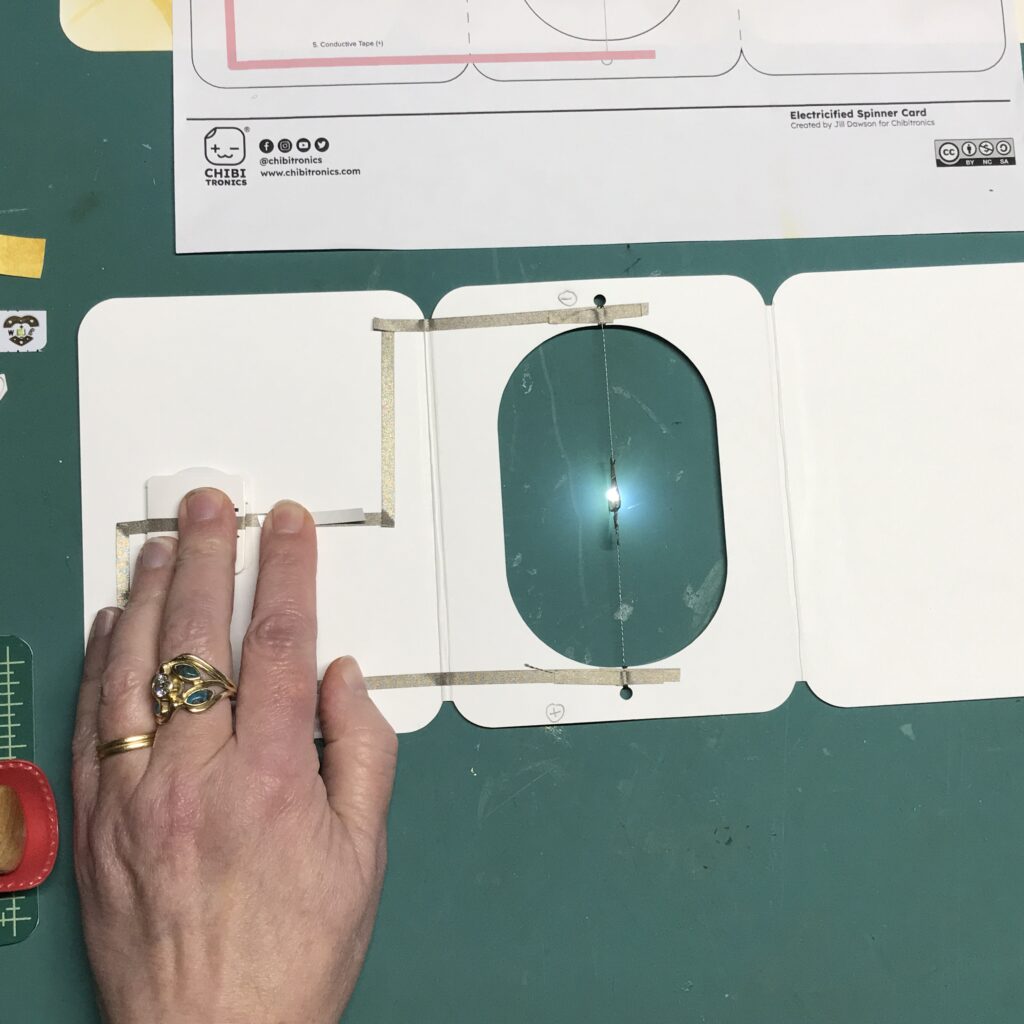
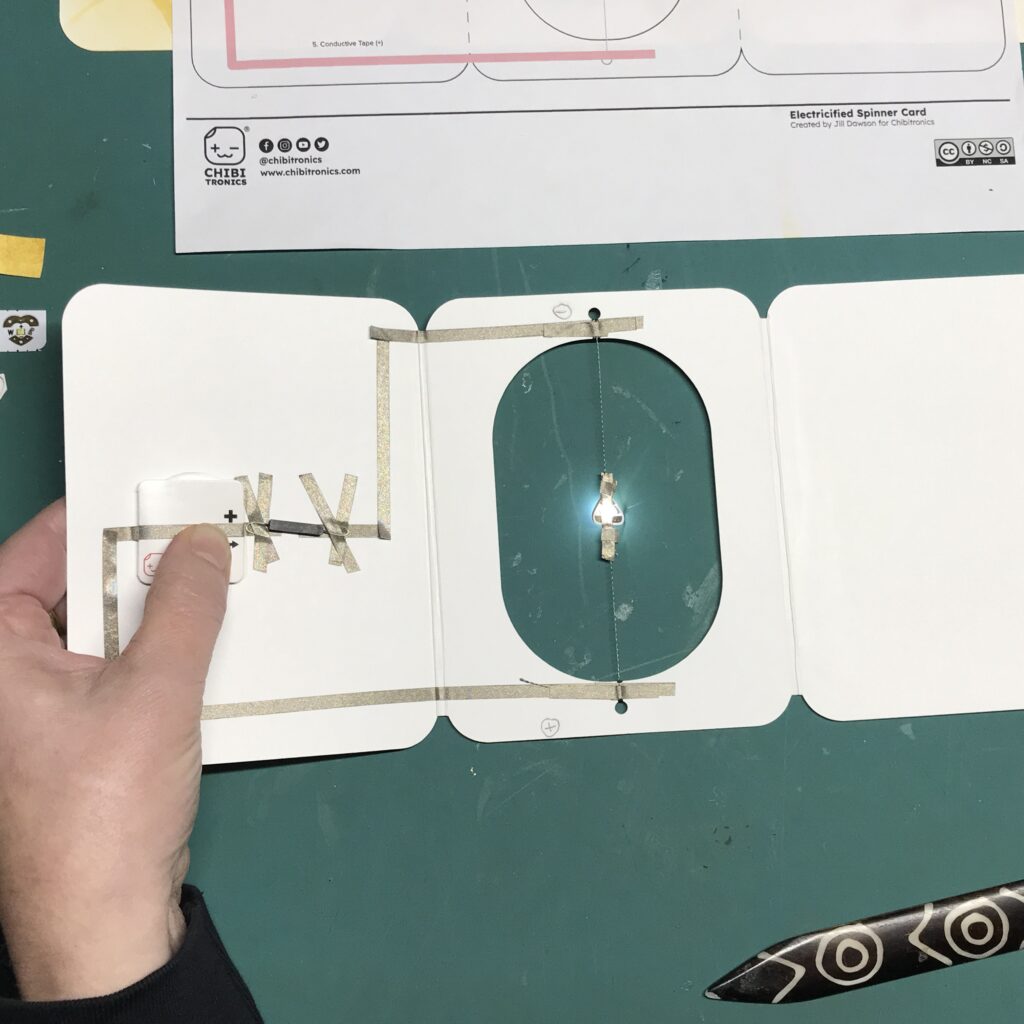
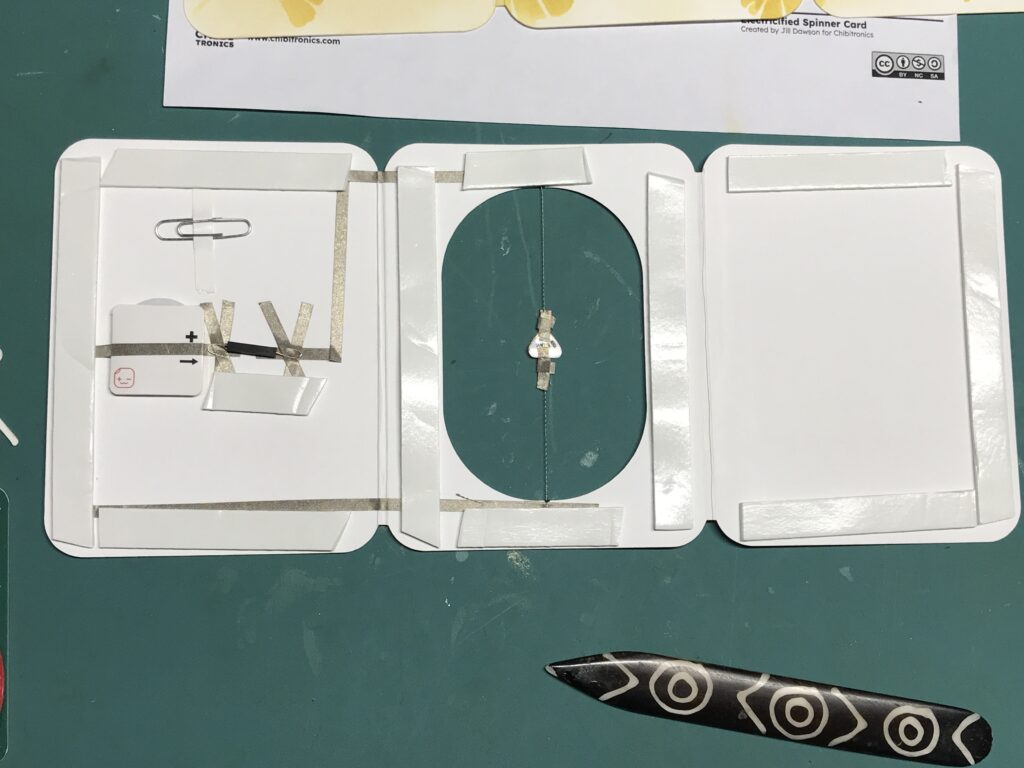
Center each LED pair between the holes on the circuit layer. Secure them each in place with a piece of conductive fabric tape to keep them from slipping as you secure the ends to the card. Then, wrap the threads through their respective holes along the inner edge of the oval cut-out.
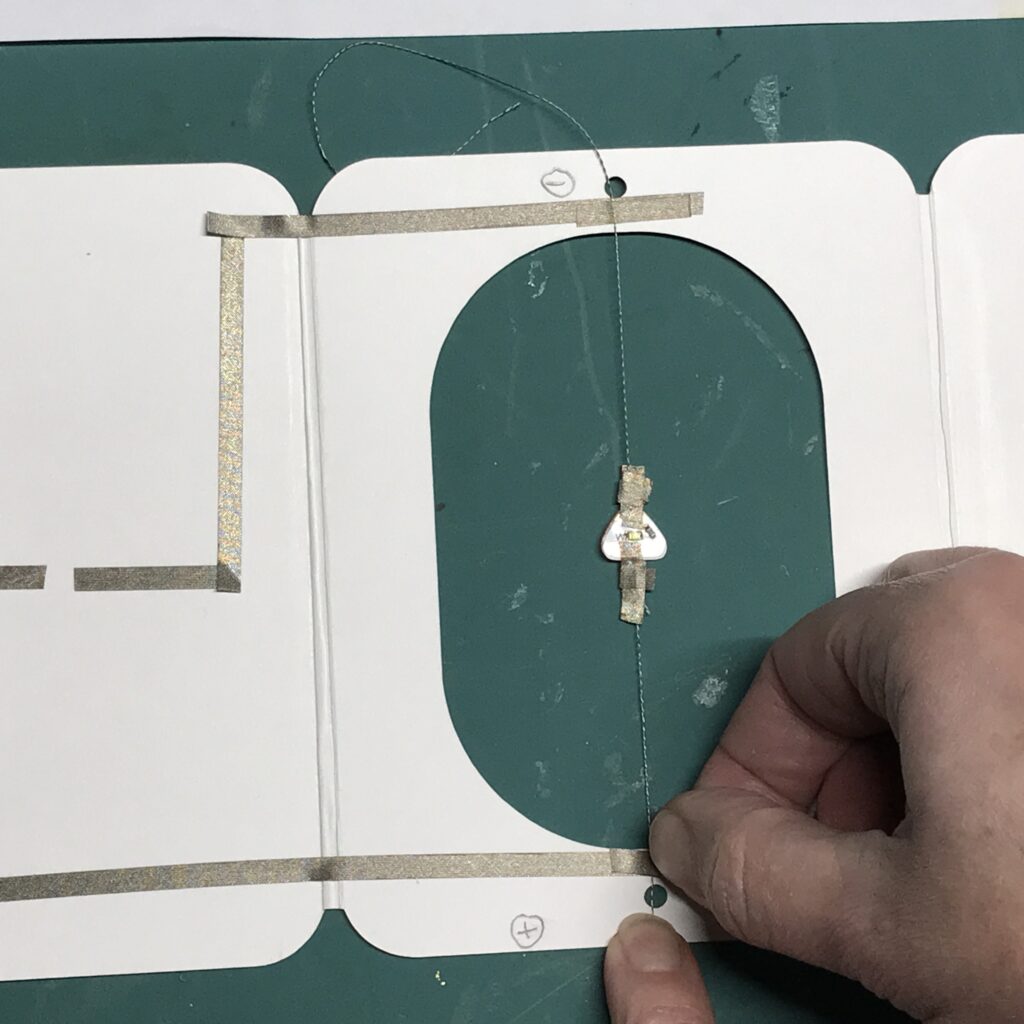
If you wrap the thread around the outer edges of the card, rather than the inner ones, the thread will be visible on the outer perimeter of the card, even if you use one of the paper frames to conceal it.
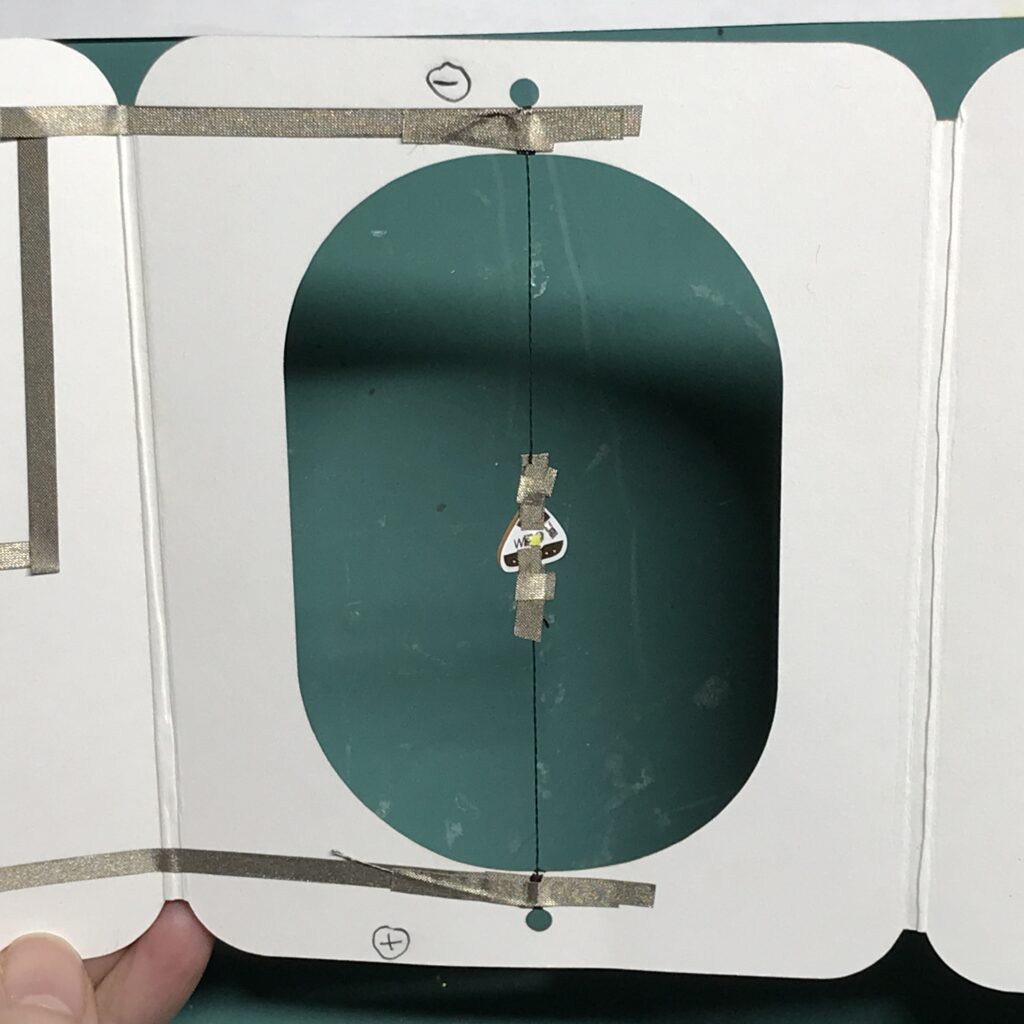
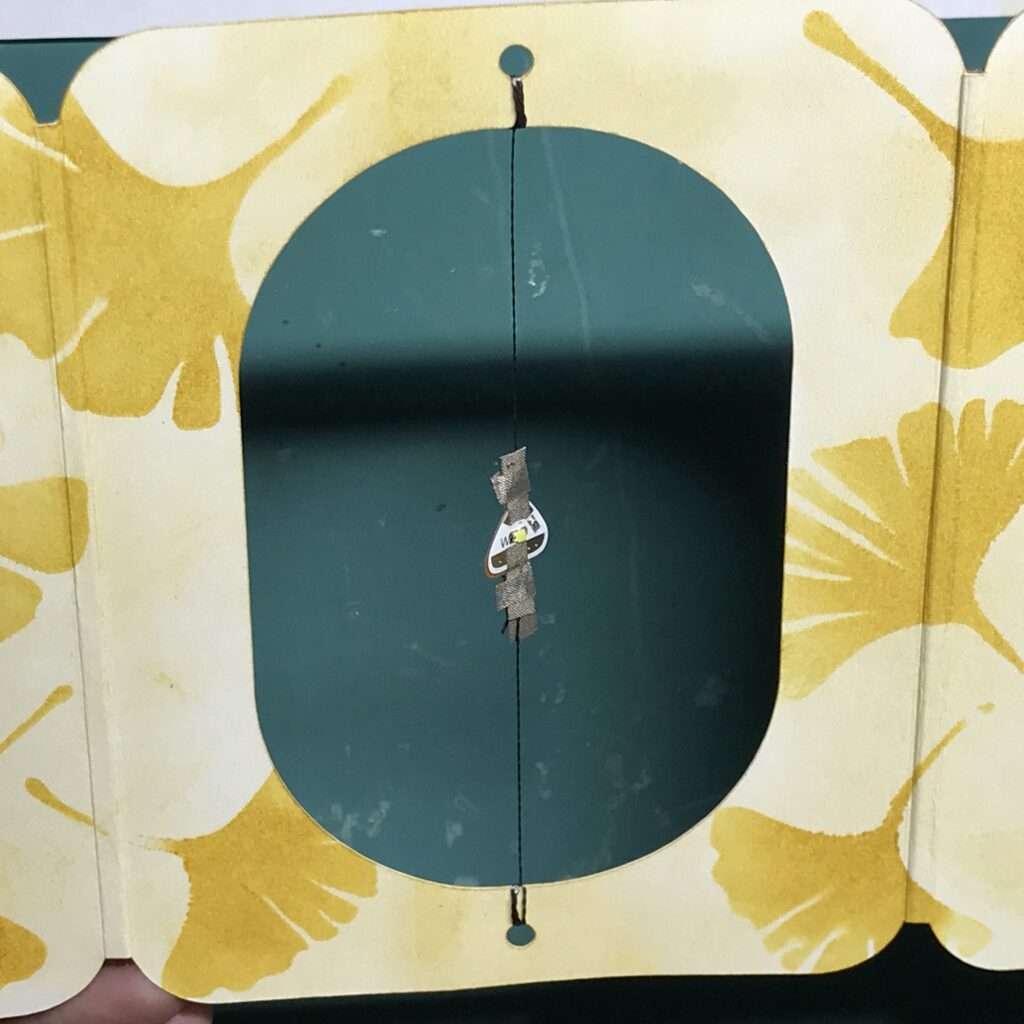
Secure the thread in place over the conductive traces using conductive fabric tape.
Make sure that the threads holding the LEDs are centered, not too loose, and that the thread is well secured.
Test the circuit by inserting a CR2032 or two CR2016 batteries into the holder (negative side down), closing the flap, and holding a piece of conductive fabric tape over the gap in the negative trace.
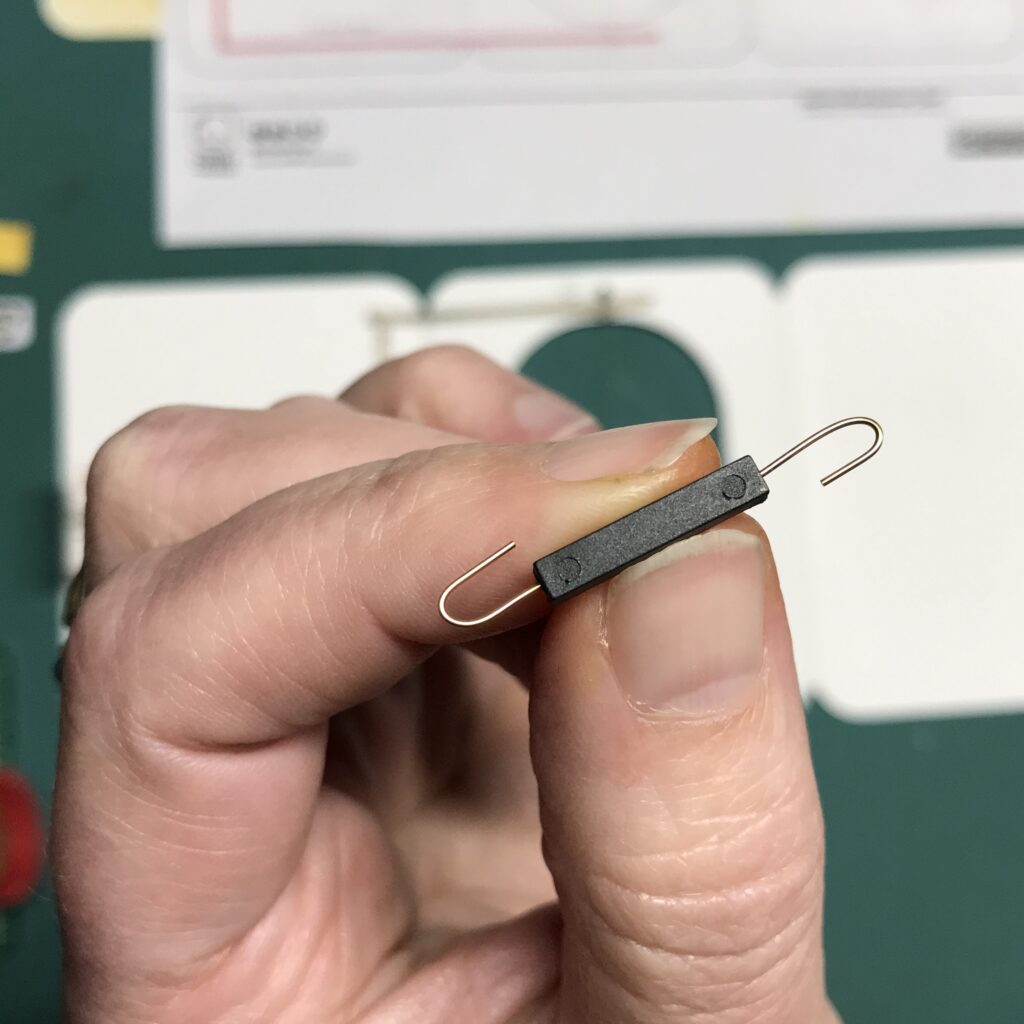
Step 5: Add Reed Switch
Now that you’ve confirmed that your LEDs and thread are well connected, it’s time to add the reed switch (magnet on) between the gap in the negative trace.
I find it helpful to locate the side of the reed switch with the two recessed dots and then curl the legs of the reed switch to make it easier to secure. Place the switch with the dots facing down. Secure it in place with conductive fabric tape.

Test the circuit by holding a magnet on the front side of the card, directly on top of the reed switch.
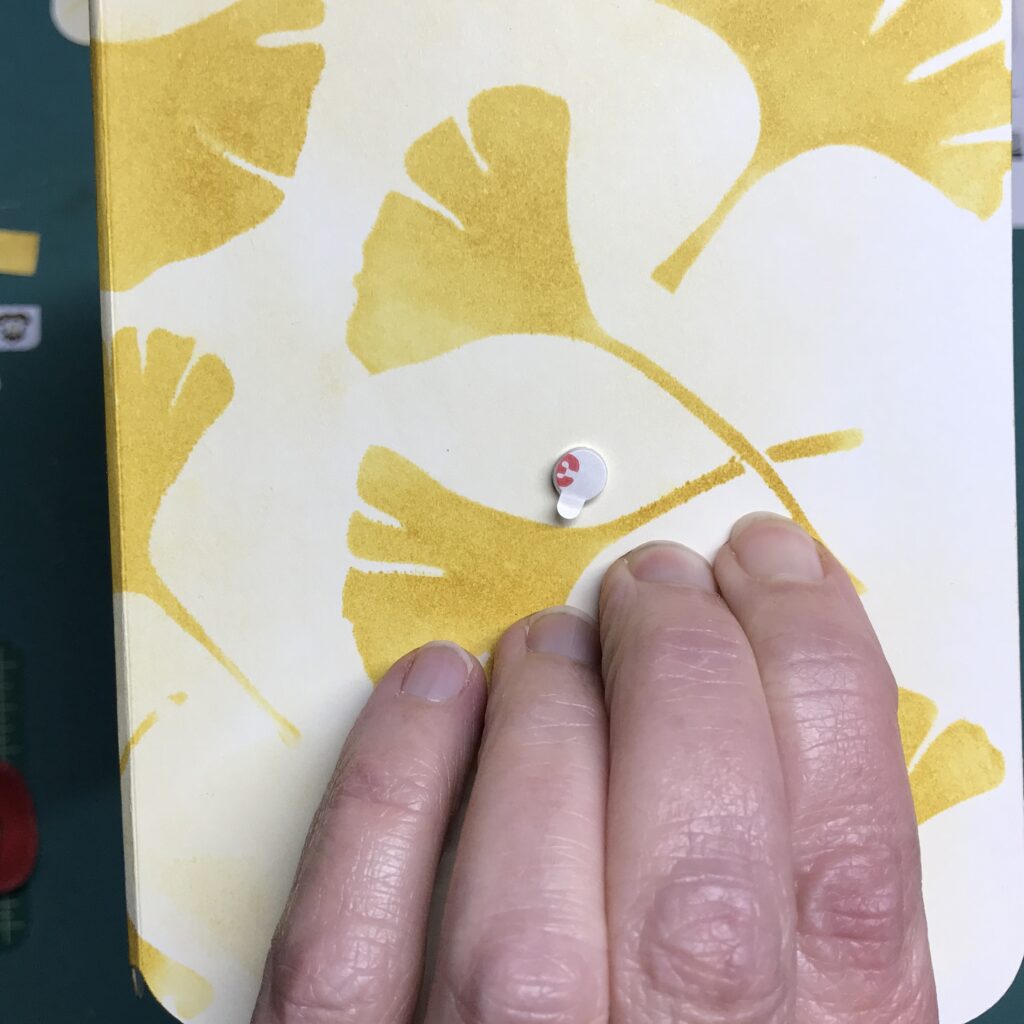
Once you’ve confirmed that it works as expected, you can remove the protective backing from the top of the foam ring inside the battery holder and secure the door and add a decorative element to the magnet.
When you place the magnet over the reed switch, the LEDs will turn on. When you wish to turn the LEDs off, you may move the magnetic piece on top of the battery holder.
Step 6: Create a Magnet Holder
To create a place for the magnet to rest when it is not being used to trigger the reed switch, use a piece of tape to add a paperclip or a small washer in an area offset from the reed switch.
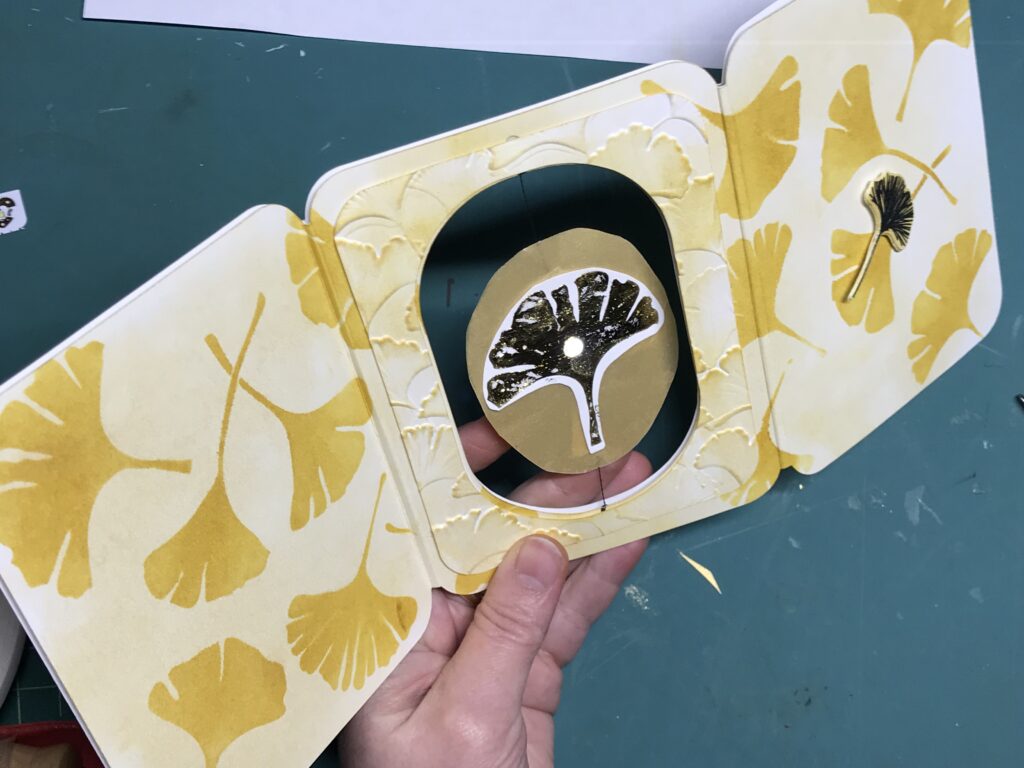
Step 7: Assemble Card & Create Spinner
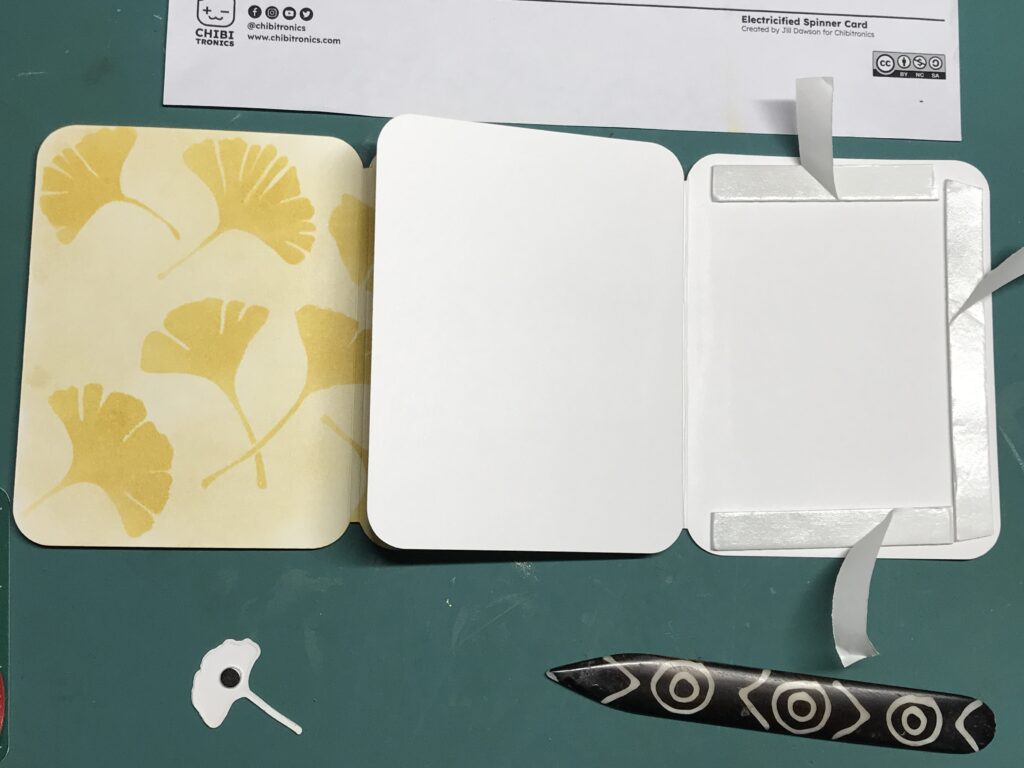
Once you know that your circuit works, apply foam tape on top of the circuit layer (avoiding the creased areas) and adhere the remaining decorative piece of the card on top. Carefully line everything up so that the pieces fold well and properly overlap.
If you prefer a slimmer profile to your card, you can substitute double-sided tape for the foam tape (see Adaptations).
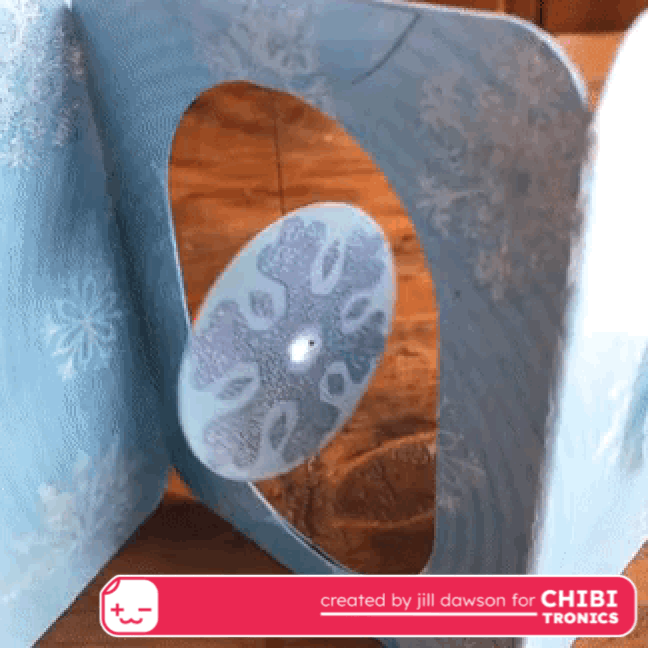
Experiment with different art supplies and materials to create the spinner effect you are going for. You might try using a screw punch to poke holes in the center of the spinners to let more light shine through, or you might try experimenting with different types of paper, such as vellum.
Adhere a frame piece over the conductive thread connections to conceal them.
Adaptations
One potential adaptation of this card design is to make your own paper battery holder, rather than the foam holder demonstrated earlier.
One advantage of doing is that you could use a single CR2016 battery, which would allow you to minimize the need for foam tape to just the area around the battery. (It is advisable to add a sticky ball of conductive fabric tape under the battery if using this method).
Then, you could use double-sided tape to mount the two card pieces together, rather than foam tape, if a slimmer card profile is preferred.
Another potential adaptation would be to create a paper belt that slides on and off to keep the card from flopping open, or to use a motif that speaks to you!
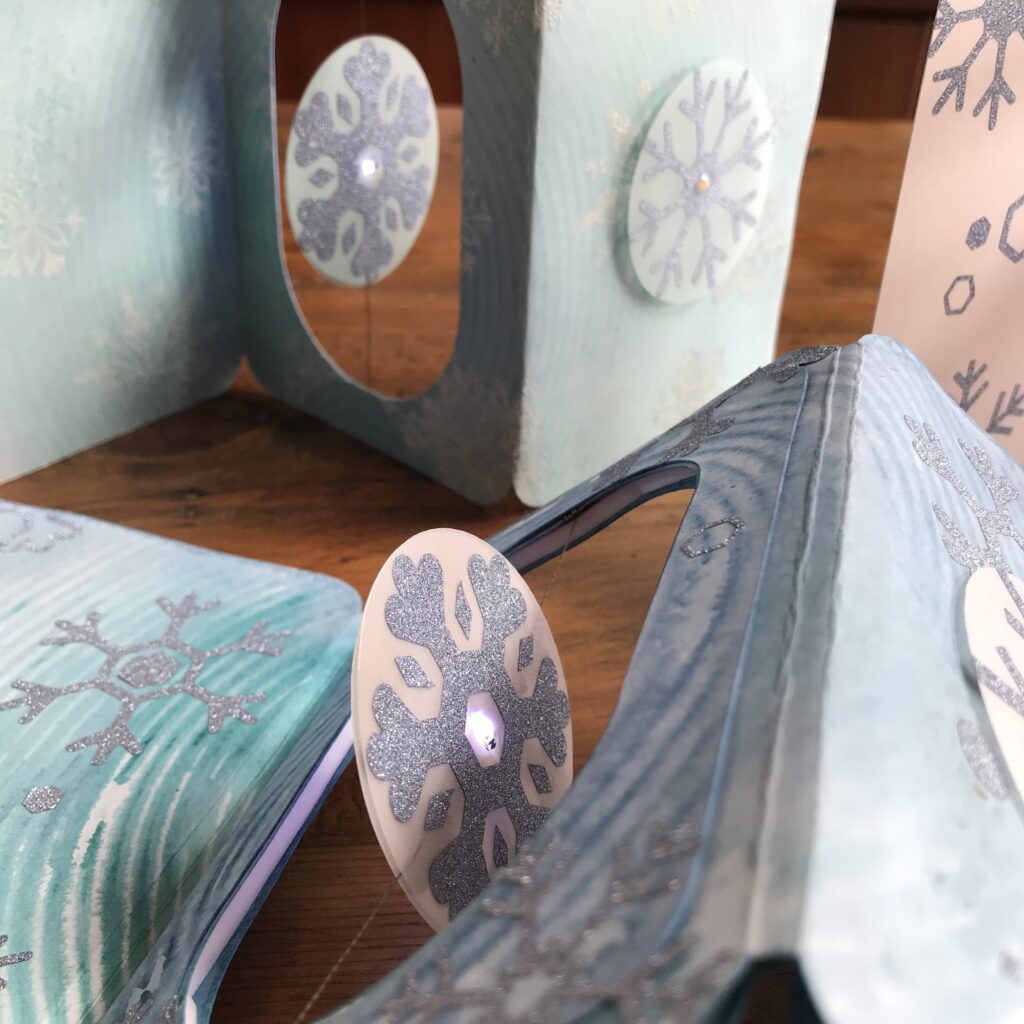
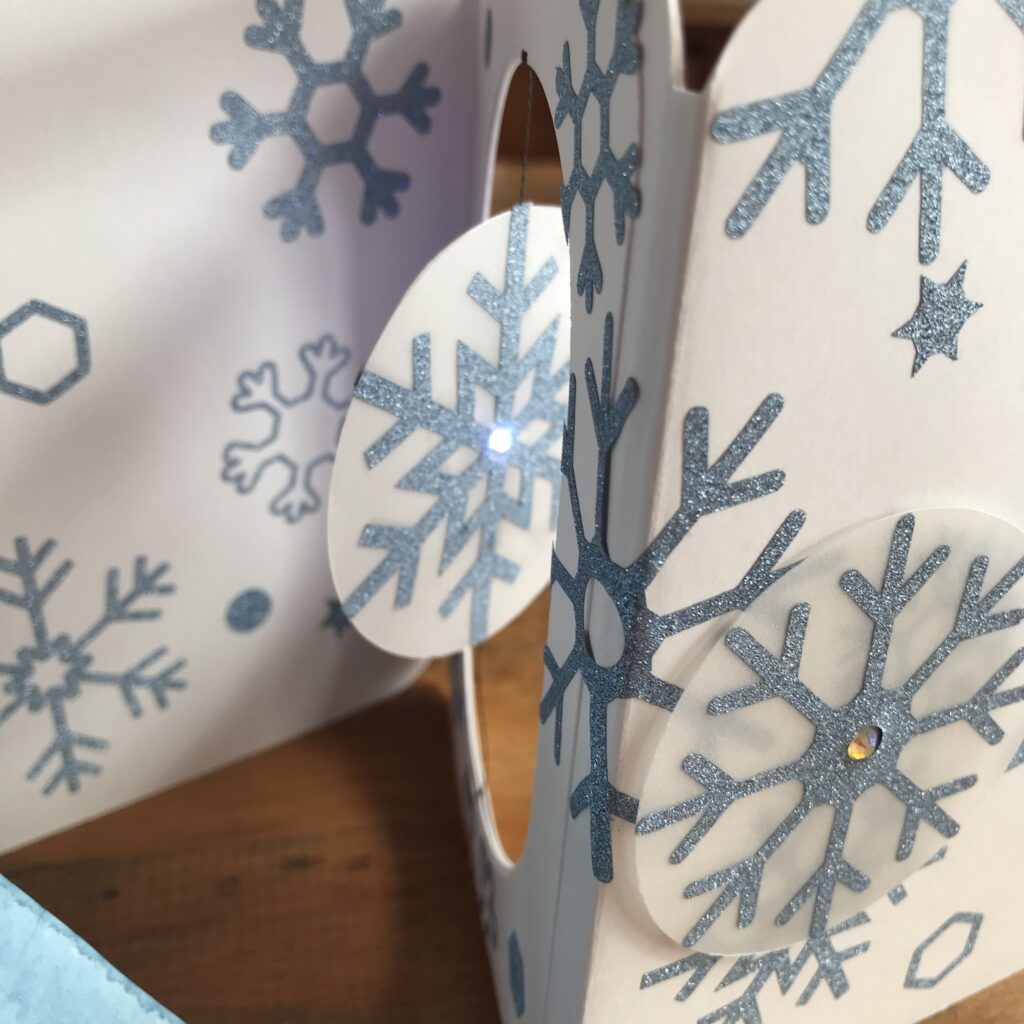
Gallery
An Electrified Spinner Card may be made for any occasion, such as these winter-themed examples.
Similar Posts You Might Enjoy
Halloween Spinner Card
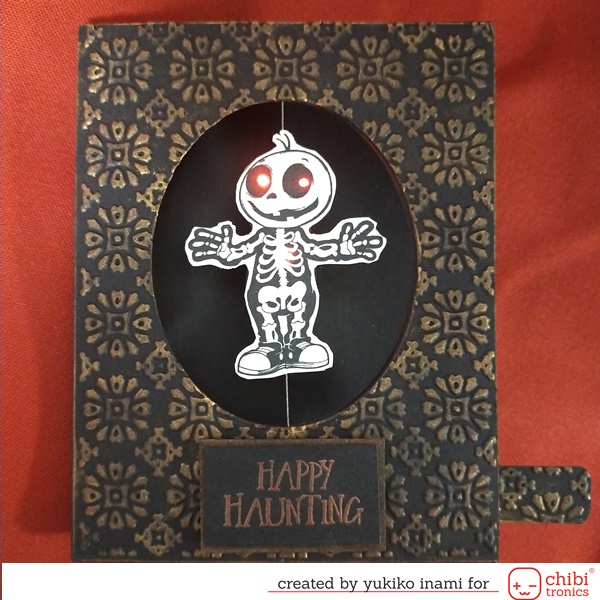
In this advanced project, Yukiko Inami masterfully demonstrates how to create an electrified spinner with multiple LEDs, triggered by a sliding switch!
Conductive Thread Guide

To learn more about different uses for conductive fabric thread, we’ve created a helpful guide.
DIY Spinner Cards
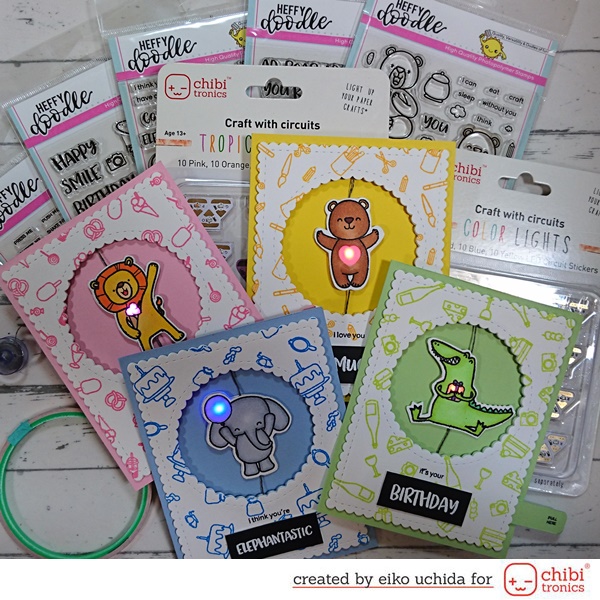
See how Eiko Uchida creates her festive, glowing spinner cards using a variety of fun craft dies!