Guide to Conductive Thread
In this guide, we’ll discuss some properties of conductive thread, tips and tricks, and ways you might use this versatile material in your paper circuit projects.
What is it? How might you use it?
Conductive thread is a fiber that conducts electricity. Because it is thin and flexible, like ordinary thread, conductive thread traces can take many shapes and connect to a variety of conductive materials and components. Conductive thread is particularly useful for creating sewn circuits (also known as soft circuits or e-textiles) in applications that combine circuitry and textiles with the use of a needle.
Although conductive thread is most commonly used to make wearable electronics, it may also be paired with paper and conductive tapes. While it is most commonly used for attaching sewable LEDs, sensors, microcontrollers, and battery holders into garments, it is also useful for creating interactive components such as switches and sensors (such as a tilt sensor) that partner well with paper circuits.
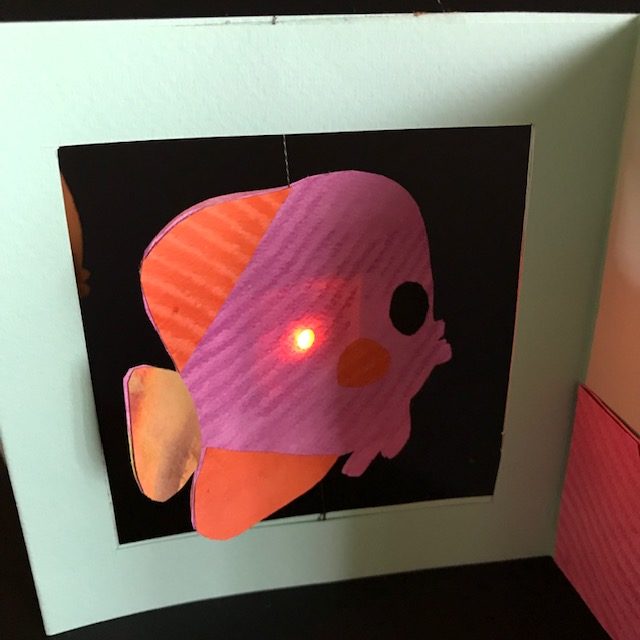
Fluttering Concertina/ Spinning Accordion Project
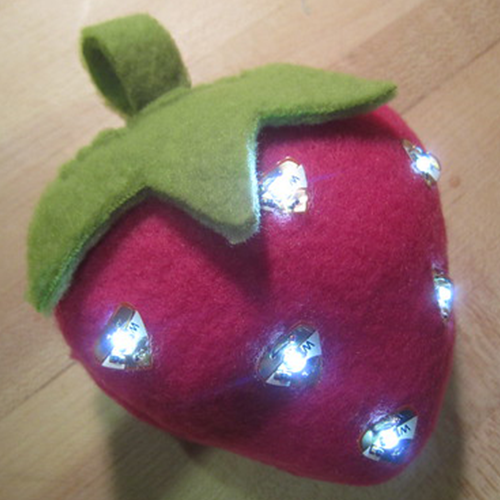
Light-up Strawberry Project
Slide Deck: What is a Tilt Sensor?
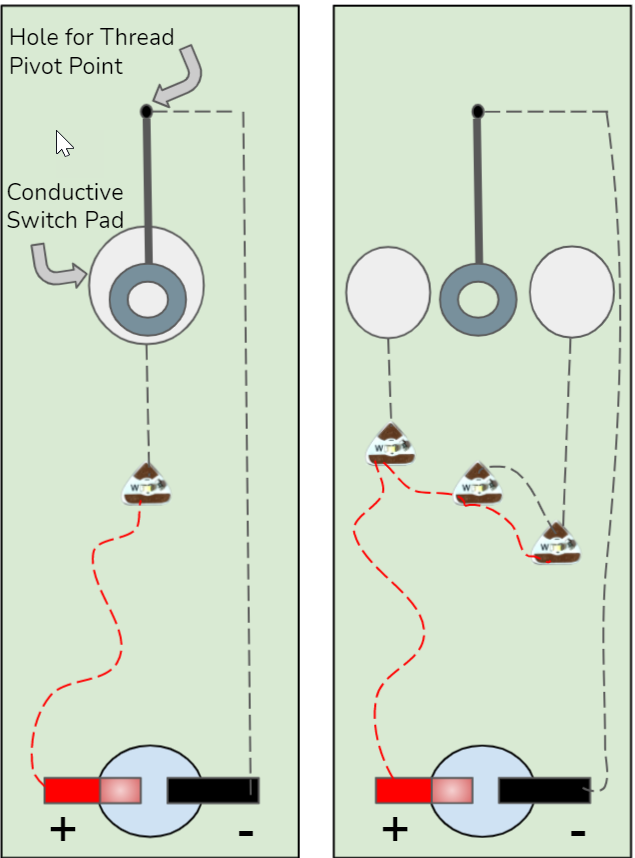
Simple Paper Tilt Switch/ Sensor
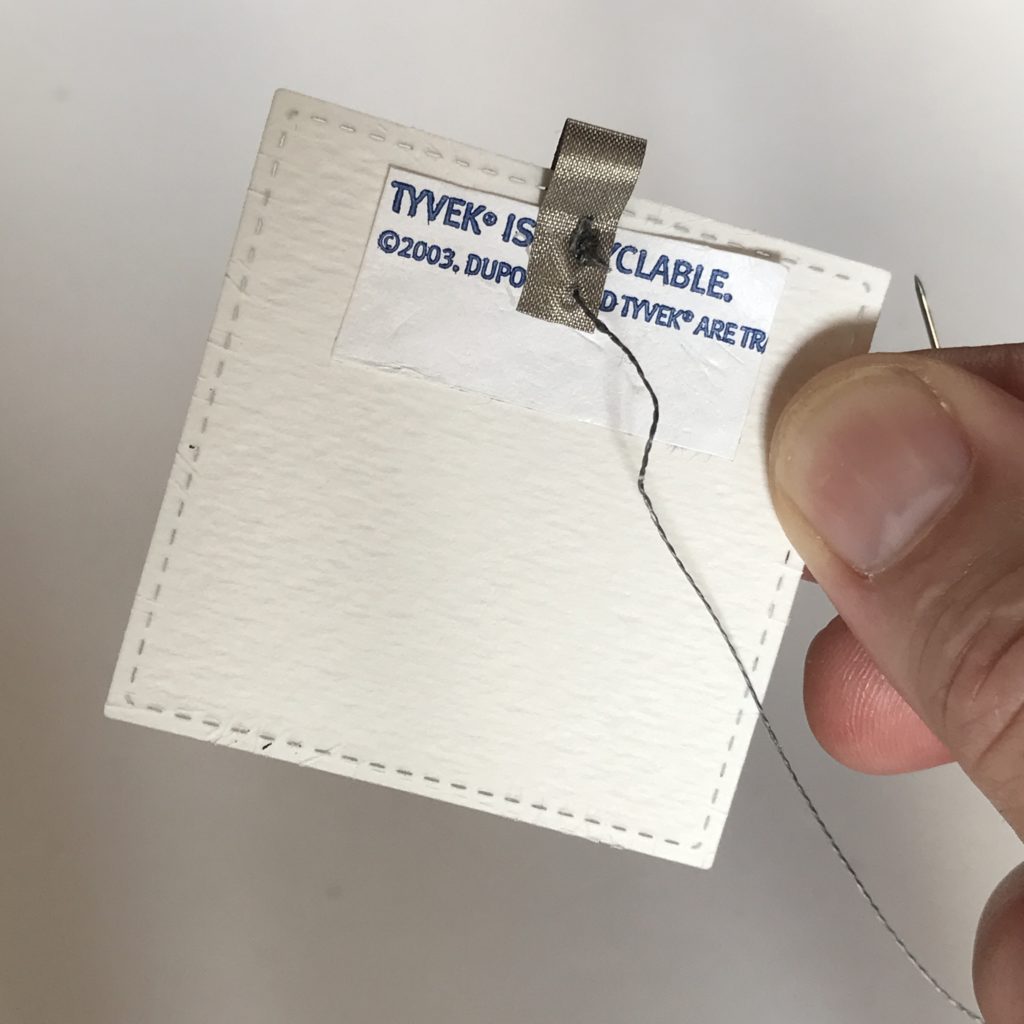
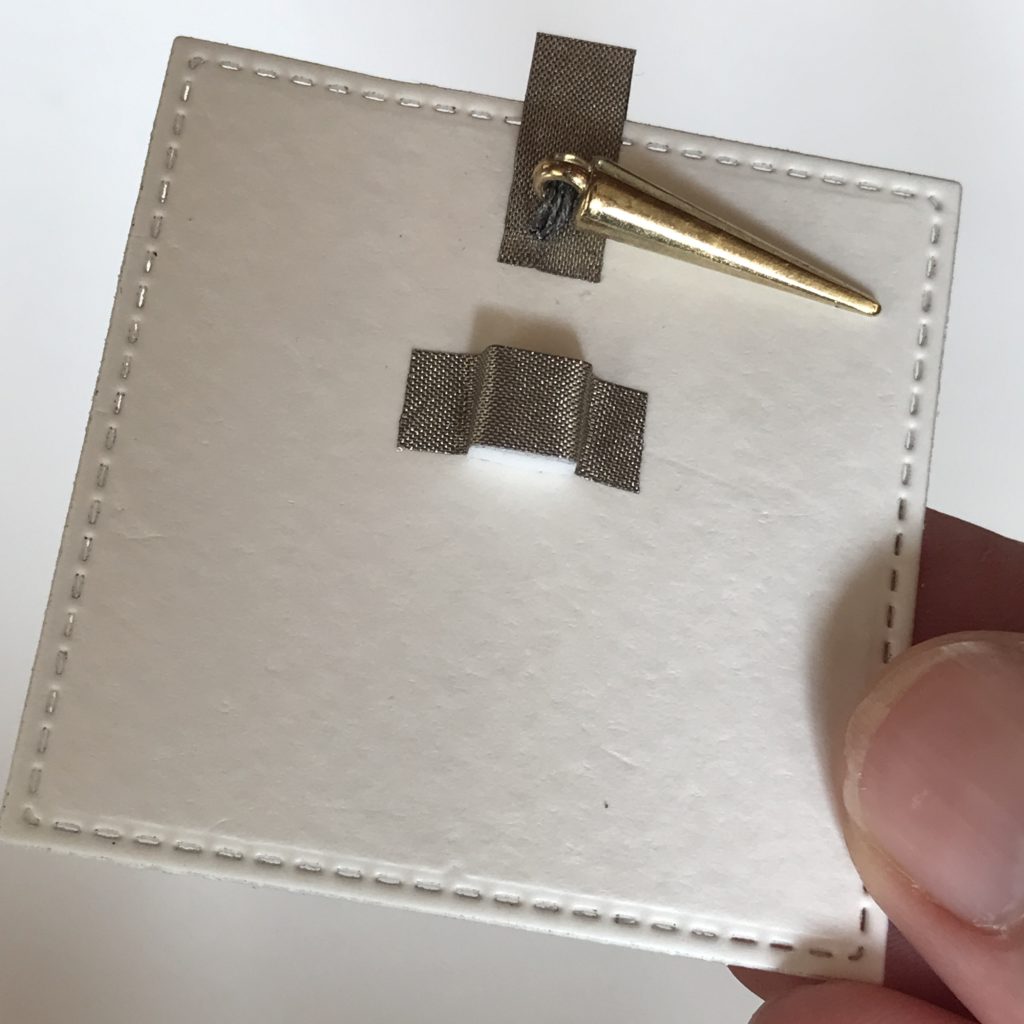
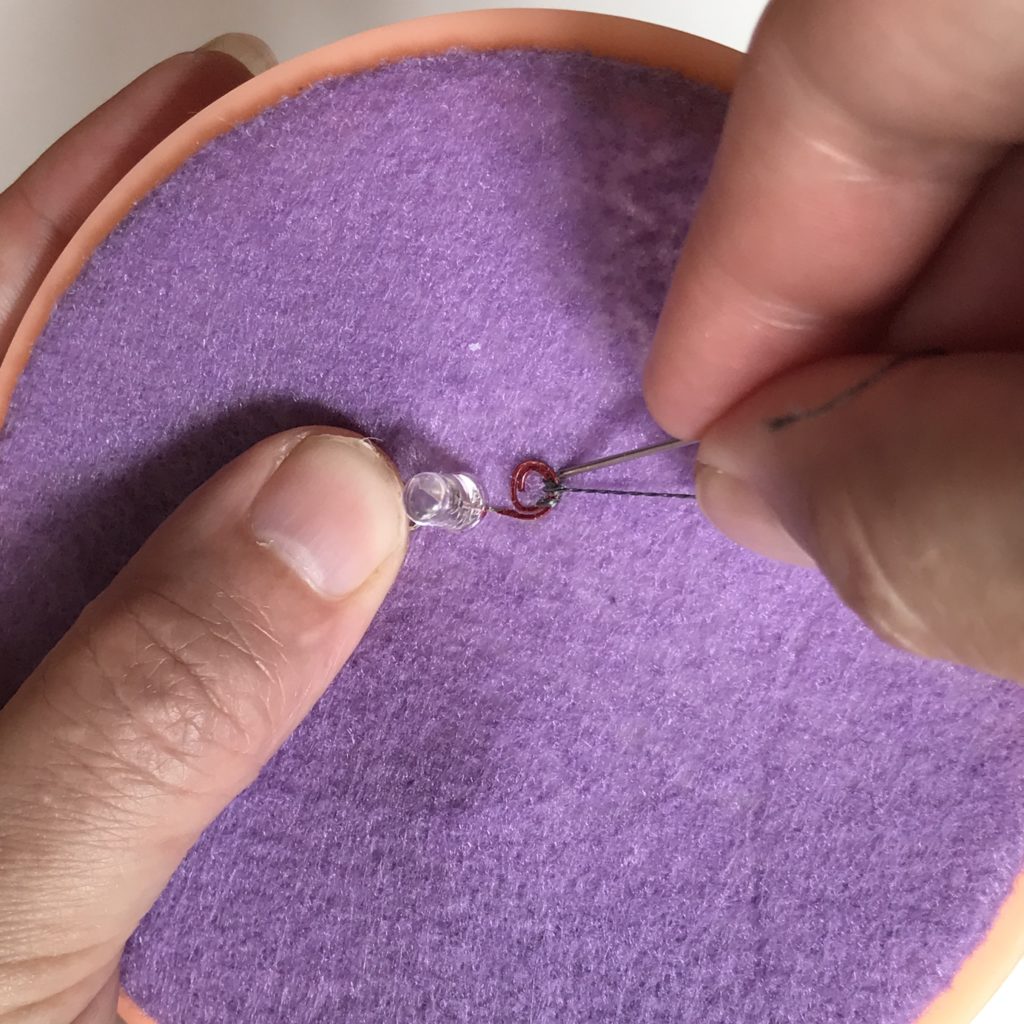
Using paper, conductive thread, conductive fabric tape, and a metal bead, you can make a tilt switch/ sensor.
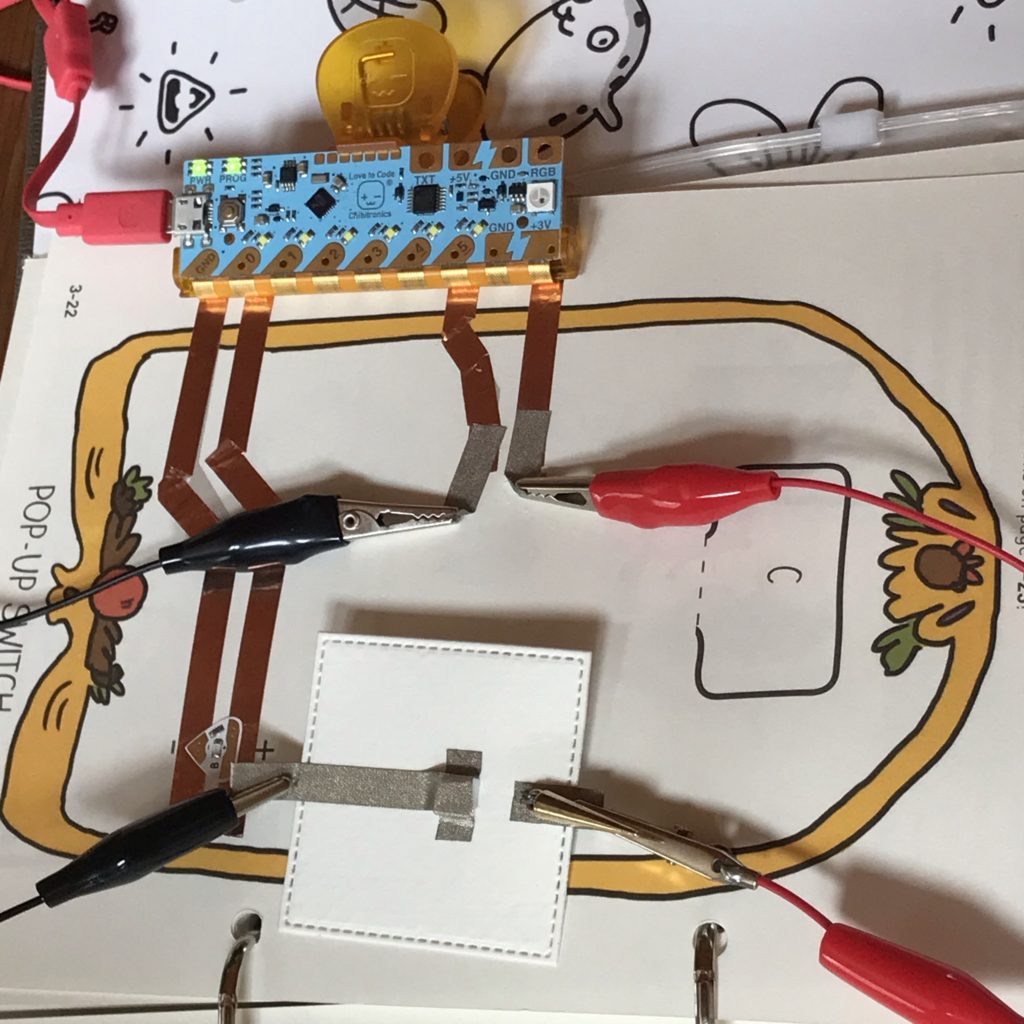
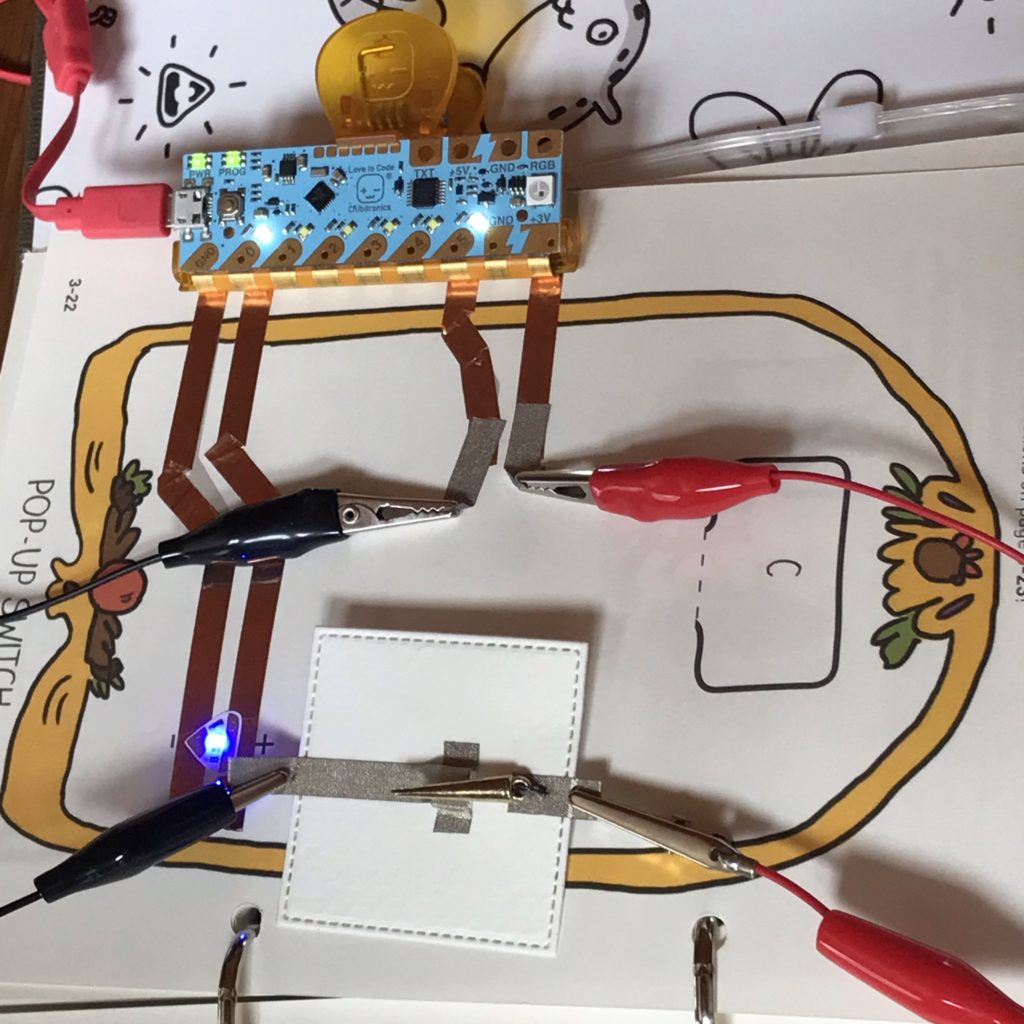
A tilt switch/ sensor such as this can connect to a paper circuit, or even a Chibi Chip, to trigger a reaction in an actuator, such as an LED!
Types of Conductive Thread
There are different types of conductive thread, including some made from copper, tin, nickel and silver; but, most are made from spun stainless steel that have been tightly wound together. Unlike the thread coated with copper or silver, stainless steel conductive thread does not oxidize or lose its conductivity over time, making it an ideal choice for crafters. Stainless threads generally come in two textures. Some are smooth and springy, but others are hairy (or “toothy”) with an almost yarn-like finish. While both types may be used interchangeably for most applications, they have different properties that you may want to consider before choosing one.

Image Courtesy of Adafruit: CC BY SA 3.0
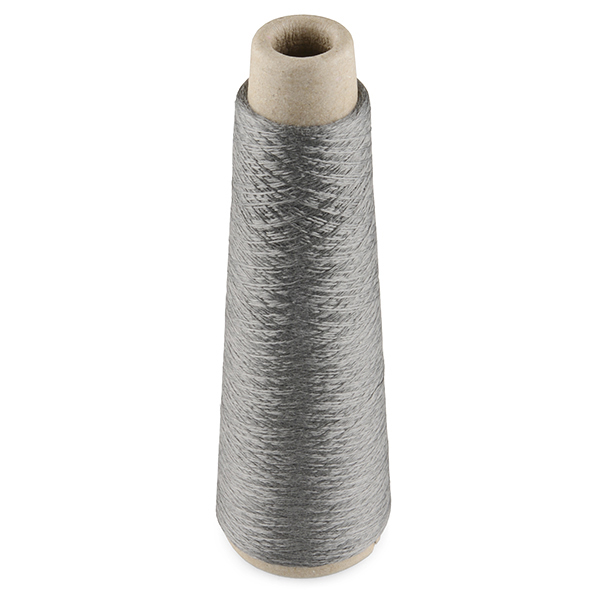

Image Courtesy of Adafruit: CC BY SA 3.0
Properties of Conductive Thread
Before highlighting a few key differences between the smooth stainless steel type of thread and its hairy, more yarn-like counterpart, there are notable properties that most types of conductive thread share.
Advantages
- It is thin, flexible, and portable.
- It’s versatile; it works well with fabric and other materials that may be pierced or sewn through.
- Conductive stitches may be easily concealed.
- It’s stronger than copper tape.
- It’s usually magnetic.
Disadvantages
- It can be a little tricky to thread and knot.
- It has more resistance than copper tape.
- Conductive stitches often need to be insulated.
- Knots can loosen over time.
- It’s difficult to solder to.
- It can tangle and fray.
In addition to having these traits in common, there are also important differences between the two types of stainless steel conductive thread.
Smooth Thread
Hairy, “Toothy,” Thread/Yarn
Ease of Use
| Smooth stainless thread is more slippery & springy, making it more difficult to knot. | It’s easier to pull out if you make a mistake. |
| Pulling it through beeswax helps reduce fraying at the ends. | Because its springy, it is more difficult to keep it wound on a spool. |
| The toothy texture of the thread/yarn makes it easier to knot. | It grips fabric & paper better. |
| It curls, frays, & tangles easily, if it isn’t run through wax. | Because it is fuzzy, it can be susceptible to short circuits. |
Strength
| Smooth stainless thread is exceptionally strong; it must be cut with scissors. |
| Stainless thread/yarn breaks easily if it’s pierced or pulled with too much force. |
Resistance
| Smooth stainless thread has less resistance than the thread/yarn, making it a better choice for circuits involving a lot of electrical components. |
| 3-ply smooth stainless thread has less resistance than the 2-ply version. |
| Stainless thread/yarn typically has more resistance than smooth thread. |
| 3-ply stainless thread/yarn has less resistance than the 2-ply version. |
Cost
| Smooth stainless thread costs a bit more than the thread/yarn. |
| Stainless thread/yarn is slightly less expensive than smooth stainless thread. |
Ideal Uses
| Smooth stainless thread is best for applications involving a sewing machine; the 2-ply thread can fit in a bobbin case and the 3-ply can be used with a cording foot. |
| Toothy, stainless thread/yard is a great choice for making DIY touch-screen gloves. |
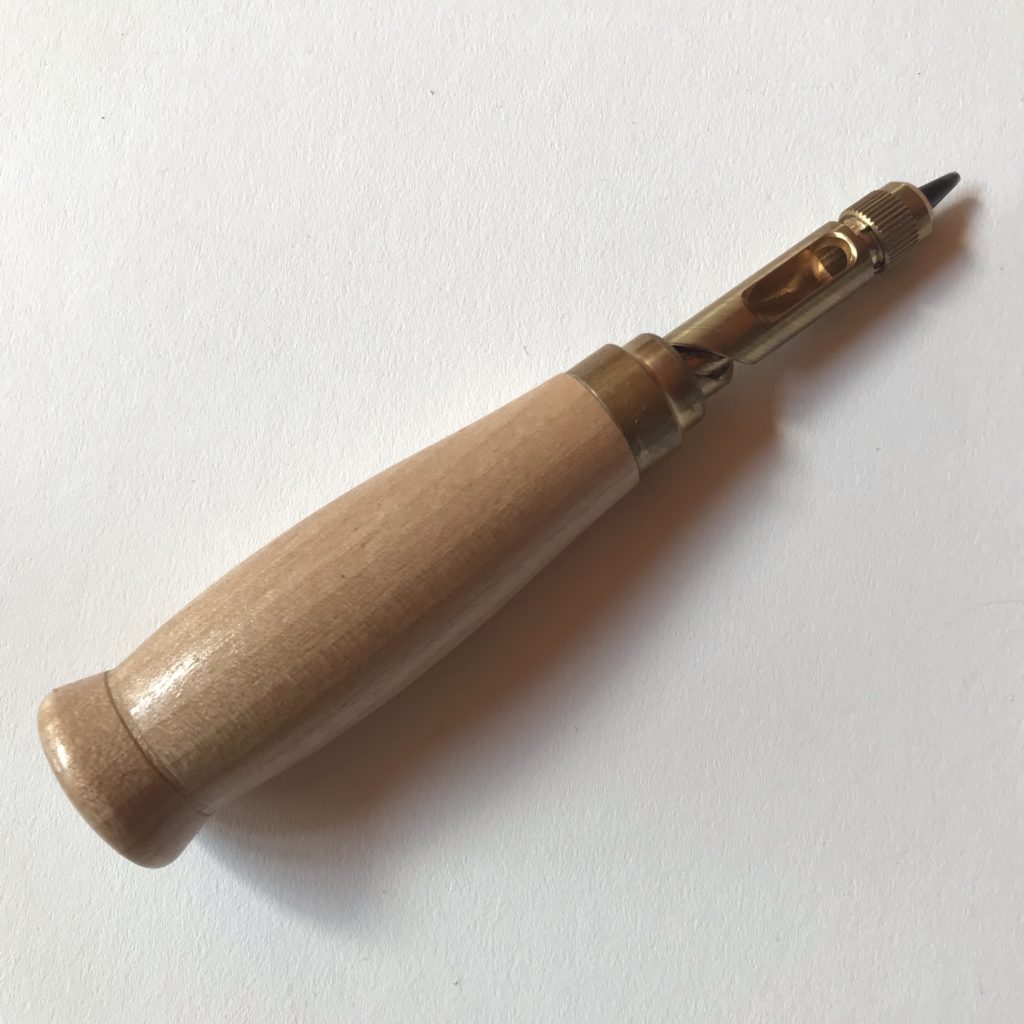
Useful Tools for Working with Conductive Thread
Tips & Tricks
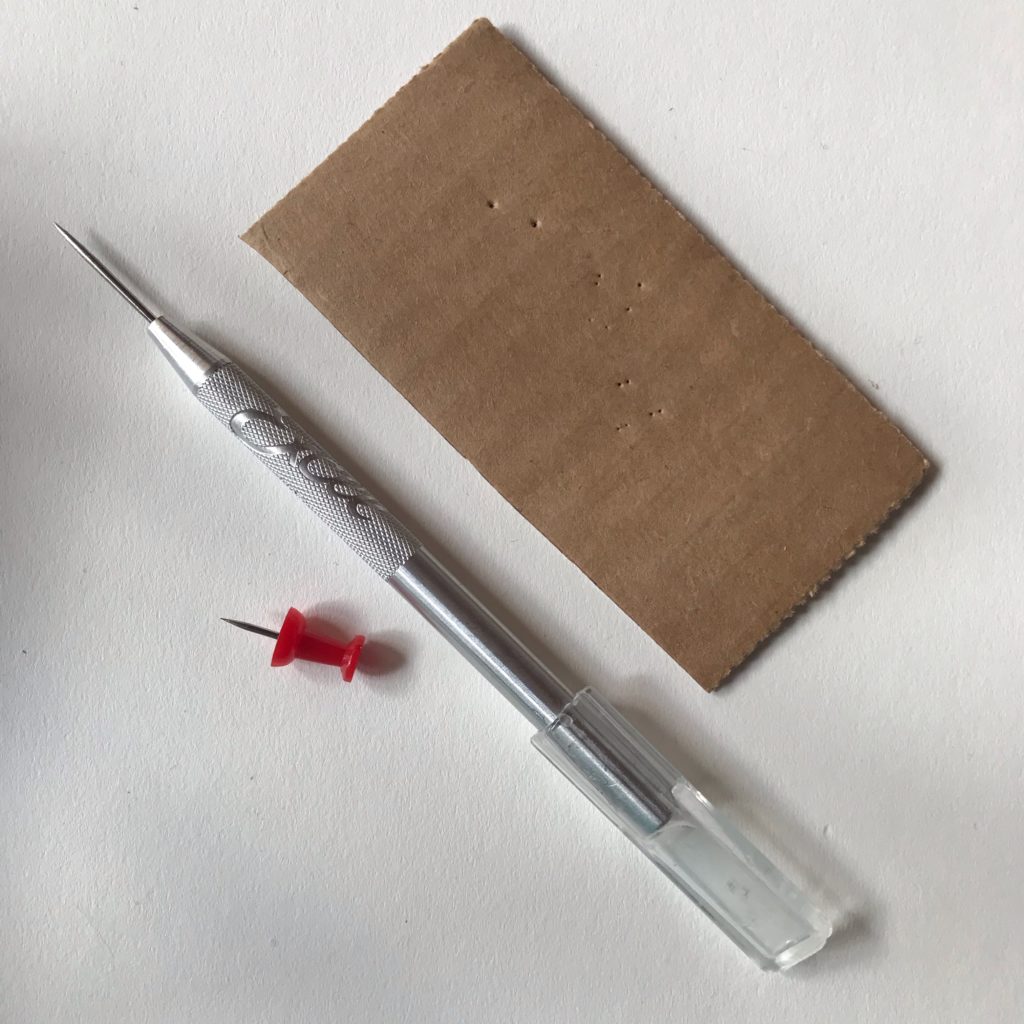
Prepping a Circuit Sticker for Sewing
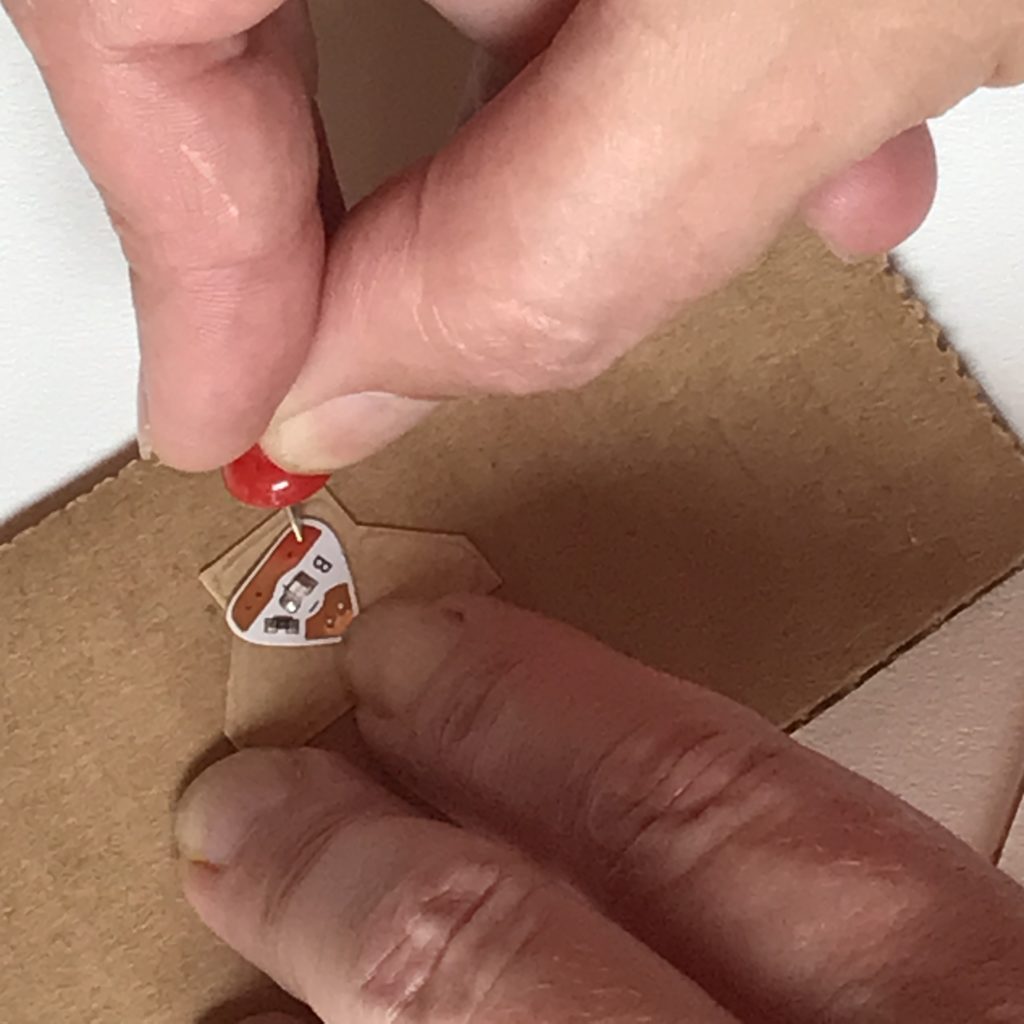
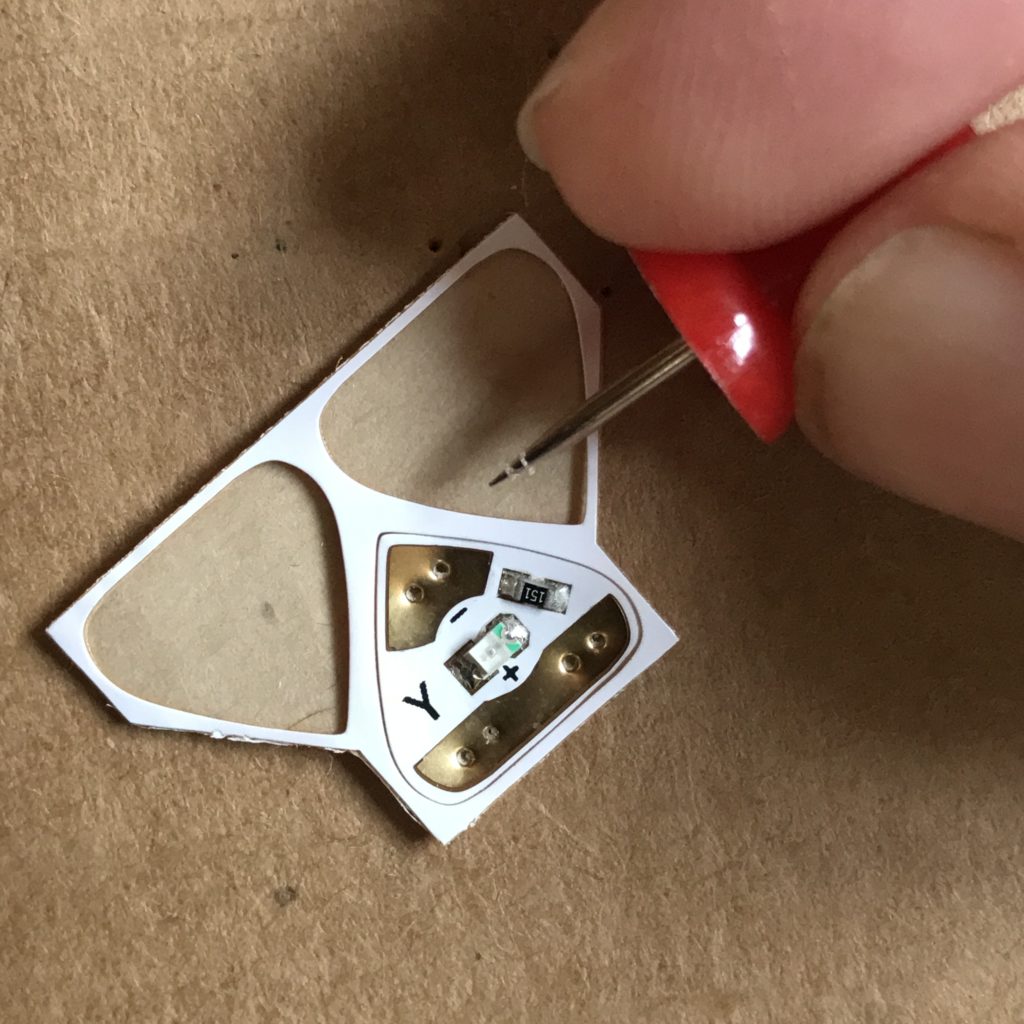
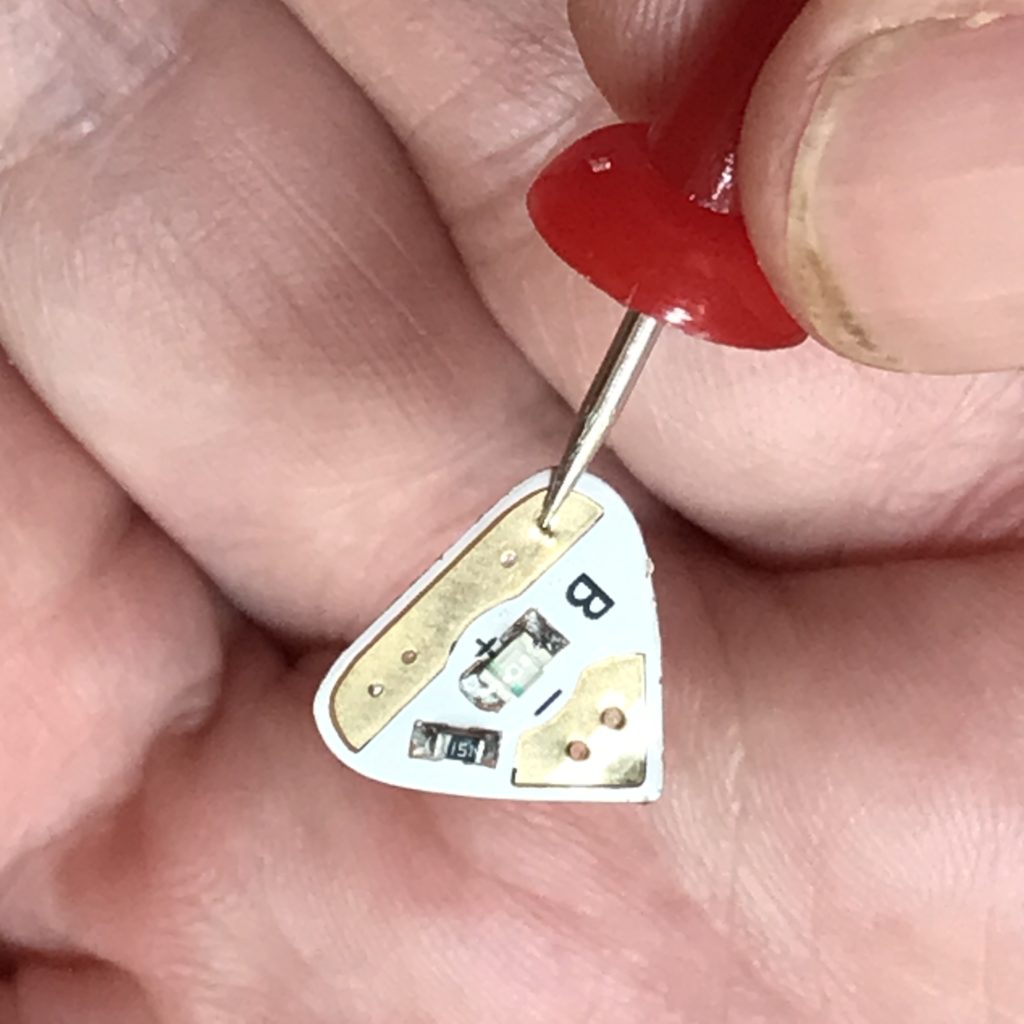
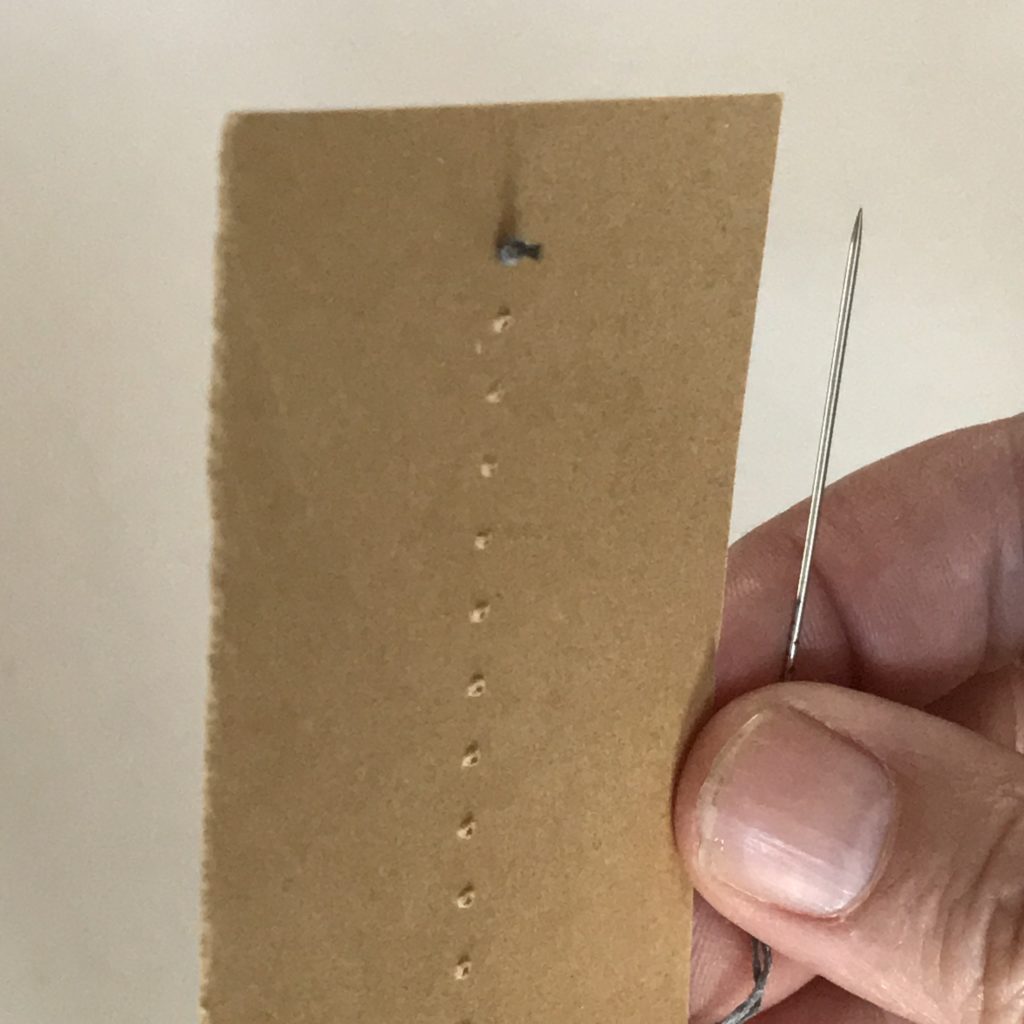
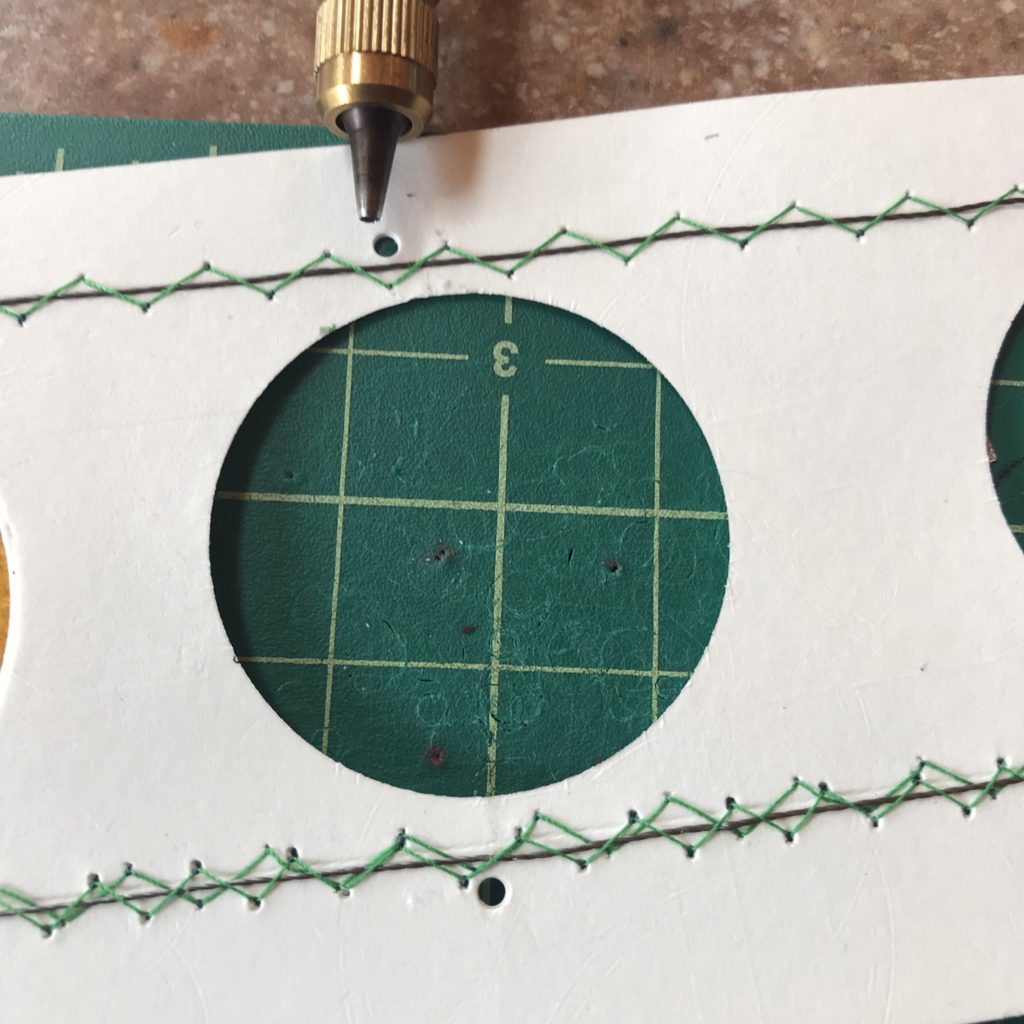
Circuit Stickers have guide holes on each end, which may be used to sew through with conductive thread. Before sewing a Circuit Sticker, it’s helpful to use a fine-tipped awl, thumbtack, or needle to gently enlarge the holes. Doing this on top of a piece of cardboard or an old phone book may help prevent the sticker from bending.
If you use a tool that’s too thick, the metal pads can tear.
Preparation
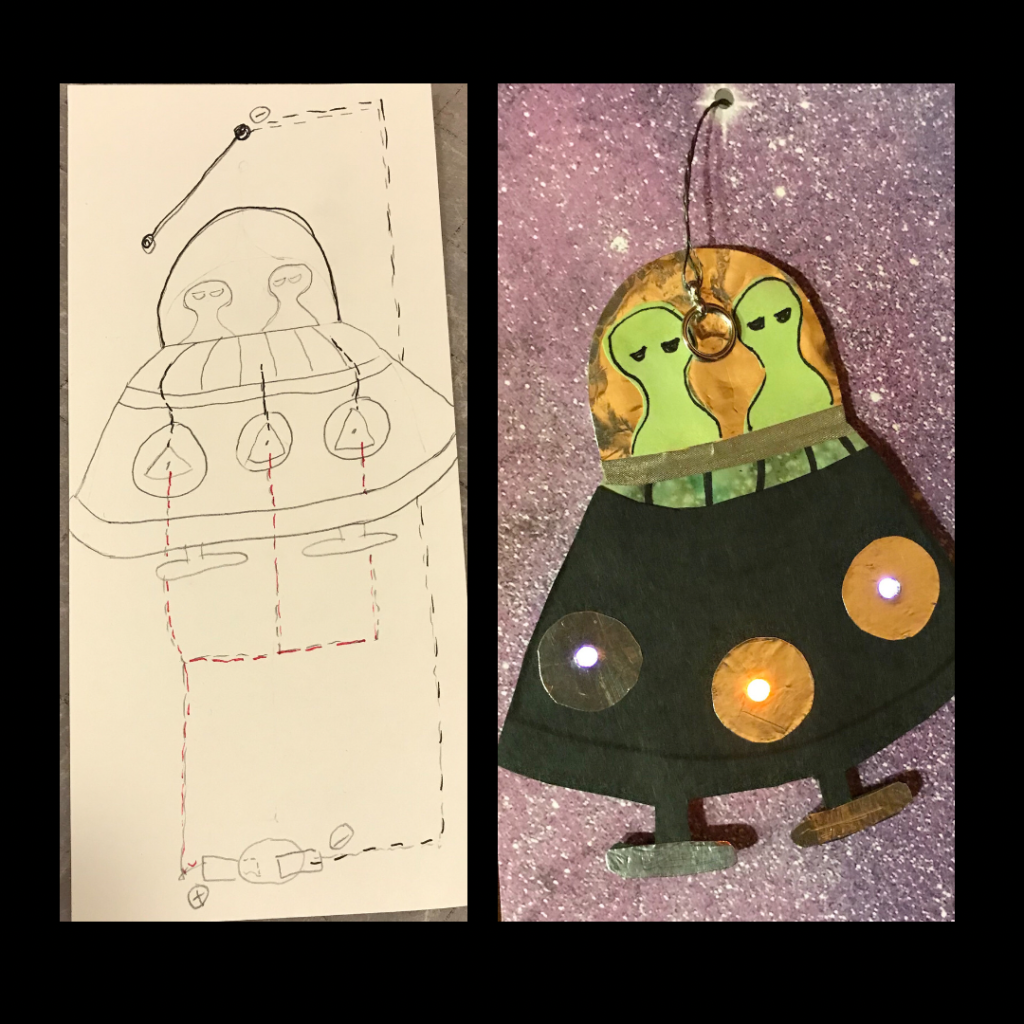
Sketching out your circuit before you sew is best practice.
After sketching the location of your battery and components, sketch the ground bus that will connect them all; then sketch out the positive traces.
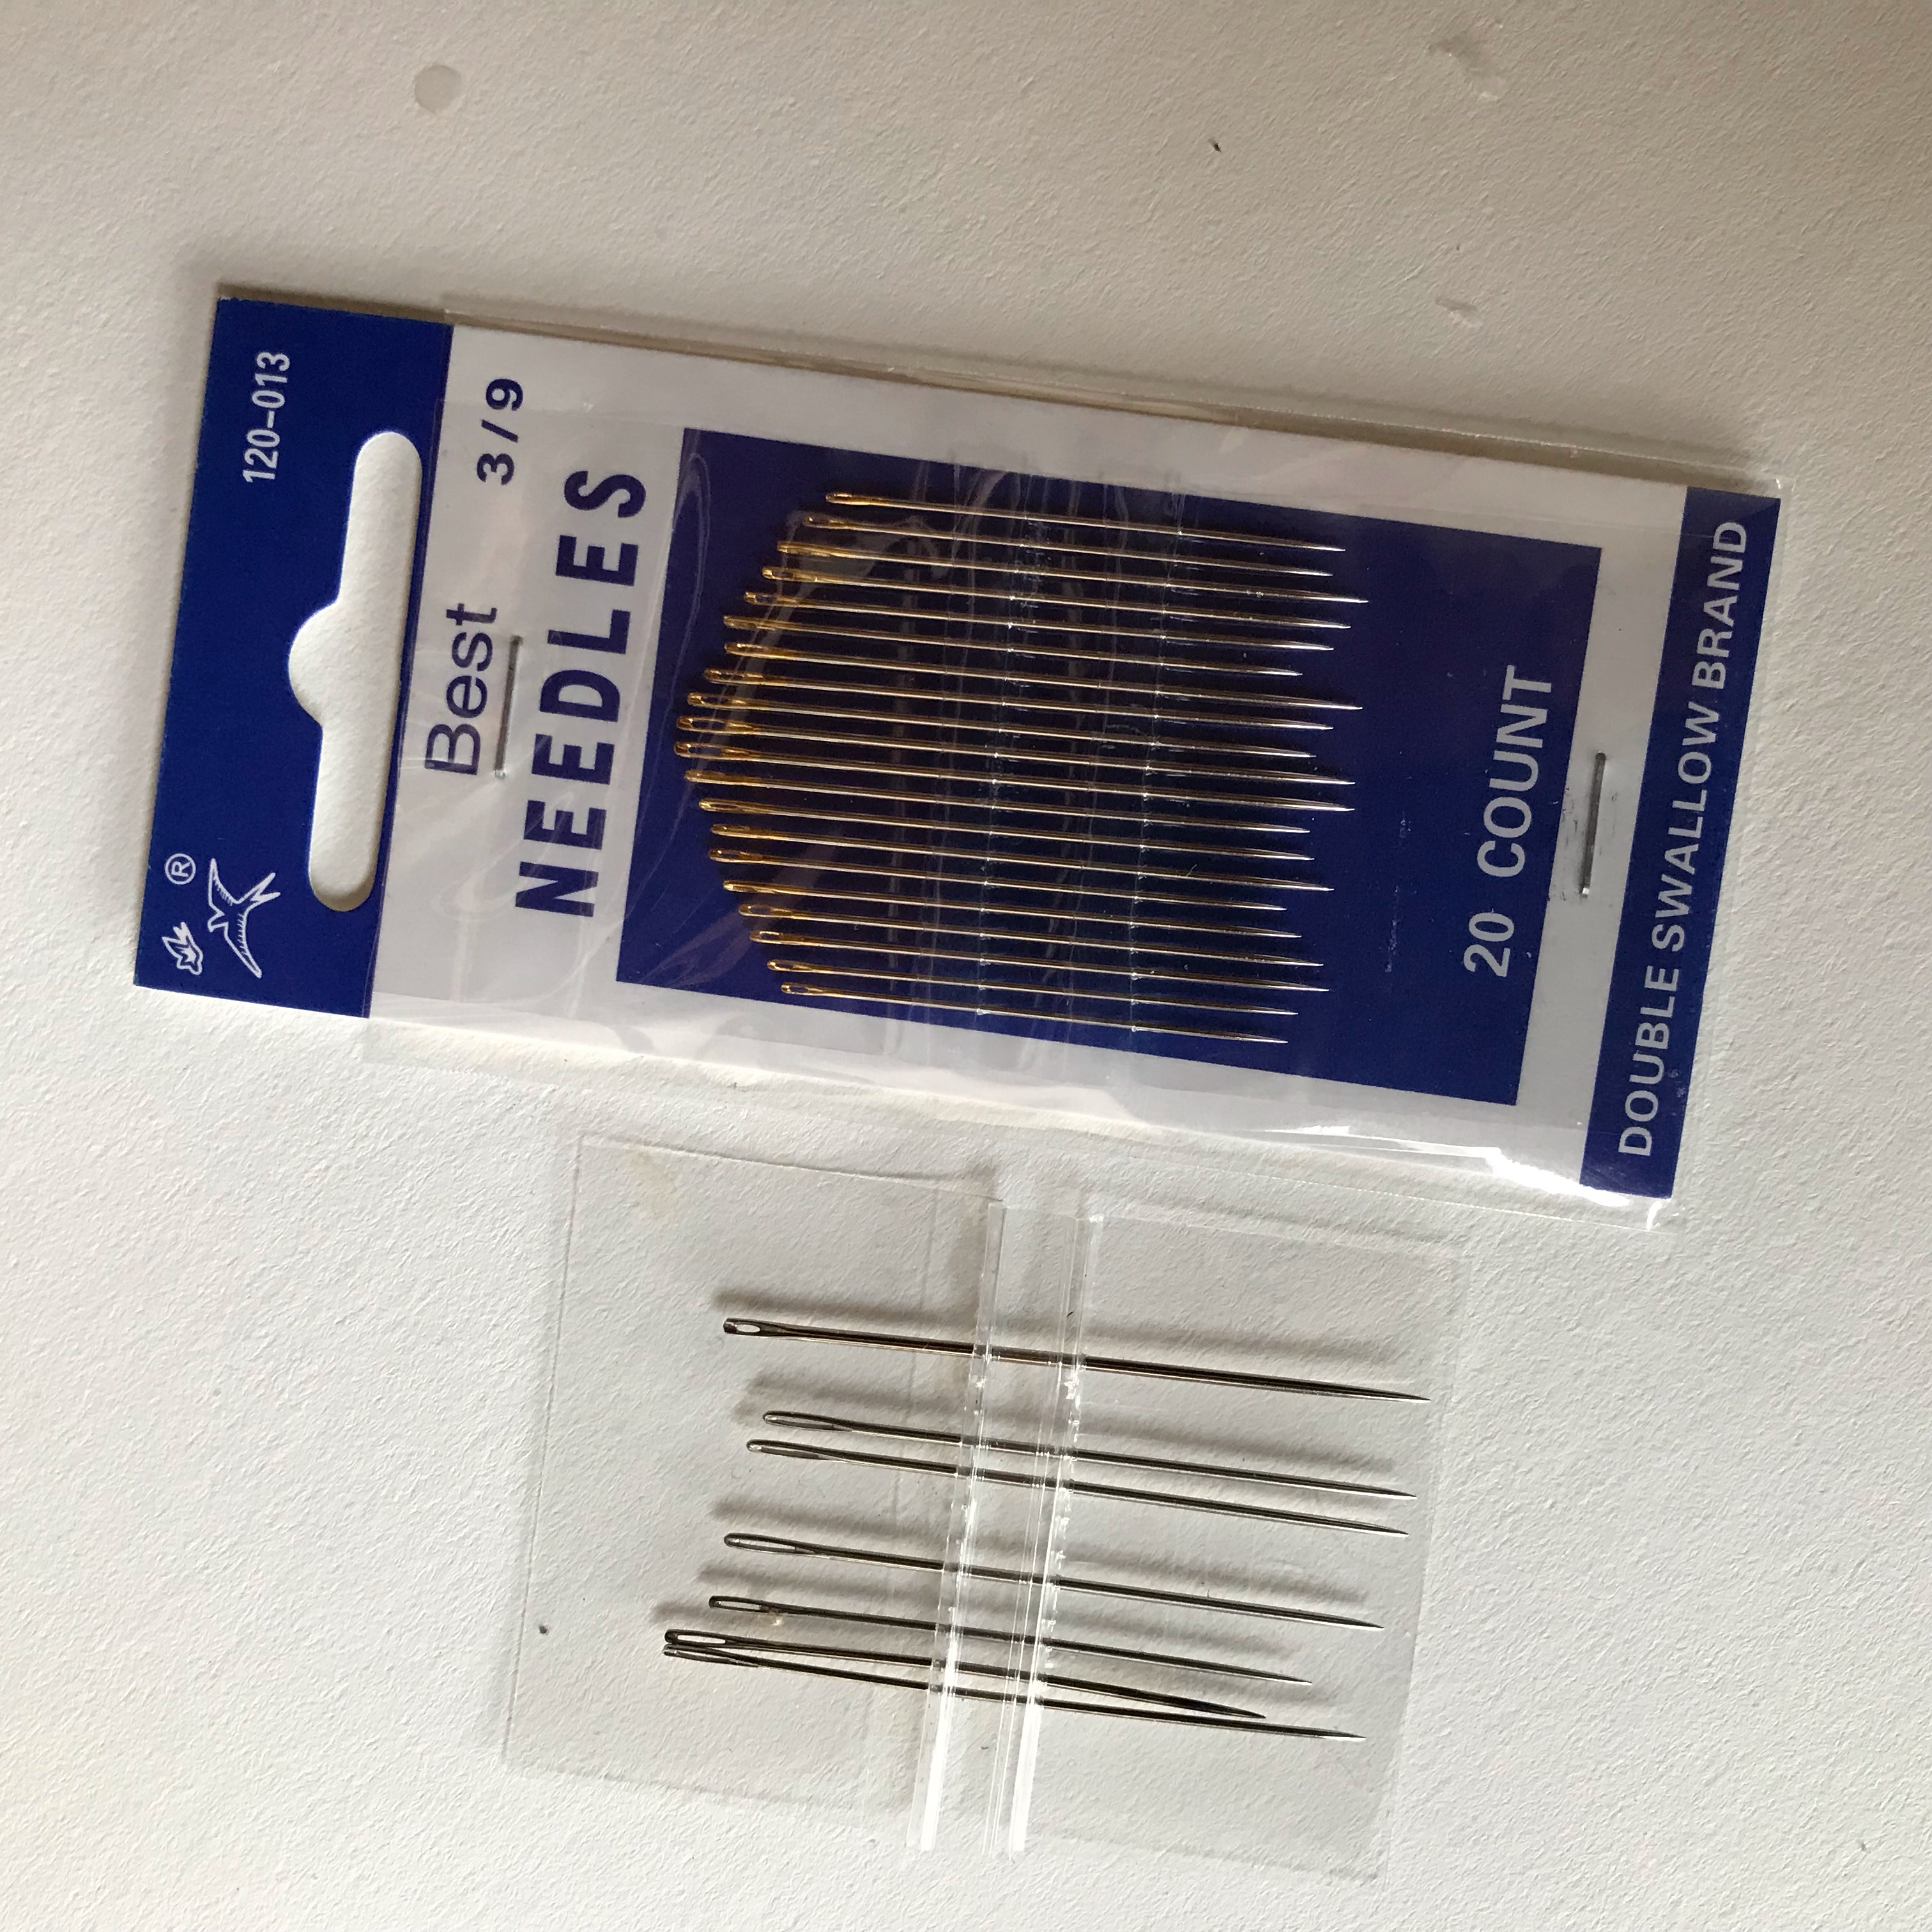
Needles
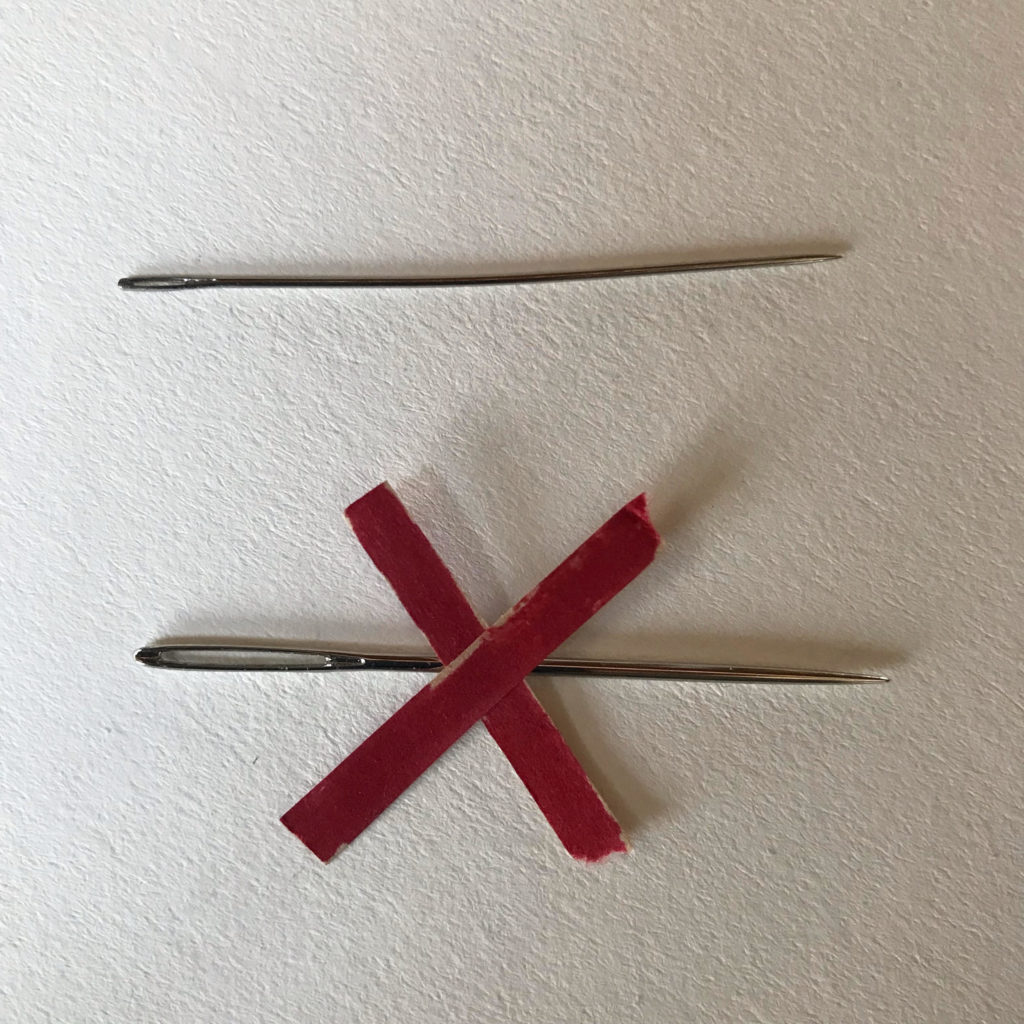
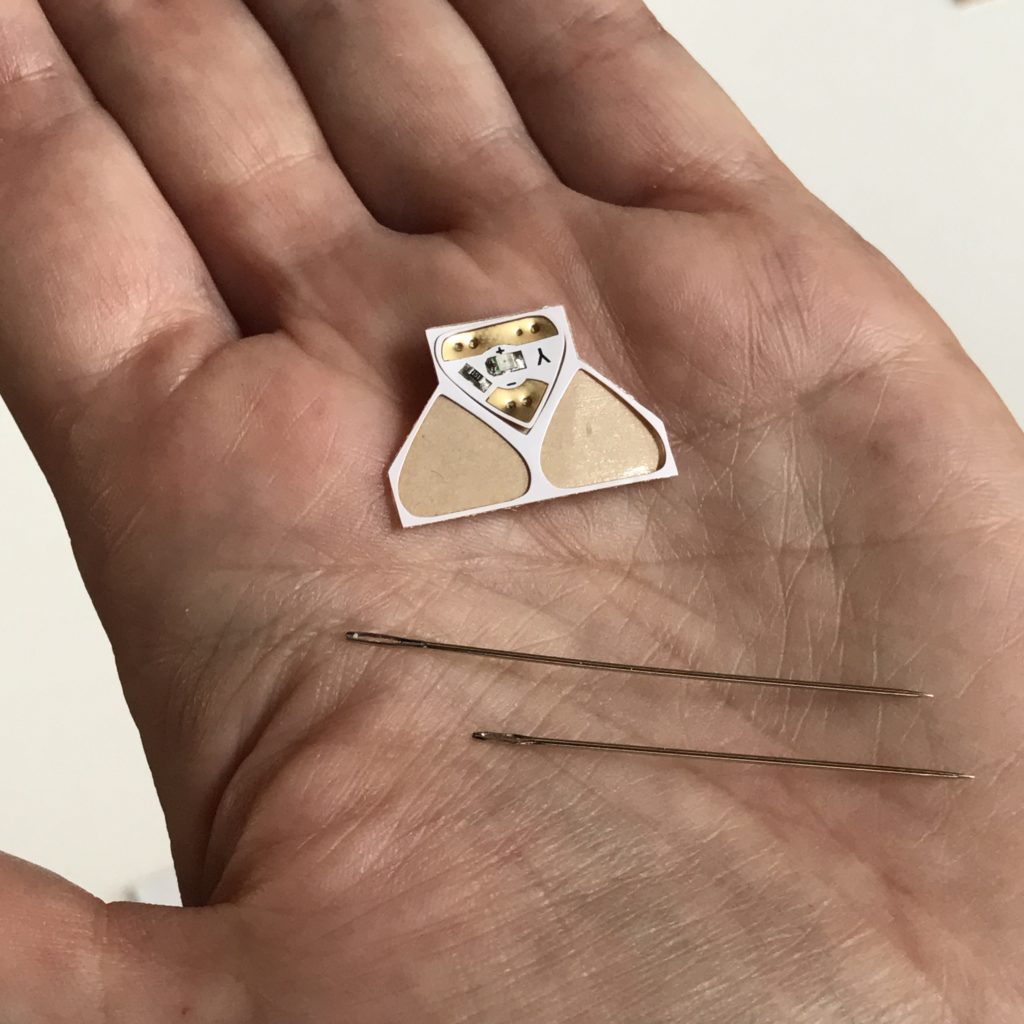
When choosing a needle, look for one with a tall, narrow eye (such as the .067 mm wide needles sold by SparkFun). In general, any needle sized #4-#8 will work well (as in this needle set by Adafruit).
You may also wish to check out the sewing section of your local craft store. Look for “embroidery sharps” with tall, narrow eyes.
While needles with wide eyes may be useful for sewing pieces of felt together, these types of needles can damage the metal pads of Circuit Stickers.
Cutting
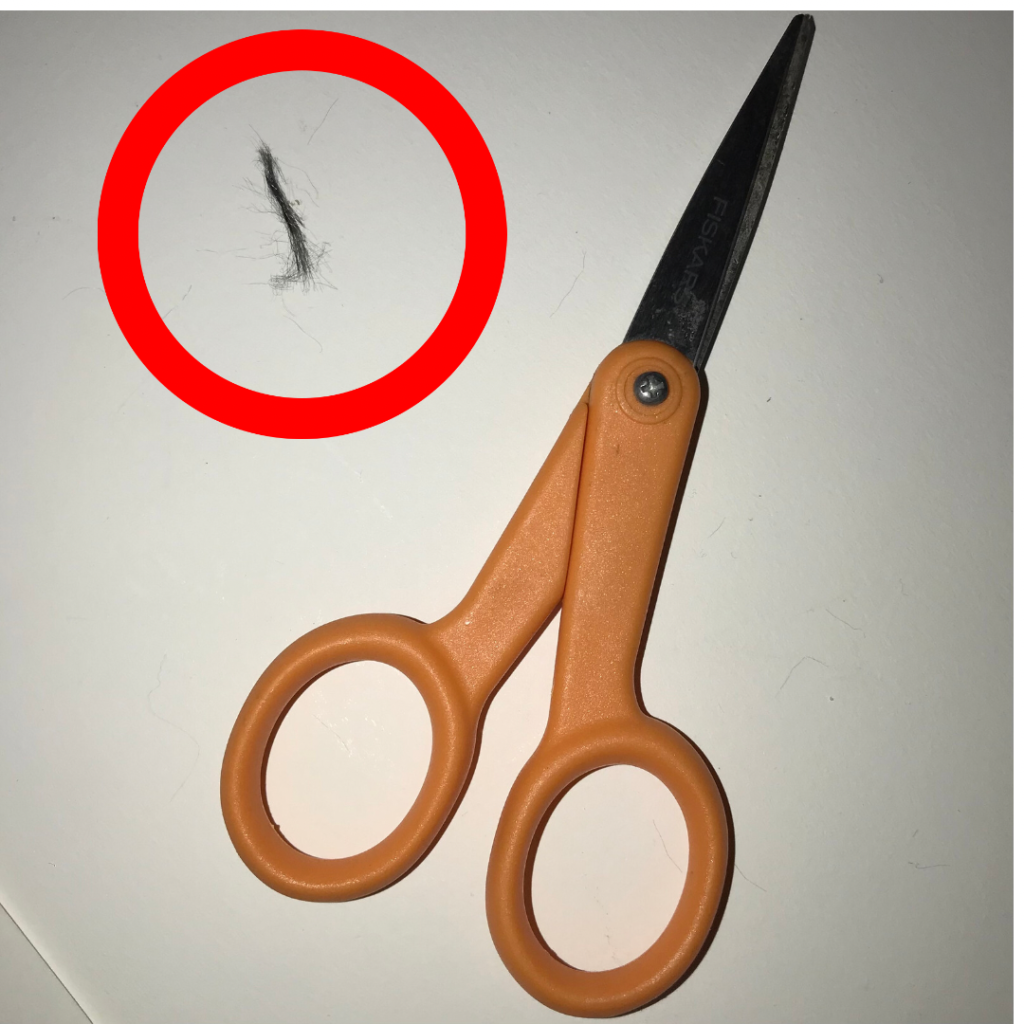
Avoid trimming conductive thread over your work space; the tiny, hairy, fragments can lead to short circuits that are difficult to locate and repair.
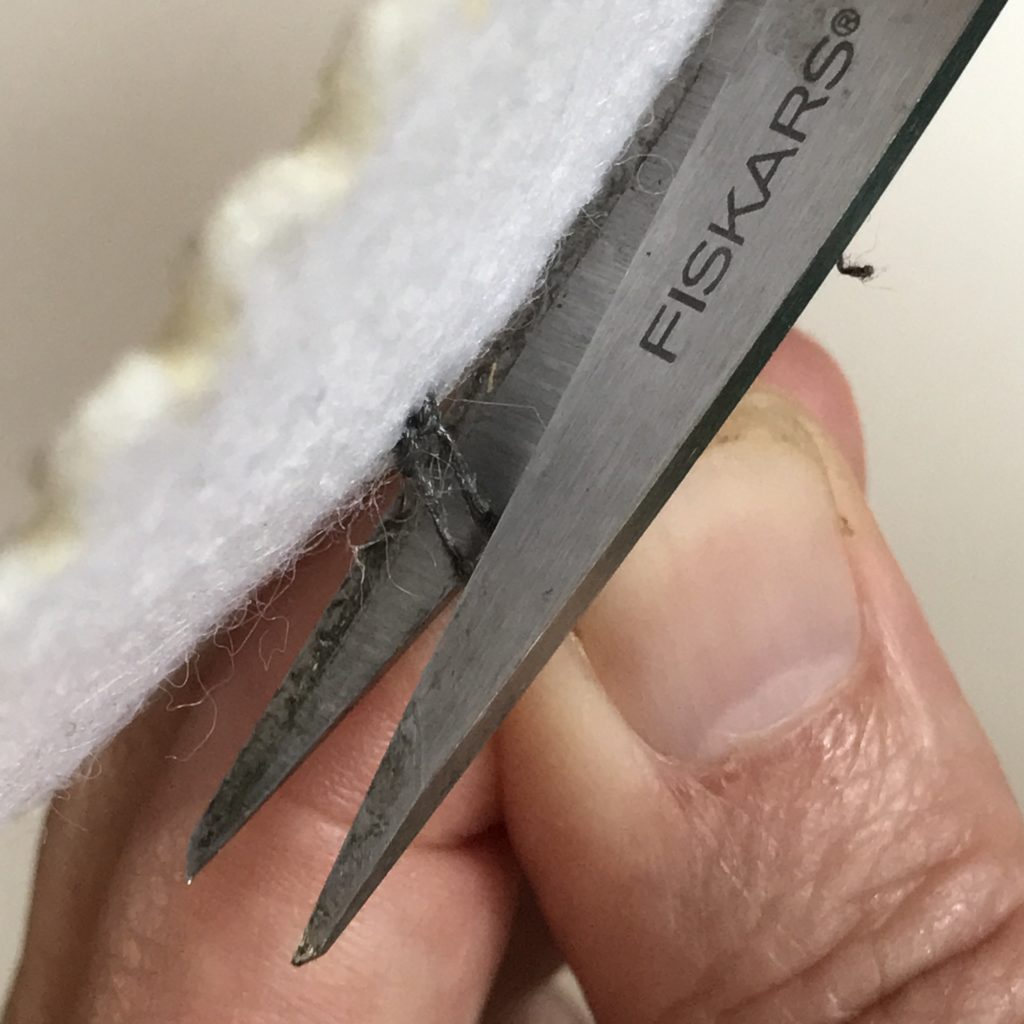
Conductive thread is made out of metal, which means that it will dull your good scissors if you use them. Keep your good scissors away from your work space and designate a sacrificial pair of snippers specifically for cutting conductive thread.
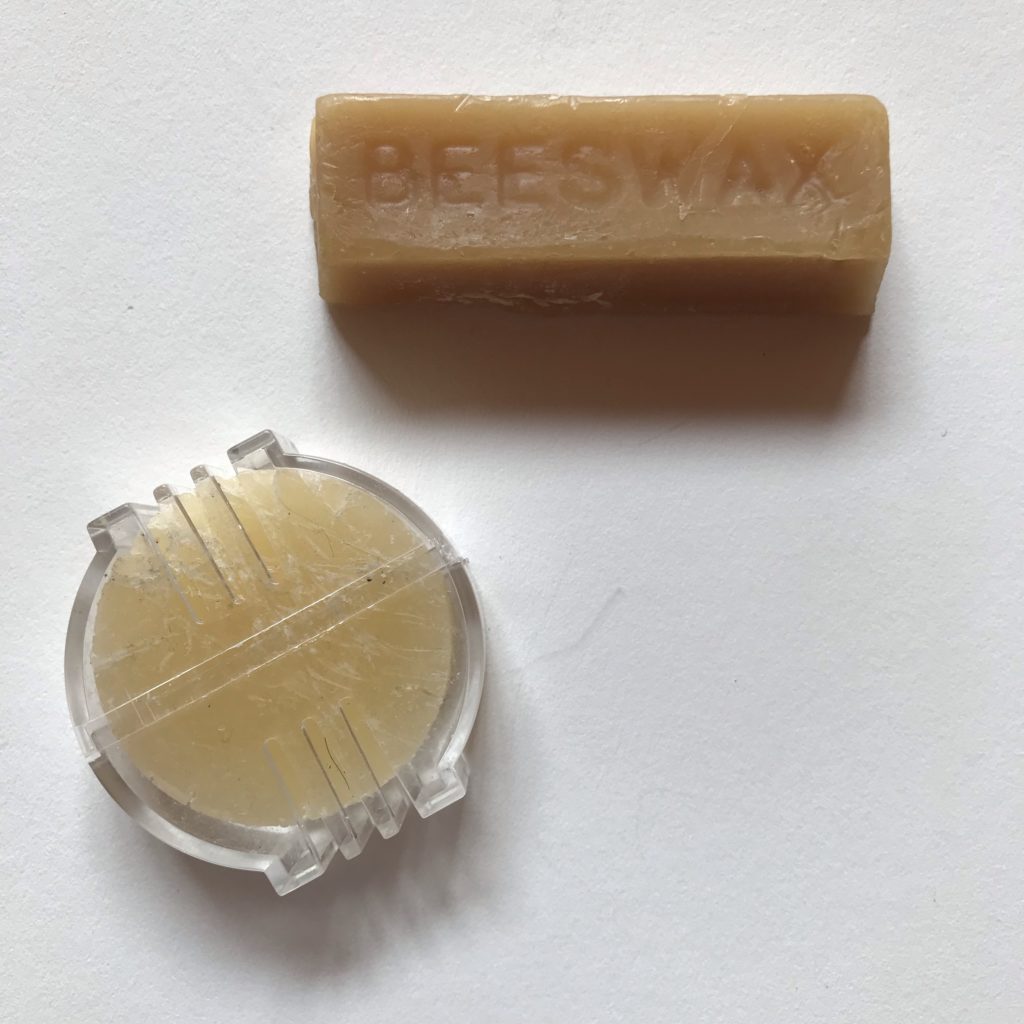
Waxing
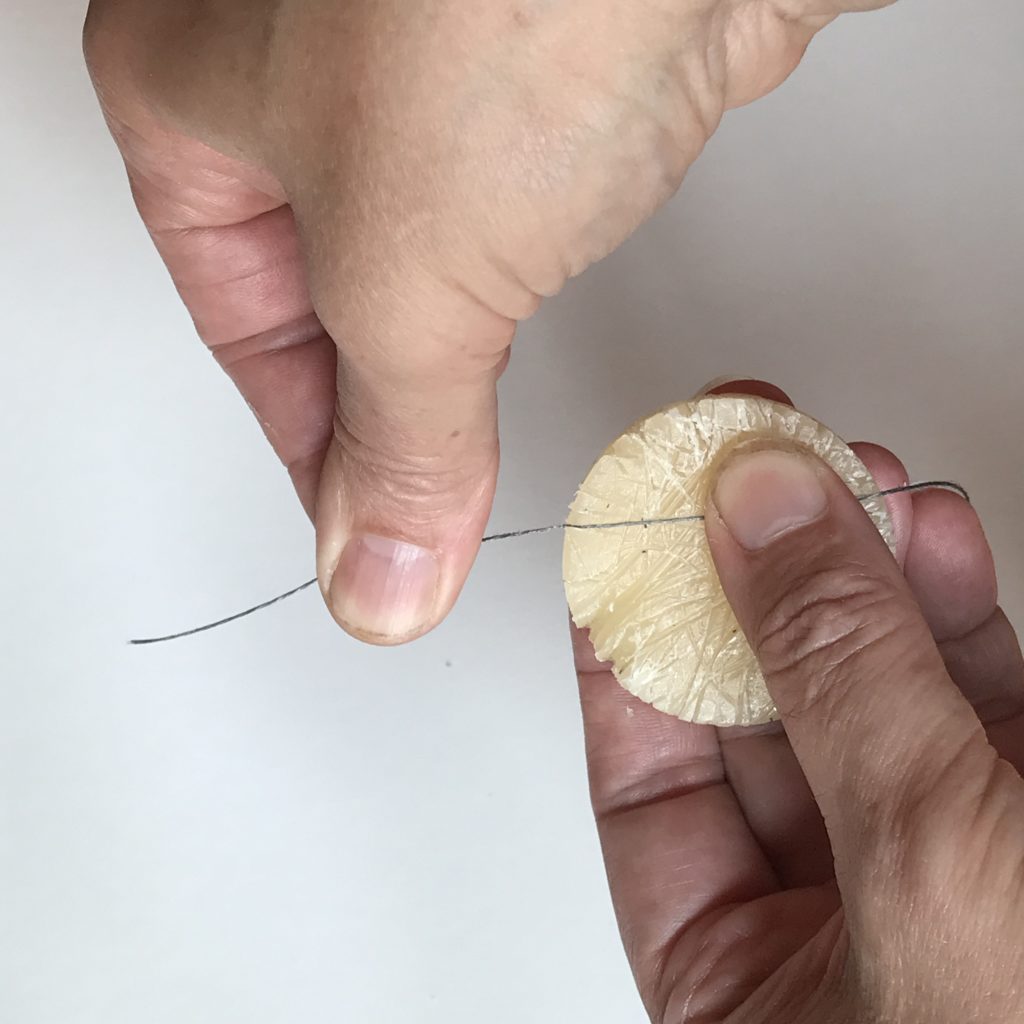
Before threading your needle, run a sufficient length of thread through beeswax a few times to prevent fraying and twisting; this is especially important for the hairy thread/yarn.
Avoid using more thread than you need to keep it more manageable.
Use one hand to hold the wax and the other to pull the entire strand of thread through, including both ends.
If you don’t have beeswax, you can substitute candle wax or canning wax (such as paraffin). Paraffin comes in large blocks, which are useful in a classroom setting.
In a pinch, a touch of Chapstick might be used to help tame frayed tips to aid with threading, but it can leave a noticable residue if you are working with paper
Threading
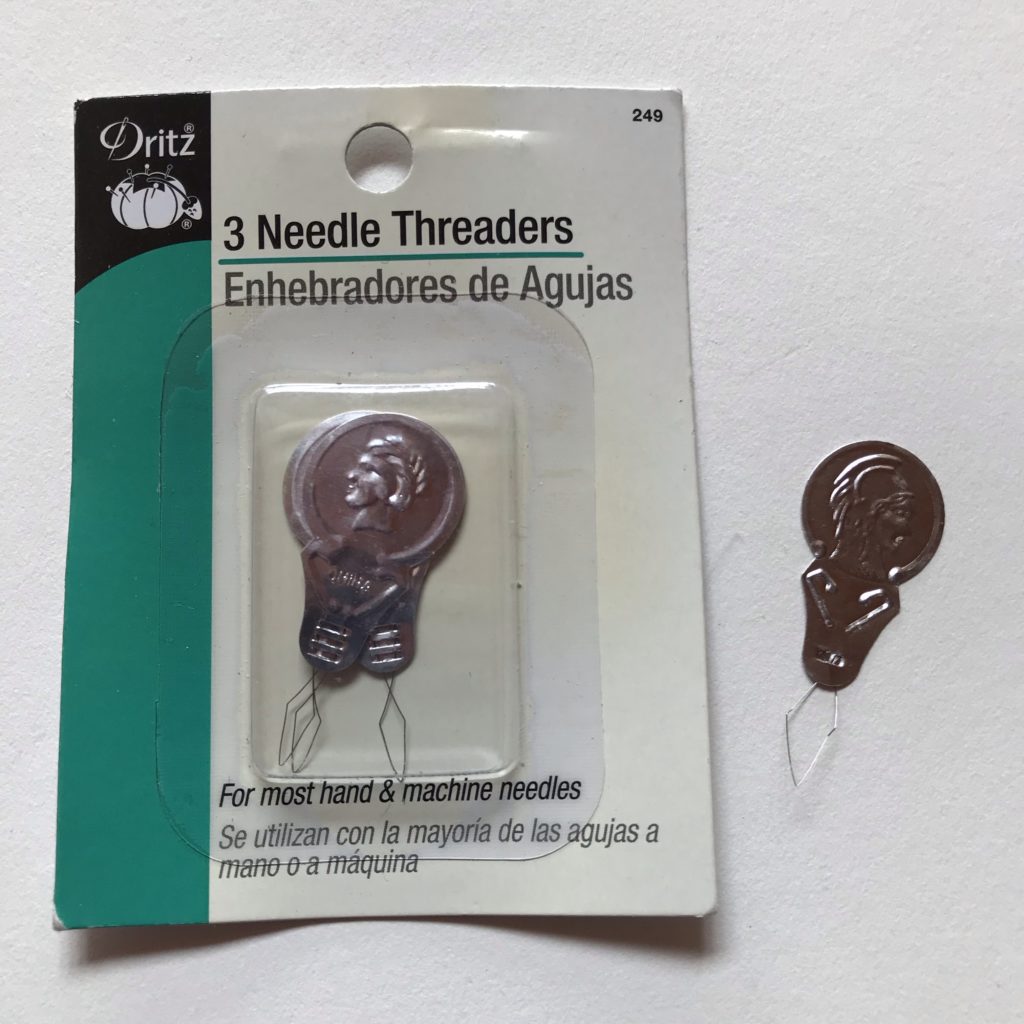
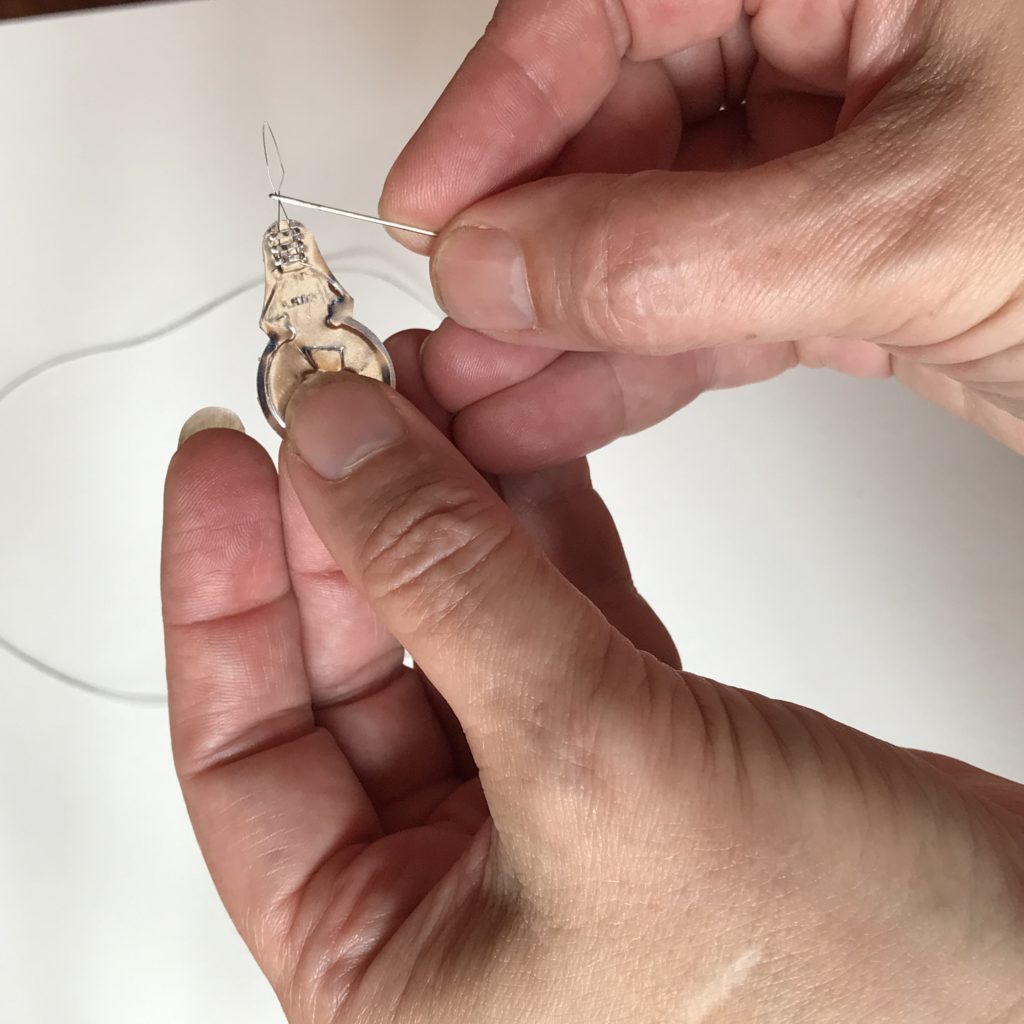
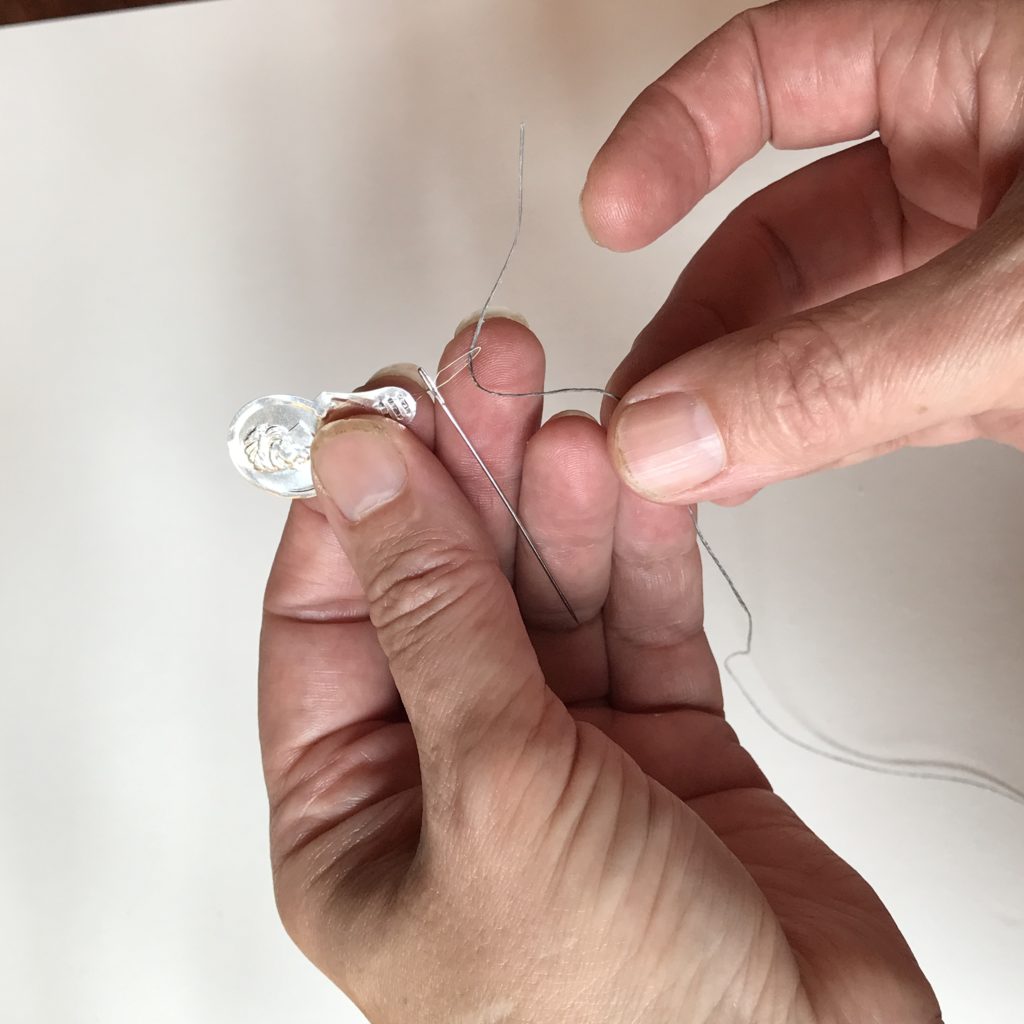
When threading your needle, you may want to try using a needle threader to help guide conductive thread through the eye. If you are not using one, pinching the waxed tip of thread between your fingertips to flatten it also works well (especially with practice).
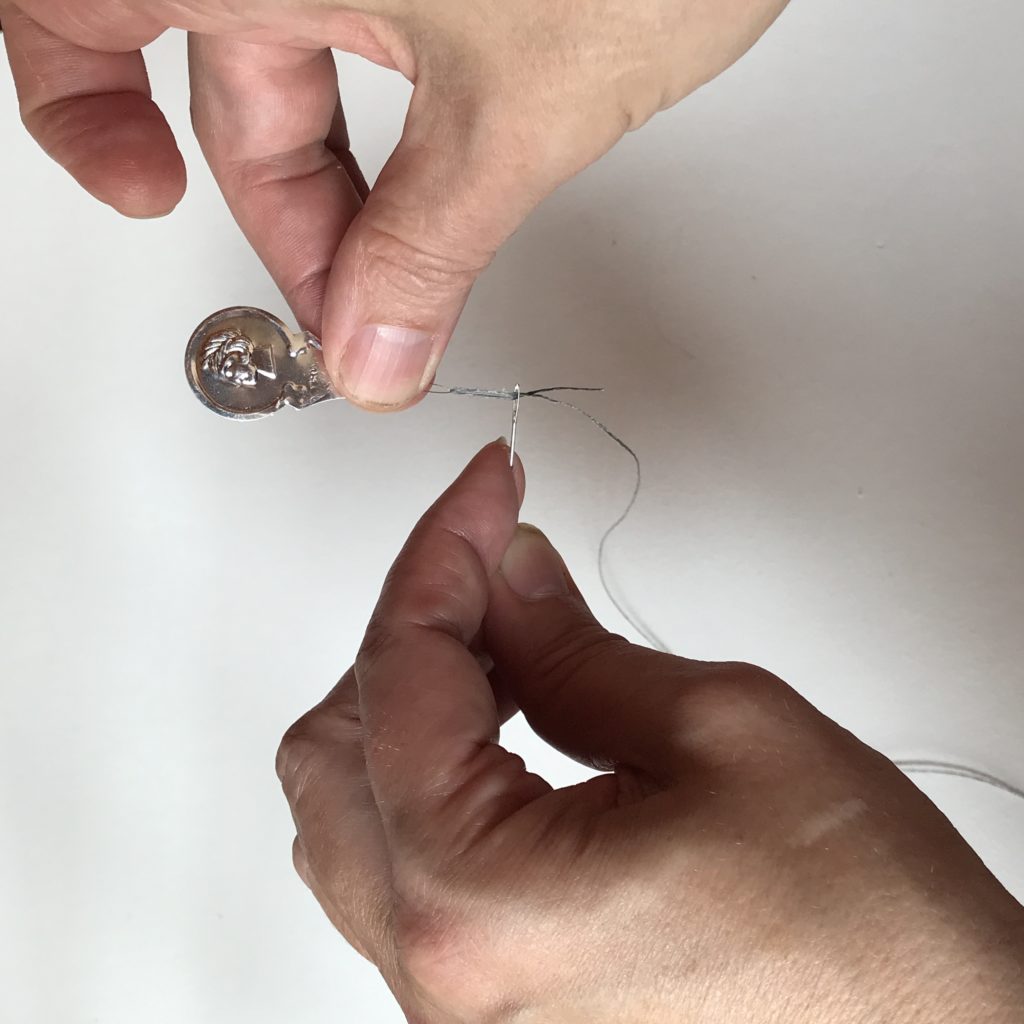
Thread the needle on one end of the strand, leaving a 1-2 inch tail coming out of the eye. This tail will allow you to adjust the length of the thread as you sew.
Threading the needle on only one end of the thread, and leaving a long tail that you may adjust as you sew, will make it easier for you to remove the needle and stitches should you make a mistake.
Knotting
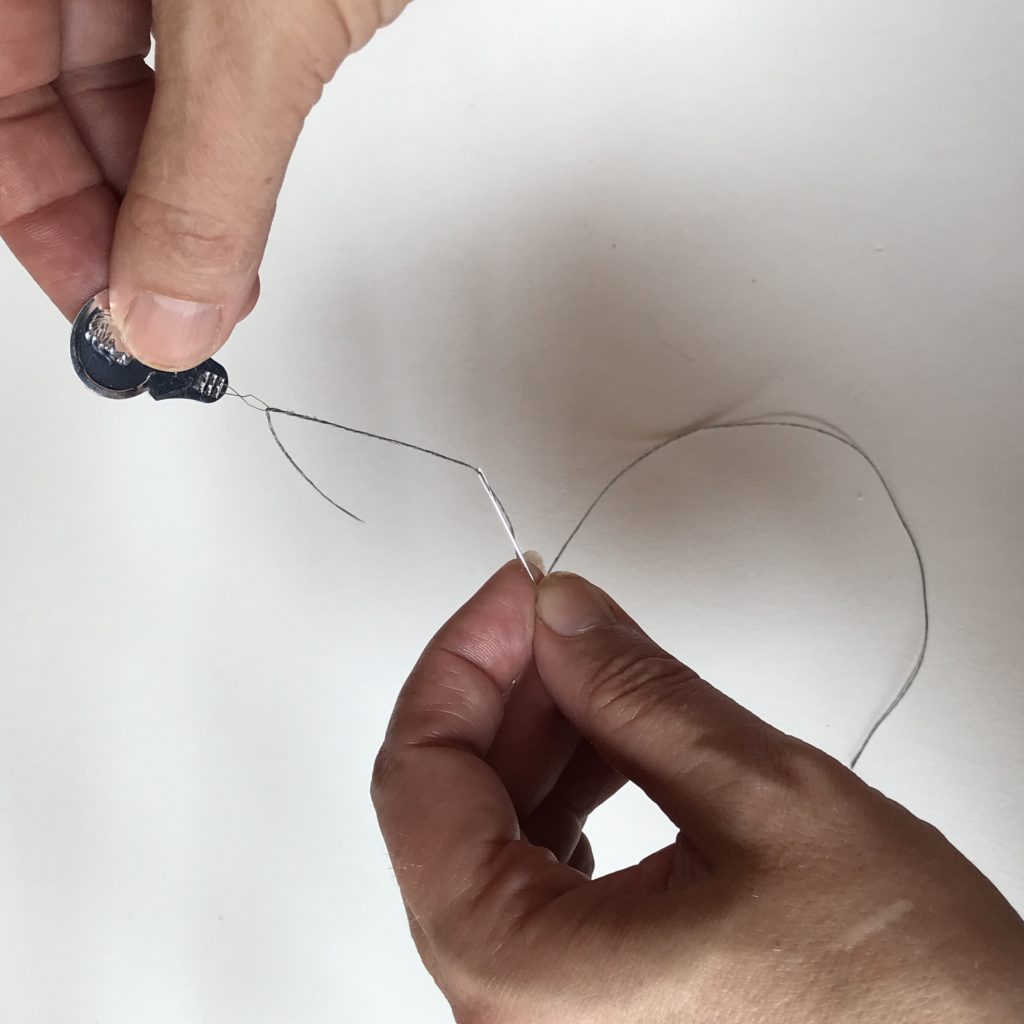
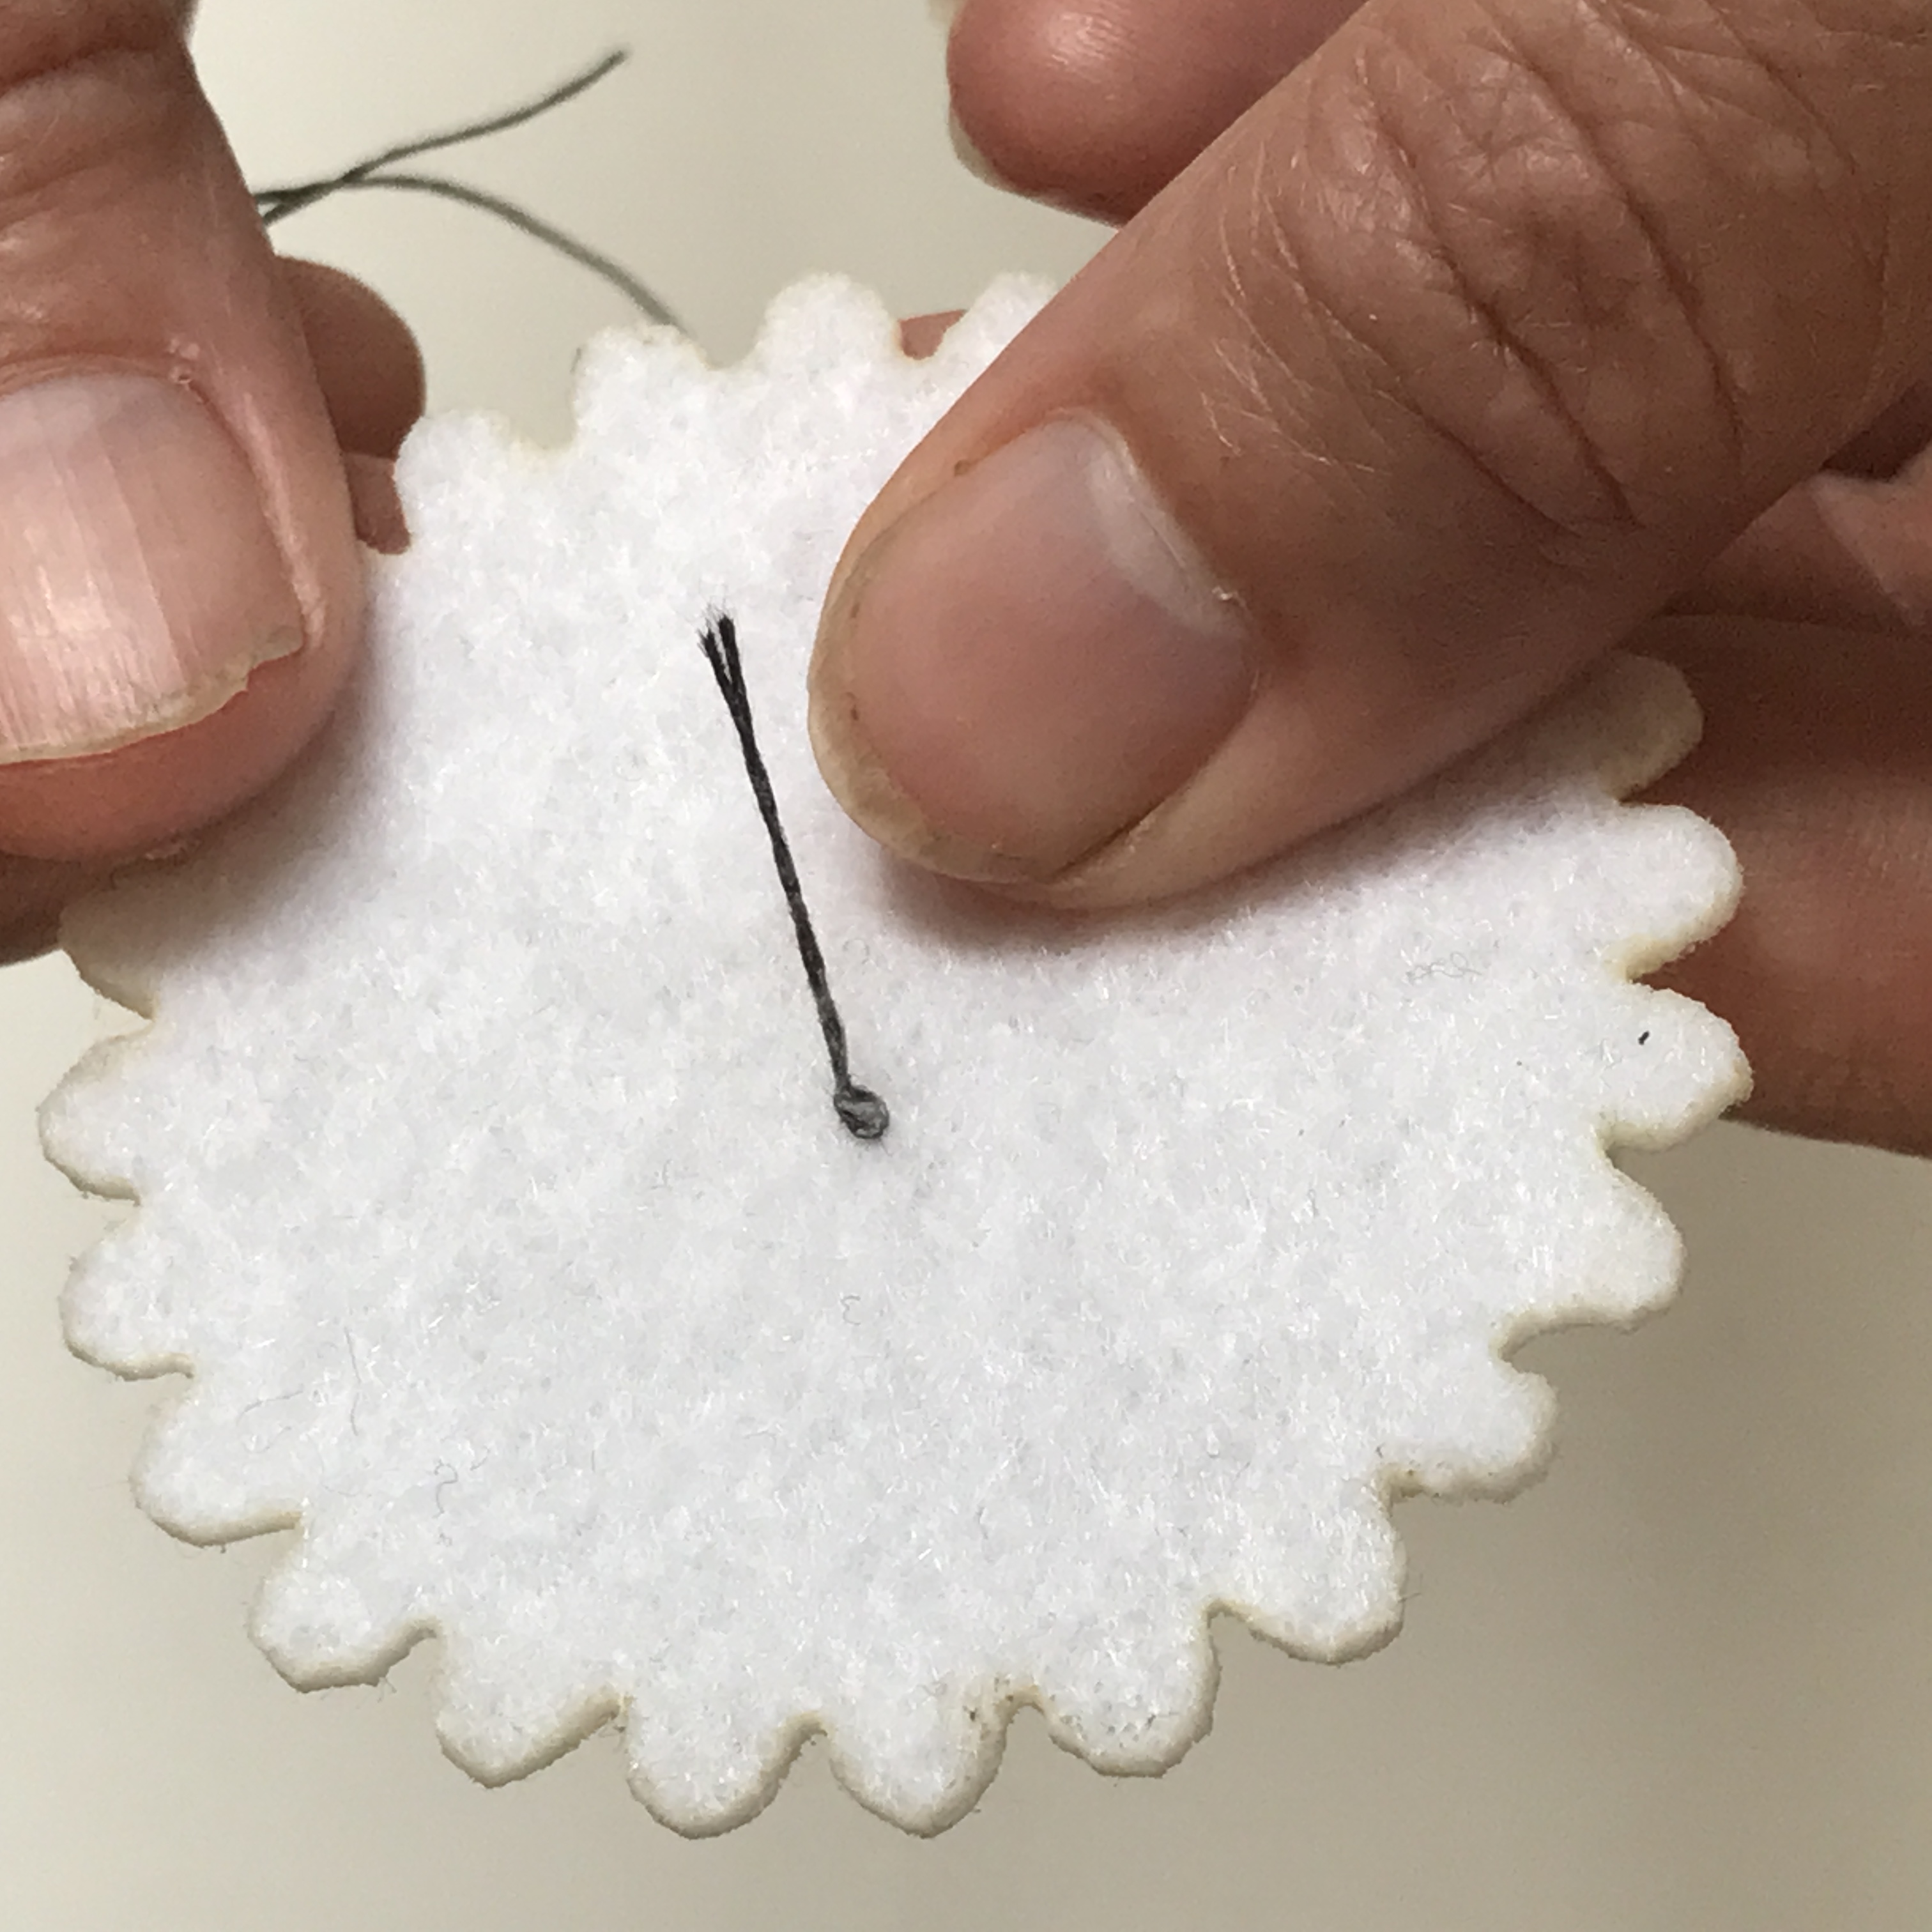
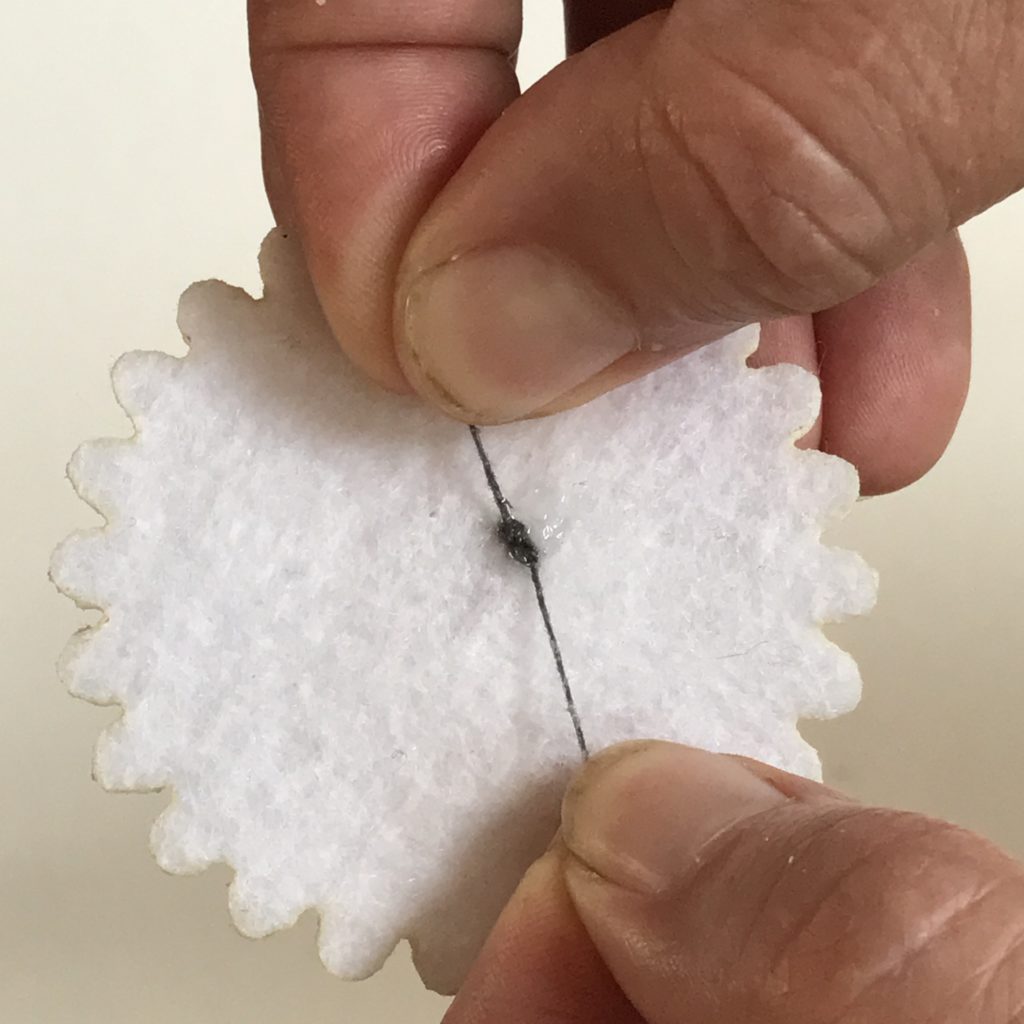
Leaving a 1-2 inch tail of thread coming out of the needle’s eye, pull the rest of the strand straight down, away from the needle, and make a knot at the bottom.
Unlike sewing with embroidery floss, where you might thread your needle, match up the two loose ends of thread, and then tie them into a knot to secure them together, conductive thread should always be left as a single strand.
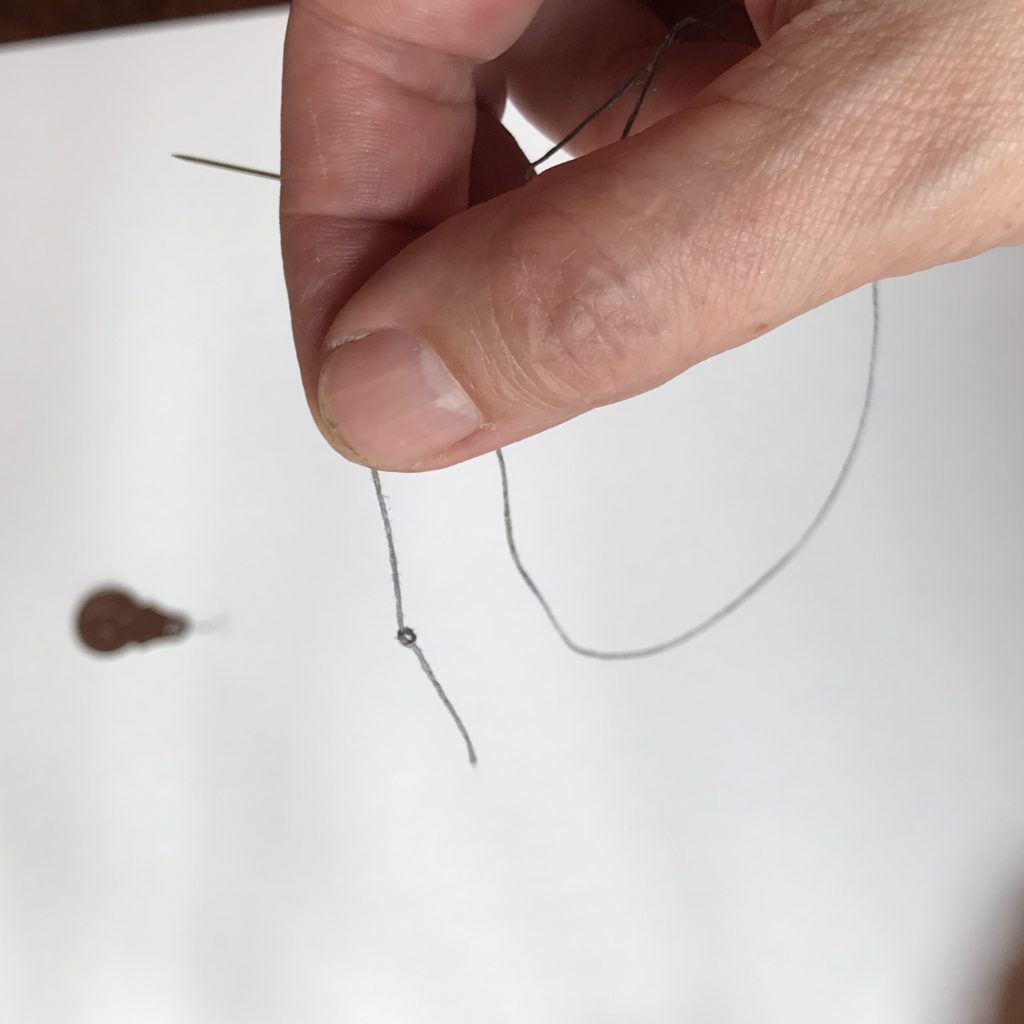
Only knot one end of the thread to make it easier to remove the needle if you make a mistake while sewing.
Knotting only one end of the thread makes it easier to undo your stitches (without cutting them) should you need to troubleshoot.
Stitching
A running stitch is the most common stitch used for sewing conductive thread traces.
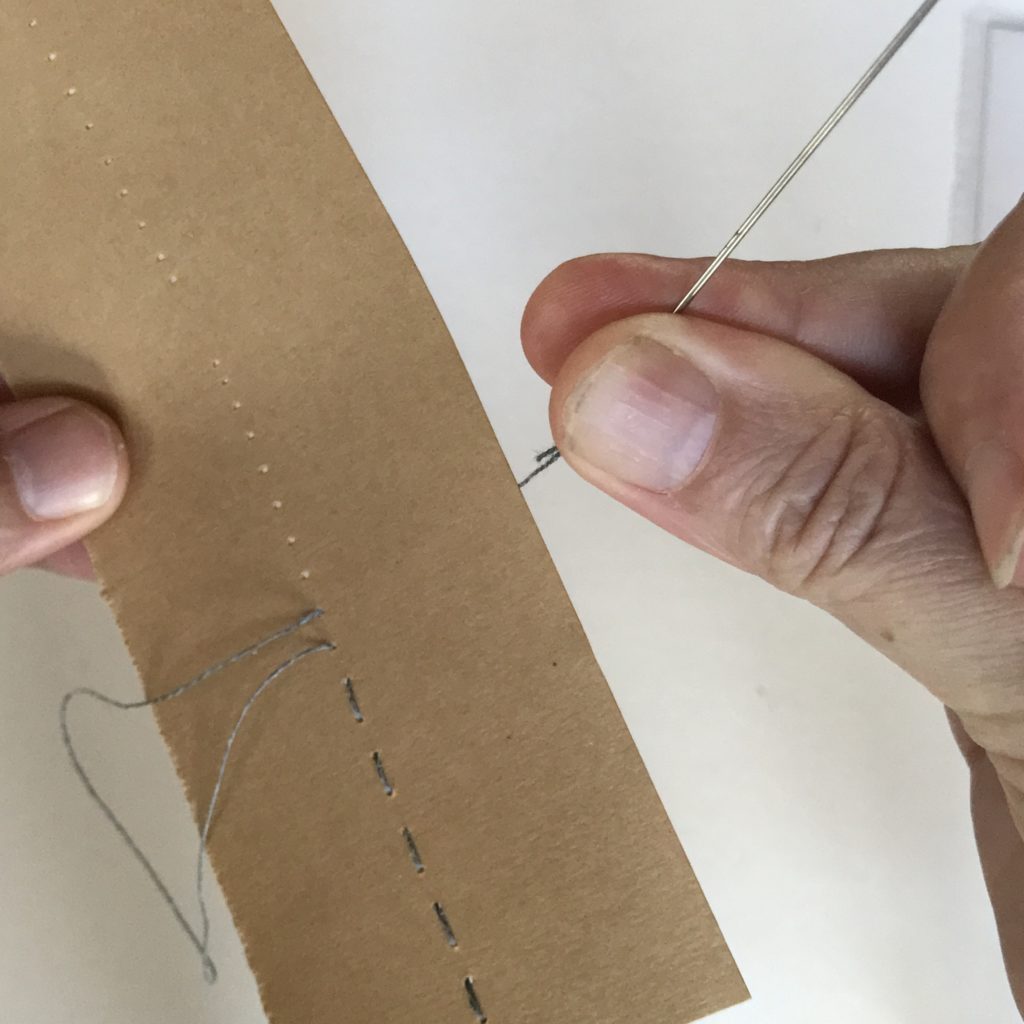
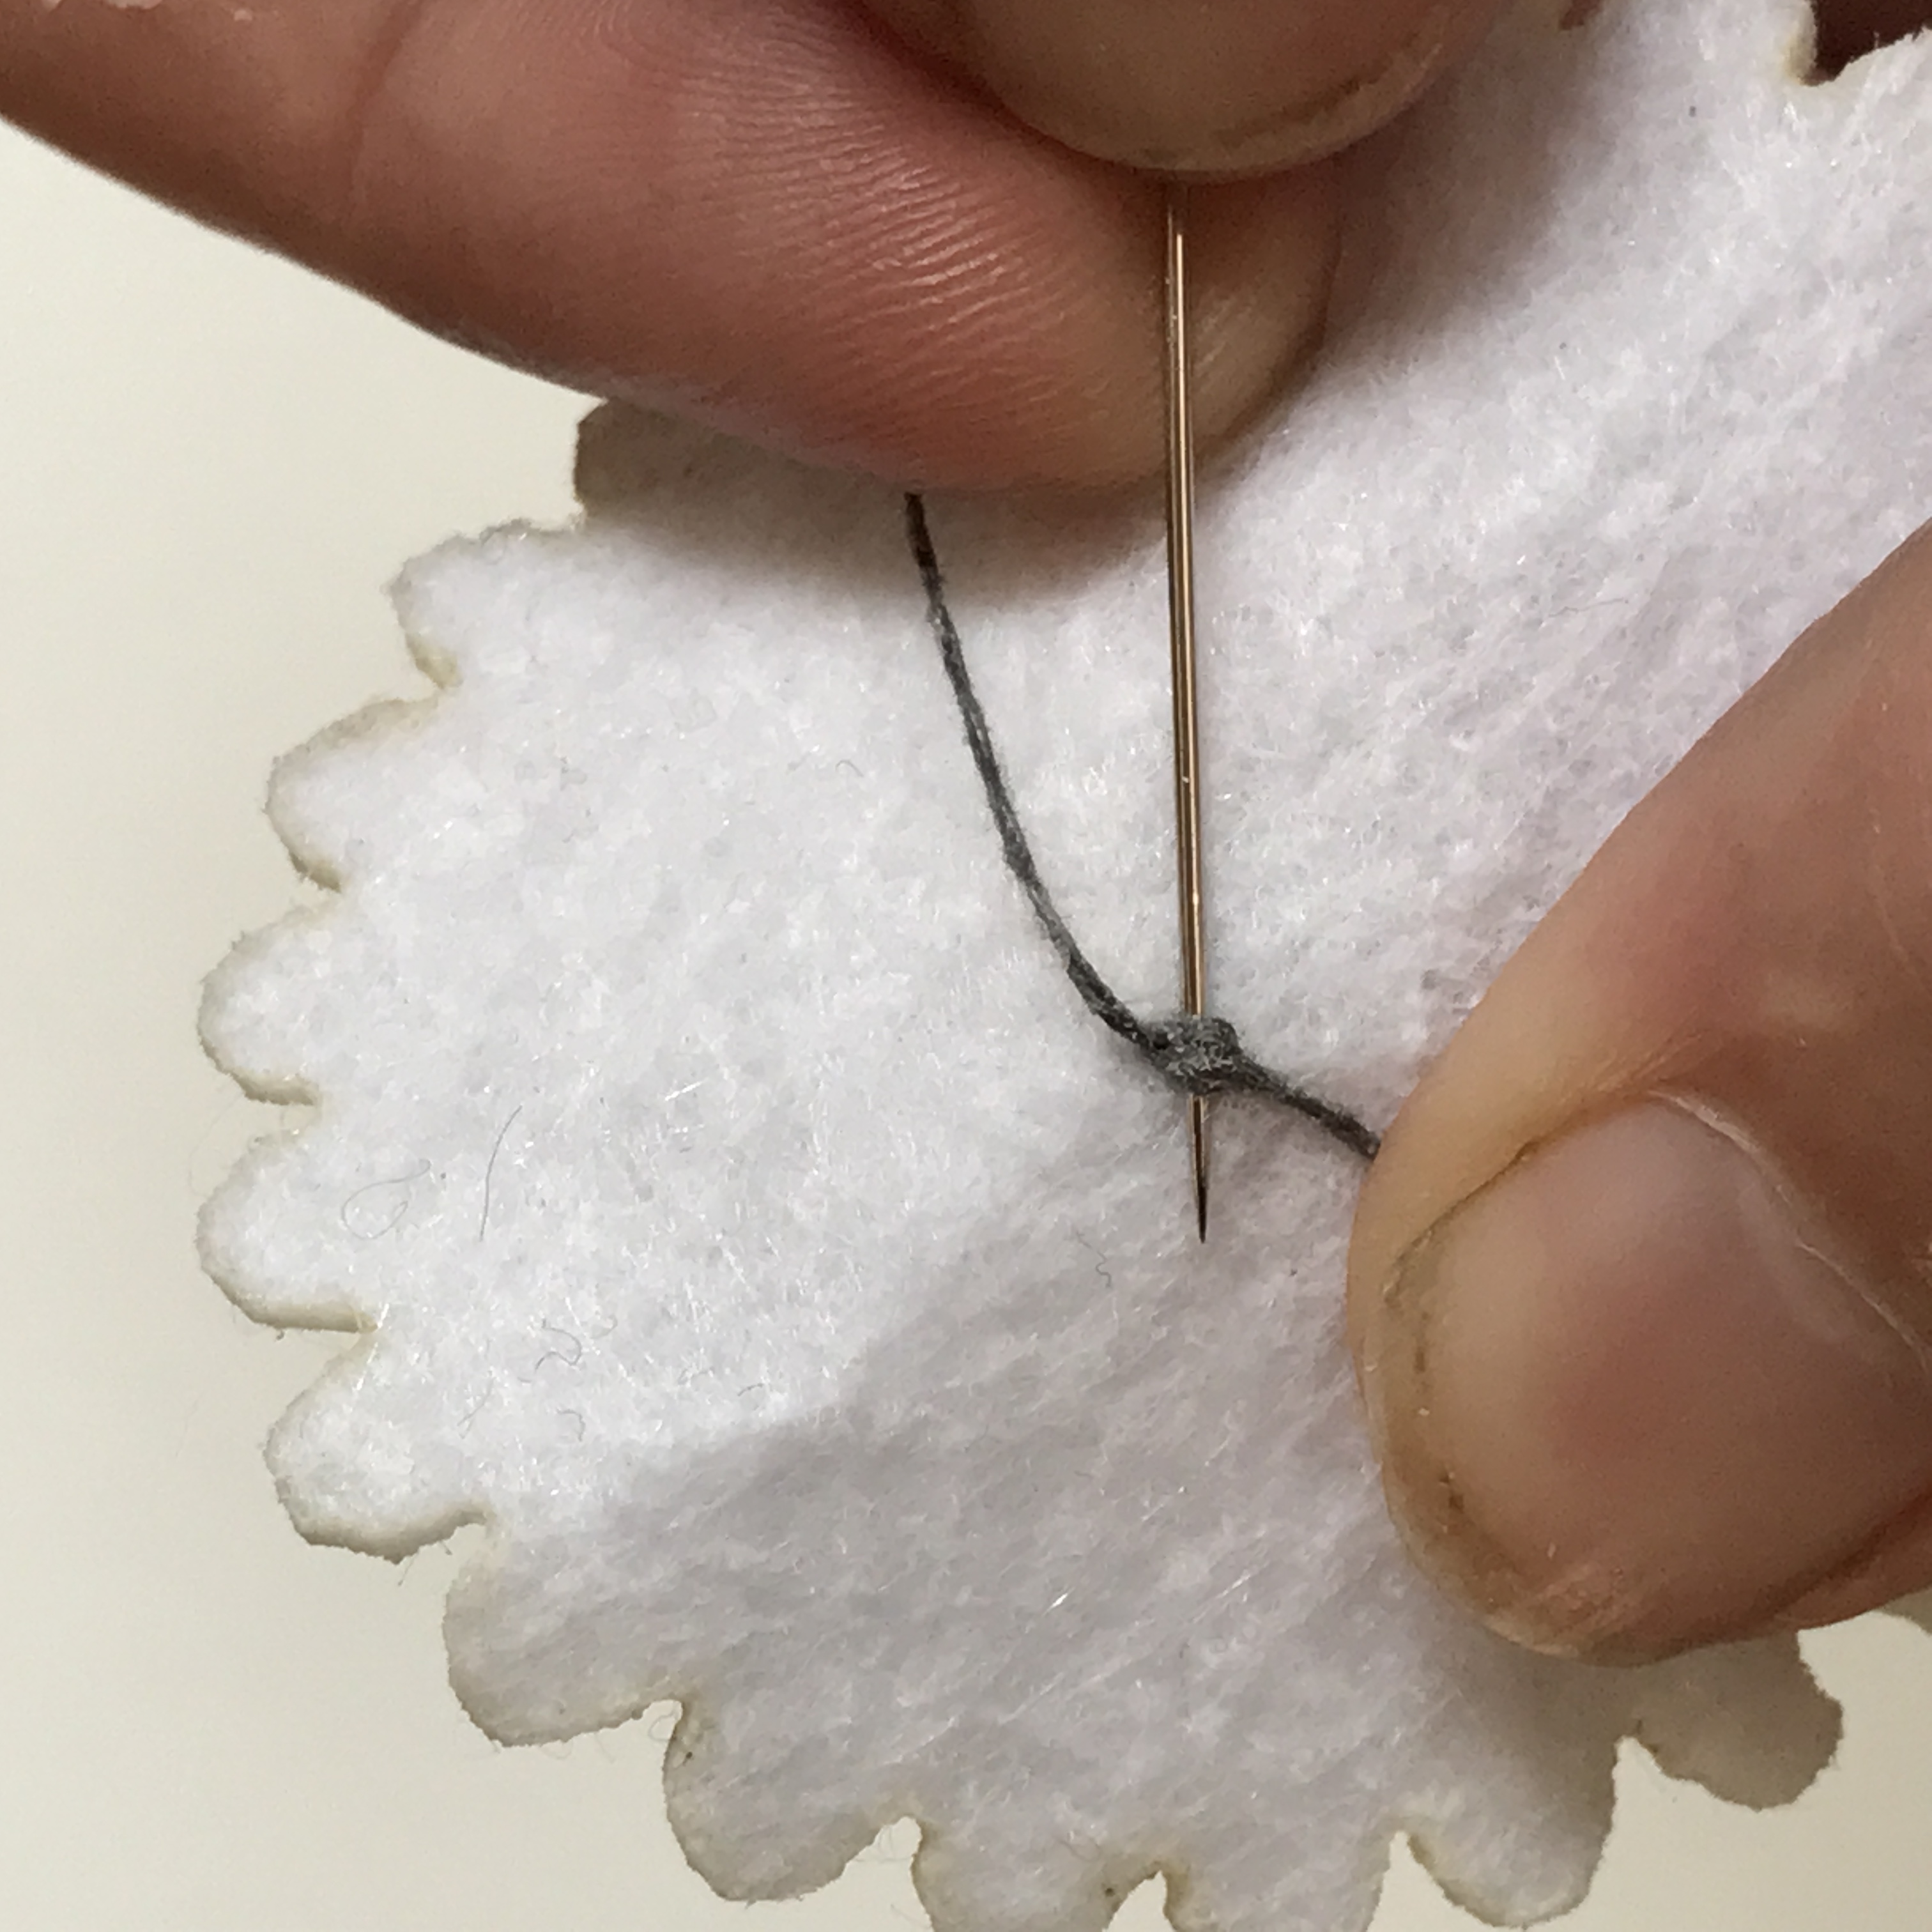
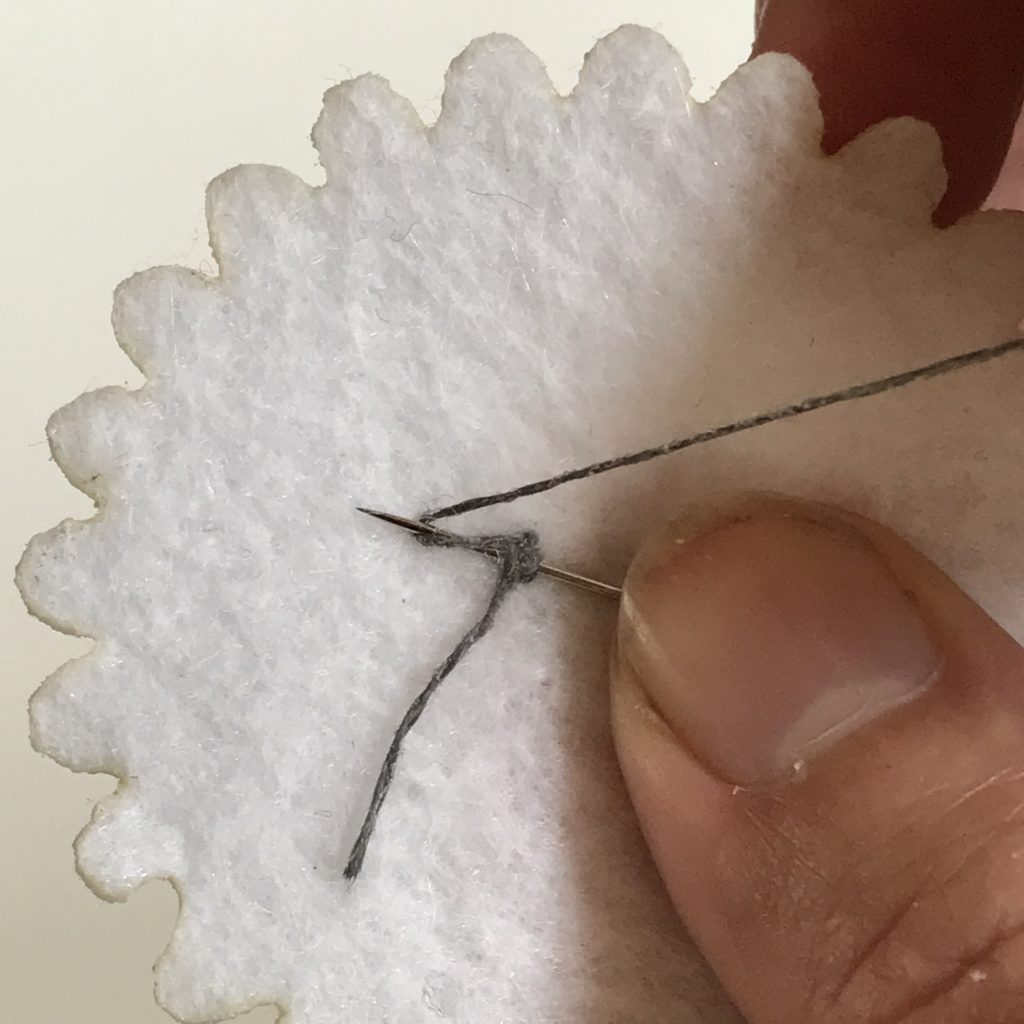
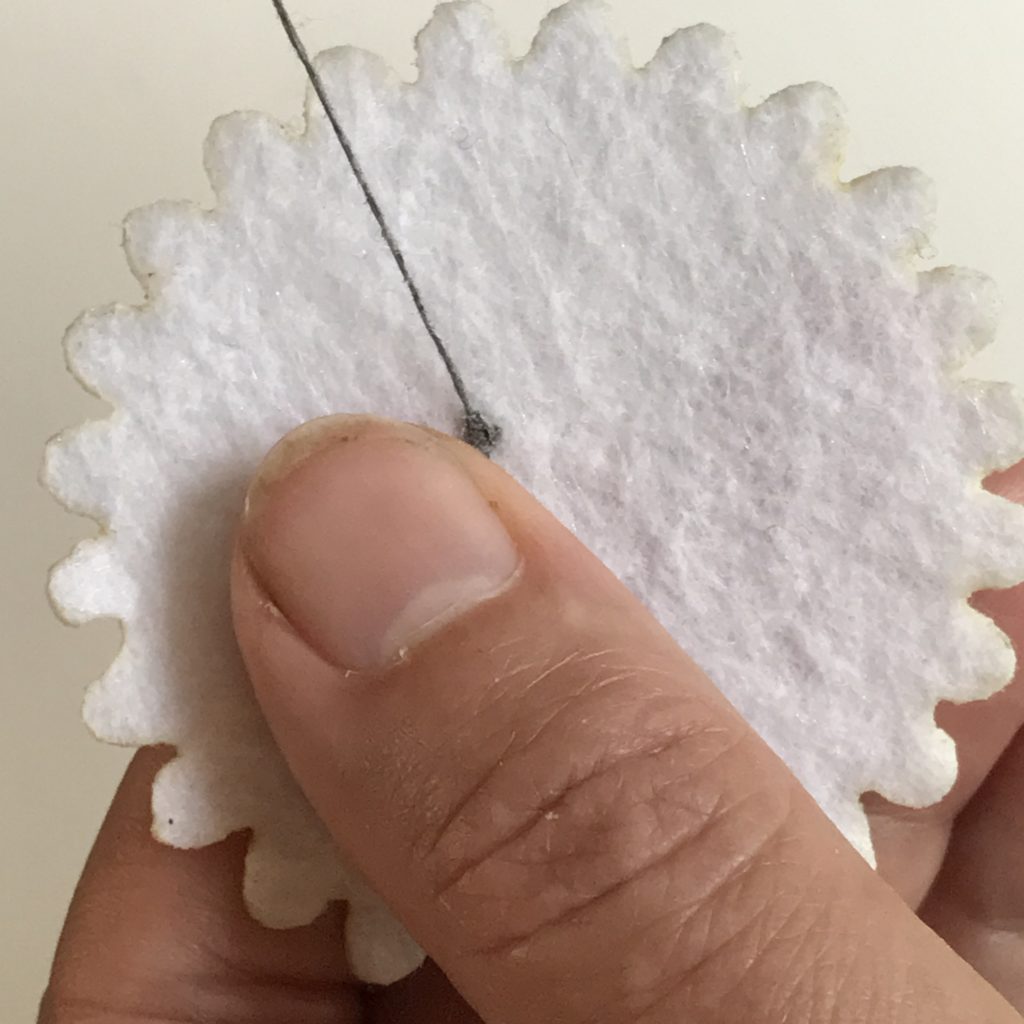
To keep the knot hidden from view, a running stitch enters the back side of a piece of fabric or paper and then passes through to the front.
Pull gently on the thread until the knot locks. Then enter the front side, and carefully pull the thread all the way through again.
Then, as the name “running stitch” implies, pass back through to the back side and keep going, in a series of sequential, repetitive stitches.
In order to avoid loose connections and short circuits, it’s wise to keep your stitches small and neat.
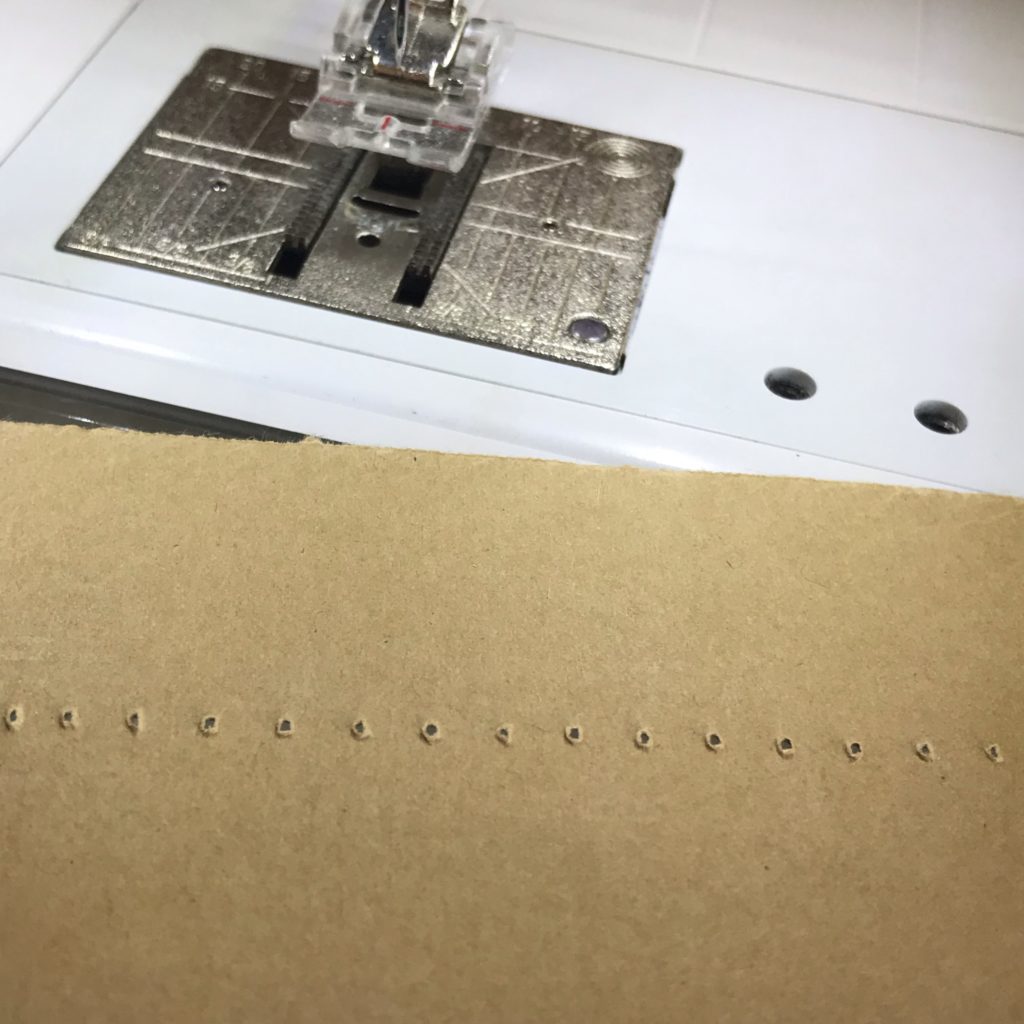
If using a sewing machine to mark your holes, choose the longest stitch possible. Short stitches will perforate your paper, causing it to rip easily.
Insulation & Bridging
It’s important to insulate conductive thread traces to keep positive and negative threads from touching, especially in areas where a component, such as a Circuit Sticker or LED, has been sewn down.
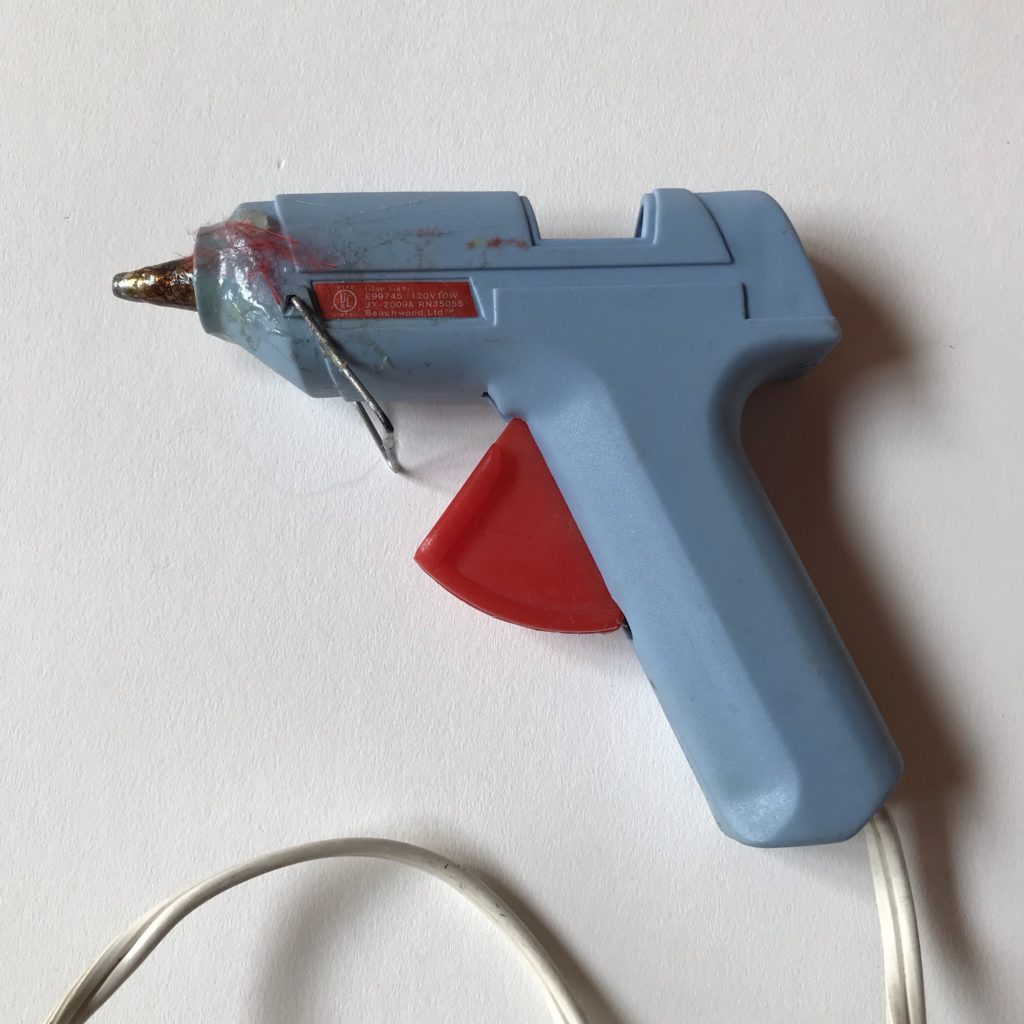
Hot glue and fabric paint, when dry, make good insulators for the back sides of circuits sewn onto fabric.
A piece of paper, fabric, or tape makes a good insulator for covering conductive thread traces on paper circuits.
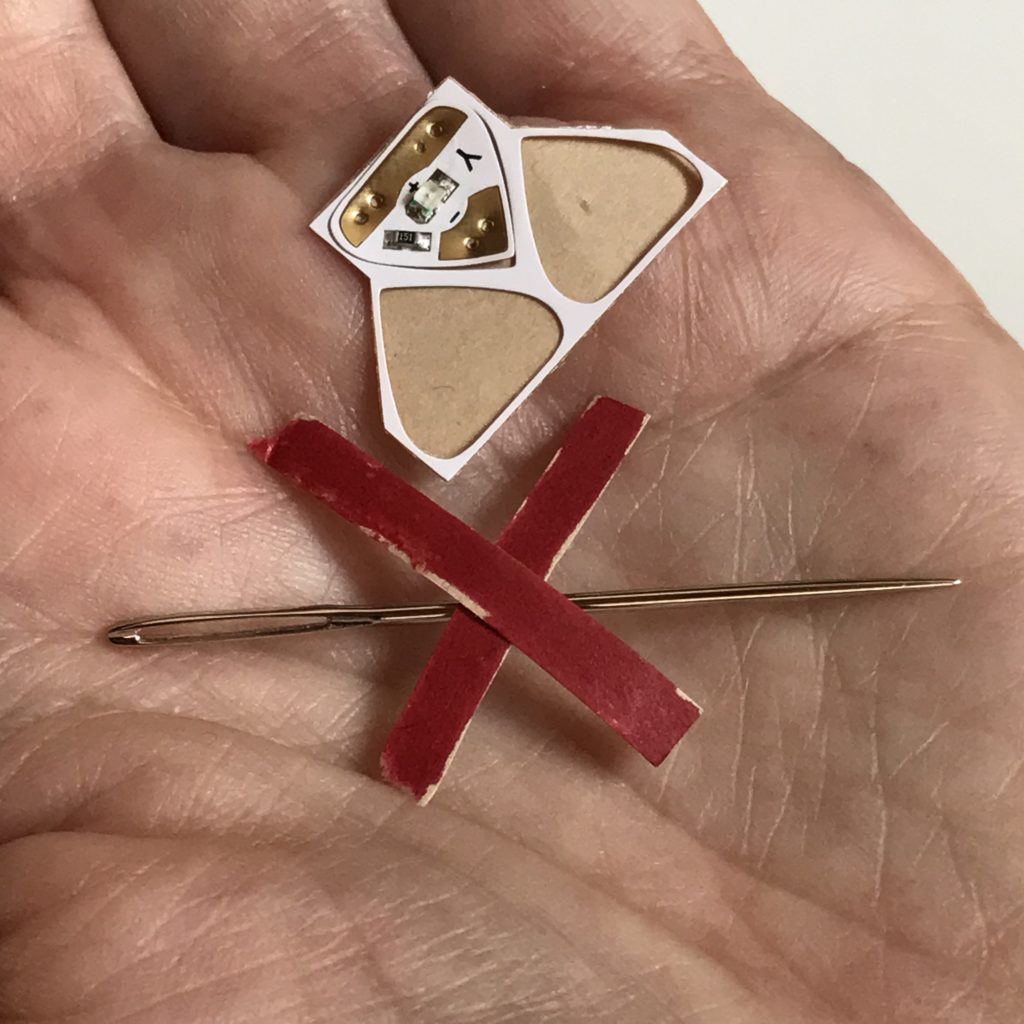
On occasions when you may need to cross a piece of positive thread over a piece of negative thread while sewing, scraps of fabric, paper, or tape make good insulating bridges (barriers) between the threads.
Sewing a Circuit Sticker to Fabric
Connections
It’s important to make a solid physical and electrical connection between the conductive thread and electrical components you are trying to secure; loose connections will result in wonky circuits.
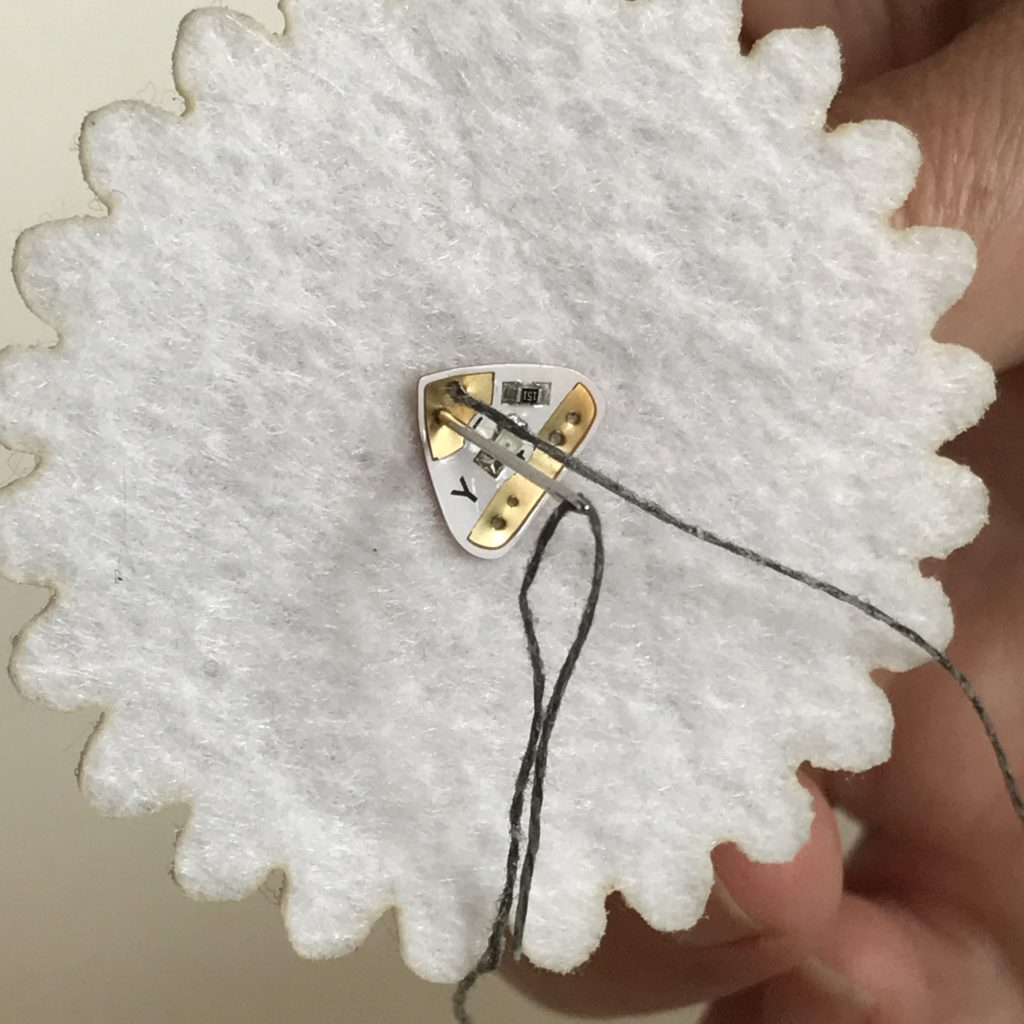
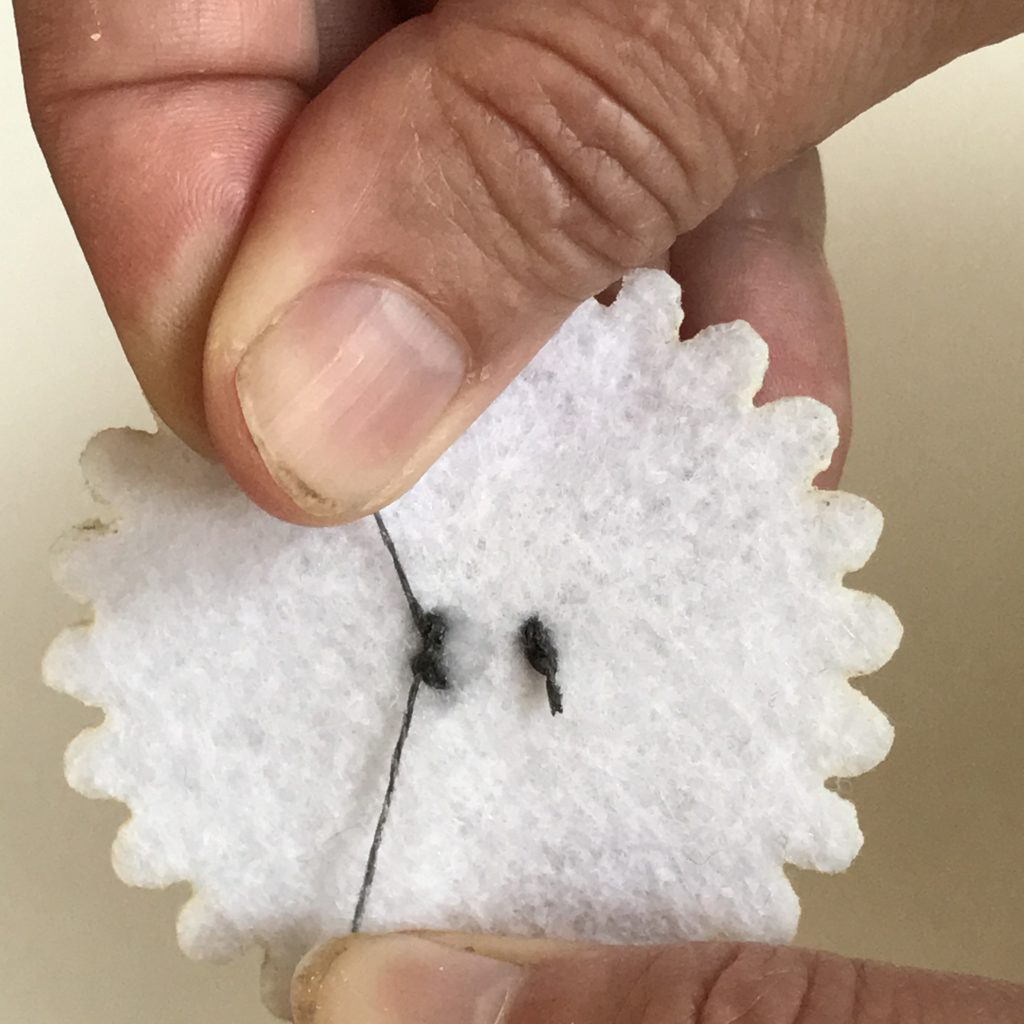
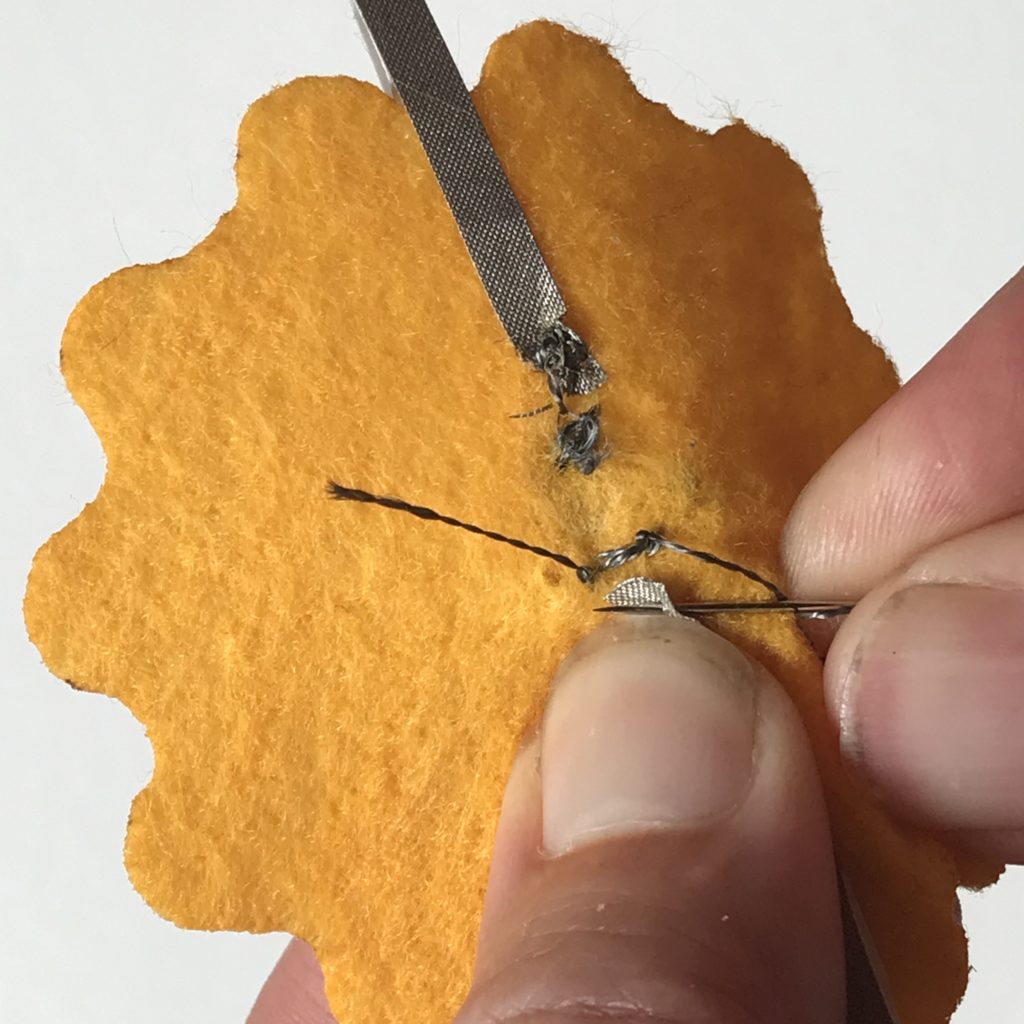
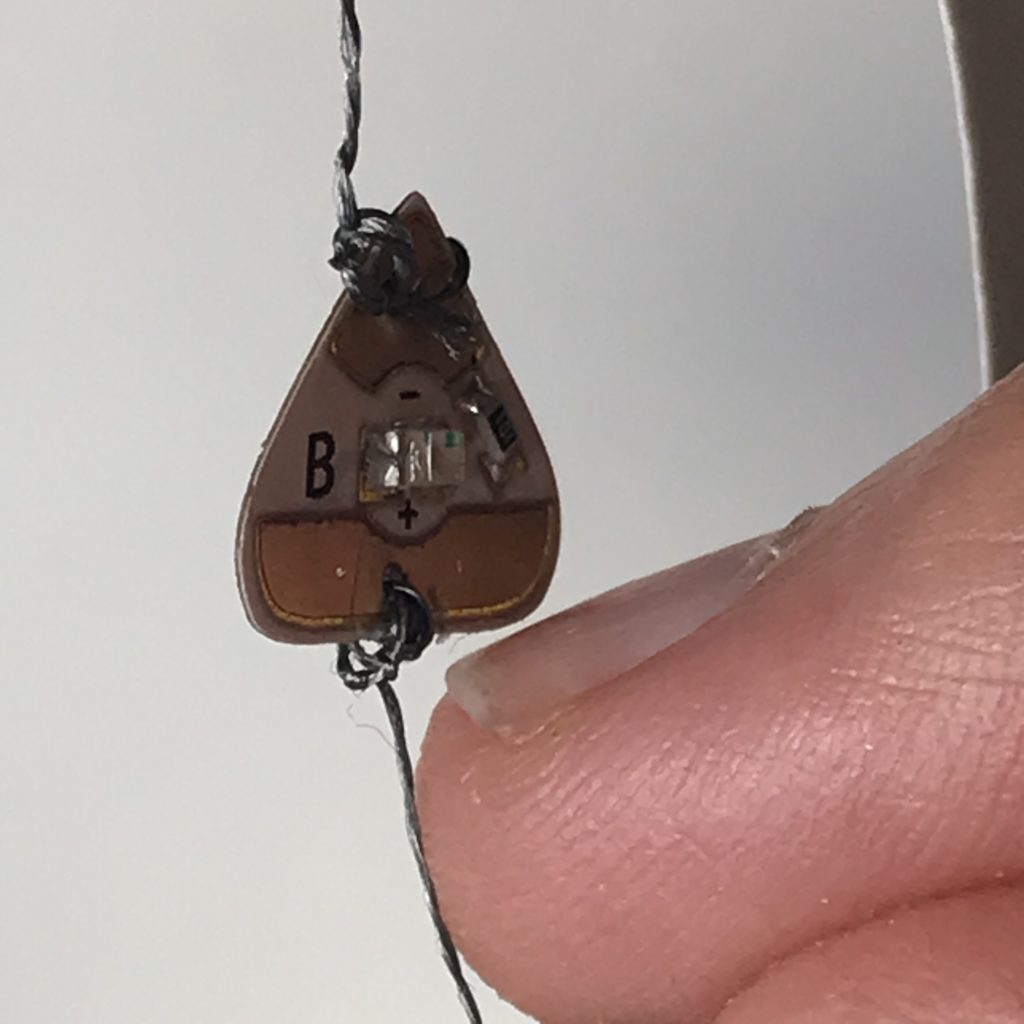
When using conductive thread to secure a component, such as the legs of a through-hole LED, a battery terminal, or the metal pads of a Circuit Sticker, sew 3-5 firm stitches around the component.
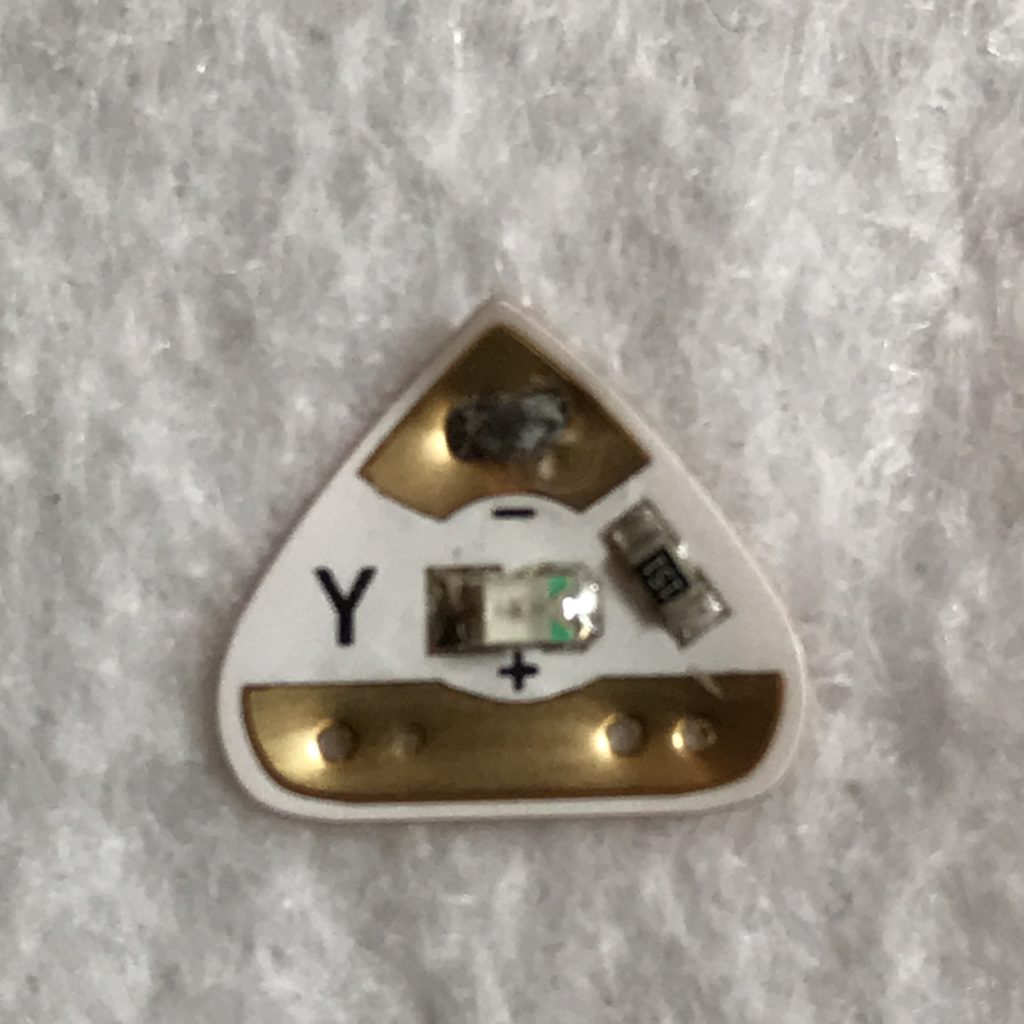
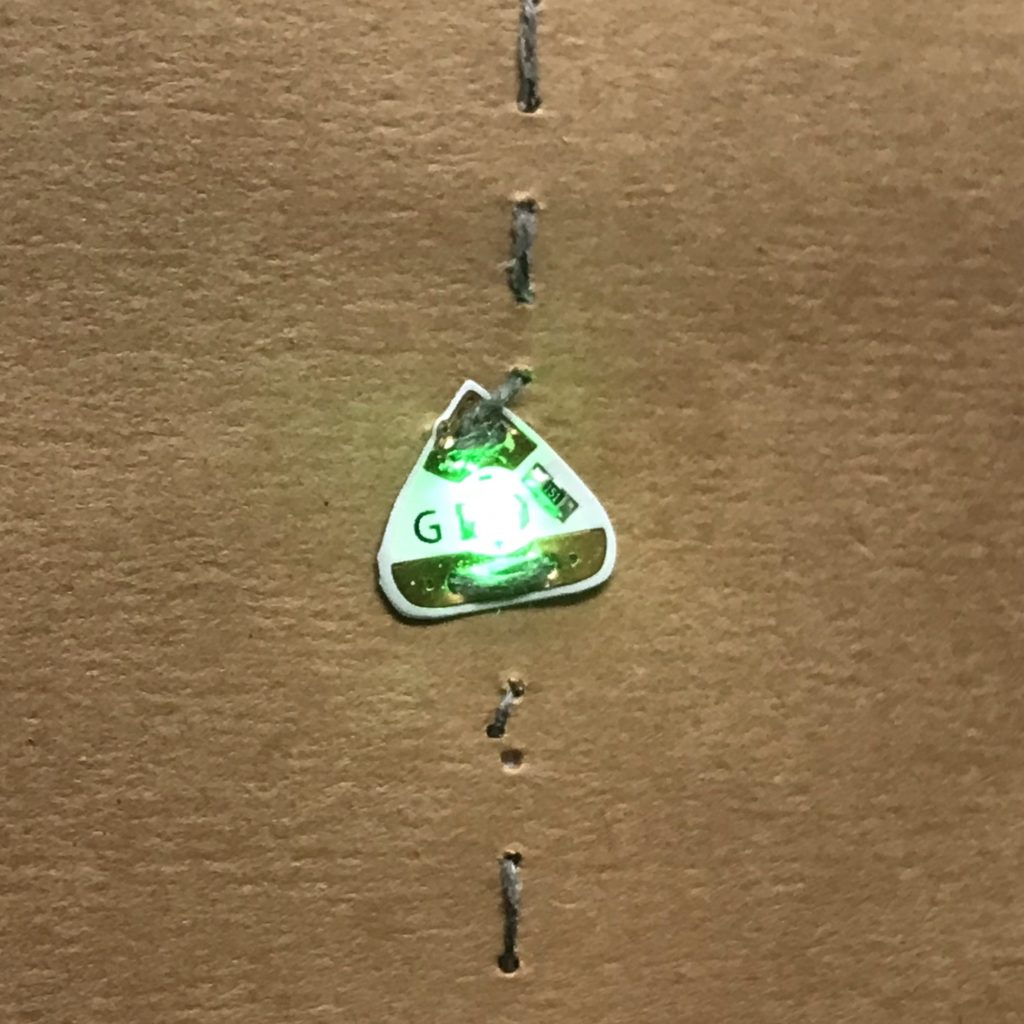
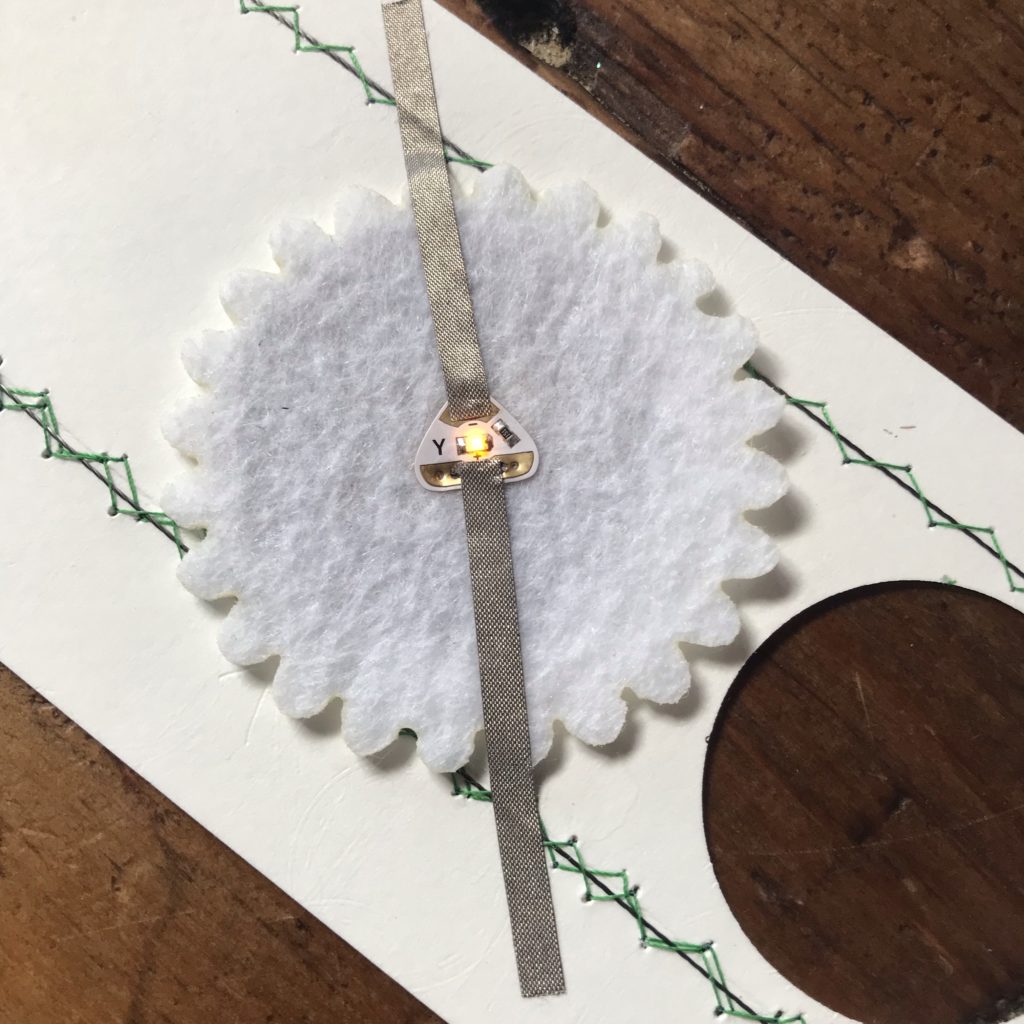
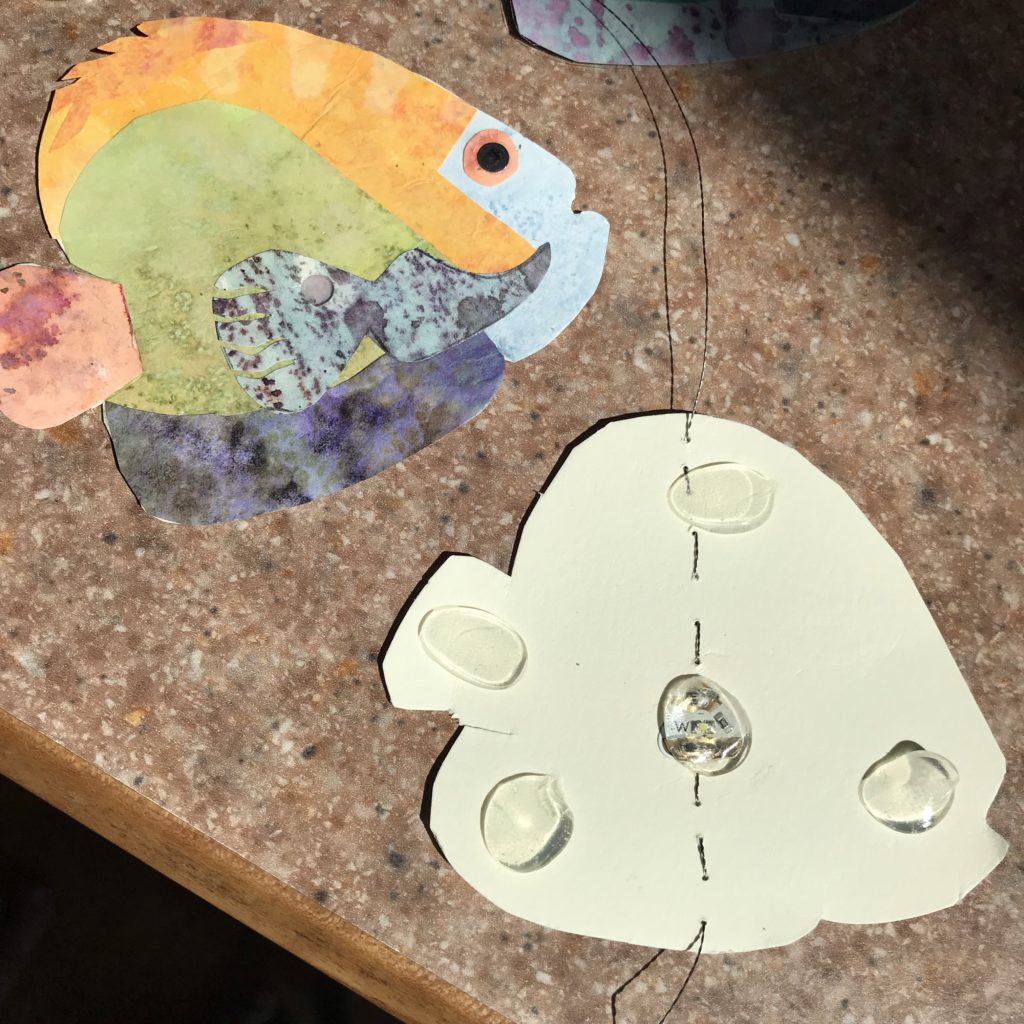
In the image to the left, four stitches of stainless thread/yarn have been made to secure the negative and positive pads of a Circuit Sticker. It wasn’t necessary to enlarge or sew through all of the holes.
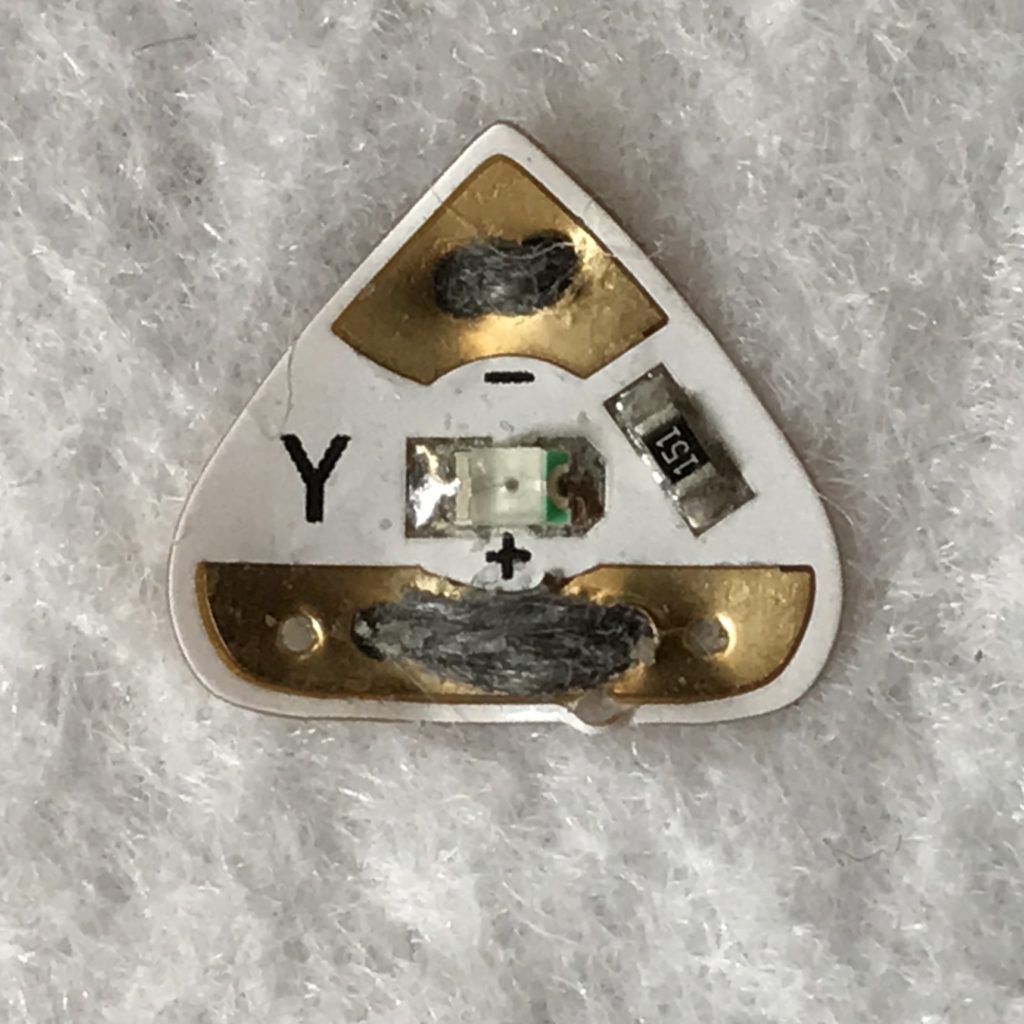
If you look carefully, you might notice a loose fiber of conductive thread/yarn, slightly to the left of the “Y.” Loose fibers such as this can cause short circuits & should be removed when discovered. To avoid encountering loose fibers, avoid cutting conductive thread over your projects and work space.
Connectors
Conductive thread pairs well with conductive fabric tape, because it’s strong enough to sew through. While copper tape may be used to connect or reinforce a strand of conductive thread on a flat surface, like a piece of paper, piercing it will tear and weaken it.
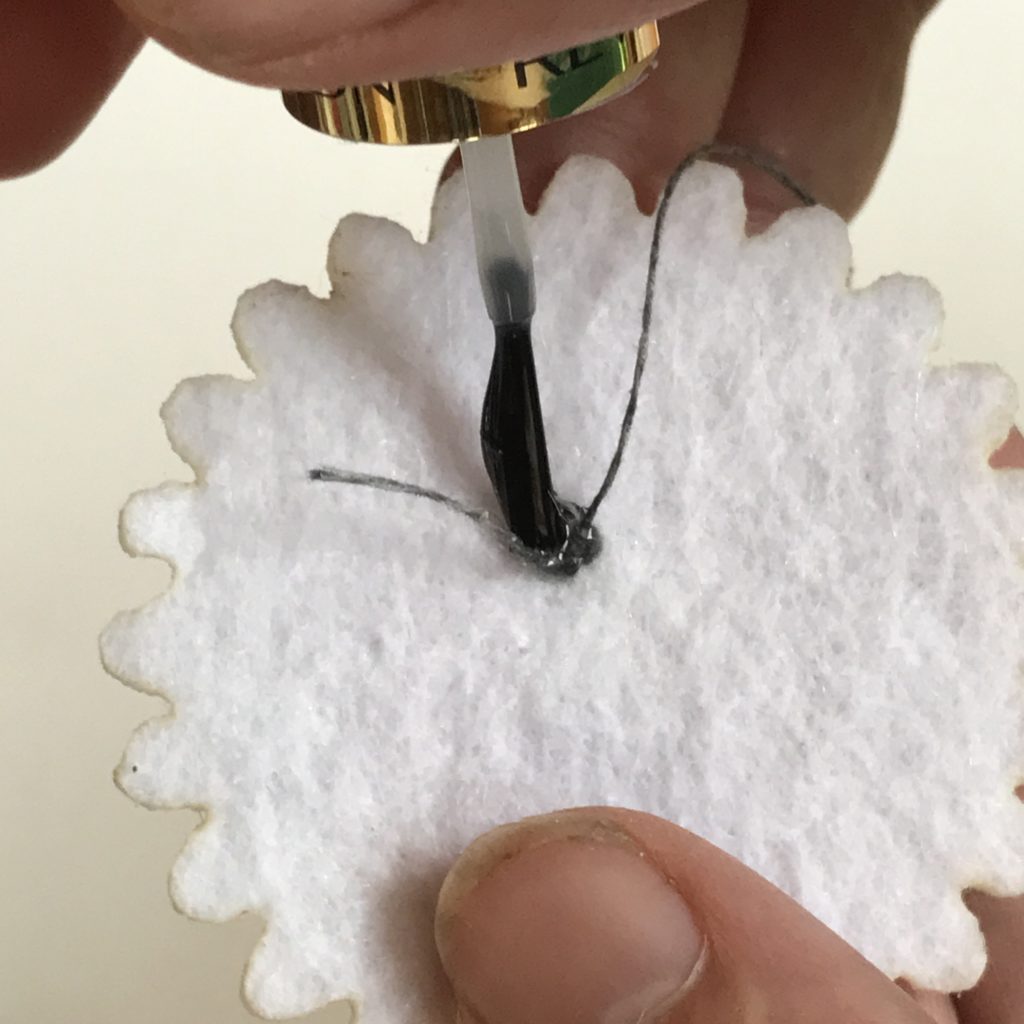
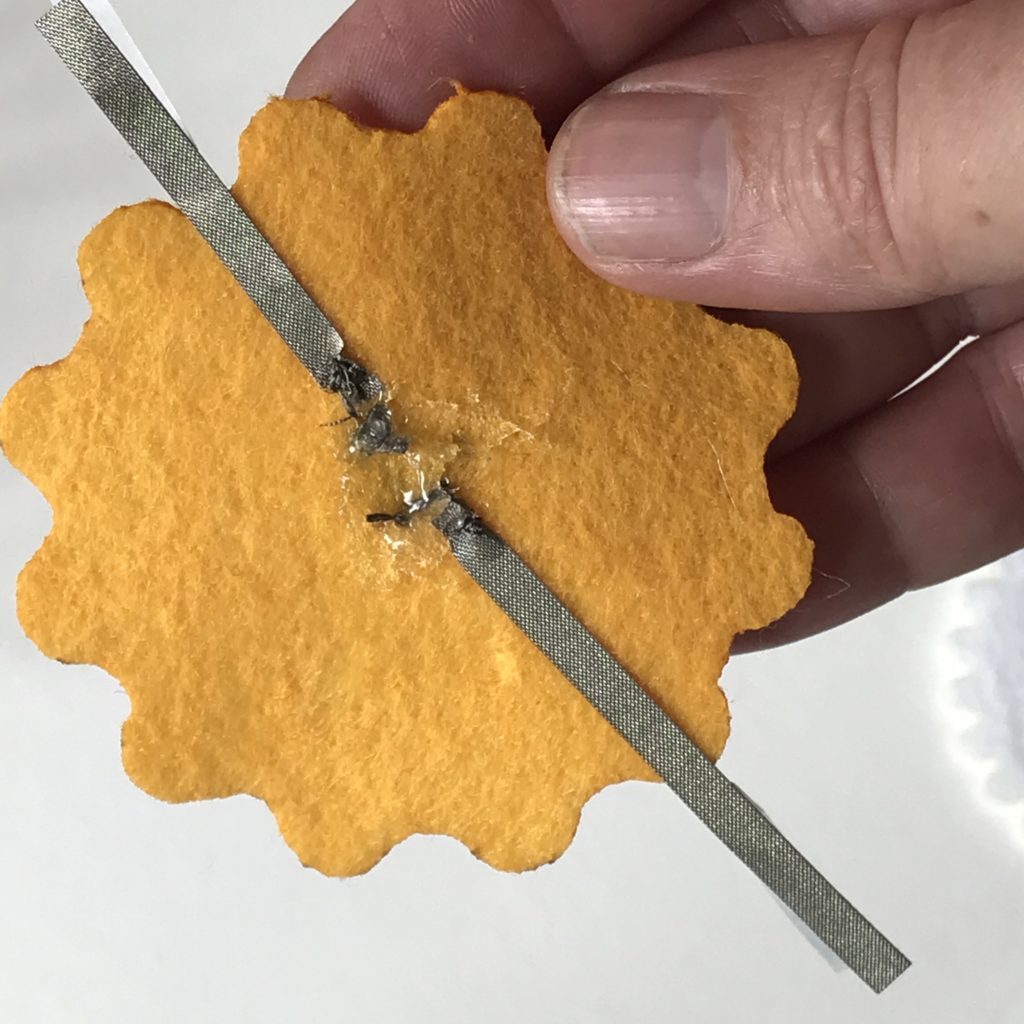
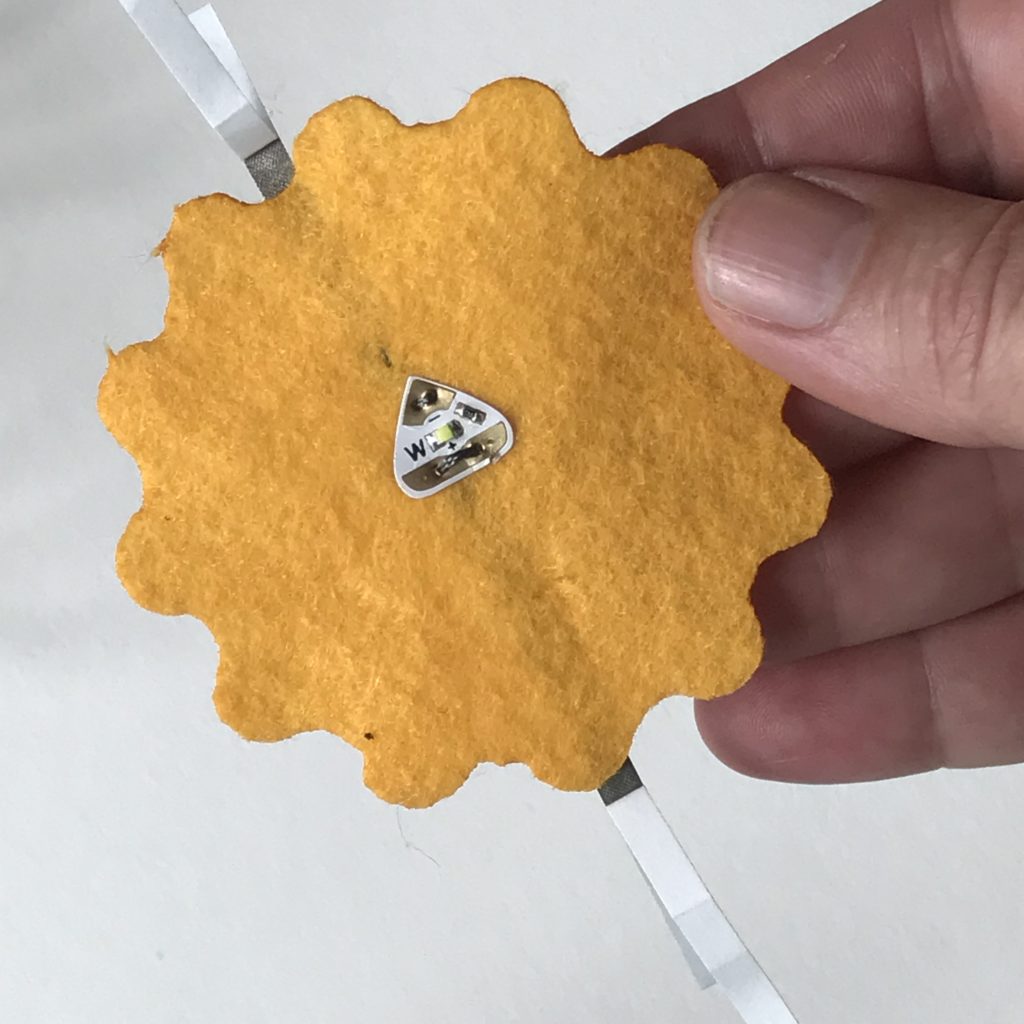
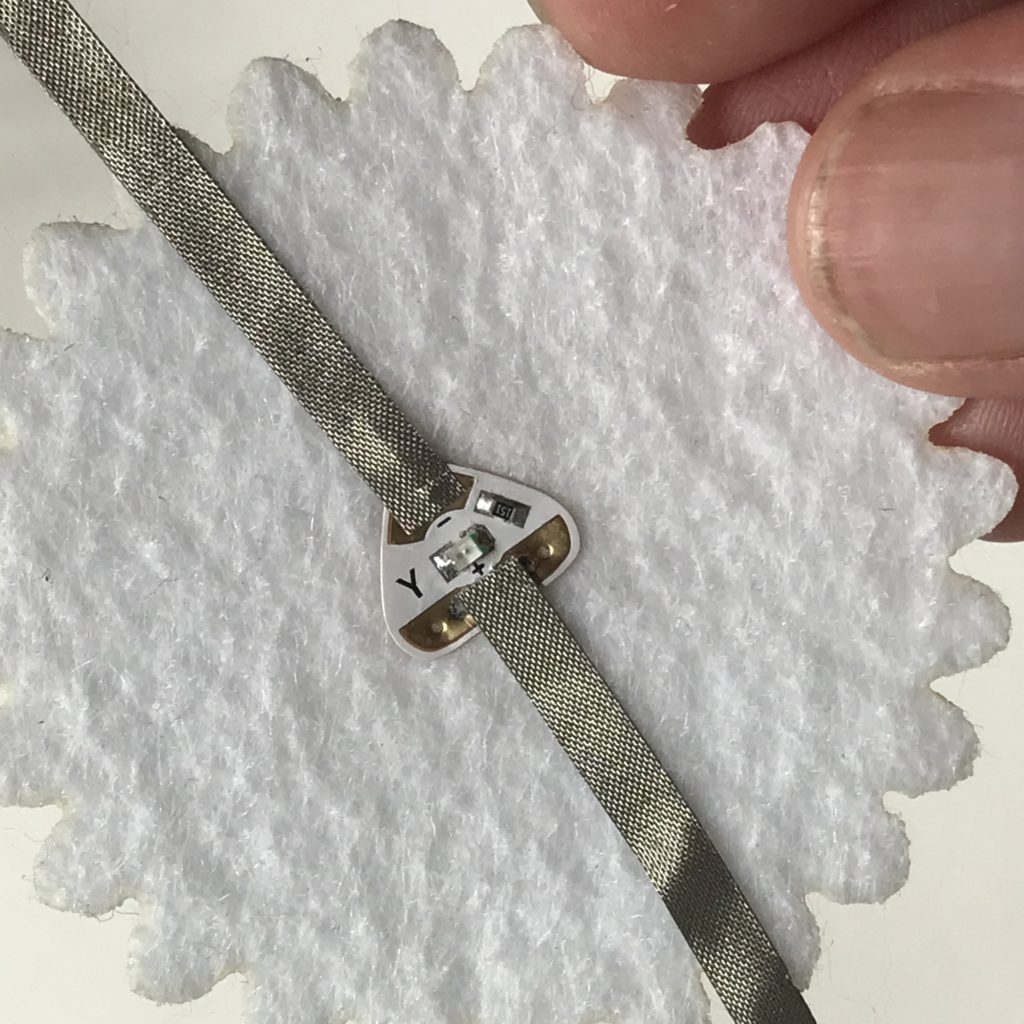
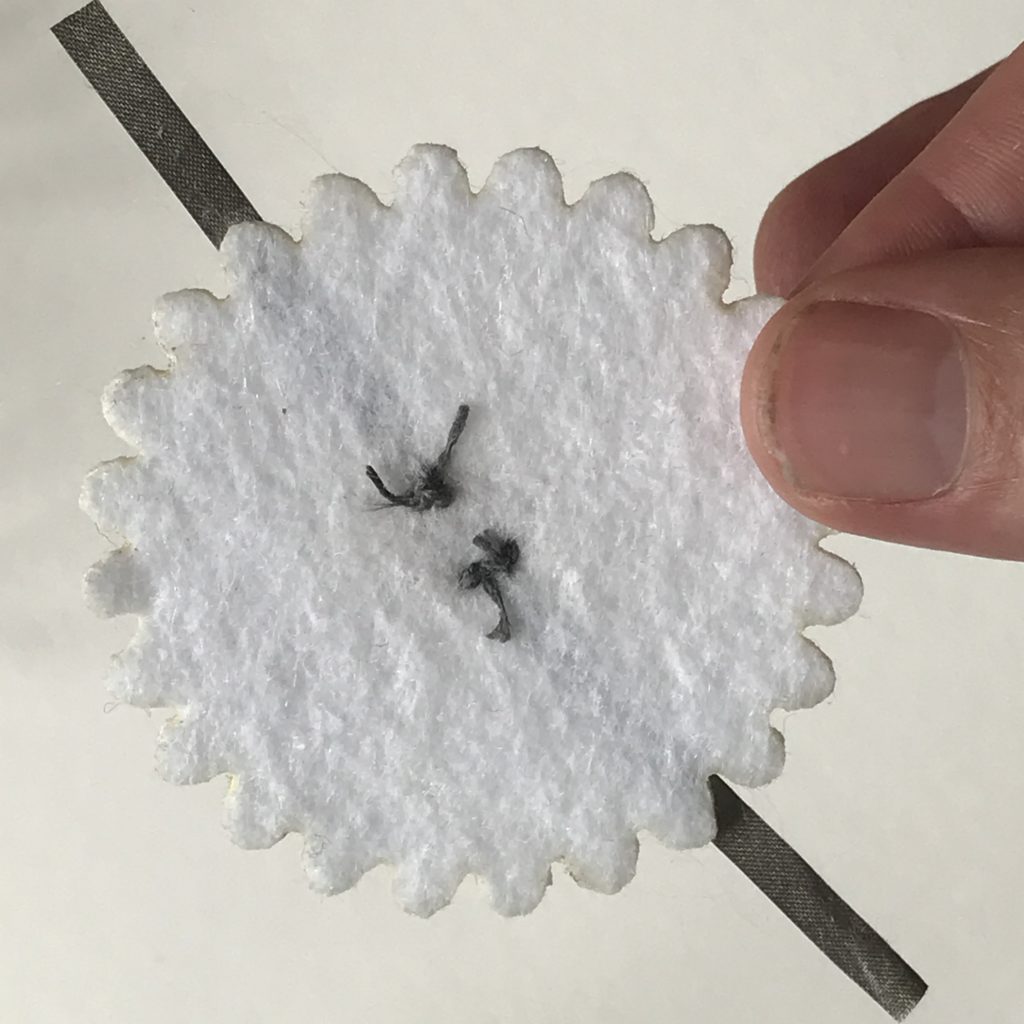
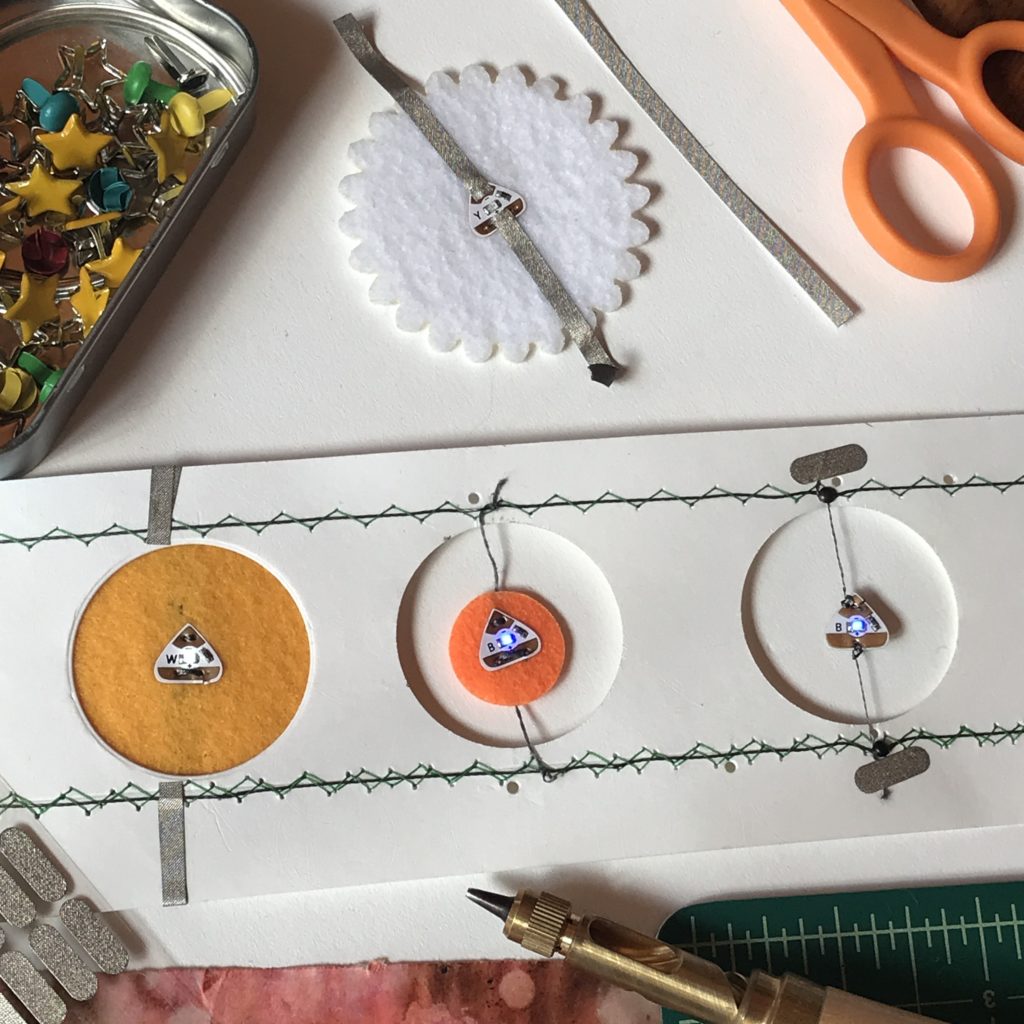
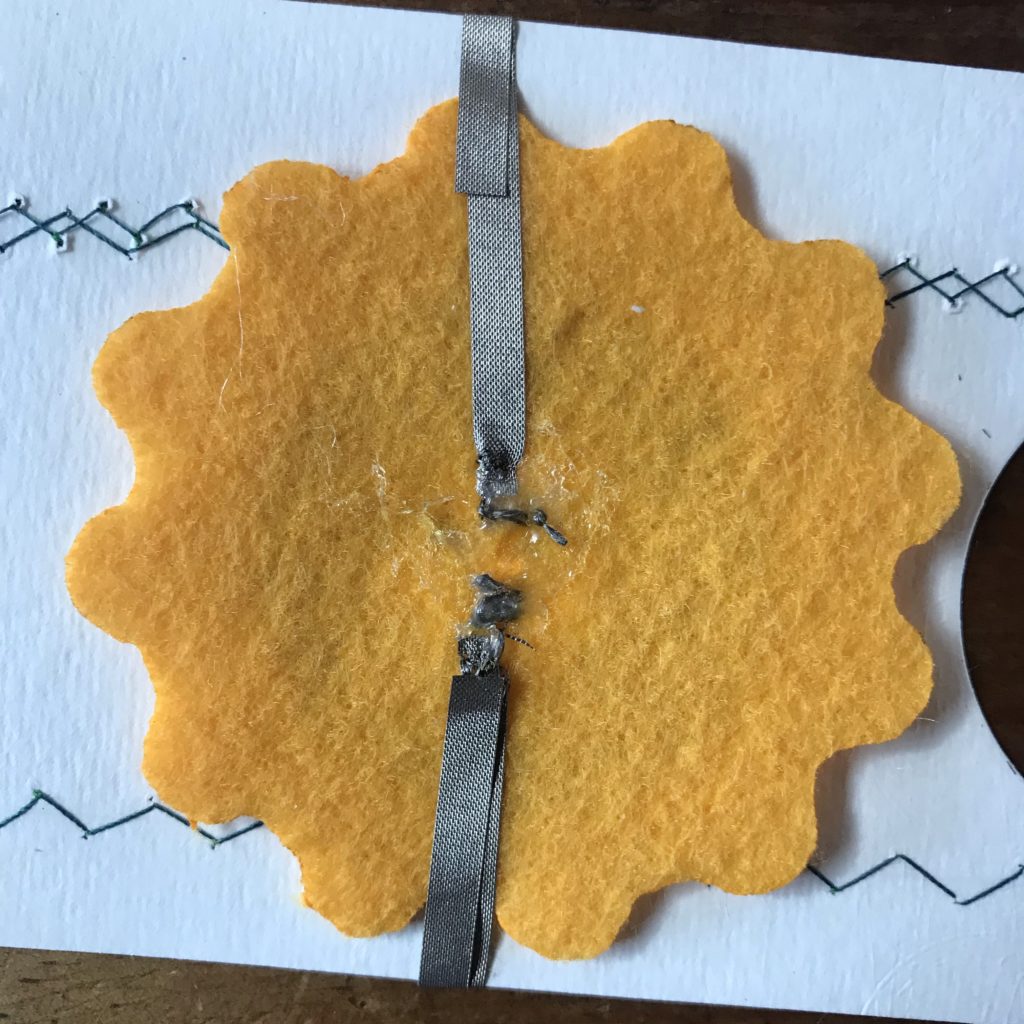
In the image to the left, strips of conductive fabric tape were adhered to the back of a piece of felt and sewn to the positive and negative leads of a Circuit Sticker. The knots on the back were then sealed with clear nail polish and a dab of hot glue.
Conductive fabric tape can be used with alligator clips, or joined with copper tape.
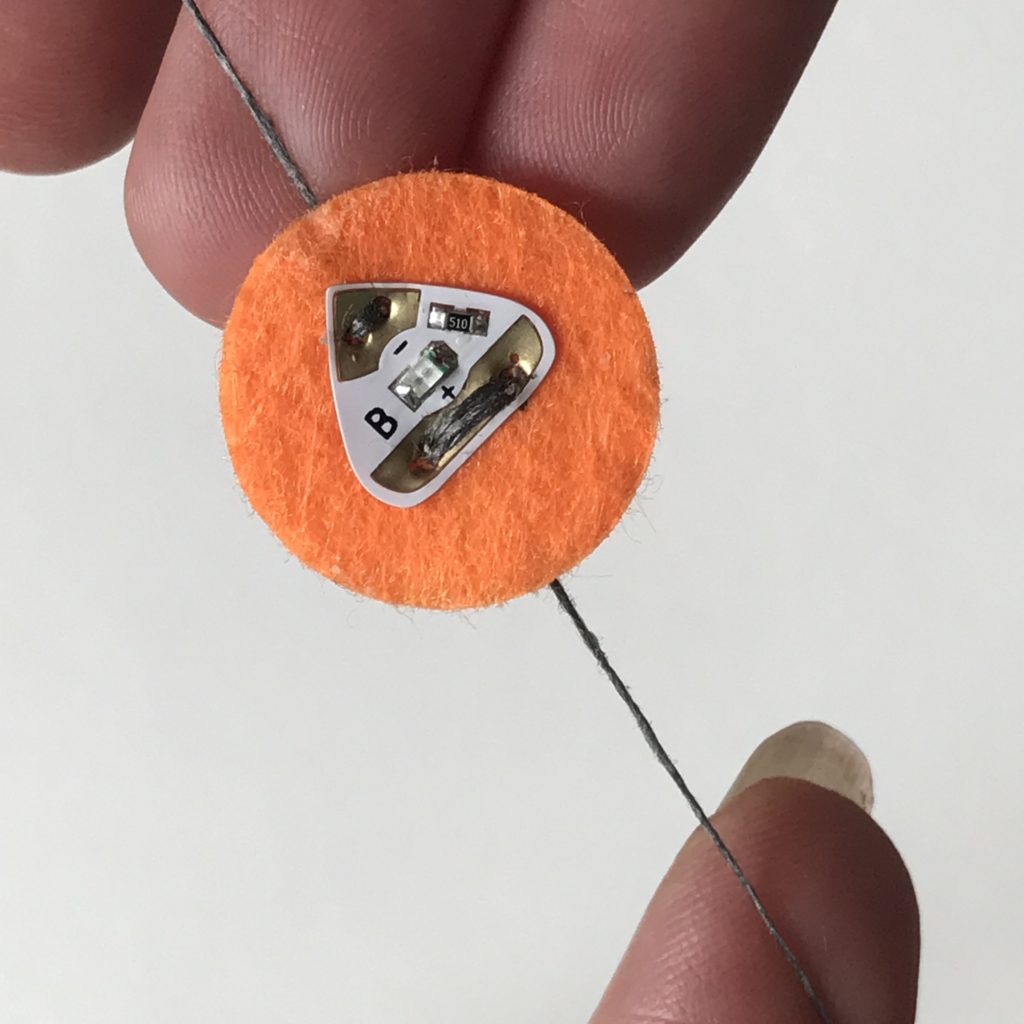
Conductive fabric tape may also be applied on top of a sewn Circuit Sticker; although, this type of connection may need reinforcement over time.


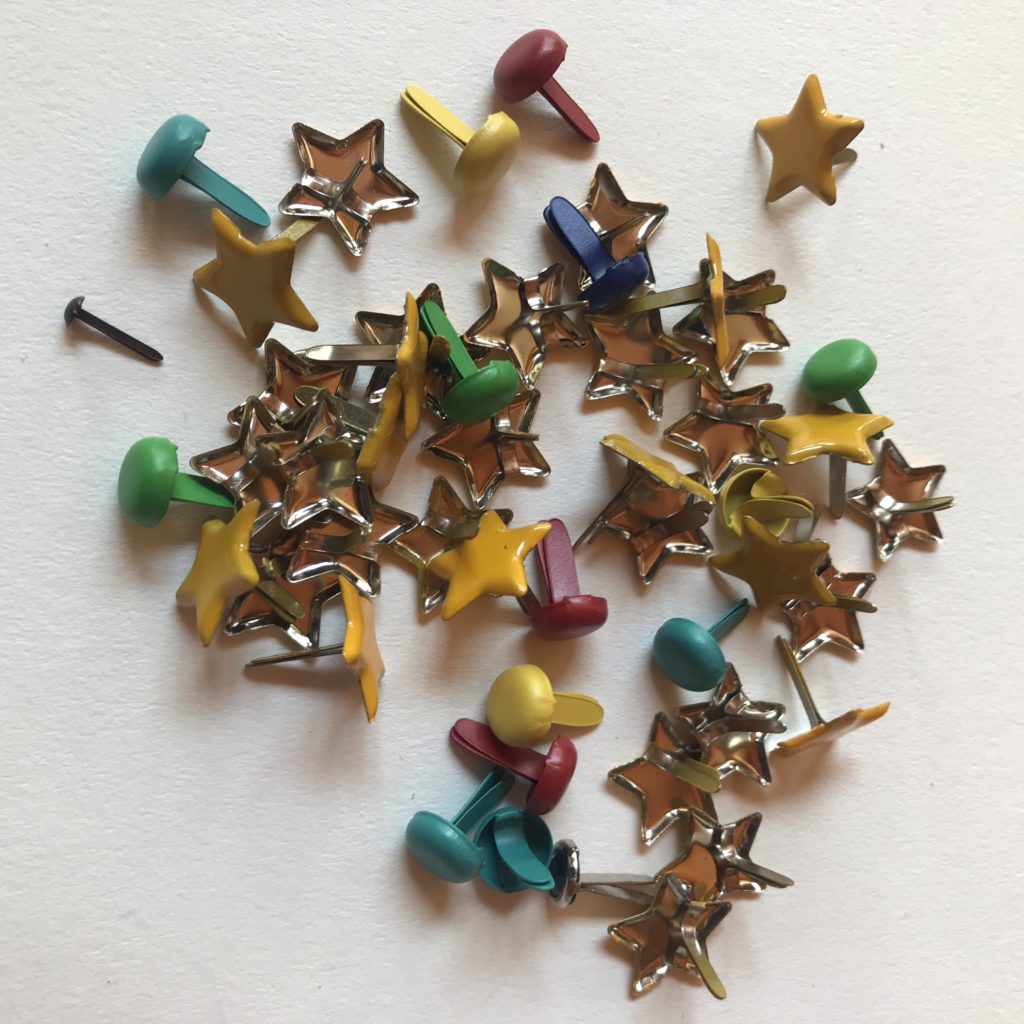
In addition to using conductive thread and conductive fabric tape connectors, metal brads and magnets may also be used.
Rapid Prototyping
One way to learn more about using conductive thread in your projects is by doing some rapid prototyping to try a few different experiments, to see what works and what doesn’t.
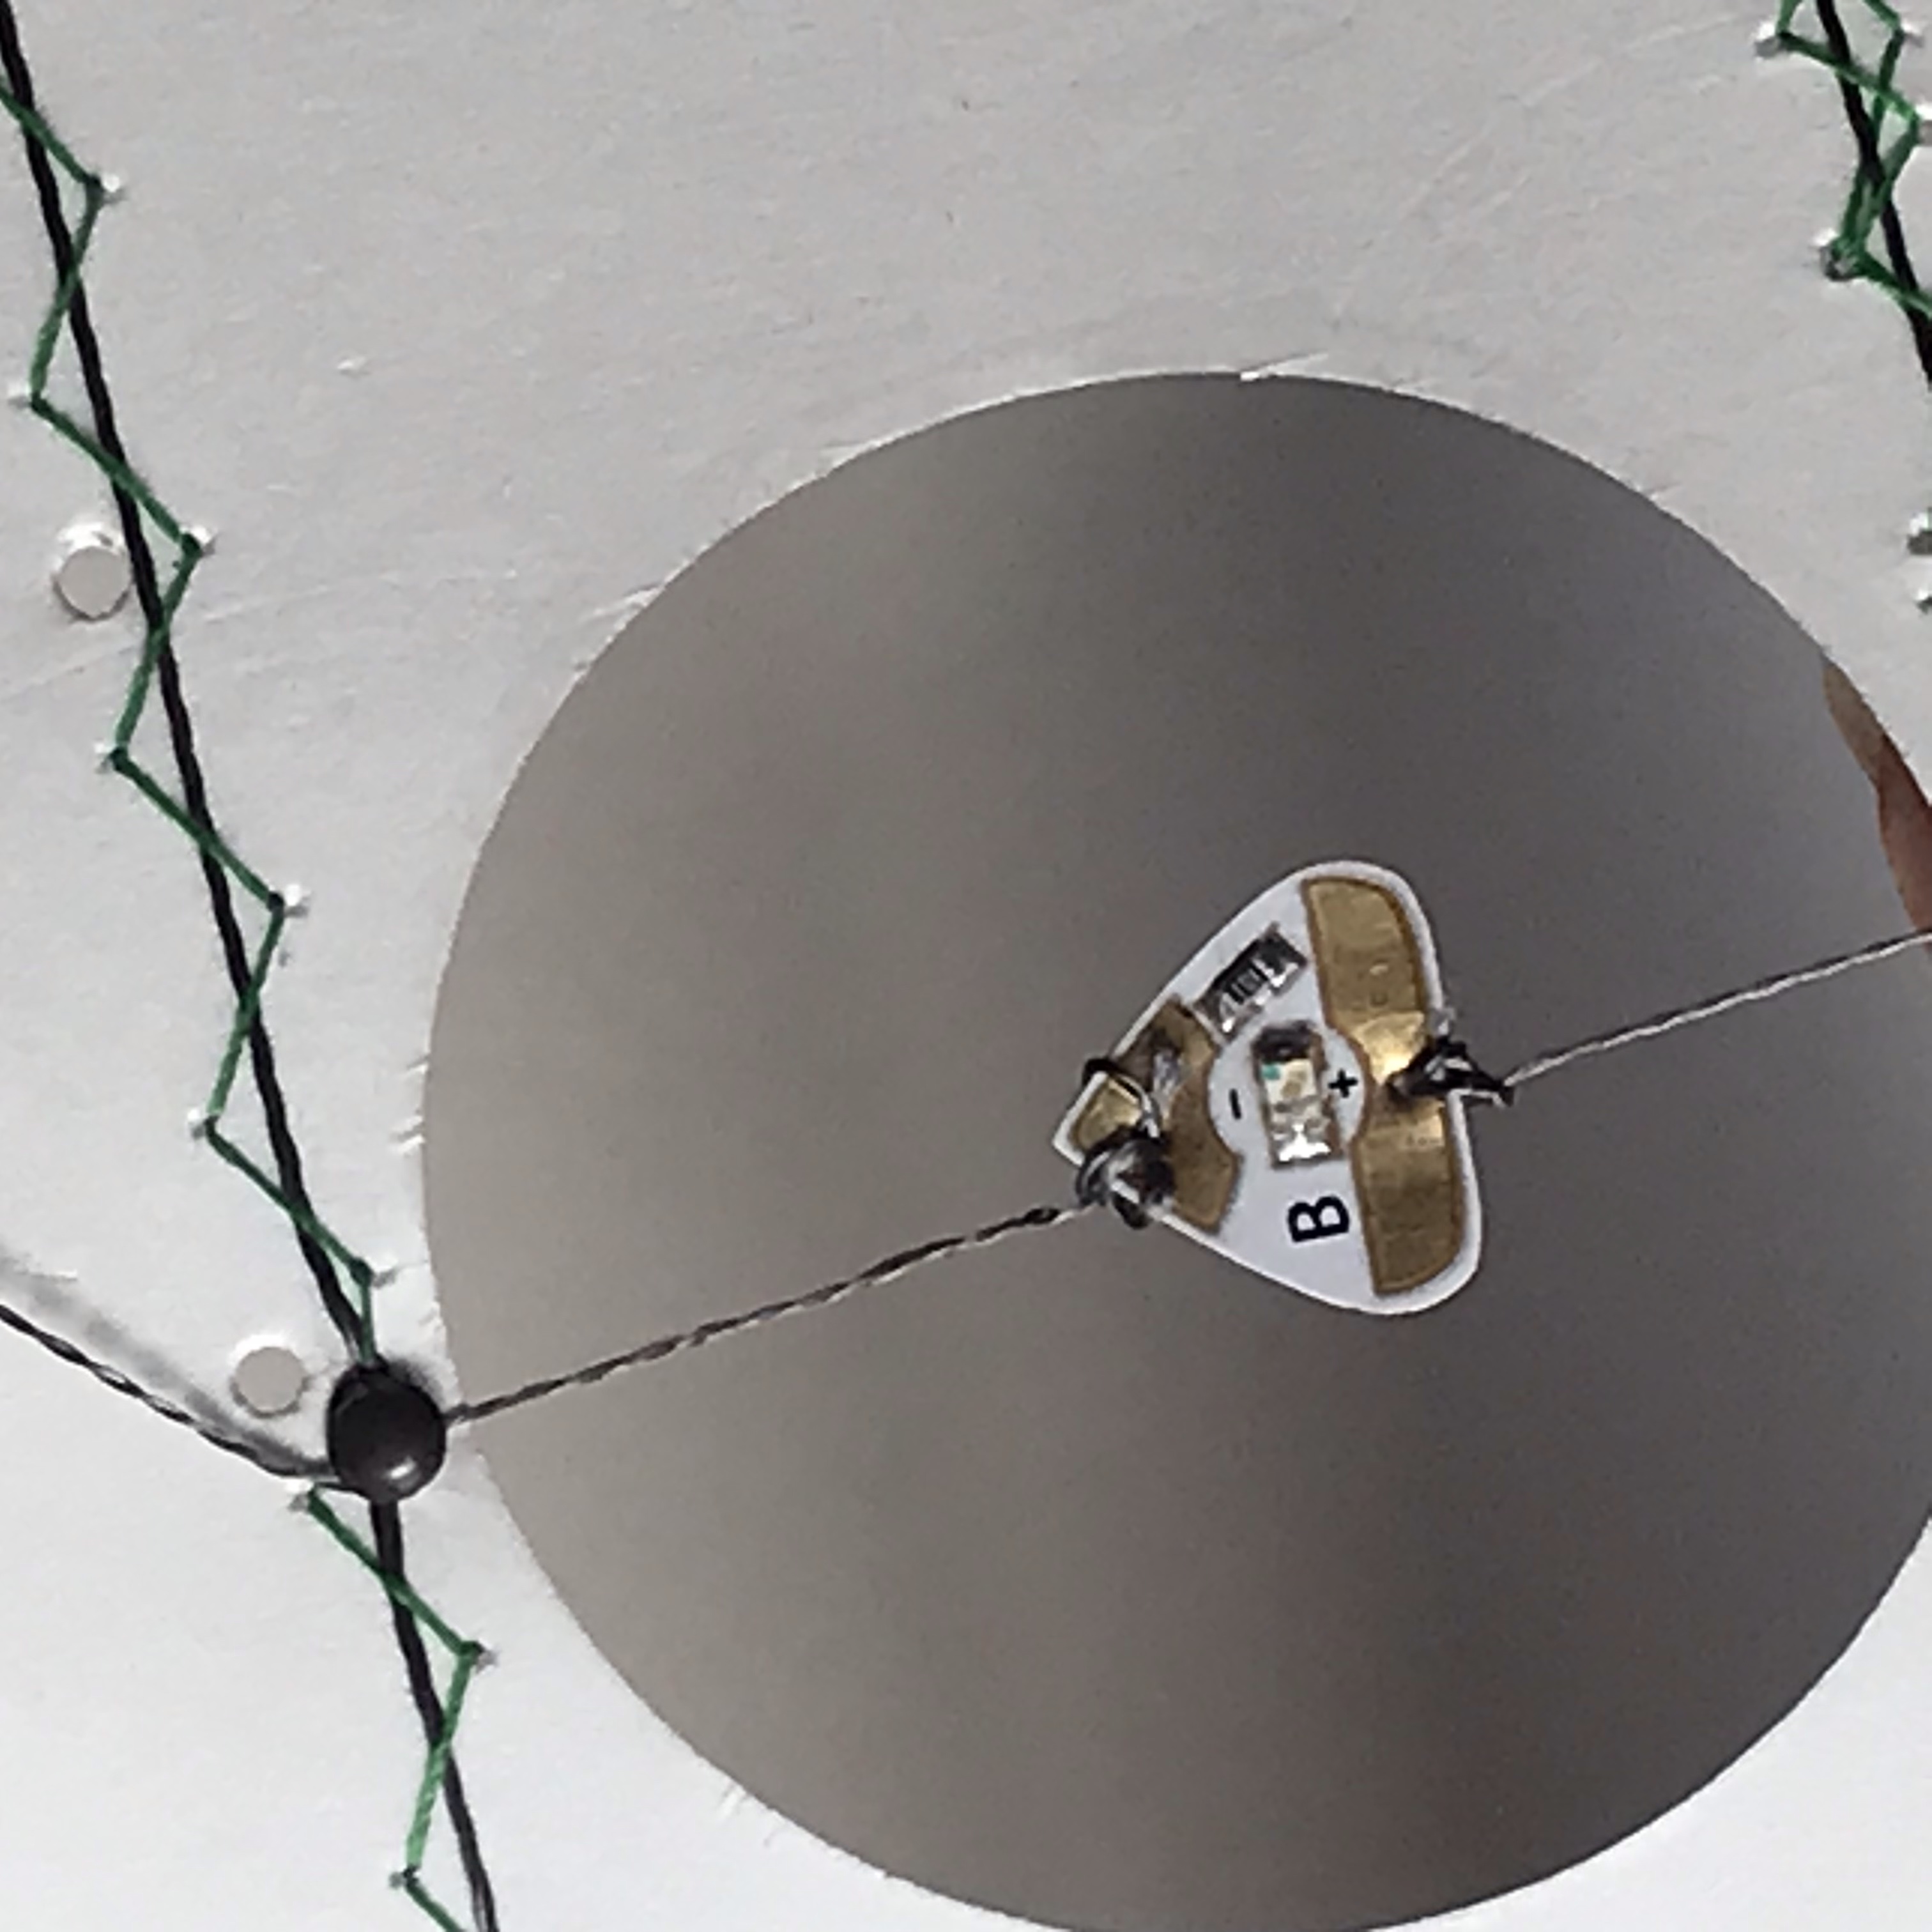
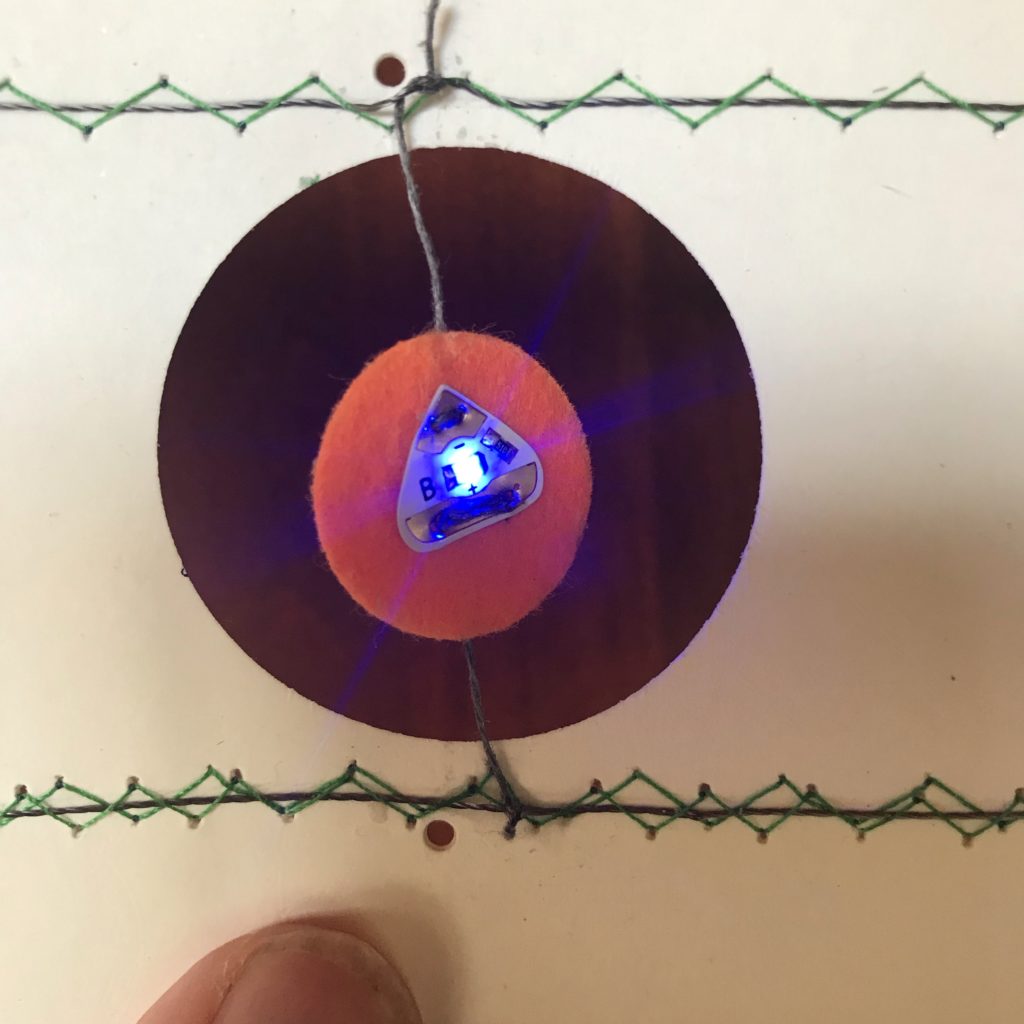
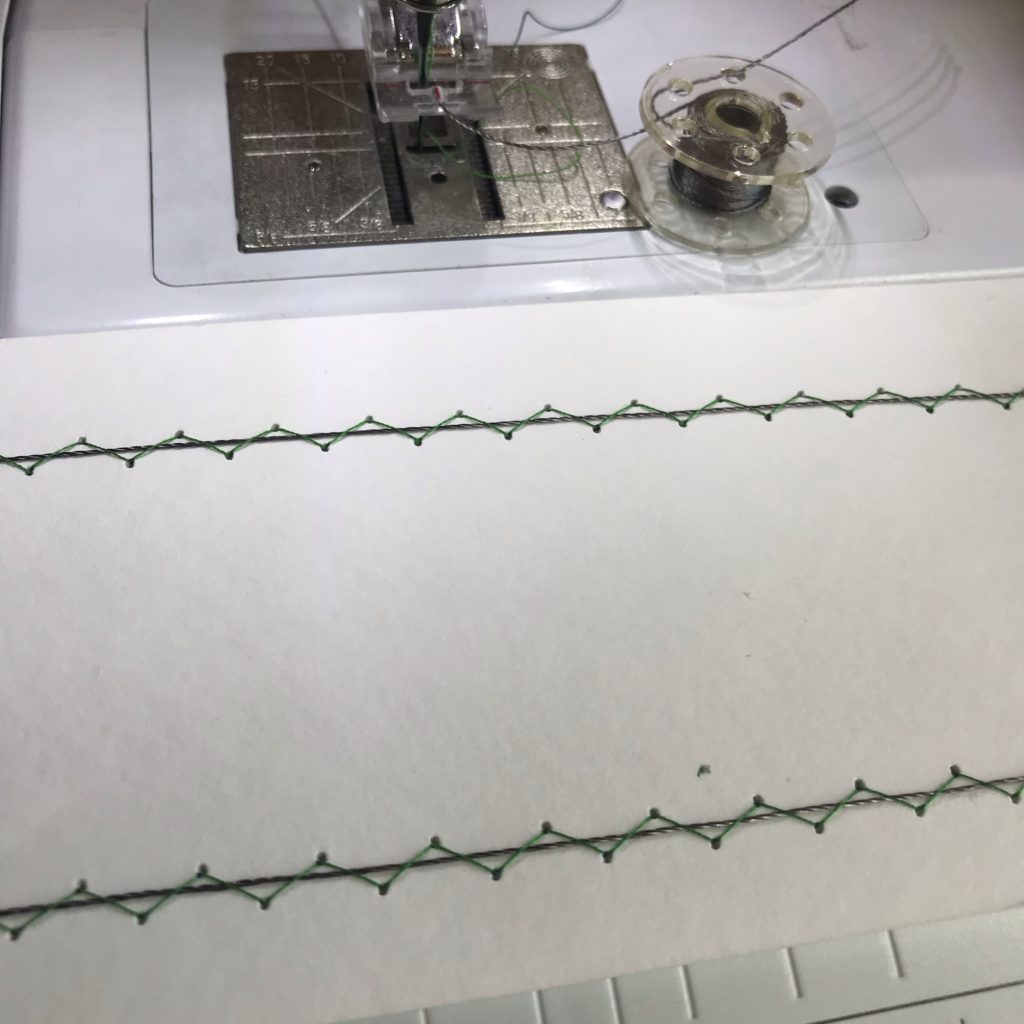
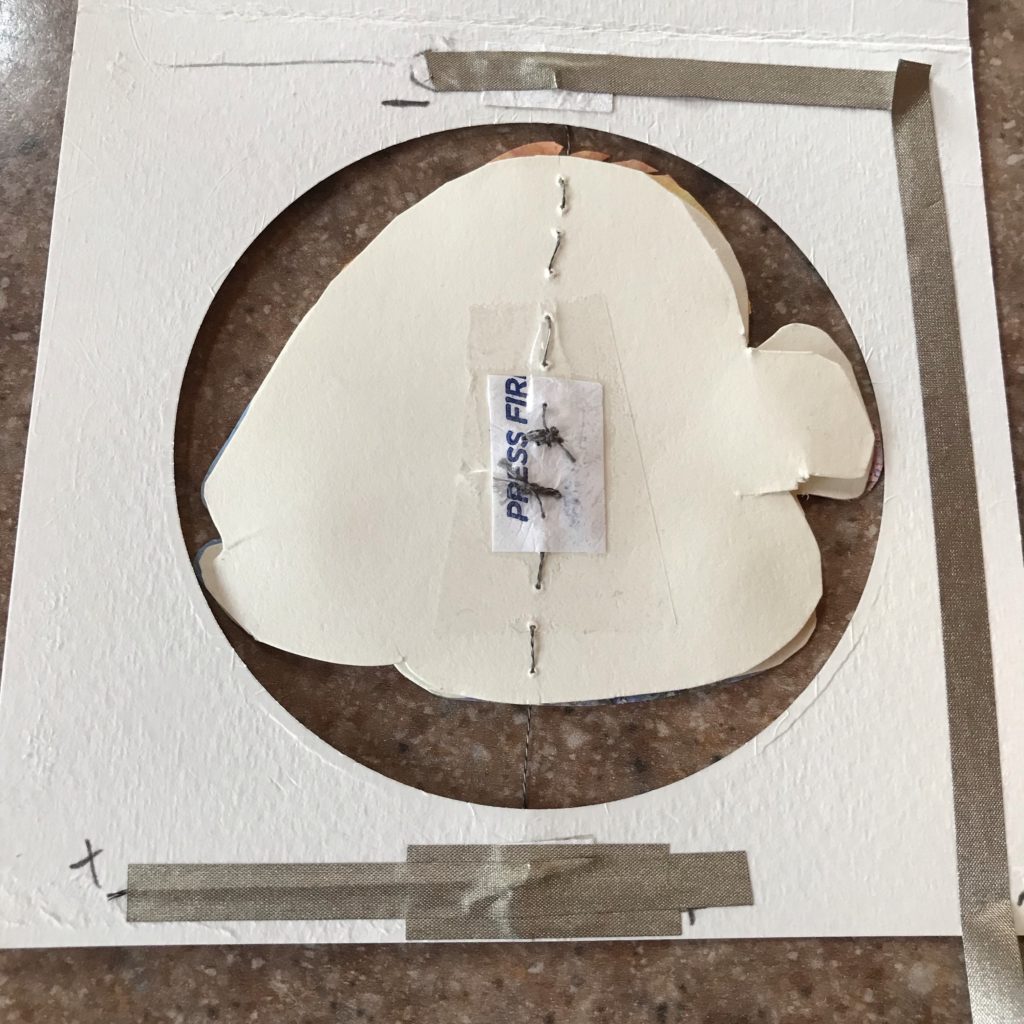
During this “couching” exploration, a sewing machine with a cording foot was used to create power and ground rails on top of a piece of watercolor paper; although, any sturdy paper, such as poster board, Bristol, or cardstock would work.
Using a zigzag stitch sewn with regular cotton thread, the two pieces of smooth 3-ply stainless conductive thread were secured at the top and bottom of the paper, leaving ample space between them for experimentation.
To keep the conductive thread from slipping through the zigzag stitch (which happened on the bottom row) clear tape was used to secure the loose thread tails on one end of the paper. The tails on the other end, which were left longer, were connected to a coin cell battery using disk magnets.
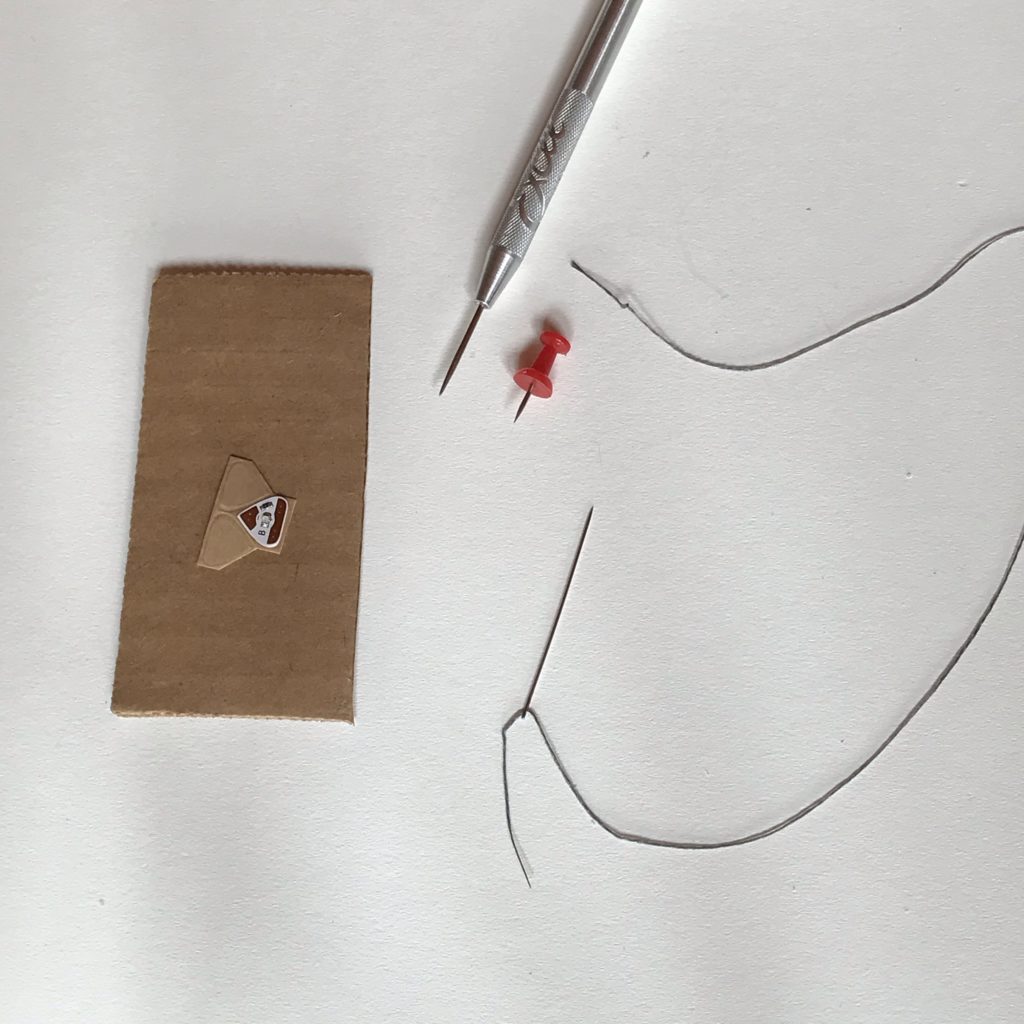
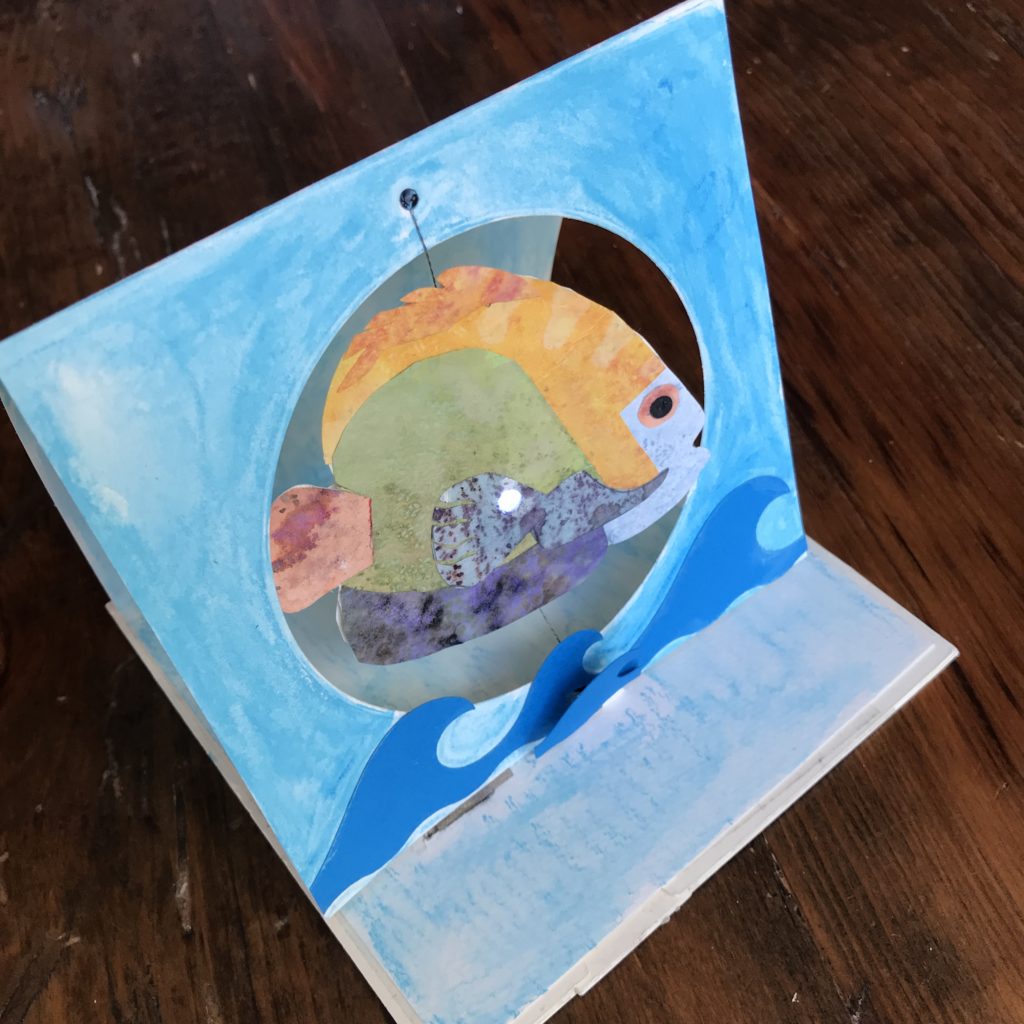
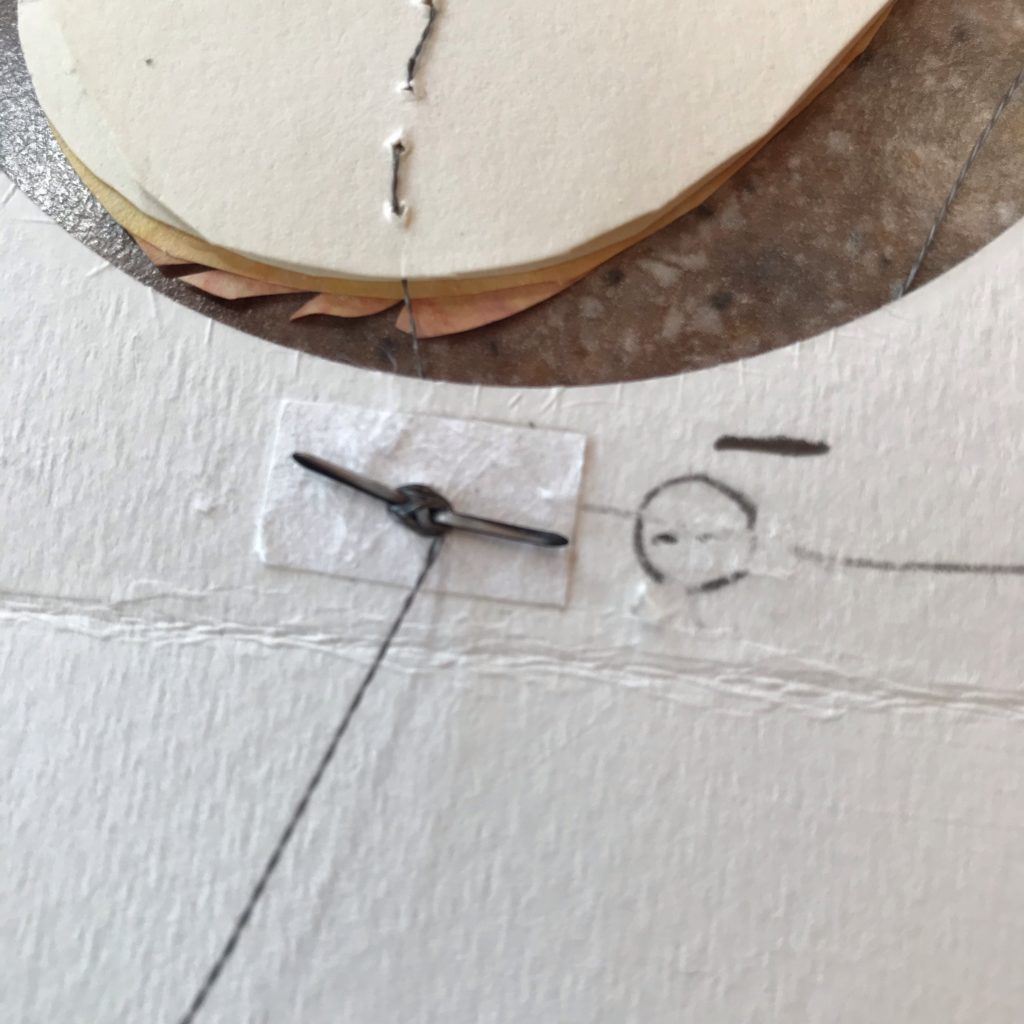
Through prototyping, you might discover a new technique that’s useful for something from your imagination. The paper fish below was attached to a ground rail of conductive fabric tape using a metal brad, after a successful experiment sparked an idea.

Battery Holders
There are many different ways to connect conductive thread to a battery.
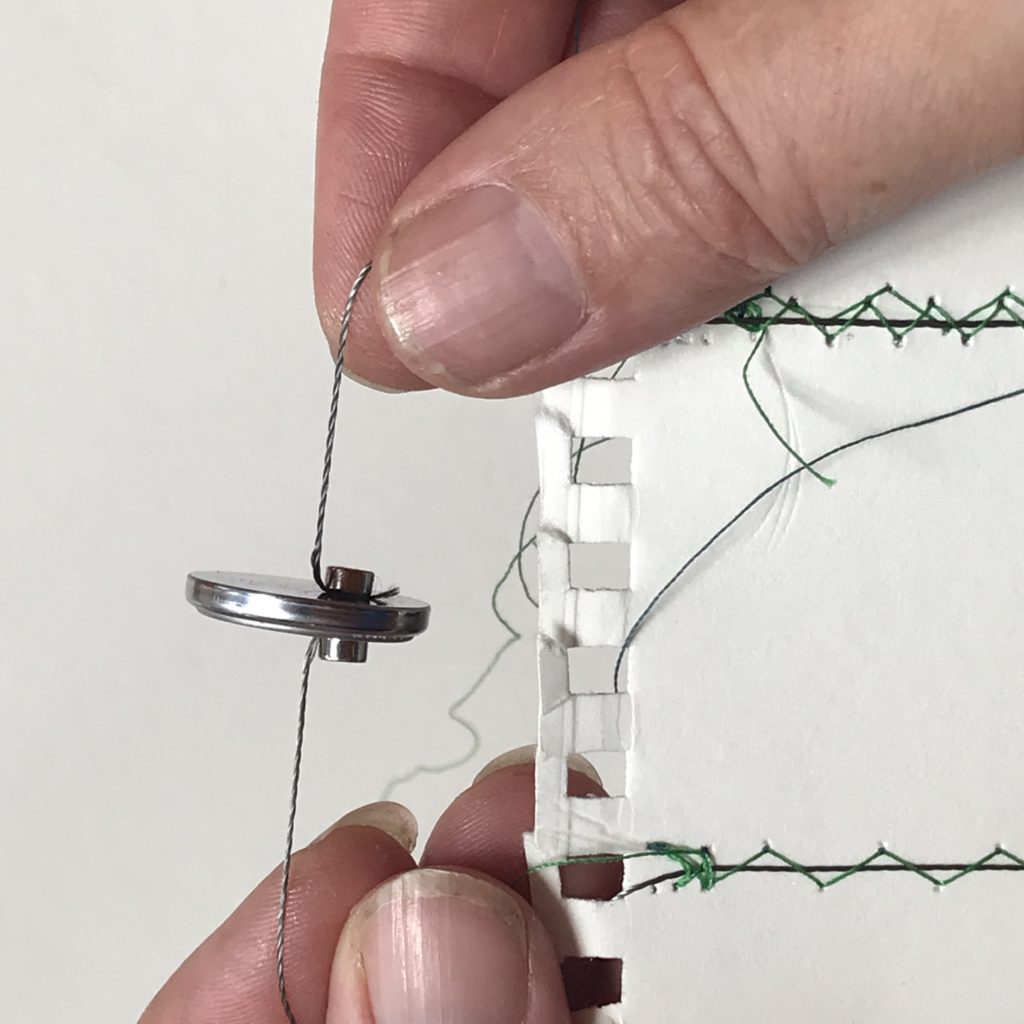
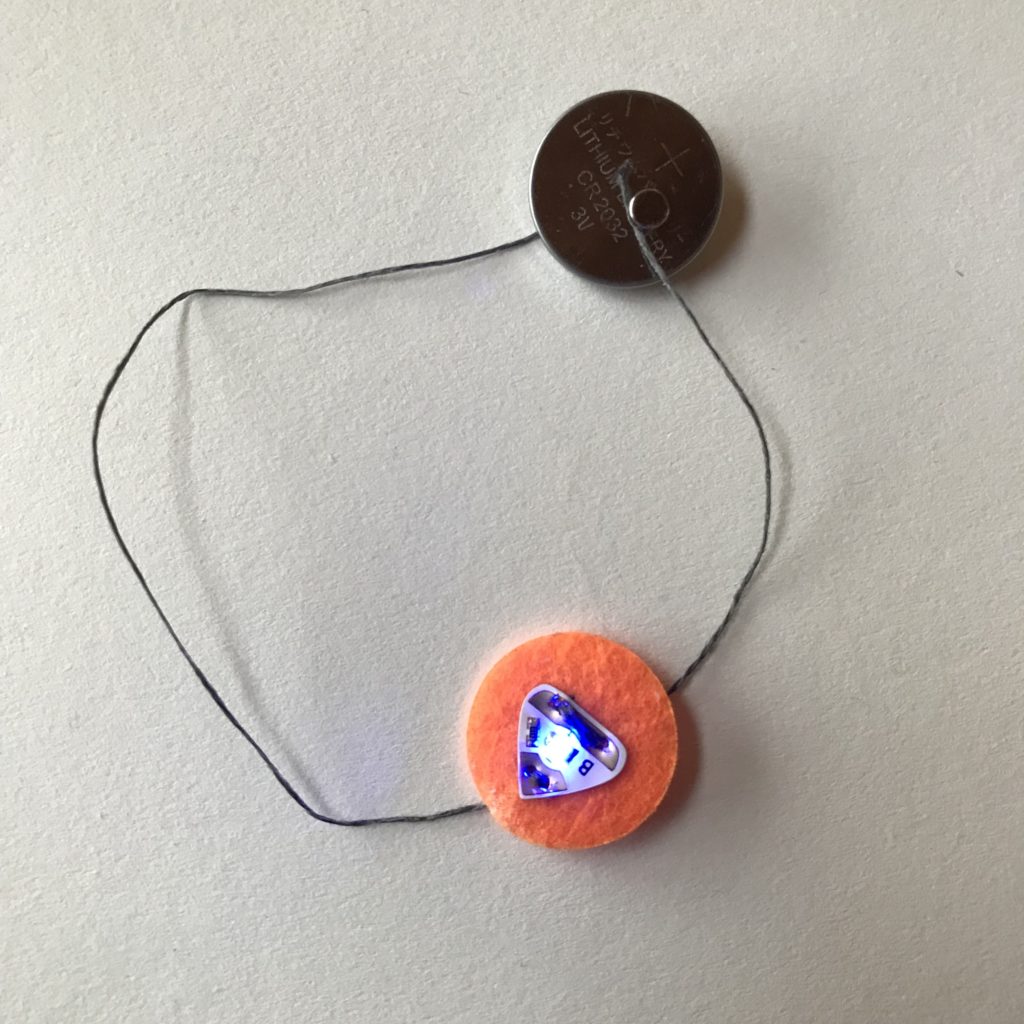
For prototyping purposes, it’s possible to connect a battery directly to conductive thread by using disk or ring magnets. Since coin cell batteries and conductive thread are magnetic, a magnet placed on top of a strand of thread, sandwiching it between the magnet and a coin cell battery, can hold the thread in place to test a connection or light an LED.
Scotch tape, copper tape, and conductive fabric tape may also be used to construct paper battery holders, such as an origami battery holder, that pair well with conductive thread.
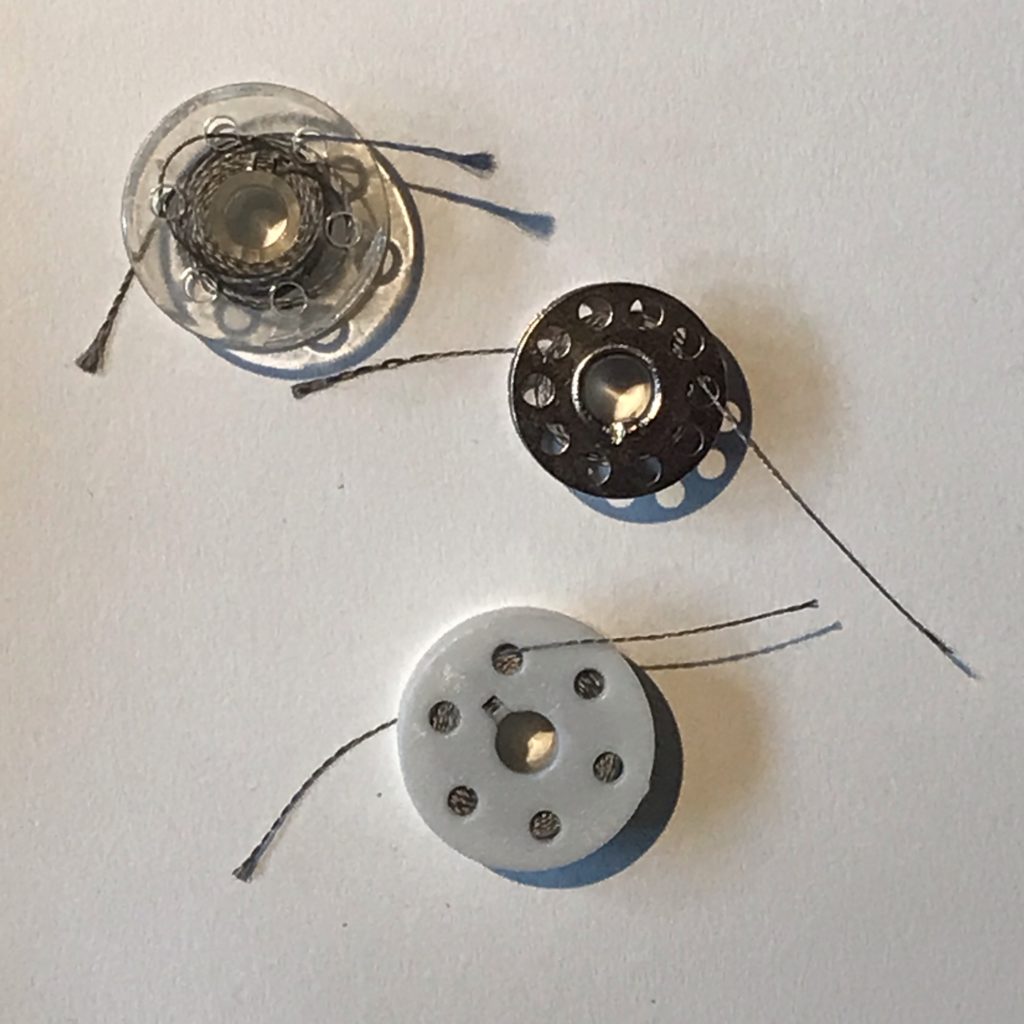
There are also a variety of commercially manufactured, sewable, battery holders that are designed for connecting to conductive thread.
These come in a variety of form factors. Some have tiny holes (which are more difficult to sew), some have large holes (which connect well to alligator clips), and some even have built-in switches. More information about these battery holders may be found in the Sourcing section below.
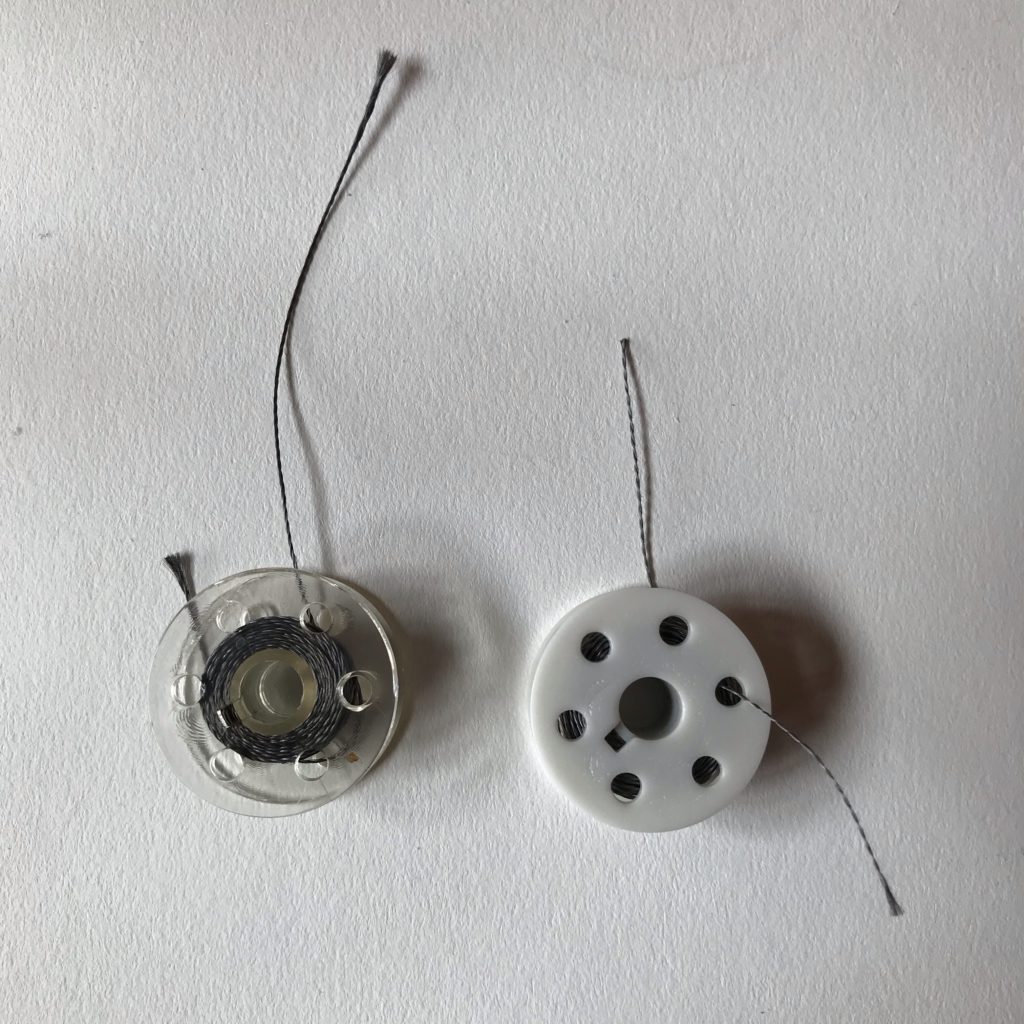
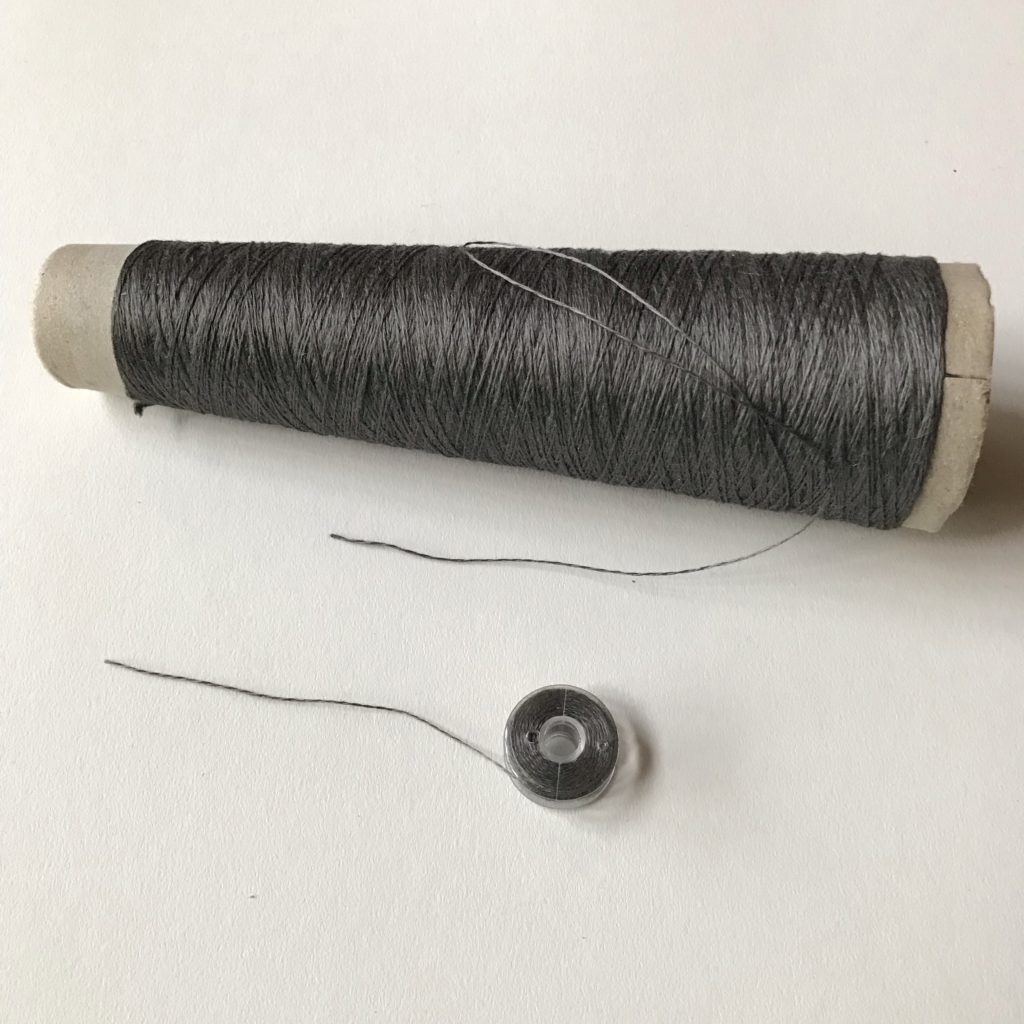
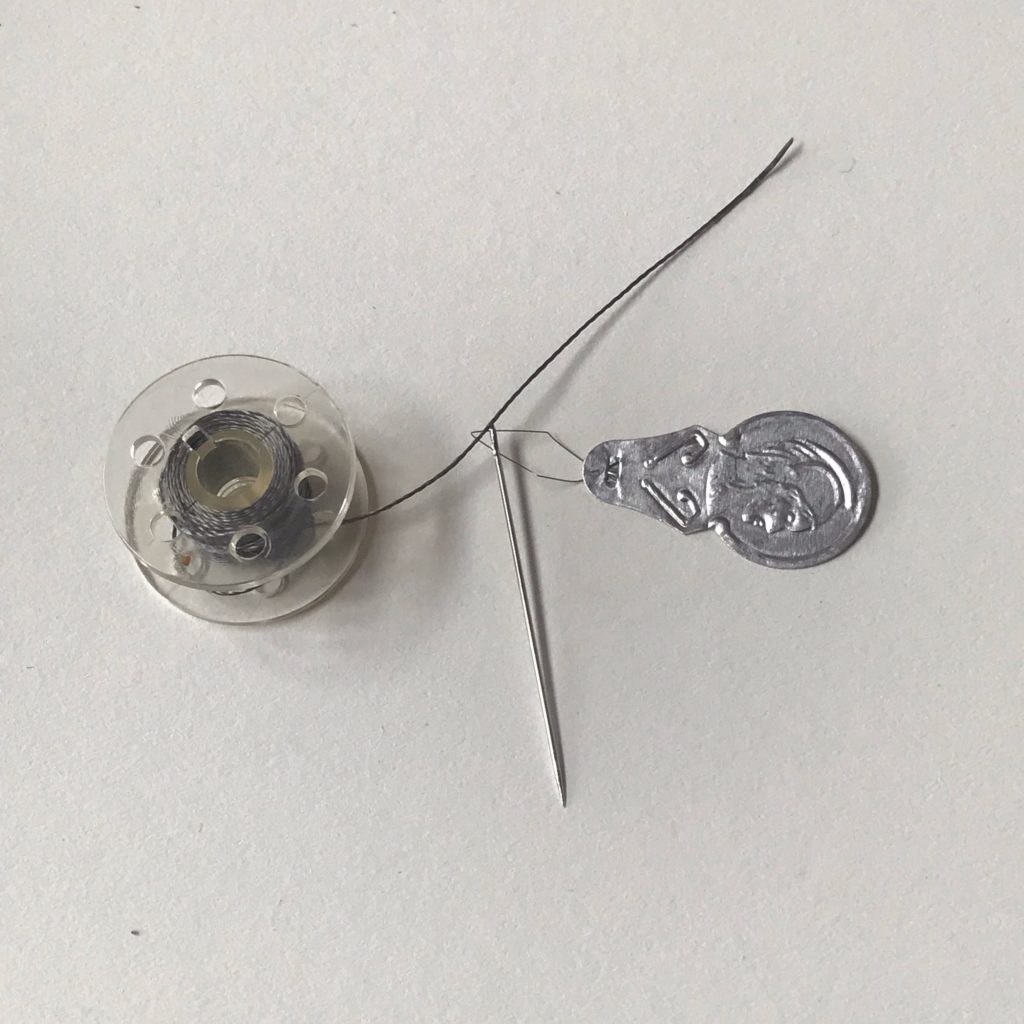
Organization
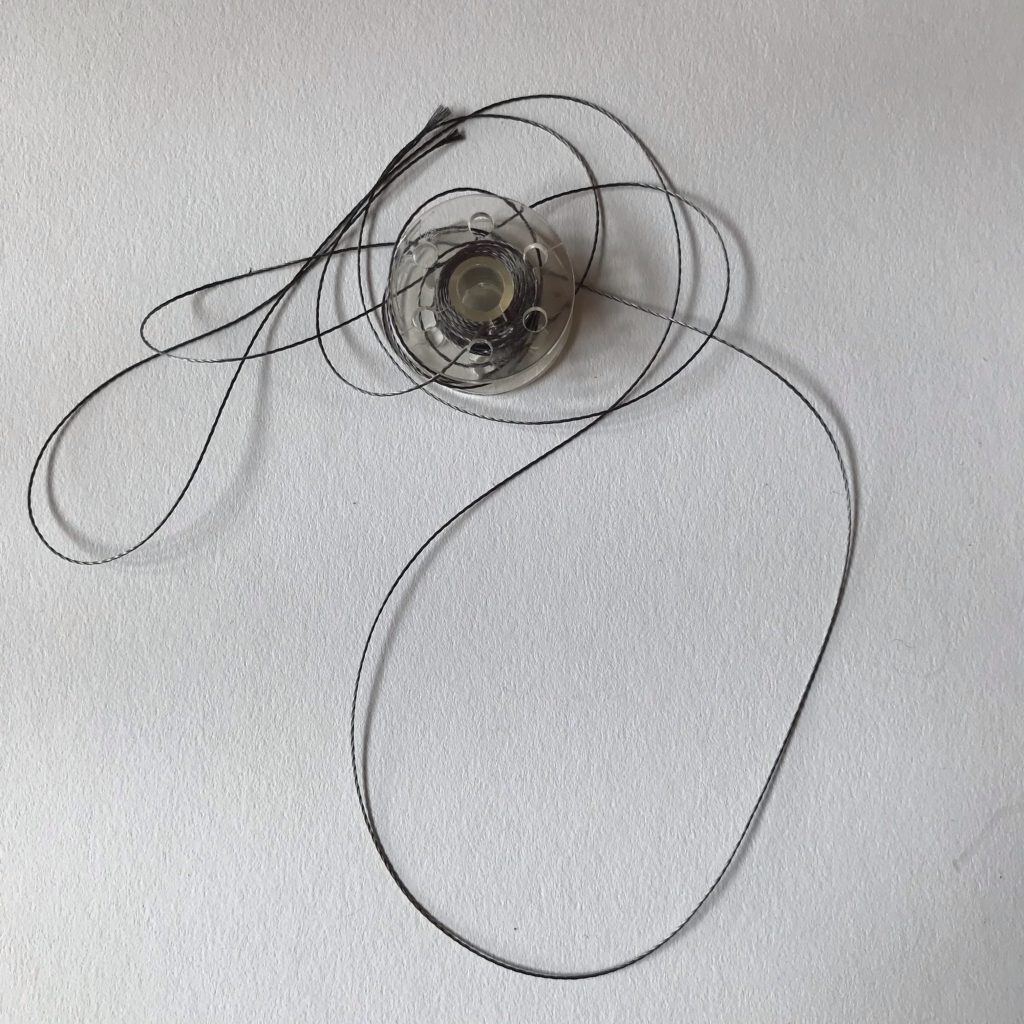
Keep your thread neat to avoid tangles. One way to do this is by keeping it wound. To prevent it from springing free, it’s helpful to insert the loose end of the thread through a hole in the side of the bobbin to keep it secure.
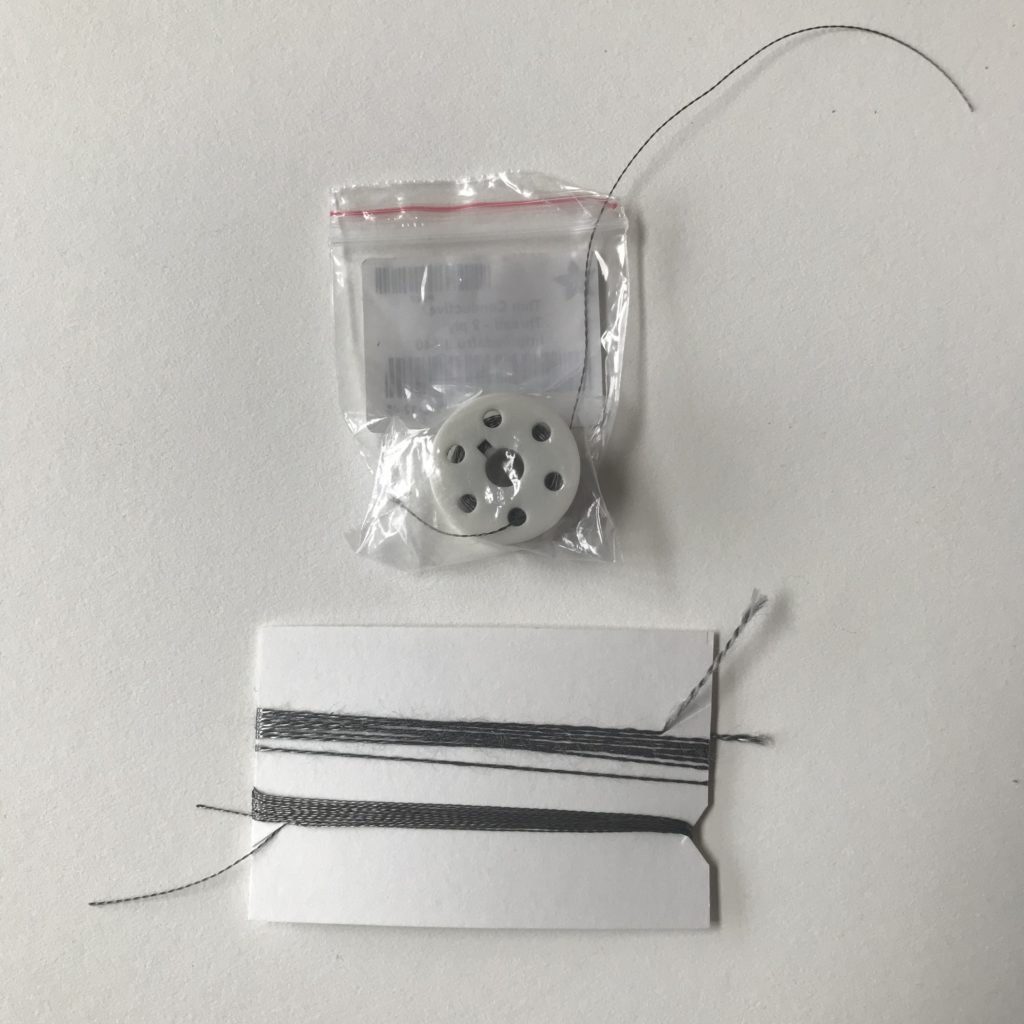
It may also be wrapped around a piece of cardstock or stored in a small ziplock bag with the loose end held in place when it’s zipped.
Additional Support
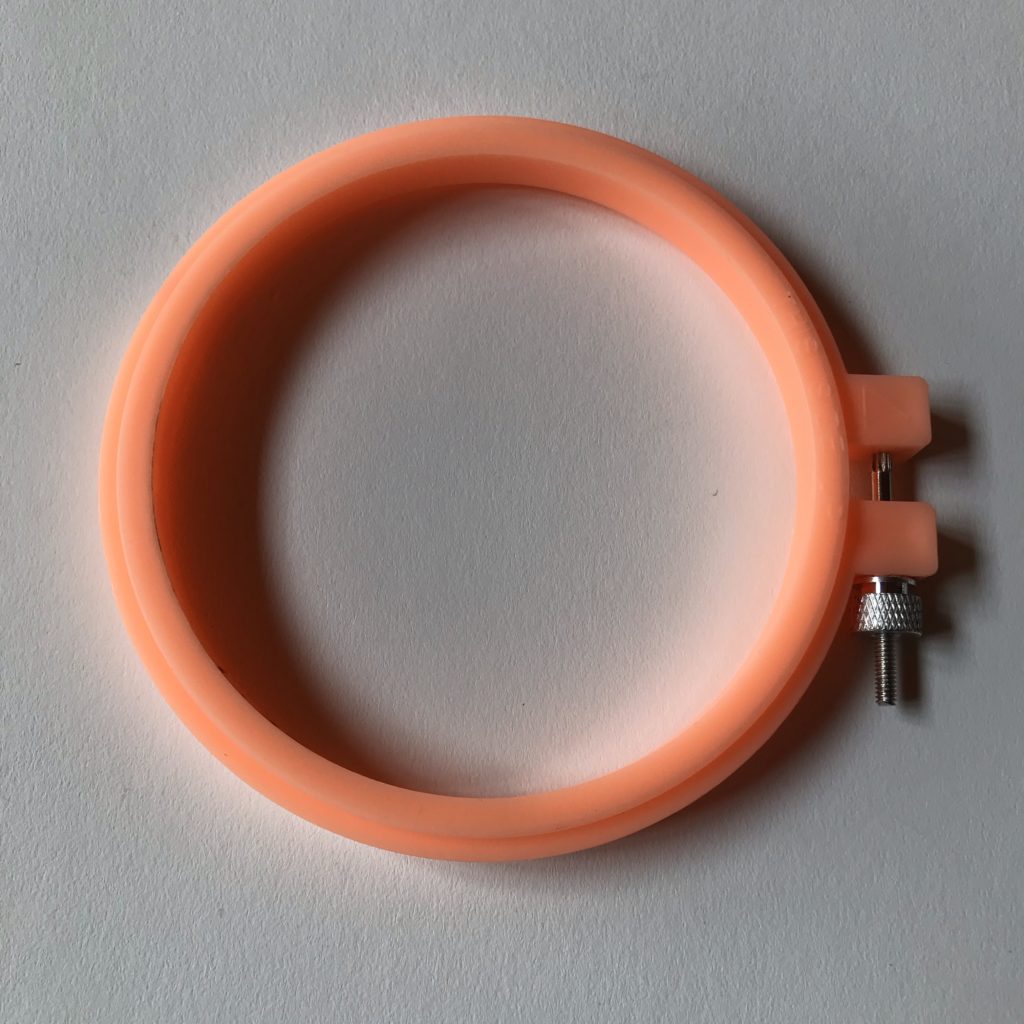
An embroidery hoop is useful for sewing an LED onto fabric, such as this through-hole LED which has had its legs curled to make it easier to sew.
Embroidery hoops are most useful when sewing large pieces of fabric that might otherwise flop around.
By allowing you to keep the fabric taut, you won’t have to worry as much about having too much slack in your stitches.
Notice how close the stitches of conductive thread are to the curled metal leg of the LED. As is the case with sewing a Circuit Sticker, it’s important to sew 3-5 loops around components to ensure a secure physical and electrical connection.
Cool Hack
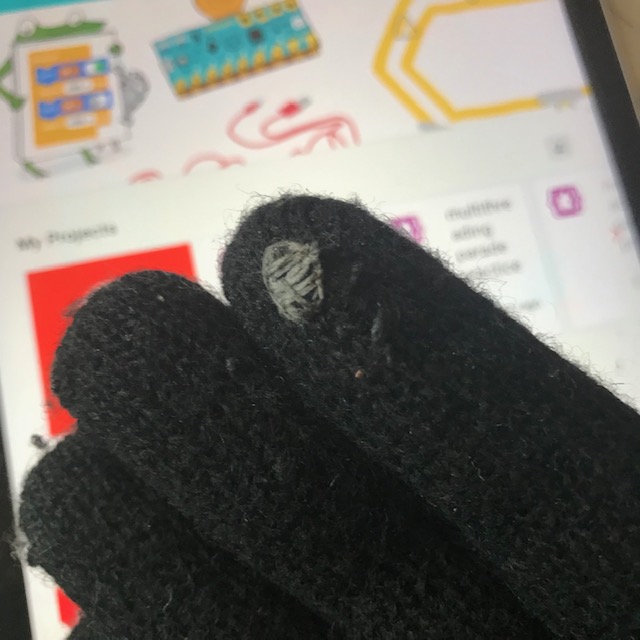
Did you know that conductive thread sewn to your winter gloves will transform them into “DIY Touch Screen Gloves“?
Basically, the trick is to sew the thread all the way through the tips of your gloves, so that the thread comes into contact with your hands on the inside.
The fuzzy thread/yard is especially good for this.
If you’d like to see some very imaginative uses for conductive thread (staring another pair of gloves), check out the incredibly inspiring video below, titled, “Connecting Thoughts.”
Inspiration
Kandenko, a Japanese infrastructure company, paired with a conductive thread manufacturer (Smart-X) to create the aspirational video, titled “Connecting Thoughts.”
In this video, a tiny city lights up and reacts in surprising ways, all resulting from clever contraptions and connections that use conductive thread.
To learn more, visit “The Kids Should See This.”
Bonus: How might the gloves in this video work?
.
Sourcing
While Chibitronics does not make or sell conductive thread or sewable battery holders, both are available from reputable retailers such as Adafruit and SparkFun. Lectrify also sells a switched coin cell battery holder that is popular with educators.
Adafruit
- Thick, yarn-like stainless steel thread (not slippery; easier for kids)
- Thin, smooth 2-ply stainless steel thread (very strong; may be used in a bobbin case)
- Thicker, 3-ply stainless steel thread (incredibly strong; less resistance than the 2-ply)
- Mixed needle pack (sizes #4 – #8 work best)
- Unswitched sewable coin cell battery holder
SparkFun
- “Toothy” Stainless steel thread (not slippery; easier for kids)
- Class size spool of “toothy” stainless steel thread (not slippery; easier for kids)
- Smooth stainless steel (very strong)
- Narrow, long-eyed needles (the smallest two in this pack)
- Unswitched sewable coin cell battery holder
- LilyPad switched sewable coin cell battery holder
Resources for Further Exploration
Curriculum, Facilitator Guides, & Tutorials
Gettings Hands-On With Soft Circuits: A Workshop Facilitator’s Guide
Stitching the Loop: An Electronic Textiles Unit in Exploring Computer Science
Stitching the Loop: E-Textiles Technical Guide
Light Stitches: E- Textiles Project Resources Book
Light Stitches Book 1: Electronic Textiles Teacher’s Resources
Exploring Computer Science Projects
Instructable: Light-up LED Cuff with Magnetic Switch (classroom tested project)
Maker Camp: Sew the Circuits (classroom projects)
Wearables: First Steps (useful materials and activities)
Chibitronics Tutorial: Light-up Sphere Card
Chibitronics Tutorial: Flying Concertina Accordion Book Tutorial
Chibitronics Tutorial: Light-up Spinner Card
Chibitronics Tutorial: Light-Up Strawberry Tutorial
Product Guides
Spark Fun: LilyPad Basics: E-Sewing
Adafruit Video: Conductive Thread 10 Tips
Sensors Using Conductive Thread
Spark Fun: Sewable Electronic Sensors
Kokobant Tilt Sensor
Slide Switch with Coins and Thread