How To > Projects> Sensors & Switches> Tutorial
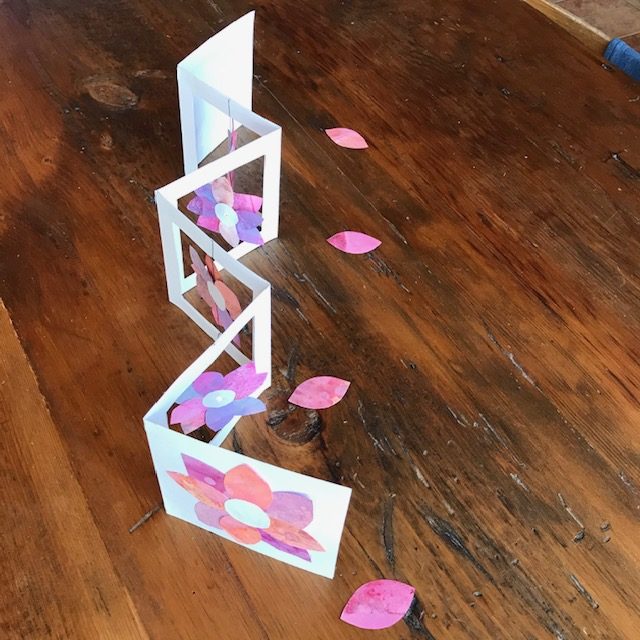
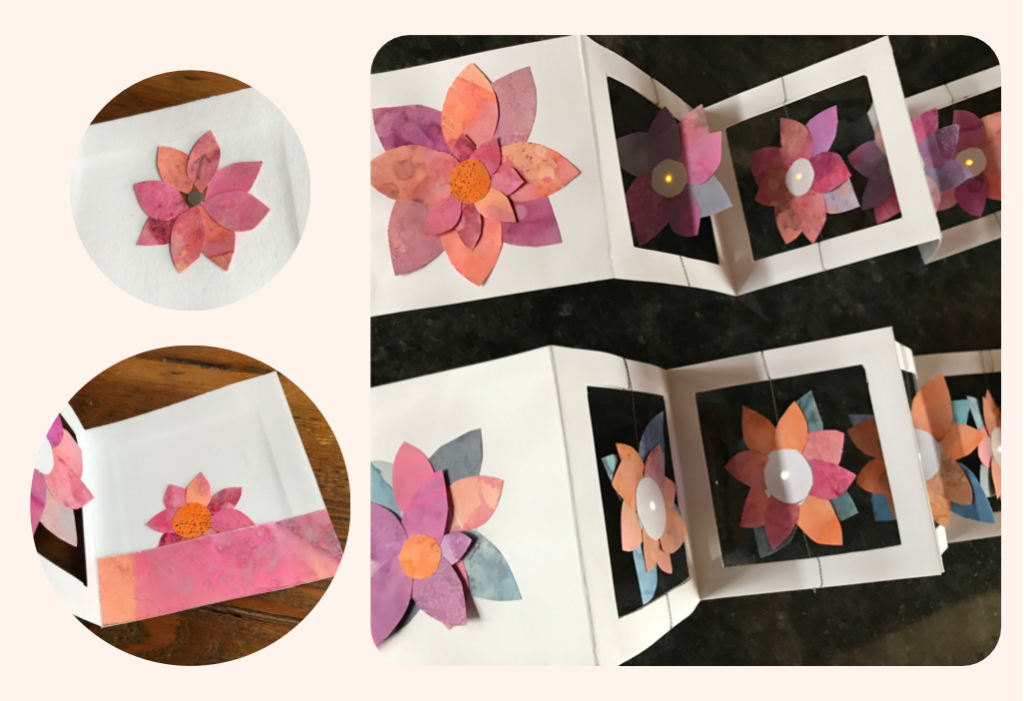
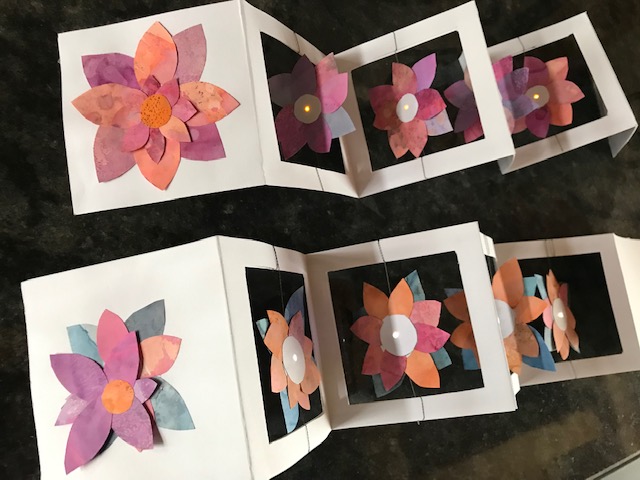
Flying Concertina: Illuminated Accordion Book
Project Design & Tutorial by: Jill Dawson
Introduction
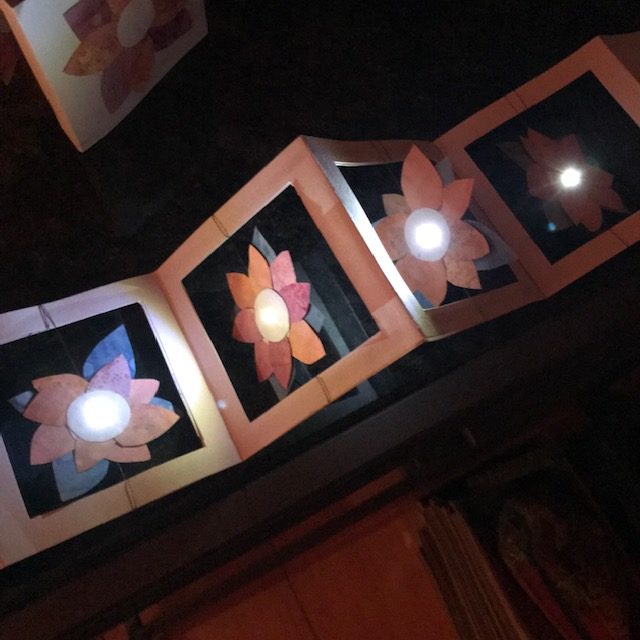
In this tutorial, we will show you how to add motion and light to a fun and flashy variation of the traditional accordion book structure! You’ll learn how to use conductive thread as a decorative and conductive element, and how to use a reed switch to add interactivity and conserve battery life.
An Accordion with a Twist
Related
Categories
Book Arts, Reed Switch, Interactive Art, Night Light, Home Decor, Paper Engineering
Materials & Tools
Electronic Supplies
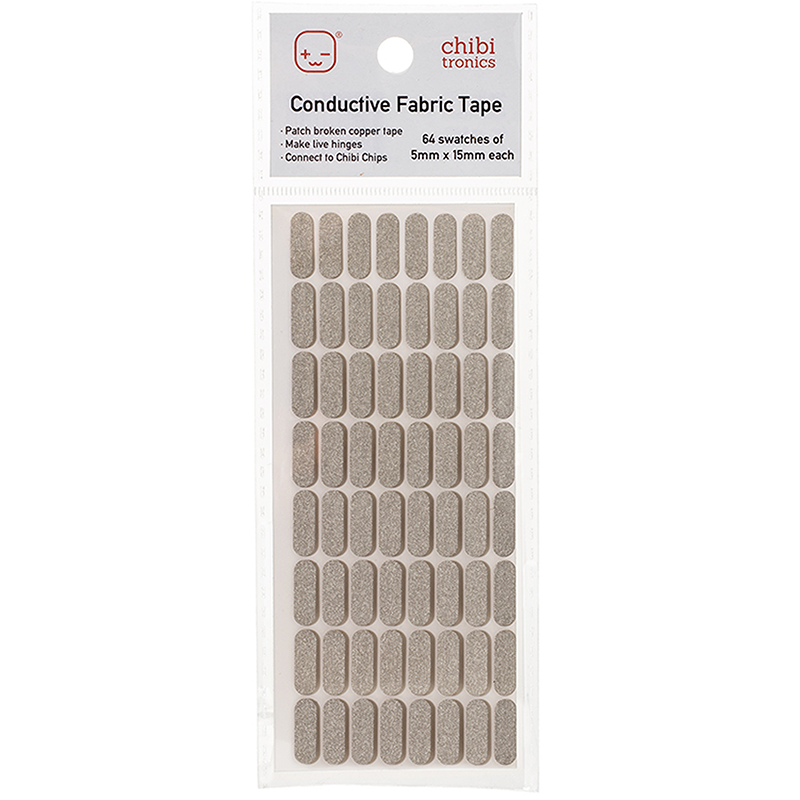
- Conductive Fabric Tape or Copper Tape
- Conductive Fabric Patches
- 4 Circuit Sticker LEDs
- 1 X CR2032 coin cell battery or the thinner CR2016
- Spool of smooth conductive thread
- (Optional) 1 Reed Switch (Magnet on) and a magnet (should you wish to add a switch)
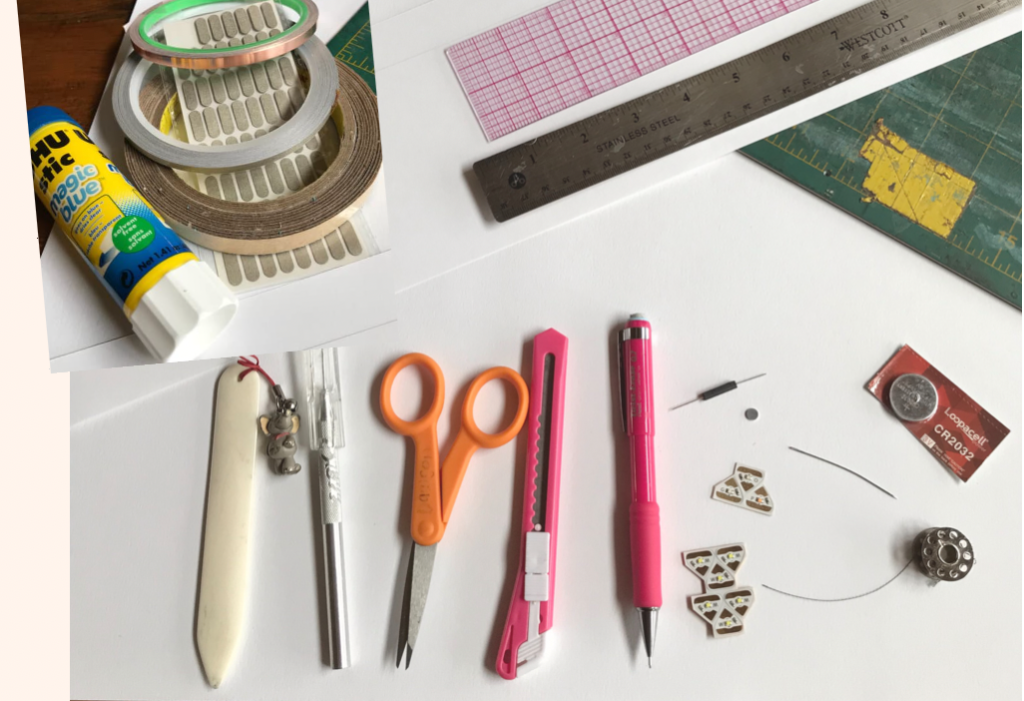
Other Tools & Supplies
- 2 pieces of cover weight paper cut 4″ H x 24″ W
- bone folder (or a fingernail)
- piercing tool
- scissors
- craft knife
- pencil
- metal ruler
- double-stick tape, glue stick, Scotch tape
- craft supplies such as decorative paper or colored pencils
- needle
- C-thru ruler (useful, but not required)
- Screw hole punch (useful, but not required)
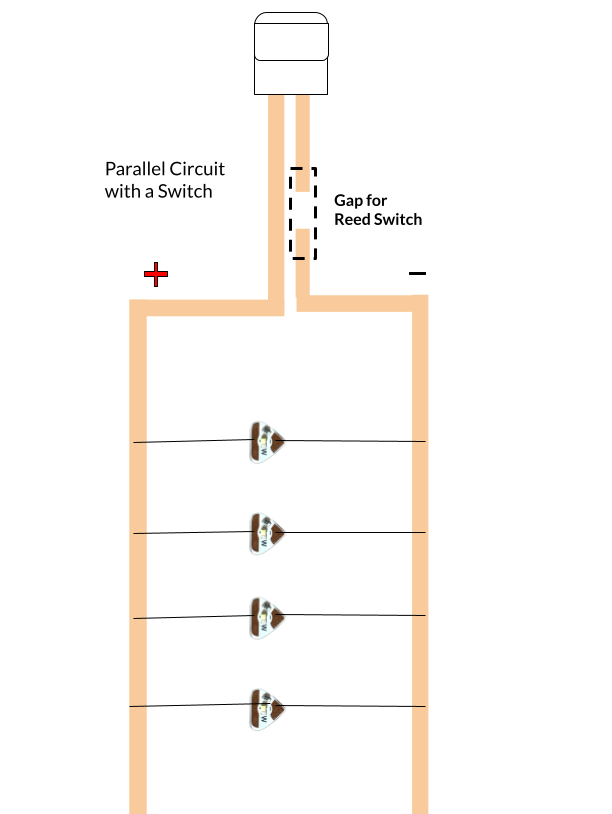
Circuit Diagram
Directions
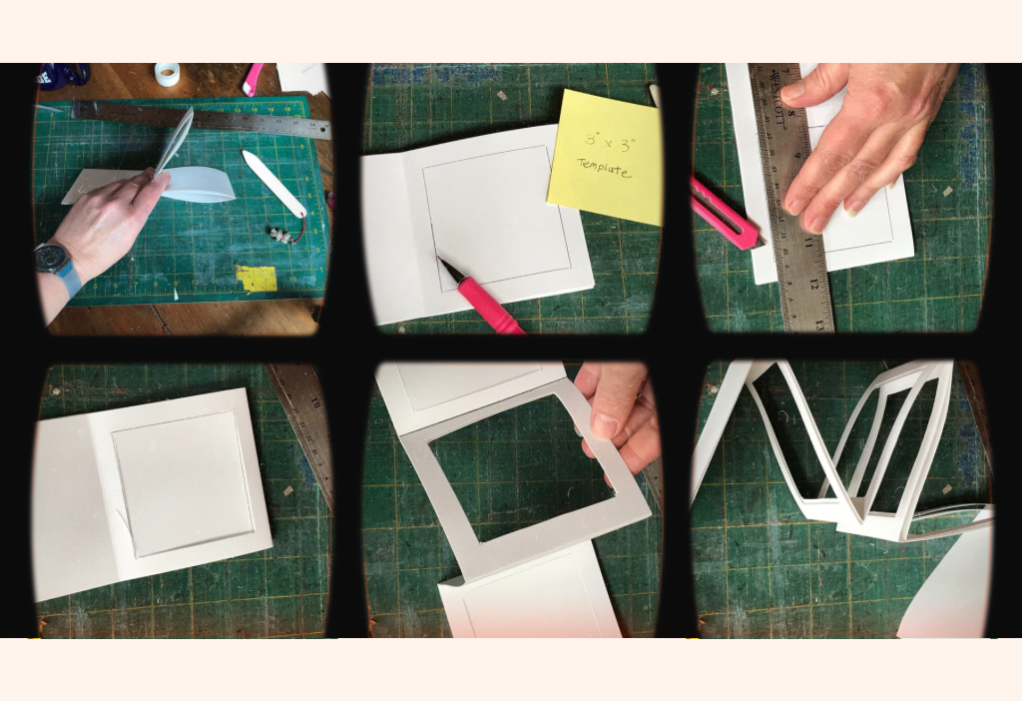
Step 1: Fold and Cut Your Accordion
When you fold your two pieces of 4″ H X 24″ W paper into sixths, you’ll end up with a book that is 4″ H X 4″ W.
Because you will be sandwiching a parallel circuit between the two pieces of paper, it’s best if you carefully fold and cut the two pieces at the same time. That way, they’ll fit snuggly together when you use double-stick tape to combine the layers.
The video up top shows how to do this, but here are the basic steps.
Jog the two pieces of paper together so that their sides and corners match up. Fold them in half lengthwise. Crease with a bone folder or a fingernail.
Measure 4″ inches from the folded edge with a ruler and mark it lightly with a pencil. Fold the open edge to that line. Fold the folded edge to the crease that was made during the first fold. Refold the accordions so that they look like six-page zig-zags.
Fold the front and back flaps so that they are touching, but leave the remaining pages folded. The shape will sort of look like a winged “W” with the cover flaps on your left and the creased folds on your right.
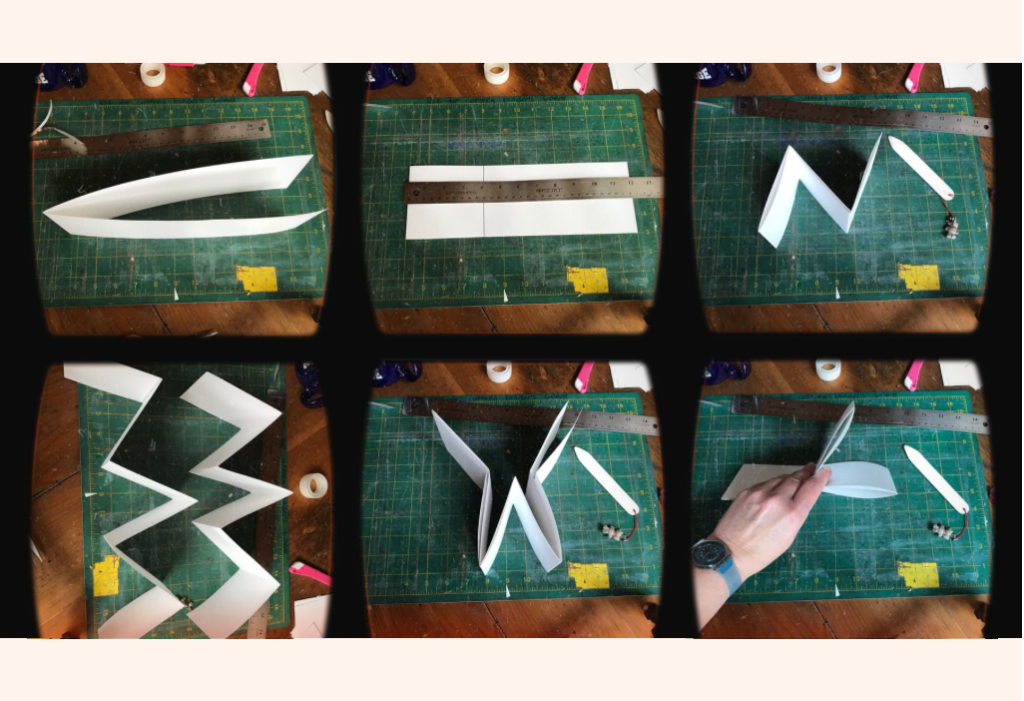
Create a 3″ X 3″ paper template to trace around, or else use a C-thru ruler to measure 1/2″ all the way around the top-most layer.
Use a craft knife to carefully cut through all of the layers. Carefully punch out the squares and put the scraps aside for later. You’ll be left with a front and back cover and four framed pages where your LEDs will go.
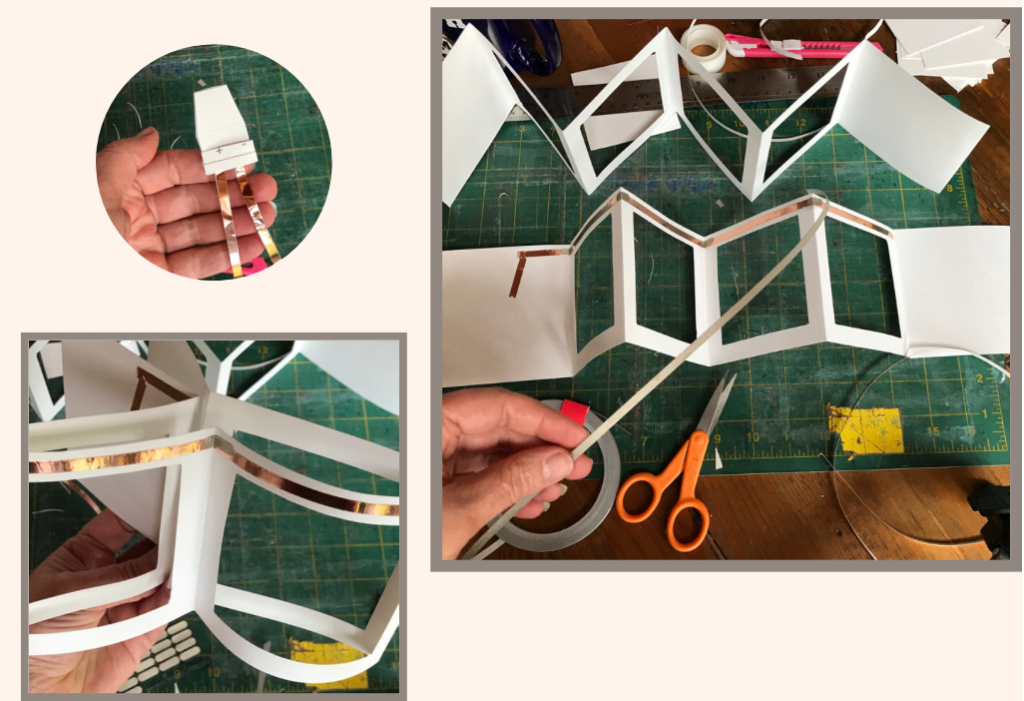
Step 2: Prepare Your Battery Holder and Lay Down Conductive Traces
An origami paper battery holder is an easy way to keep your battery discretely hidden inside of the cover of your book.
Print the battery template after downloading it at this link, which will take you to a PDF containing four templates that fit to an 8 1/2″ W X 11″ H piece of paper.
While the video up top quickly addresses how to assemble this holder, a more detailed tutorial may be viewed here.
Put the top layer of your accordion aside and lay the circuit layer onto your work surface with the front cover pointing left.
If you are using copper tape, you’ll also need to use a Conductive Fabric Tape or Conductive Fabric Patches on all of the hinged areas, because copper tape will crack after too much folding. If you are using conductive fabric tape to create your circuit, you do not need to do this.
In my video, I used copper tape and Conductive Fabric Patches for the negative (top) trace and Conductive Fabric Tape for the positive (bottom) trace; this was only for demonstration purposes.
Using one continuous piece of copper or fabric tape, adhere the ground (negative) trace on the top of your accordion, starting inside of the front cover (see picture and/or video), where it will be connecting to the battery holder.
Repeat this for the positive trace on the bottom of your accordion.
You are creating a parallel circuit.
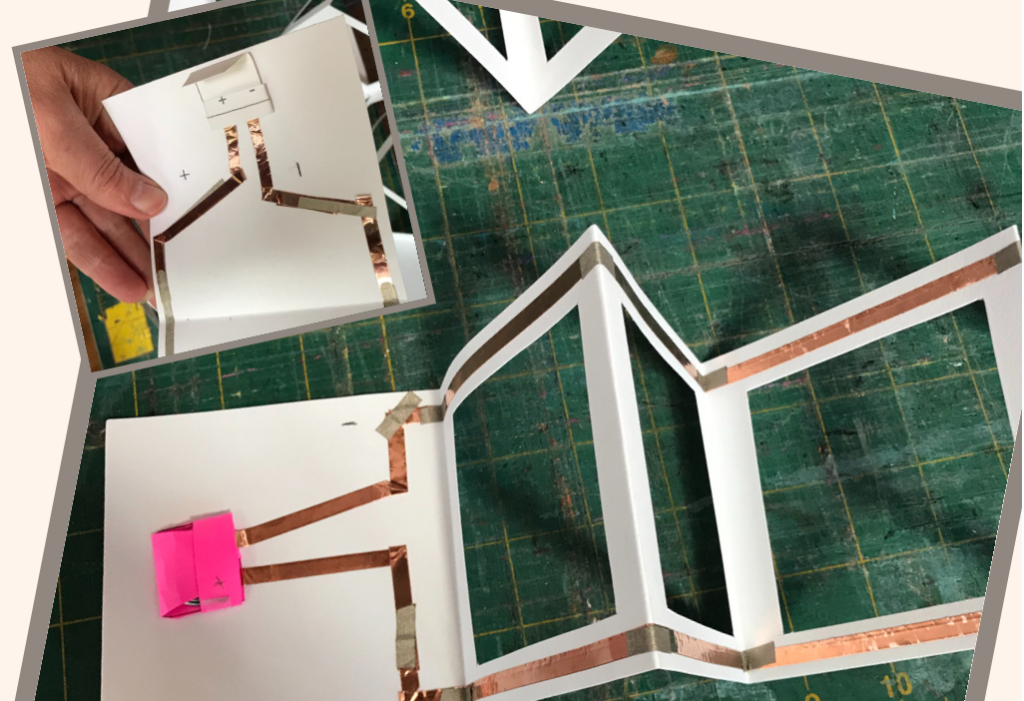
Step 3: Connect the Battery Holder to the Conductive Traces
Stick your battery holder to the inside of the front cover, so that the negative leg is overlapping the negative (top) trace that you stuck down. Adhere the positive leg of the battery holder over the positive (bottom) trace.
Stick a conductive fabric patch (or piece of conductive fabric tape) on top of the spots where the battery holder overlaps the positive and negative traces.
I like to label my top trace with a “-” and the bottom one with a “+” as a visual reminder of the circuit’s polarity.
You may want to add a ball of Scotch tape behind the paper battery holder to keep it secure. I also like to place a piece of Scotch tape over the bottom edge of the battery holder, and slightly over each of its legs. Just be careful not to cover too much of the copper legs, or the tape may interfere with the connectivity of your reed switch in a later step.
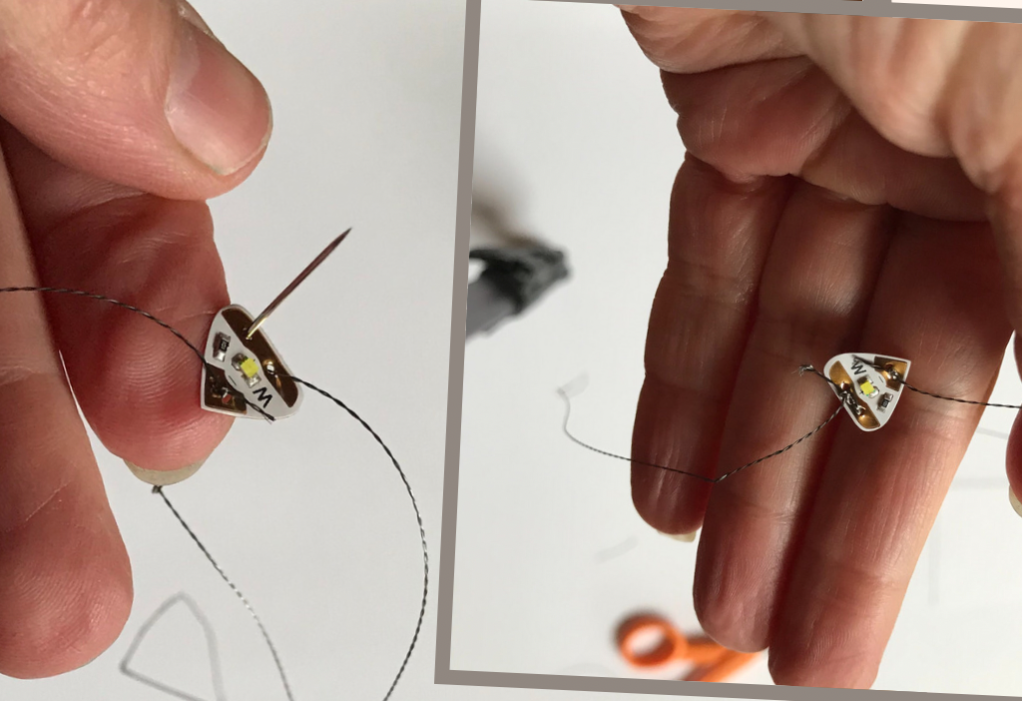
Step 4: Connect LEDs to Conductive Thread
This step is the most fiddly part, but it’s also one of the most important. The first time I tried doing this, I made my holes too close together and ended up ripping a sticker.
Poke a couple of holes (not too close together) in each end of your four Circuit Sticker LEDs. You may use a needle, a thumb tack, or a fine awl.
Thread your needle with a 7-8″ strand of conductive thread for each end of your stickers. Do not knot the thread onto the needle. (If your thread is frayed, try a little wax or even ChapStick to tame it).
Sew through the holes on one end of each sticker a couple of times, leaving a 2″ tail on one side. Tie a secure knot.
(TIP: Steel thread is slippery. I didn’t need to use nail polish to knot my 2-ply conductive thread, but a 3-ply thread is more unwieldy, and may require a dab of nail polish to keep knotted. If you end up needing nail polish, be careful not to get any on the metal pads of the stickers.)
Trim the short tail (BUT, NOT TOO CLOSE TO THE KNOT) and leave the long one dangling; it will be used to tie the LED to your book. In the second photo, you might notice that I have a little tail sticking out. It’s okay to leave it this length; just be sure that the tails from one end of your stickers do not touch the other end, or you’ll end up with a short circuit.
Repeat this process for each of your LEDs.
Step 5: Create Your Paper Flowers (or Come up with Your Own Idea)
To create my flower tops and bottoms, I made small paper circles by tracing the inside of a roll of Scotch tape onto the scraps I had left from cutting the squares out of my accordion.
I then used some colorful scrap paper to cut flower petals, ensuring that they weren’t too tall or fat, since the flowers needed to swing without obstruction.
I made my blue flower bottoms and pink flower tops by adding glue to a paper circle and then sticking four paper petals onto it.
I used a screw hole punch to poke holes in the centers of my flower tops, but you can use a small hole punch, thumb tack, or awl. While the hole isn’t required, it makes the light appear brighter.
When my flower bottoms were ready, I added the LEDs and reinforced the connections with conductive fabric patches. When my flower tops were ready, I added a couple of pieces of double stick tape to the back side on both sides of the hole and stuck them on top of the flower bottoms containing the LEDs.
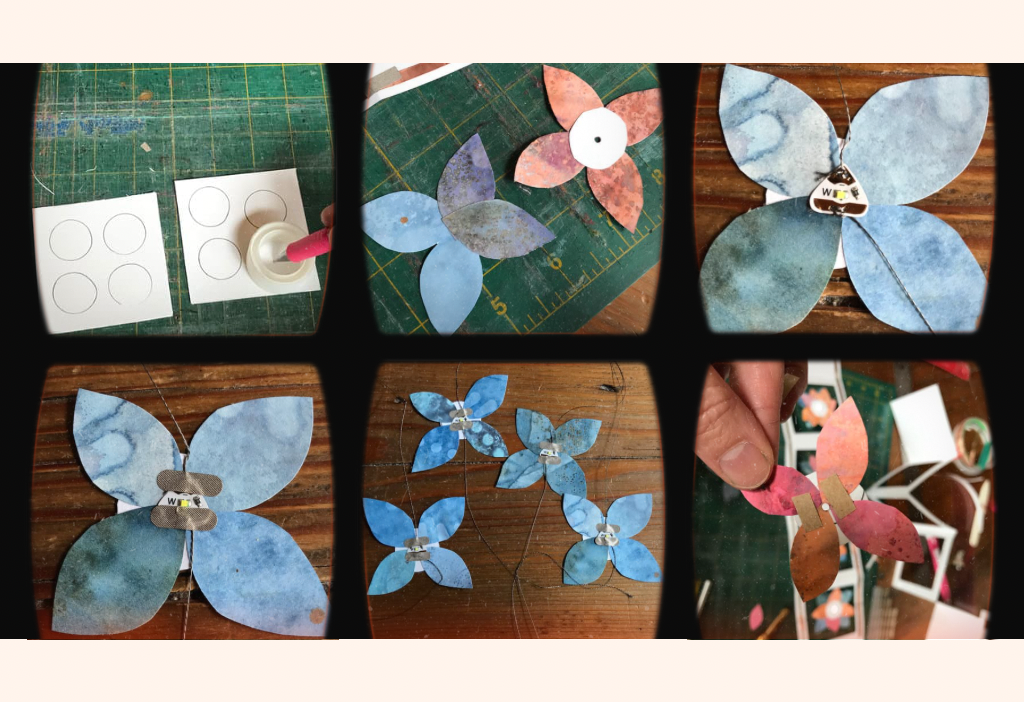
Step 6: Tie LEDs to the Book
Ensuring that the negative (pointy) end of the LED points up and the positive (wider) end of the sticker points down, carefully position your flowers where they will swing without obstruction. Wrap the conductive thread around the top (negative side) of the accordion twice and then secure it with a piece of copper tape or conductive fabric tape. Do this for all four of the LEDs.
Once they are secure (and you’ve ensured that they are all lighting properly), add the flower tops, securing with double-stick tape.

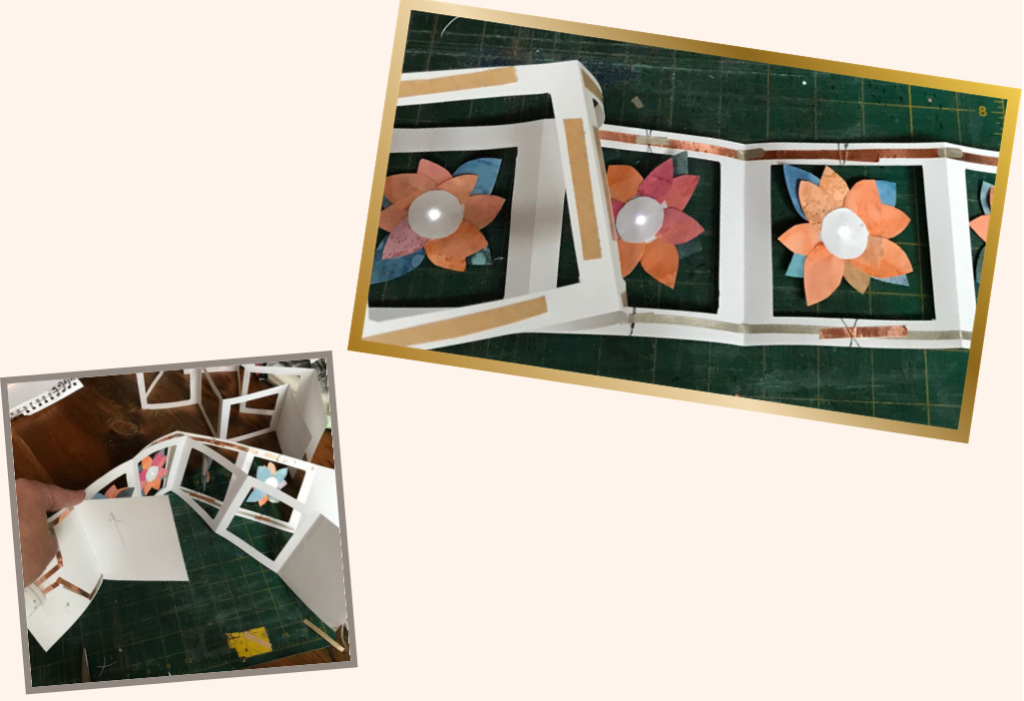
Step 7: Make a Circuit Sandwich with Double Stick Tape
Once you’ve tied and secured each of your LEDs into your flying concertina/ accordion, it’s time to use double-stick tape to create a circuit sandwich.
Apply double-stick tape to the back side of the second accordion, ensuring that you DO NOT PUT TAPE ON THE INSIDE FRONT COVER, where your battery lives.
I like to smooth my book down one section at a time, to keep everything aligned properly.
Step 8: Add a Reed Switch
If you want to add some intrigue and interactivity to your project, it’s time to add the reed switch. The type of reed switch I’m using is normally open, meaning that the circuit will remain open until a magnet is brought near enough to close it. In other words, the lights in your project will remain off (since the circuit will be open) unless a magnet is brought near enough to the reed switch to close it.
Using a craft knife, carefully remove a little of the copper tape to create a gap in the circuit on one of the battery holder’s legs. I tried to place my reed switch as close to the center of my front cover as I could. If you used a piece of Scotch tape to keep your battery holder from shifting, pay attention that the tape is not inadvertently covering the copper tape in the area where the reed switch will be adhered.
A reed switch does not have polarity, so it doesn’t matter which direction you place it. Use a conductive fabric patch (or a piece of copper tape with a conductive adhesive) to secure the legs of the reed switch on both sides of the gap you made. I carefully bent the legs of the reed switch into little half circles to increase the amount of metal in contact with the copper tape.
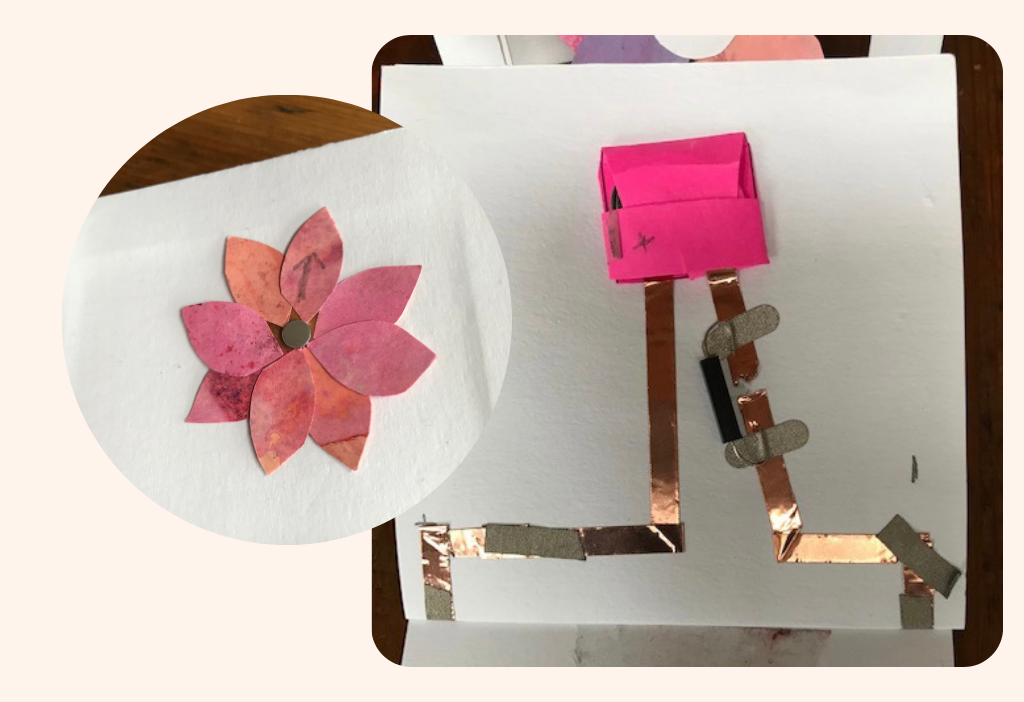
Step 9: Add a Magnet to a Decorative Element (to Close the Circuit)
Decorate your front cover and add a pocket to the back one (to keep your magnet safe when it’s not being used). I adhered a paper flower to the front. I tried to align the center of my flower with the location of the reed switch on the other side of the cover.
Using trial and error, figure out the optimal position for your magnet and then use a bit of double-stick tape to secure the magnet to the back of a flower or other decorative element. This part can be fiddly. At one point, I had to go back and add more conductive tape to my reed switch, because it had gotten loose. In my first prototype, I also had to remove some of the paper from my cover decoration, because the thickness of the layers made it difficult for the magnet to connect with the reed switch.
Once you find the optimal position for the magnet on your decorative piece, draw an arrow at the top to make it easier to find that ideal placement again.
Gallery
Related Project Tutorials
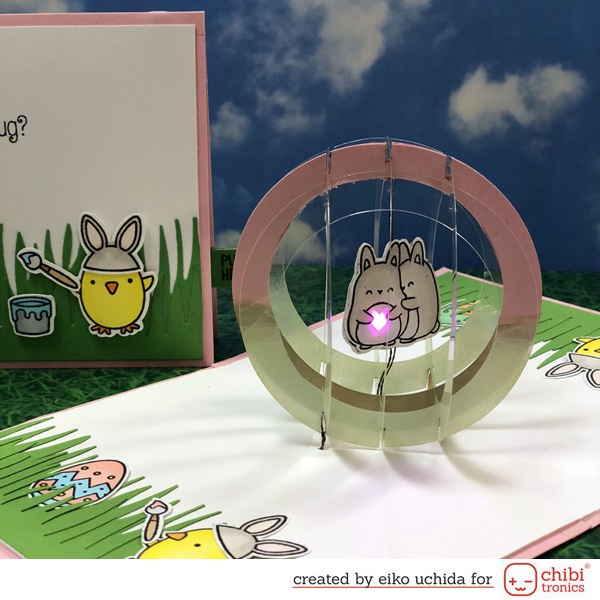
Pop-up Sphere Card
In this stunning project using conductive thread, a sphere pops up when you open a card and light turns on when you pull a tab.
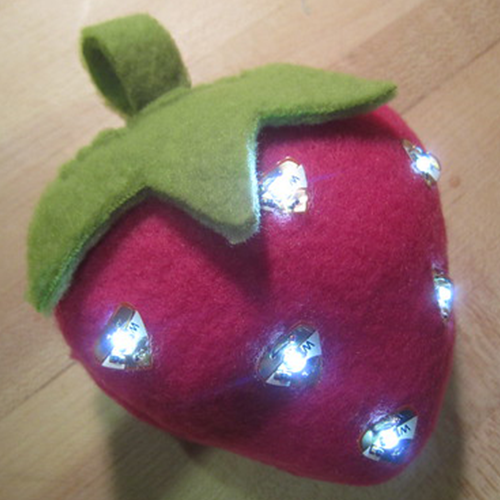
Light-up Strawberry
Using conductive thread and some Chibi Lights, you can make an adorable stuffed strawberry with glowing seeds.

Electrified Spinner Card
Learn how to make a trifold spinner card with an LED that lights up, with help from a reed switch (magnet on).
Featured Products

Reed Switch – Magnet On
$12.00
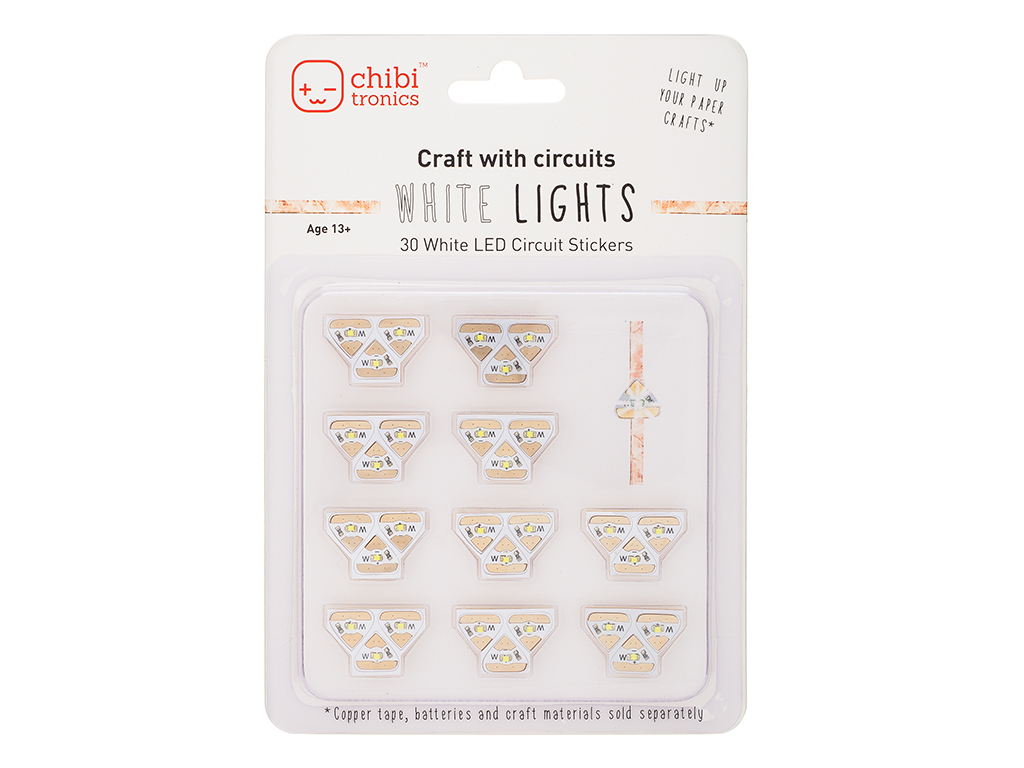
Chibi Lights
$35.00
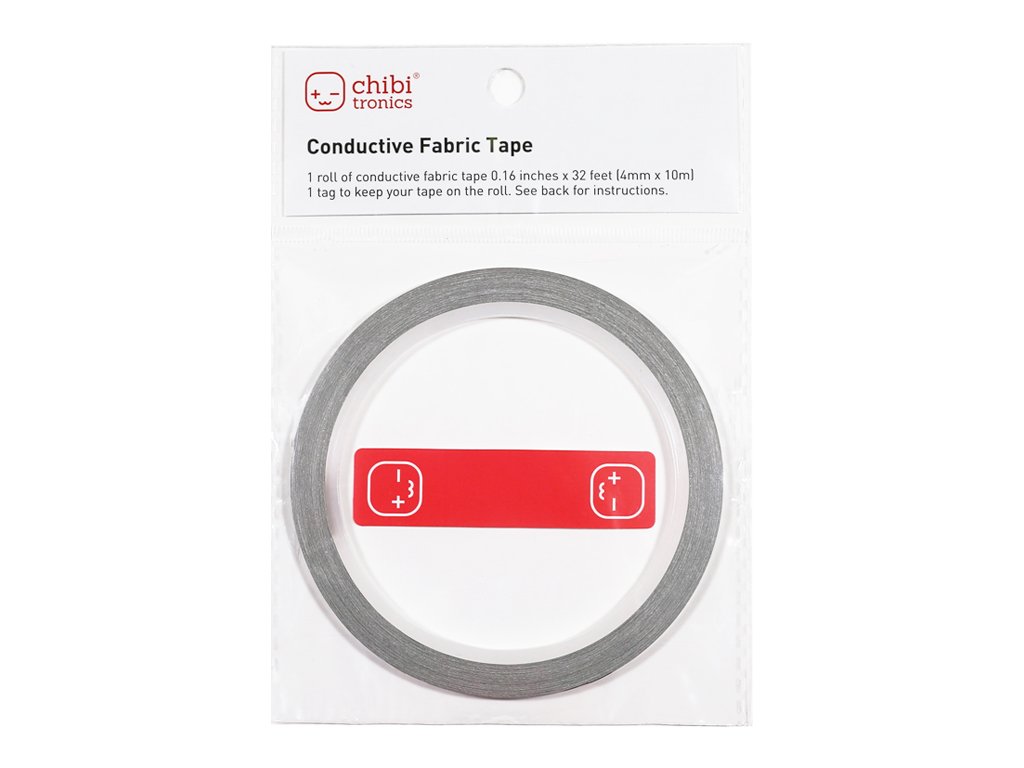
Conductive Fabric Tape
$10.00
Copper Tape
$10.00