Hi, everyone!
It’s Nicorin here.
I am showing Valentine’s project again following the last month.
This month’s work is more simple and easy to make.
Because Valentine’s day is just around the corner. Then, for someone who needs to make many cards for the classmates, I show you these projects today.
The shining love cards and the heart mini tags.
Today’s TIPS are
1) Using the hologram sheet for making reflection and shield from translucent.
2) Point to notice, when you use the tiny battery

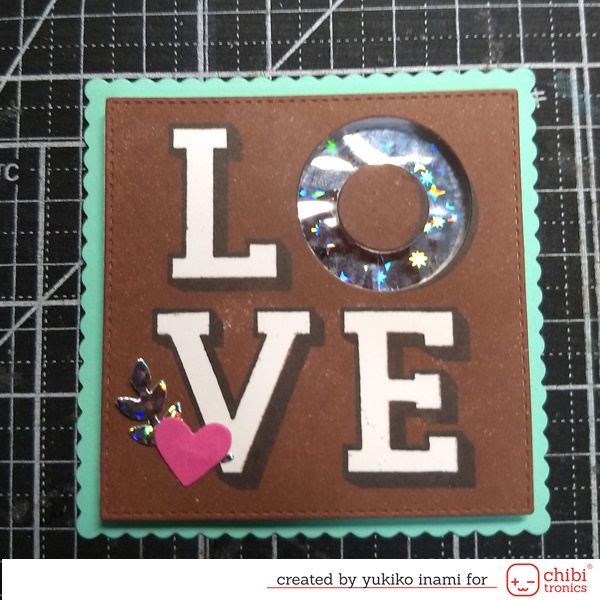
<The Shining Love Card>
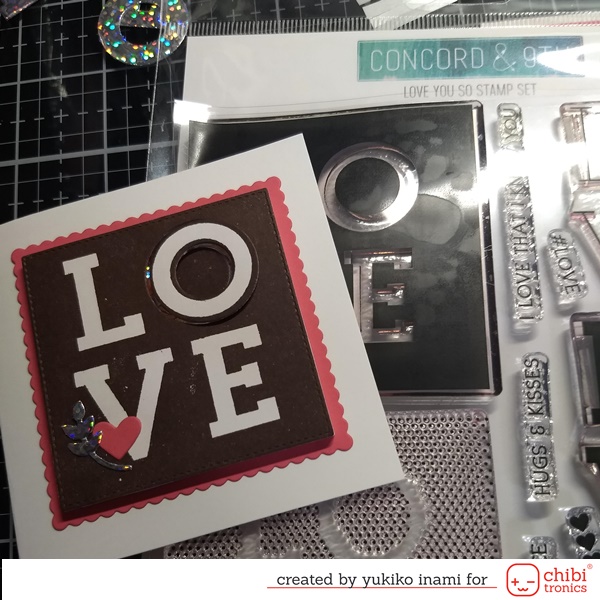
This stamp set is by Concord & 9th. It is stylish so I love it.
I use the hologram sheet for making the effect of the light reflection.
Just one LED light using for this card, but the light effect is amplified with the reflection. It’s very effective!
It’s friendly for making and easy on the wallet ;), too!

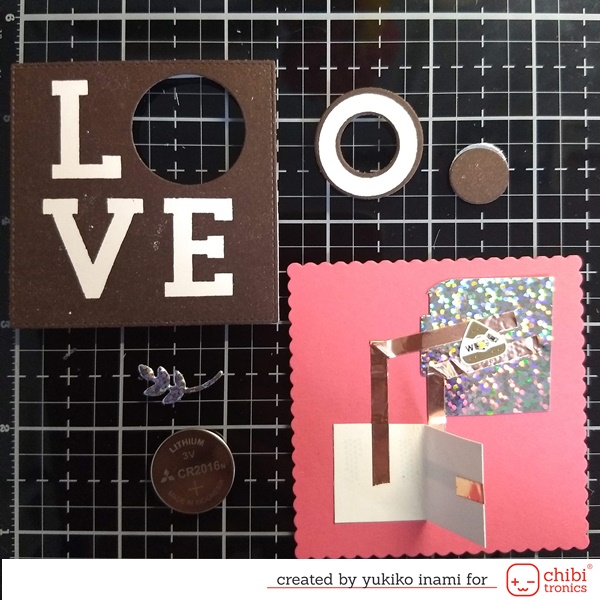
1. Supplies
I prepare these parts as shown below.
・Stamp the panel with Love You So Concord and 9th; It’s valid unfortunately but the stamp is in stock still now with the super discount price on their website.
・Cut the square panel for the top panel, the scallop square for the circuit, “O” shape, the leaf and the heart parts.
・Switch Parts; a piece of paper 7/8 x 1 3/4 inch and half folding
・The hologram sheet
・Circuit Panel
・Folding Card base
・MegaPack of LEDs (30 stickers) Red
・Copper tape
・Cell Battery; CR2016
・Foam tape or strip; thickness is 1/8″
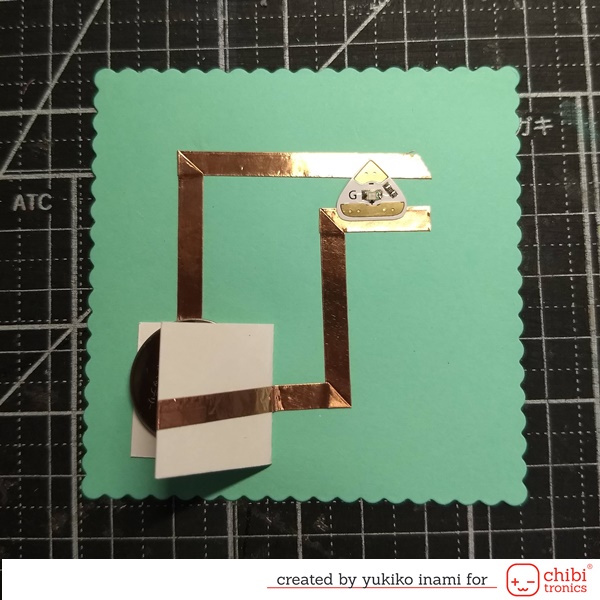
2. How to make the circuit
Make the circuit as shown in the above photo.
・Stick the folding switch part on the battery place of the circuit.
・Mark the light place in the center of the “O” letter.
・Draw the circuit; Start the negative pathway from the battery place and go through the negative side of the LED. The positive pathway is started from the inside of the switch part lid and goes to the positive side of the LED.
・Stick the copper tape on the pre-drown path.
・Stick the LED connecting the circuit.
・Make sure the turning on the light when you set the battery in the switch part then push the switch.
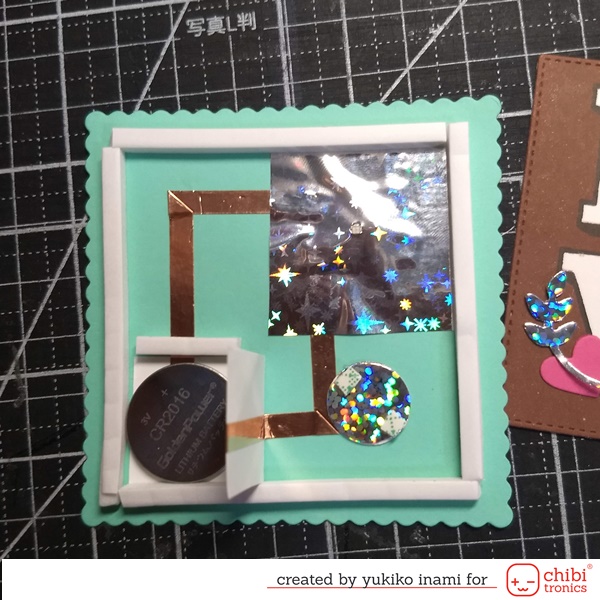
3. Assembly
・First, stick the hologram sheet covering the O hole place. The hologram sheet has a tiny hole in the center for the light.
・Stick the hologram sheet on the backside of the center part of “O”. Because it has the role of the shield and the reflection board.
・Then set the foam tape on all edges of the top panel.
・Set the top panel on the Circuit Panel.
・Set the center part of the “O” letter on the light with the small piece of foam tape. It can cover the light. You can choose using or not using the O part on the hole of O laying the hologram sheet.
You can see the difference between the two in the movie showing the begining of this section.
・Glue the panel on the card base.
Completed!
You can make it very quickly and send a special surprise to your valentine.
<The Mini Heart Tag with light>
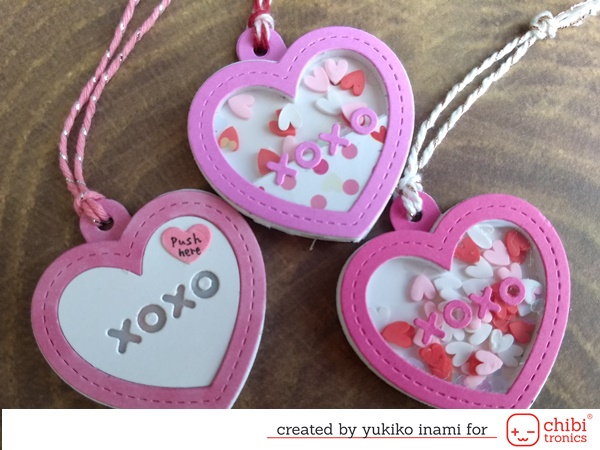
Is the tiny thing just adorable, isn’t it? I feel so, absolutely!!
This mini heart tag has light. It is so attractive to the little kids.
I made the mini tag with light for the goody bag of my daughter’s birthday party. The kids were so excited to push switch and see the turning on the light! The mini heart tag is so adorable without the light, but I add the light on it, it is getting more special and interactive.
In October, Eiko posted the light-up tiny snow globe tag. It’s very detailed and kindly telling how to make it. I recommend her post before reading mine. It’s a kind of textbook for everyone!
1. Supplies
Prepare the parts as shown below.
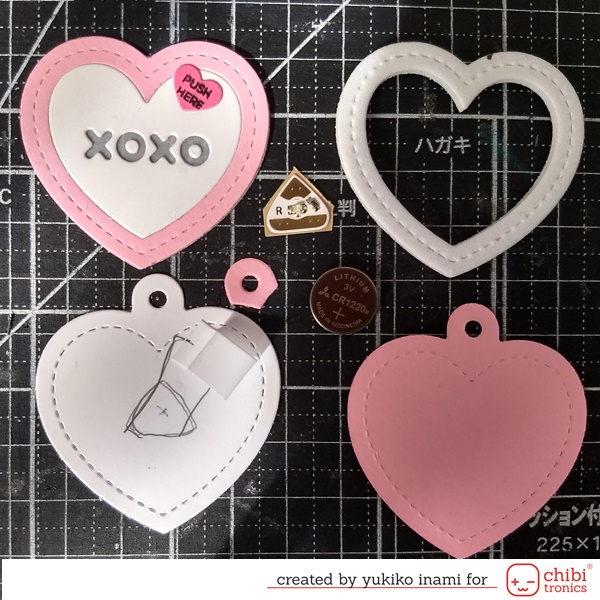
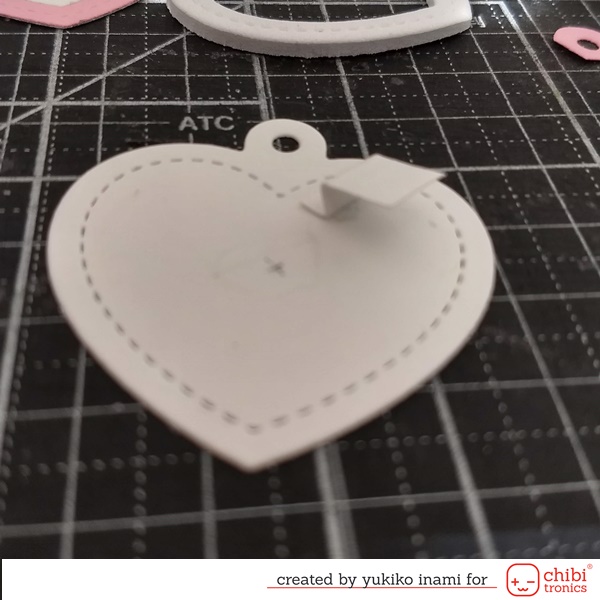
・Die cut the parts with the heart shaker gift tag by Lawn Fawn.
Cut the frame, the heart shape, the “XOXO” letter, the frame of foam; thickness is 3mm=1/8″, the heart, and the reinforcement part for the hole.
・MegaPack of LEDs (30 stickers)
・Copper tape
・Cell Battery; CR1216 or CR1220
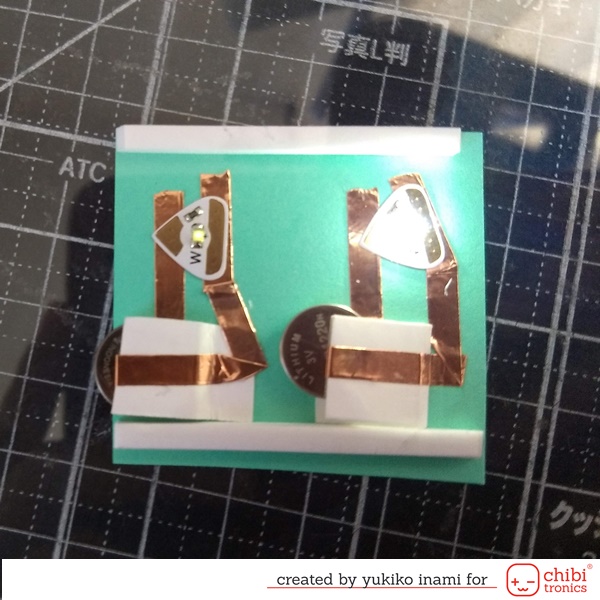
2. Make the Circuit
・Mark the battery place and the light.
・stick the switch parts at the battery place. If you use CR1220. The battery thickness is 2mm. The difference in the thickness between the battery and foam sheet is very important for switching well. You can see the basics of the push switch, here. If you hadn’t ever read it, please check it, they must be useful for your success 😉
Anyway, when you use CR1220 not CR1216, it is safer changing the switch parts to the lid type. I am explaining it here next section.
・stick the pathways, the positive side and the negative side, and LED.
・Set the battery inside the switch, and push the switch for confirming switch can turn on correctly!
3. Arrangement of the Push Switch; to make the space for on-off switching
I made the lid type switch for the combination of CR2020 and the 3mm foam sheet. The lid type switch can reduce the total thickness of the switch and the battery. It means that space is kept enough, and the switch lid and the battery do not touch each other when the switch off.
You can see the advantage of the lid type switch(Rt.side). It is thinner than the fording switch the thick of the one paper thickness. Then the lid type can keep more space between the battery and the lid.
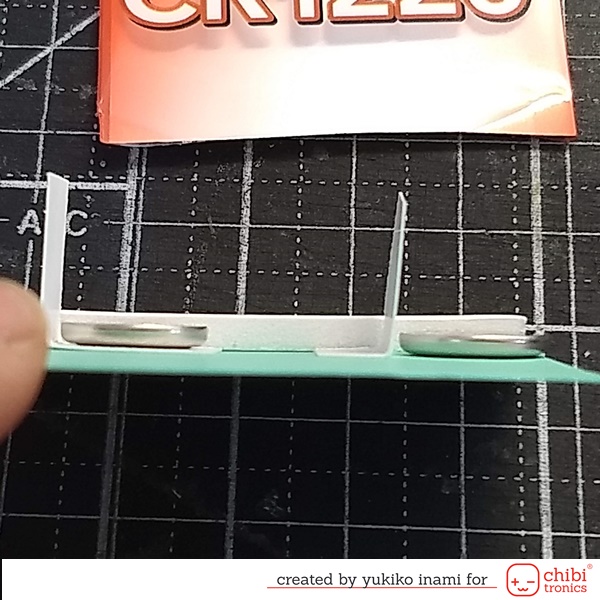
And I found one more pit hole when you use the tiny battery. Check the movie. When I set the switch the point of flat position, off position, then the one side edge of the battery is pushed and the other side of the battery comes up upward. It makes the connection and the switch can be keeping turn-on status.
That’s why I made one more arrangement for the switch. I add the folding corner for preventing to push the edge of the battery.
The combination of CR1220 and 3mm foam tape tends to keep turn on when you stick the top panel on the circuit. Be careful!
OK. The switch can work correctly with CR1220 and 3mm foam tape now.
Of course, you can use thicker foam tape or thinner battery like CR1216 as other solutions. I show an optional way for you.
4. Assembly
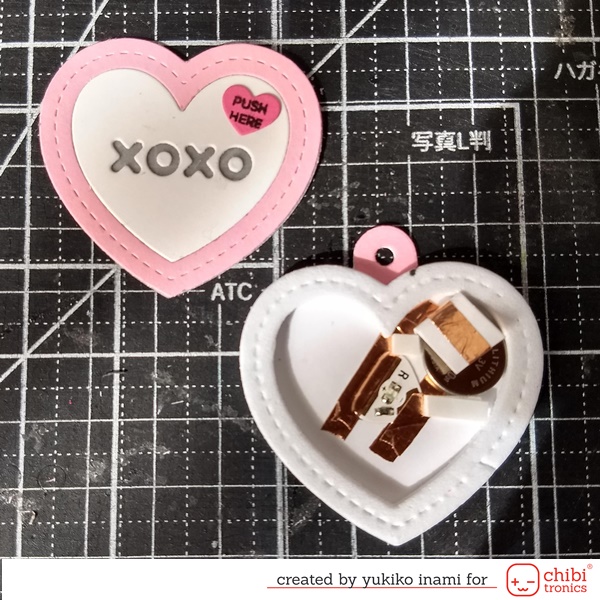
・Glue the foam seat on the circuit panel
・Make the top panel with the center panel and flame.
・Stick the vellum sheet on the backside of the top panel.
・Set the top panel on the foam flame.
・Glue the reinforcement around the hole place.
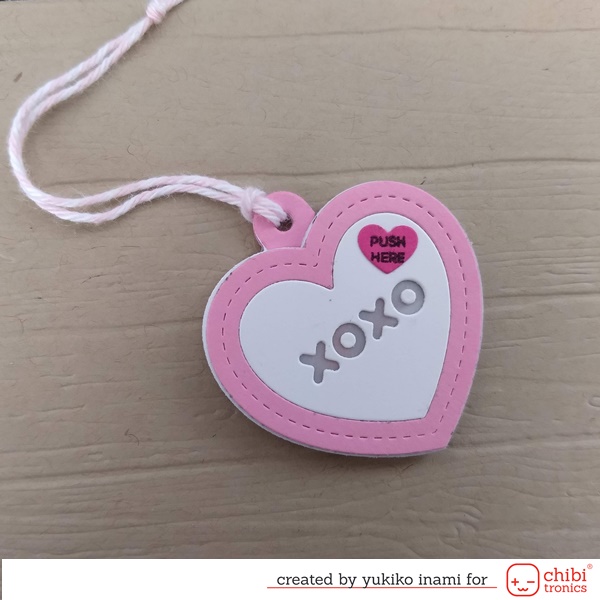
・Tie the string!
That’s all. Done!
If you are interested in the arrangement, the light-up heart tag with pull tab switch, please come and see my blog.
Thank you for stopping by.
I hope you have a wonderful Valentine’s Day!
Yukiko I.