Story in a Box
In this tutorial, we’ll show you how to use reed switches (magnet on) to control lights (and the mood) in a story-telling shadow box!
Video Tutorial
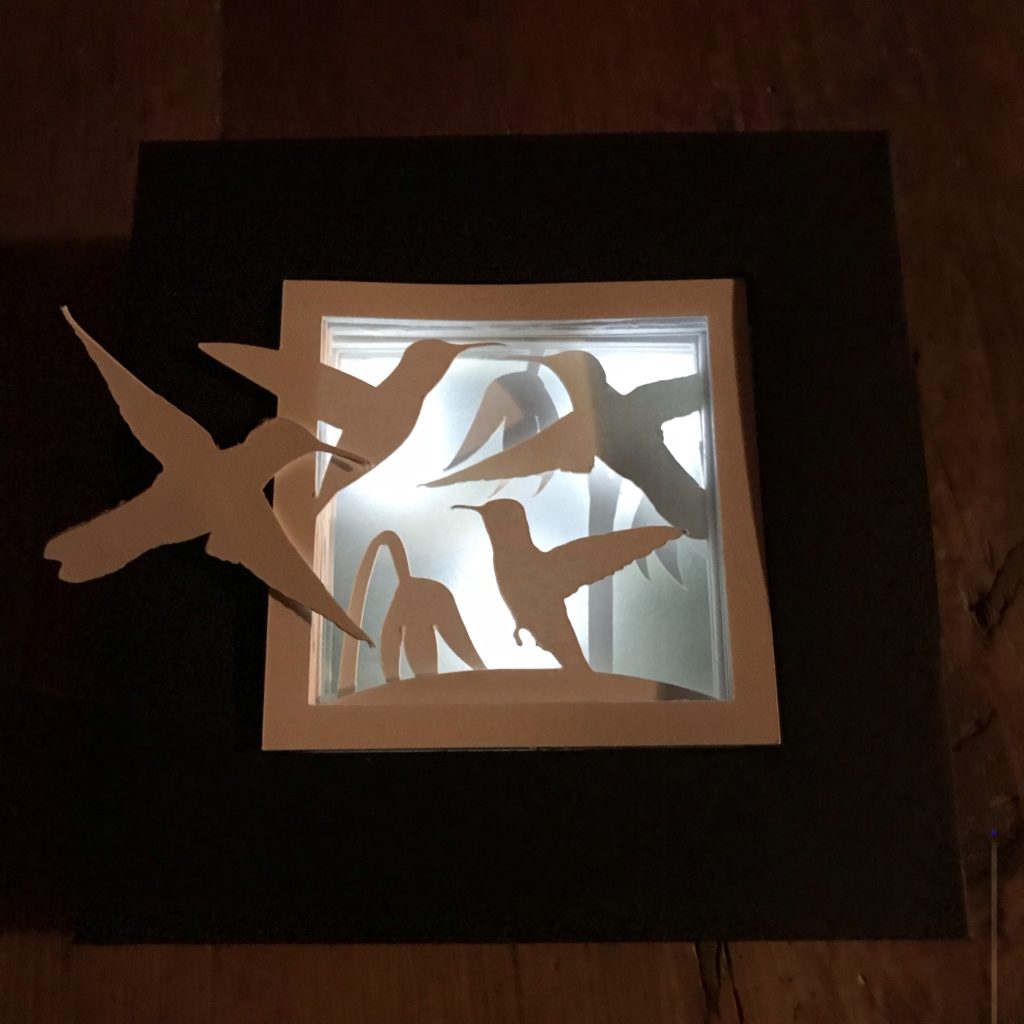
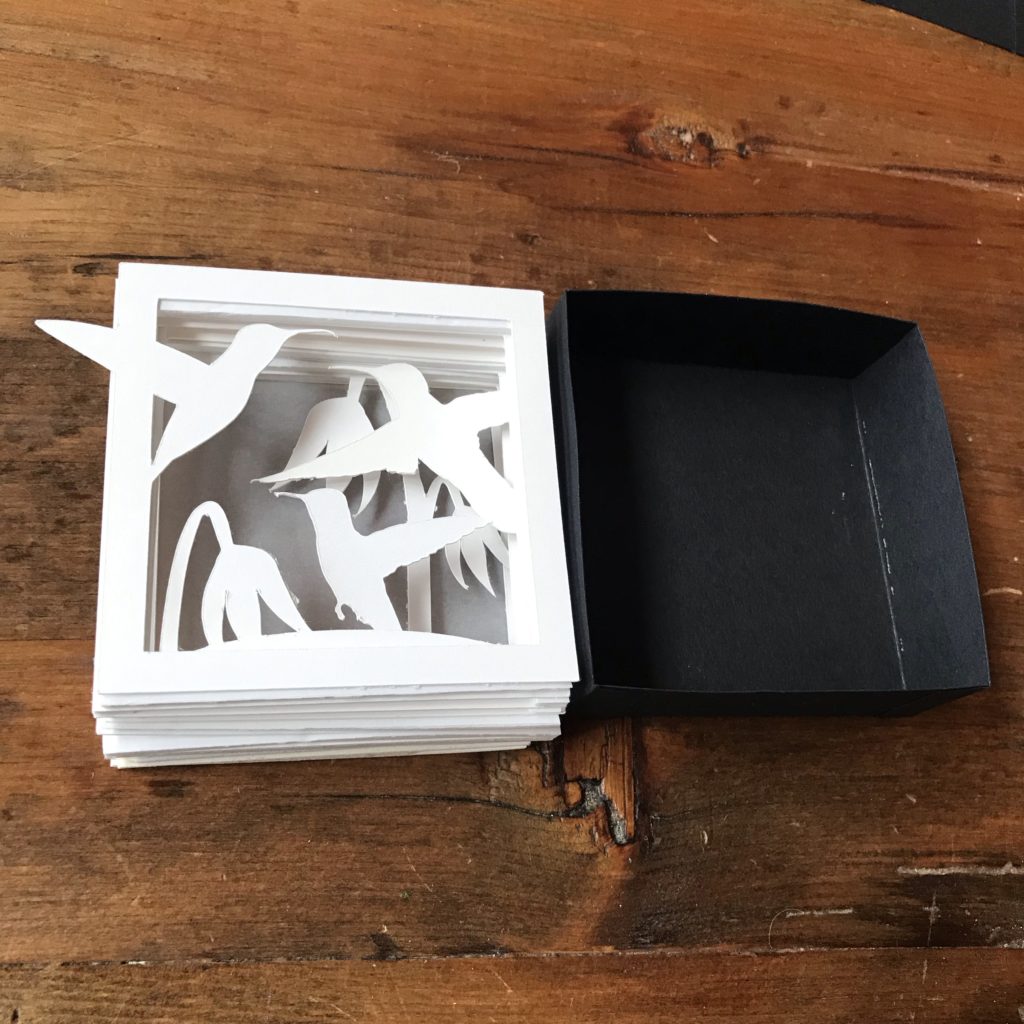
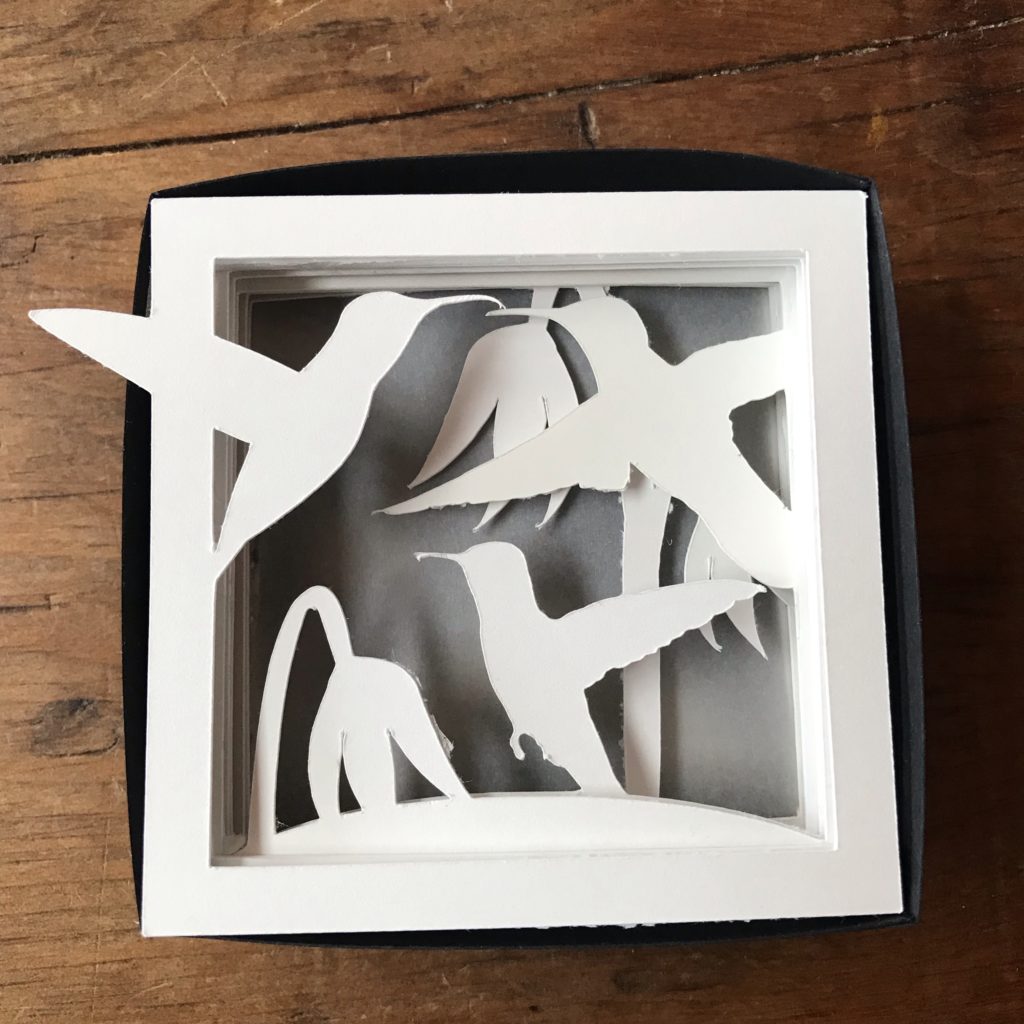
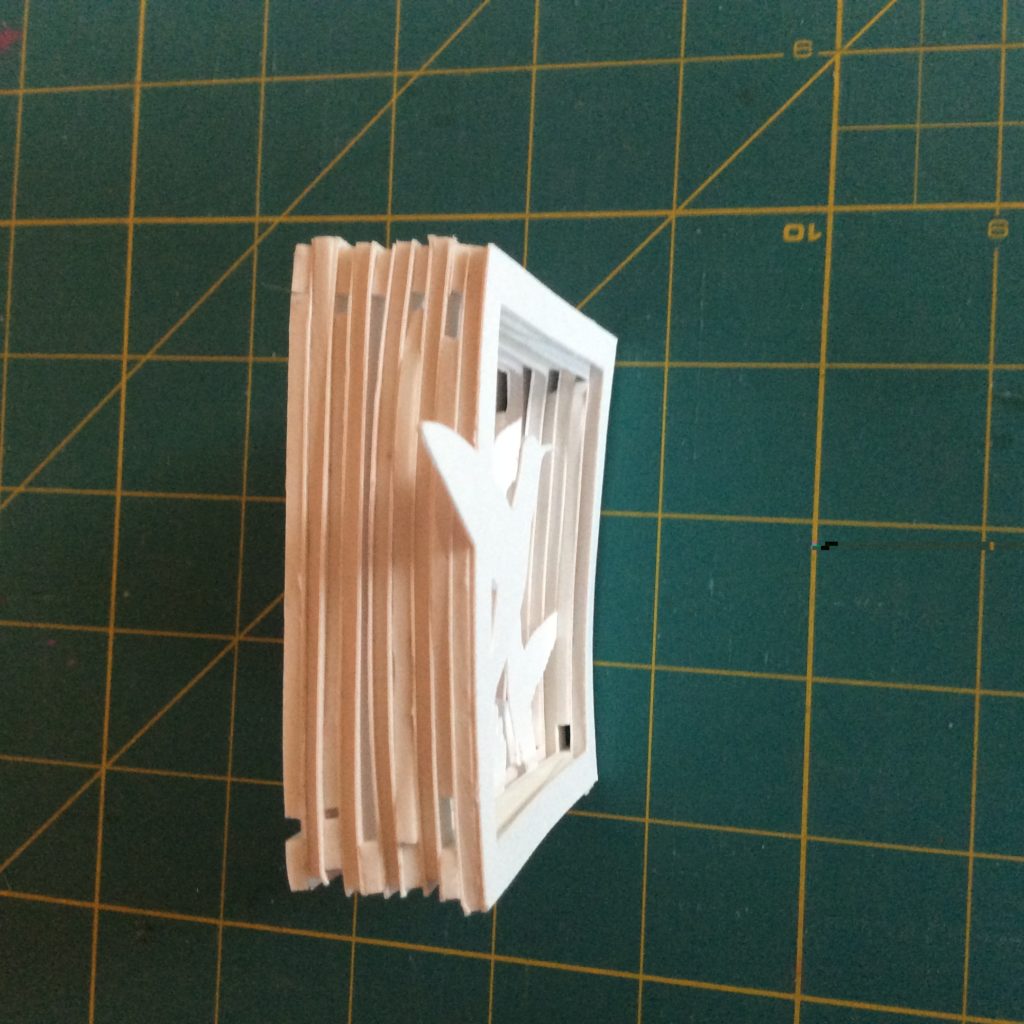
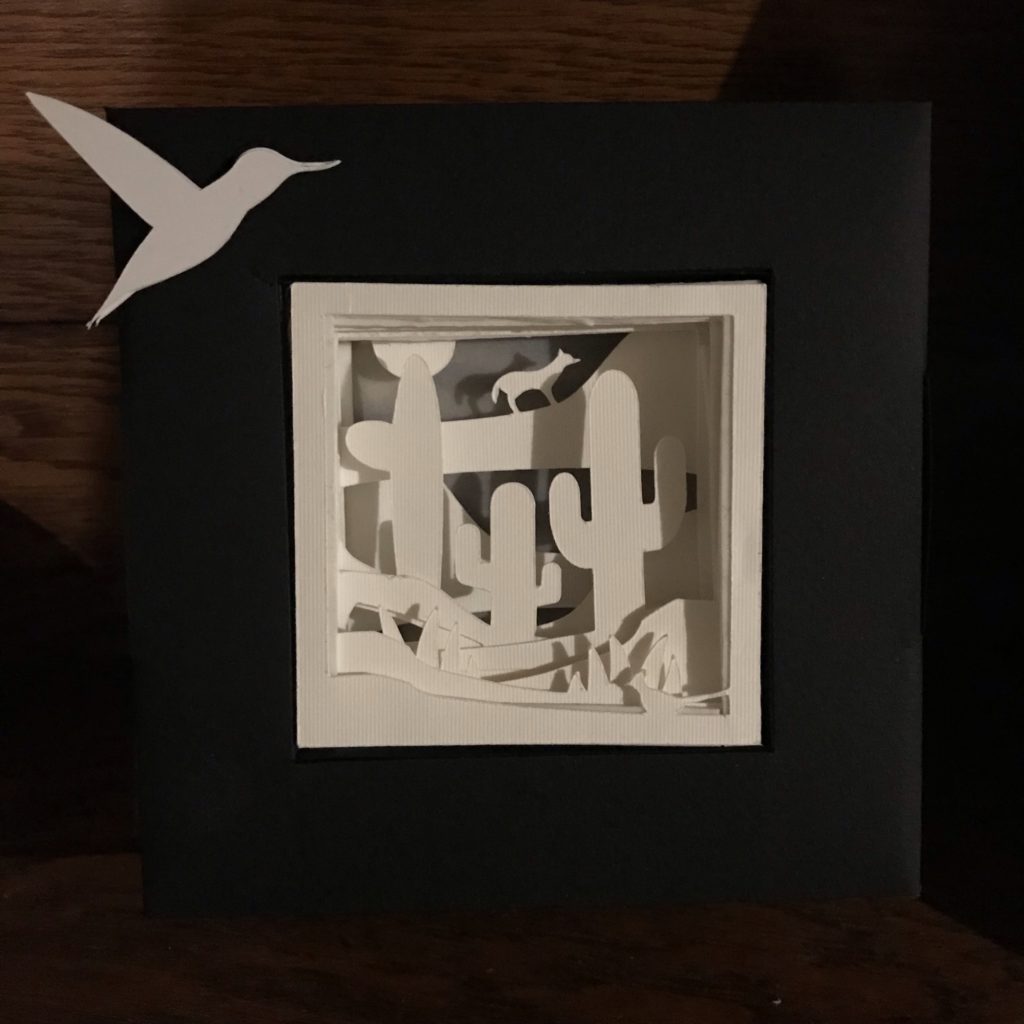
In this tutorial, we’ll show you how to build an interactive Reed Switch Shadow Box. This project, a three dimensional piece of art in a folded paper box, takes advantage of shadows, silhouettes, layers (and the magic of reed switches) to create a scene and tell a story. The idea for the hummingbird scene featured below was inspired by my mother’s garden.

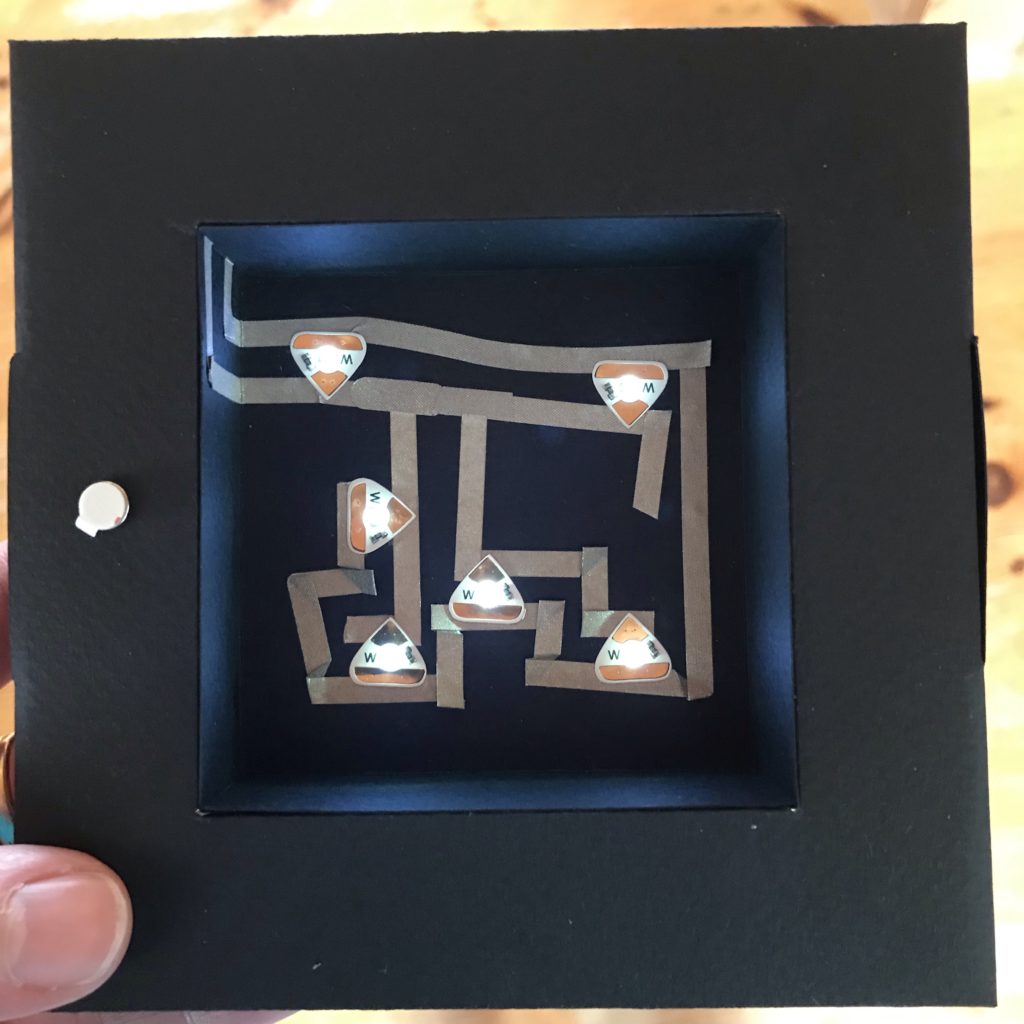
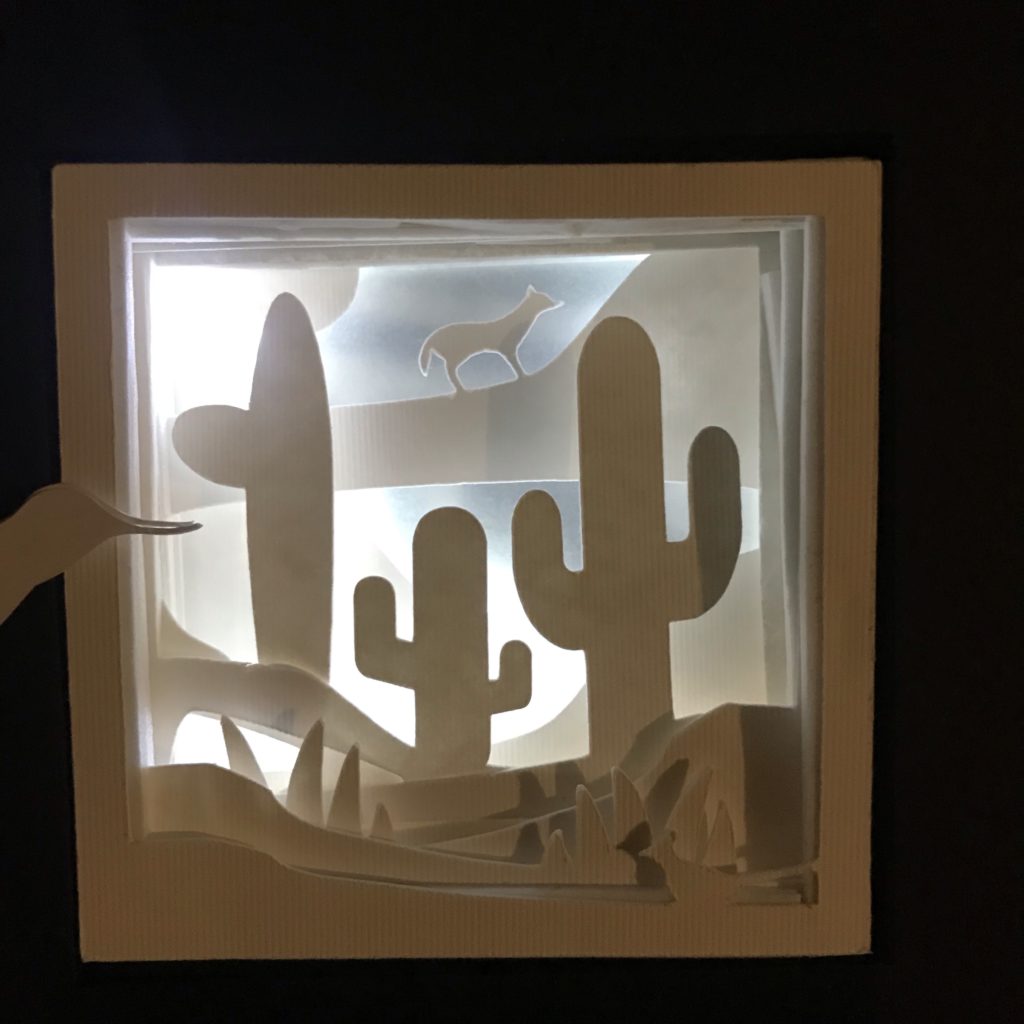
In the first example below, the shadow box was constructed with a single reed switch (magnet on) that triggers a path containing white LEDs. In that example, white lights turn on when a hidden magnet on a moveable bird closes the circuit.
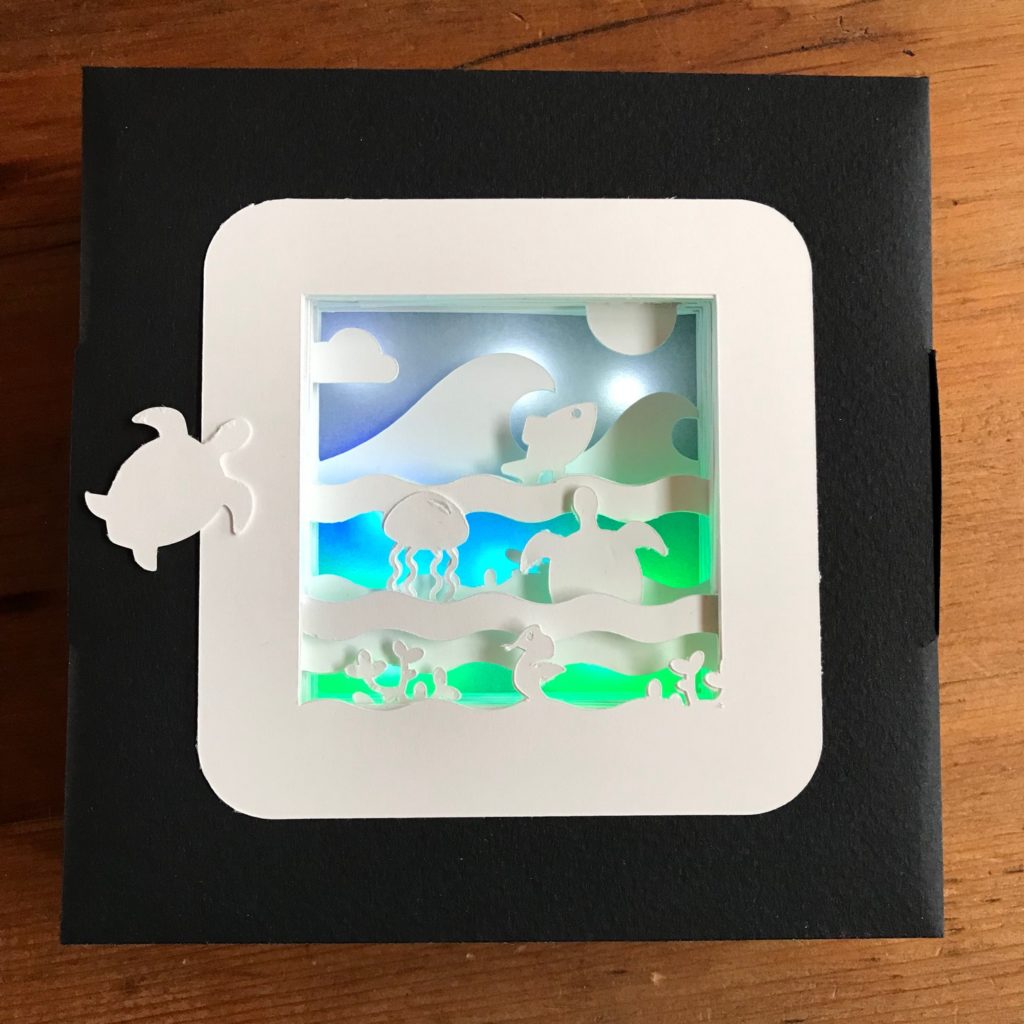
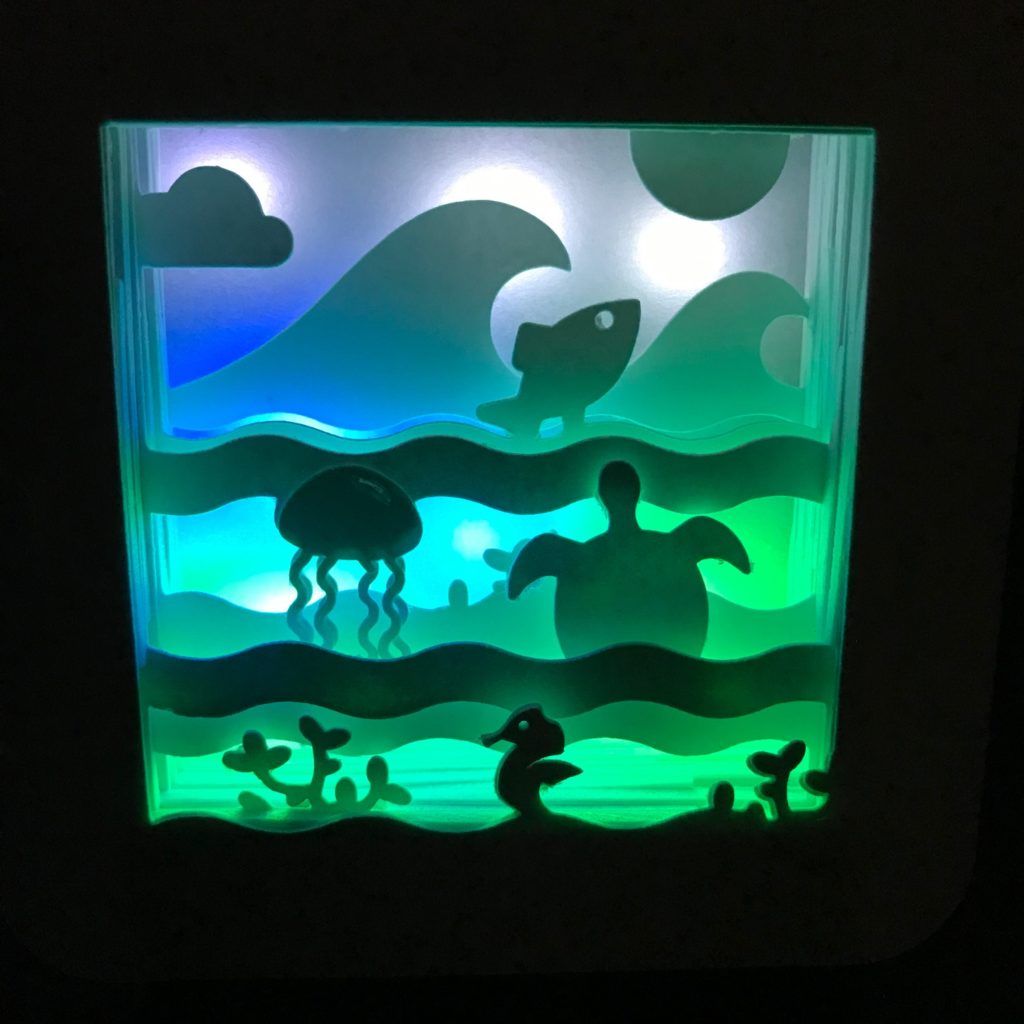
In the remixed example, a second reed switch was added. One triggers a path with white LEDs and the other triggers a path with colored ones. To see more examples, visit the gallery below.

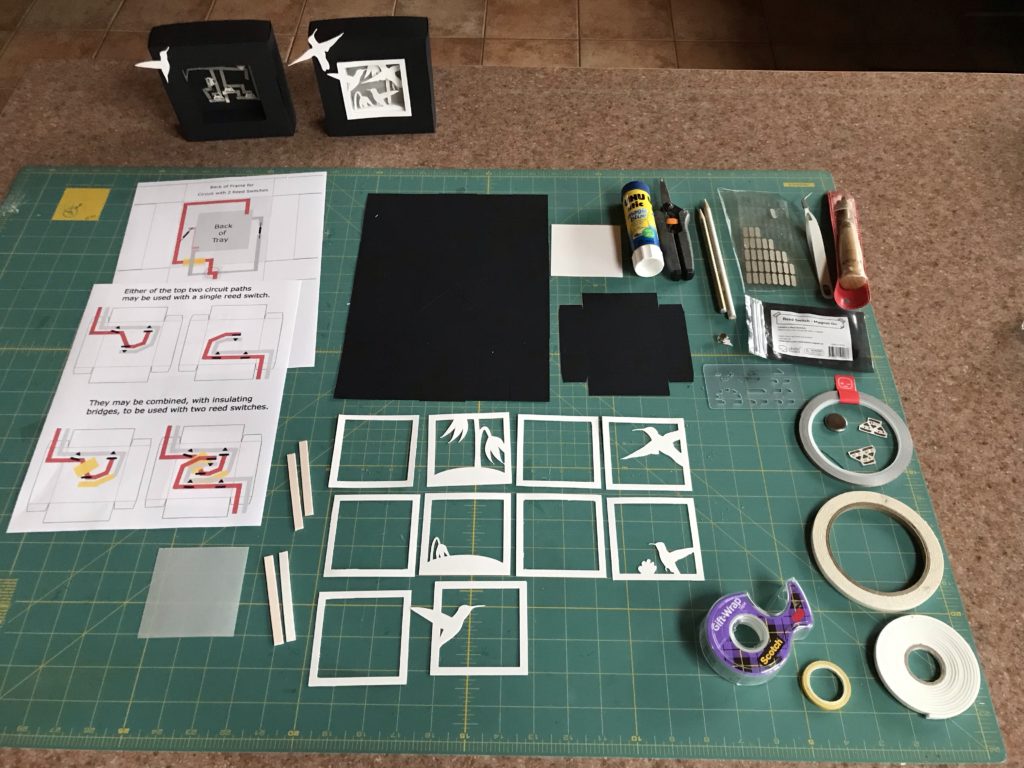
Materials & Tools
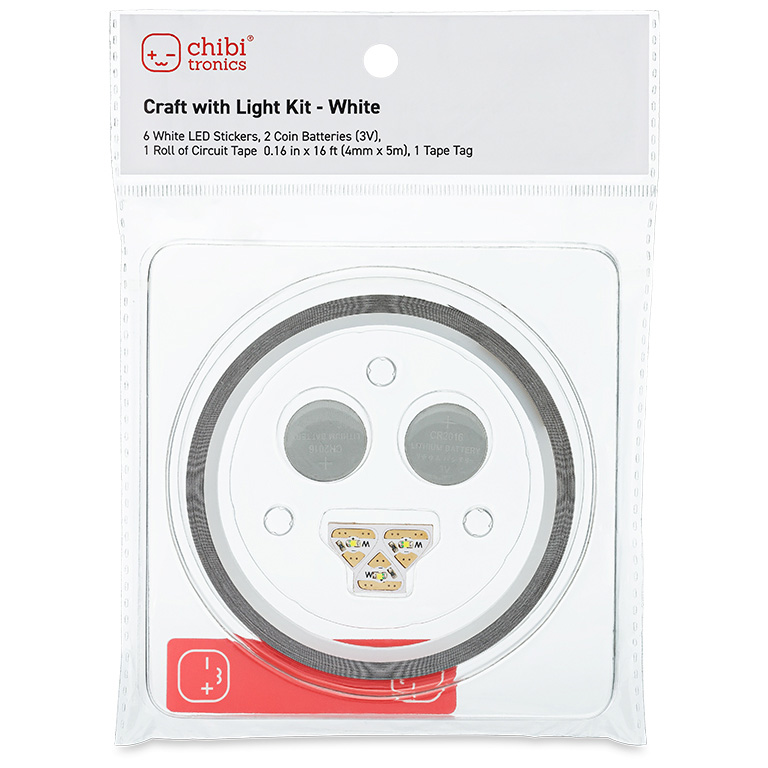
NOTE: A Chibitronics Craft with Light Kit contains most of the electrical components required for creating a Reed Switch Shadow Box.
Electronic Supplies
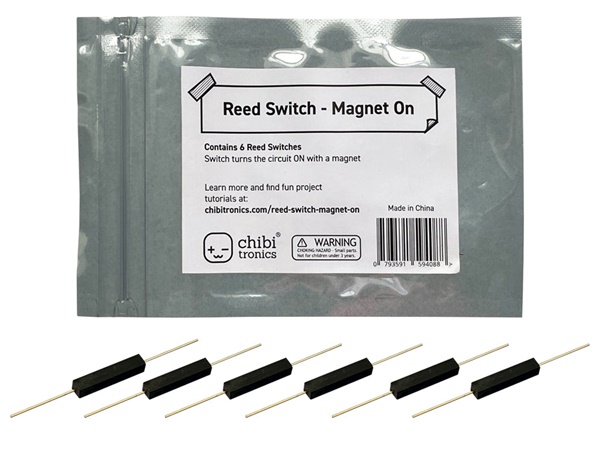
- 1-2 Reed Switches (Magnet On)
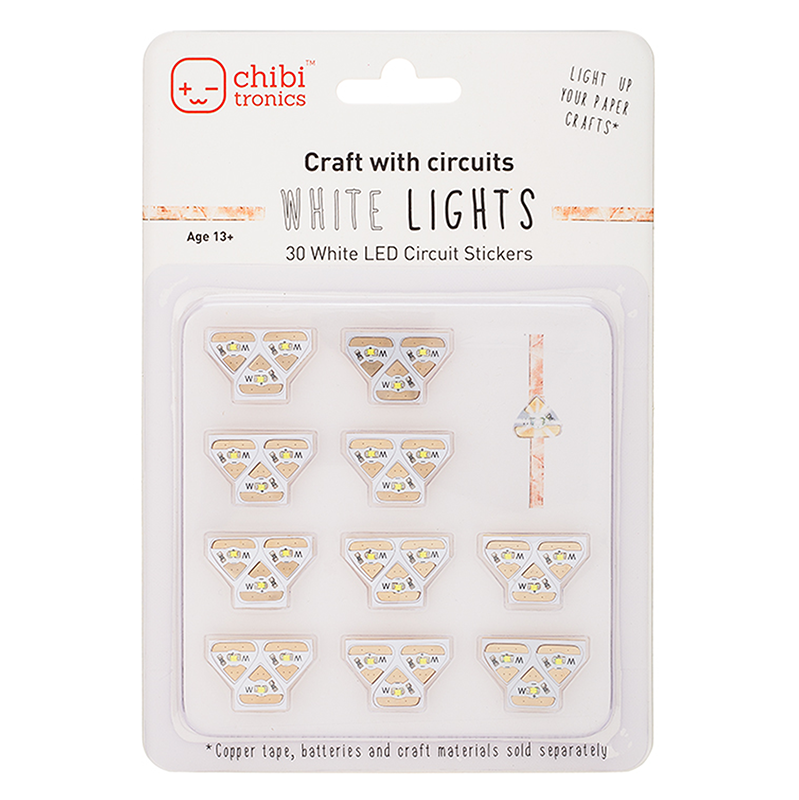
- Circuit Sticker LEDs
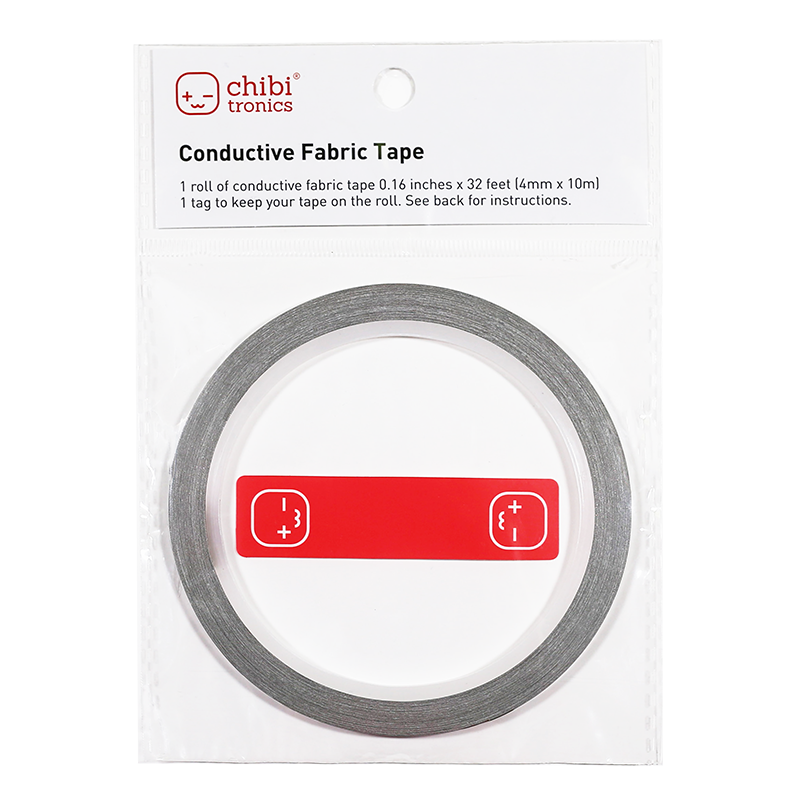
- Conductive Fabric Tape
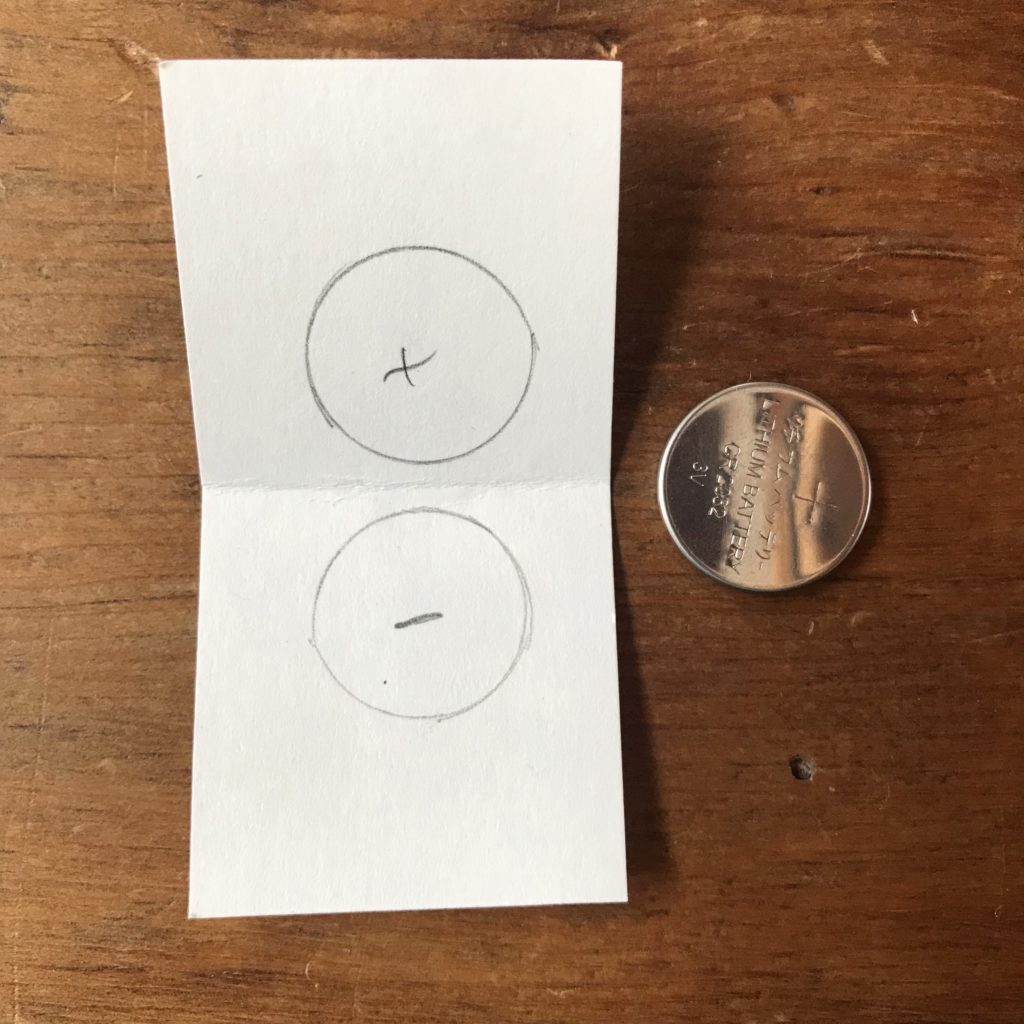
- 1 CR2016 or CR2032 battery
- (Optional) Fabric Tape Patches
Other Tools & Supplies
- 1-2 magnets for triggering reed switch
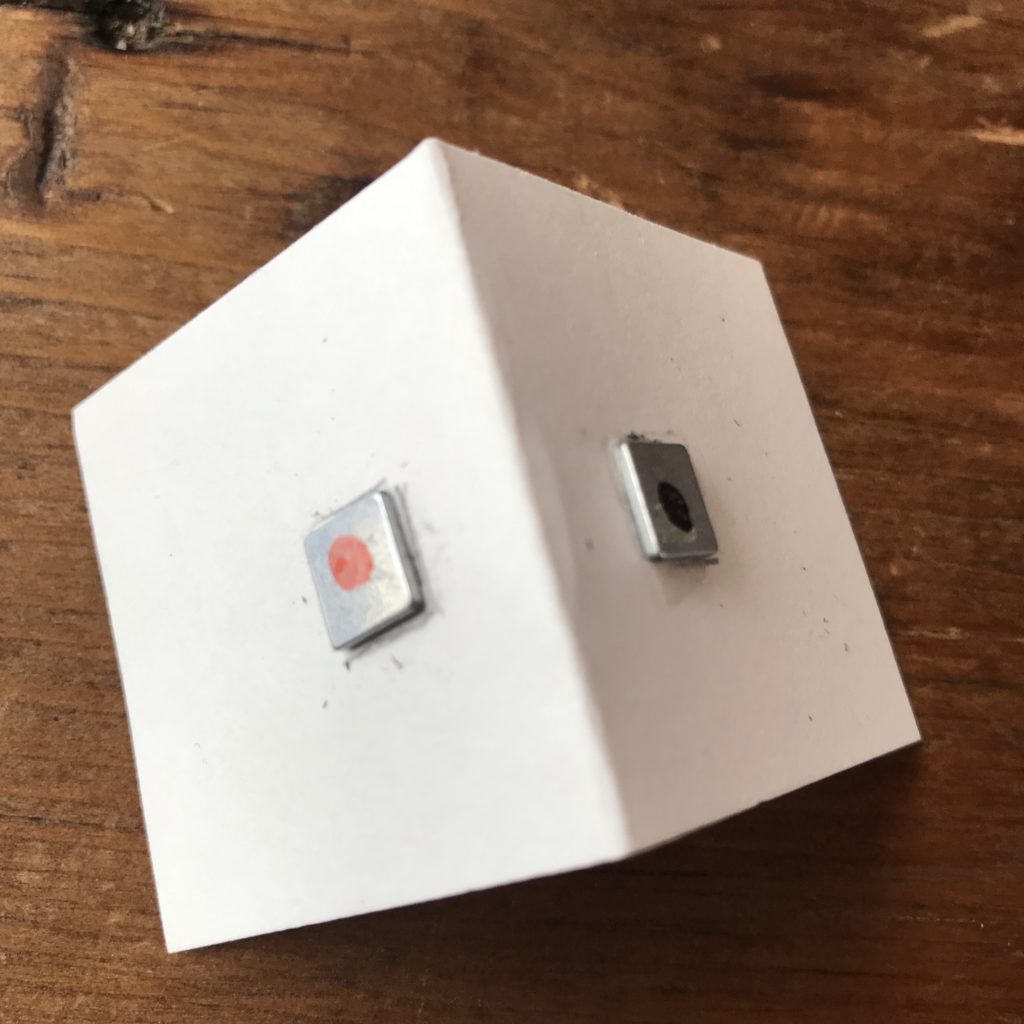
- 2 magnets for battery holder (unless you prefer to use a different type of battery holder)
- Dark colored/ medium to heavy weight paper for the shadow box frame & tray (I used Fabriano Tiziano art paper).
- White cardstock for the art layers
- 2.9” X 2.9” piece of translucent vellum (to back the art layers & diffuse the light)
- Double-sided tape
- ¼” Double-sided foam tape
- Scotch tape and/or washi tape
- Scissors
- Ruler
- Glue Stick
- Pencil with eraser
Optional
- Craft Cutter such as a Cricut (for cutting shadow box & art layer parts)
- Printer (if printing circuit diagrams)
- Chibitronics Craft Stencil
- Japanese screw punch & self-healing mat (for making a template)
- Magnet or steel washer (for securing the magnetic trigger when the box is turned off)
- Needle-nosed pliers (for curling legs of reed switch)
Directions
Please see the accompanying video to see a detailed demonstration of how to assemble a Reed Switch Shadow Box.
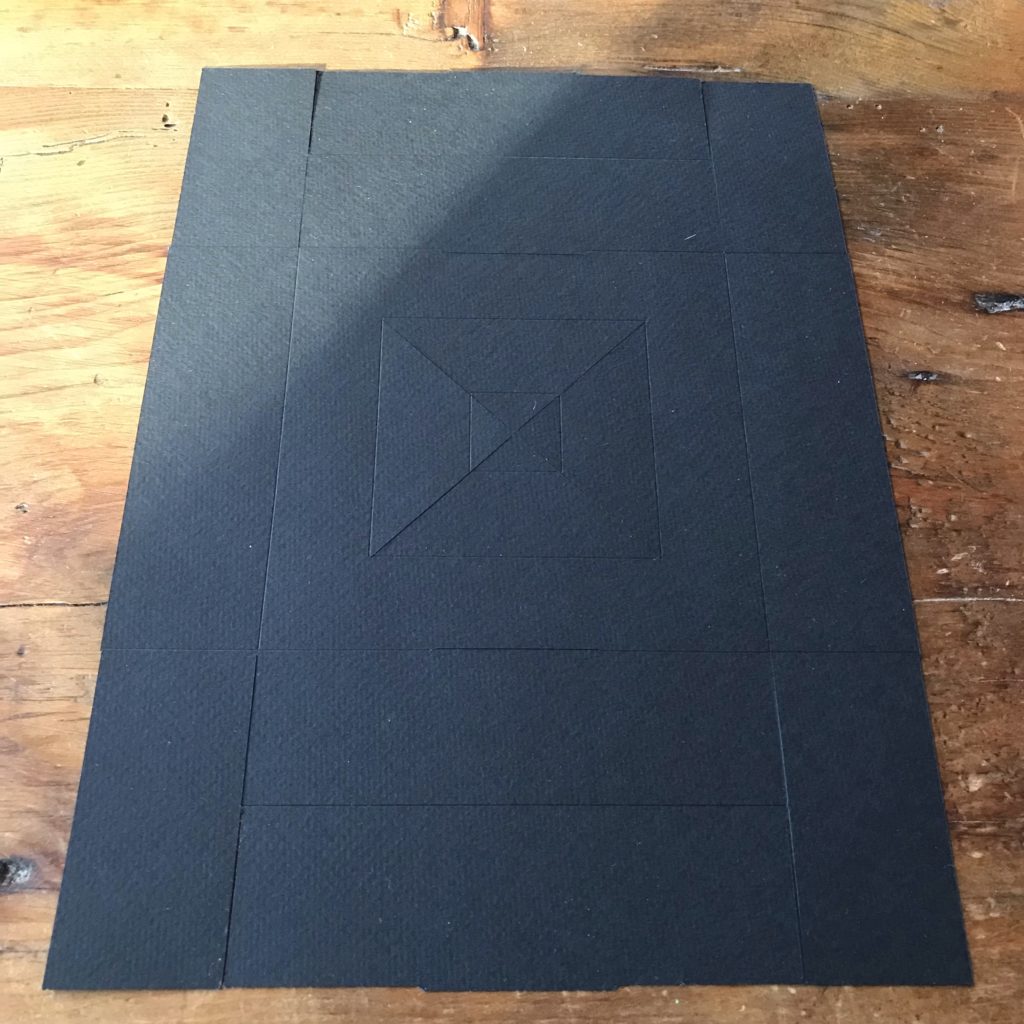
Step 1: Cut & Crease the Shadow Box Parts
The first step to making a Reed Switch Shadow Box is to cut and crease the shadow box parts. The shadow box, itself, comes with two parts: a frame and a recessed tray. The frame will conceal your battery and reed switch, while supporting the tray. The tray will house the Circuit Sticker LEDs, as well as the layered artwork you create to fit inside.
Box Template
To create the box for this project, I used an amazing resource, TemplateMaker.nl/en/, that has tremendous creative potential and generous copyright rules for educators. Since the copyright holder has explicitly requested that digital copies of his templates and cut files not be shared digitally, you’ll need to go directly to his site to create the cut file and template for the box that I’ve used in this project.
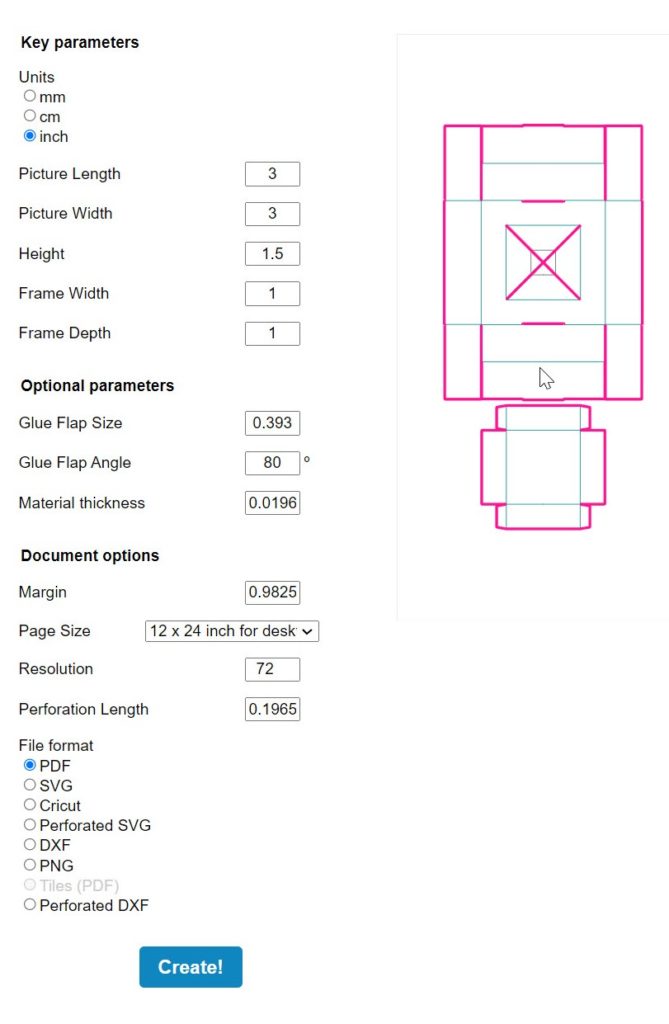
If you would like to make a Reed Switch Shadow Box with the same dimensions as mine, visit the Templatemaker.nl website and select the “Passapartout Frame/ Shadow Box” option. Once there, enter the following dimensions into the template maker.
Key parameters:
- Units: Select “inch”
- Picture Length: 3
- Picture Width: 3
- Height; 1.5
- Frame Width: 1
- Frame Depth: 1
Optional parameters
- I used the defaults for Glue Flap Size, Glue Flap Angle, and Material Thickness.
Document options:
- When creating my files for export, I used the defaults for Margin, Resolution, and Perforation Length.
- For the Page Size, I selected 12 X 24 inch for desktop cutting plotters.
- For the File Format, I selected PDF and Cricut.
- The Perforated SVG is useful for importing into other cutting machines.
After importing the Cricut SVG into my design software, I left the top as a “cut” layer and changed the second and third layers to “score” layers. Before cutting, I attached the layers as a group. I used a medium to heavyweight paper (black Fabriano Tiziano).
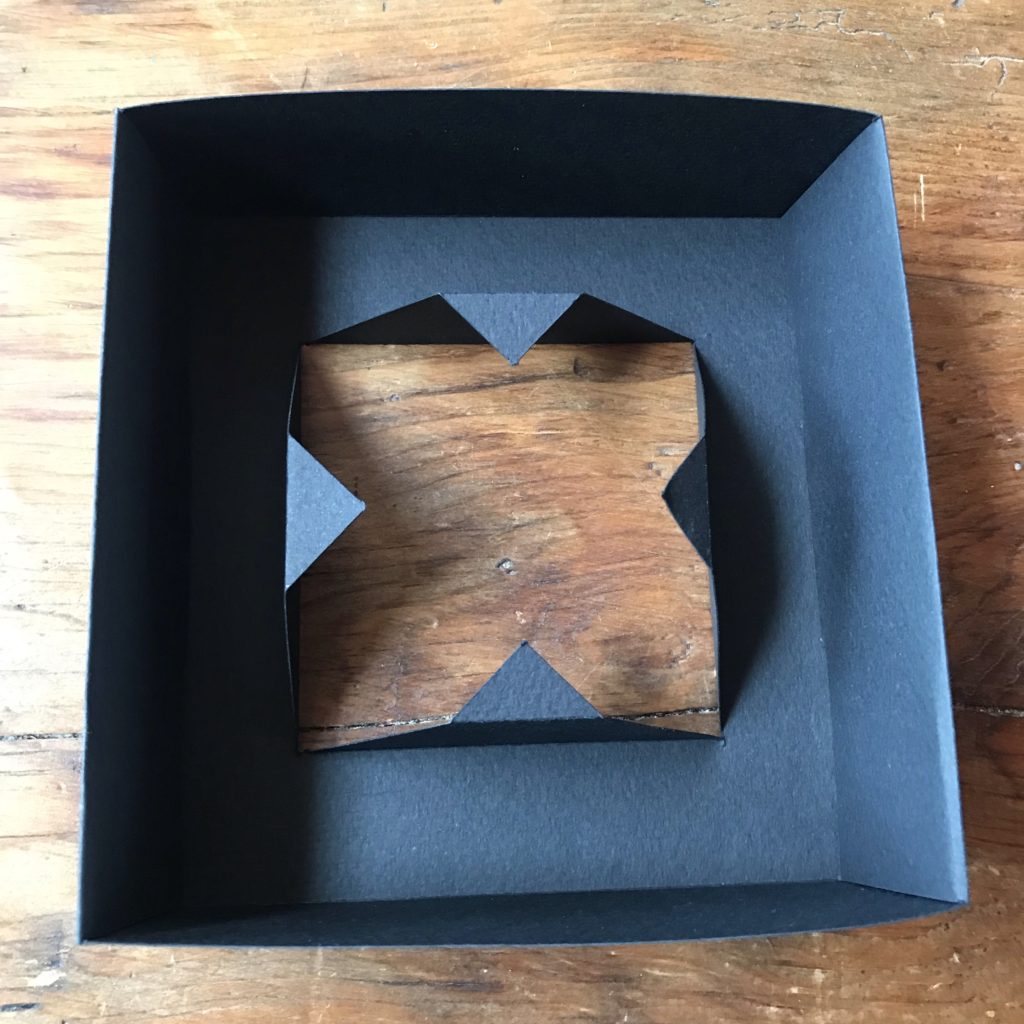
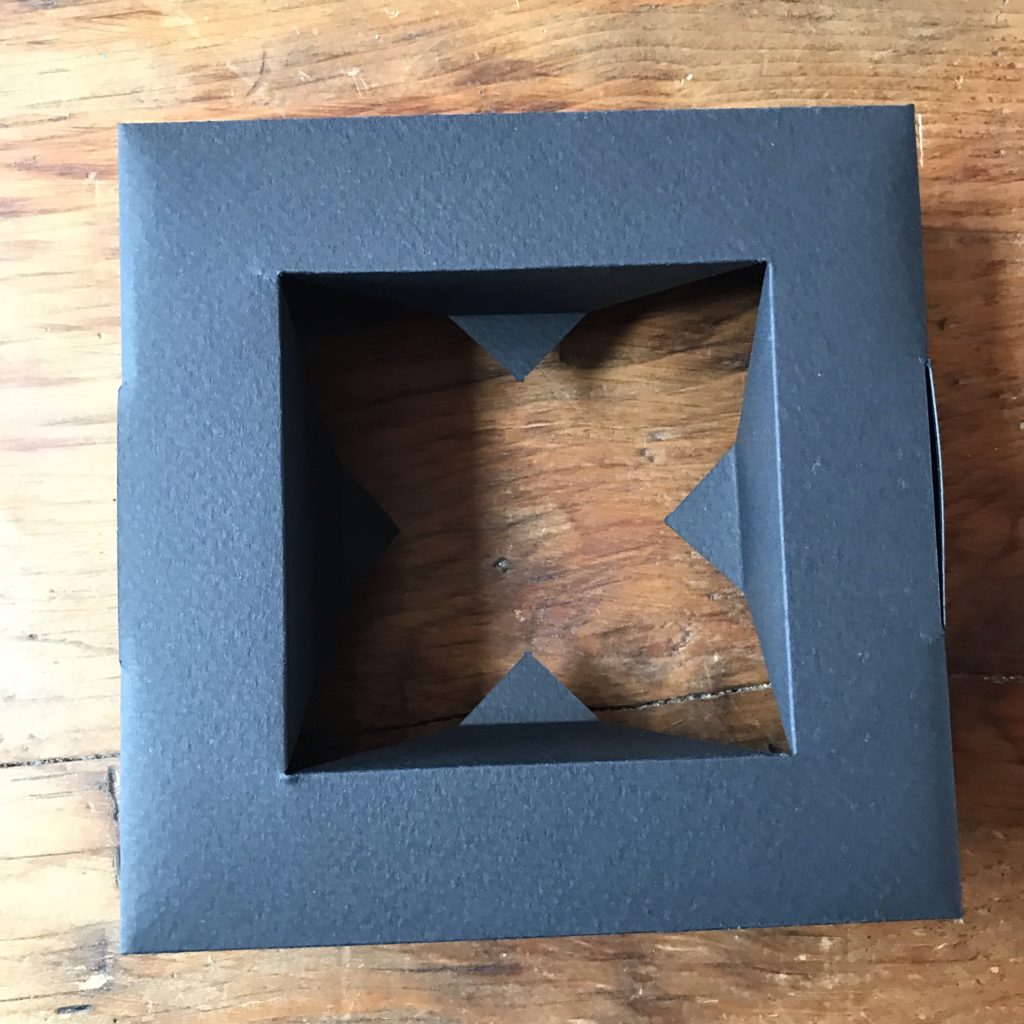
The directions for folding this box may be viewed in my video up top, or here: Folding instructions for the Passepartout template.
Do not tape the box or tray closed yet!
Step 2: Create Your Art Layers
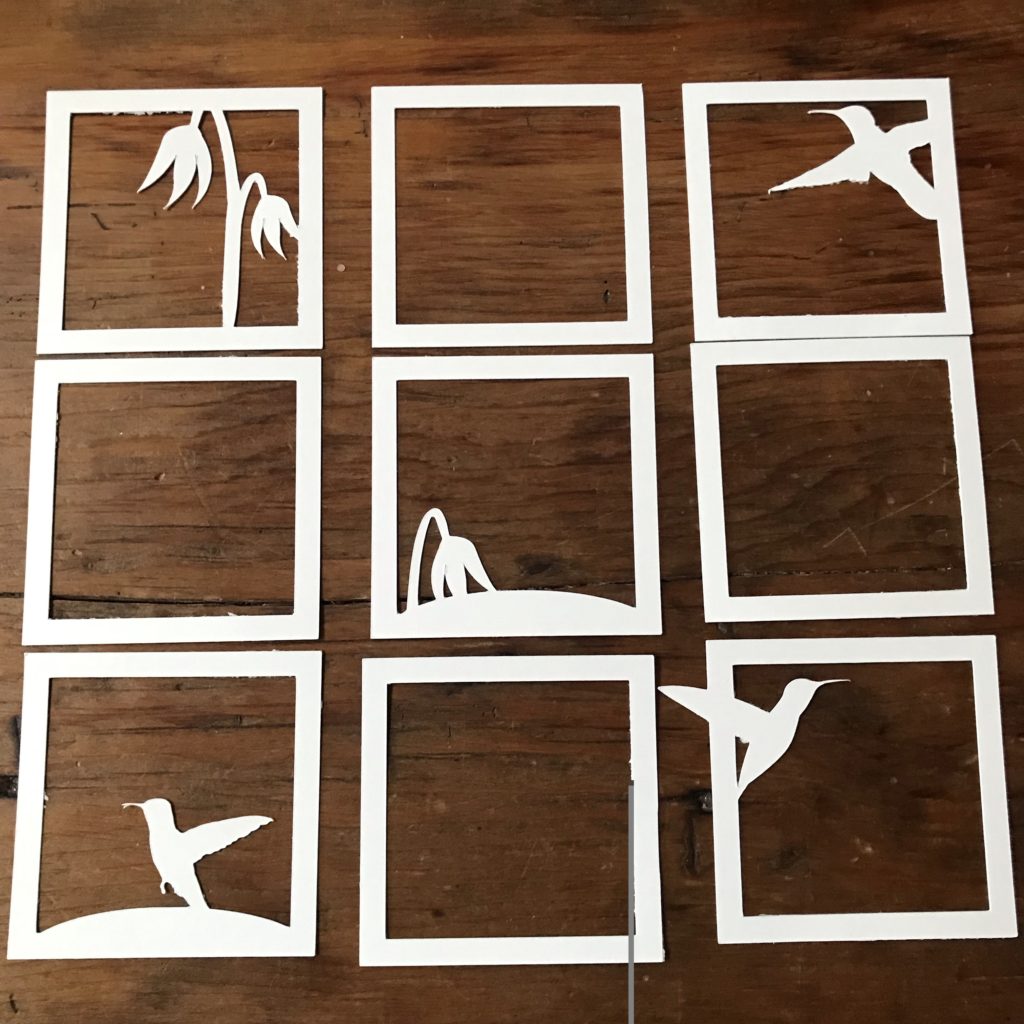
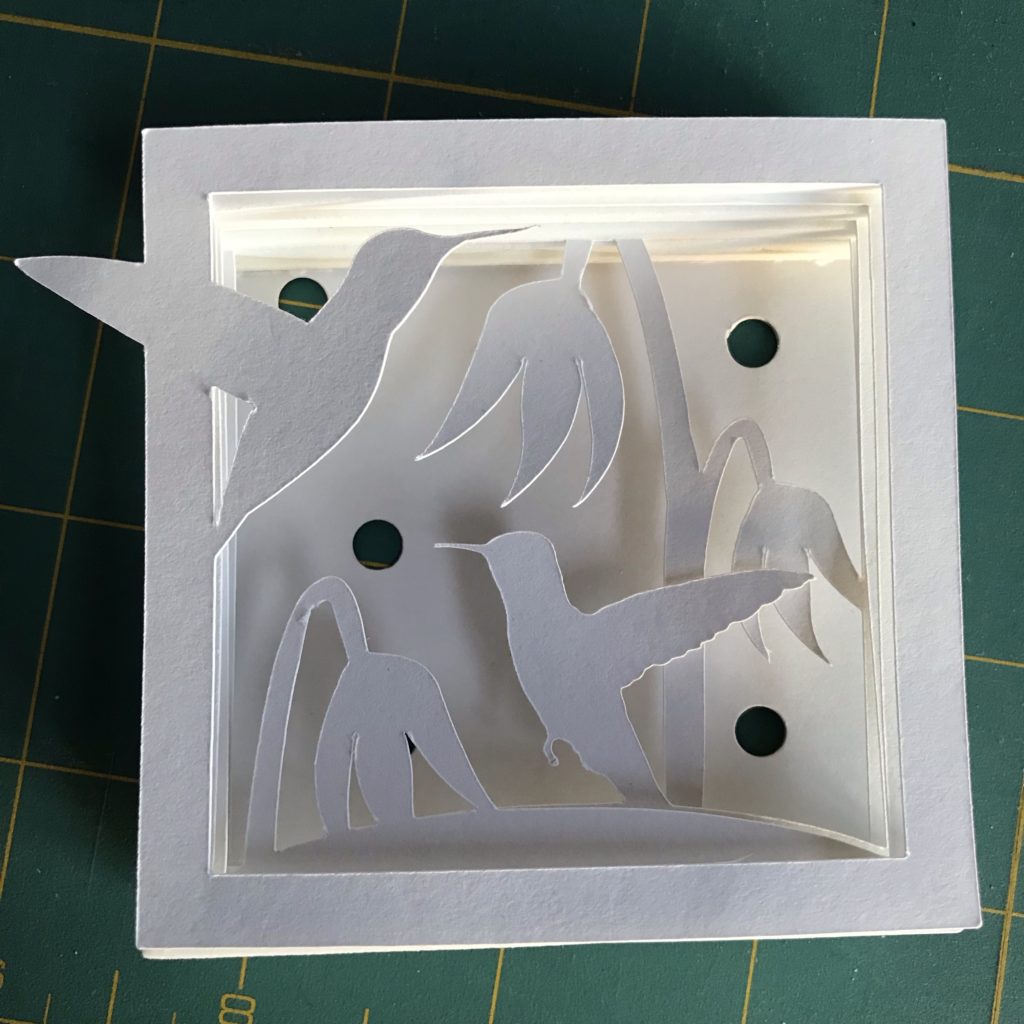
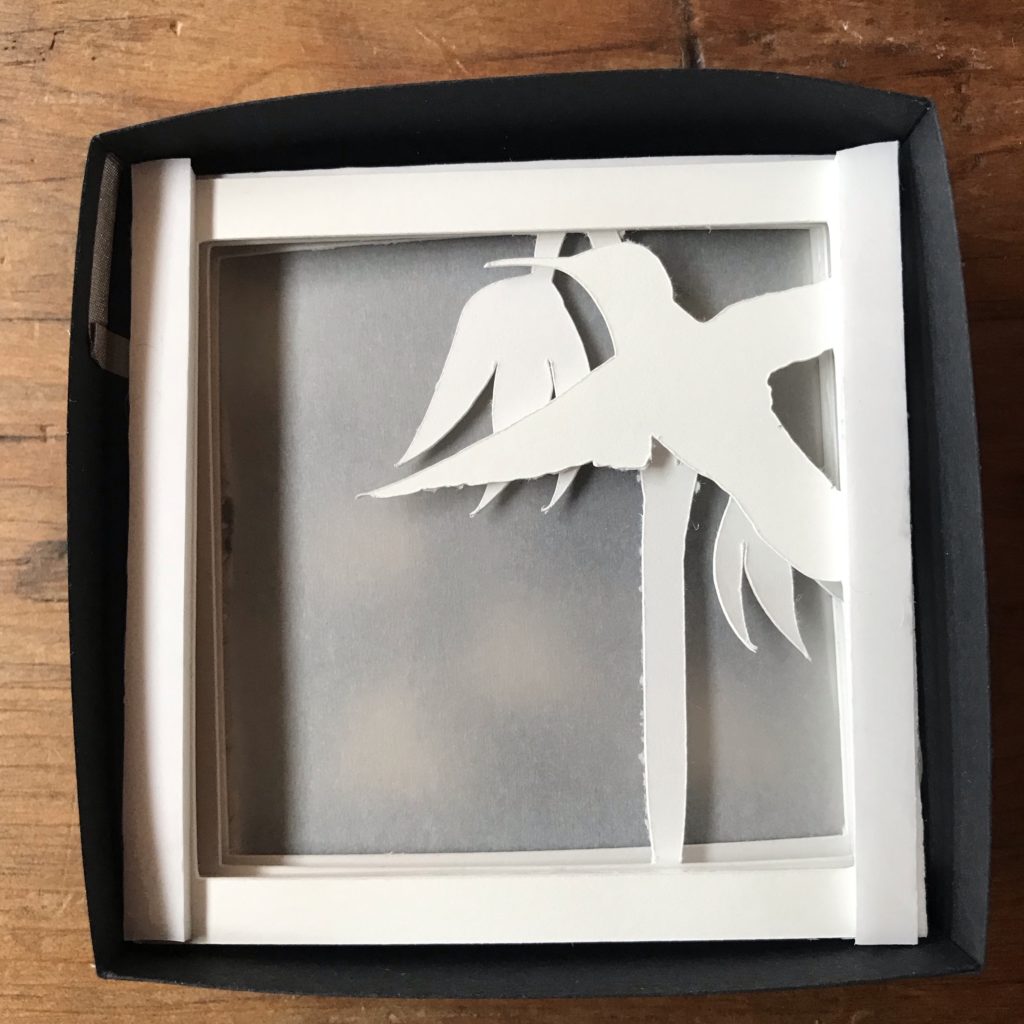
Once the box has been prepared, the second step is to create the art layers for your Reed Switch Shadow Box. I created my art layers using Inkscape and Cricut Design software, but this may also be done by hand. The basic idea is to build up a story or a scene one layer at a time. I wanted to set a scene of hummingbirds visiting the flowers in my garden, because they remind me of my mother.
I started by creating a series of 2.9” X 2.9” frames, each with a ¼” border all the way around. Since the shadow box frame is 3″ X 3″, the art layers needed to be slightly smaller.
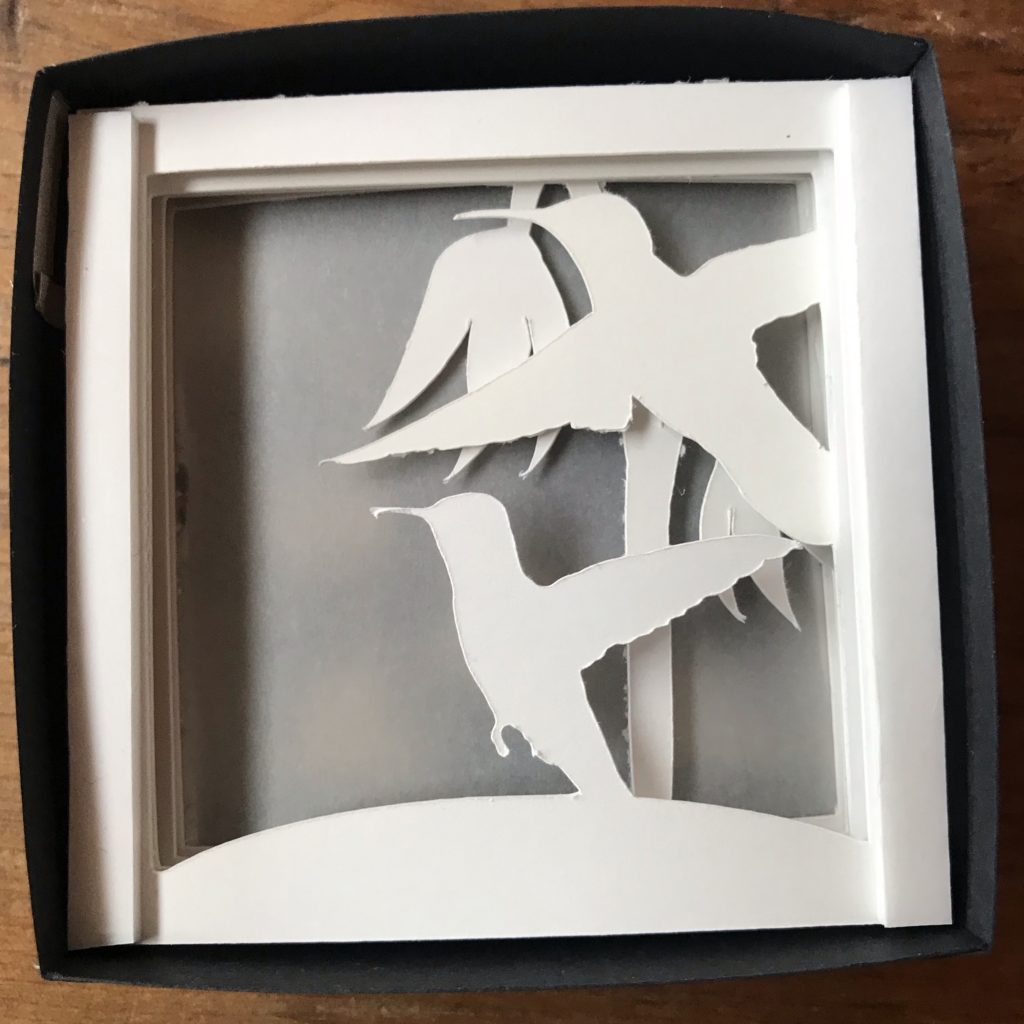
I added a flower to my first frame and birds on most of the others. I left some frames empty to place in between the scene pieces, to build depth.
If you wish to use or adapt the art layers that I made, you may download my cut file here.
Hummingbird Cut File/ SVG

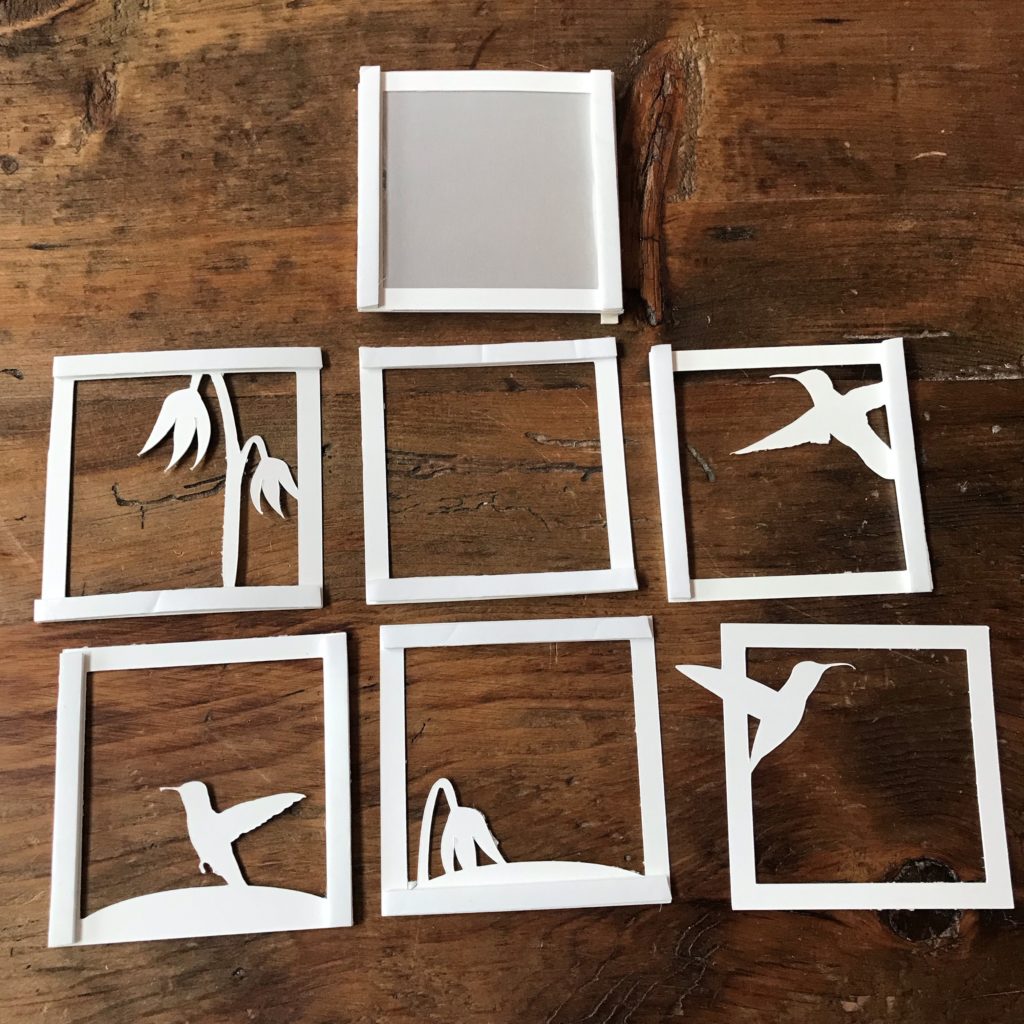
While experimenting with the layers, I learned that I needed to add spacers between them to build depth. For this, I used strips of ¼” double-sided foam tape between the layers. I left the protective backing on the top side of the foam tape so that I could play with the pieces, waiting until the final assembly to remove it.
Step 3: Figure Out Where You Want Your LEDs
After you’ve created your art layers, the next step is to figure out where you want your LEDs to go (and whether you will be wanting one or two circuit paths). There are different ways to approach marking the location for your LEDs on your shadow box tray.
One is to create a template in your design software, by layering all of your pieces together digitally, to decide where the lights should be.
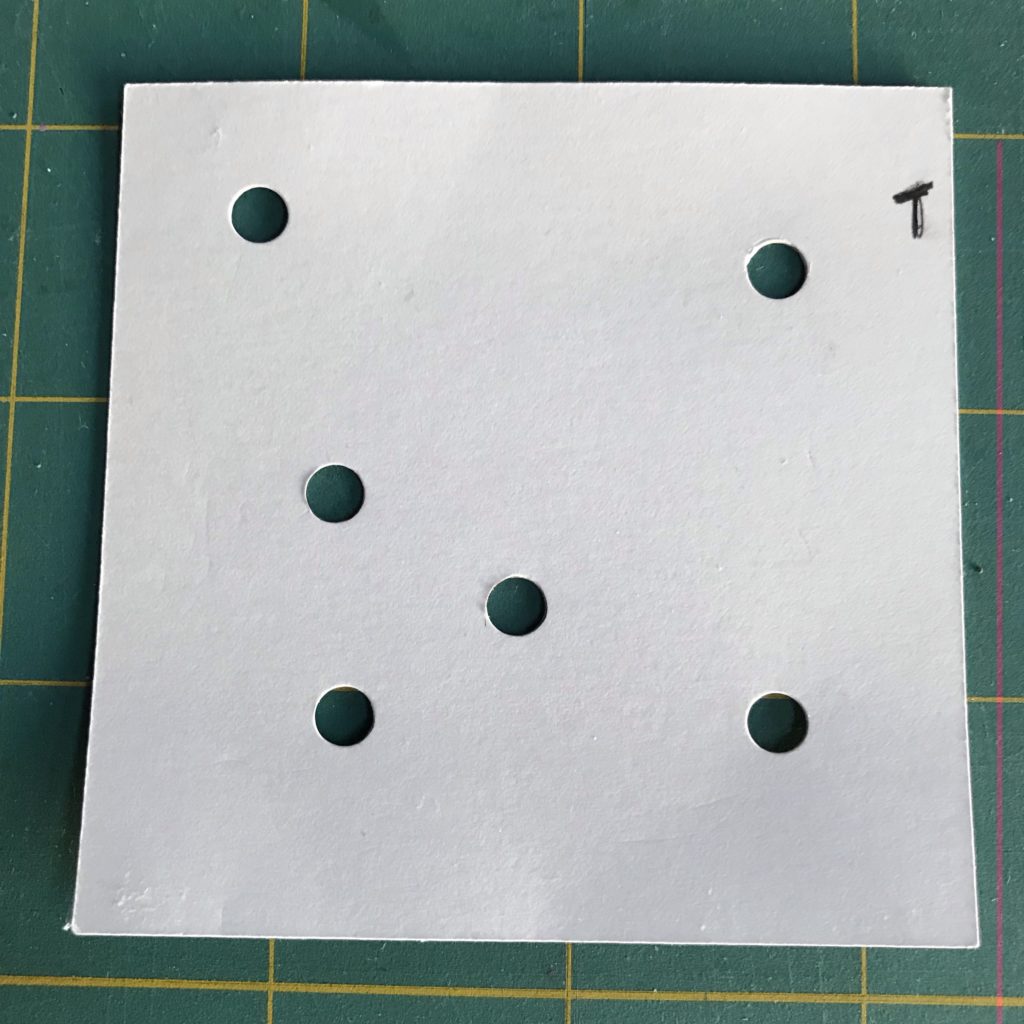
Another way is to stack your layers physically onto a 2.9” X 2.9” paper template, marking the location of your LEDs with a pencil, and using a Japanese screw punch to make holes for tracing.
Another way is to follow the circuit diagrams.
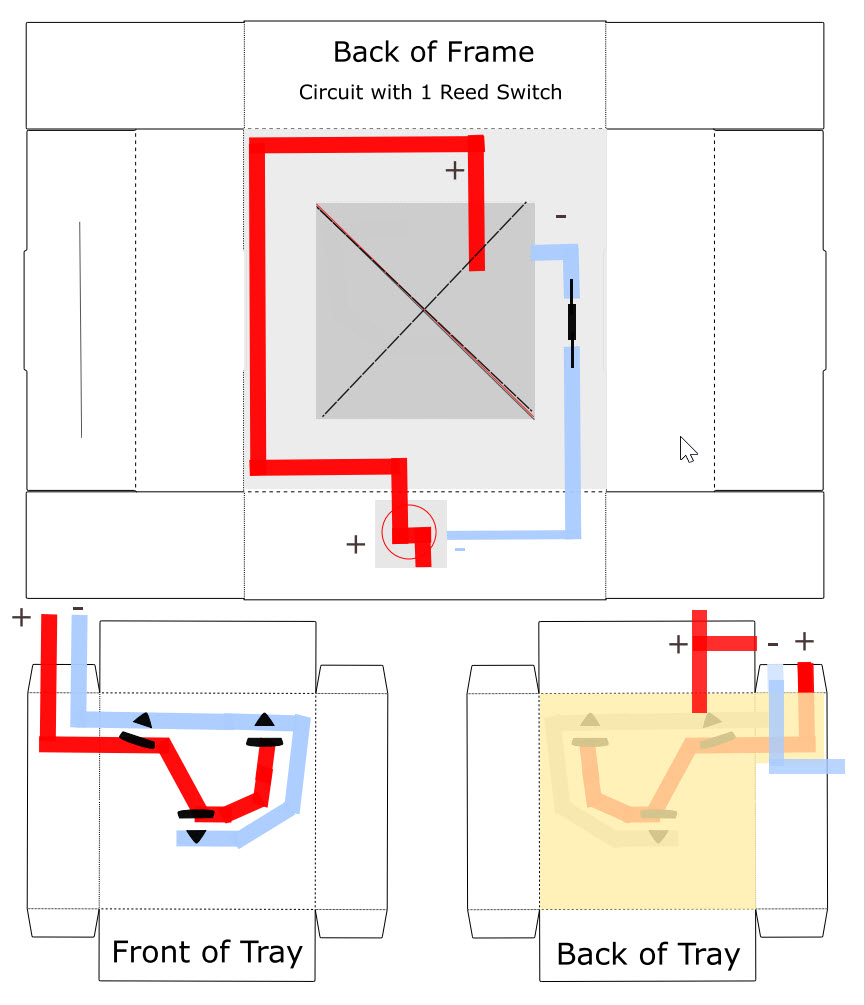
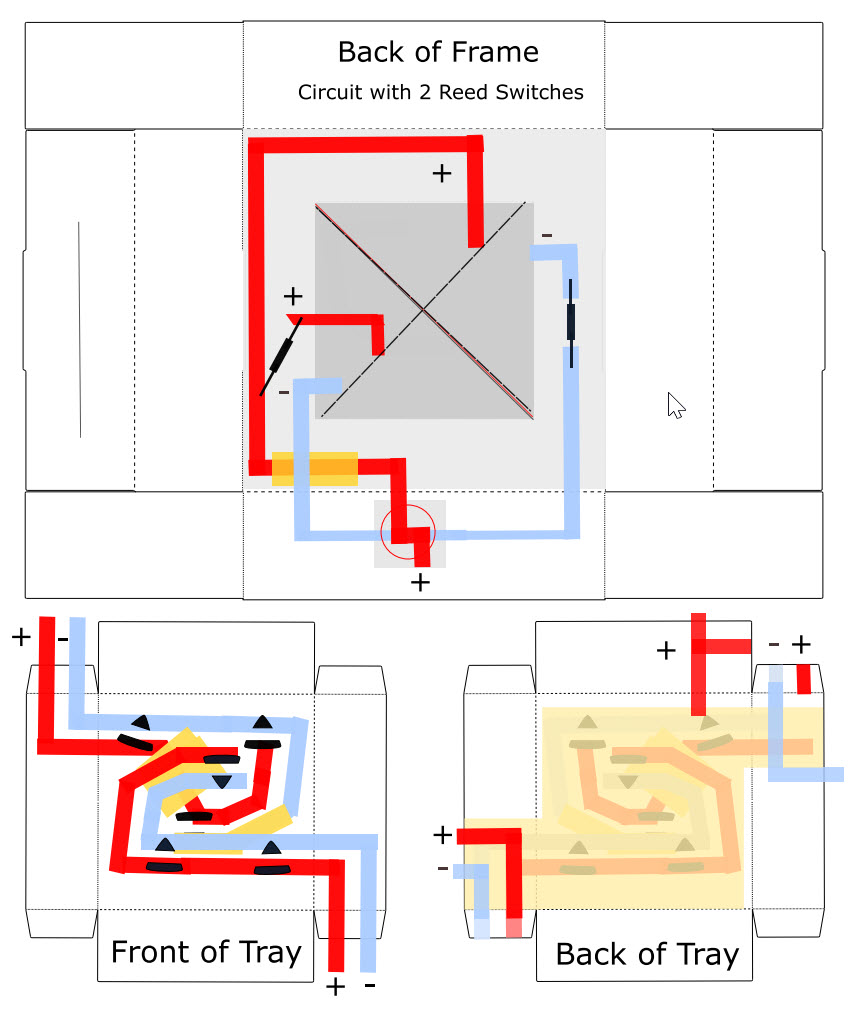
Circuit Diagrams
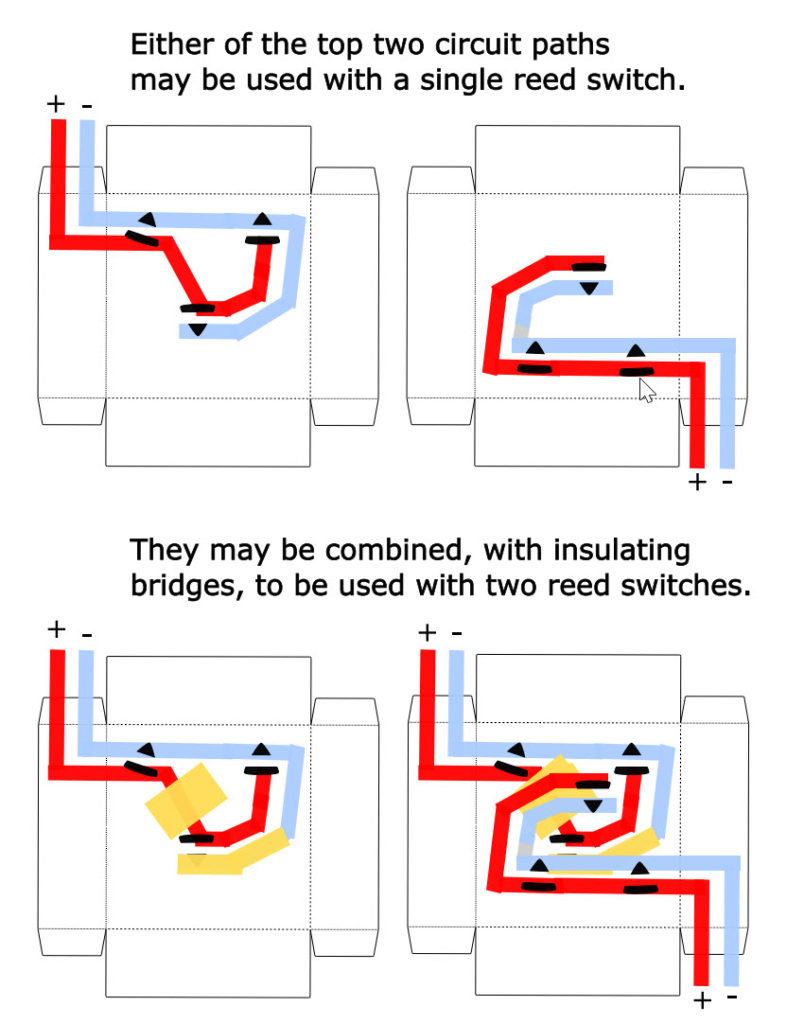
Either of the top two circuit paths may be used in your shadow box, using a single reed switch.
They may be combined (separated by insulating bridges of paper or tape) if you want to use two reed switches.
Your circuit does not need to look exactly like mine.
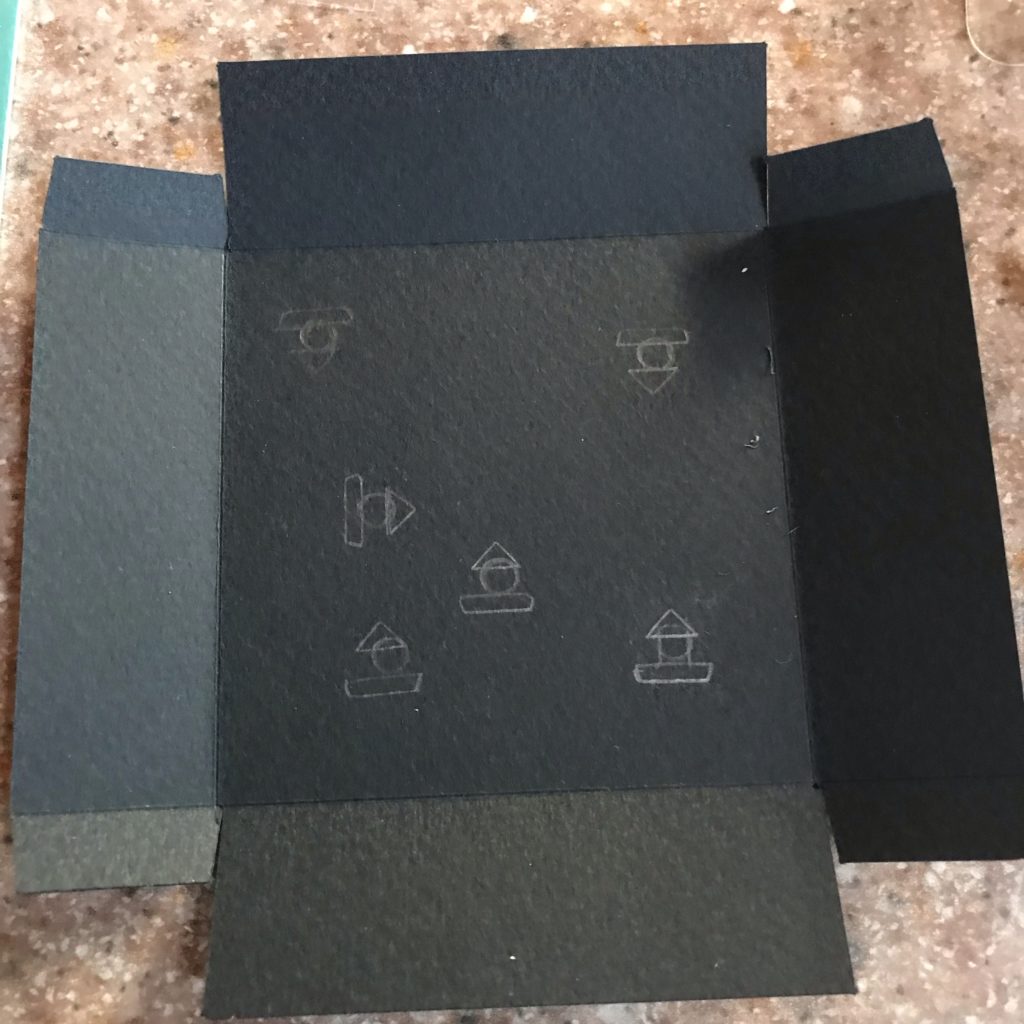
Once you’ve decided where you want your LEDs to be, mark their location on your shadow box tray with a pencil. I used a Chibitronics Craft Stencil.
Step 4: Lay Down Conductive Traces
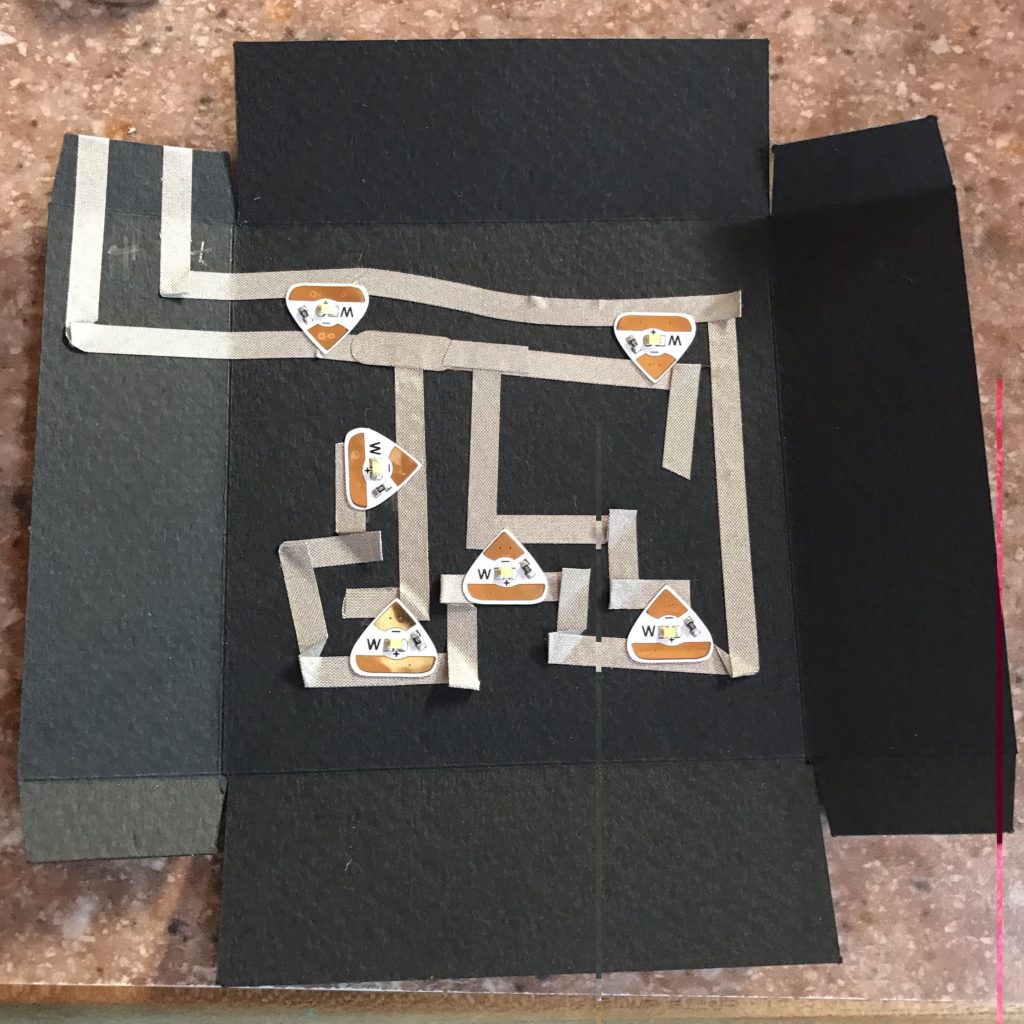
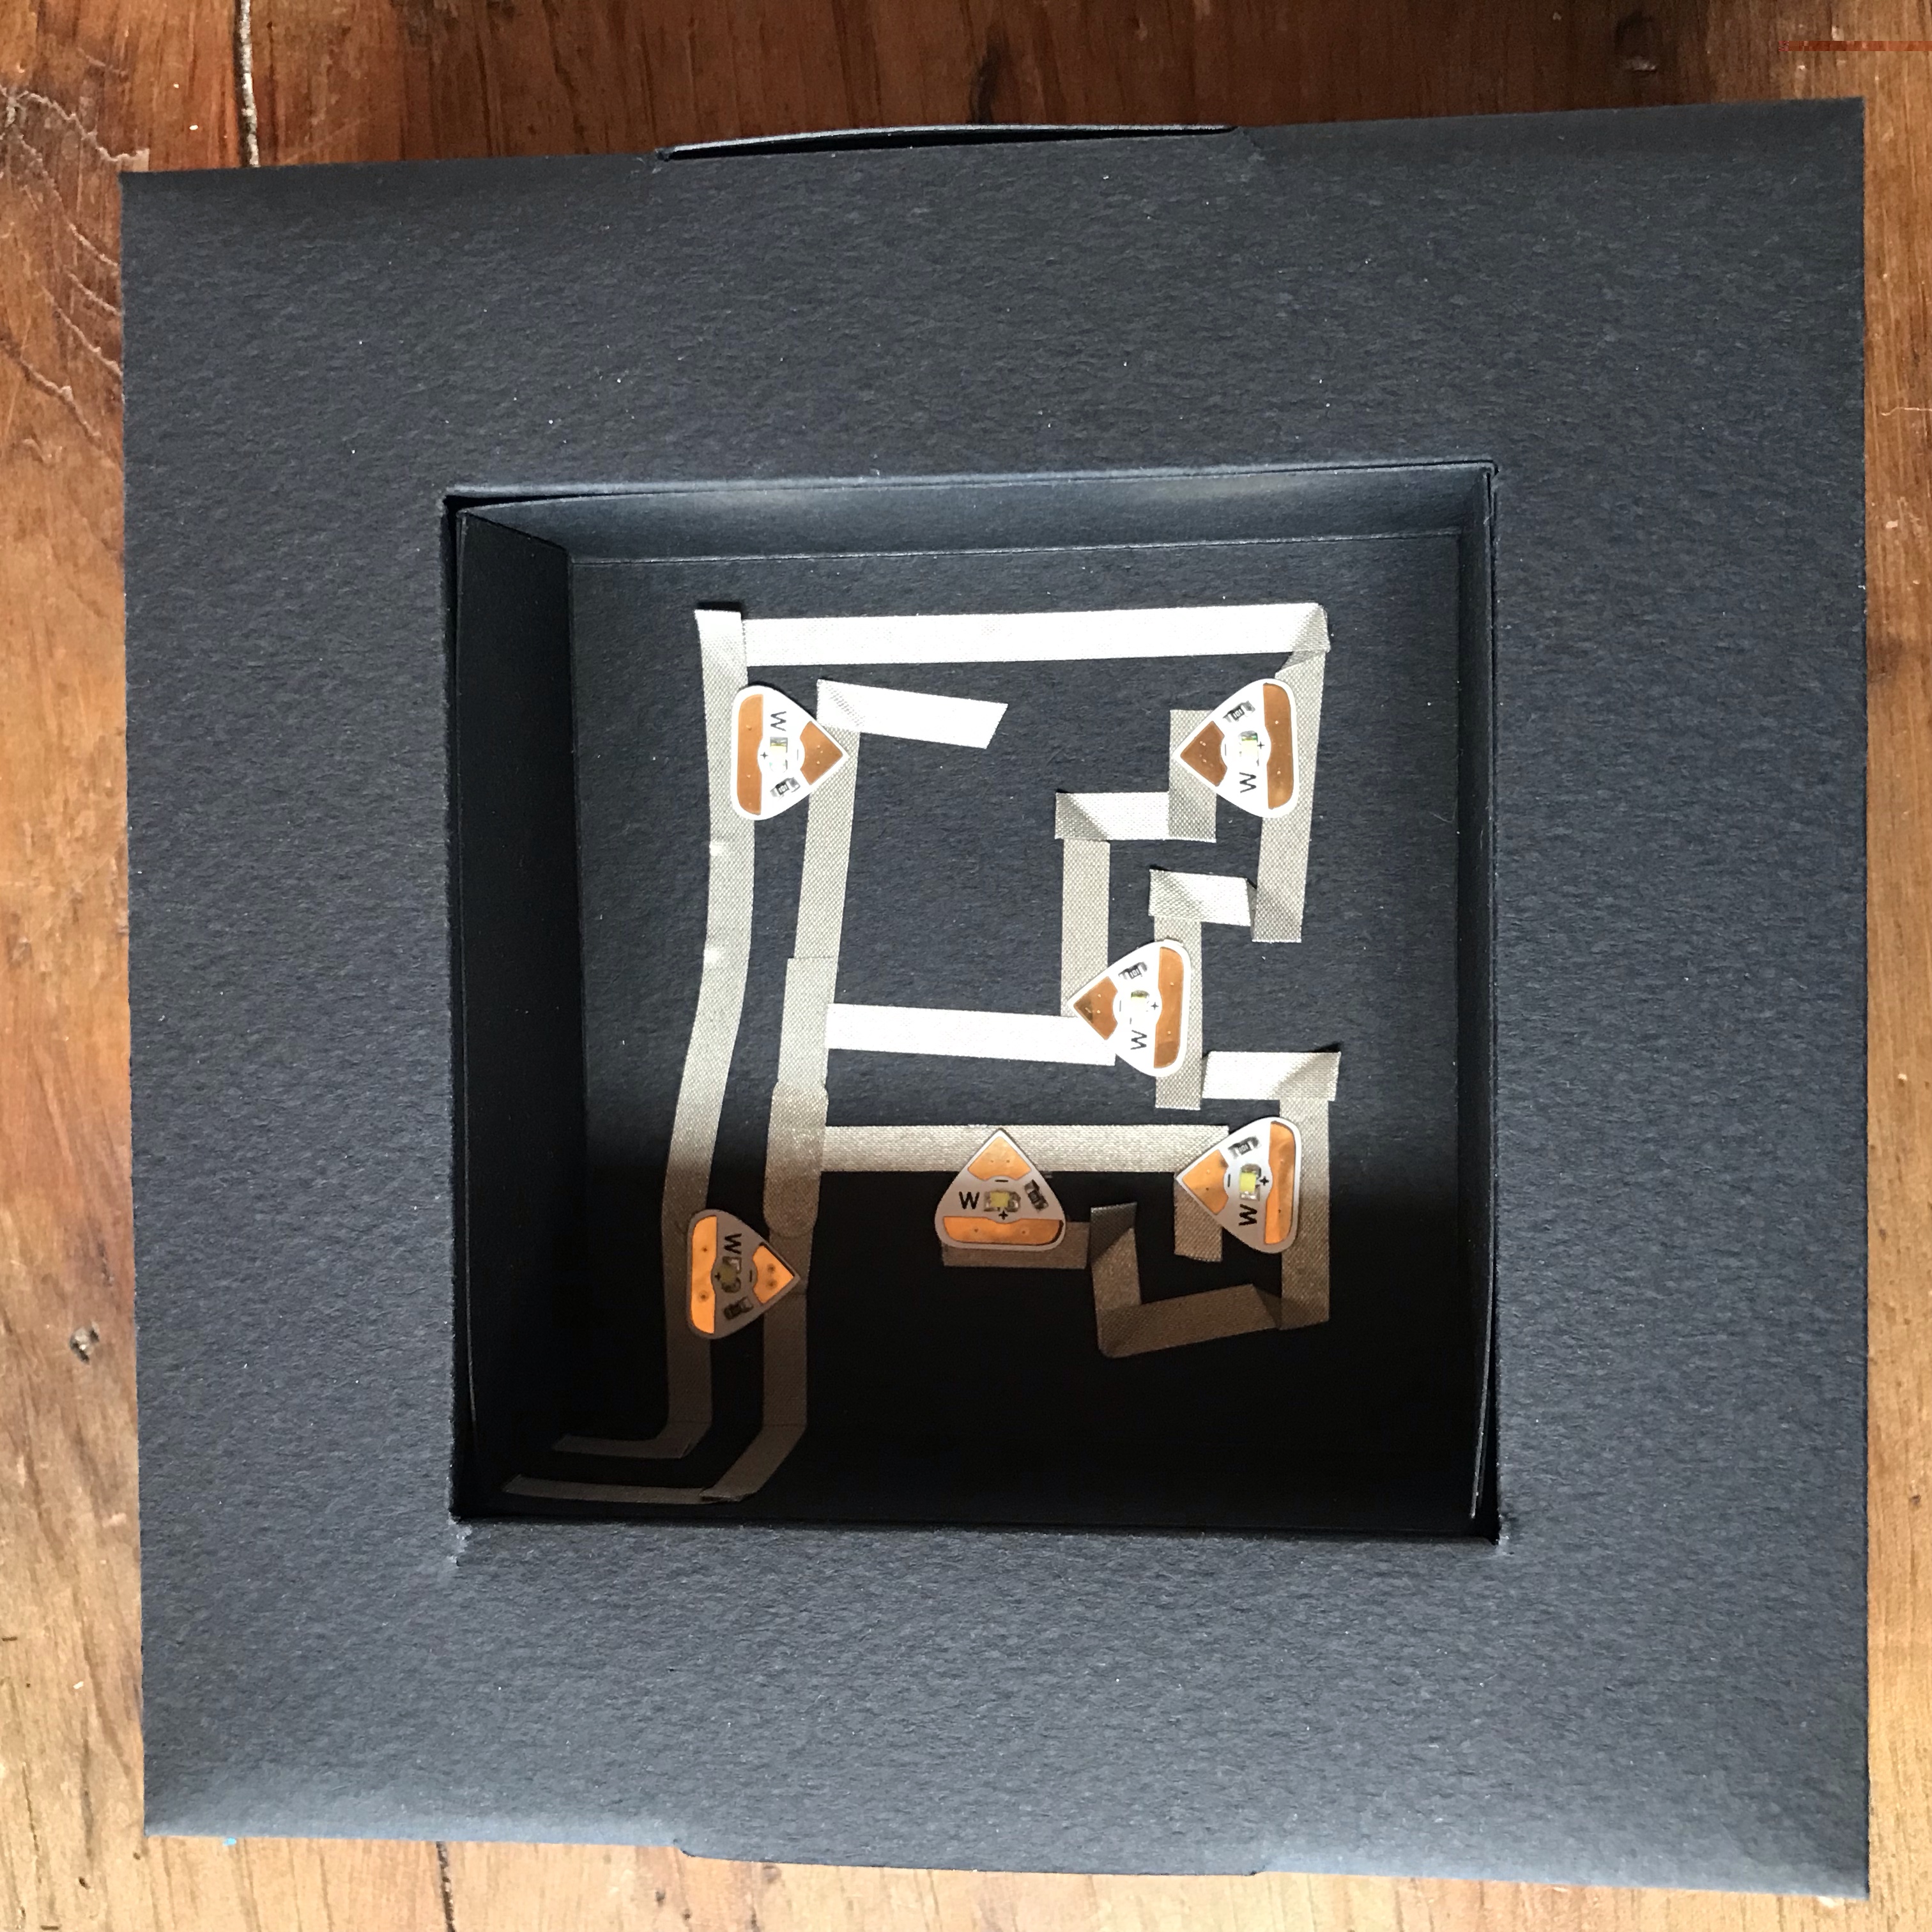
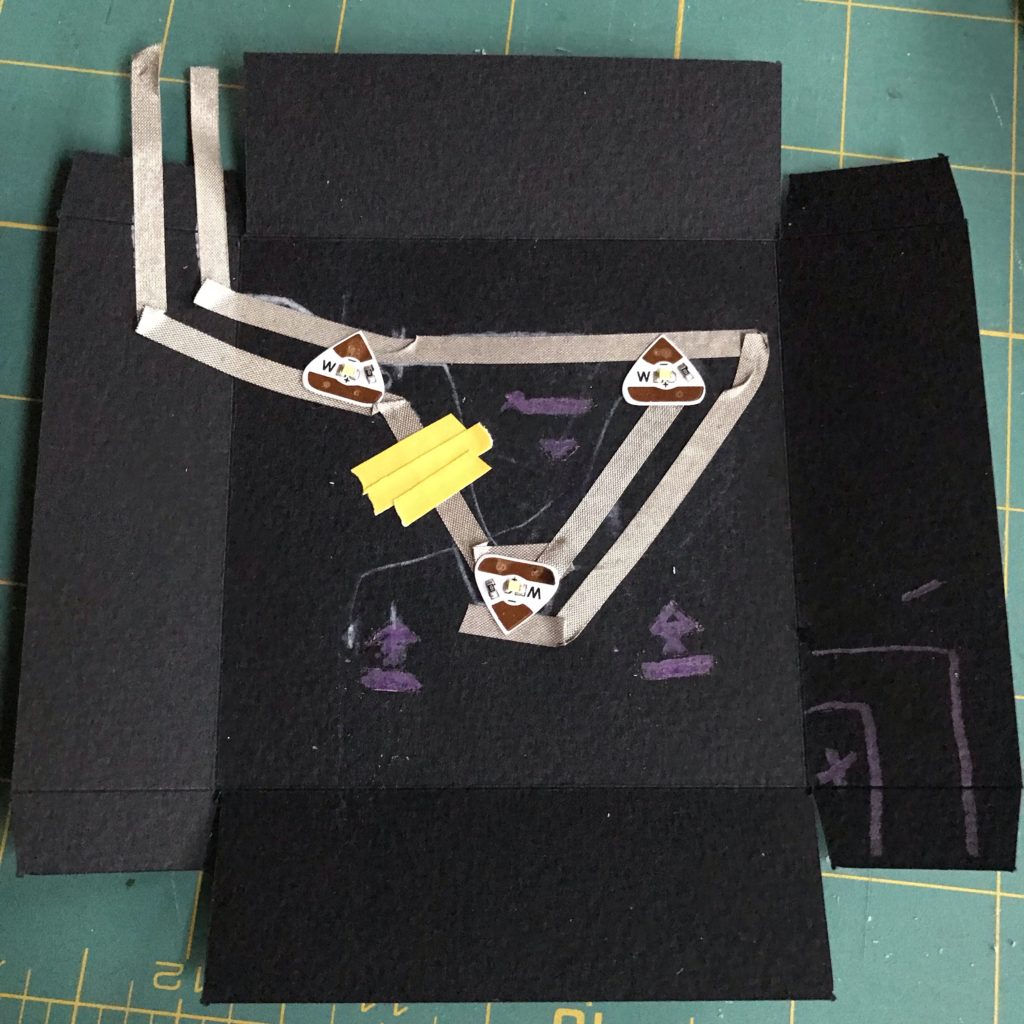
After you’ve sketched your Circuit Sticker LEDs, lay down conductive traces and apply the stickers. I extended my positive and negative traces around the back side of the left tray tab, so that I could complete the circuit in an upcoming step.
Both circuit examples below were designed to be used with one reed switch (magnet on). The one on the left was a prototype that has multiple LEDs.
The one on the right, which follows the Circuit Diagram for One Reed Switch, is the one that will be built upon in Step 7 and the Remix section.

After laying down your circuit, test it to make sure that the LEDs are working.
Then, add double-sided tape to each of the four tabs of your tray and secure them around the outside of the box.
Wrap the extra bits of conductive fabric tape for the positive and negative leads around the corner in order to connect the tray with the rest of the circuit, which will be inside of the frame.

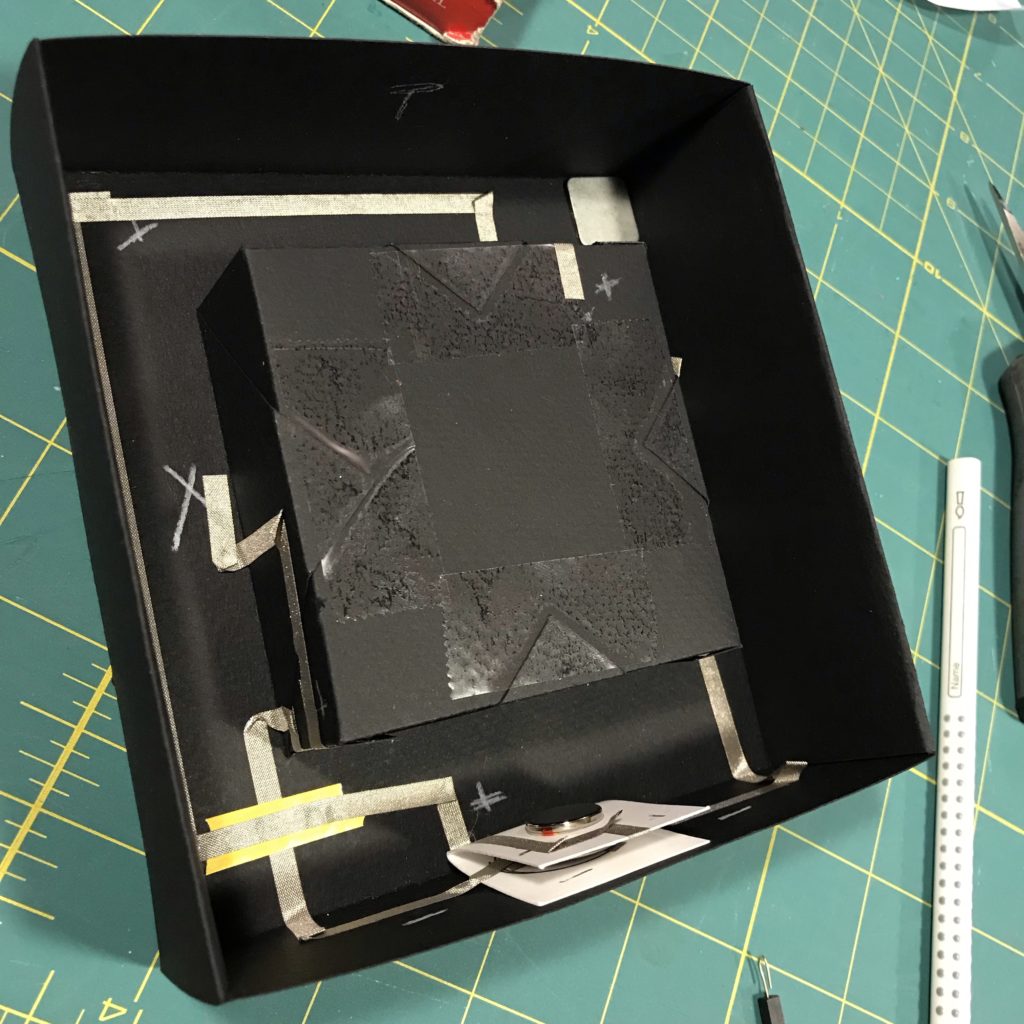
Step 5: Assemble the Box
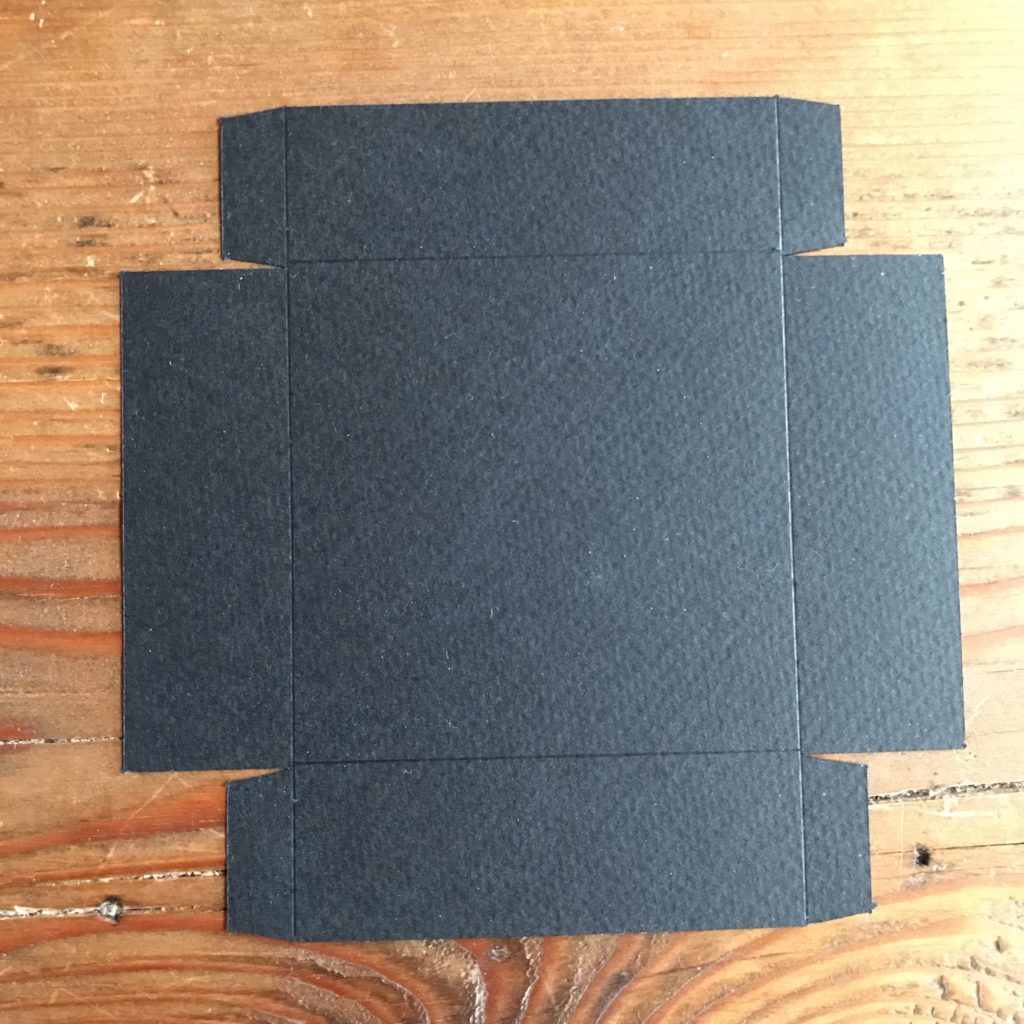
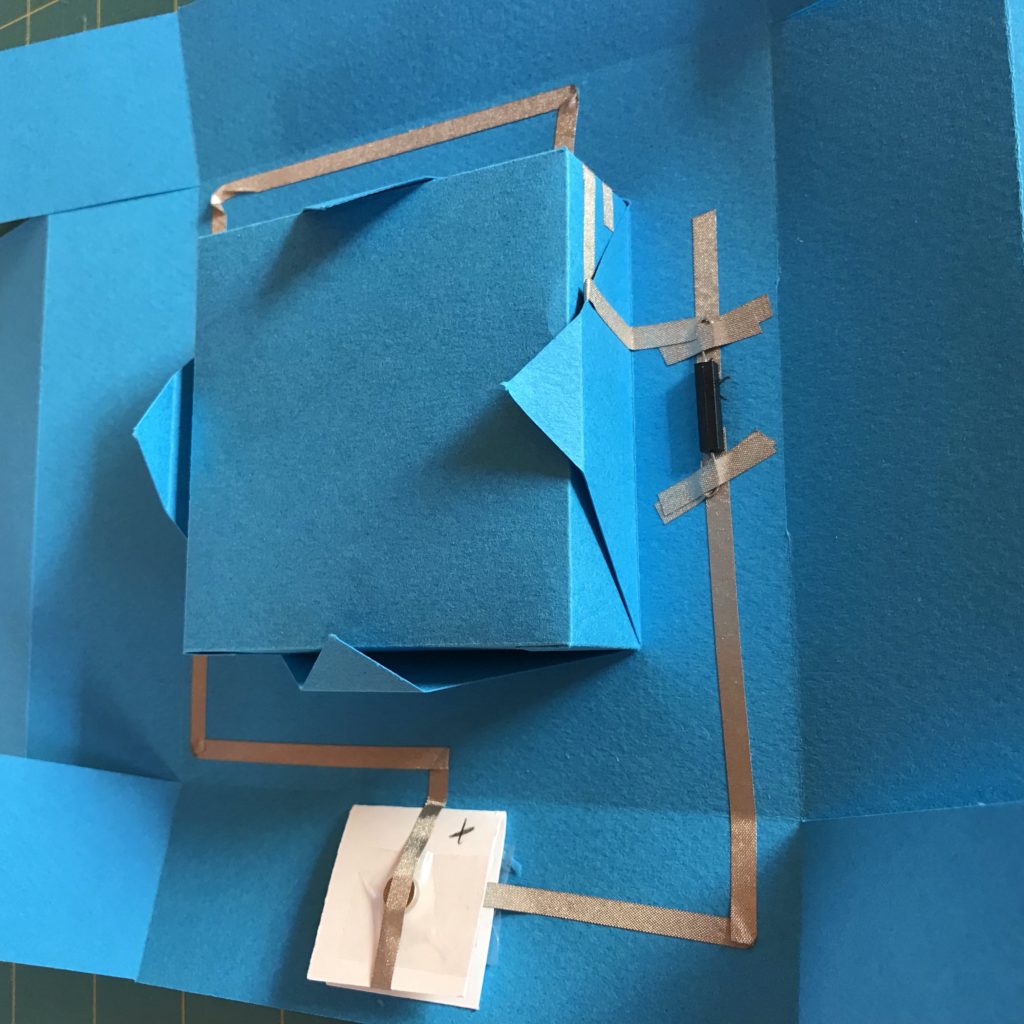
Note: I originally created my circuit on a 3D, folded box frame; but, after some experimentation, I discovered that it’s easier to work with a flat box.
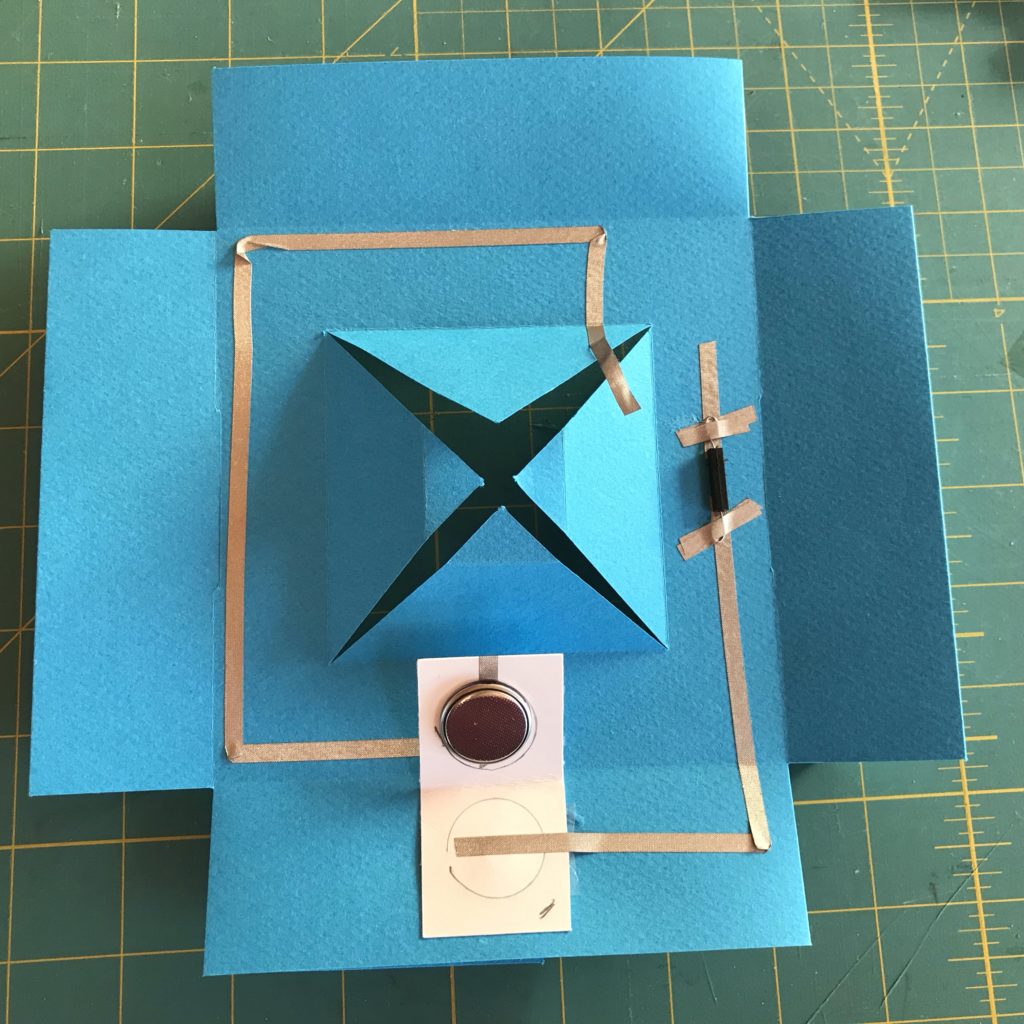
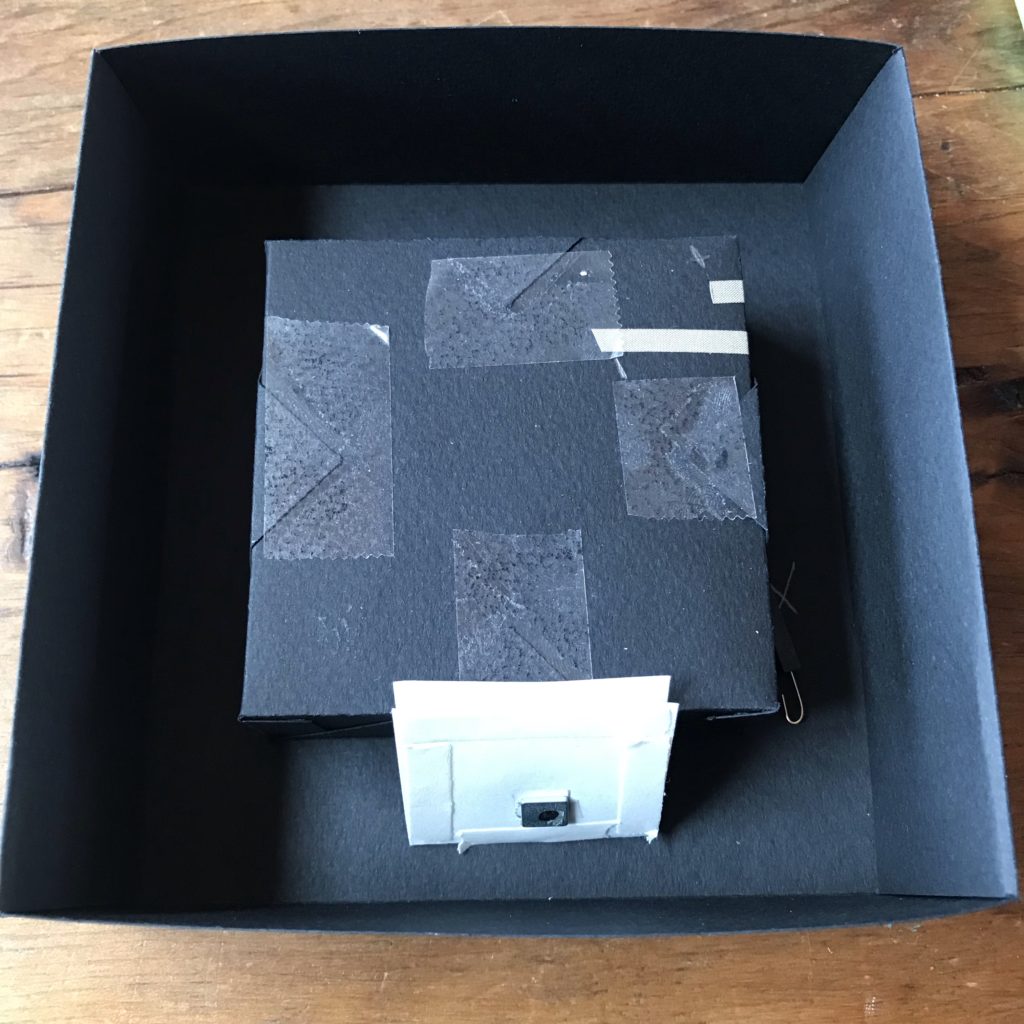
The image pictured to the left, depicting a circuit created on a flat box frame, features a circuit with one distinct path (and one reed switch). If you plan to use one reed switch follow the Circuit Diagram for One Reed Switch.
To work with two reed switches, visit to the Remix section.
Note: Many of the photographs below document my working with a folded box frame. If you are working with a flat box, however, the directions are generally the same.
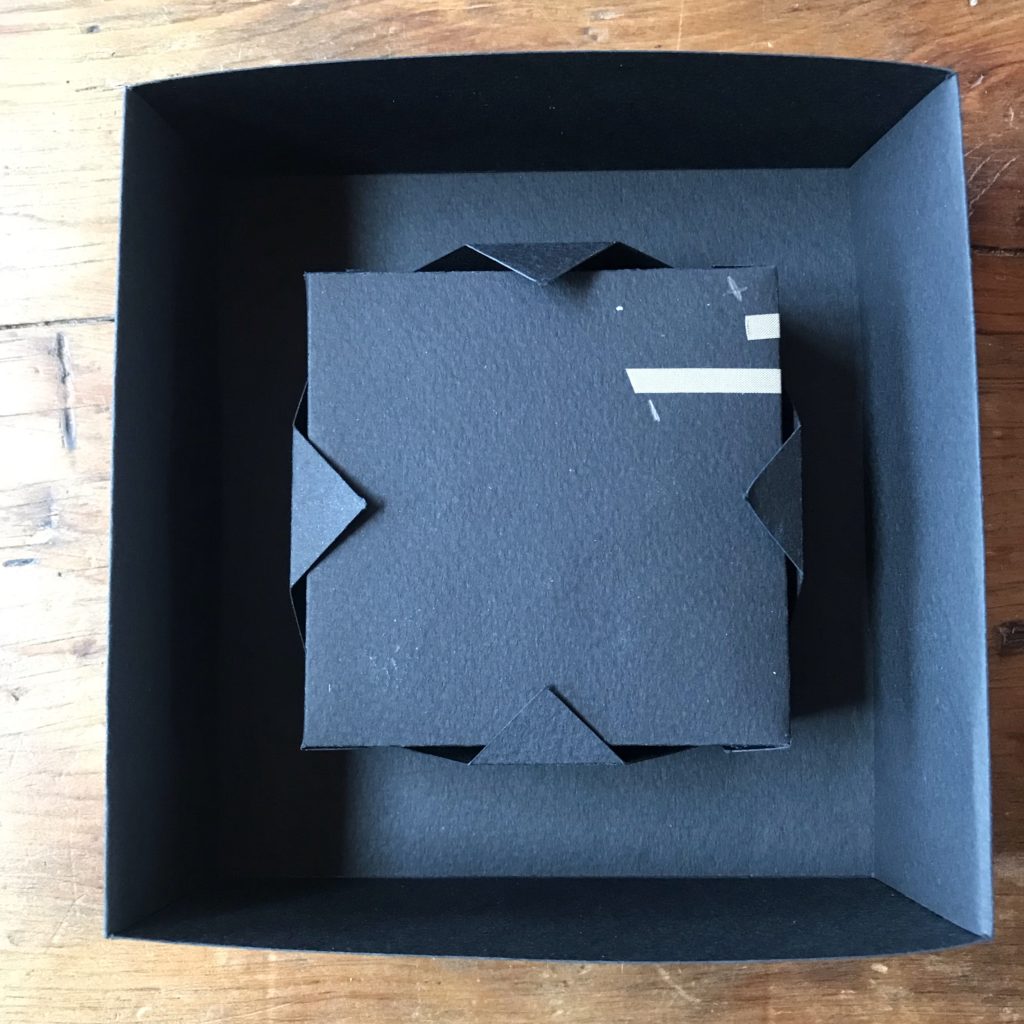
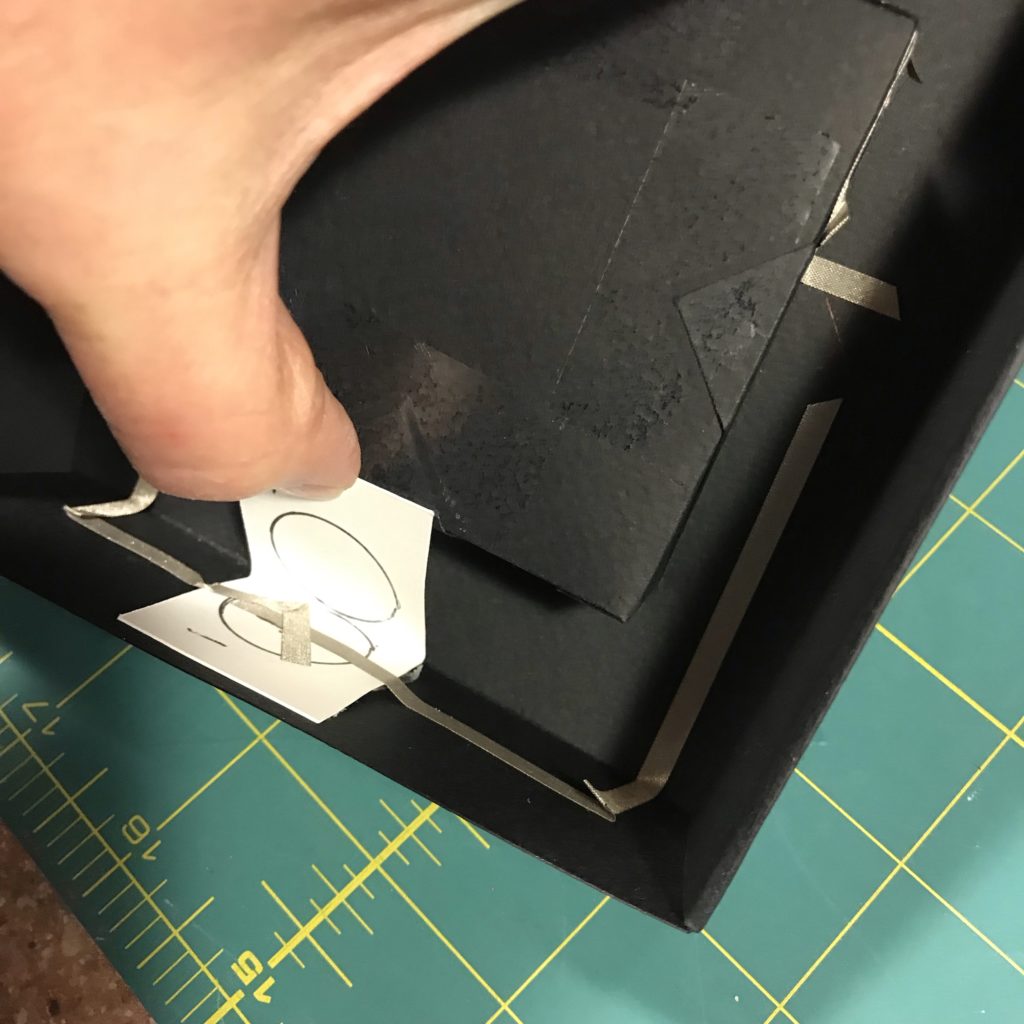
Once your LEDs have been adhered to the inside of the tray, and you’ve wrapped (and labeled) the extra conductive fabric around the outside corners of the box, it’s time to add the tray to the frame. I’ve extended the positive and negative traces onto the back side of the tray to make them easier to access and see.
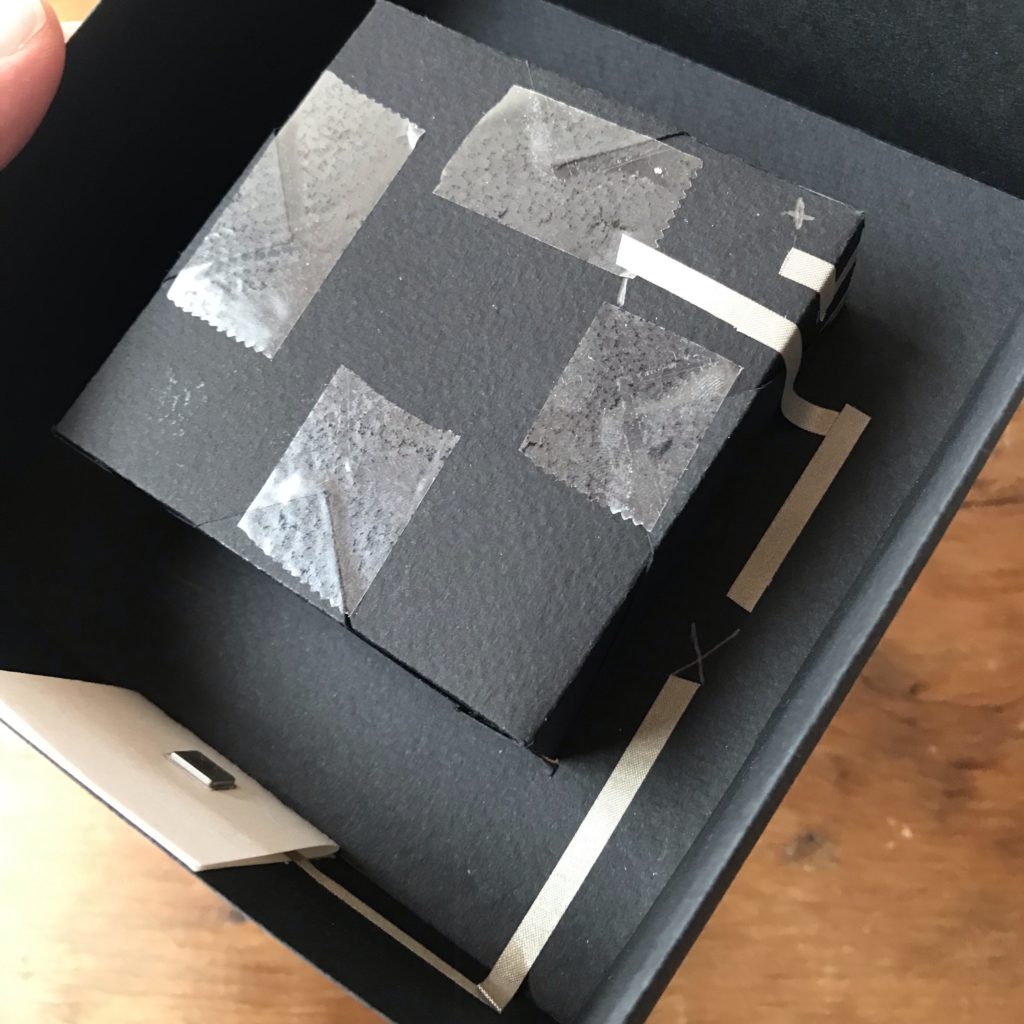
Turn the frame upside down with the box top positioned away from you. Insert the tray, bottom side up (also with the top pointing away from you).
When you are ready, tape down the supporting flaps to secure the tray into the shadow box frame.
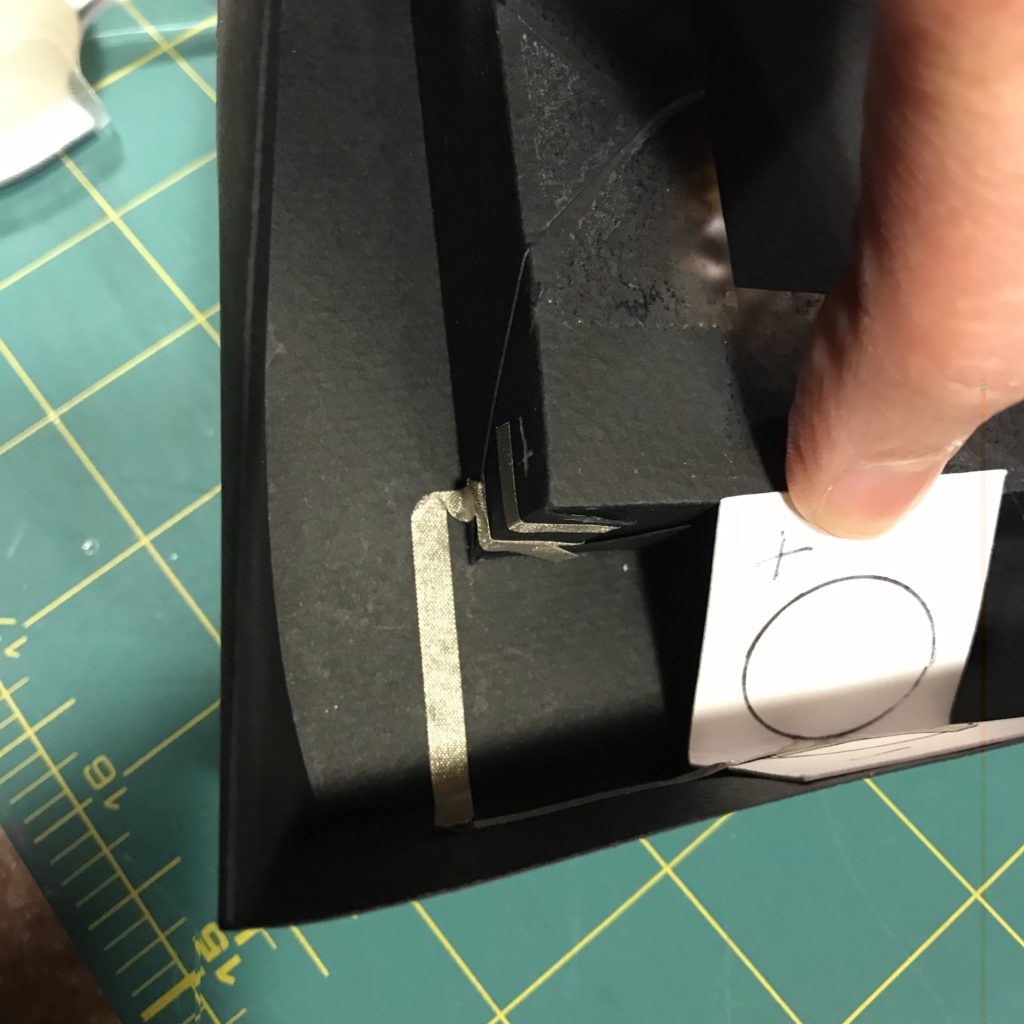
Step 6: Prep Battery Holder
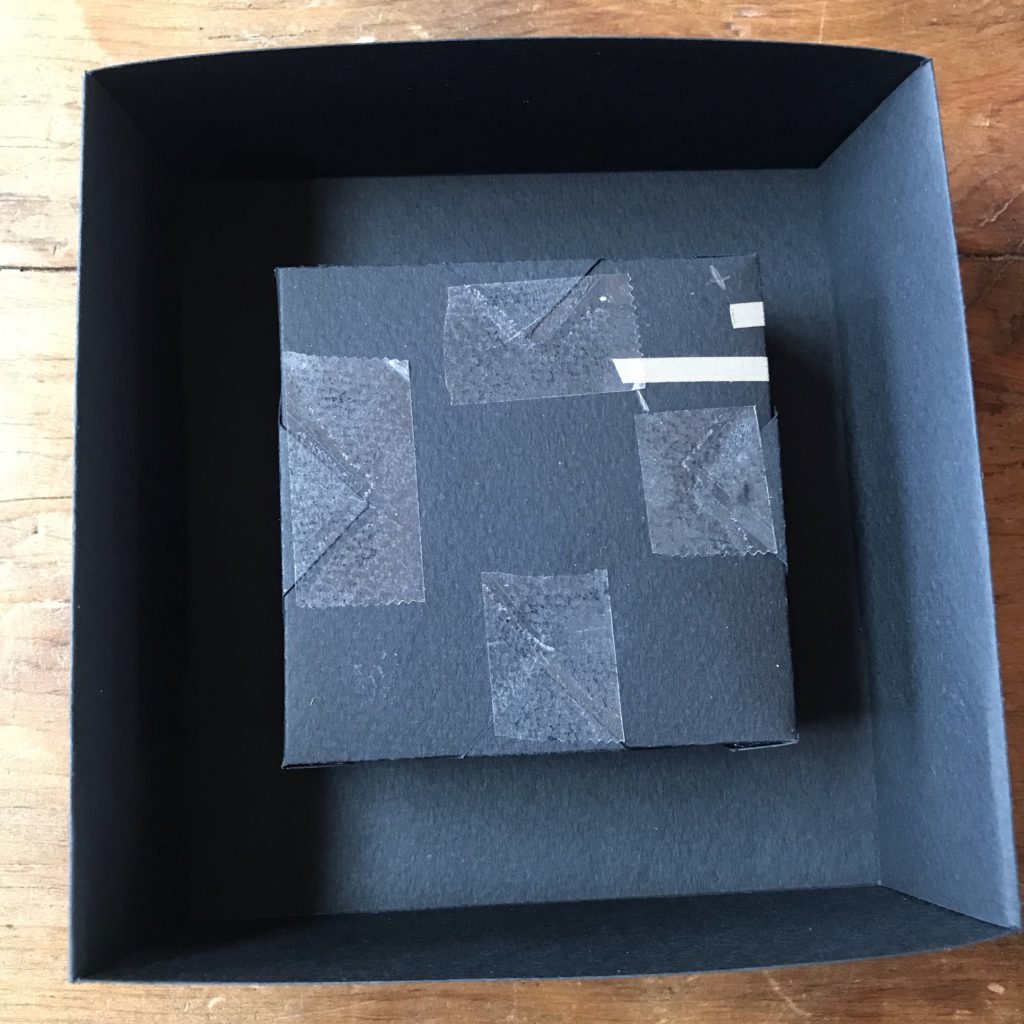
The next step is to decide what type of battery holder you want to use. I used a folded scrap of cardstock, held together with magnets, that I adhered to the outside with double-sided tape.
After the magnets were in place, I used double-sided tape to adhere the battery holder to the bottom of the shadow box frame.
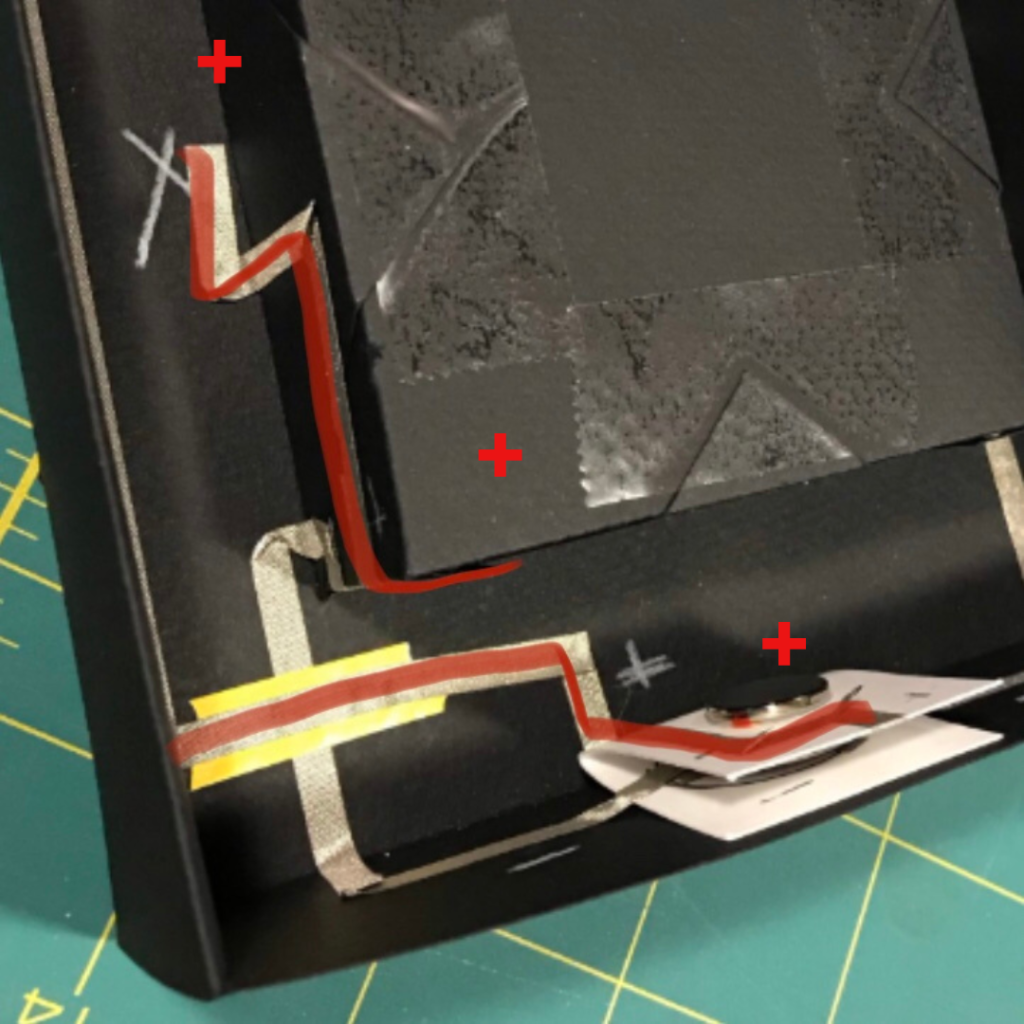
Step 7: Add Negative Trace & Reed Switch
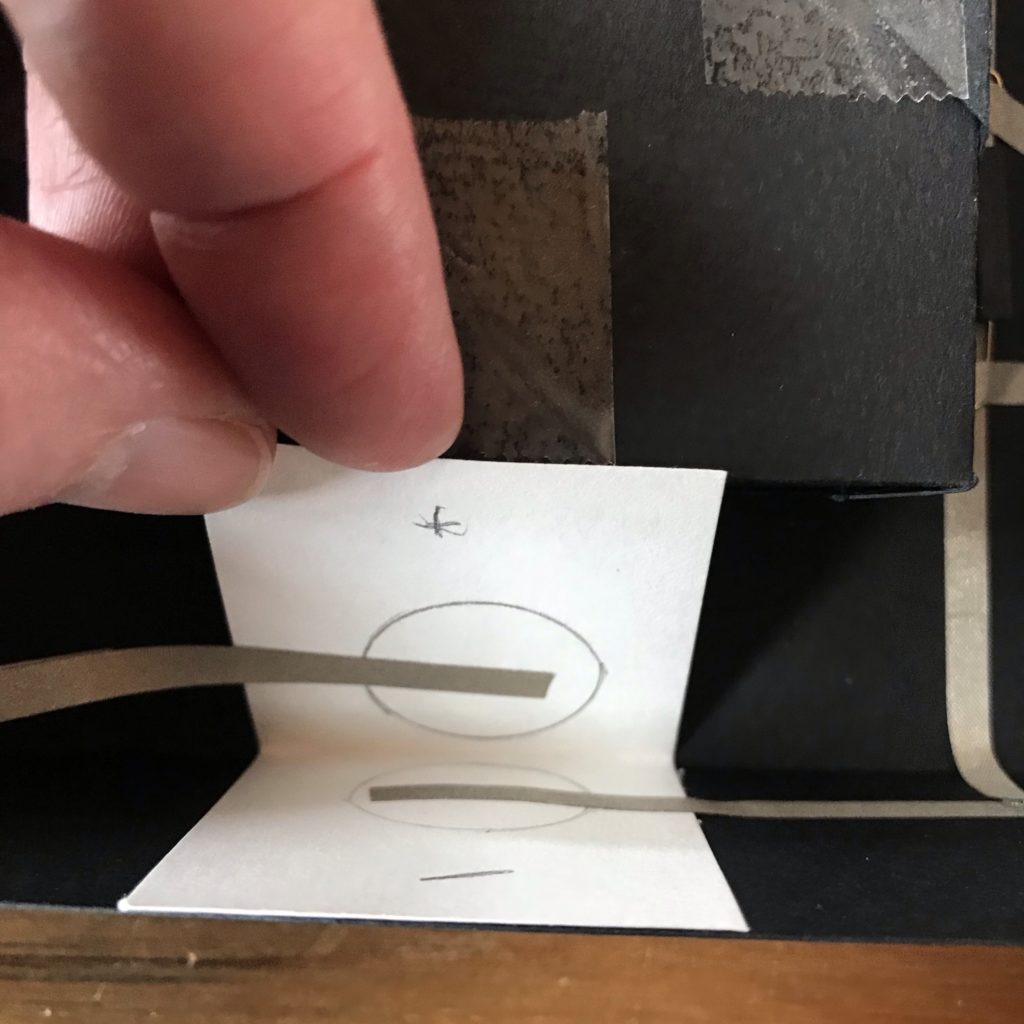
Once the battery holder is attached to the frame, determine where you want to place your reed switch and mark it. Use the Circuit Diagram for One Reed Switch as a guide.
Lay down your negative trace, starting inside of your battery holder and extending to the gap where your reed switch (magnet on) will be placed.
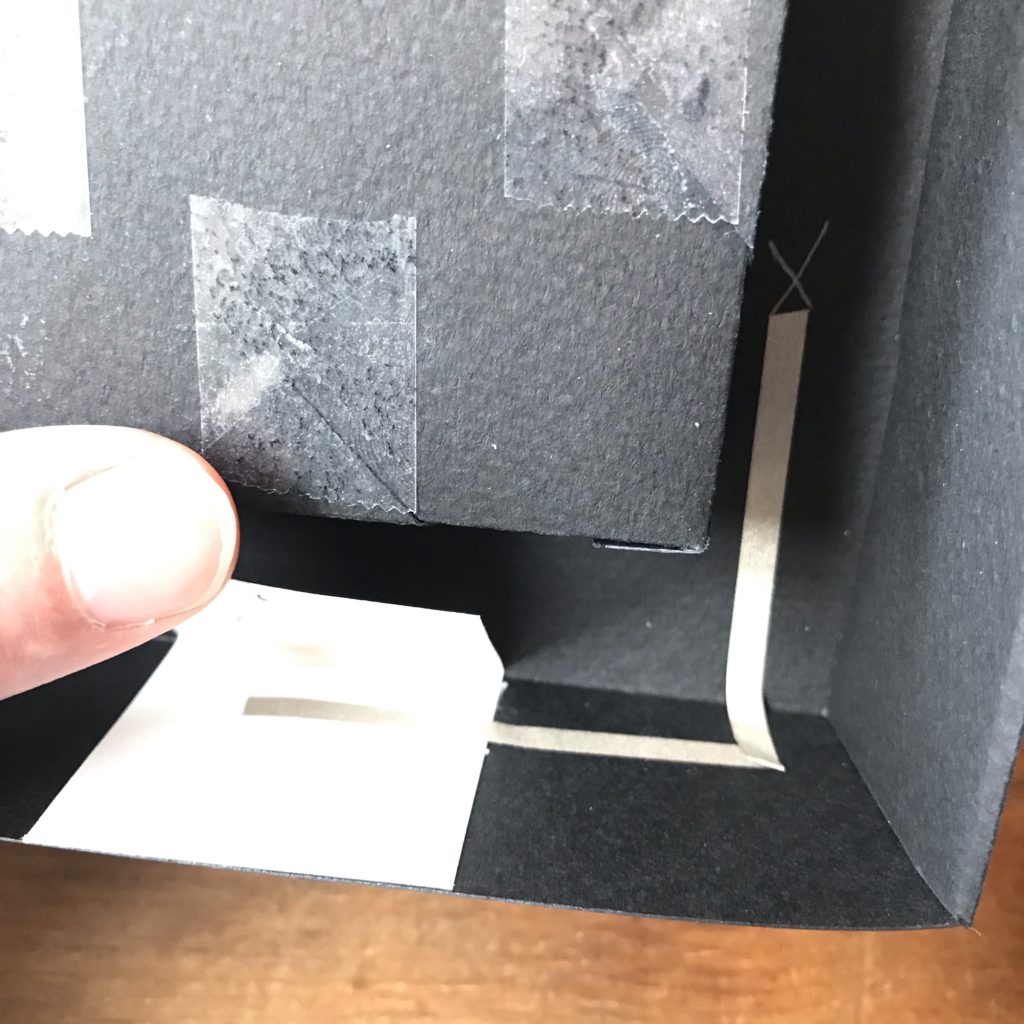
Leave a gap for the reed switch and finish creating your negative trace by overlapping the negative piece of conductive fabric tape that you wrapped around the corner of the tray. To make it easier to see where I wrapped the tape around the corner, I extended the tabs onto the back of the tray and marked them positive or negative.
Make sure that you have a solid connection between the new piece of conductive tape and the piece you’re connecting with. Add more conductive tape as needed.
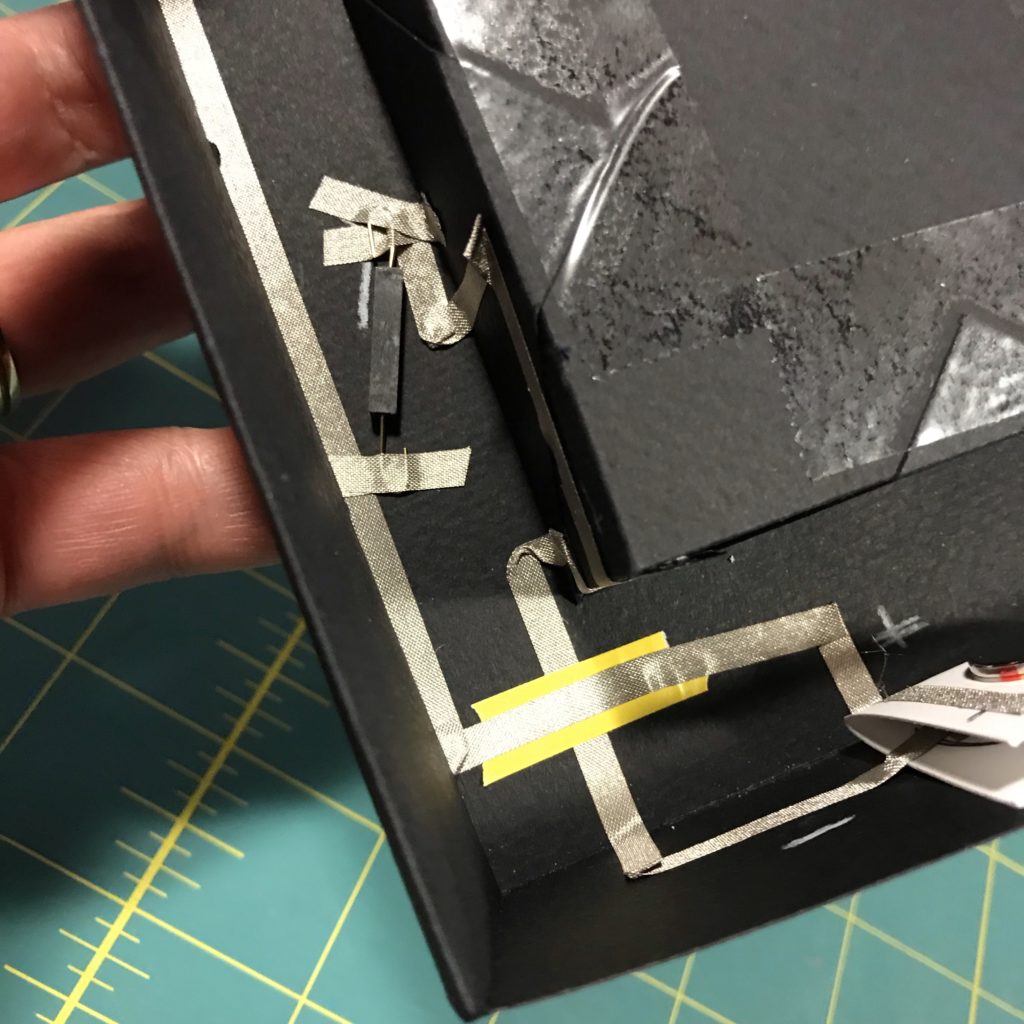
Tips, Tricks & Call-outs
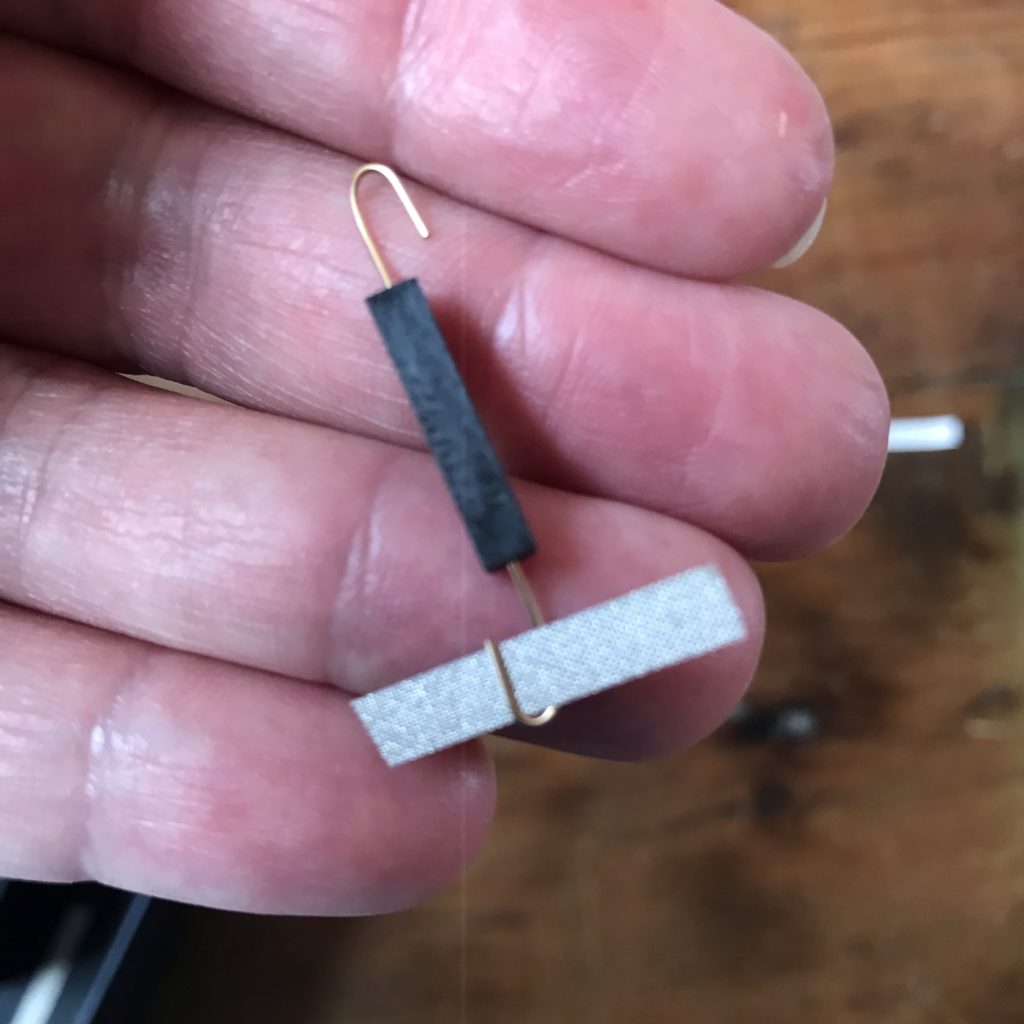
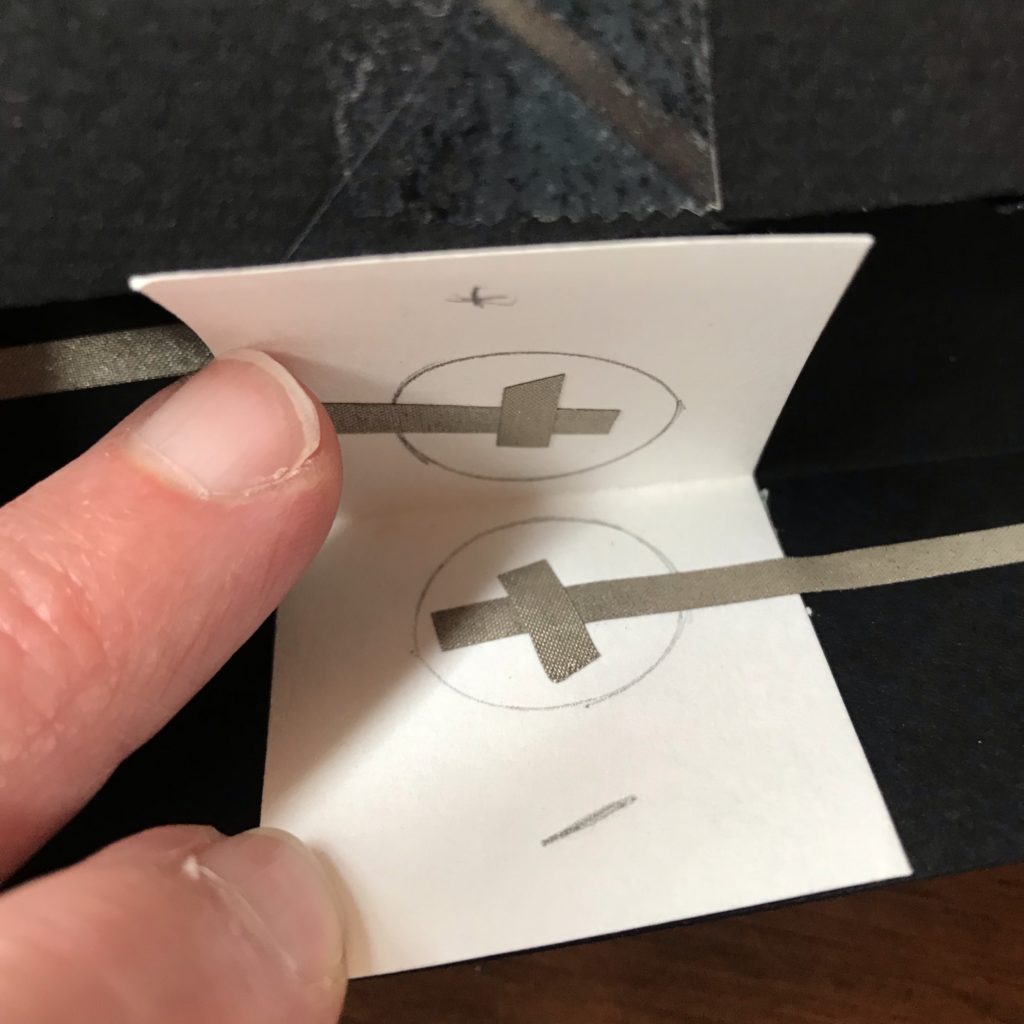
Before adding the reed switch, it’s helpful to use your fingers or a pair of pliers to curl the legs (as depicted) to keep the switch from rolling. Bending the legs also increases the surface area of the reed switch that comes into contact with rest of the circuit, helping to ensure a solid physical and electrical connection.
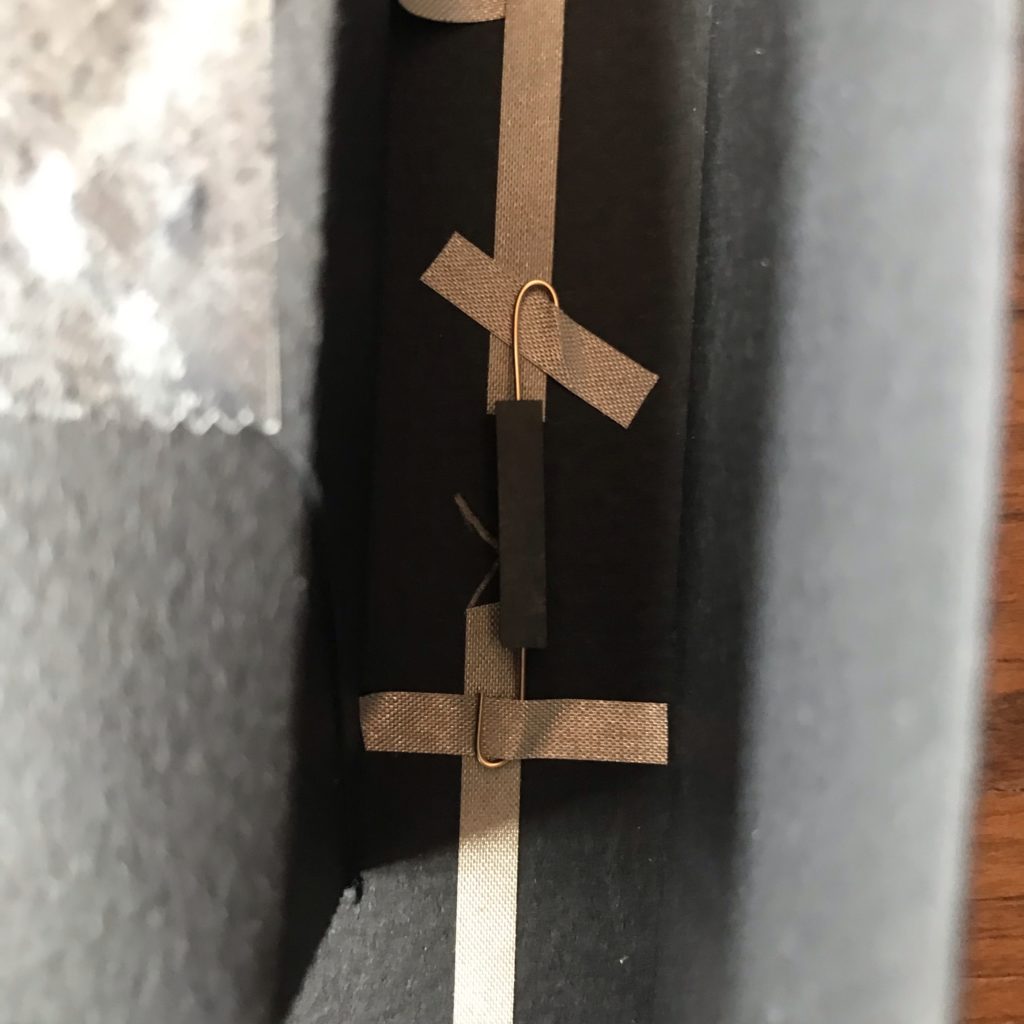
Weave pieces of conductive fabric tape between the curled legs and adhere the reed switch between the gap. You may need to reinforce the connections with additional pieces of conductive fabric tape to keep the reed switch securely in place.
Step 8: Add Positive Trace & Test Circuit
Next, add the positive trace to the battery tray and connect it securely with the positive lead you wrapped around the box tray. Continue using the Circuit Diagram for One Reed Switch as a guide.


Step 9: Test the Circuit
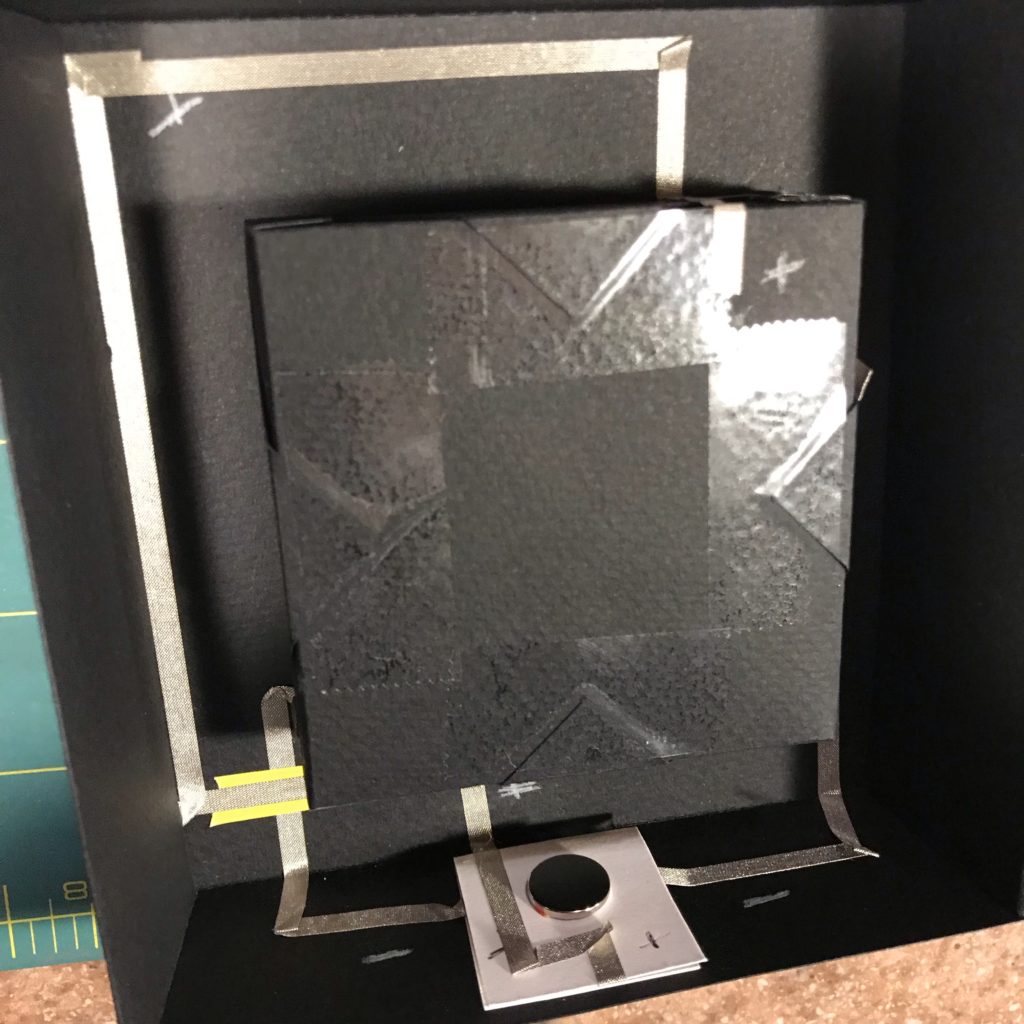
Before adding the art layers to the tray, test the circuit by placing a magnet on the outside of the shadow box frame. If it doesn’t work, double check your connections, especially around the reed switch.

Step 10: Add Art Layers to the Tray
Once you’ve ensured that your circuit works the way you want it to, it’s time to build the art layer.
The first layer that I placed down was a frame backed wth a piece of translucent vellum. Because I wanted to increase the depth, I added extra double-sided foam tape to the back of the piece before pressing it in.
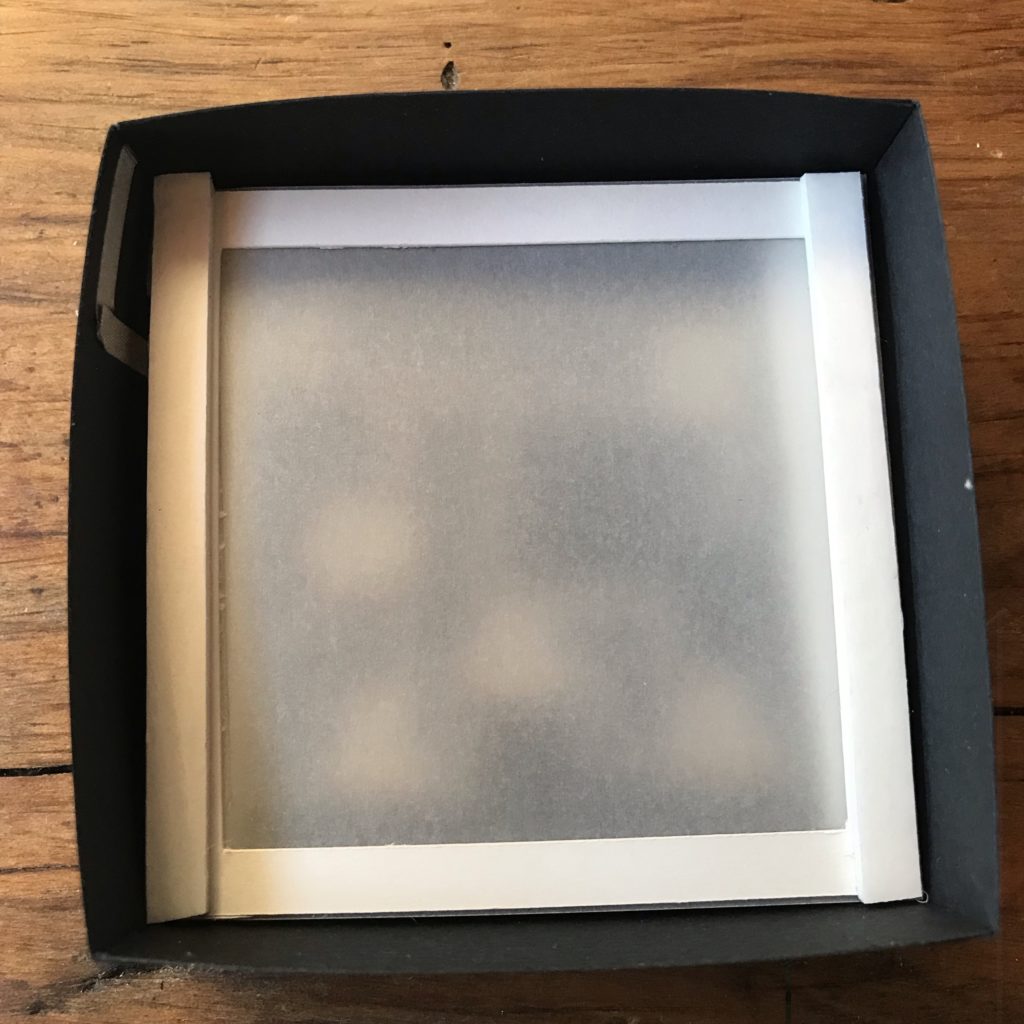

Note: I did NOT use adhesive between the first art layer and the shadow box tray. This allows the art layers to be removed if needed, to replace them with something new or to make easy repairs.
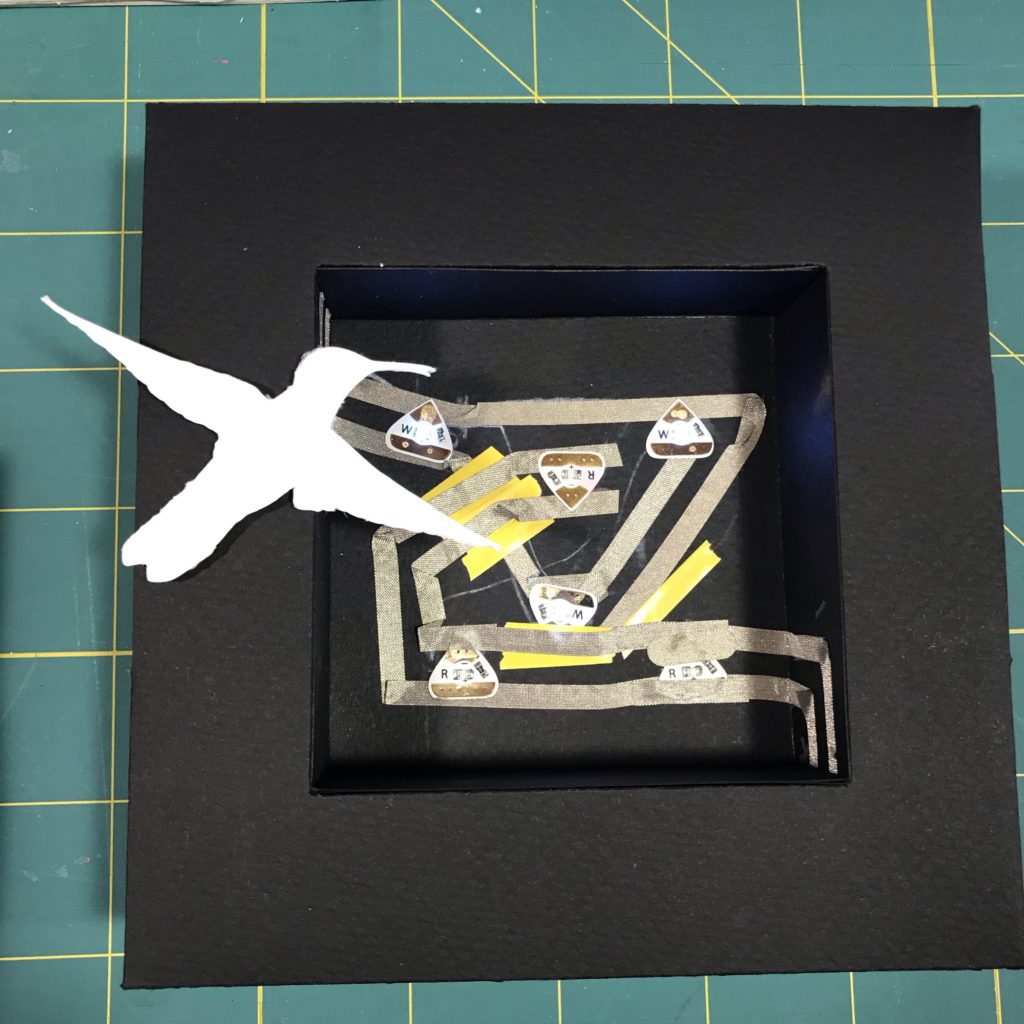
Remix
If desired, you may add a second switch to turn on another set of LEDs.
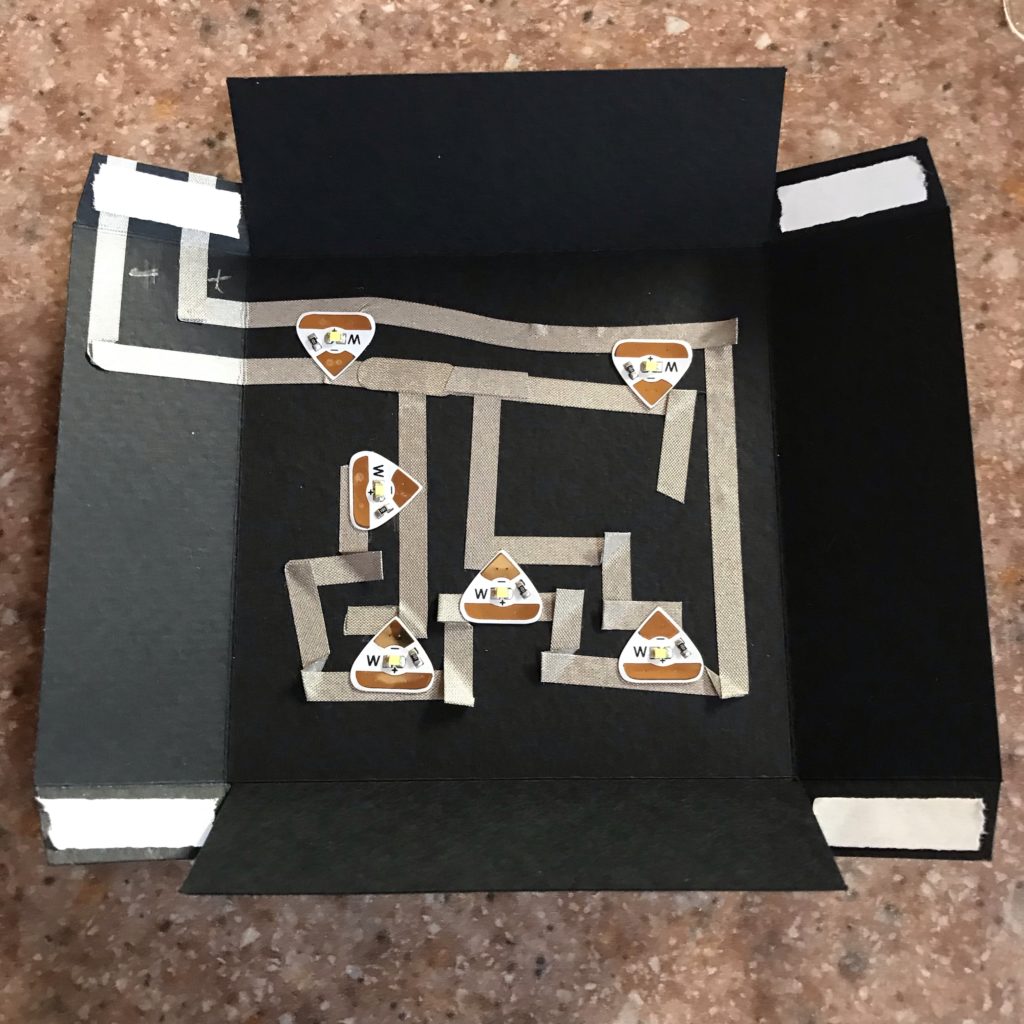
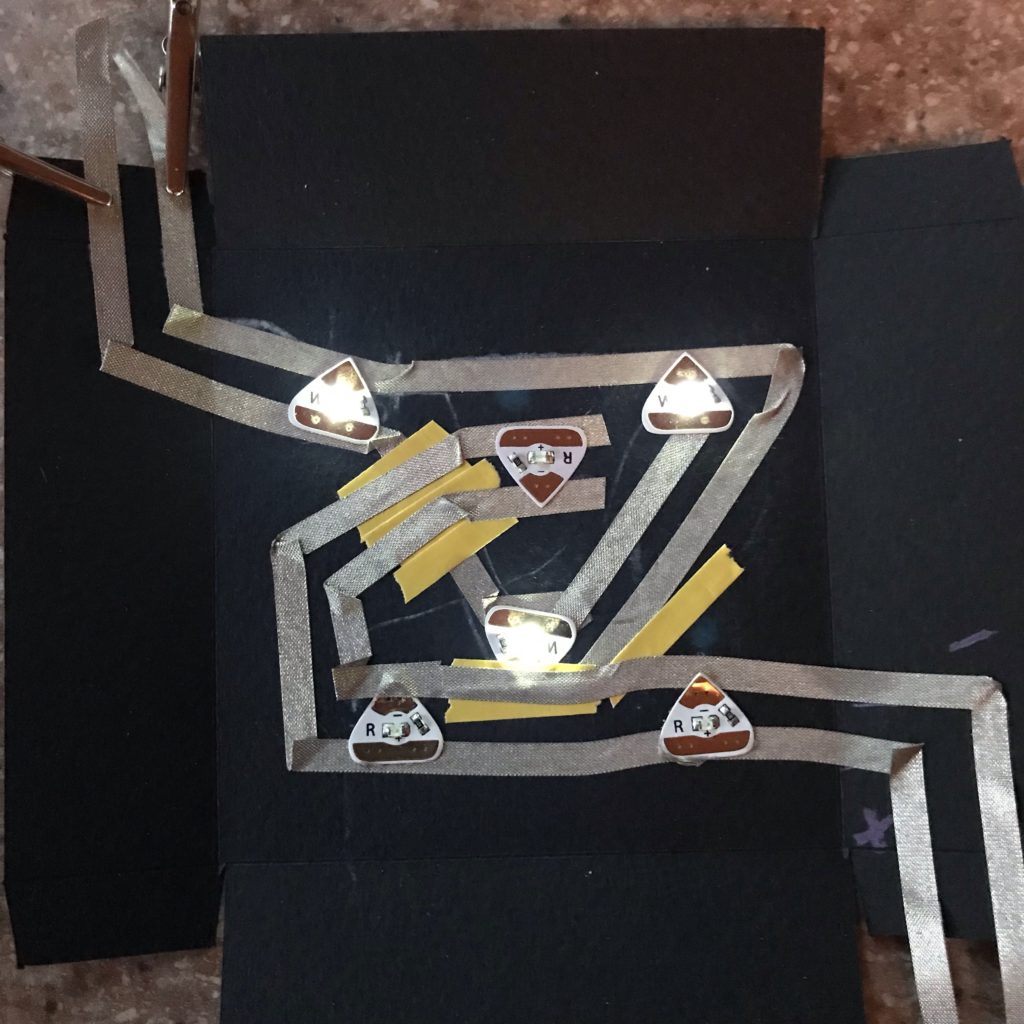
To achieve this, I reconfigured the circuit into two separate switched paths. The first circuit path, constructed like the first one discussed in this tutorial, is triggered by a reed switch to turn on white LEDs. The second circuit path, which connects to the battery and a second reed switch, turns on a set of three colored LEDs (in blue, green, and pink).
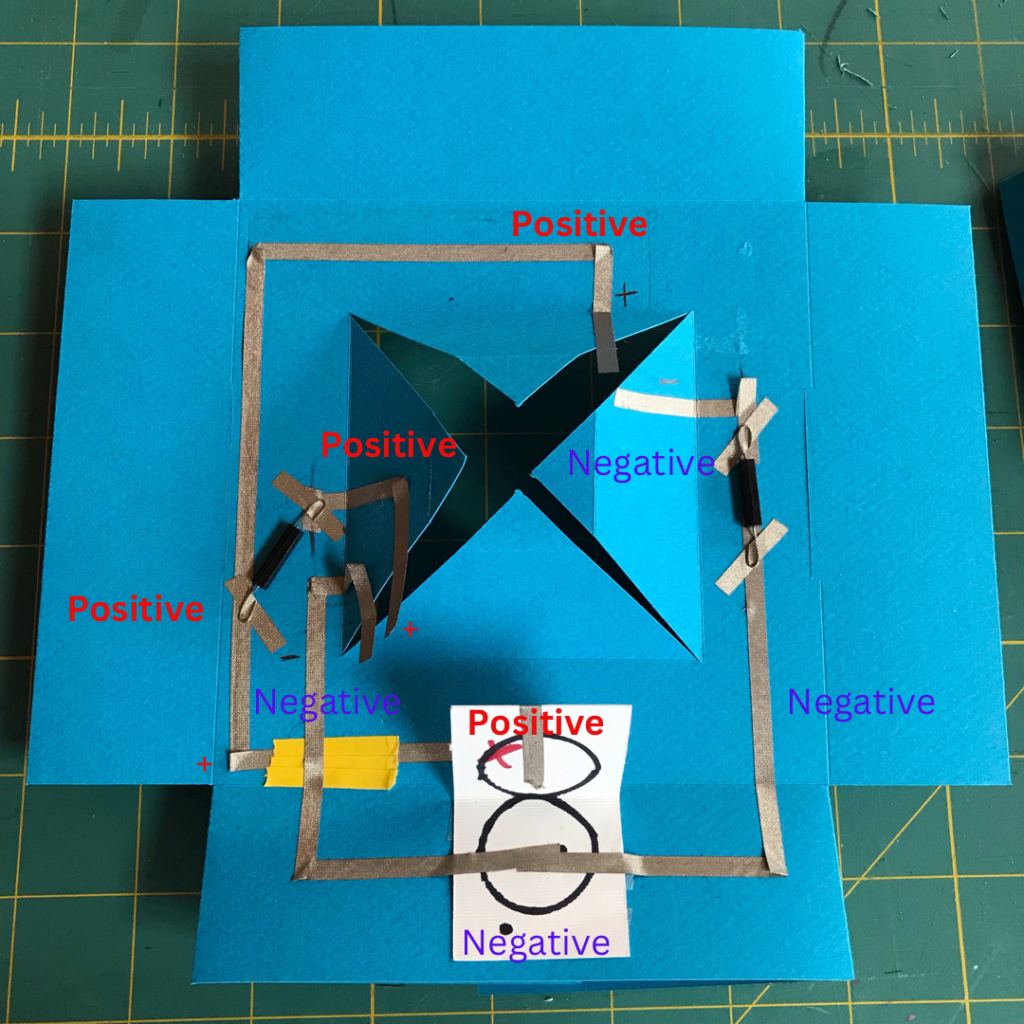
In the image below, I detail how I combined my two circuit paths in order to trigger two sets of lights with two reed switches.
In this image, I show how the two completed circuits compare.
Since there are two different paths in this circuit, I had to add insulating bridges between them. Each path will connect to the battery and a reed switch (magnet on).
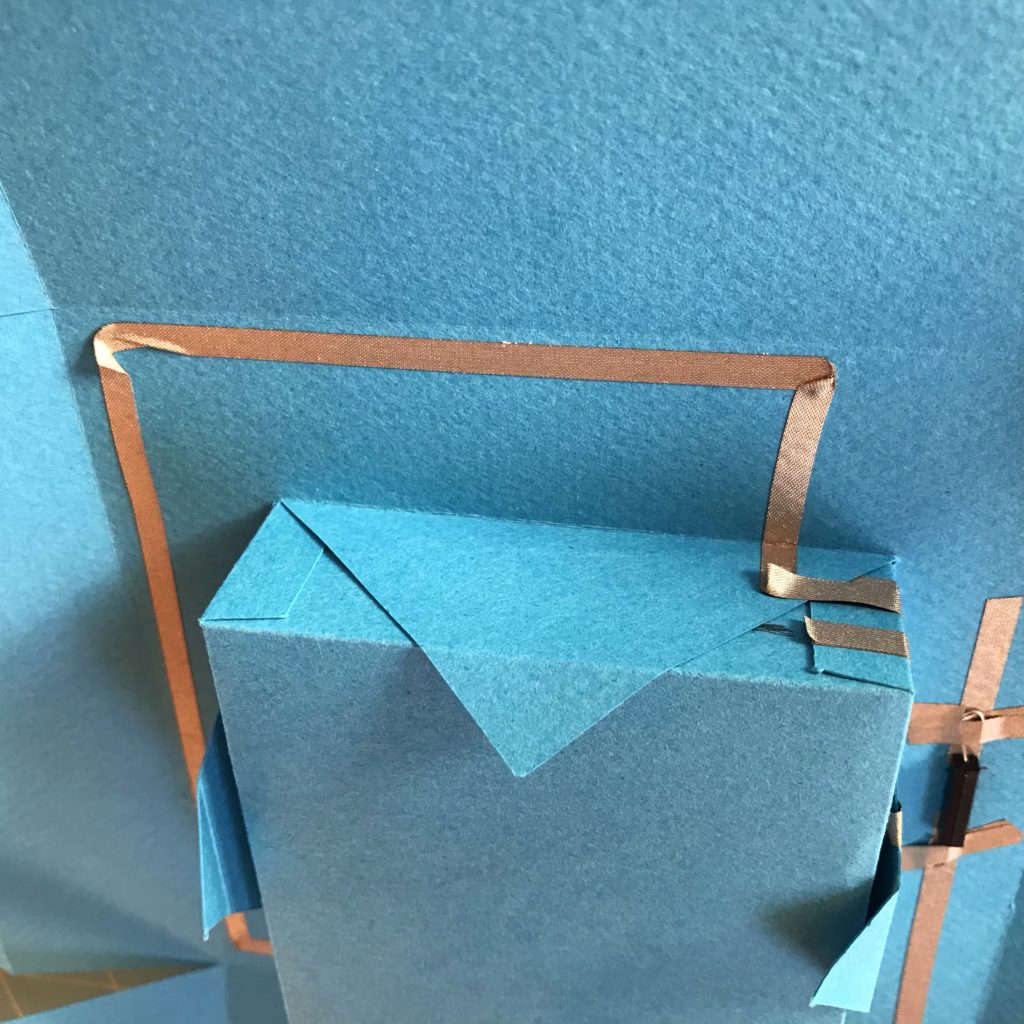
Whether you are working flat or in 3D, you will need to connect your shadow box frame with the tray.
To complete the circuit on your shadow box, use the Circuit Diagram for 2 Switches as a guide.
To get a better look at how the positive traces connect to the battery itself, or to get a better look at the positive traces on the box tray in 2D (rather than 3D), please refer back to photo of the blue box frame.
Tips, Tricks & Call-outs
When choosing your LED colors, using two reed switches presents you with an opportunity to experiment with the ways that different LED colors work together within the same circuit (if using one battery). For example, if you use white LEDs on one path and several red LEDs on the other, only the red LEDs will turn on if you have magnets on both switches at the same time! This is because electrons are lazy and will take the path of least resistance; red LEDs require less voltage than white LEDs. If you wanted to go for a color mixing effect when both reed switches are triggered, you’d either need to choose LED colors that have similar forward voltages (such as green, pink, and blue), or try adding a second battery.
Gallery


Similar Posts You Might Enjoy
Holiday Train

Yukiko Inami’s train decoration lights up when two circuits, each containing a reed switch, come together with help from magnets.
Candy Treats
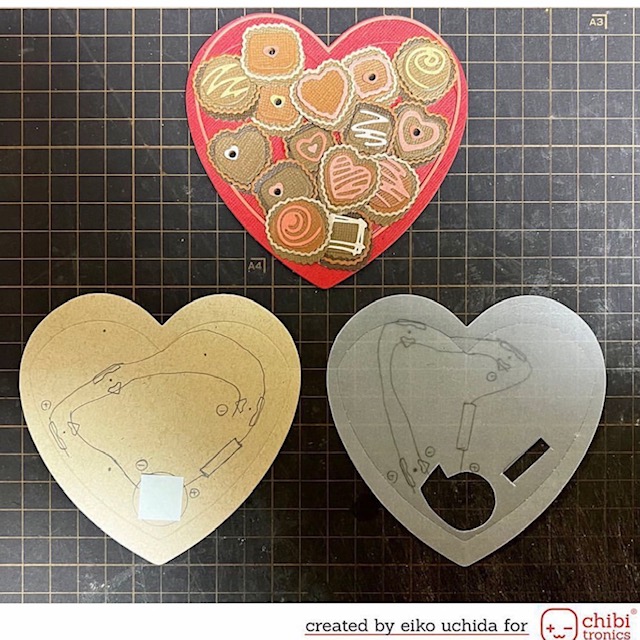
Eiko Uchida’s Valentine’s Day chocolatier (on Instagram) is an interactive feast for the eyes, with two reed switches lighting up paper sweets!
Hexagon Box
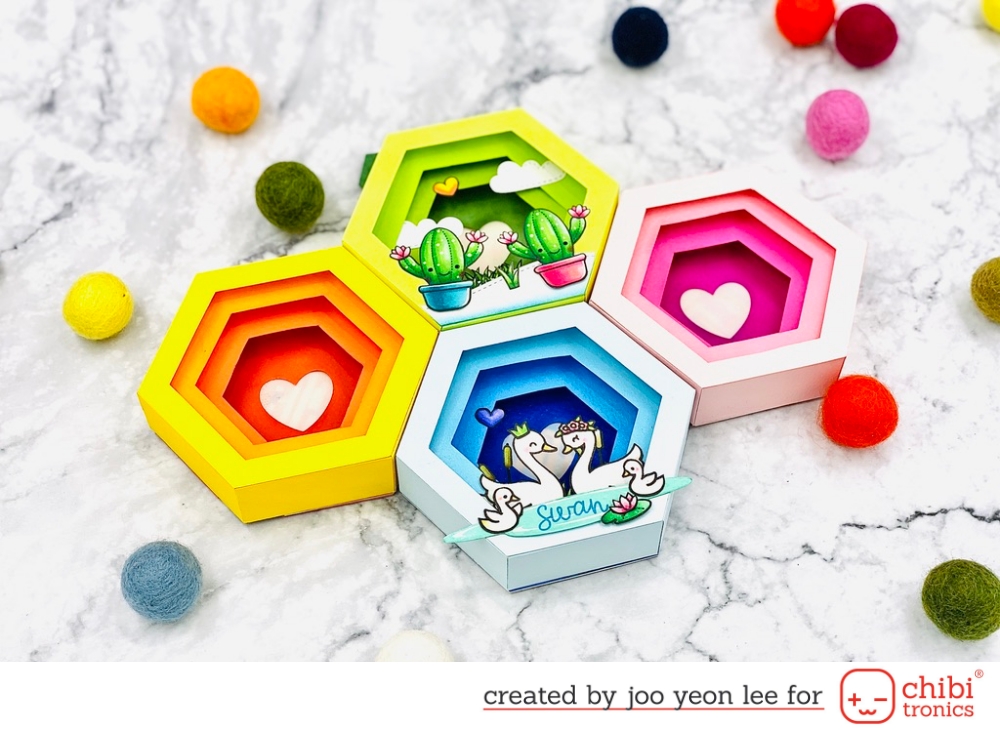
Joo Yeon Lee shares an original design (and templates) for a hexagon shaped shadow box in this inspiring post!