Shadow Box Celebration
In this tutorial Celeste Moreno, a guest designer and maker, will teach you a novel way to add light and programming to transform a traditional Mexican art form, called a nicho, into a glowing tribute that honors something or someone important in your life.
In this tutorial Celeste Moreno, a guest designer and maker, will teach you a novel way to add light and programming to transform a traditional art form, called a nicho, into a glowing tribute that honors something or someone important in your life.
Hi there, I’m Celeste! I’m a designer of creative learning experiences and a maker. Today I’m going to share my approach to making a light-up nicho.
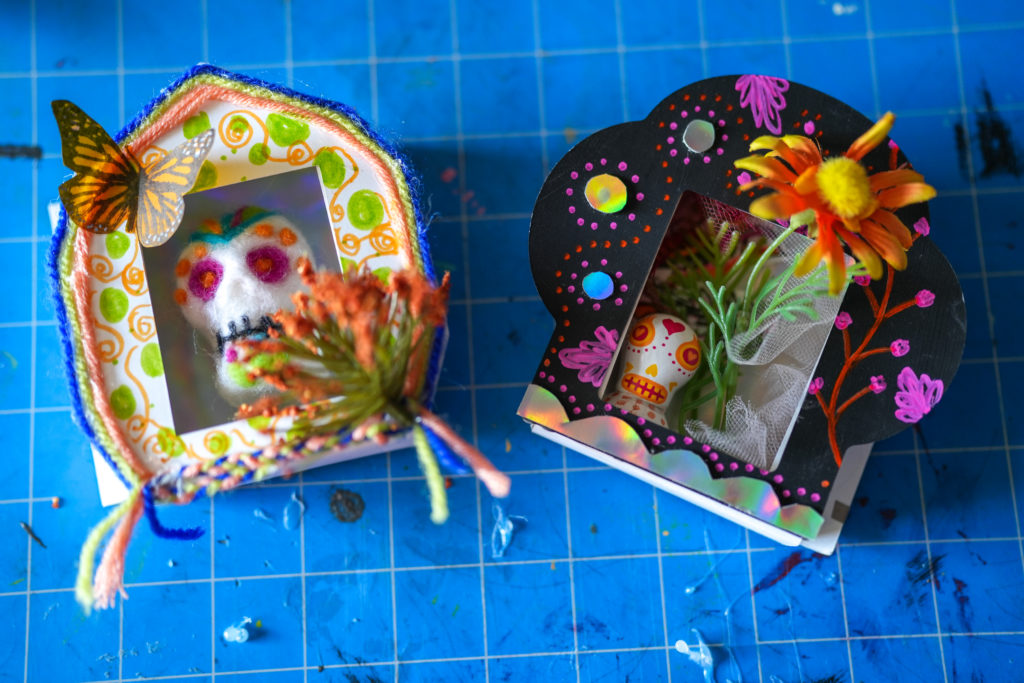
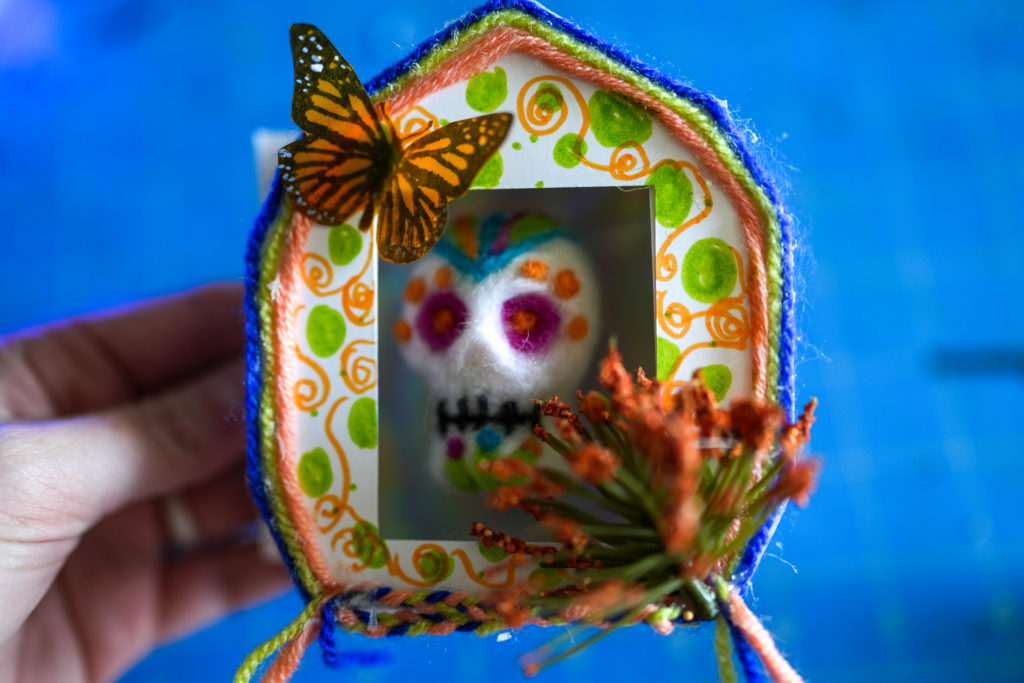
Nichos are small, decorative shadow boxes that are sometimes referred to as mini shrines or altars because they are often made to honor something important in your life, like a loved one. This is a beloved traditional art form in Mexico in particular, and nichos are sometimes displayed during the Día de los Muertos (Day of the Dead) holiday to pay tribute to loved ones who have passed away. Nichos can also celebrate everyday life, highlighting elements like favorite foods or hobbies. You can see some incredible examples and learn more about the craft by reading, “What Is a Nicho Box.” Lights are not traditionally included in nichos, but I think they add a beautiful layer that can contribute to the storytelling and design.
Materials & Tools
If you want to follow along with my approach to making a light-up nicho, here’s what you’ll need:
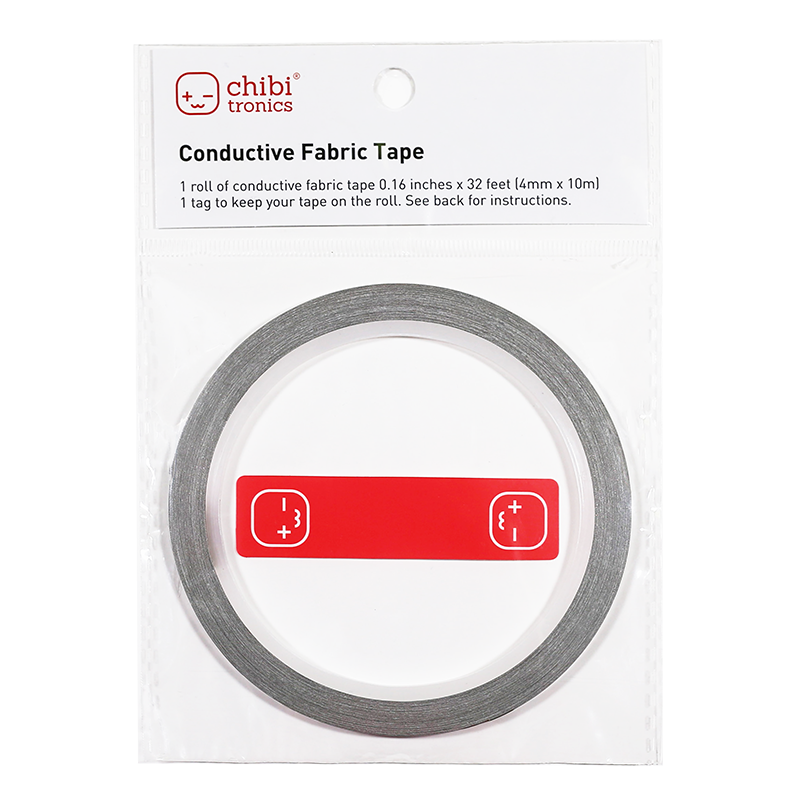
- Conductive Fabric Tape
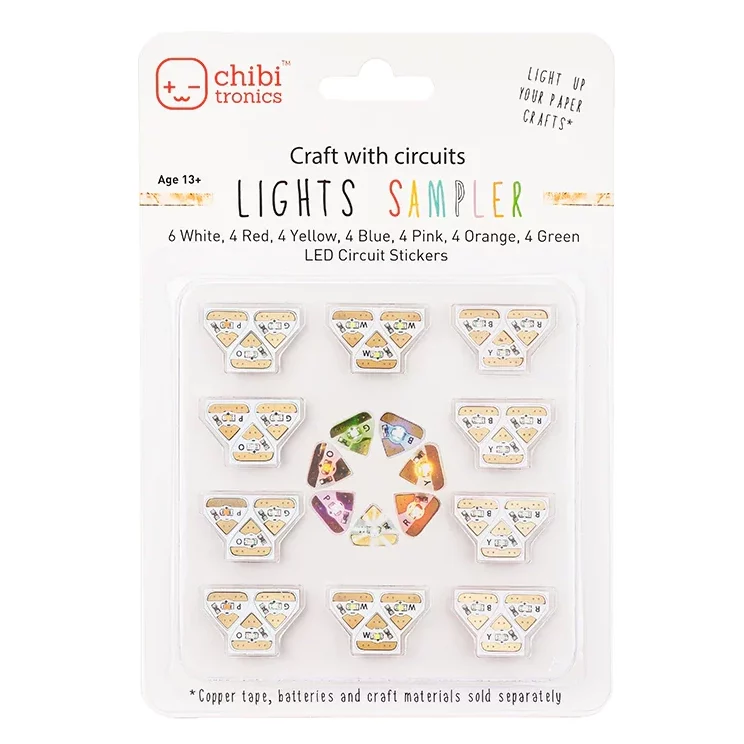
- Circuit Sticker LEDs
- Cardstock paper (or any type of heavy, sturdy paper)
- Tools for cutting: scissors or X-acto knife
- Hot glue (or any other preferred adhesive)
- Decorative materials: colorful paper, photographs, embellishments, miniature objects, fabric scraps, paint, etc.
- Optional: a craft cutter to make cutting nicho elements easier
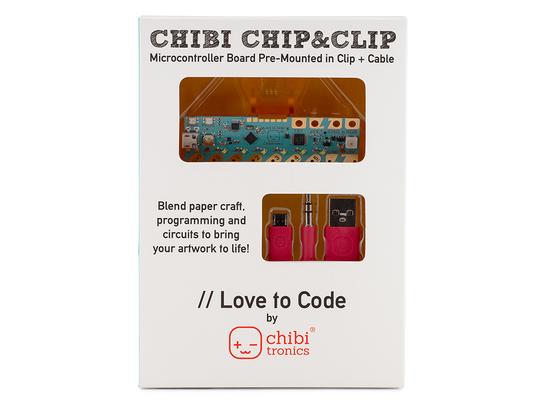
- Optional: a Chibi Chip & Clip to create animated light patterns and a power source to power the chip
- Optional: a coin cell cr2032 3V battery and battery pack to power the circuit (if you’re not using a Chibi Chip & Clip)
Directions
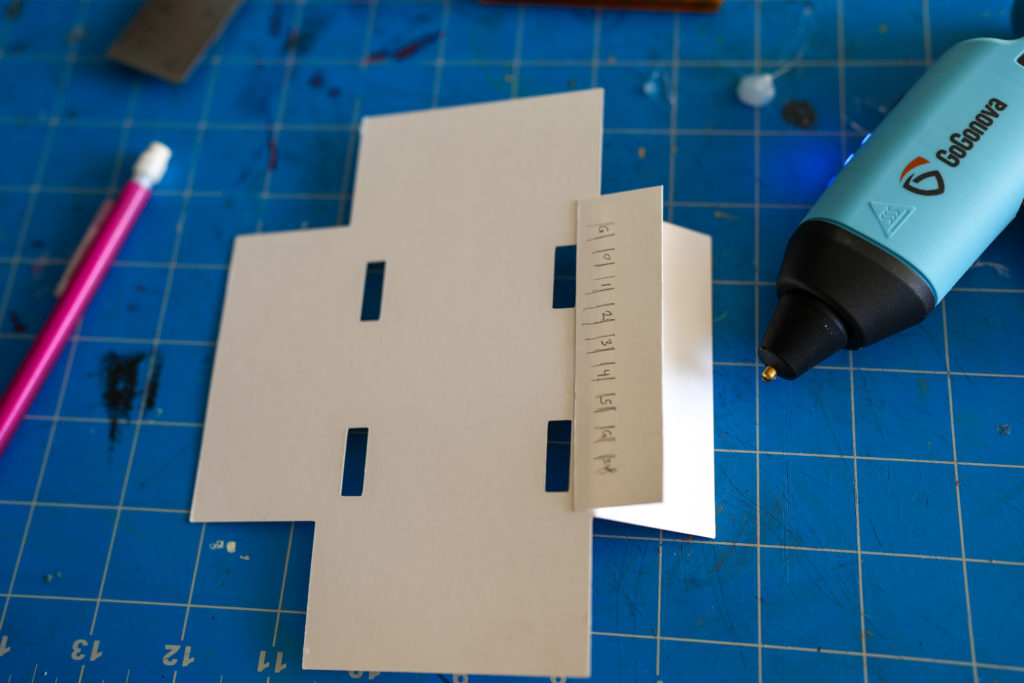
Step 1: Cut Out the Nicho Box
There are two parts to my nicho template. The first part is a foldable box. If you’re able to print on a heavy paper like cardstock, you can print this template directly onto your paper. Otherwise, you’ll need to transfer the template onto your cardstock paper. I have access to a Cricut and used the machine to cut the template, and draw the fold lines.
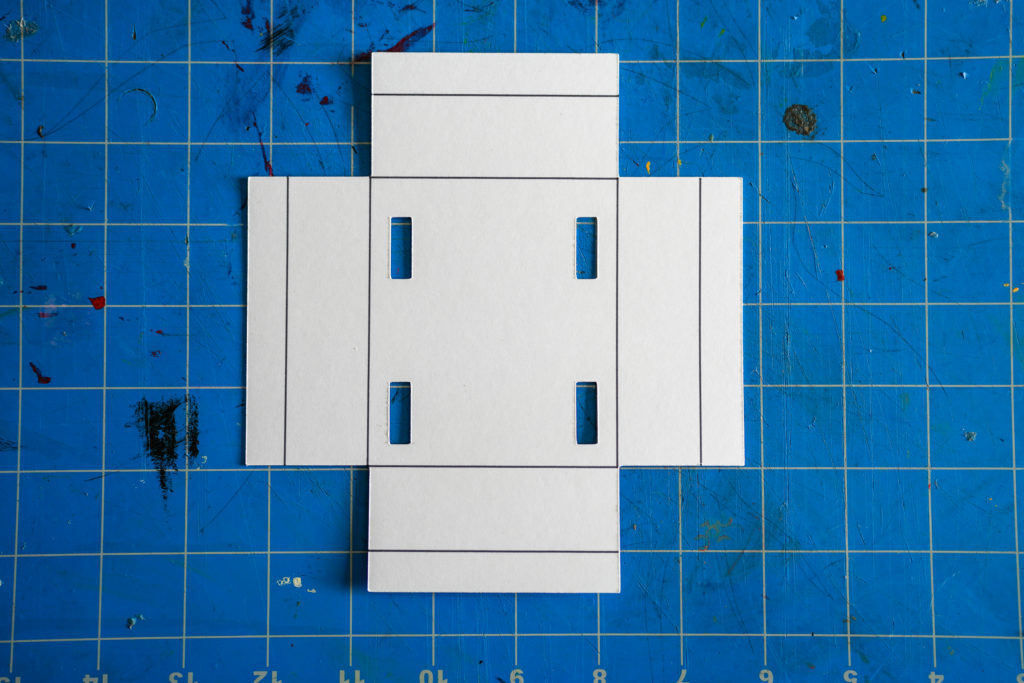
Don’t assemble the box yet! It’s helpful to do the circuitry and decoration first, and assemble at the end.
Templates and Cut Files
Nicho Box Printable Template
Nicho Box Fold Lines Cricut Template
Nicho Box Cricut Template
If you’d like to edit the design of the foldable box you can access my design file on Cuttle.
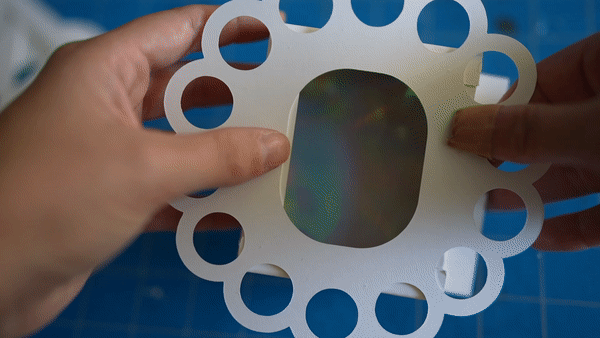
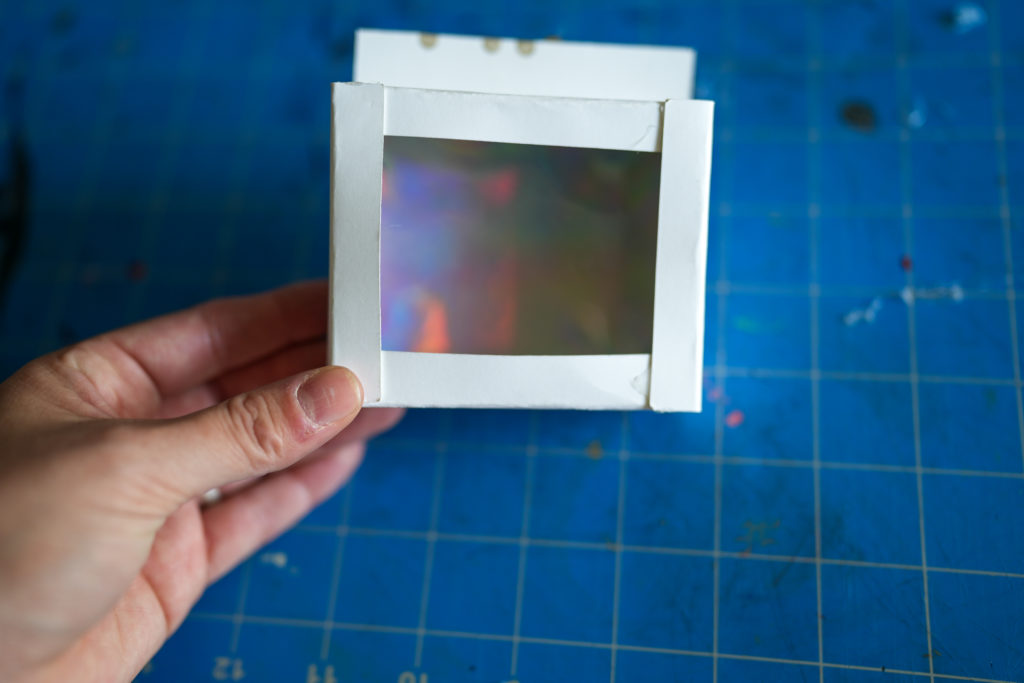
Step 2: Cut Out the Nicho Box “Face”
The second part of my nicho template includes a few different designs for the “face” of your nicho. Pick one and cut it out using the same process you used for the box.
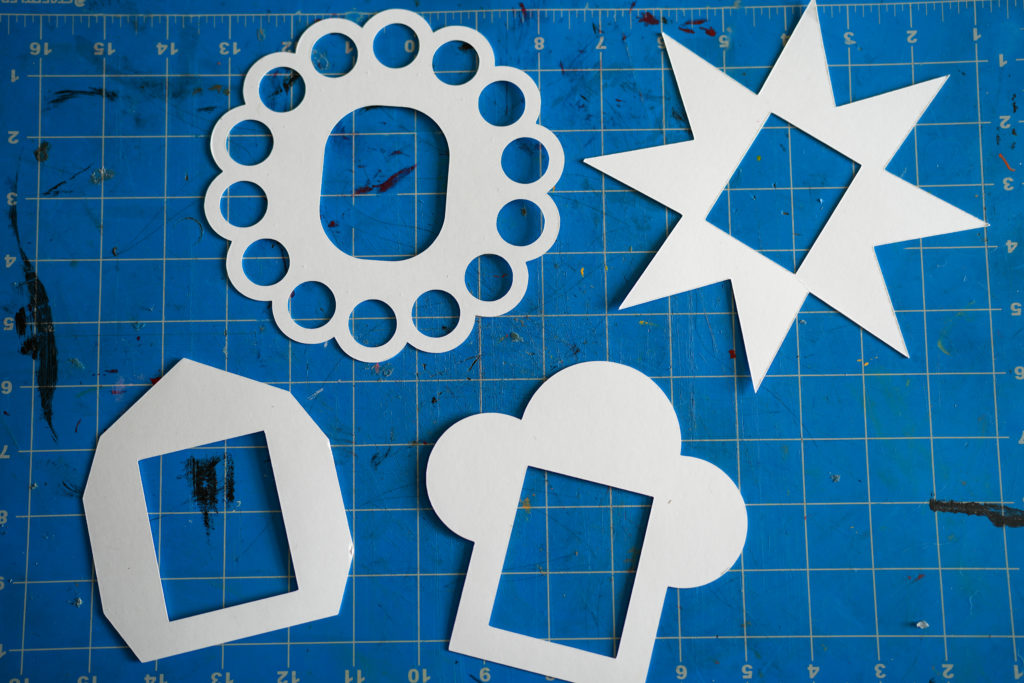
You can also layer multiple faces to create an interesting effect.
Feel free to cut or design your own nicho box face. Just make sure you leave a window in the middle of the shape that is 2” x 2.5” or less.
Don’t glue the face to your box yet! There are a couple more steps to take care of first. I recommend cutting out all of these pieces first because I think it’s helpful to see the box and the face as I’m planning my decorations.
Templates and Cut Files
Printable Nicho Faces (Star, Heart, Flower, Circle Motif, Bubble Top)
Star Nicho Face
Heart Nicho Face
Flower Nicho Face
Circle Motif Nicho Face
Bubble Top Nicho Face
If you’d like to edit the design of the nicho faces you can access my design file on Cuttle.
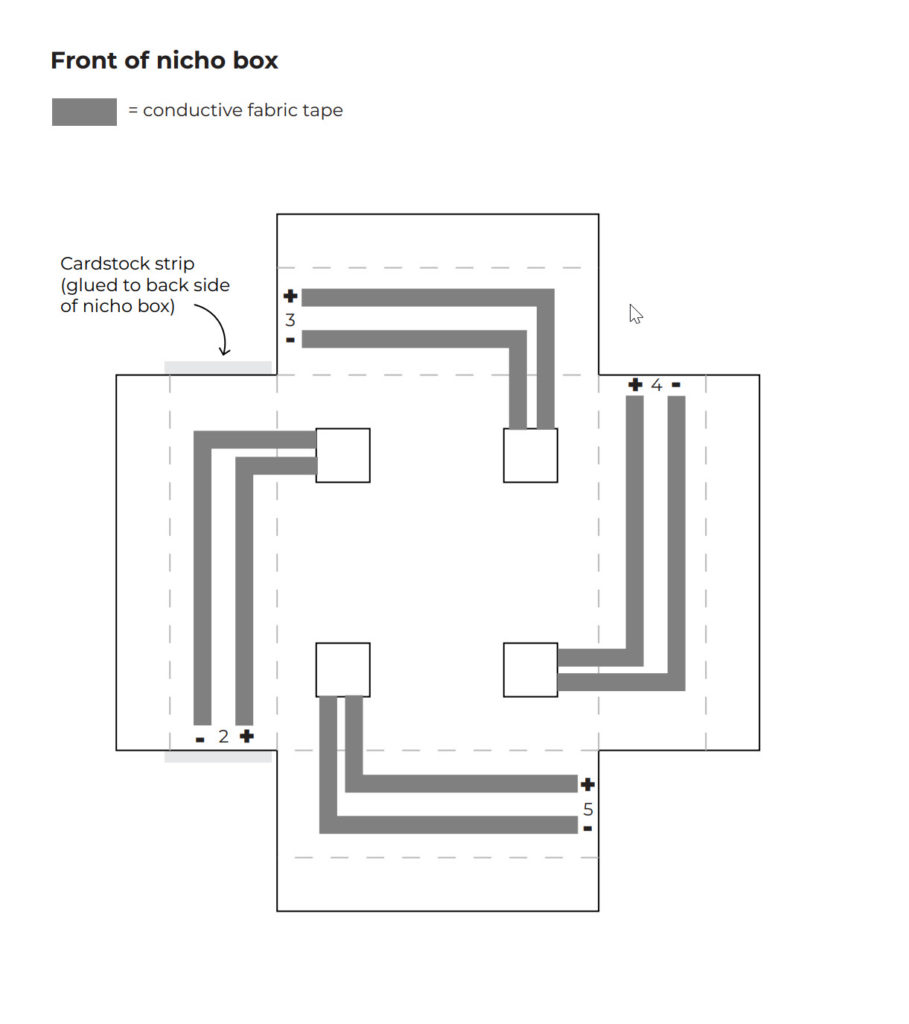
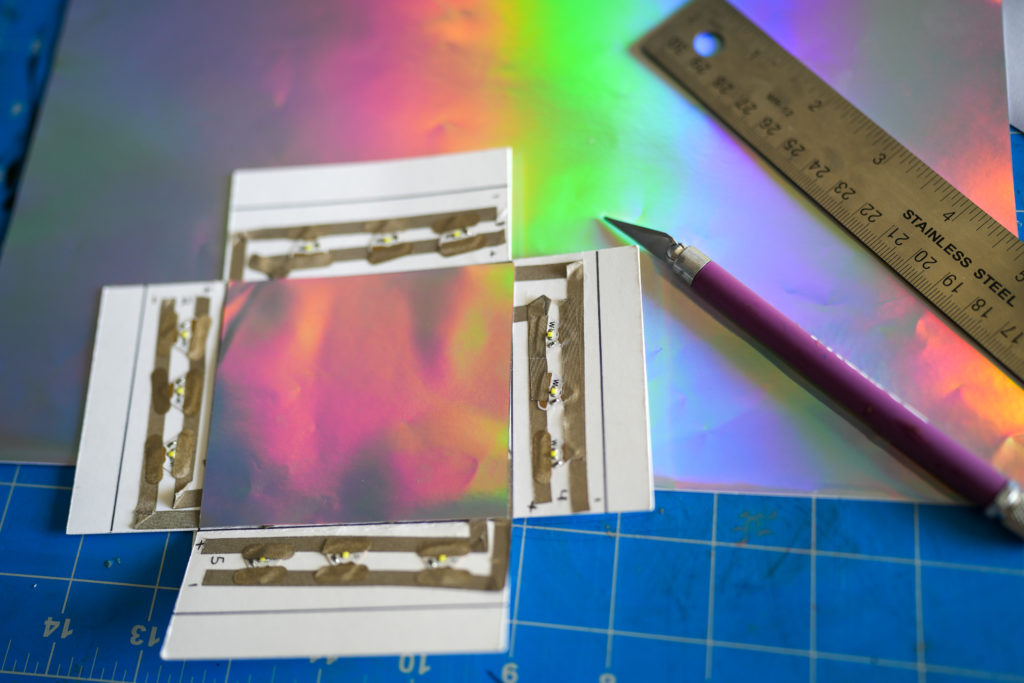
Step 3: Place the Conductive Fabric Tape Traces
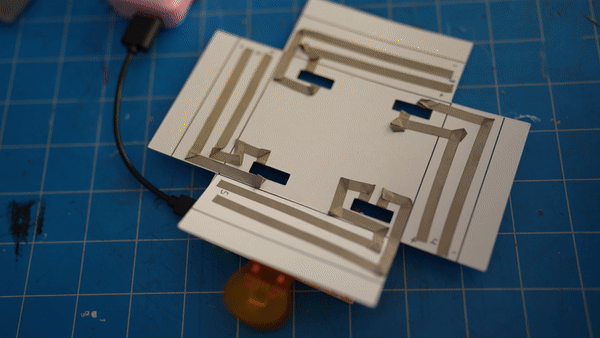
There are many different ways that you could design this circuit, I’m sharing just one way you might approach creating a nicho-box circuit. It’s important to note that this circuit was designed to work with the Chibi Chip & Clip. If you don’t want to use the Chibi Chip in your nicho, you can simply create one big circuit that wraps all the way around the inside of your nicho box (I’d recommend folding your box, then adding your circuit). The nice thing about the approach I’m sharing here is that it creates four different individually programmable circuit paths, one for each wall of the box. This allows you to create different lighting patterns and animations.
Here’s how I created my circuit:
First, I cut a small piece of cardstock to the height of my box and clipped the Chibi Clip to it.
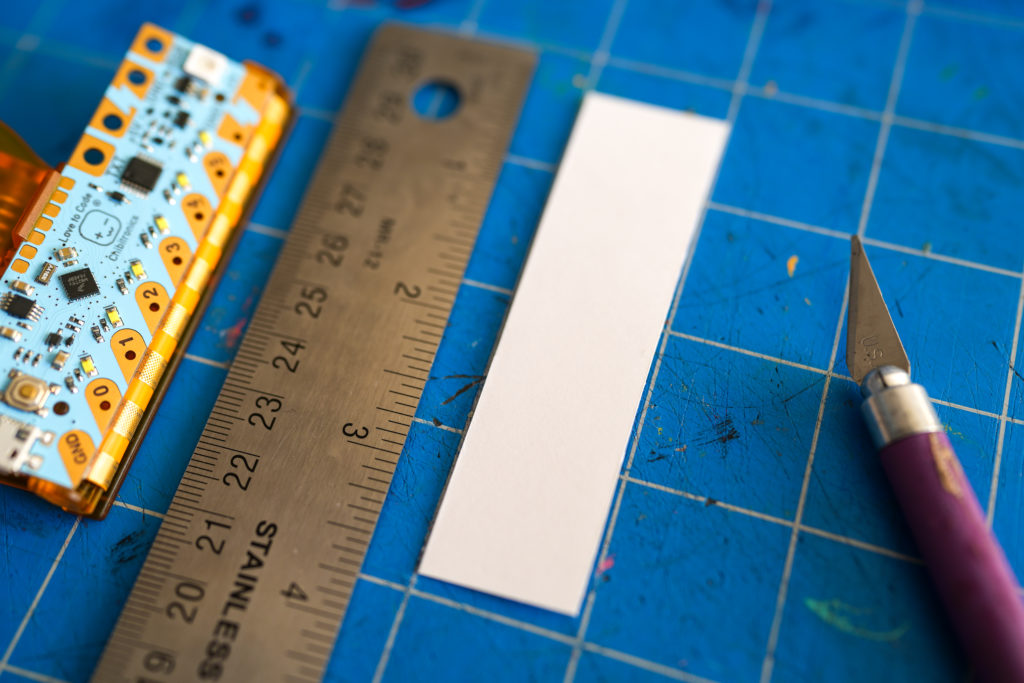
Next, I used a pencil to mark and label the pins and ground.
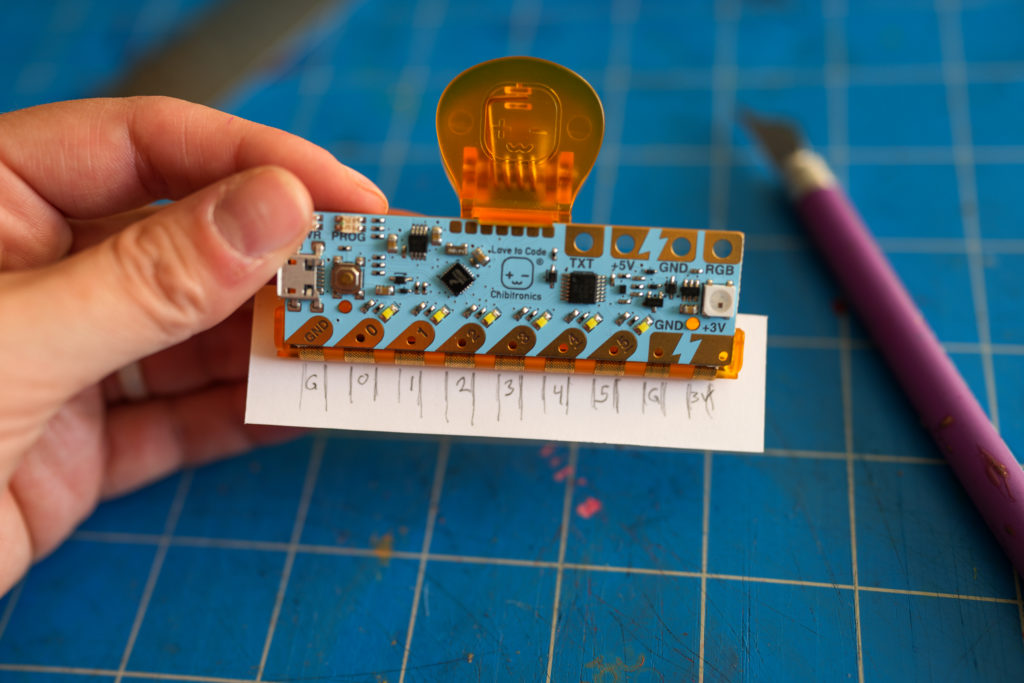
Afterward, I glued the cardstock to the side of my nicho box. Note: It doesn’t matter which side of the box you glue the cardstock strip to, but if you’d like to follow along with the template I made, take a look at the Nicho Circuit Diagram PDF which will show you where to place the strip.
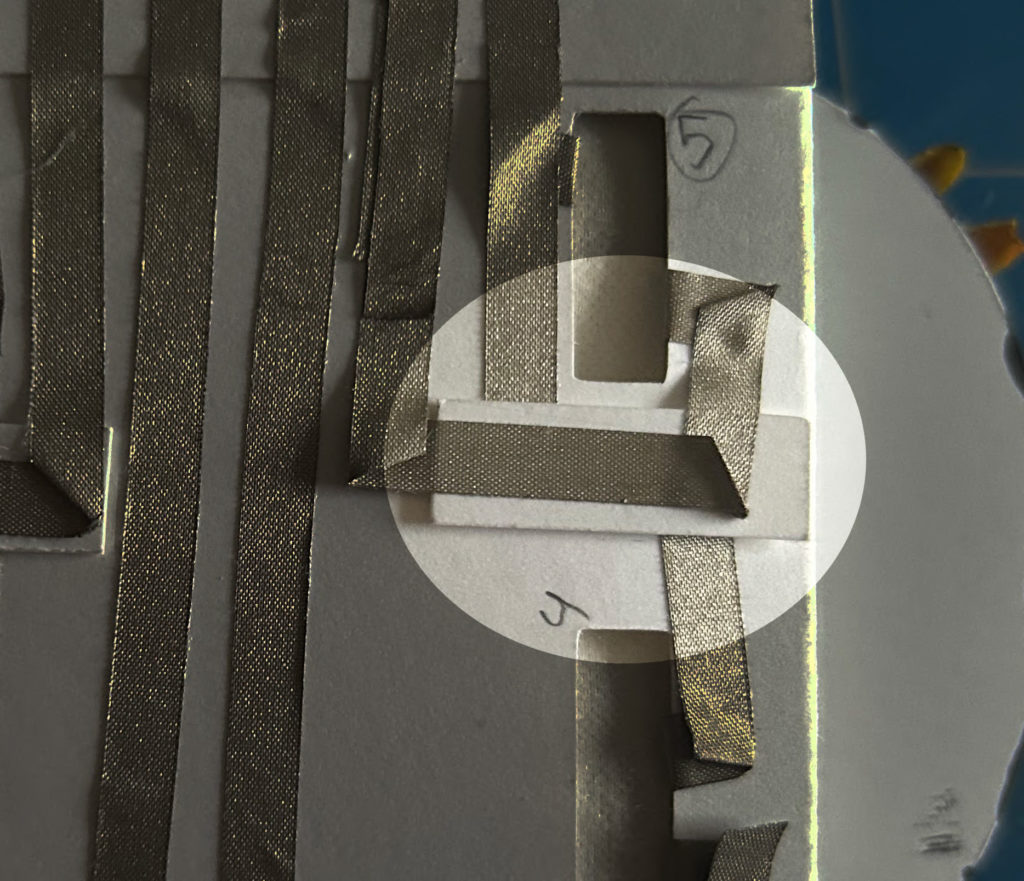
For the next step, I used the conductive fabric tape to create circuit traces for each side of the box. I began by cutting off a piece of tape that was a few inches long. I started placing the tape on the back side of the box, and fed the tape through the small holes cut into the box. After I finished the back side, I turned the box around and finished the front side.
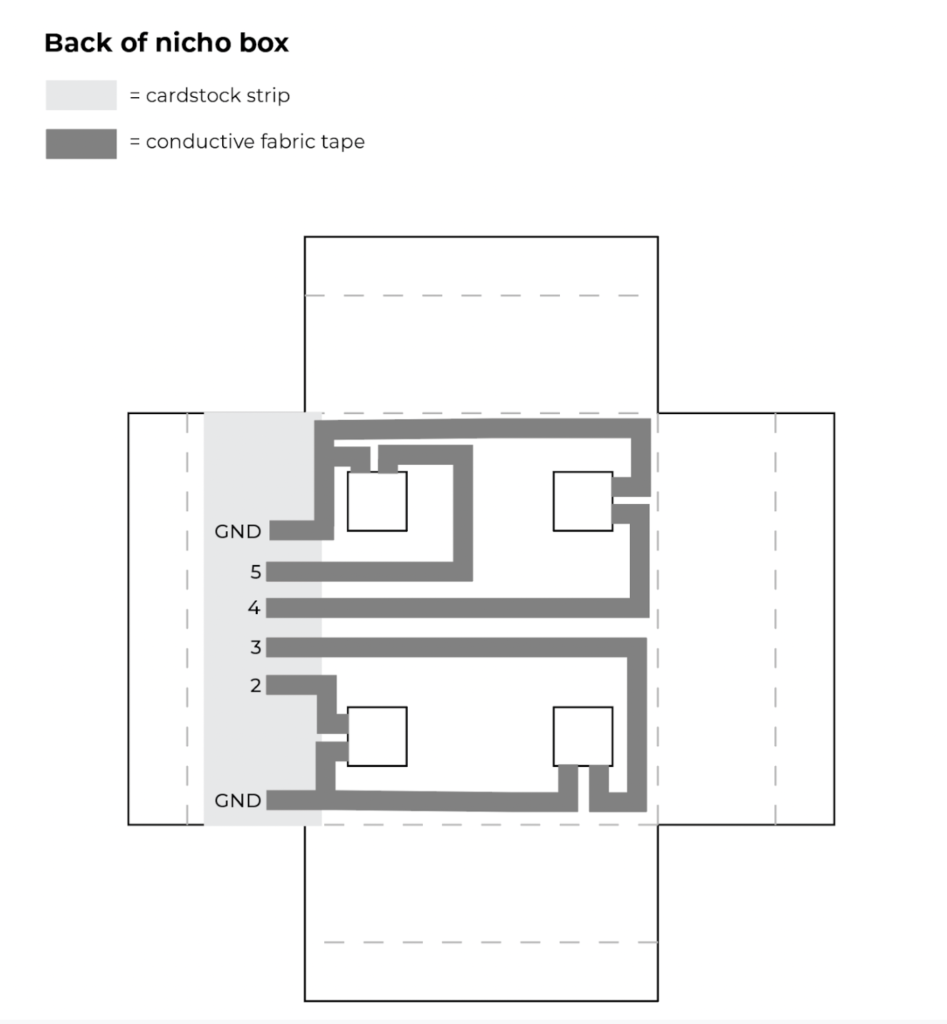
Be sure that your positive and negative traces do not touch.
Be sure that your positive and negative traces do not touch.
Note: If you choose to try a different circuit design for your nicho, you may need to create “bridges” to insulate overlapping circuit traces. You can make a bridge by cutting a small piece of cardstock paper and gluing it on top of the area that you need your trace to overlap.
The Nicho Circuit Diagram template shows just one way to place your circuit traces. You might find another way to create a circuit that’s more efficient, more beautiful, or easier to work with. Feel free to experiment!
Nicho Circuit Diagram
Tips, Tricks & Call-outs
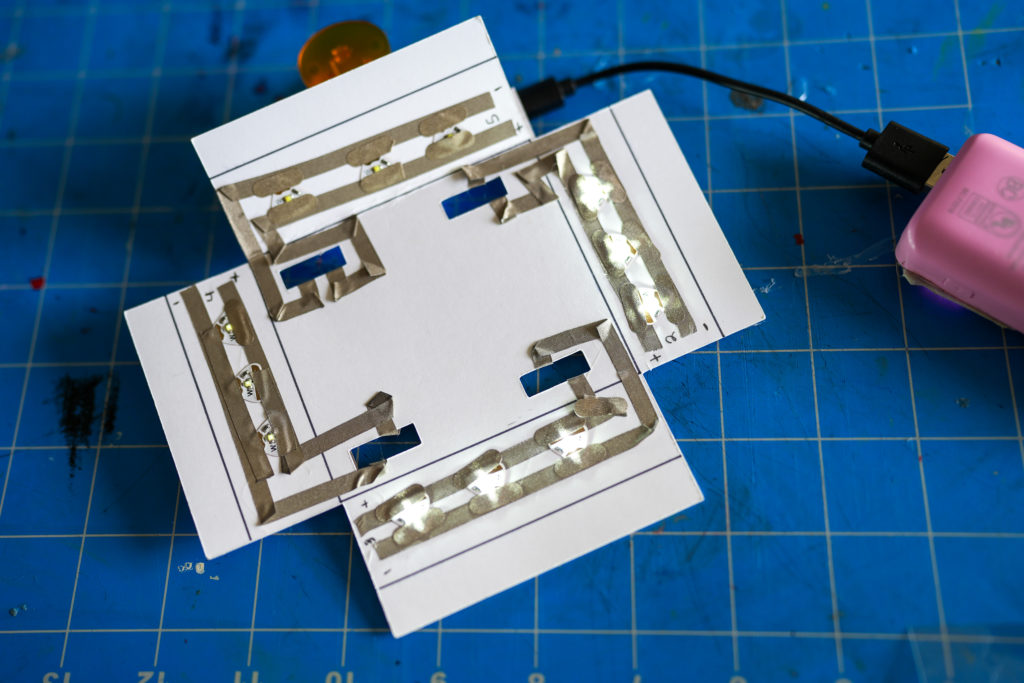
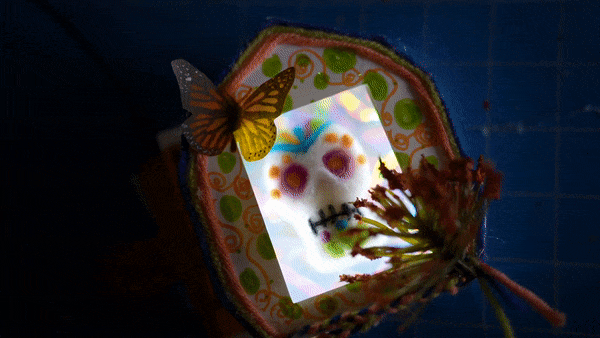
I programmed the Chibi Chip before placing my conductive tape traces and I clipped it to my box as I was making my circuit. After I completed the circuit paths on each side of the box, I gently placed an LED onto the circuit to confirm that it was working correctly.
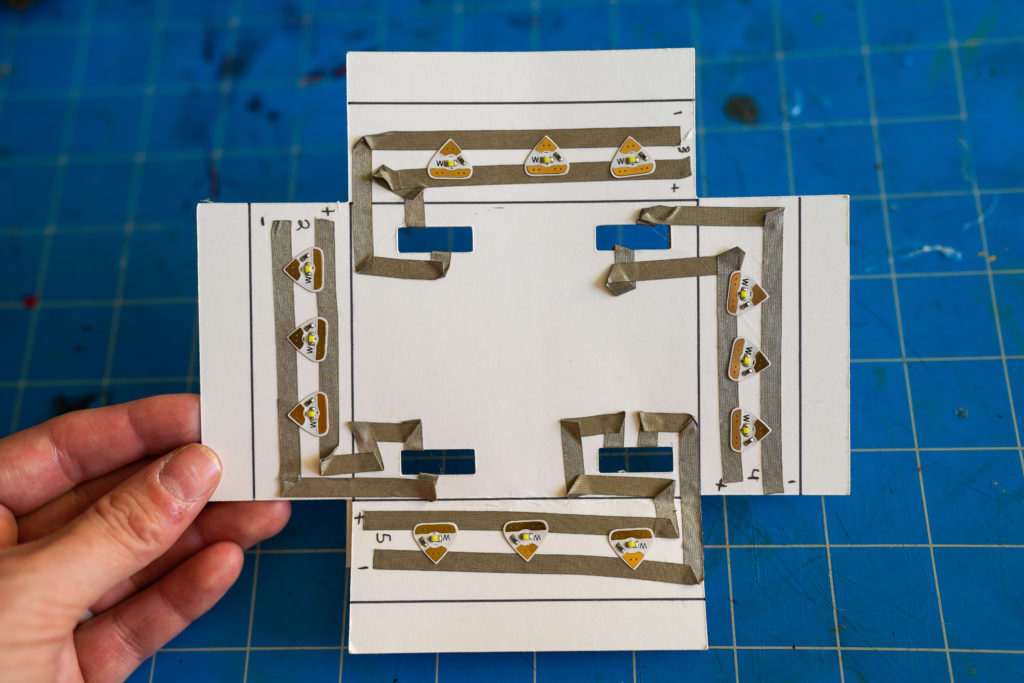
Step 4: Place the LED Stickers
Next, I placed my stickers on the inside of the nicho box. I placed three stickers on each wall. You can choose to place more stickers, or less.
Then, I connected the Chibi Chip and wrote a quick program to turn all of the lights on and make sure my circuits were working. You can also use the program I share in Step 6 to test your lights.
Tips, Tricks & Call-outs
I placed small pieces of conductive tape on top of the LED stickers to make sure that they had good contact with the circuit traces.
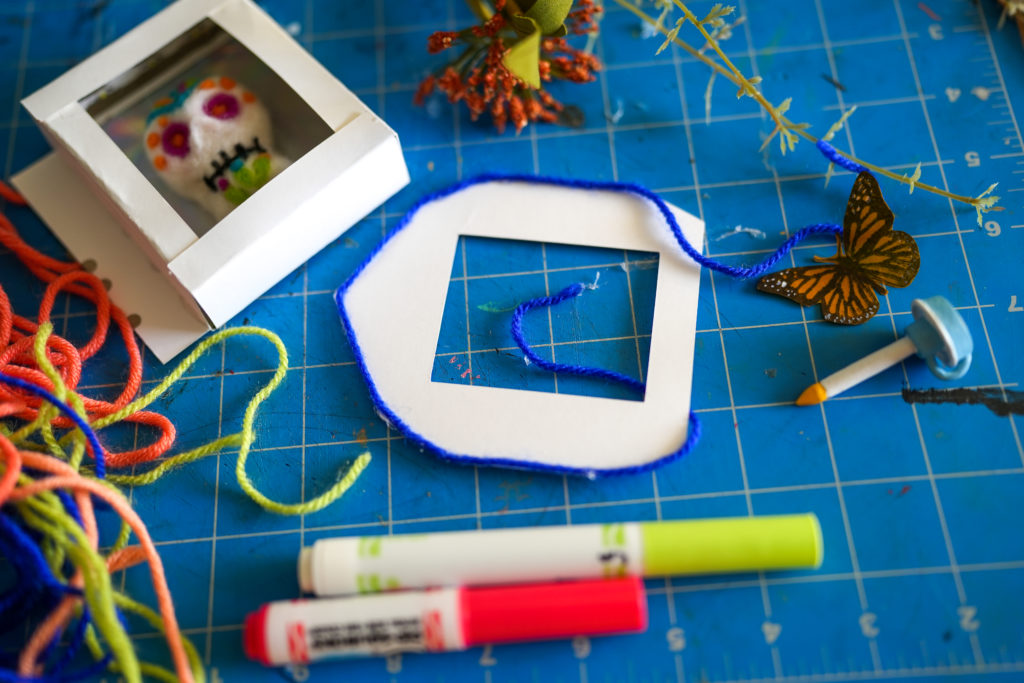
Step 5: Decorate and Assemble the Nicho
Now you’re ready to put your nicho box together! Here’s the order of assembly that I recommend:
First, decorate the inside of your nicho. You can cover the back wall of the nicho with a photograph or decorative piece of paper. You can glue decorations to the bottom or sides of the box.
Next, fold the box and glue the flaps on the front. A small dab of glue where the flaps overlap should be enough to hold the box together.
Then, decorate your nicho face. It’s easier to paint, draw, and glue things to your nicho face when it’s separate from the box.
When you’re done decorating the nicho face, glue it onto the nicho box.
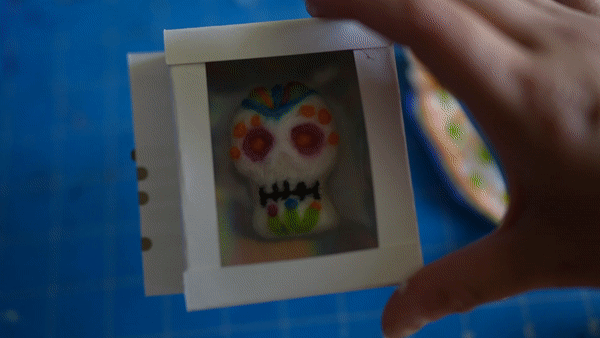
If you’re not using a Chibi Chip, this is the final step! Turn your lights on using a coin cell battery and battery pack of your choice and enjoy your creation.
(Optional) Step 6: Program Your Lights
If you’re using a Chibi Chip, now you can play with programming different lighting patterns. As you’re coding your lights, you can think about what role lights will play in the story of your nicho. Do you want to create a fun and playful animation? Something dramatic and bold? Or maybe a gentle fade on and off to create a calming effect.
Here’s one program I made. It randomly twinkles the lights on each wall on and off to create a lively animation.
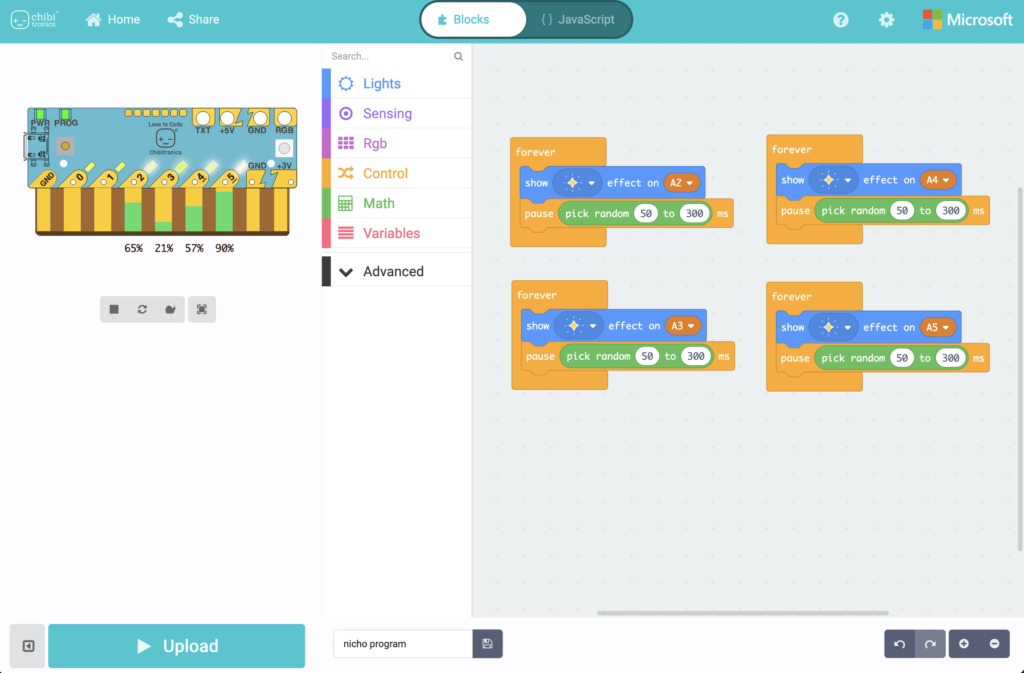
Make Code: Nicho Program
Happy making!
You can see a short video where I quickly show you how I went through these steps (in not as much detail) here.
Tips, Tricks & Call-outs
You can find more resources for exploring the Chibi Chip here. I like to recommend a “tinkering” approach where you just try things out and see what happens. What happens if you repeat an animation four times? What happens if you change the timing in a “wait” block? This is how I came up with the program I shared above.
Similar Posts You Might Enjoy
Sugar Skull Card
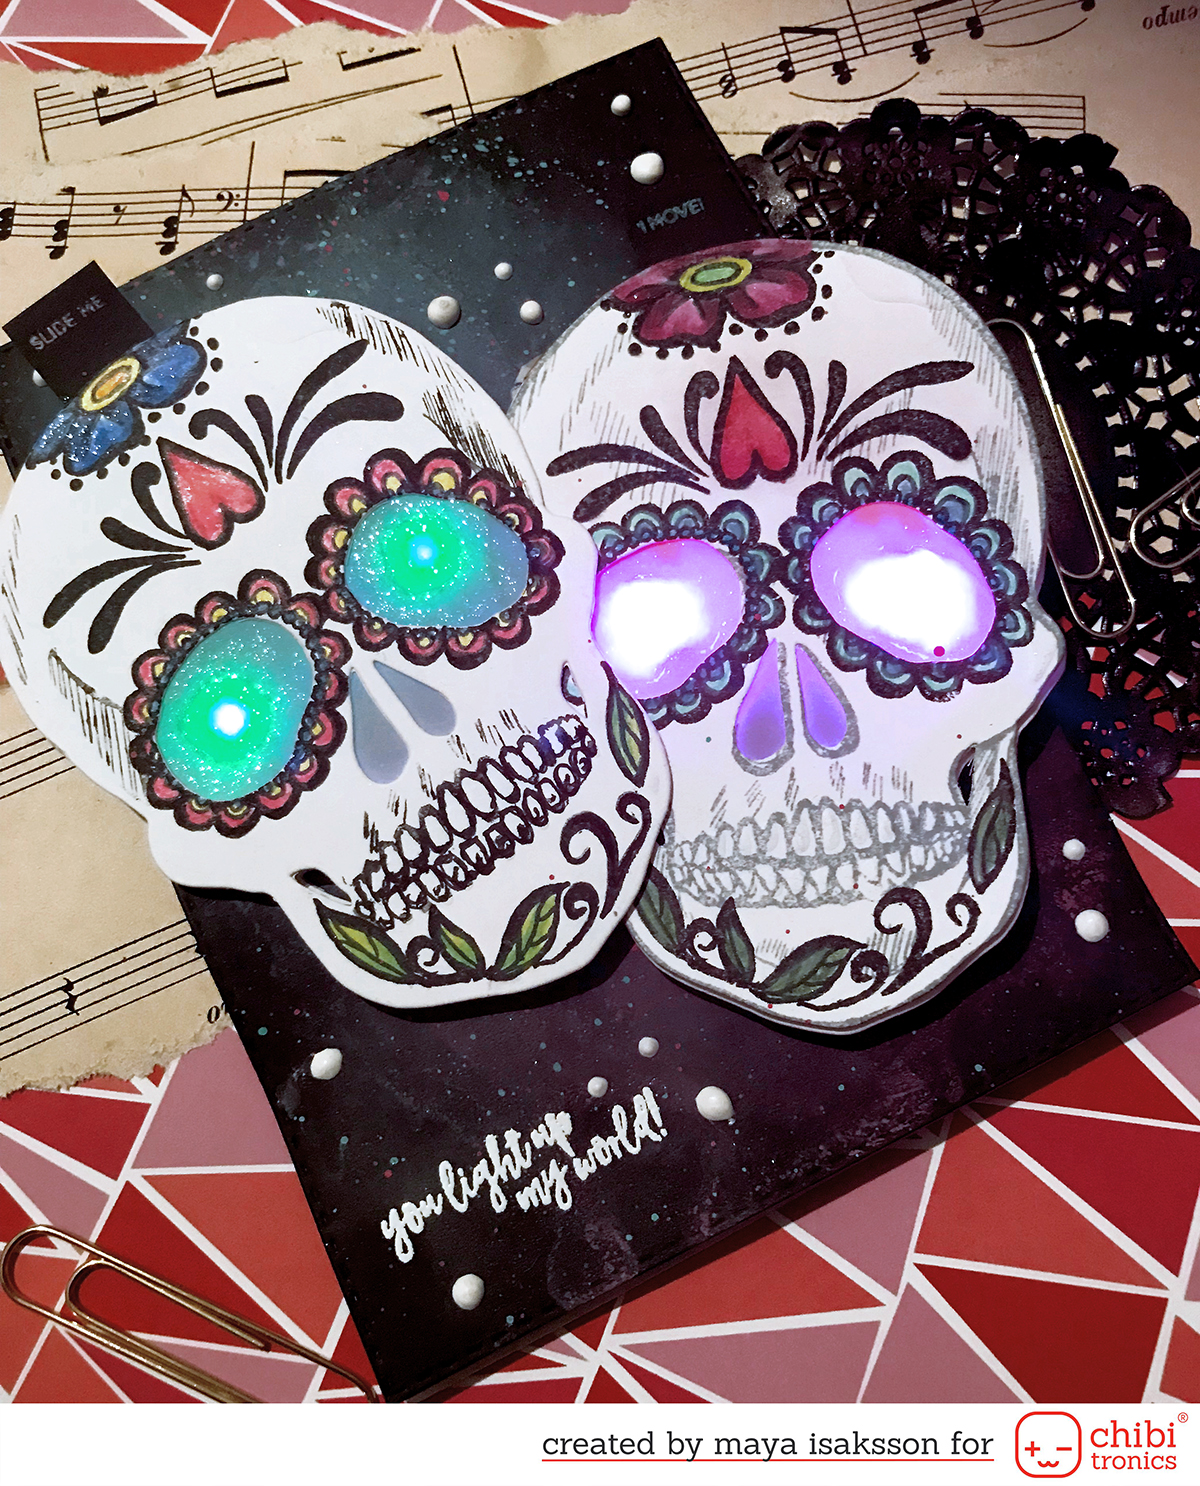
See how Maya Isaksson creates glowing sugar skulls with flashing eyes, with help from our Effects Stickers!
Calavera & Calacas
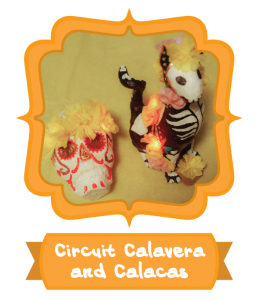
See how Lindsay Balfour documents how to make papier-mâché sculptures that combine the traditional media of papier-mâché, paper folding, and clay crafted with circuitry.
Night Light
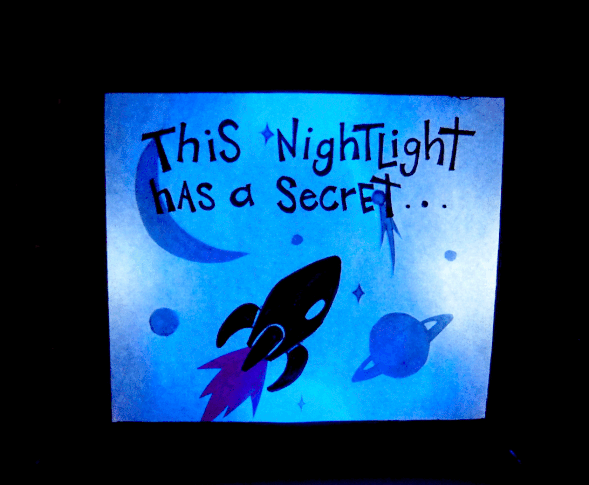
In this project, Jasmine Florentine shows how to transform an ordinary box into a night light that contains a secret message.