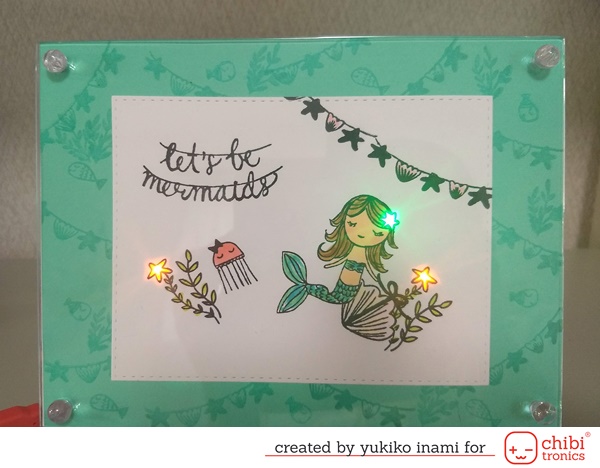
Hi there, it’s Yukiko here. It’s too hot around 33-35℃(93-96℉)every day in Japan! So I try to imagine the scene in the sea, a mermaid staying be cool. Waving with the sea wave….. Phew, feel a cool wind.
Making the Frame as a Platform for the Circuit
I used a clear photo frame for this project. I set a battery box on the backside of the frame as the power charger for the circuit. It can be changeable not only the batteries but also the circuit inside!! You don’t worry about battery power run out. And you can use this frame changing the pictures and circuits as you like.
Supplies for the Frame
・Photo Frame made of clear material;two panels and pins for fixing 4 corners
・Battery holder: If you can’t find it, you can make a battery holder with a paper using this template in the Chibitronics website.
・Coin Batteries
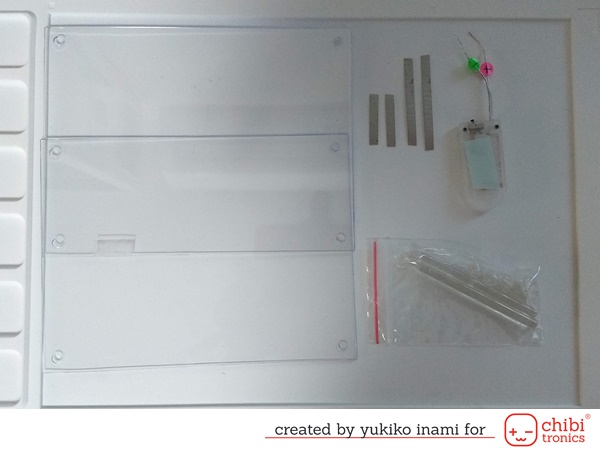
Actually, I got this photo frame at the one dollar shop in Japan. And I looked for the similar one on the online shop in the US. I found the nice one but it is more expensive than one dollar. It contains two clear plates to make a sandwich of the circuit and picture or drawing inside and fix the 4 corners with 4 screws or pins etc…
I’ll show you an example of the same type one here. If you find more good frames please share!
How to Make the Battery Power Station
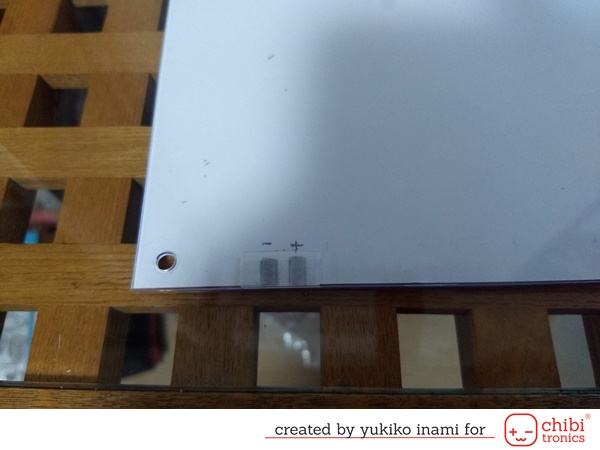
I make the power station on the frame panel surface. It means the place for connecting the circuit. The circuit and the battery power pathways meet at the backside of each other.
You can see the just place because the frame material is translucent.
Made the bank with the small plastic plate to connect securely at the site.
Stick the fabric tape* across both faces of the frame’s back panel.
*the long tape type of the fabric patch
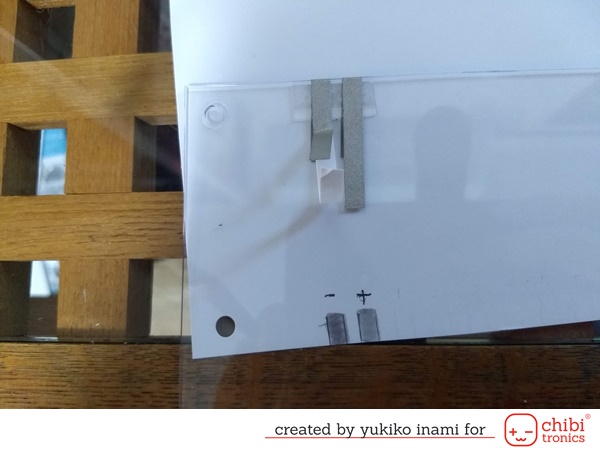
Connect the battery box wires and the fabric tape with the short fabric tape pieces.
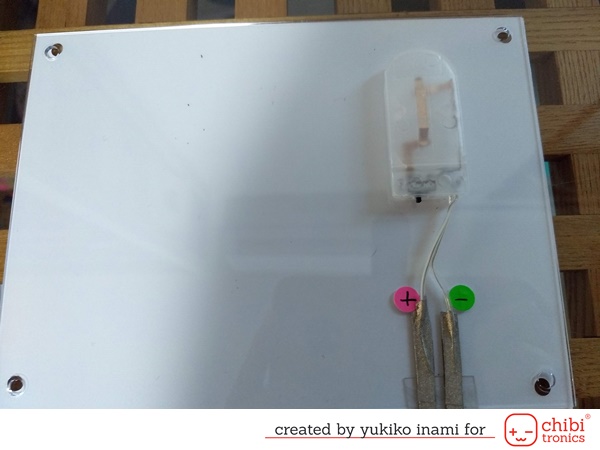
Done!
You can use this frame changing the circuits and drawing or photos. You have only to use the same place for connecting the battery power when you make a new circuit. Then the circuits can work on the same frame.
Making Your Scenes and the Circuit
Make the Scenes
OK, let’s get ready to make your scenes!
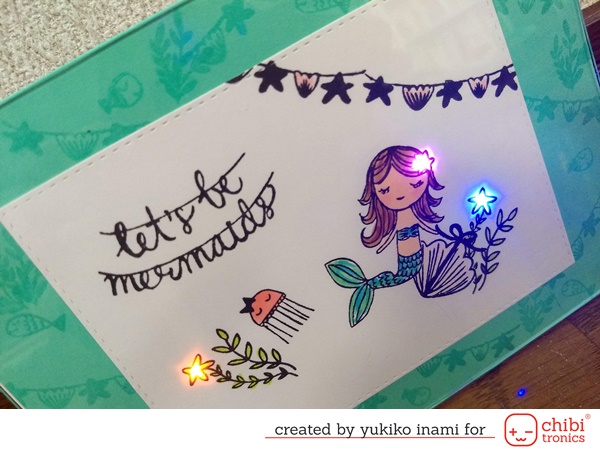
I made this one. First, I stamped the mermaid image, then stamped the shell using the masking technique. I added some images and sentiment. I chose the place for light up, the starfish on the mermaid’s hair and flowers of the seaweed. Then I cut the holes for the lights and stick the vellum paper on the backside of the panel.
I stamped small images on the teal paper with VersaMark ink for the mat for the picture.

Make the Circuit
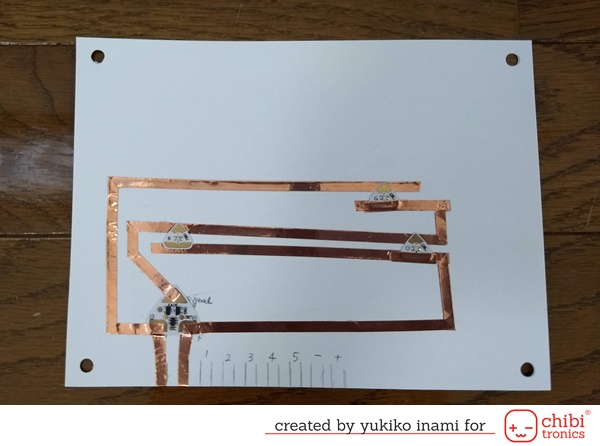
Mark the place of the LED lights.
Draw the positive circuit path starting from the place of the positive power station to the LED positive pads.
Draw the negative circuit path starting from the place of the negative power station to the LED negative pads.
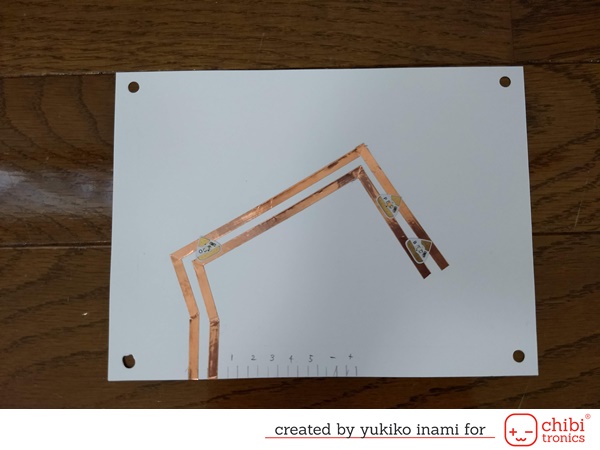
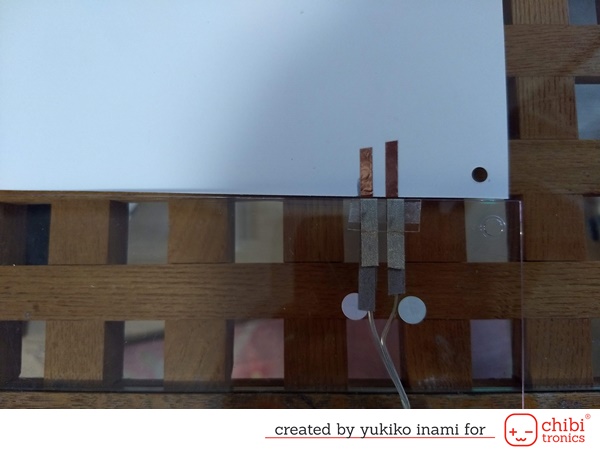
Stick the copper tape on the paths drawn. Please make sure to finish the path at the backside of the circuit panel. ( See the below photos)
As you see below, the circuit and battery power connect here, the backside of the circuit panel and the upper face of the back panel of the frame.
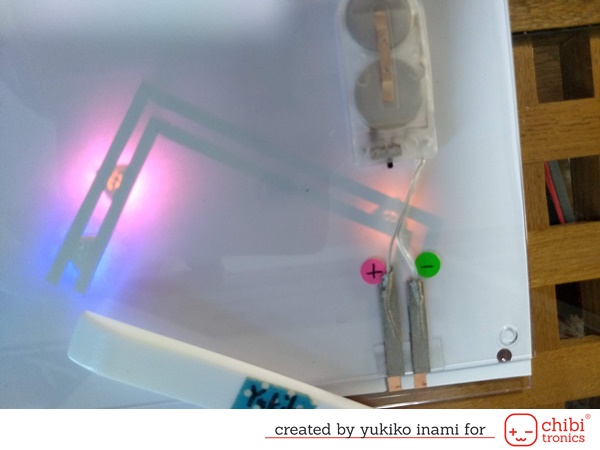
Assemble the frame setting the circuit and the picture inside it.
Switch on and shine up the scene!
The Variation of the Circuits
Using Effect Sticker
You can add the effect sticker in your circuit. It can make the effect changing the way of lightning up!
The Combination of the Circuit
It’s quiz time! How do I make the circuit showing below? You can check the answer in my blog. Please check it out!
That’s all for today. I am using this system for “ Love to Code“. I’ll try to tell you about the coding. Tune in the next month.
Thank you for stopping by. Hope you have a great summer!
Nicorin