Your First Paper Circuit: Sticker LED
This card will get you started with all the tools, materials, and concepts you need to make paper circuits!
You’ll need a template printout, one Circuit Sticker LED, some Conductive Fabric Tape, a Launchpad Battery, two micro binder clips, scissors, and art supplies of your choice.
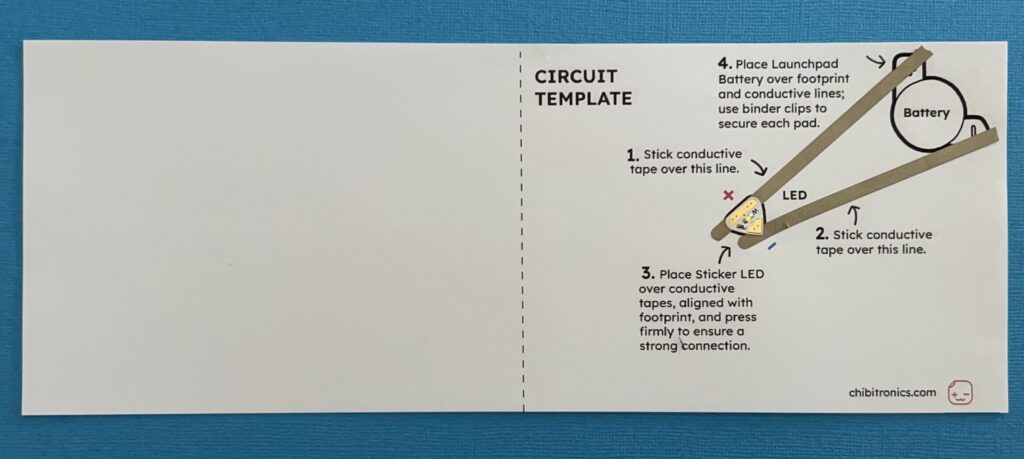
Circuit
We will use the Conductive Fabric Tape to connect a Launchpad Battery to the Circuit Sticker LED in a loop.
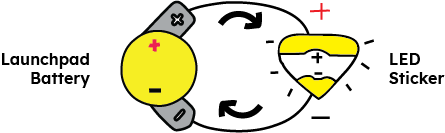
The positive “+” side of the Circuit Sticker LED needs to connect to the “+” side of the Launchpad Battery and the negative “-” point of the sticker needs to connect to the “-” side of the battery.
This continuous loop will form a complete circuit, lighting up your LED!
Materials
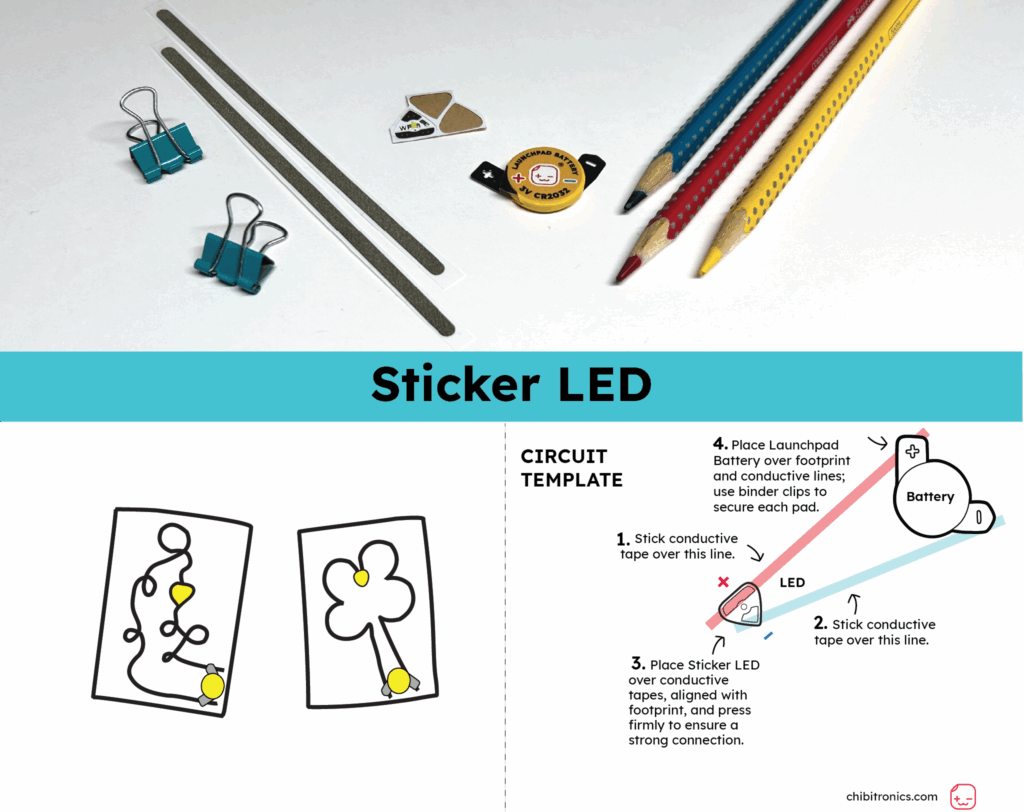
Tip: All of the materials, except for the printable template, are included in the Create with STEAM: LED Circuit Sticker Kit (Level 2)!
- 1 x Circuit Sticker LED
- 1 x 3V Launchpad Battery
- 2 x Micro binder clips (1/2″ wide, 3/8″ capacity)
- 2 x Conductive Fabric Tape Strips or 7.25″ (18 cm) of another conductive tape
- 1 x Sticker LED Circuit Template (You may print it double-sided with the explanation or only print the template.)
Directions
Step 1
Take one of the pieces of conductive tape and use the pad of your finger to start peeling it away from the paper backing.
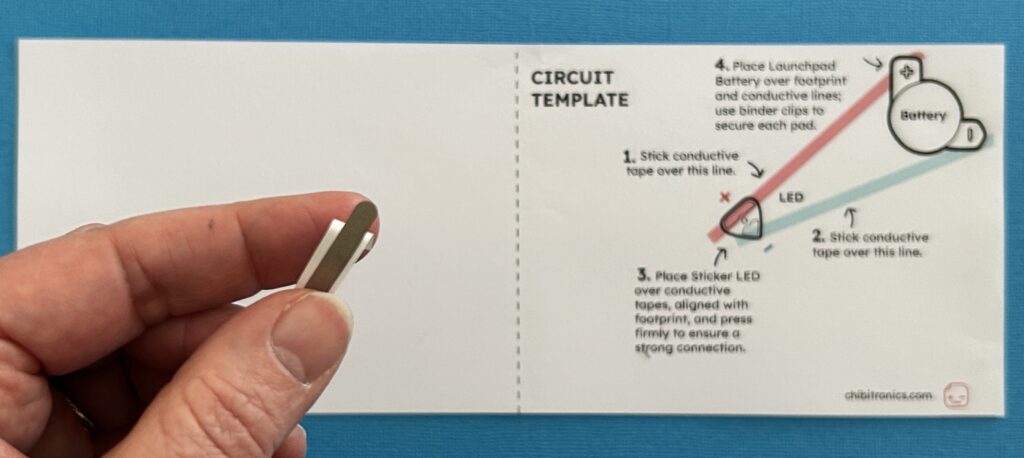
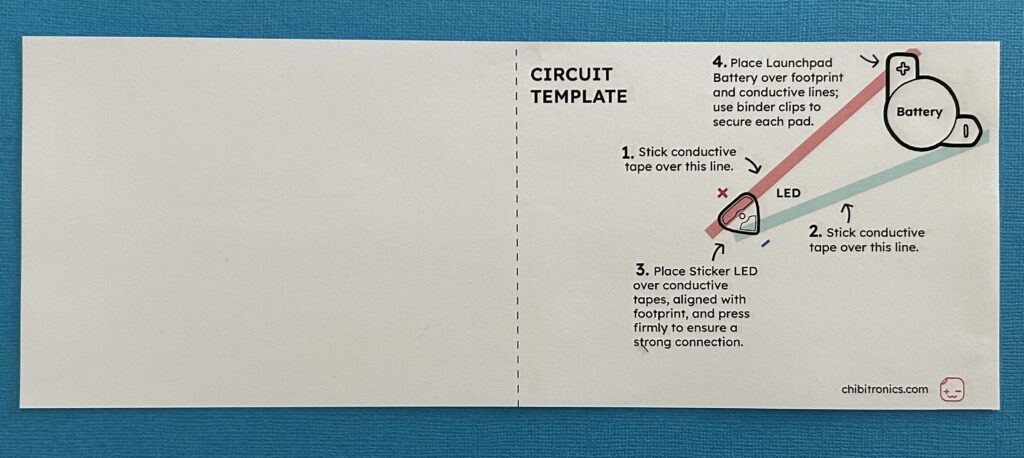
Apply conductive tape over the pink (+) line. Cut off the excess with scissors.
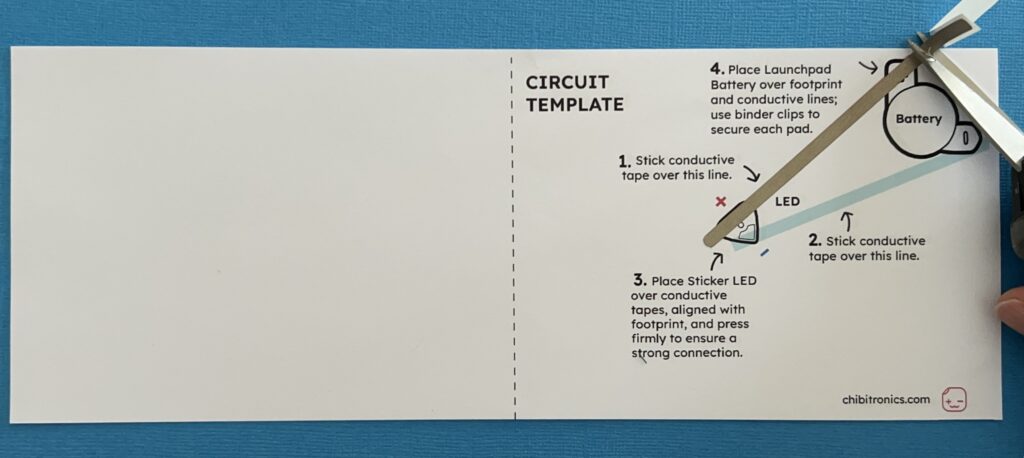
Make sure that the the conductive tape covers the entire line, going over the battery footprint.
Step 2
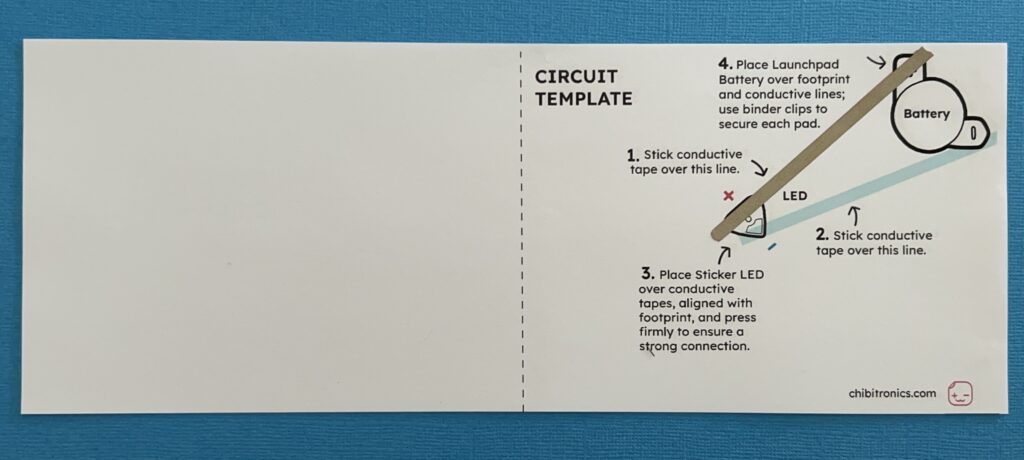
Take the other piece of conductive tape and apply it over the blue negative (-) line. Cut of the excess with scissors.
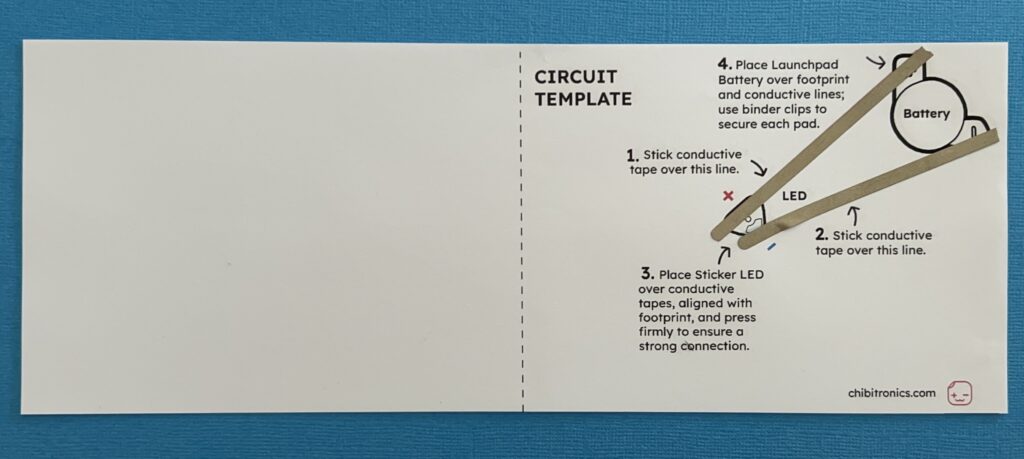
Make sure that the conductive tape covers the entire line, going over the battery footprint.
Make sure to leave a gap between the two strips of conductive tape. They should not touch one another.
Step 3
After applying conductive tape, place your Circuit Sticker LED over the LED footprint and press it down for a count of five.
To achieve the best connection, avoid touching the adhesive with your fingers as much as possible.
Step 4
After applying the Sticker LED, place your Launchpad Battery on top of the battery footprint (and the two conductive lines).
Use a binder clip to connect the positive (+) pad to the positive line of conductive tape.
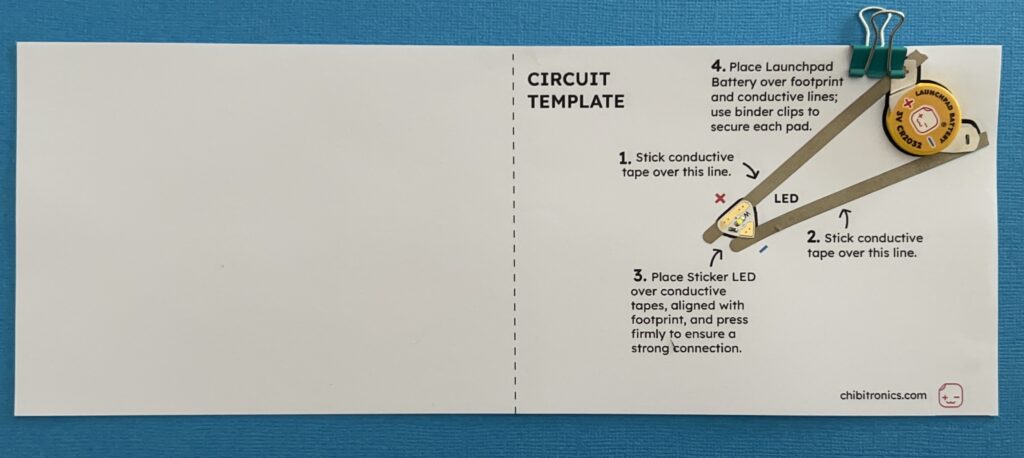
Repeat this step to connect the negative (-) pad to the negative line of conductive tape.
If desired, flip the wings of the binder clip to flatten them.
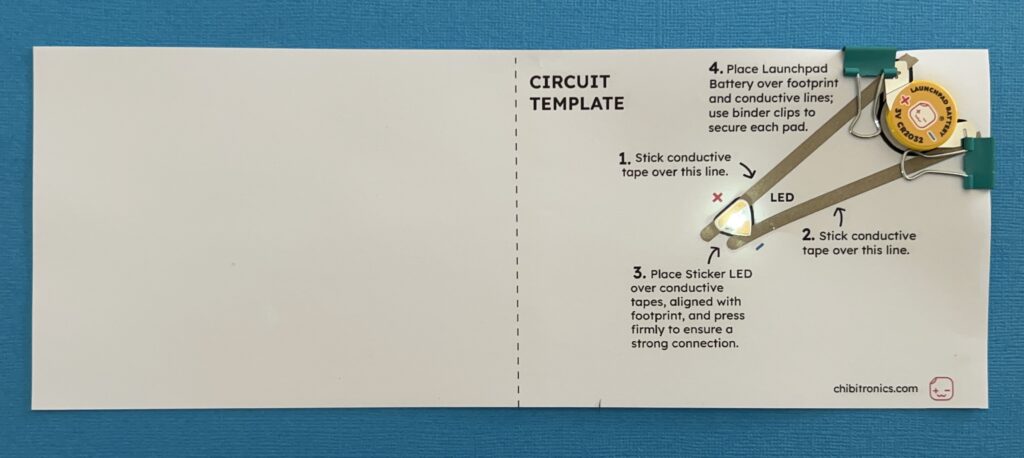
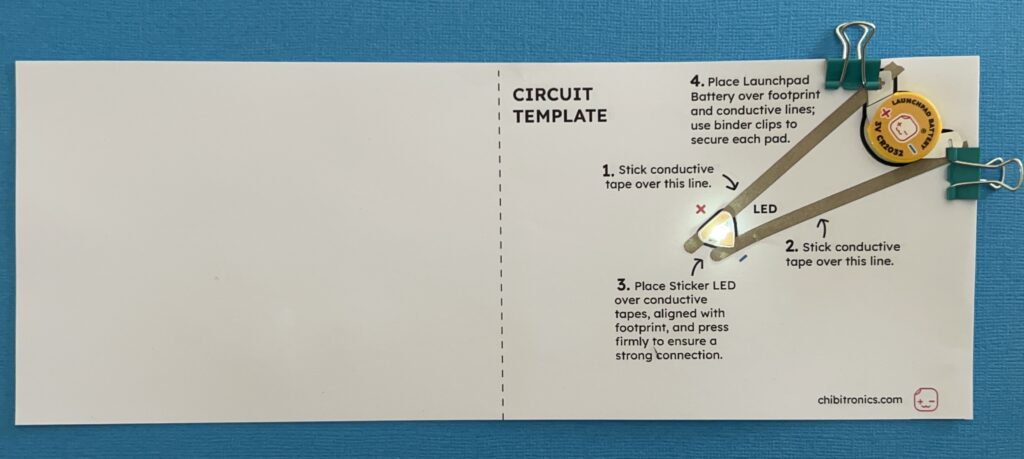
Step 5
Is your Sticker LED turning on? Excellent! If it’s not shining, don’t worry—this is common for first circuits! Try these handy troubleshooting steps:
• Is the battery facing the right way?
Make sure your battery is positioned as depicted on the template.
• Is the LED pointing the right way?
Check that the metal parts of the sticker are sitting on top of your conductive tape, positive to positive (wide side of triangle) and negative to negative (pointed side of triangle).
• Is the LED sticker stuck down firmly?
Press down on your LED Sticker for a count of five seconds to ensure a good connection.
• Still not working?
If that doesn’t work for you, check out our more detailed Troubleshooting Guide.
Step 6
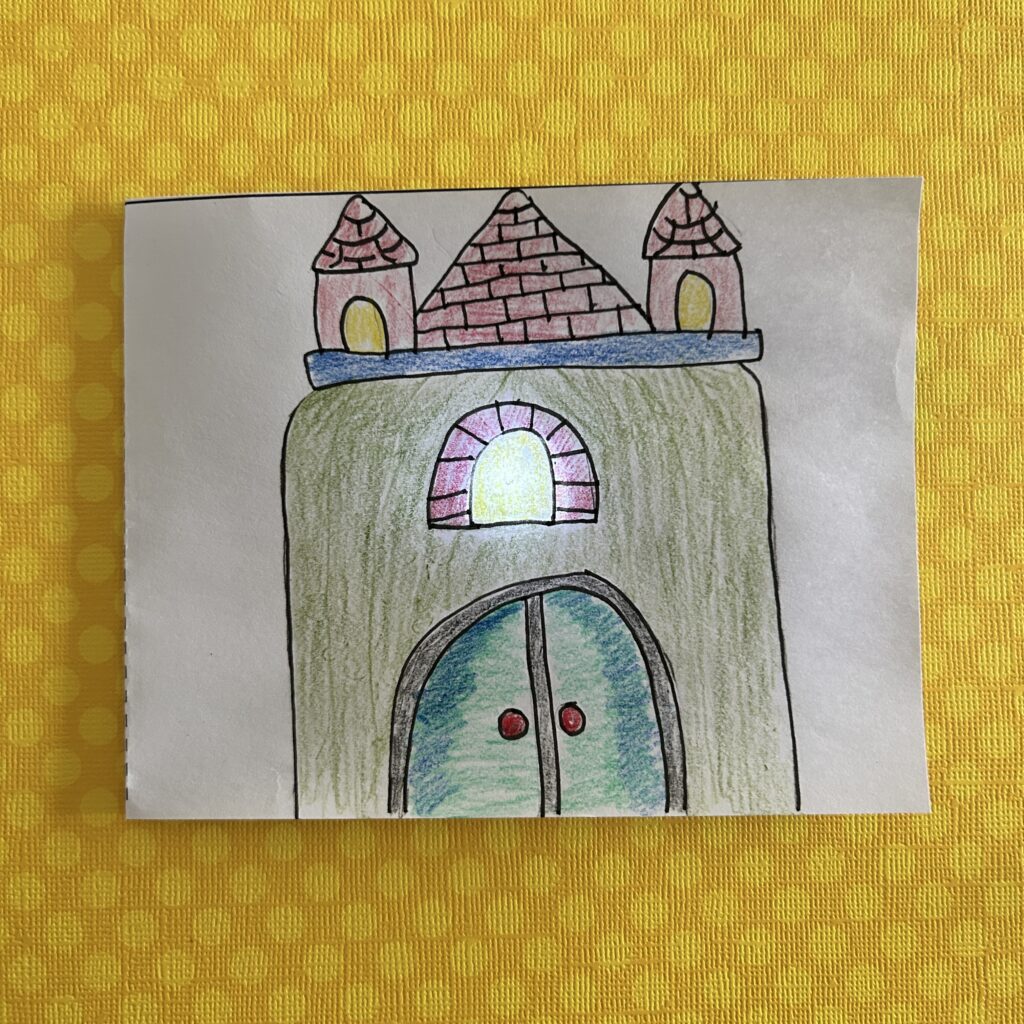
Fold the left half of your template over to the right so that it covers the circuit and your light shines through the paper.
Now you can decorate the blank page and use your LED to tell a story or illuminate your artwork!
Hooray! What’s next?
Check out the Circuit Sticker Sketchbook to learn more circuit-building ideas and techniques, or Love to Code to program your LED.