The best thing about Chibi light is that it is a light sticker. Don’t we all love crafting with stickers? It’s a great medium to create quick, easy and aesthetically pleasing projects. One needs to just peel, place and press to create delightful craft magic. Ever wondered how you can make your own stickers at home? We found a great way to create craft stickers with Xyron Creative Station, a neat tool to apply adhesive to your projects quickly and easily. It also lets you make magnets.
Here are some project ideas to integrate sticker and magnet based craft with our Chibi lights.
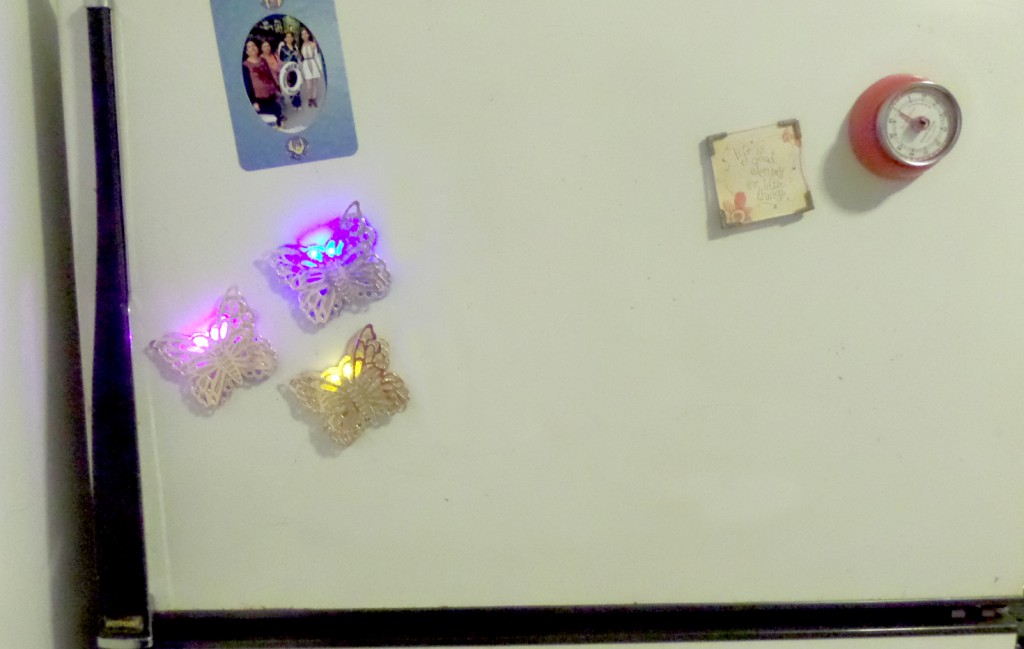
Refrigerator Magnets
This is a tutorial on how to make light-up decorative refrigerator magnets with Chibi lights using Xyron Creative Station.
MATERIALS AND TOOLS
- Chibi Lights in different colors
- Copper tape
- 3V coin cell battery (CR3032)
- Xyron Creative Station with Laminate+Magnet and Permanent Adhesive refill cartridges
- Felt Fabric Pieces
- Die cut designs
- Pens
- Glue Dots
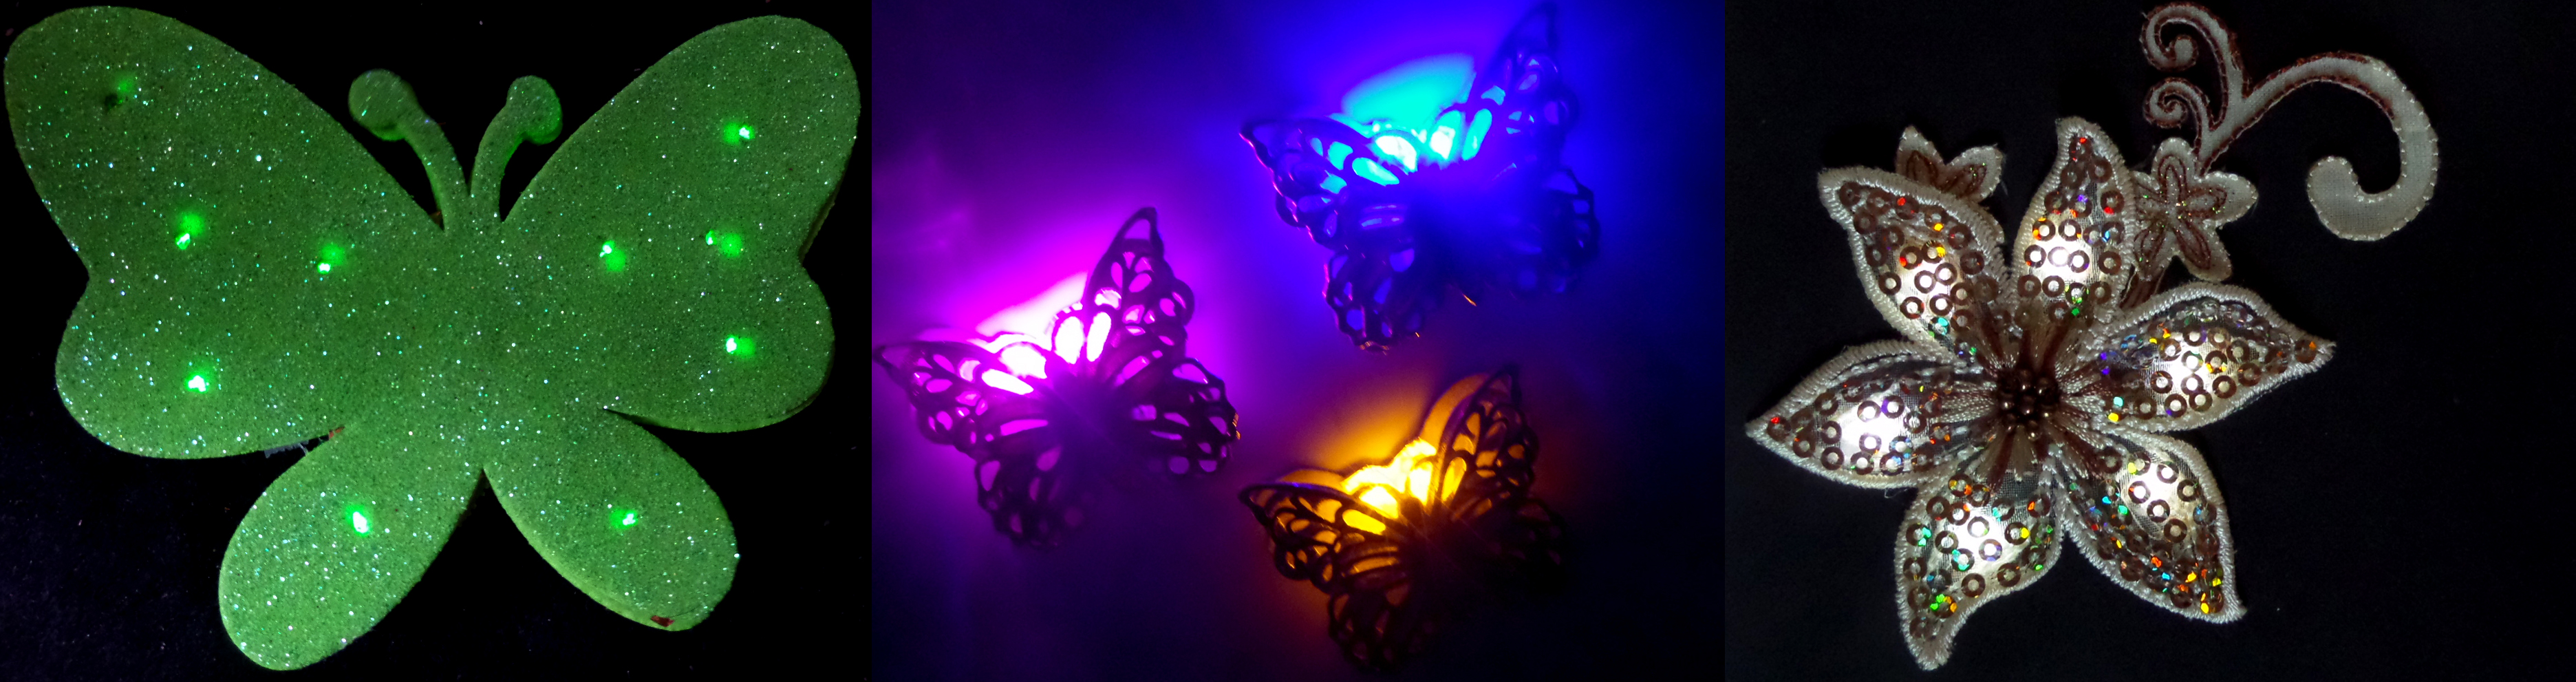
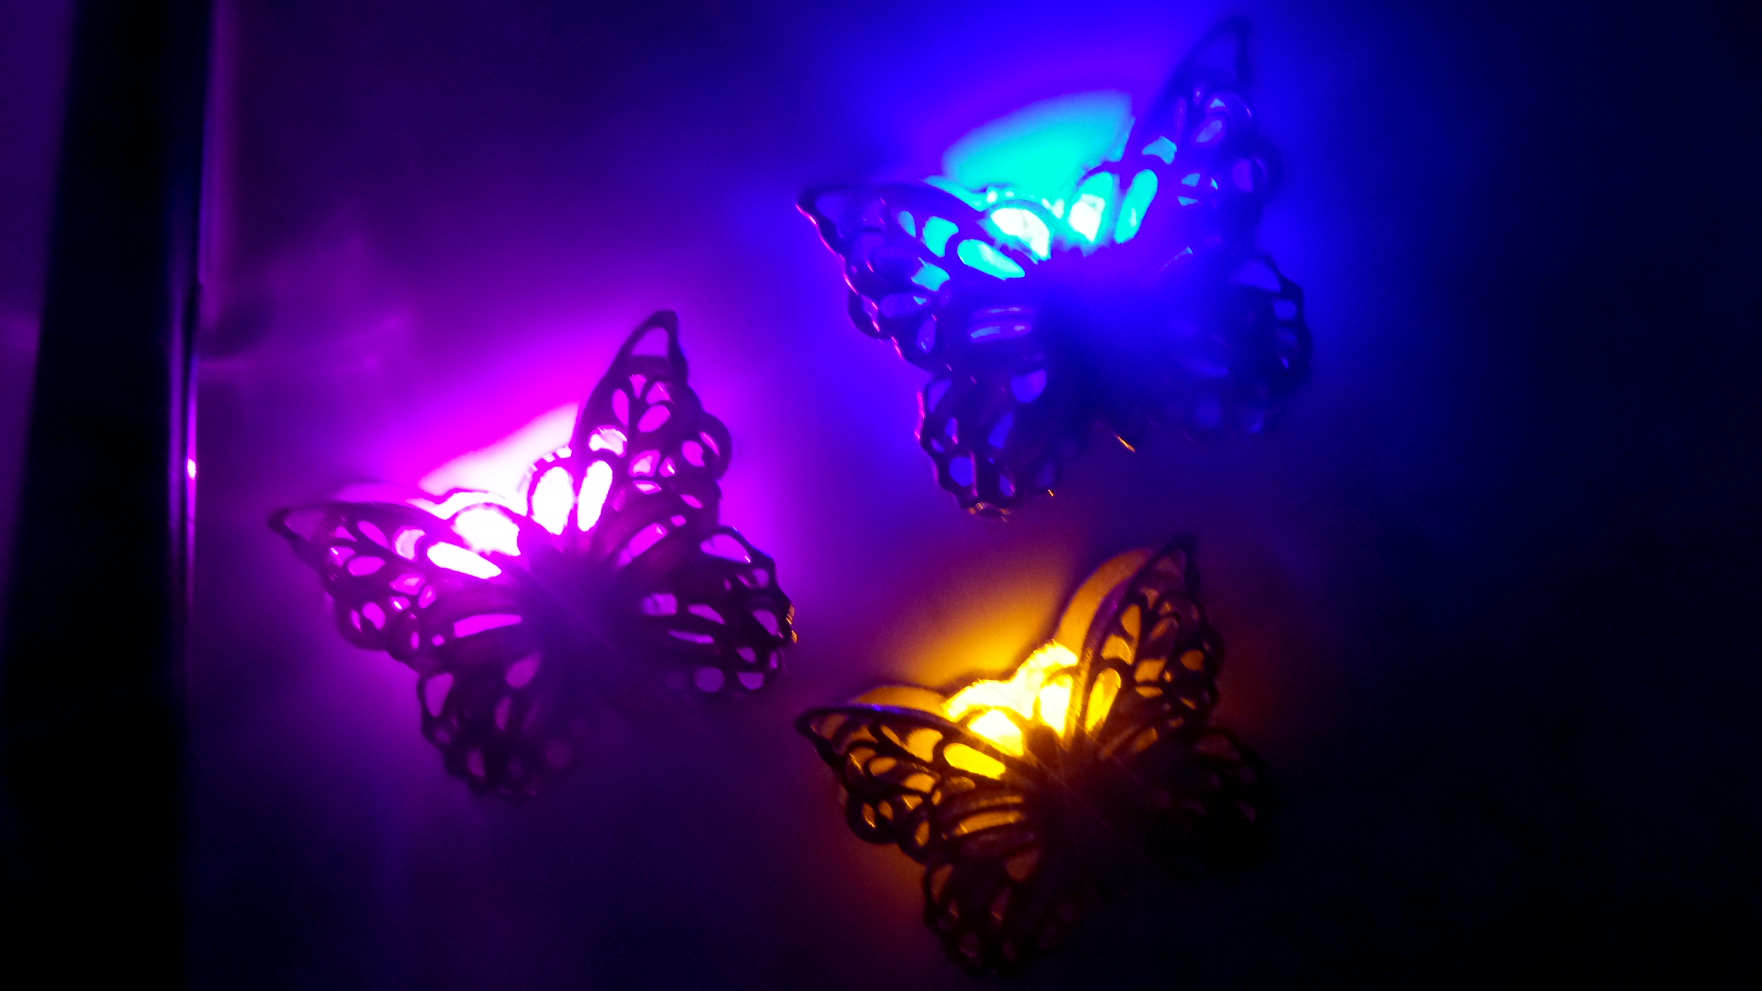
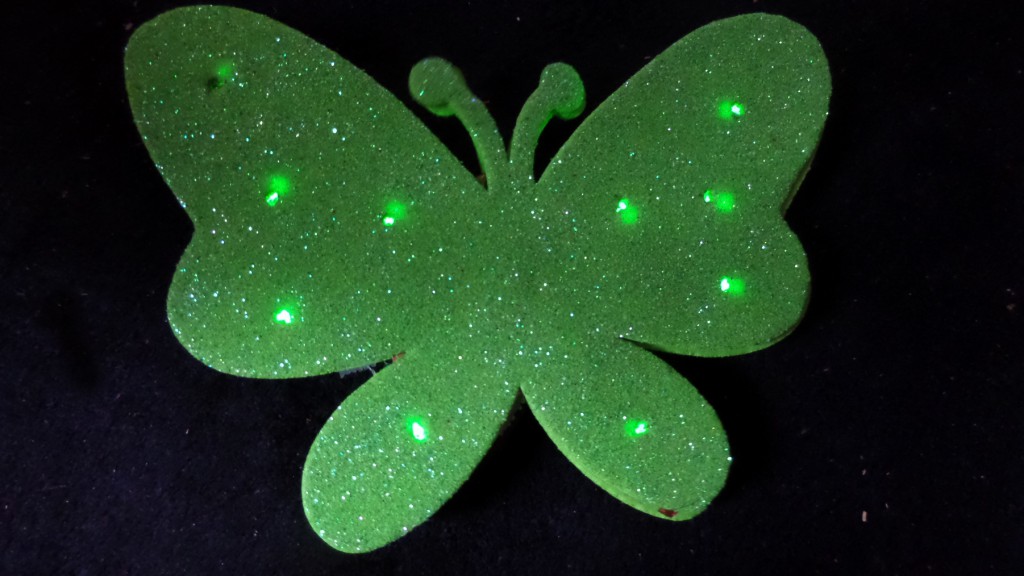
This project uses butterfly shaped glitter and foil die cuts that were bought from a local craft store. You can choose any design that you like. You could also make your own design by drawing and cutting with scissors
Step 1: Take your die-cut and trace the shape on to the felt fabric. Cut the traced image with scissors.

Step 2: Load the Laminate+Magnet refill cartridge in the Xyron Creative station. Here is a great demo video of the Xyron Creative Station.
Step 3: Add magnet backing to the felt cut-outs using the Creative Station.
- Place the felt cut-outs on the feed tray and gently guide the, forward through the back of the machine while turning the handle clockwise. Press down and slide the cut blade across cut bar.
- Cut the laminated and magnetic felt pieces. Do not throw away the leftover magnetic sheet scraps. You could use them to make a battery holder. Here is a tutorial to create sheet magnet battery holder.

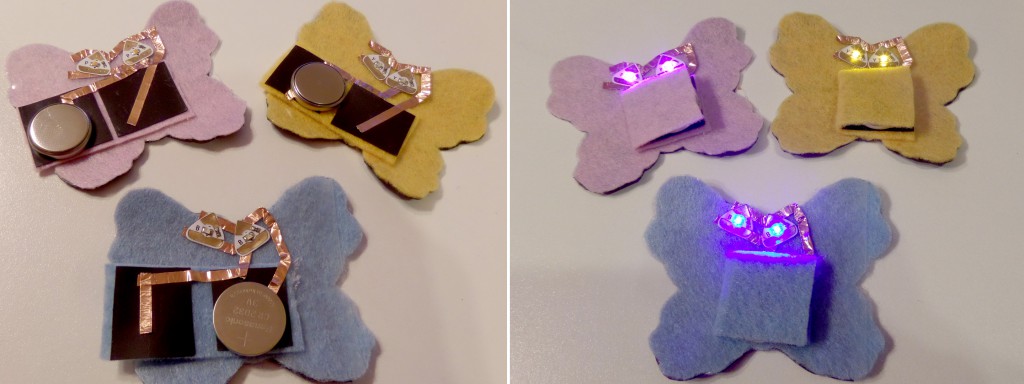
Step 4: Add the circuit
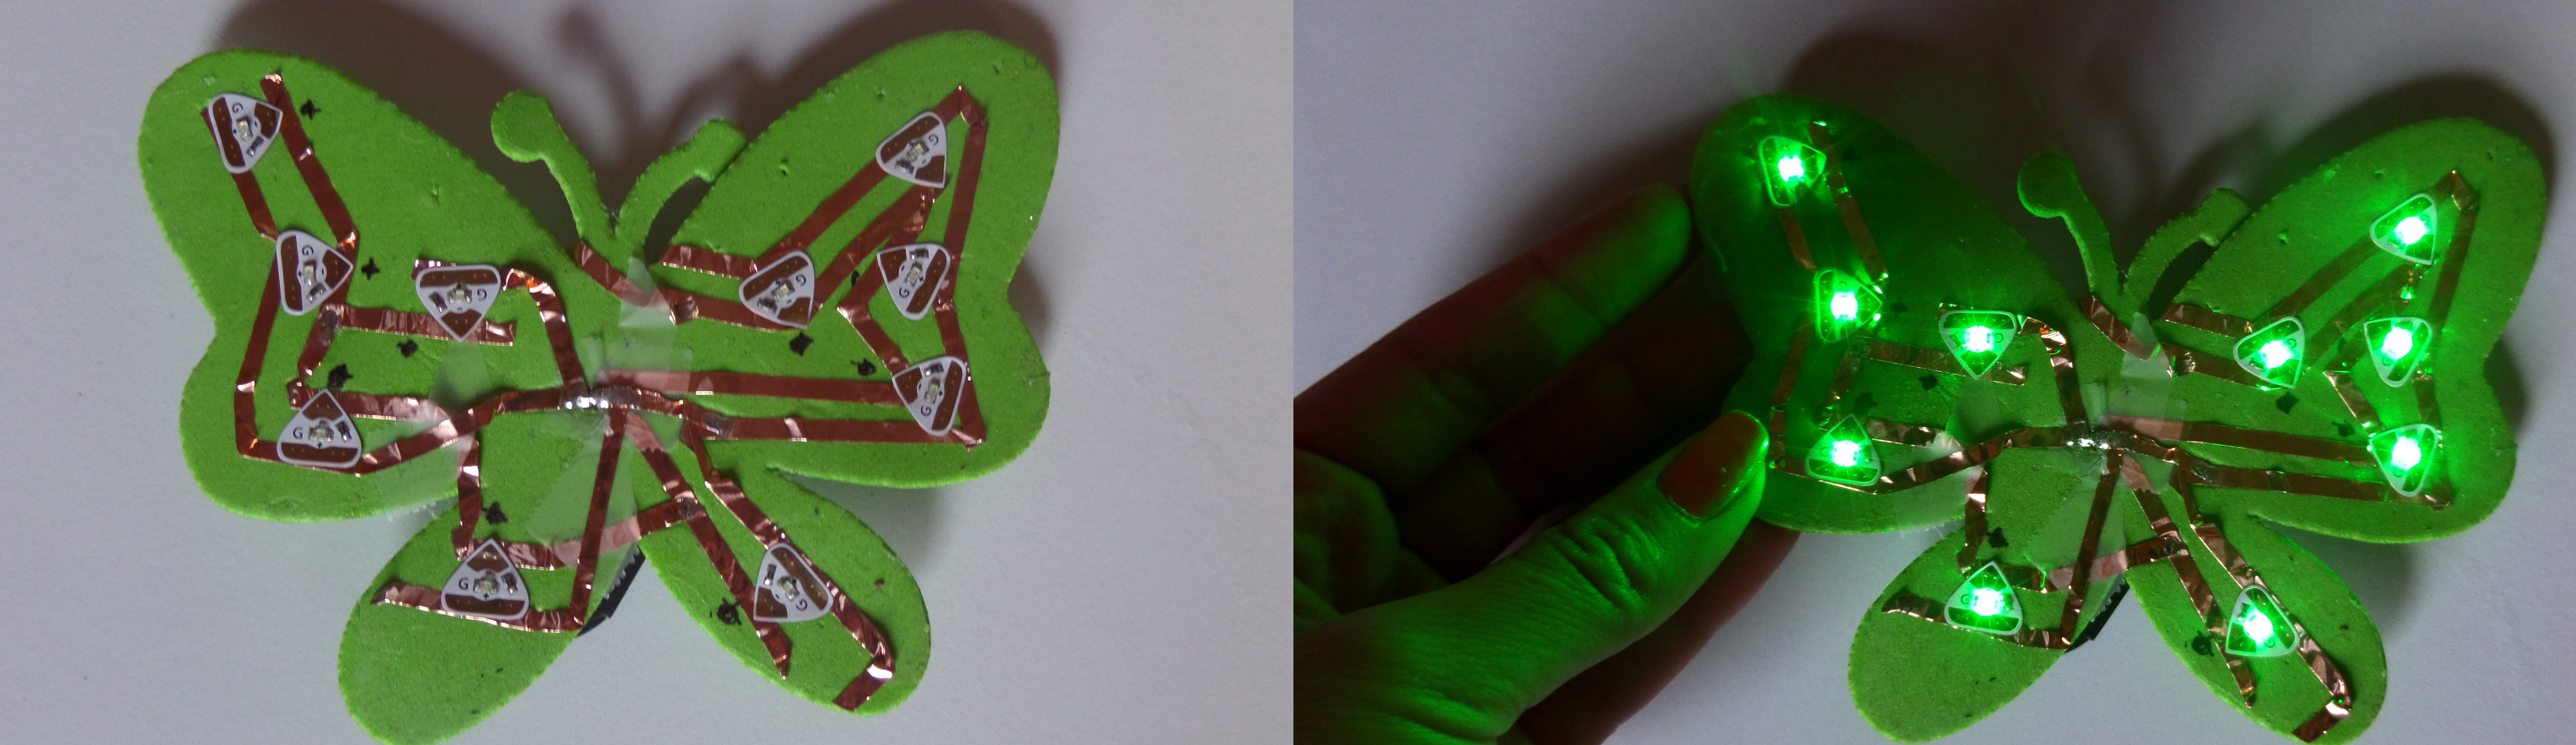
- Make the circuit on the laminated felt layer and add lights.
- Attach the magnetic sheet battery holder to the felt layer using glue dots.
- Power the circuit with a 3V coil cell battery

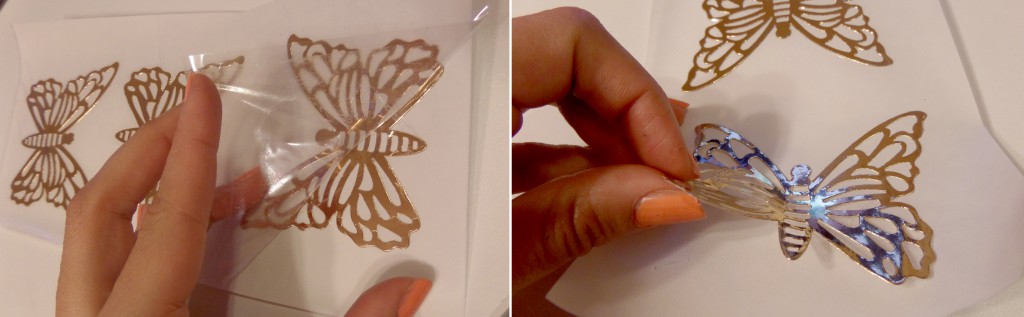
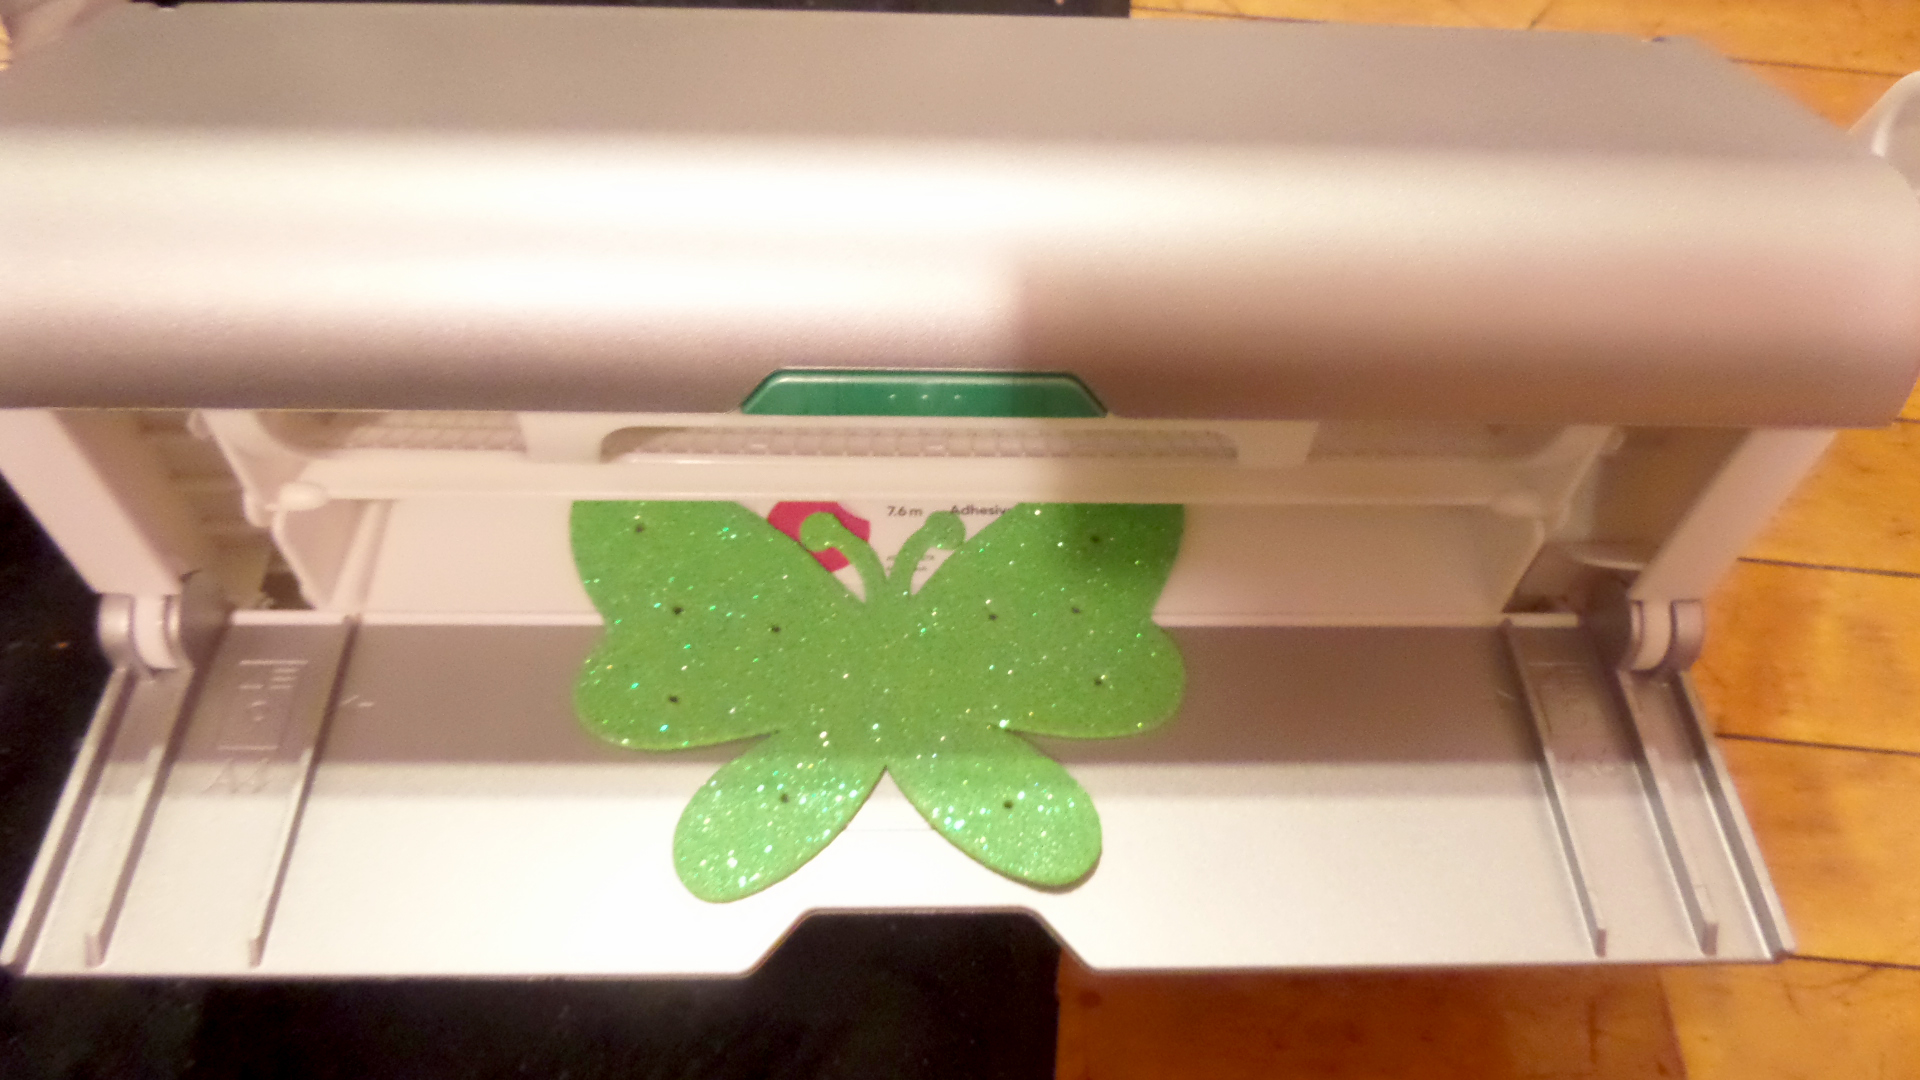
Step 5: Add sticky backing to the butterfly die cuts using the Creative Station.
- Load the Permanent Adhesive refill cartridge in the Creative station
- Place the die cuts on the feed tray and turn the handle clockwise. Press down and slide the cut blade across cut bar.
- Peel the plastic off and lift the die cuts gently. The die cuts now have sticky backing.
Step 6: Stick the die cuts on the base magnetic fabric layer with circuits.
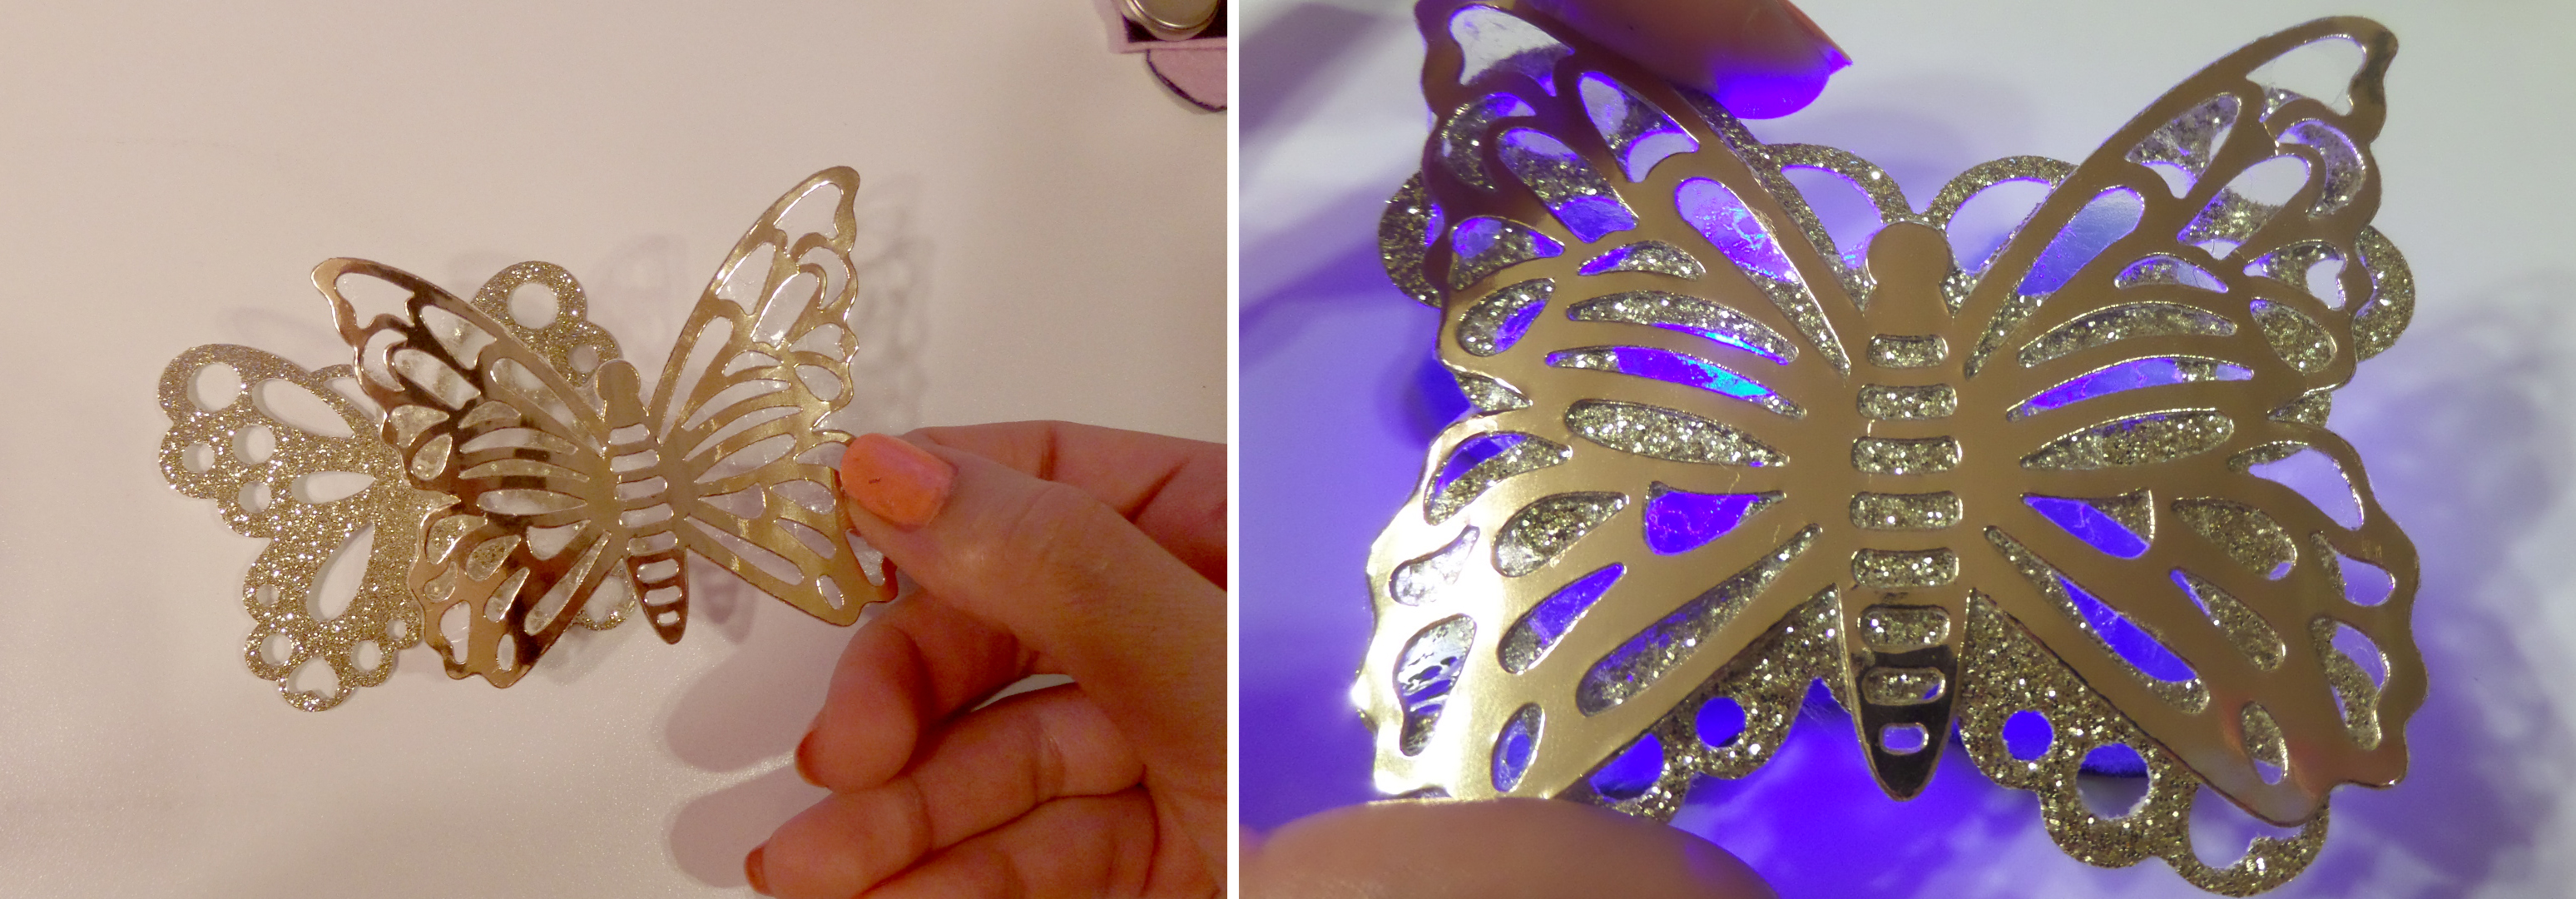
And you are ready! Put the lovely handmade light-up butterflies on your refrigerator.
Moving Butterfly with a vibration motor and lights
This project uses a vibration motor and lights to make a moving creature. Two pieces of foam sheets are used and the circuit is sandwiched between the two pieces. Xyron Creative Station is used to stick the two pieces together using permanent adhesive.
MATERIALS AND TOOLS
- Chibi Lights
- Copper tape
- Two 3V coin cell battery (CR3032)
- Coin cell battery holder with a switch
- A flat vibration motor
- Two pieces of glitter foam sheets cut in the shape of a butterfly
- Xyron Creative Station with Permanent Adhesive refill cartridges
- Glue dots
Step 1: Take one piece of glitter foam sheet and mark points where you want to place the lights.
Step 2: Use copper tape and chibitronics LED stickers to make a circuit with multiple lights. Extend the positive and negative terminals to the back of the sheet to connect them to the battery holder.
Step 3: On the back side, attach the battery holder to the center with glue dots. Add the batteries to the battery holder and tape the wire to the positive and negative terminals of the copper tape. You could either tape them to the wire or use a soldering iron to attach the terminals to the battery holder wires.
Step 4: Switch on the battery to light-up your circuit. You can switch it off again and continue working on the project.
 This is the bottom layer of your project.
Step 5: For the top layer, take another piece of the glitter foam sheet and mark the points that are aligned with the lights on the bottom layer. Punch holes through the top layer.
Step 6: Add sticky backing to the top layer butterfly using the Creative Station.
Step 7: Place the sticky layer on top of the base circuit layer and press firmly
Step 8: Attach a vibration motor on top of the battery holder. Connect the motor wires to the battery holder wires. The vibration motor is placed at the bottom of your creature.
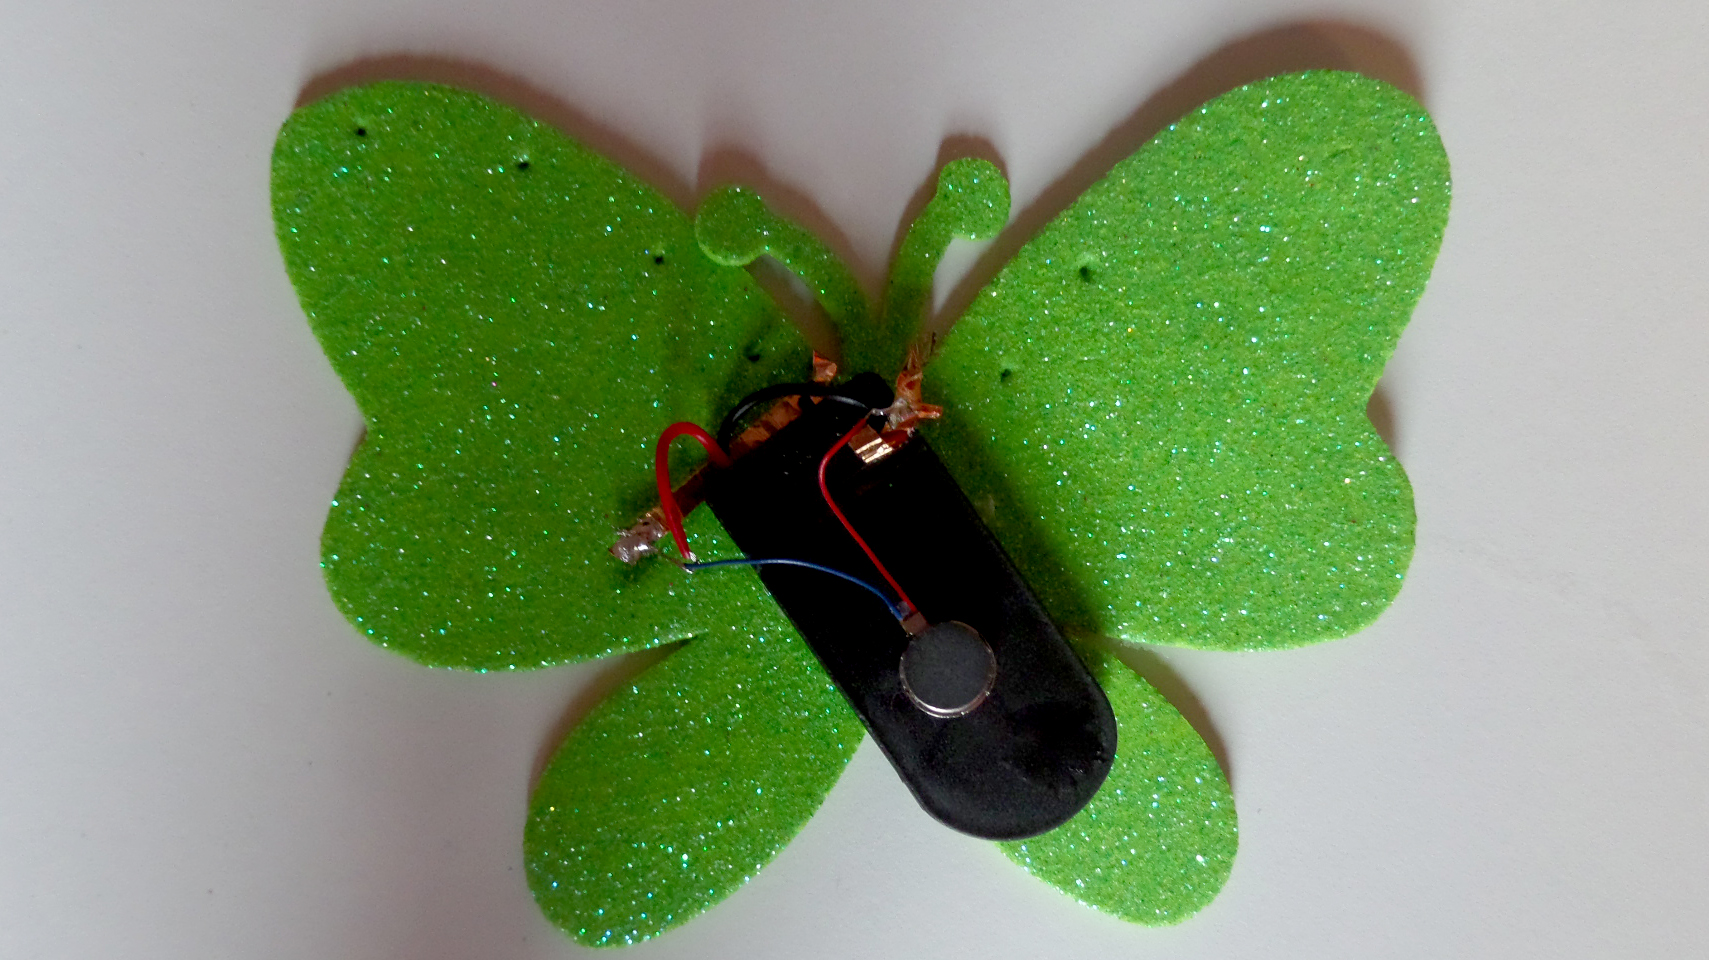
And you are done! switch the battery on again and place the creature on a hard smooth surface such as a table or hardwood floor. The butterfly lights-up and moves in circles.
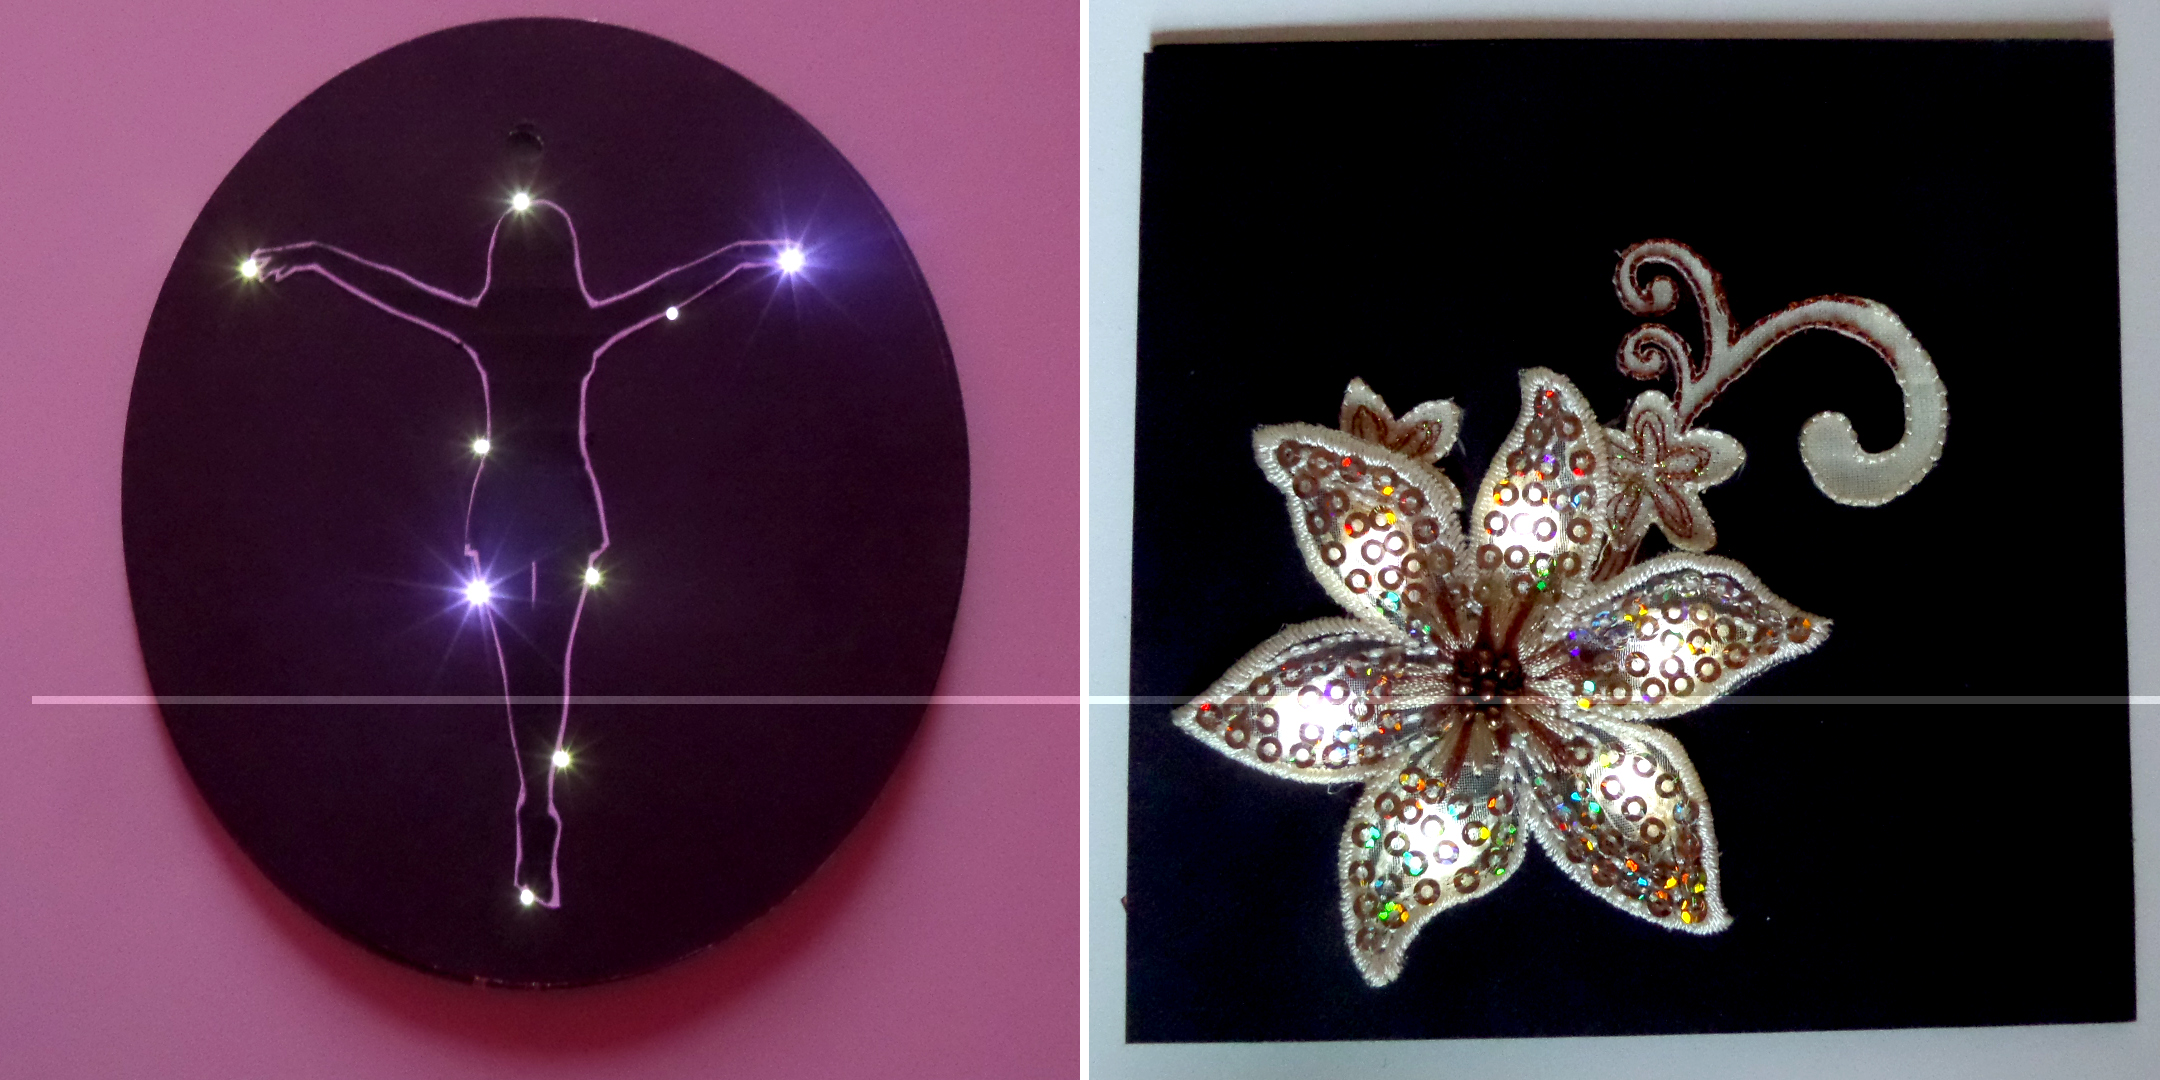
Light-up cards
With Xyron Creative Station, stickers can be made with any material. We continued experimenting with paper and embroidered patch to make simple greeting cards using some of the techniques explained earlier in this post.
One thought on “Decorative project ideas with Xyron Creative Station and Chibi Lights”
Comments are closed.