We’re excited this month to introduce rockstar maker/educator/librarian Colleen Graves. Colleen has been sharing all sorts of wonderful ideas and resources for making with technology and how to set up spaces that nurture such creativity!
1. What is your story?
I’m Colleen Graves, I’m a Maker, a Teacher, and a Librarian. I started using Chibitronics notebooks during the 2014-2015 school year when I realized that I needed to “make” room for girls in my makerspace at the middle school where I worked at the time. I wrote a Donors Choose grant and was able to start a girl’s tech group called “Circuit Girls.” Every week for the rest of the semester, the girls and I learned about circuitry by creating circuitry art in Jie Qi’s awesome Circuit Sticker Sketchbook.
We learned about simple circuits, parallel circuits, and even DIY Pressure sensors. I love how easy Chibitronics Circuit stickers are to use, so my husband and I included an entire chapter on Paper Circuits in The Big Book of Makerspace Projects (Publishing early this fall!) While we do have some projects with regular LEDS, the majority of projects in our paper circuit chapter use Chibi stickers because we love them so much! My husband Aaron designed the art for these projects and I designed the circuit templates. In just under a year, I went from learning about circuits to teaching others how to make interactive art that will light up their own writing!
I’m also very passionate about helping others incorporate long-lasting makerspaces into their schools and utilizing maker tools to their highest potential. Because of this, I’ve written lesson plans for Makey Makey, a Librarian’s guide for littleBits, and as I mentioned above, I just finished co-authoring the Big Book of Makerspace Projects with my husband. We are now wrapping up Challenge Based Learning for School Library Makerspaces co-authored with Diana Rendina and about to start writing an entire book of Makey Makey projects!
2. What are the things you like to make?
I’ve always loved making crafts, sewing, knitting, etc, but my newest obsession seems to be CIRCUITS! I’ve heard from others that I have a love of circuits, but for me, it is really about integrating electronics into these low-tech craft ideas I’ve been making for years. I’m infatuated with wearables and sewing circuits because I’ve always loved making and sewing my own distinctive clothing. Now, I’m able to take my own weird clothes and add LEDS and other interactive elements. I also enjoy creating unique interactions with Scratch and Makey Makey because this type of making boosts my creative confidence, it’s easy, and it’s super fun. Plus, I adore paper circuits because they taught my brain more about circuitry and have helped me level up in my maker skills!
Whenever I host a workshop for other educators, I share Chibitronics templates because paper circuits are an excellent way to start learning about circuitry! Then if desired, students can go even further by learning to sew circuits, or go even further by exploring Arduino microcontrollers to create soft circuit wearables or stuffies. (Yep, we have a chapter dedicated to sewing circuit projects in our book too!)
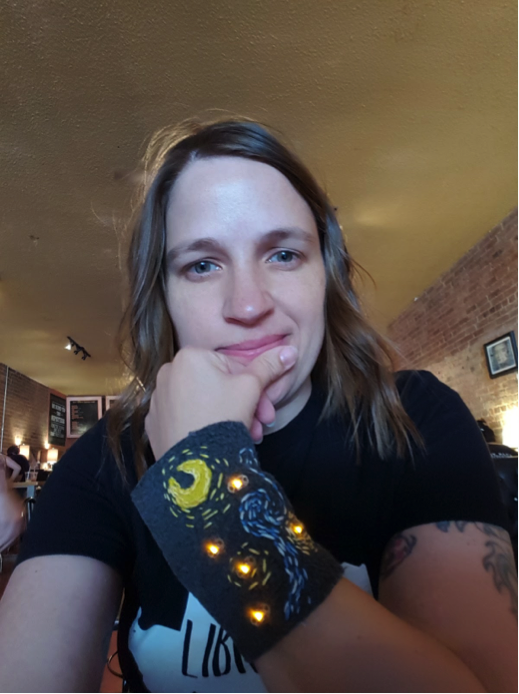
Here is a wearable I made to wear at the Capitol Hill Maker Faire (because you know…. how could I NOT make my own bling for such an affair??):
What is your current project?
I’ve been tinkering a lot with Arduino and capacitive touch. I’d like to integrate this with some paper engineering so I can make more three-dimensional and interactive paper circuits. After we get done with our Makey Makey book, I’m hoping to create an entire book on paper circuits and another book on wearables (see above where I say I’m obsessed with sewing circuits!) So right now, I’m focused on creating Makey Makey projects, but am also tinkering and brainstorming some ideas focused on paper circuitry and sewing circuits!
How would you describe your creative making process?
I thoroughly enjoy following projects made by others. I find that hacking and changing a project written by someone else really helps me solidify concepts my brain makes when making. I often try to mash up three different projects to come up with something new, but I also think I do that because I like to see what happens when I mash different ideas together. Other times, I really like assigning myself creative constraints because then I’m forced to make something outside of my comfort zone (like the capacitive Arduino/Neopixel ring tinkering mentioned above!) I might constrain myself by concept, or material, or theme. Recently, I created a littleBits project, but I limited myself to ONLY using the materials that come in the littleBits Arduino kit. Originally, I wanted to make a song, but the kit doesn’t come with a speaker. So I was forced to create something new and I taught myself how to add an “if/else” statement to an existing Arduino sketch. Something I really wished I knew how to do when I started playing around with Arduino in 2014.
What inspires your making?
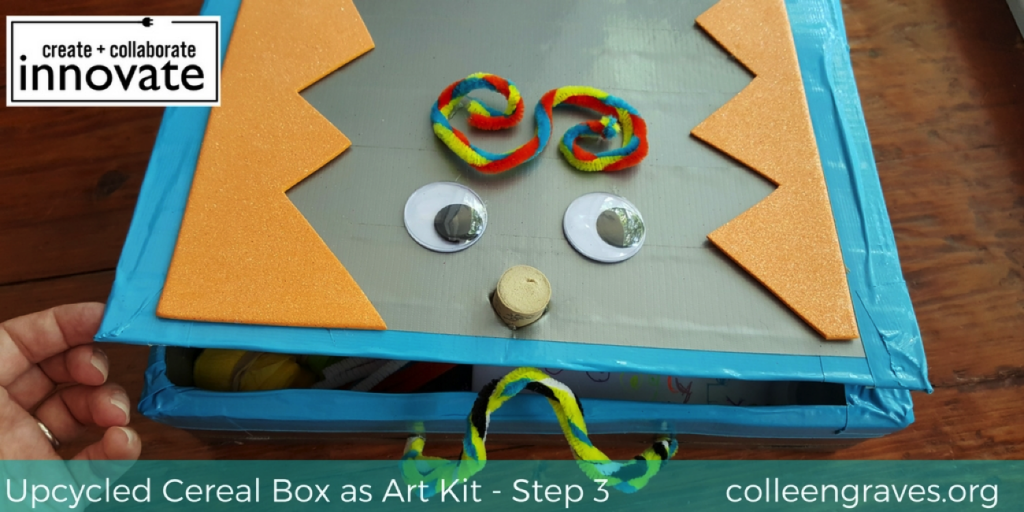
My 7 Year old inspires me to make on a daily basis. Recently, she wanted to create something for a friend’s birthday. We wanted to make her friend an art kit, but we couldn’t find the perfect box for the supplies. Instead of going out and buying a box, we worked with our own creative constraint. I told my daughter that we would have to make do with things we had around the house. We ended up finding a cereal box that we turned into a briefcase by using duct tape, piper cleaner, and a wine cork. We came up with how to latch it together and she started decorating it and it serendipitously turned into a funny little face. After an hour (or so) of fevered making, we were finished. She looked at me and said, “Mom! I can’t believe we just did that! I can’t believe we made it and it looks so good! Now, when can we make me one?” The creative constraint of making do with what we had around the house pushed us to make something we didn’t know we could make! (I’m actually in the process of writing up this project and story for my blog, but here is a picture of the finished project.)
My students that frequent the library also inspire me to be creative! I enjoy teaching them how to make things and a lot of times I make things just to learn how to do it so I can teach my students! I love seeing how creative my students can be when working within similar creative constraints. I held a “Circuits for Mom” workshop around Mother’s Day and I loved seeing the illustrations my students made with a DIY switch! I shared the Chibitronics template, helped them create their own switch for the circuit, and the students made their own illustrations. You can see a lot of them on this post. Here is one of my favorites:
Super precious Ss made #papercircuit ! Thx for template @chibitronics ! #happymothersday #makered #makersgonnamake pic.twitter.com/c5ZUKRXyIg — Colleen Graves (@gravescolleen) May 4, 2016
What helpful hints do you have for future makers?
I just finished reading Zero to Maker and I found this passage very true in my own journey of making.
“I had to choose to become a beginner, to get comfortable with mistakes, to ask a lot of questions, and to seek out the right teachers. After I crossed that bridge, everything else fell into place. Makers are a community of beginners, and we’re all learning together.” (Lang 12)
In the maker movement, we are all beginners at something. So the important things to realize when starting are:
– Making is messy!
– It’s okay to fail as long as you persevere.
– You just need to get started because the fun is wrapped up in the process and learning happens along the way!
What is your favorite thing about Chibitronics?
One of my favorite things about Chibitronics is how easy they are to use! I love the templates, the idea sharing, and the super easy (and cute) stickers with conductive adhesive. They’ve empowered me to become a better maker and to share that learning with others! And I adore Chibitronics as a company because these amazing templates are available for free!
Favorite Chibitronics Projects:
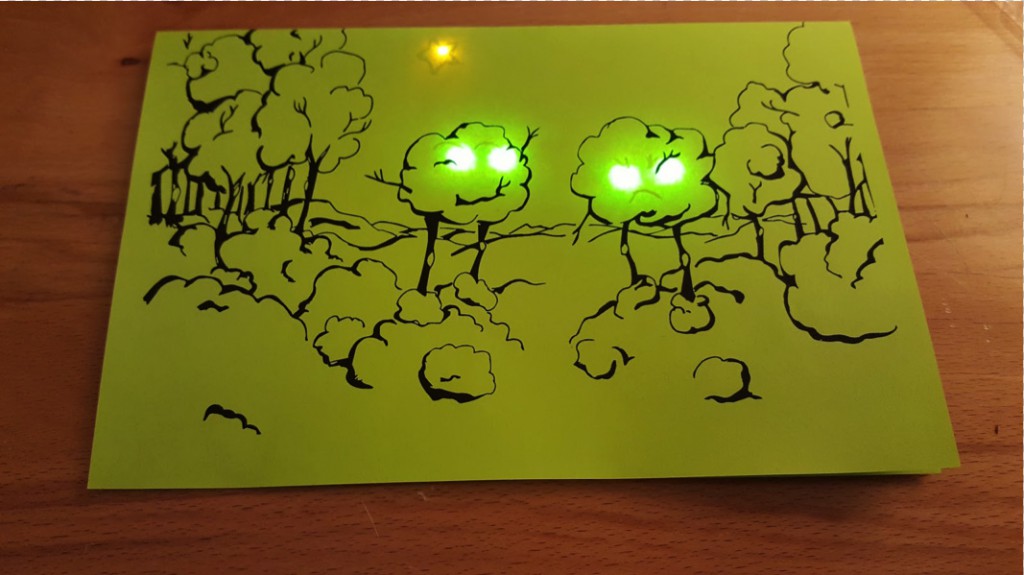
We included four different types of circuits in our Makerspace Project book. Aaron created all of the illustrations for our cards because we like giving beginners something to work with. When teaching others about circuits, we prefer this method of having a few card styles with illustrations or a few cards with templates. After our students get comfortable with making circuits, then the next step is to have illustrations that lack the circuitry templates. In this scenario, you would challenge the kids to make a circuit for the illustration. In the end, you would take away all scaffolding and have students design art and design the circuitry! Here is our most complicated (and my favorite) circuit and illustration in our Big Book of Makerspace Projects (it’s included in our mash-up chapter.)
I also really have a new found fascination with Chibitronics Effect Stickers and conductive fabric tape! I made this just to see how the effect stickers worked and ended up using it for a maker display at my library:
Still #tinkering w @chibitronics circuit stickers & #papercircuits! For my May-ker display @ryan_library! #makered pic.twitter.com/aeleJJl2vq
— Colleen Graves (@gravescolleen) May 1, 2016
I’ve been following the work that The Tinkering Studio does with paper circuits, and I love all the Arduino tinkering that Ryan Jenkins is doing LEDs and copper tape! My next step is to create Arduino programs for paper circuits! I love sharing ideas with others and mashing up maker tools. Now that I’ve learned how to write capacitive sensing code for Arduino, I can’t wait to see what else I can create!
Thanks for these wonderful stories and tips, Colleen! Learn more about Colleen’s work at her website at colleengraves.org.


