Hello, my crafty friends! This is June.
I hope everyone is healthy at this time of global hardship due to the epidemic. I think the crafting at a time when everyone has to stay at home is the most creative and safe way to protect us from this COVID-19.
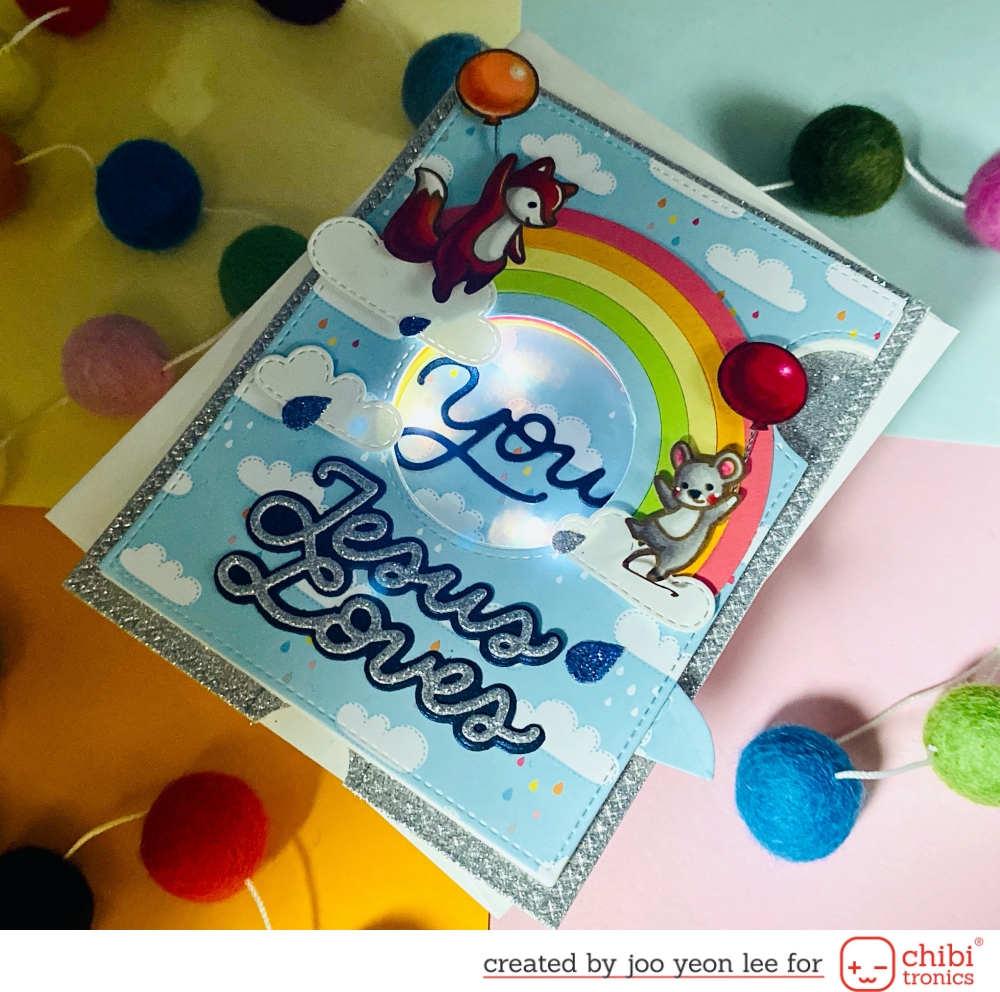
So I am happy to share my card on the Chibitronics Blog again. I am going to sharing a ‘Magic Iris Light-up Card’. Magic Iris is also called a Mechanical Iris that is type of pop-up. This card is not only a pop-up but also a light-up card. I designed that the lights turn on automatically when you pull down a tab.
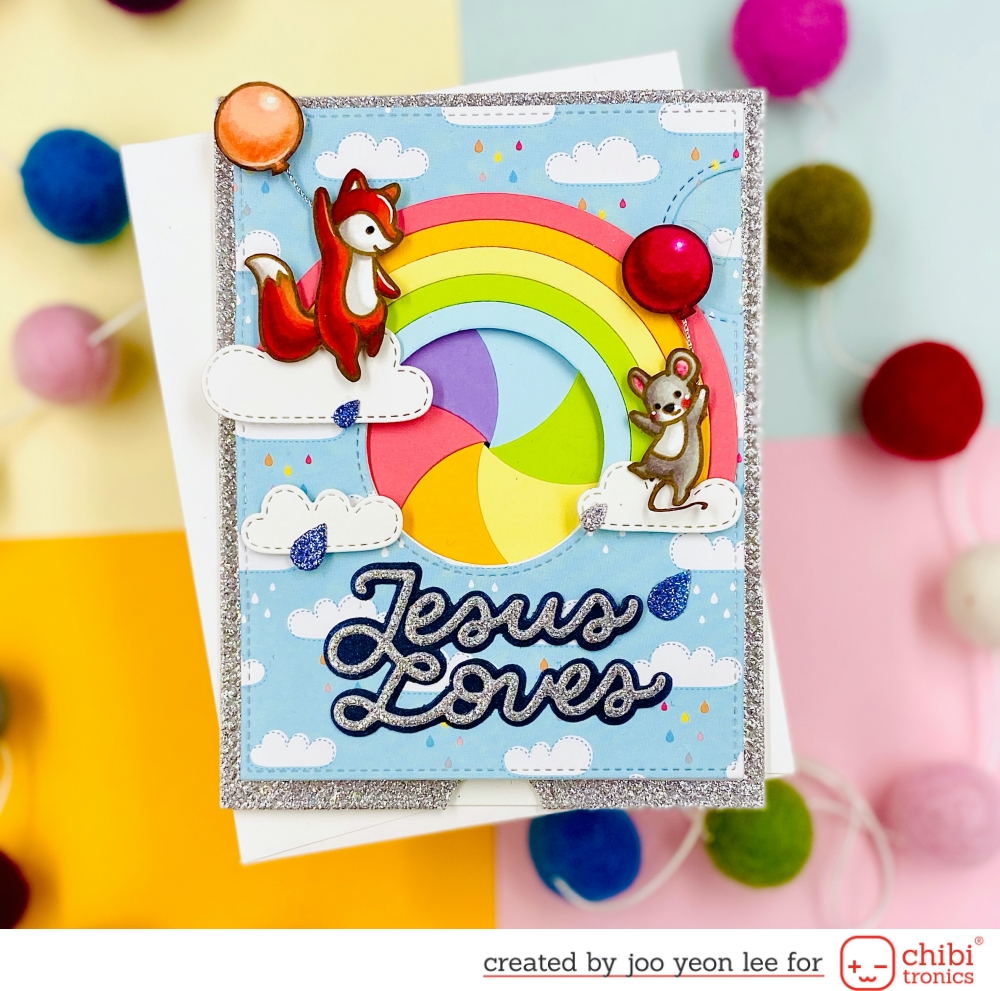
I created a Magic Iris with six blades instead of three using Lawn Fawn MAGIC IRIS Die Cuts. You see the six blades in rainbow colors in the center over there?
Please, check out the video tutorial on my YouTube channel to learn how to make a six blades magic iris.

It’s you!
I made this card in the order down below.
Step 1. Stamping & Coloring

Step 2. Die Cutting
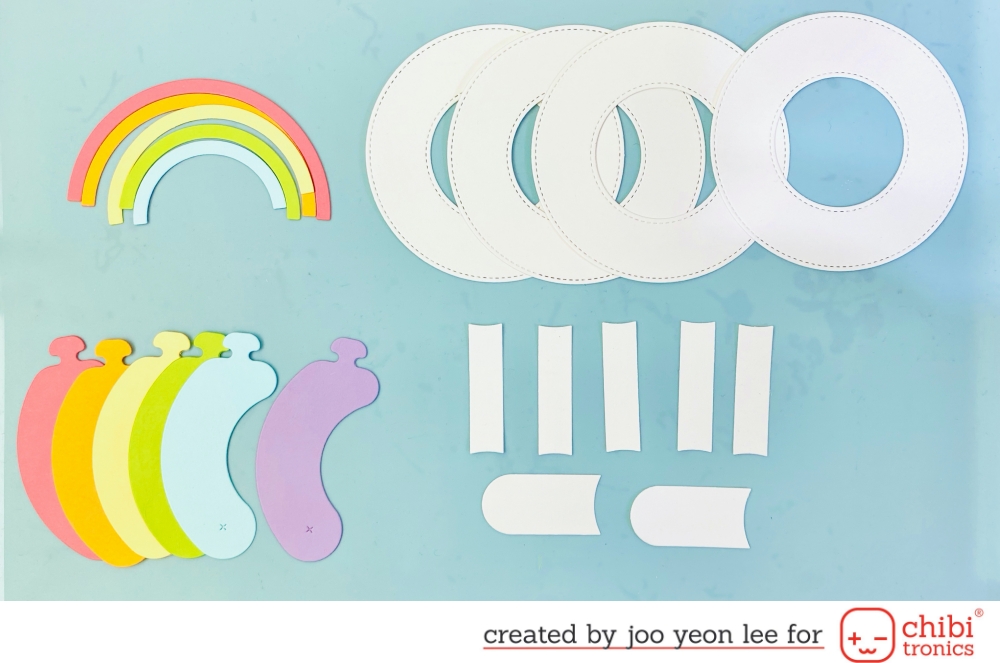
Stack and glue together half rings of rainbow colors for rainbow. And then Assemble the 6 blades Magic Iris.
Step 3. Download Template
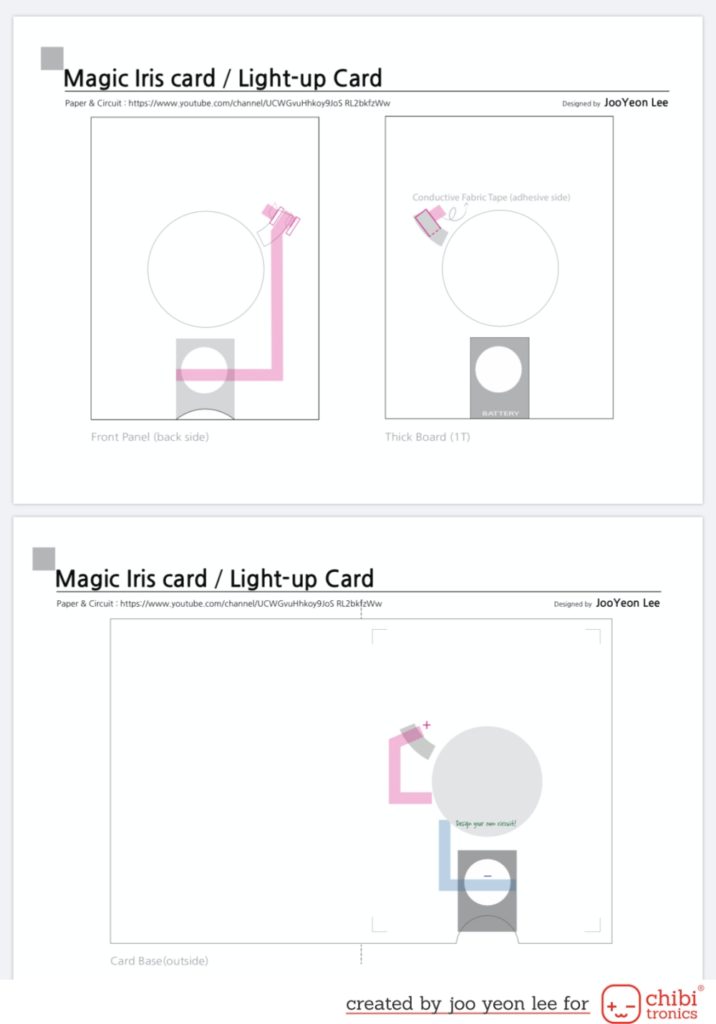
Download this free template which is helpful easier to make this light-up card.
Step 4. Design Your Own Circuit
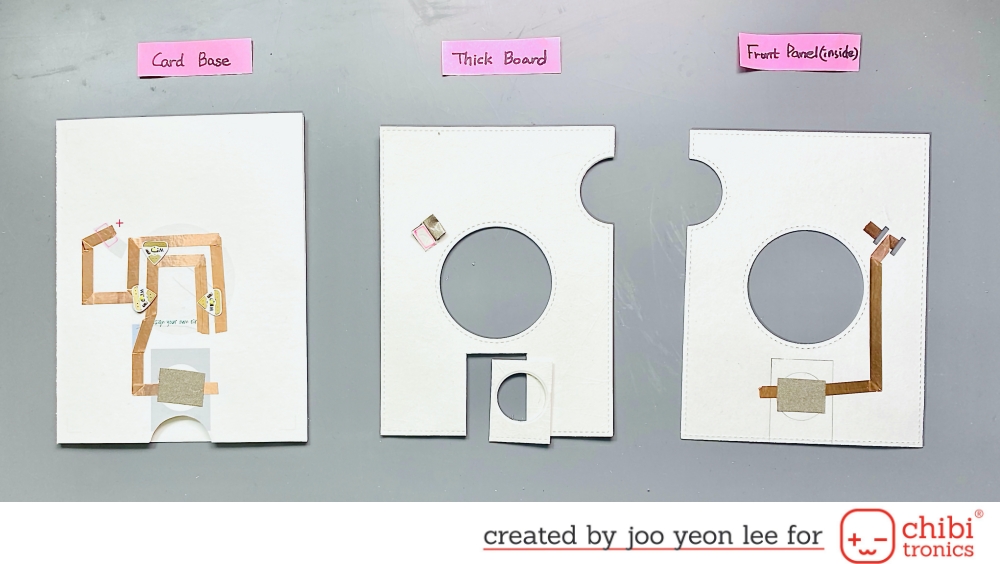
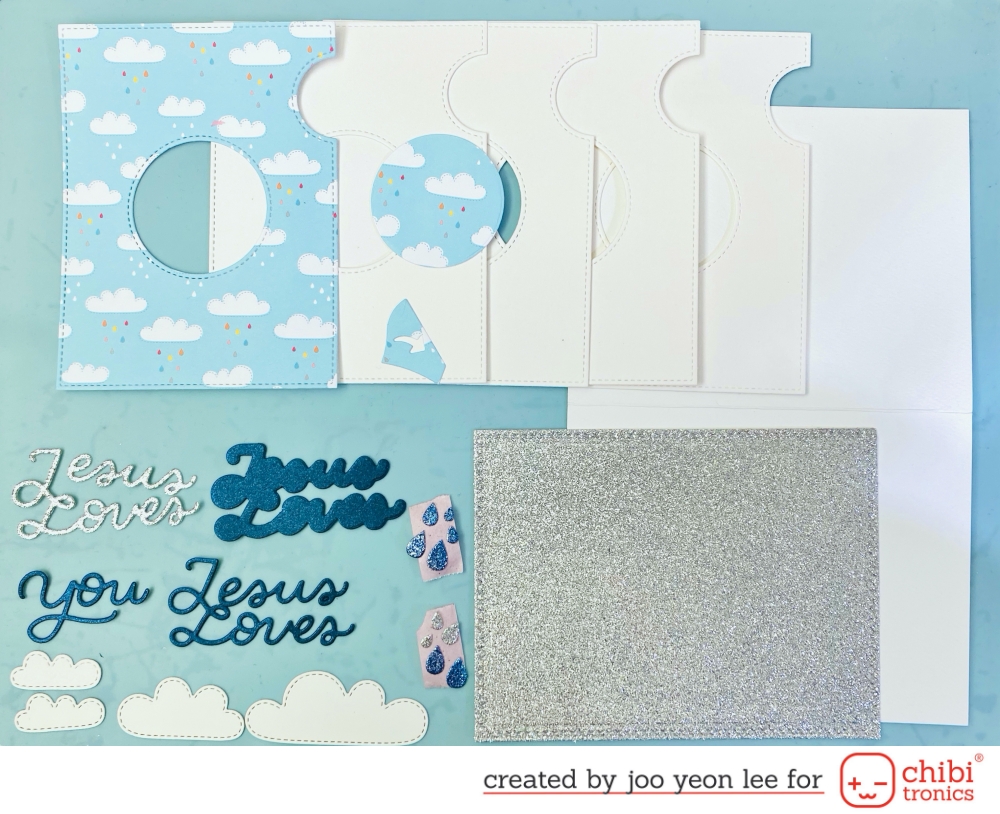
Step 5. Assembling
Assemble the Card Base, Thick Board(1T) and Front panel for making light-up card. After then, attach Magic Iris to the backside of the cover and attach it to the circuit board that made right before.
Step 6. Creating Front Panel

Done!
If you need more information about this Magic Iris and interested in mechanism of this circuit, please be sure to check out the video tutorial linked here.
Thank you so much for stopping by!
June Lee (paperandcircuitr)
SUPPLIES
- White LED’s Sticker from Chibitronics
- Copper Tape from Chibitronics
- Conductive Fabric Tape
- 3V coin battery (2016)
- Mighty Hands JESUS LOVES YOU Die set
- Lawn Fawn REALLY HIGH FIVE Clear Stamps
- Lawn Fawn MAGIC IRIS Die Cuts
- Lawn Fawn MAGIC IRIS ADD-ON Die Cuts
- Lawn Fawn LARGE CROSS-STITCHED RECTANGLE STACKABLES Cuts Dies
- Lawn Fawn SPRING SHOWERS Lawn Cuts Dies
- Lawn Fawn HELLO SUNSHINE REMIX
- Simon Says Stamp BUILD A RAINBOW Wafer Dies
- KUUQA Cutting Dies Stencil Metal Template Mould – Circles
- Template
How cute! I never thought of combining these.
Thank you very much for your kindness! 🌸🌸🌸