Hi crafty friends! It’s June.
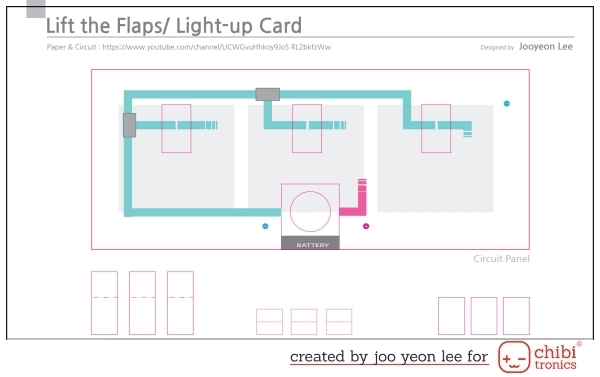
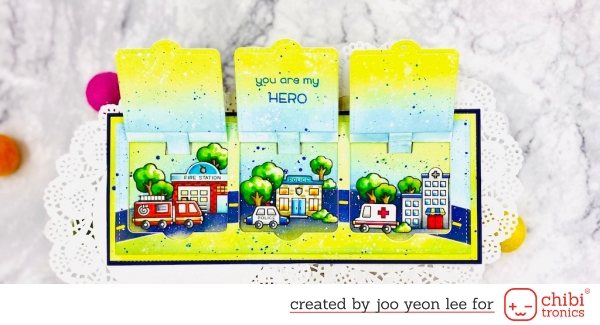
It’s time for new monthly project with me. Today I am going to share a Slimline Lift the Flaps Card. Lift the Flaps is a most simple pop-up that hide messages and other images behind the flaps. My card hide another images under flaps too. And of course this is a light-up card using Chibitronics stickers. Because the flaps are switches, lifting the flap will light-up the sign of heroes, closing the flap will lights go out again.


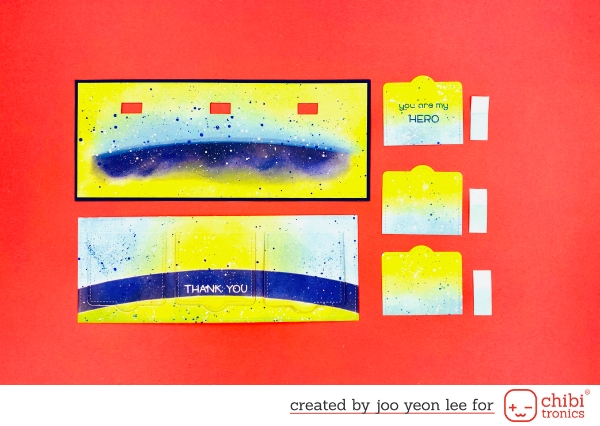
1. Stamping & Coloring

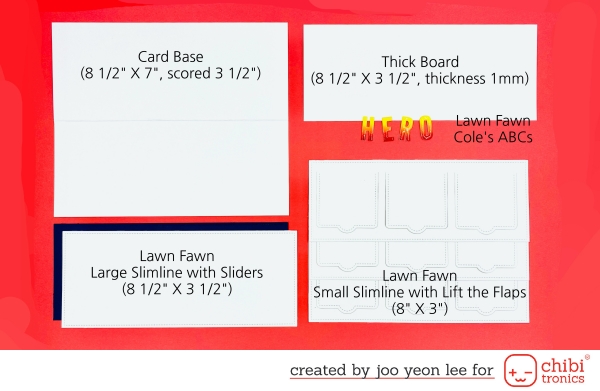
2. Cutting Paper
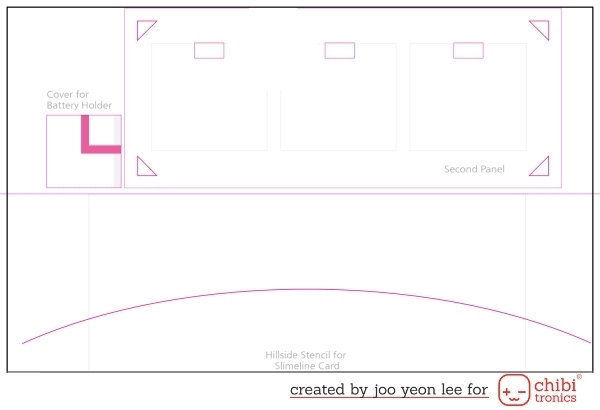
3. Download Template
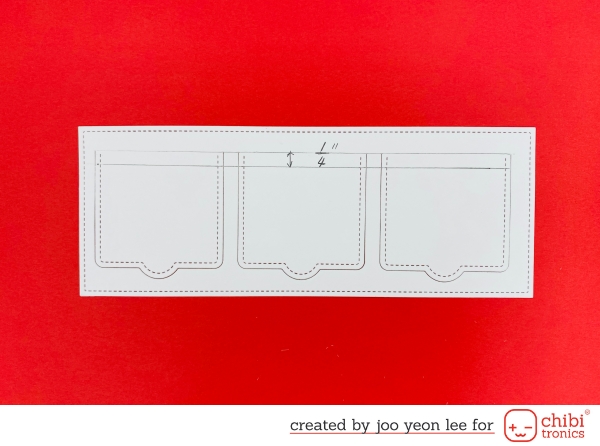
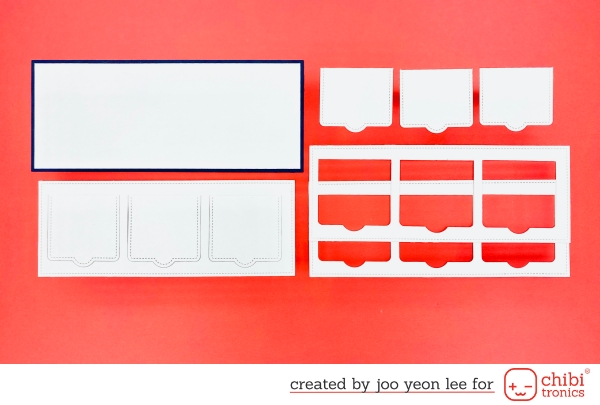
4. Creating Background
5. Creating Scene

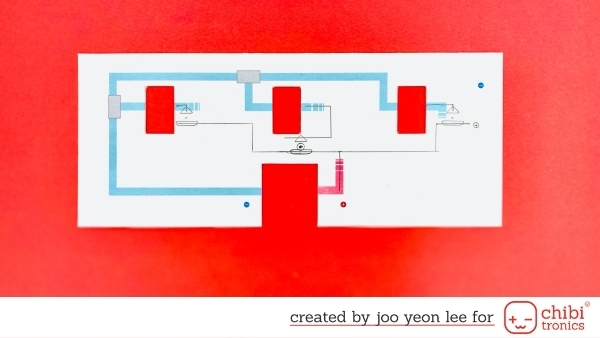
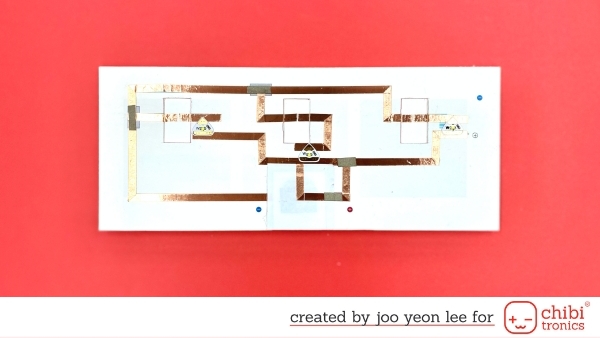
6. Circuit Composing
7. Assembly

I finished this card by checking that insert a battery(2016) into the battery holder and lift flap to ensure proper operation.
Thank you for stopping by. Have a safe and joyful day!
Instagram : paperandcircuit
YouTube chanel : Paper & Circuit
Supplies
- Chibitronics WHITE LED CIRCUIT LIGHTS Stickers
- Chibitronics COPPER TAPE
- 3V LITHIUM BATTERY (2016)
- Conductive Fabric Tape
- TEMPLATE for Lift the Flaps
- Lawn Fawn VILLAGE HEROES Clear Stamps
- Lawn Fawn HAPPY VILLAGE Clear Stamps
- Lawn Fawn ALL THE CLOUDS Clear Stamps
- Lawn Fawn LARGE SLIMLINE WITH SLIDERS Die Cuts
- Lawn Fawn SMALL SLIMLINE WITH LIFT THE FLAPS Die Cuts
- Lawn Fawn COLE’S ABCs Lawn Cuts Dies
- Lawn Fawn SIMPLE ROAD BORDER Lawn Cuts
- KUUQA Cutting Dies Stencil Metal Template Mould – Circles
- ‘SQUEEZED LEMONADE’, ’TWISTED CITRON’, ‘MOWED LAWN’, ’TUMBLED GLASS’, ‘CHIPPED SAPPHIRE’, ‘BLACK SOOT’ Tim Holtz Distress Oxide Ink Pads
- Bira 3 Tips 2mm, 3mm, 4mm Screw Punch
Lift the Flaps