Hi Chibi-Friends!
It has come summer finally in Japan. It was a very long rainy season this year.
It’s very humid and the paper got wavy and the ink pad was getting too juicy!
Actually, I can’t say “Tsuyu” which means the Japanese rainy season is a good time for crafting..
So now, I start my engine for the summer greeting card!
First, I am going to share my project for August. It’s a happy birthday card!
It has a special effect. Check out it in the movie what will happen in this card. Ninja jumping’ up to say…
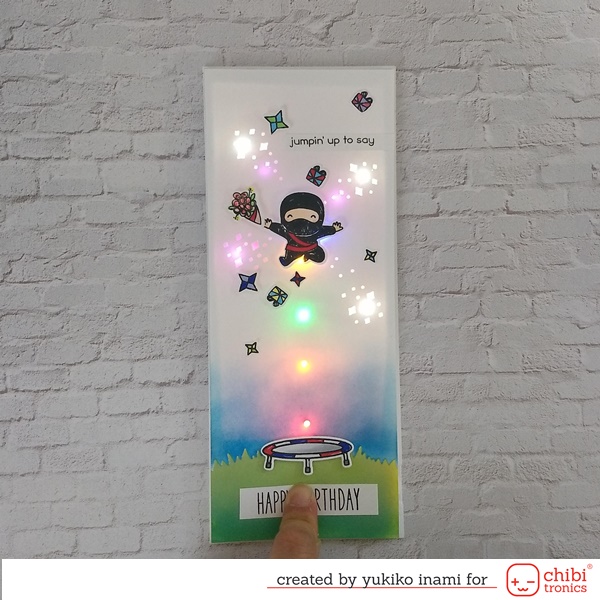
The jump trail is coming up and the fireworks set off!
If you’d like to watch the how-to-make movie, go to the end of this page.
There is a 10 minutes movie.
1. About Pressure Sensor Conductive Plastic
In the beginning, I am talking about this. Because it is an essential product for this monthly project.
I used the Pressure Sensor Conductive Plastic. It has known as Velostat or Linqstat.
When you press on the material, the resistance goes down depending on how hard you press. So you can adjust the power for the LEDs.
Then, what will happen? Please check the below movie on your eyes.
I used this sheet before, so if this is the first time for you knowing this pressure sensor, I recommend you check the last post too!
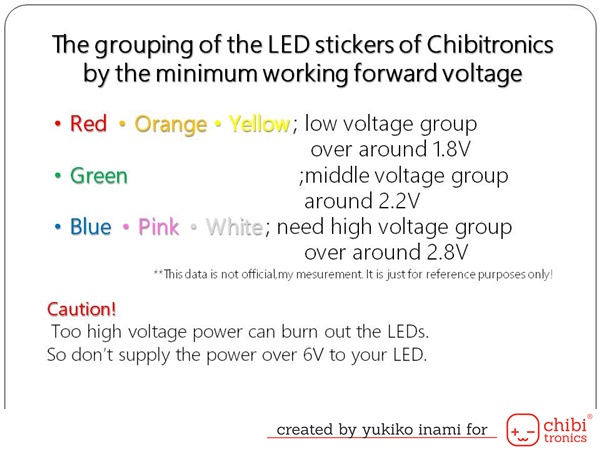
Today’s project uses this material characteristic so when you choose the light color, keep in your mind this grouping.
And the TIPS to make a good effect is choosing the light color from each group.
For example, Red, Green, and Blue choice is good. Orange, Green, and Purple combination is nice too!
If you choose Red, Orange, and Yellow, these light can’t make the effect obviously.
The plastic sheet can change the character after many presses. In my test cases, the plastic got thinner and the conductive got lesser.
So if the sheet doesn’t work well after many tests, it is better to change the sheet to a new one.
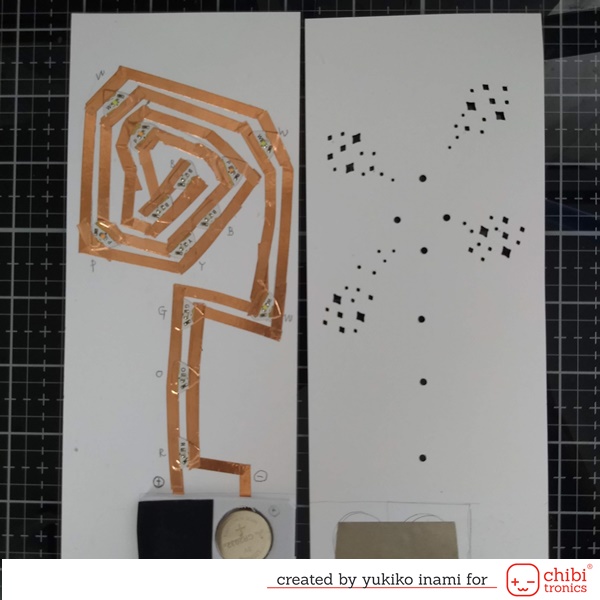
And I needed two 3V cell batteries in series for this circuit. Because the 3V battery is not enough make the power for this circuit.
2.Supplies
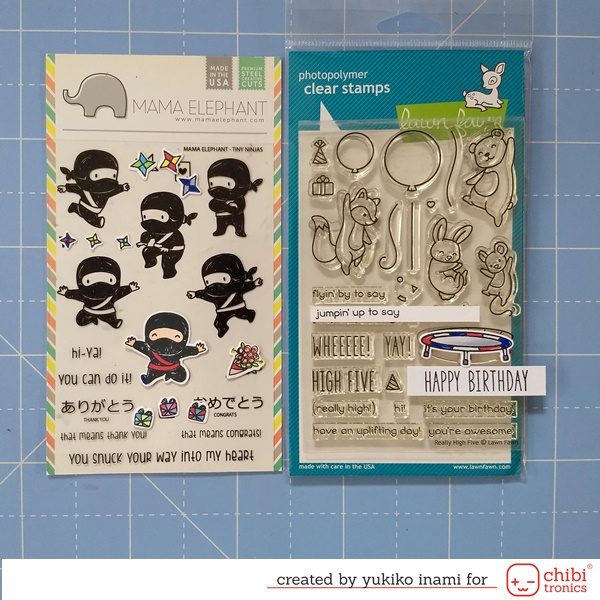
・Tiny Ninjas; mama elephant
・Really High Five; Lawn Fawn
・Unicorn Dies; Concord and 9th
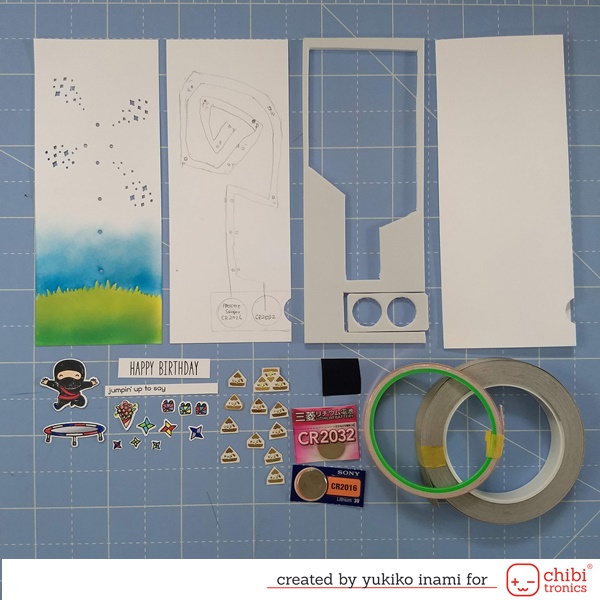
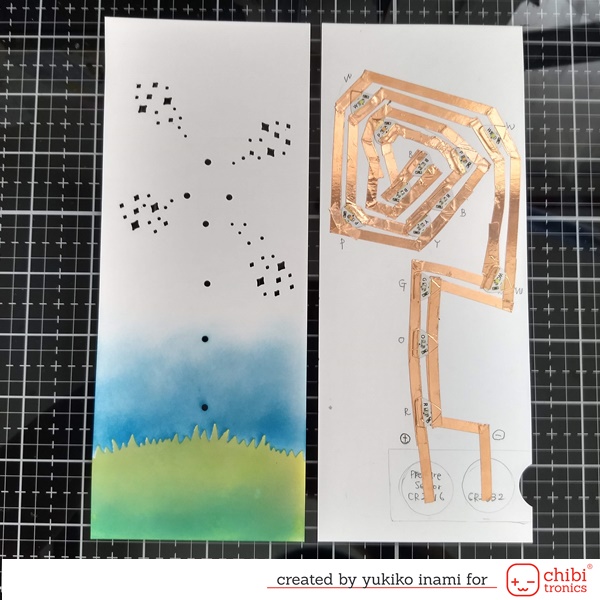
・Cover panel; 3 1/4 x 8″ Blend the color of glasses and sky, Make holes for light with the Unicorn light die and screw punch
・Circuit panel; 3 1/4 x 8″
・Foam sheet; 1/8″ thickness 3 1/4 x 8″ Cut out the battery holder and the center space
・Card base; 7x 8 1/4″ fold on half Make the notch for the battery holder
・LED sticker; white3, pink 3, blue 3, green 1, yellow 1, orange 1, red 1; MegaPack of White LEDs (30 stickers), Red, Yellow, Blue MegaPack (30 stickers), Pink, Orange, Green MegaPack (30 stickers)
・3V Cell battery; CR2032;1, CR2016;1
・Pressure sensor conductive plastic
・Copper tape
・Conductive fabric tape 1.5cm wide
・Parts; Ninja, trampoline, confetti; gift boxes, Shuriken, bouquet and sentiment strips
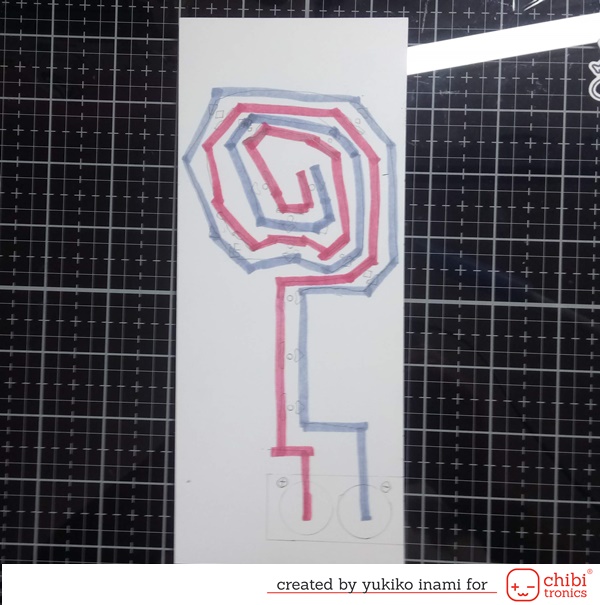
3.Circuit
I chose the color of light thinking of the effect. I’d like to make an effect like jumping trace and the firework spread behind the Ninja from the center to the outside. So I set the light from the bottom, red, orange, yellow, and green. Then from the center, green, blue, purple, and white.
According to the color grouping figure which I mentioned earlier.
I marked the place of the LEDs and the battery places. And connect the positive side of the battery to the positive side of the LEDs.
I thought how can I make the route to every light….
Basically, I don’t want to make the positive
and the negative lines cross over each other. And I try not to cut the circuit as much as possible.
I chose a snail shell’s shape pathway.
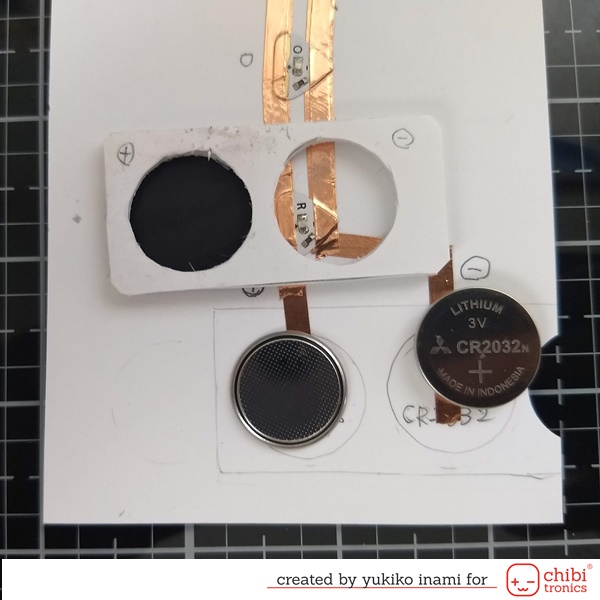
Then I stuck the copper tape on the circuit sketch. Next, set the LED stickers. I set the battery and check the circuit works well.
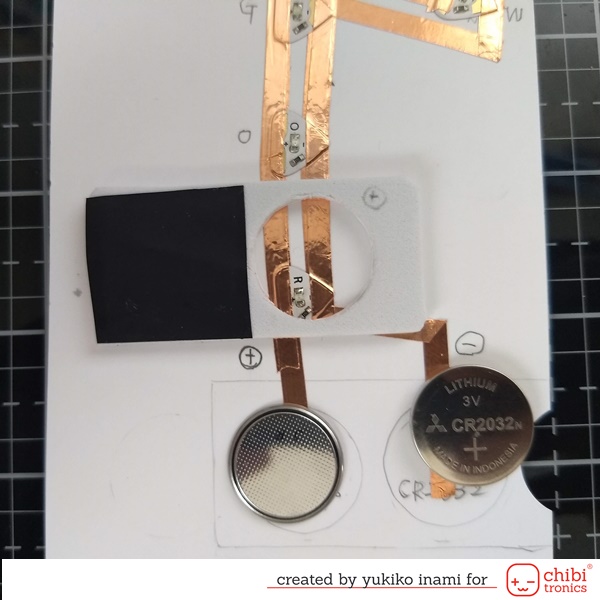
On the backside of the front panel, I stuck the conductive fabric tape to connect two batteries.
The battery folder has two holes and one hole sealed with the pressure sensor conductive plastic sheet.
This hole is for CR2016. The foam sheet thickness is 3mm>1.6mm battery thickness.
This point works as a switch. Because it doesn’t touch normally and when it is pressed, the fabric tape connects the battery through the pressure sensor conductive plastic. Not just make the circuit closed, it can change the power with the pressure!! How wonderful switch is!
If you’d like to know how to stick the copper tape. You can check the movie on the last part of this post.
I set the pressure sensor conductive plastic sheet on the top of the battery hole for CR2016.
<the frontside view>
<the backside view>
4. Assembly
From the bottom, I stuck the circuit panel, the foam sheet, and the front panel with the bond or the double-sided adhesive tape.
Around the edge of the battery-holder is an important area for the connection of the circuit. So make sure to stick well there.
I stuck the vellum paper on the backside of the front panel covering the holes for lights.
I made a scene on the front panel with prepared parts. Last, I set the front panel on the folded card stock.
I’ve finished! If you are interested in this card, you can check more information on the below movie and my blog.
Please come to see it!
I made one more card. Happy summer card. It has the same system.
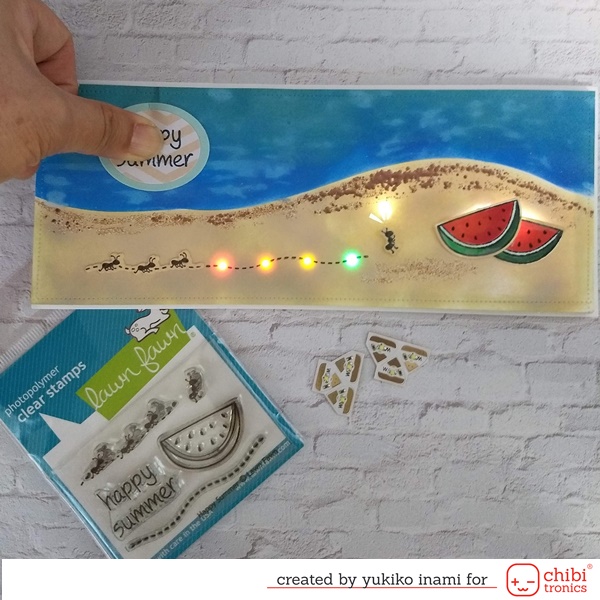
One day, the ants’ group explored the beach. It’s a very hot day.
Then An ants found watermelons. ” WOW!! We are so lucky! It looks so yummy!” It was a happy summer day.
I am sharing how-to movie for you here. If you would like to make some projects with the pressure sensor, please check out.
The pressure sensor conductive plastic has much potential in your project.
I am looking forward to seeing your project with it! Please post with tag #chibitronics, then we wouldn’t miss your amazing project.
Thank you so much for stopping by.
Have a happy summer day!
Nicorin; YUKIKO I.