Autumn is my favorite season because the air is clean and the leaves change their colors. It is so beautiful. I am so inspired by them every year.
Animals are so busy preparing the coming winter.
I am so happy to share my monthly project with you here.
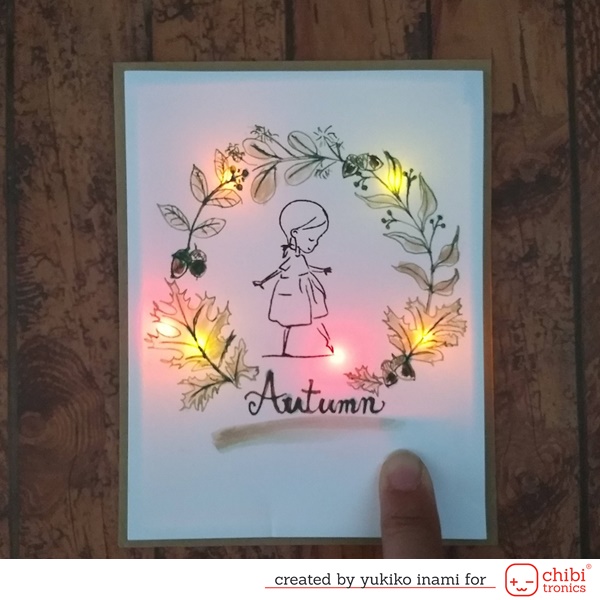
I imagined the autumn of MA when I made this card. A girl is walking around the forest. When she makes steps, the leaves whisper in the dry sounds.
“Kasa-Koso” is an imitative word in Japanese for it.
I made the scene of walking around the autumn forest. Now, the leaves are starting to change their color from faded green to yellow and red.
A kind of secret joy fills her heart.
I used the pressure sensitive conductive plastic continued from the last month.
This plastic changes the conductivity with the pressure. So when you press harder, the light gets brighter.
I hope the changing color of the leaf on this card will bring the fresh autumnal air in your mind.
This is a very simple circuit. Then if you have interested in it. It is very good to try this.
I share the making movie the last of this post. If you would like to check the movie, you can skip to the last! 😉
1.Supplies
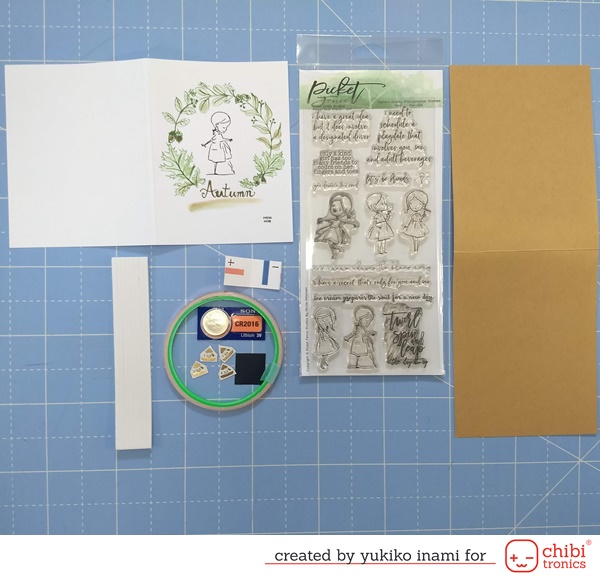
・Sweet Dear Friend; Picket Fence Studios
・Cover and circuit panel; 5 1/4 x 81/8″ score the 4, 4 1/8
・Card base; 41/4x 11″
・Switch part 1 3/4 x 3 1/2″ fold in half
・LED stickers
・Copper tape
・Pressure sensitive conductive plastic
・Cell battery 3V; CR2016
・Foam tape; thickness 1/8″
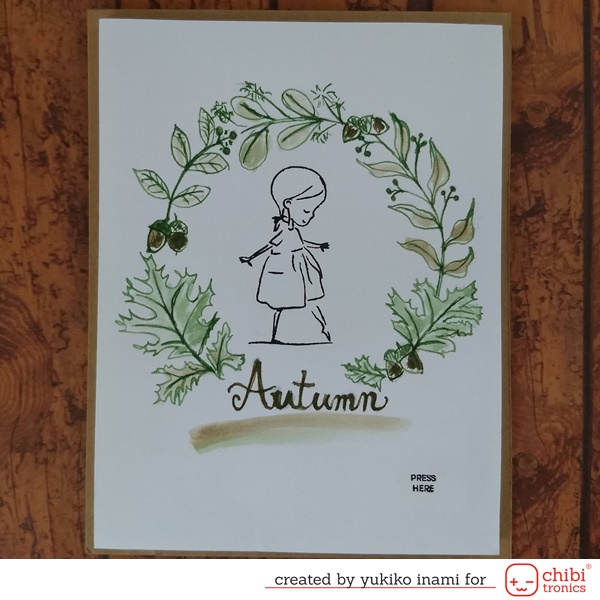
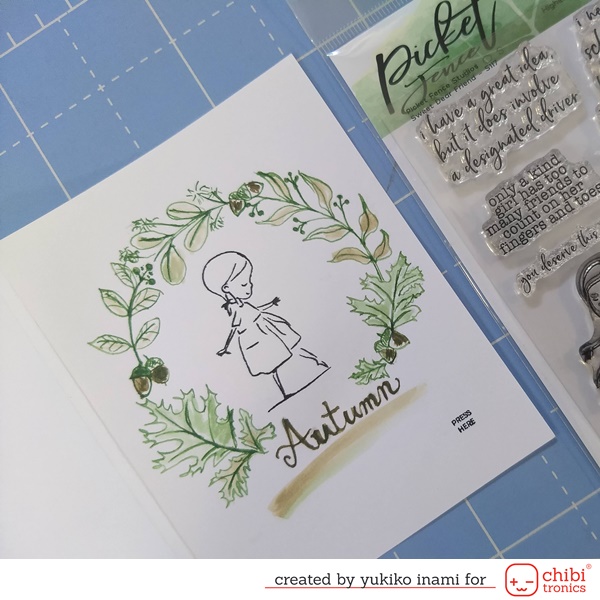
I drew a leaf wreath with the fountain ink. I took the online class produced by Miyuki Mazume last month. It was an amazing design. Then I draw again it in the Autumn version on my card. It’s an early fall season.
Next, I stamp a girl’s image in the center of the wreath. I love her step with her toe! Then I stamped the “press here” on the place of the switch.
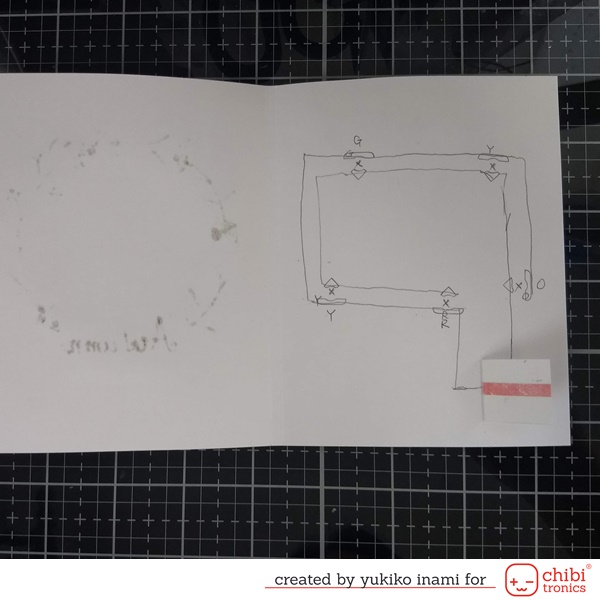
2. Circuit
First, I marked the place of the battery with switch and the lights. It is nice to use the stencil for marking the LED sticker shape.
Next, I designed the circuit. The positive of the battery connects to the positive site of the LED. And the negative side of the battery connect to the negative side of the LED stickers. Make sure not to cross the positive line and negative line. If you make the crossing with each other, it makes the short circuit and the light will not turn on.
Then I stuck the copper tape on the drawing circuit as showing below.
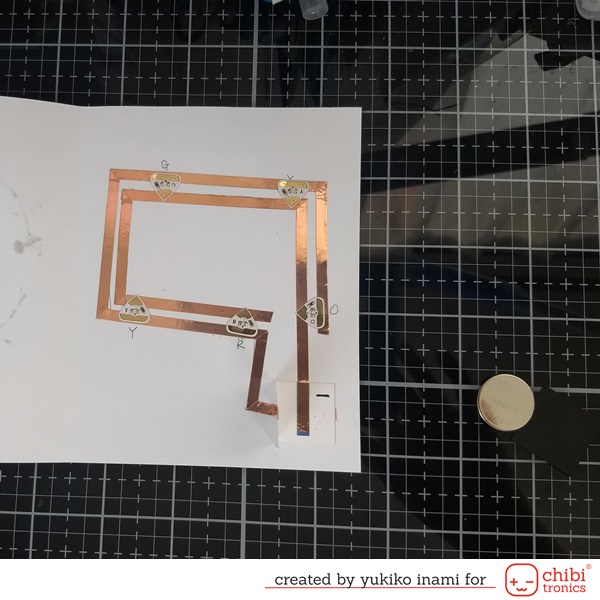
Put the battery in the switch parts. Test the circuit closing the switch. In the case your light doesn’t work, check the circuit, no crossing, the sure connections with lights and circuit, the right way of the sides of the light setting.
To finish, put the pressure sensitive conductive plastic sheet between the battery and switch. So You can get the effect with the pressure.
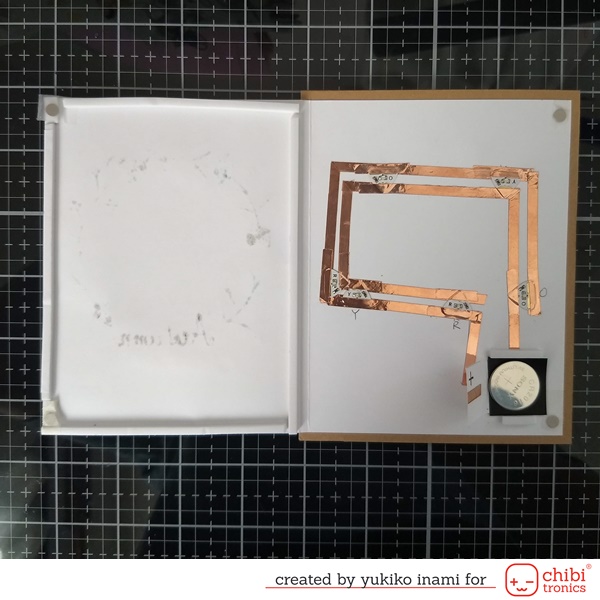
3. Assembly
Today, I didn’t set in circuit and front panel completely, because I’d like to show the inside for the recipient.
So I used the magnets on the corner of the panel. You can check the circuit and the effect of the pressure sensitive sheet testing with and without it.
I stuck the foam tape all edges of the top panel and the battery. It works for preventing the battery slip out.
The pair of magnets set on the corners with scotch tape. The top panel can open like a lid.
And now, I set the top panel on the card base.
Done!
There is a very nice tutorial of the pressure sensitive conductive sheet by Jei Qi here! I recommend that you check there strongly!
That’s all for today. Thank you for stopping by!
Have a nice weekend and a beautiful autumn season!
Yukiko I. (Nicorin)