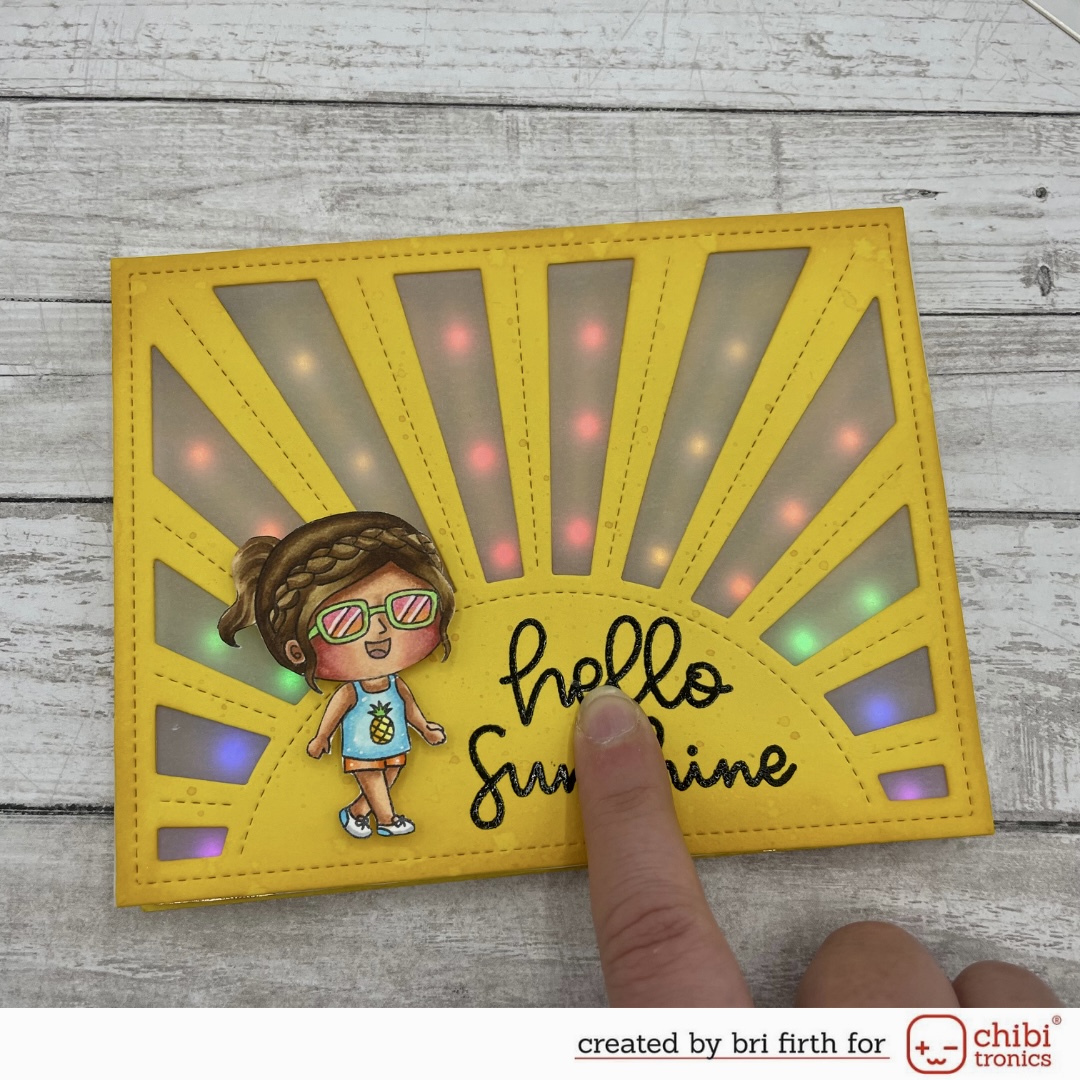
Decorating the Front Panel
To decorate the front panel, first, I die cut the front panel with the “Sunrise Backdrop” die. I distressed the edges of the front panel with Mustard Seed Distress ink. I used water and Mustard Seed Distress ink to add the ink splatter look to the front panel as well. Next, I stamped the “Hello Sunshine” sentiment from the “Soak Up the Sun” set with black pigment ink and heat embossed it with clear embossing powder. To finish the front panel, I colored the girl from the “Soak Up the Sun” set with Copic markers and used foam tape to attach her to the card front.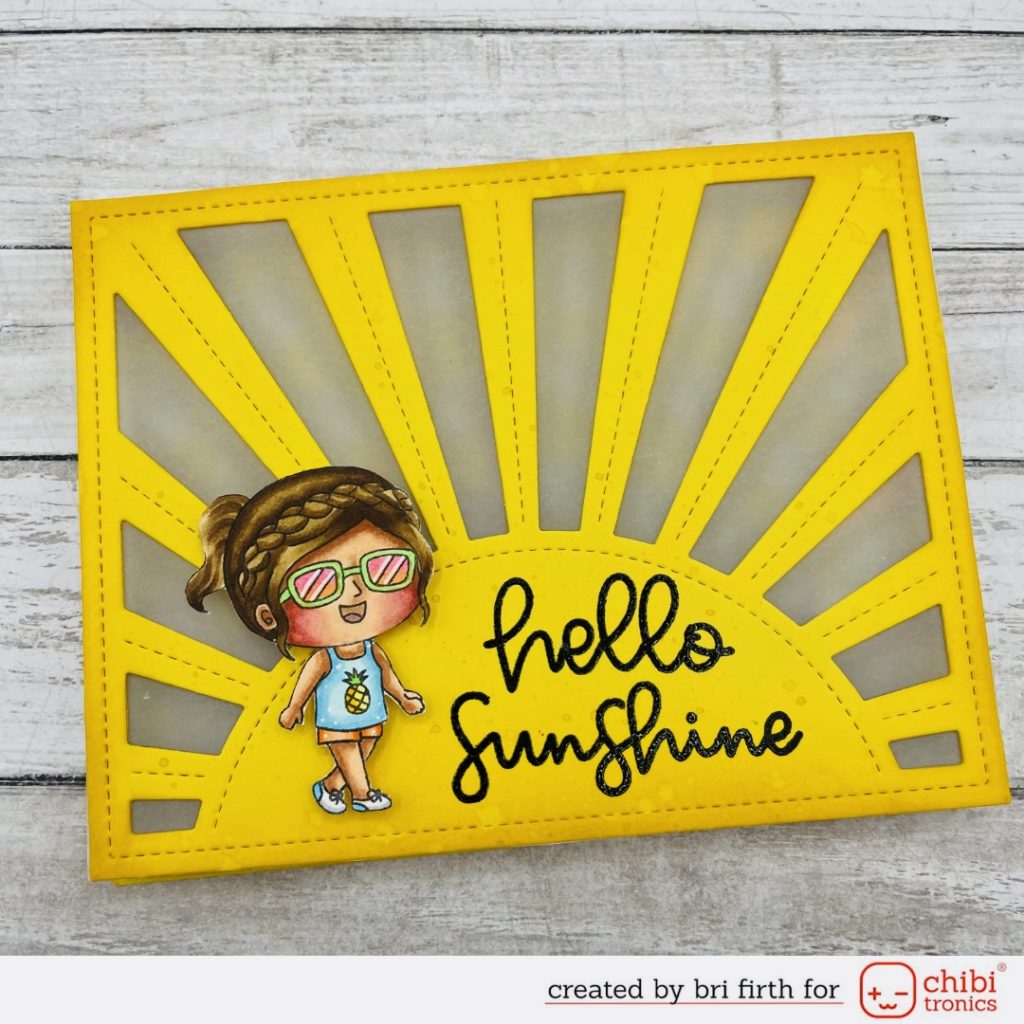
Designing the Circuit Layout
First, I traced the sun ray openings from the front panel with a pencil onto the card base to determine the placement of the colored lights. After the openings were traced I attached vellum to the back of the card front to disguise the sticker lights. Next, I labeled the openings with a letter to indicate which color I want to place within each opening. Now that I have labeled the openings, I can plan out my positive and negative conductive tape circuits. I decided to use the Conductive Fabric Tape since I am lighting a large quantity of lights with this project. *Side note: After finishing the project I noticed I placed the orange and yellow colored lights in the wrong order. It’s a silly mistake; fortunately, I still love this project!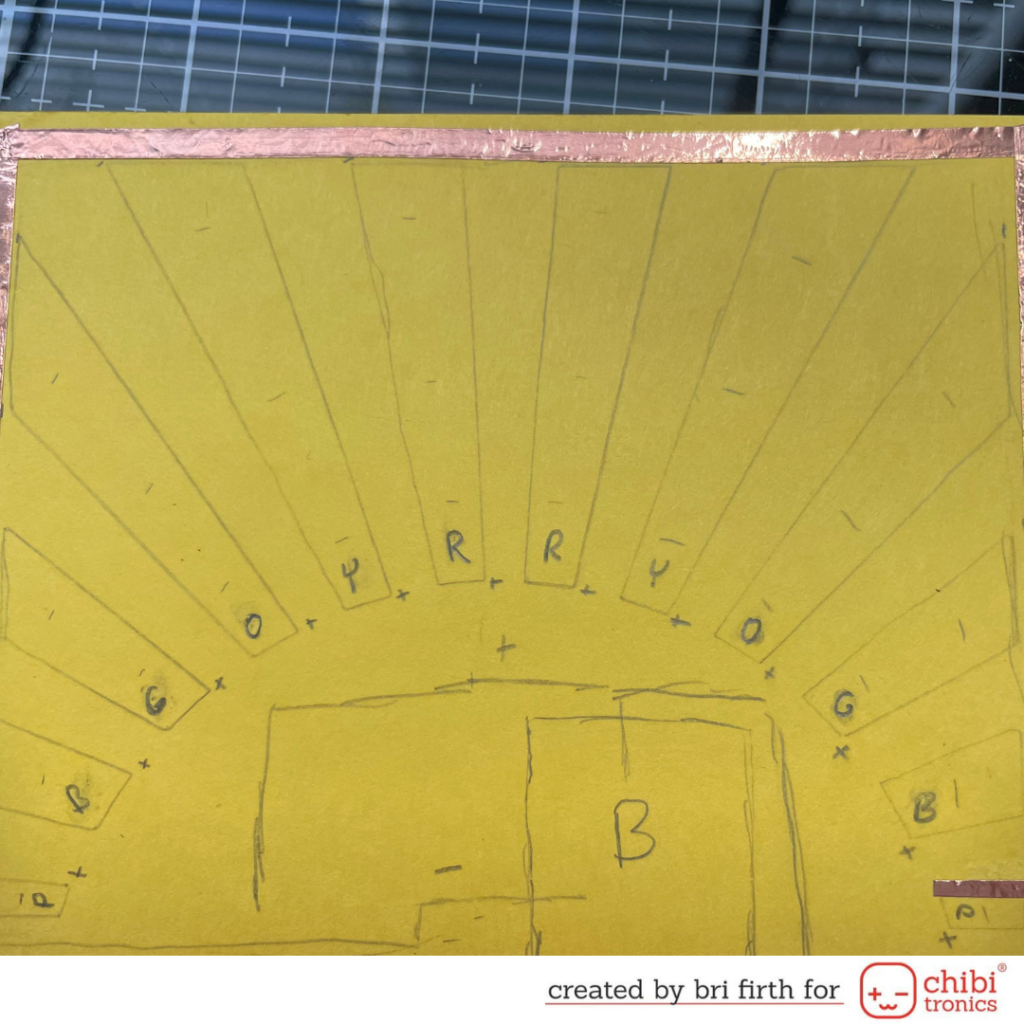
Building the Light Mechanism
The number of lights I placed in each opening depended upon the size of the opening. For example, I put one pink sticker light in the small bottom openings but I put three red lights in the larger middle openings. I decided to run my negative circuit along the outside of the rays and on the left-hand side of the sticker lights and the positive along the inside on the right-hand side of the sticker lights. Once I finished placing the the circuits I added double-thick foam tape to account for the battery height. I used one 2032 battery for this project, but because there are so many lights using 2 batteries causes the lights to be more sustainable.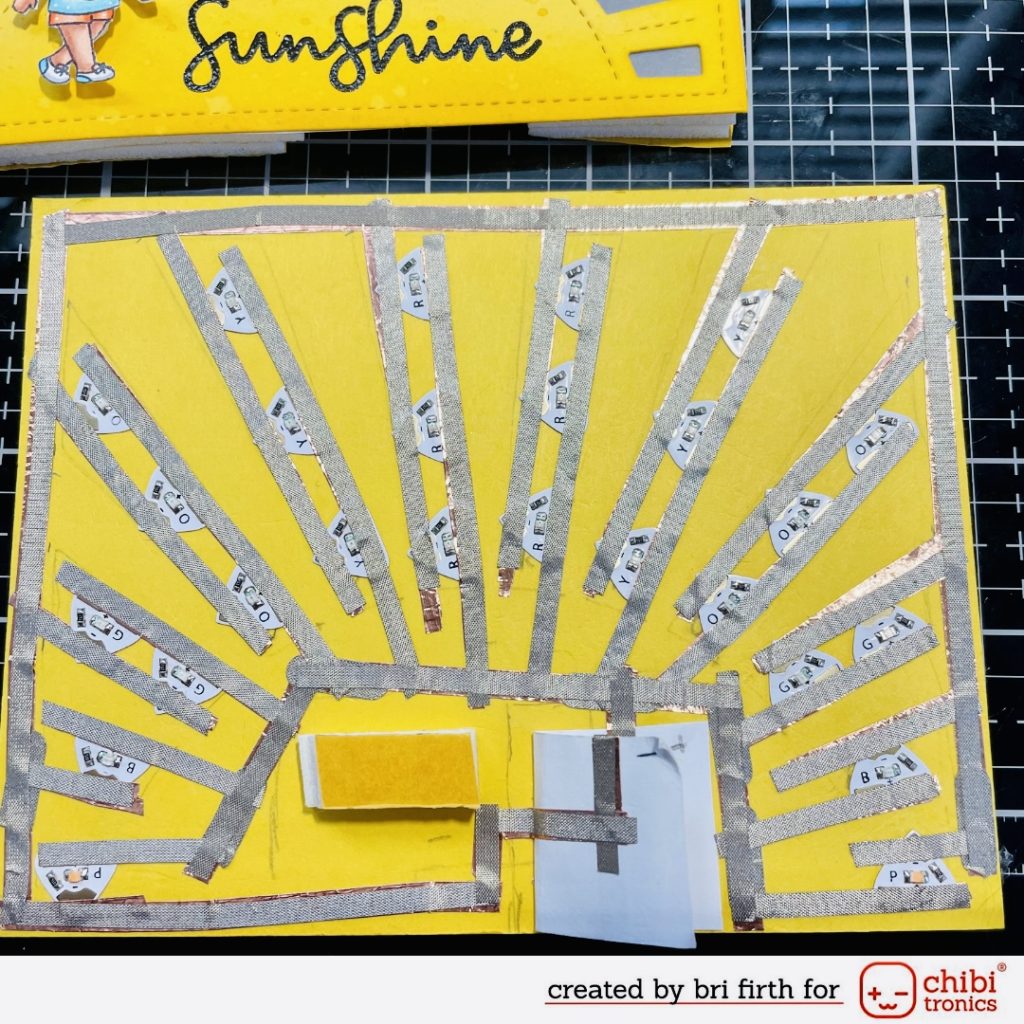
Check out all the bright lights in action in the video below:
Hope this sunny creation inspires you today! -Bri Bri Firth Creates
Supplies
Summertime Sunshine and Rainbows with Lights Sampler MegaPack