Hi, crafty friends!
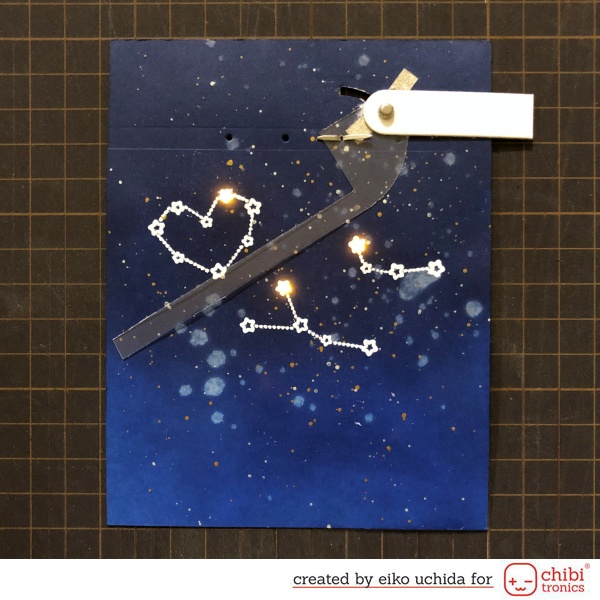
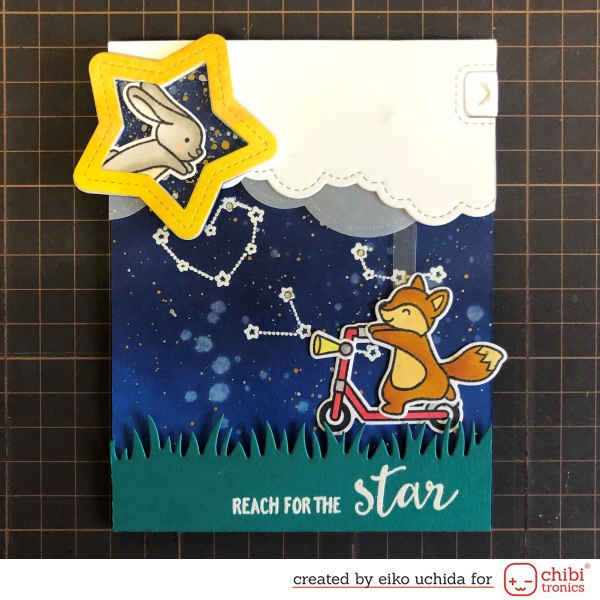
This is Eiko. I make light up swishing scooter card using Chibitronics and Lawn Fawn stamps and dies.
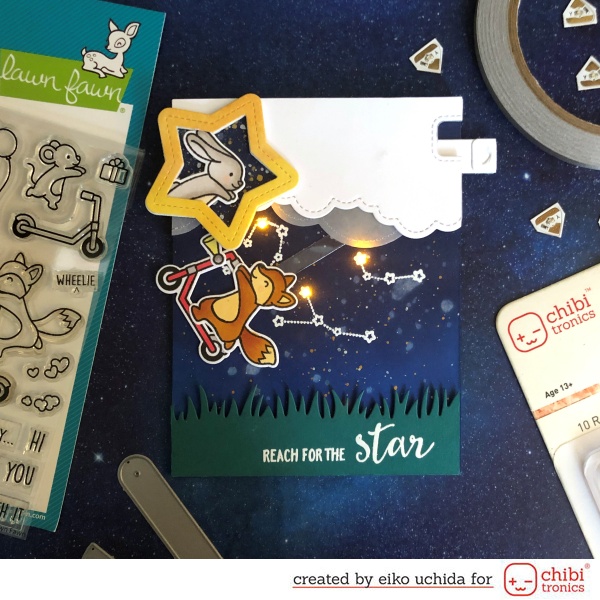
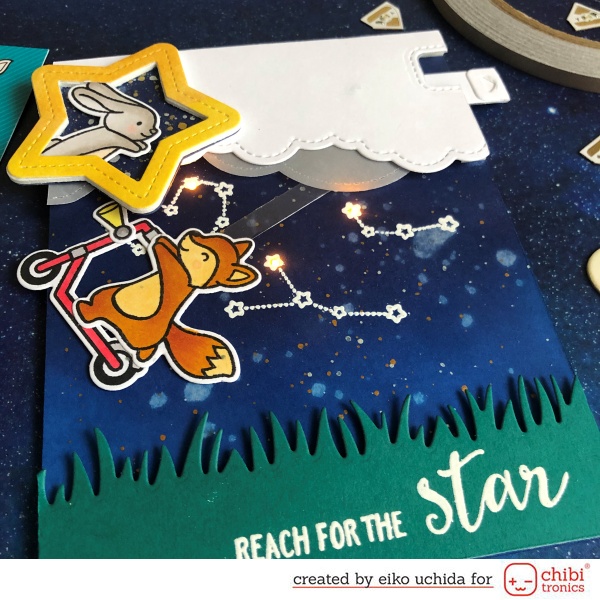
When you pull the tab, the scooter swinging up and the constellations glow.
I will make the parts referring to the picture below.
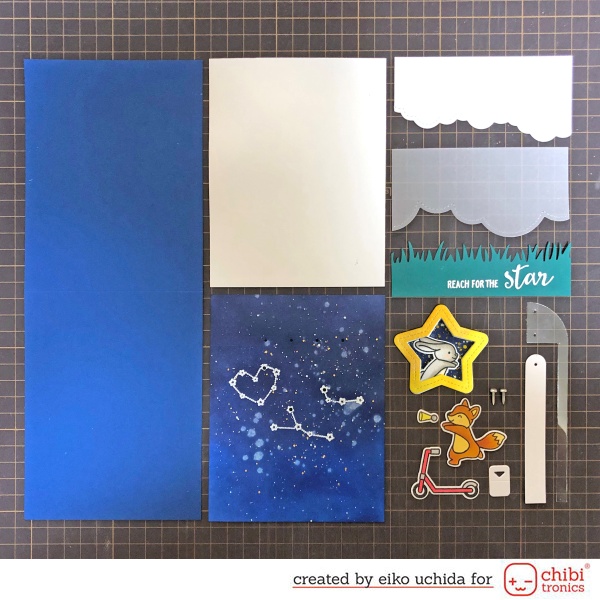
- 4 1/4 x 11 inches blue cardstock.
- 4 1/4 x 5 1/2 inches white cardstock.
- 4 1/4 x 5 1/2 inches another white cardstock for background. Stamp the constellations, heat emboss with white embossing powder and color with 2 colors of distress ink. Splash the silver and gold water-based pigments. Die cut with hole creating die.
- Die cut vellum paper and white cardstock with puffy cloud borders die.
- Die cut green cardstock with grassy border die, stamp the sentiment and heat emboss with white embossing powder.
- Die cut white cardstock with pull tab die and decorative die.
- Die cut acetate with swishing die.
- Star frame part. Die cut white cardstock with star die and color with 2 colors of distress ink. Die cut yellow paper and thin foam sheet with star frame die. Stamp the bunny, color and die cut with coordinating die.
- Stamp the fox, scooter and light. Color and die cut with coordinating die.
- Two mini metal brads.
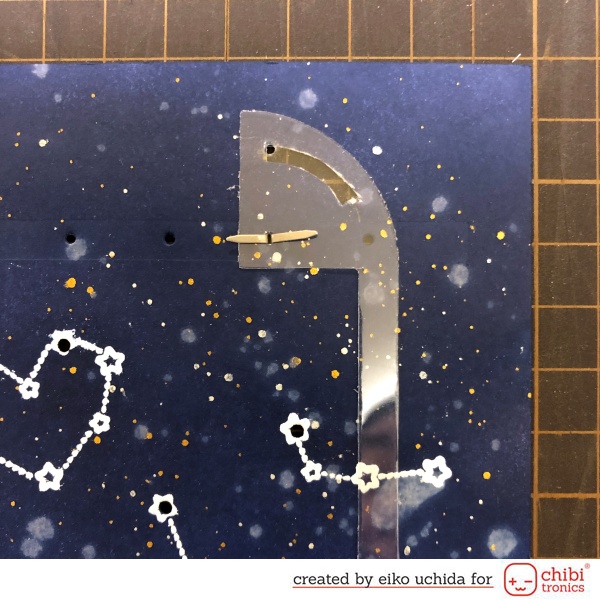
Fix the swishing part to the second hole from the right with brad. Cut the path of another hole in the swishing part with a craft knife.
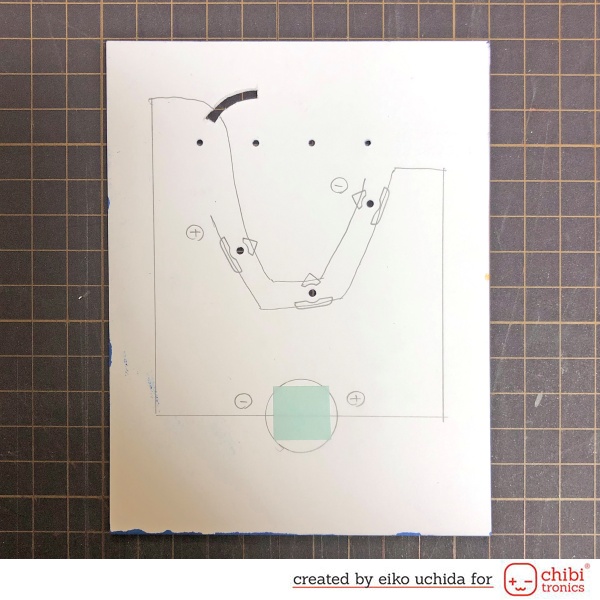
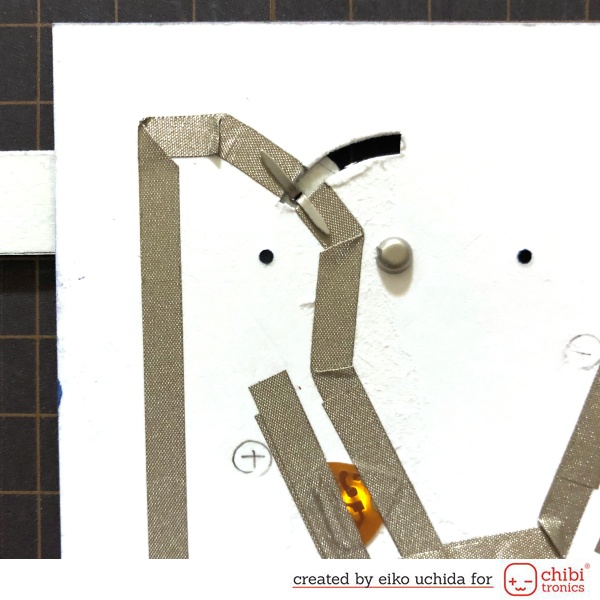
- Make the circuit on the backside of the background.
- Mark the position of the Chibitronics and the battery.
- Draw the circuit with a pencil.
- Apply the double-sided tape on the battery place.
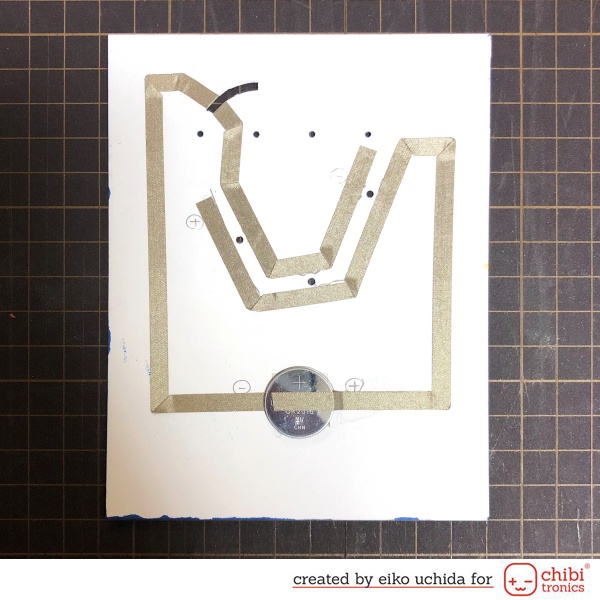
- Stick the conductive fabric tape on the pre-drawn path.
- At the battery place, peel off the release paper, stick the negative side fabric tape, fold it back and cut it.
- Stick the positive side fabric tape.
- At the position of the battery leave the positive side fabric tape about 1 inch and cut it.
- Place the battery on the fabric tape with positive side facing up and stick the positive side fabric tape on the battery.
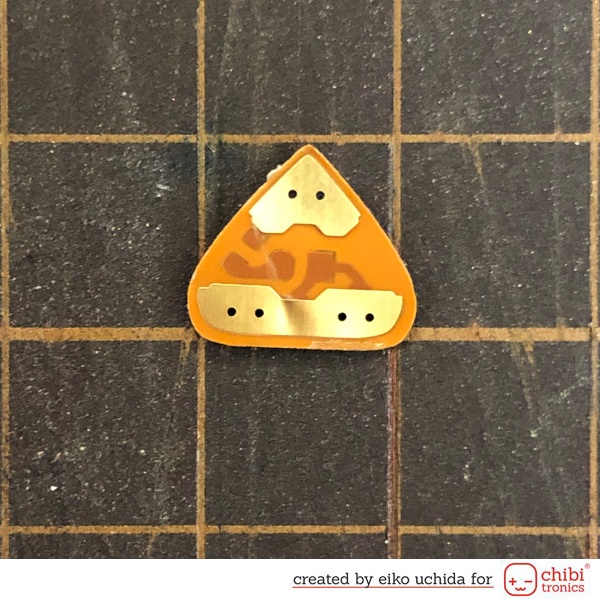
Remove the adhesive tape on the back of the chibitronics LED sticker.
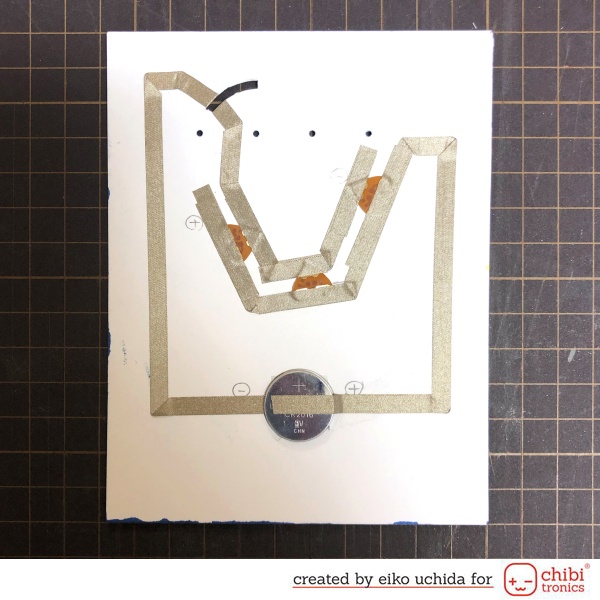
Put the yellow LED to the fabric tape, over the outline. Stick short fabric tape on the edges of the LED to reinforce.
Connect the pull tab part and swishing part with brad. Pass the brad legs through the slit.
The back side is like this.
- Assemble the card.
- Die cut the cloud parts with notch creating die.
- Stick the cloud and grass parts with thin foam tape.
- Stick the fox and scooter parts on the swishing part.
- Stick the star frame part on the cloud part.
- Stick another white cardstock on the backside of the background to reinforce.
- Stick the background on the folded blue cardstock.
I finished it!
When you pull the tab, the scooter swinging up and the constellations glow.
Thank you for stopping by!
Eiko Uchida
~Supplies List~
- Chibitronics Red, Yellow, and Blue LED Sticker Pack
- 3V coin cell battery (CR2016)
- Conductive Fabric tape
- Lawn Fawn swish’n pop pull tab lawn cuts
- Lawn Fawn scootin’ by
- Lawn Fawn scootin’ by lawn cuts
- Lawn Fawn upon a star
- Lawn Fawn grassy border lawn cuts
- Lawn Fawn puffy cloud borders lawn cuts
- Lawn Fawn outside in stitched star stackables lawn cuts
- Lawn Fawn stitched star frames lawn cuts
- Lawn Fawn citrine paper
- Lawn Fawn blue jay cardstock
- Lawn Fawn rainforest cardstock
- Lawn Fawn vellum
- Lawn Fawn clear acetate
- Ranger distress white heavystock
- Lawn Fawn white embossing powder
- Tim Holtz distress ink chipped sapphire
- Tim Holtz distress ink prize ribbon
- ZIG Gansai Tambi starry colors set