Hi, crafty friends!
This is Eiko. I make light up platform pop up card using Chibitronics and Lawn Fawn platform pop-up dies.
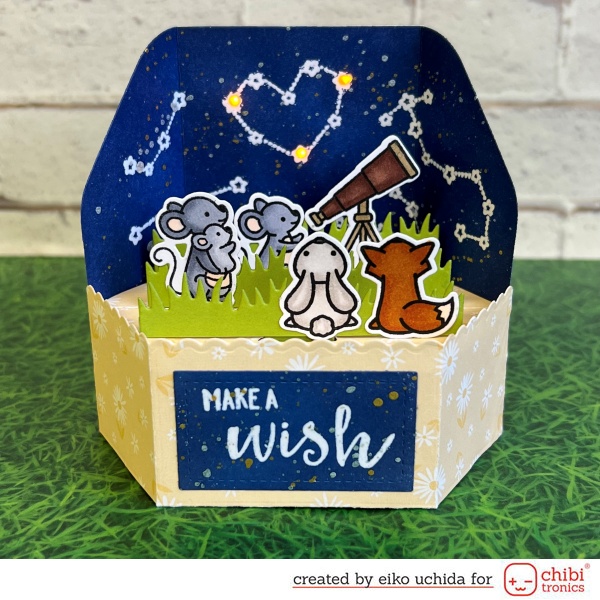
When you push up the platform, the heart-shaped constellations will shine.
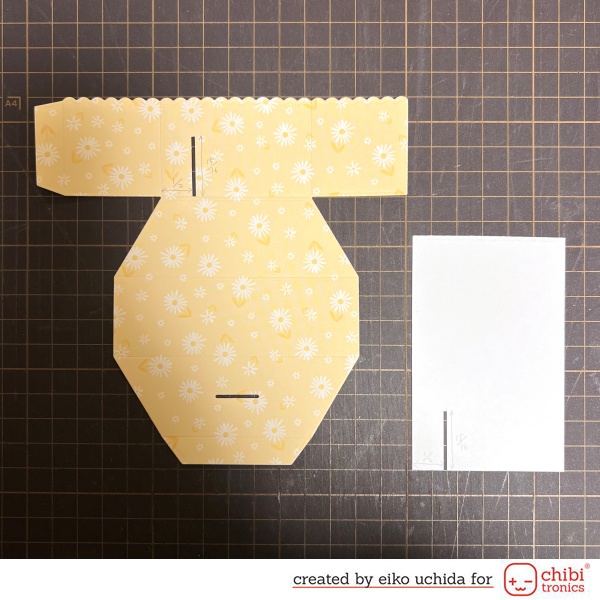
I will make the parts referring to the picture below.
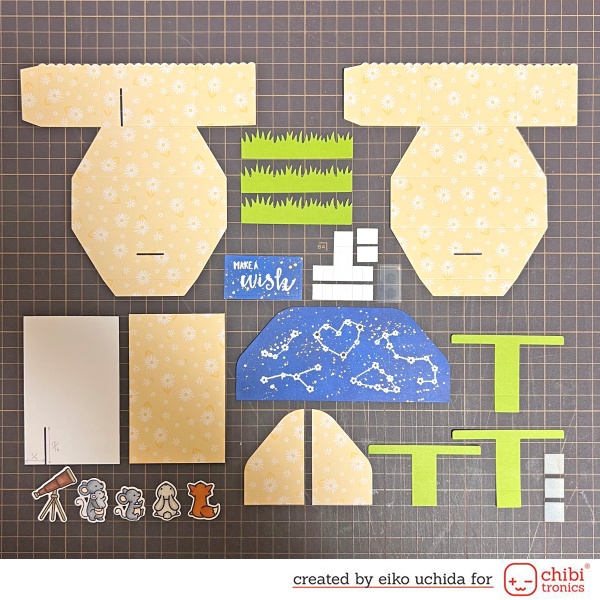
- Die cut buttercup pattern paper using platform pop-up die
- 3 pieces of cilantro cardstock die cut with a grass die
- Die cut the white cardstock with a rectangular die, emboss the sentiment with clear embossing powder, and color it with prize ribbon and chipped sapphire distress ink
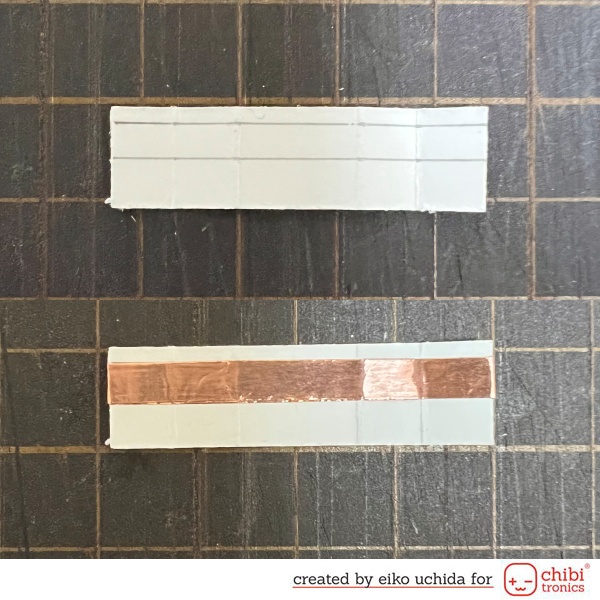
- Make 4 switch parts from white card stock (detailed size is shown in the next picture)
- 1/2 x 7/8 inch acetate part (for switch reinforcement)
- 2 3/8 x 3 5/8 inches white cardstock and buttercup pattern paper
- Die cut the white cardstock with a platform pop-up add-on die, emboss the constellations with clear embossing powder, and color it with prize ribbon and chipped sapphire distress ink
- Stamp the mouse, telescope, bunny and fox on the white cardstock, color it with copic marker and die cut
- Die cut buttercup pattern paper using platform pop-up add-on die and cut along the fold line
- 3 pieces of cilantro cardstock die cut with a T-shaped die
- 3 small vellum pieces
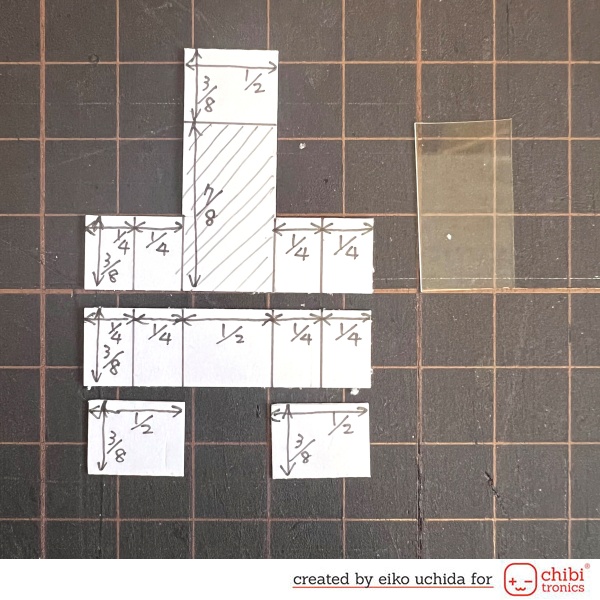
Make switch parts with reference to this picture. Paste the acetate part for reinforcement in the shaded area.
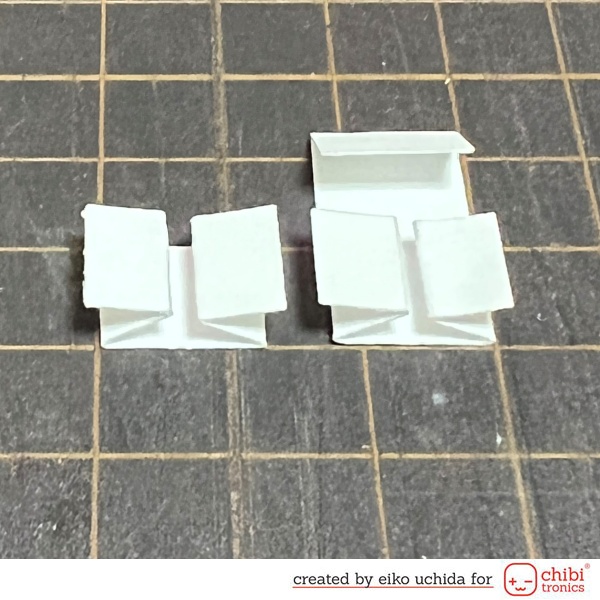
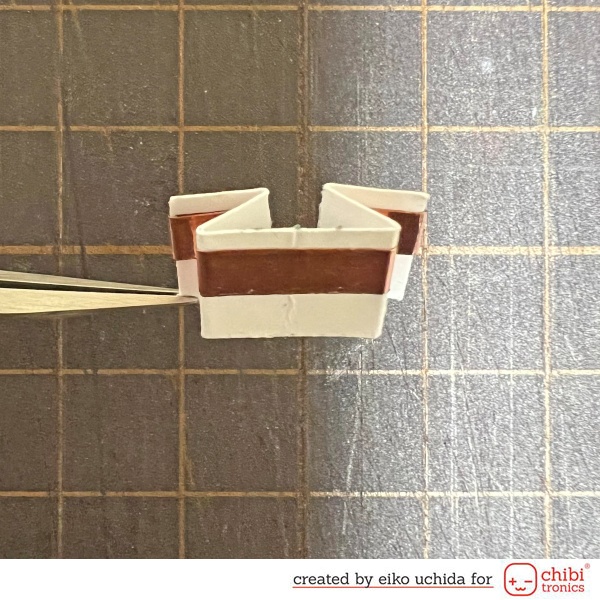
Fold along the crease.
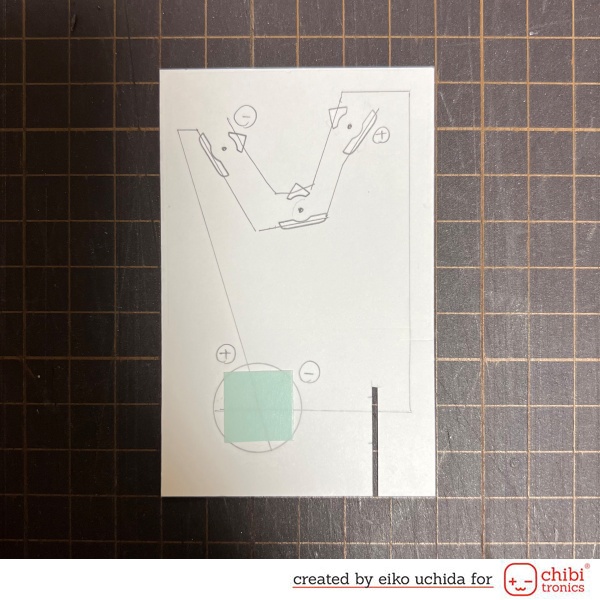
Make a slit on one of the platform part and the white card stock by referring to the figure.
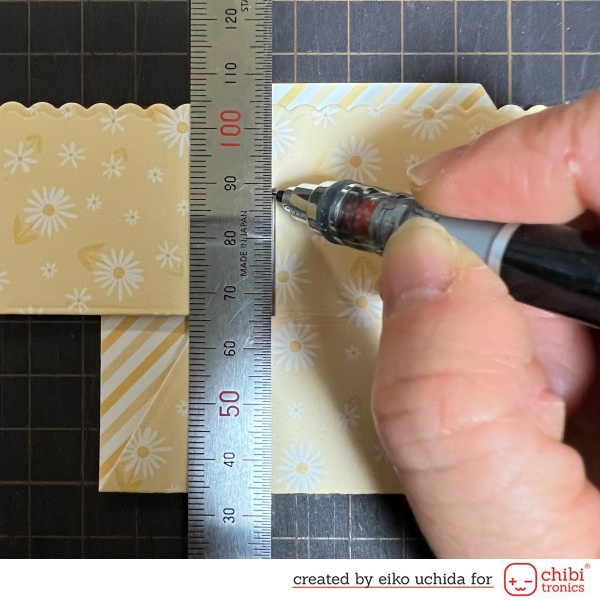
Fold the platform part and mark the location of the slit.
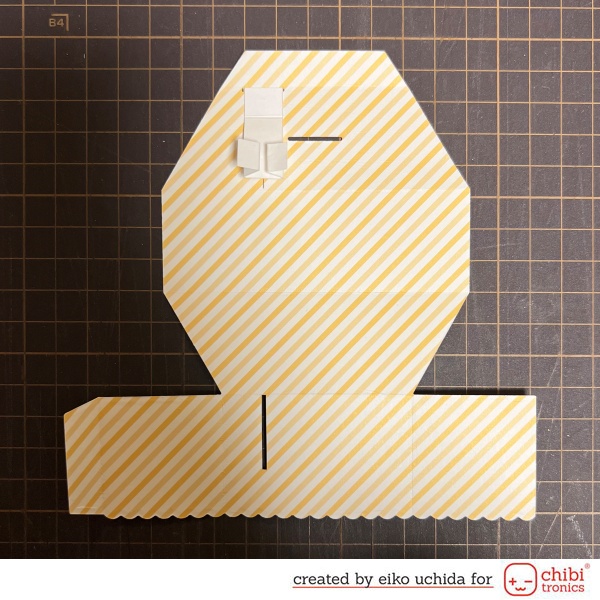
Attach the switch part to the marked place.
Assemble the platform parts. (Please refer to here for how to assemble)
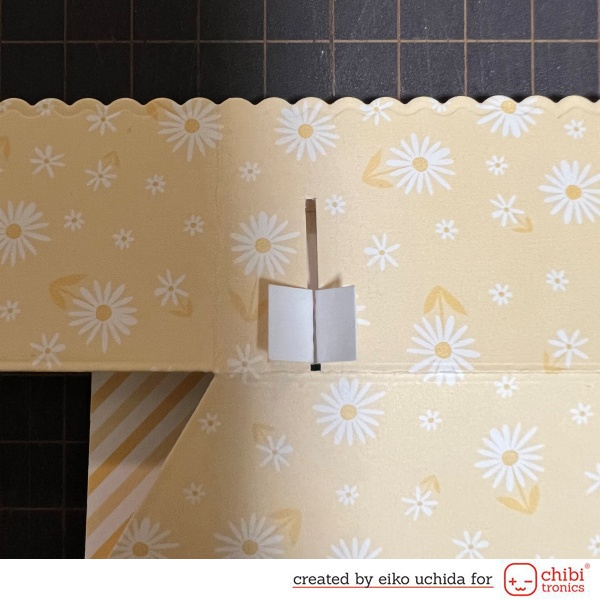
Put out the switch parts through the slit.
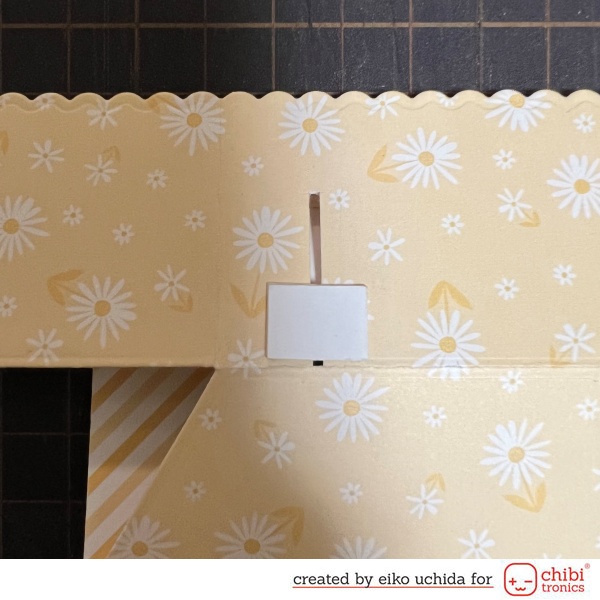
Stick 1/2 x 3/8 inch part on the switch part for reinforce.

Seen from the side, it looks like this.
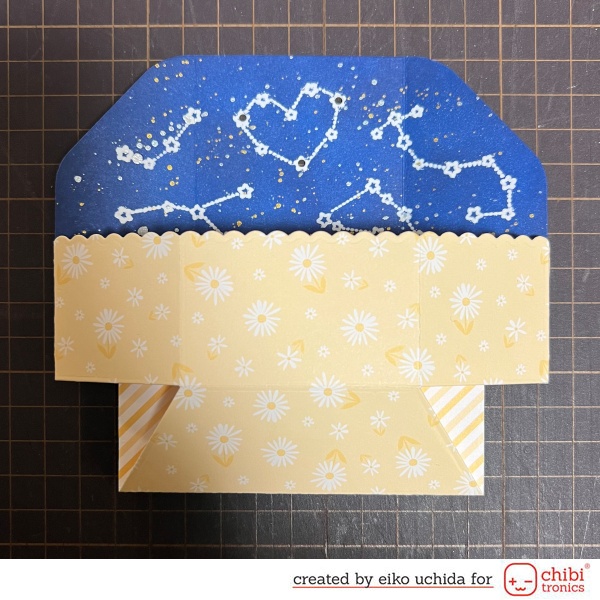
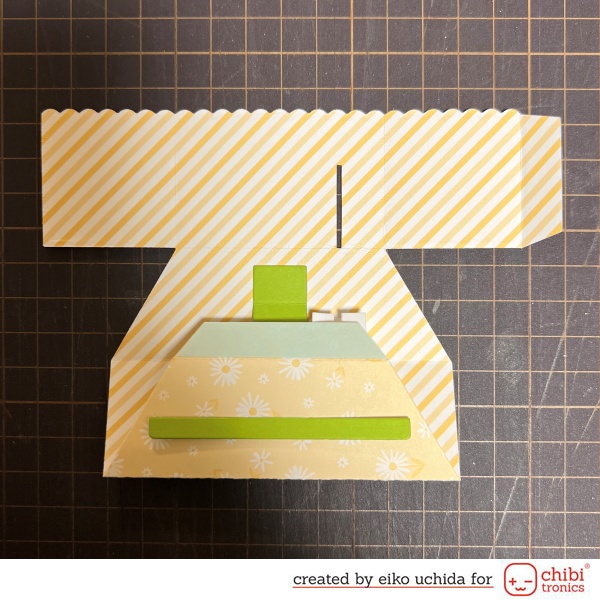
Assemble another platform part and attach the background part.
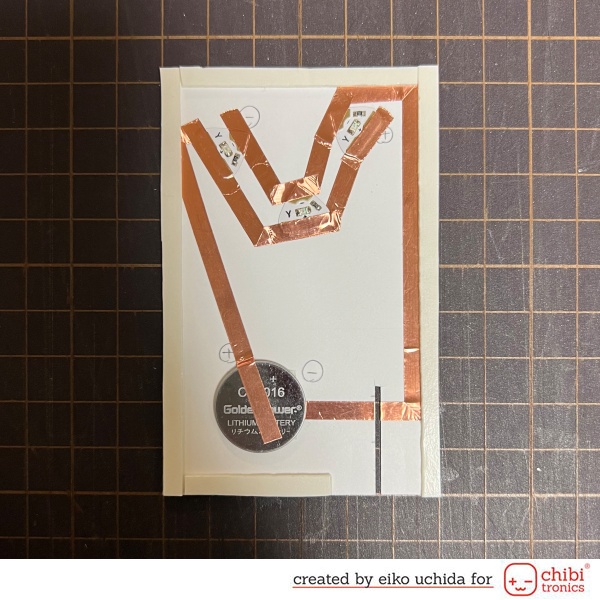
- Put the background part on white cardstock and mark the lights with a pencil.
- Mark the position of the Chibitronics and the battery.
- Draw the circuit with a pencil.
- Apply the double-sided tape on the battery place.
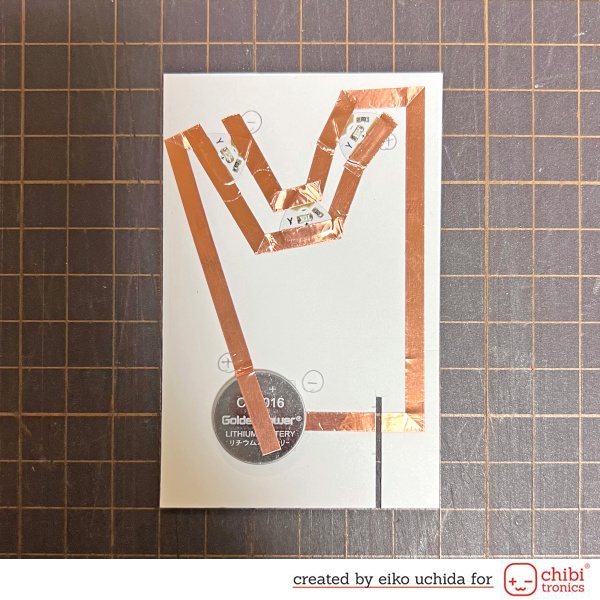
- Stick the copper tape on the pre-drawn path.
- At the battery place, peel off the release paper, stick the negative side copper tape, fold it back and cut it.
- Stick the positive side copper tape.
- At the position of the battery leave the positive side copper tape about 1 inch and cut it.
- Place the battery on the copper tape with positive side facing up and stick the positive side copper tape on the battery.
- Attach the yellow LED to the copper tape, over the outline.
- Stick short copper tape on the edges of the LED to reinforce.
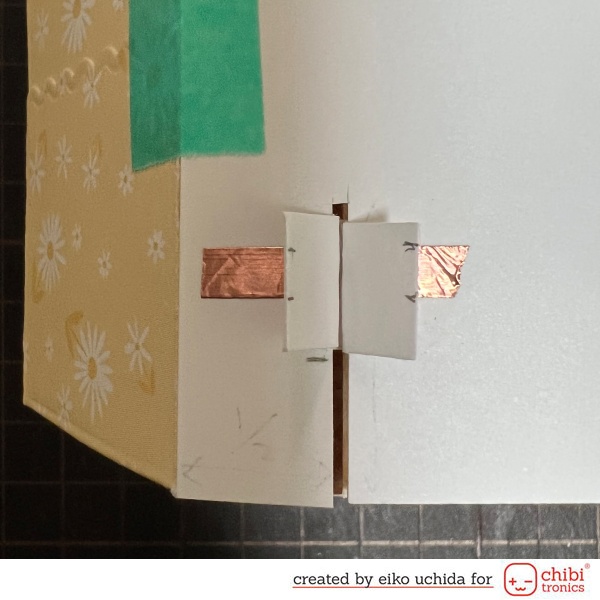
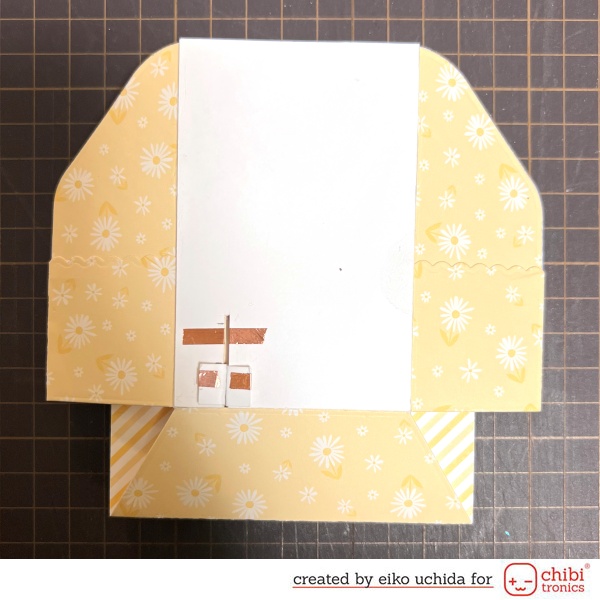
- Temporarily fix the circuit card base to the back of the platform part.
- Insert the switch into the slit and place it at the top end of the slit.
- Mark the position of the copper tape.
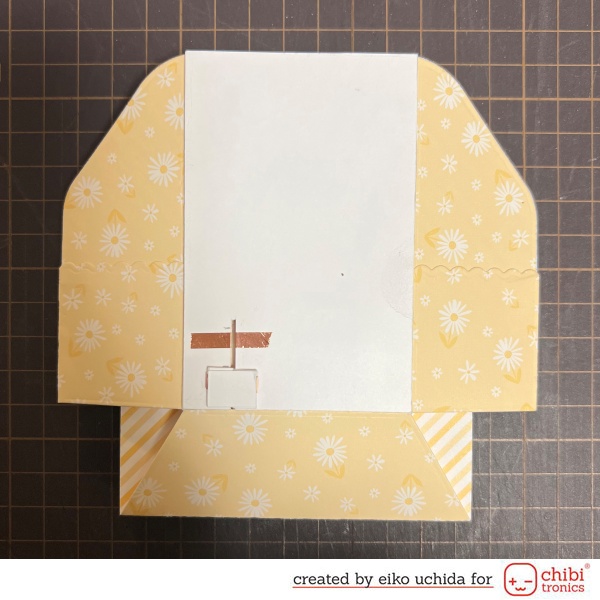
Remove the switch part from the slit and stick the copper tape on the mark.
Fold along the crease.
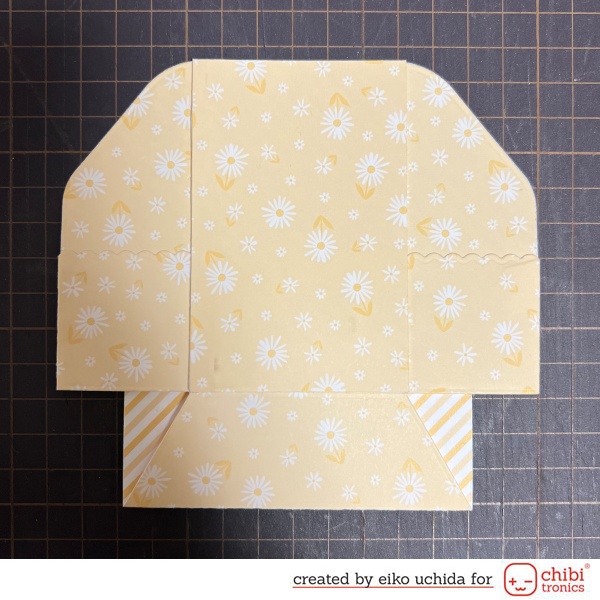
Stick the foam tape around the entire edge of the circuit card base.
Stick vellum parts on the back of the background part. Attach the circuit card base to the back of the platform part and pull out the switch parts through the slit.
Stick 1/2 x 3/8 inch part on the switch part for reinforce.
Stick the butter cup pattern paper on the back of the circuit card base.

Attach grass, mouse, telescope, bunny, and fox parts to the platform parts.
I finished it!

When folded, it becomes flat.
Thank you for stopping by!
Eiko Uchida
~Supplies List~
- Chibitronics Red, Yellow, Blue Mega Pack
- Two 3V coin cell battery (CR2016)
- 5mm wide Copper tape
- Lawn Fawn platform pop-up die
- Lawn Fawn platform pop-up add-on die
- Lawn Fawn super star stamp set
- Lawn Fawn super star lawn cuts
- Lawn Fawn upon a star stamp set
- Lawn Fawn upon a star lawn cuts
- Lawn Fawn dandy day stamp set
- Lawn Fawn dandy day lawn cuts
- Lawn Fawn buttercup pattern paper
- Lawn Fawn cilantro cardstock
- Lawn Fawn 80lb white cardstock
- Lawn Fawn acetate
- Lawn Fawn vellum
- Distress ink prize ribbon
- Distress ink chipped sapphire
- Hero arts ultra fine clear embossing powder
- ZIG Kuretake Gansai Tambi Starry Colors
- Copic marker E00, E25, E27, E50, Y28, W0, W2, W7, YR24, YR27, C0, C2, C4, C9