Hi everyone, this is Rana and I’m so happy to be back here in the blog with a new project with Chibitronics products.
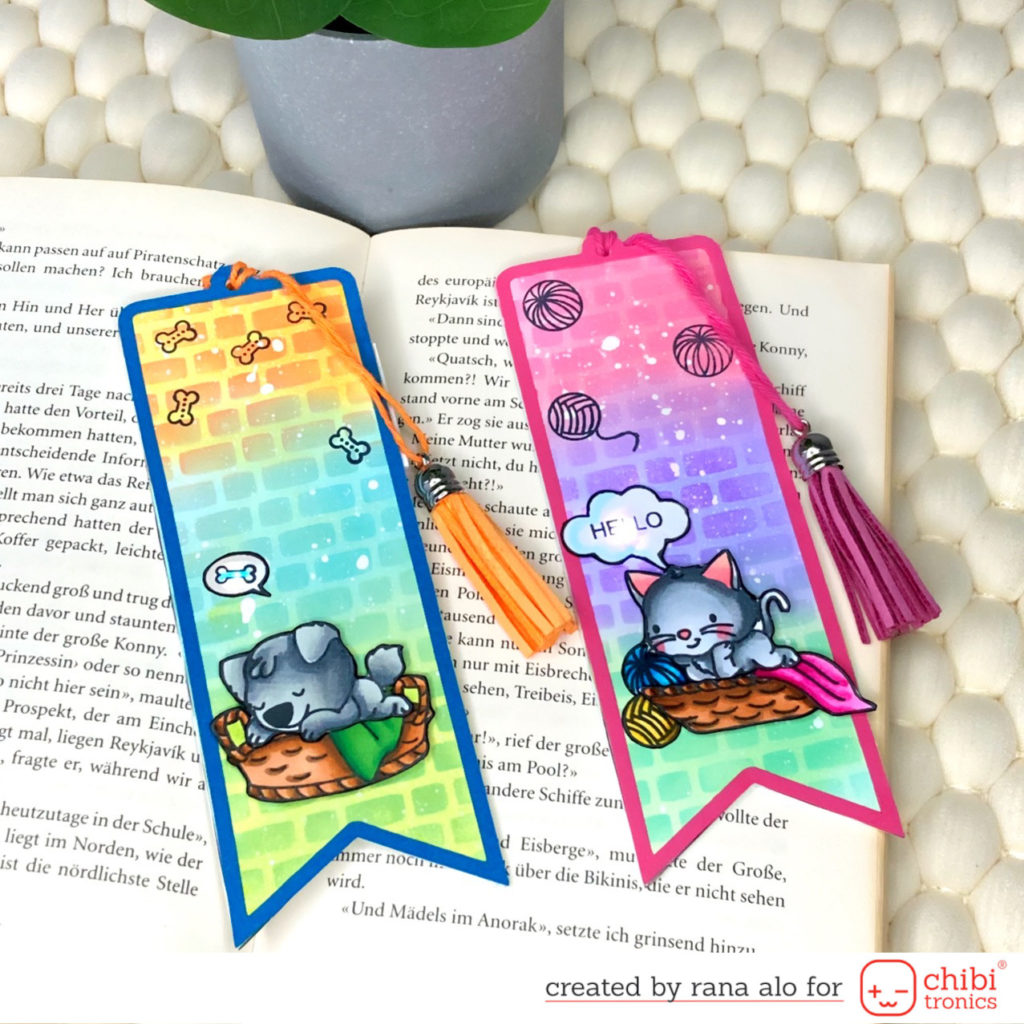
My project for today is a very cute light up bookmarks:
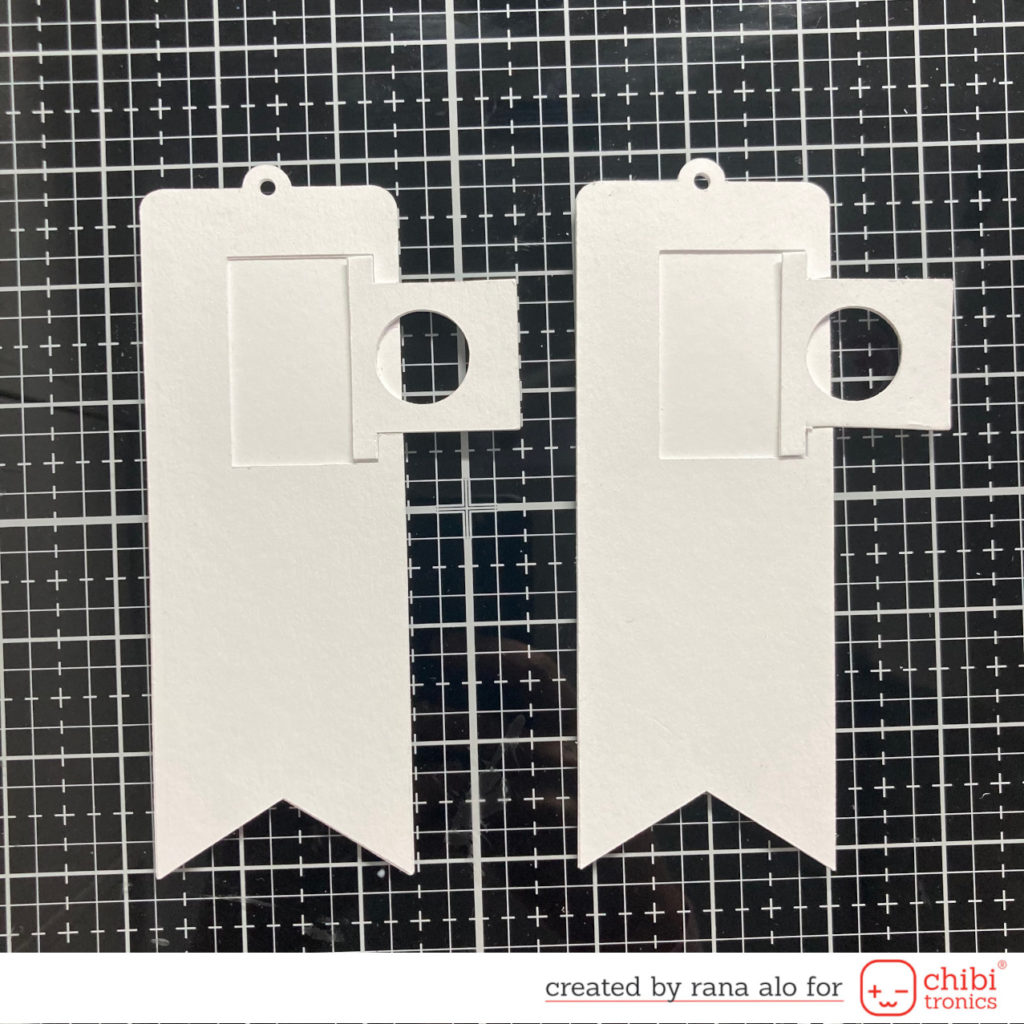
At first I started to design my bookmark with the circuit in silhouette studio software and then I simply cut all the elements using my silhouette portrait machine, here is the prices of the base and the battery holder:
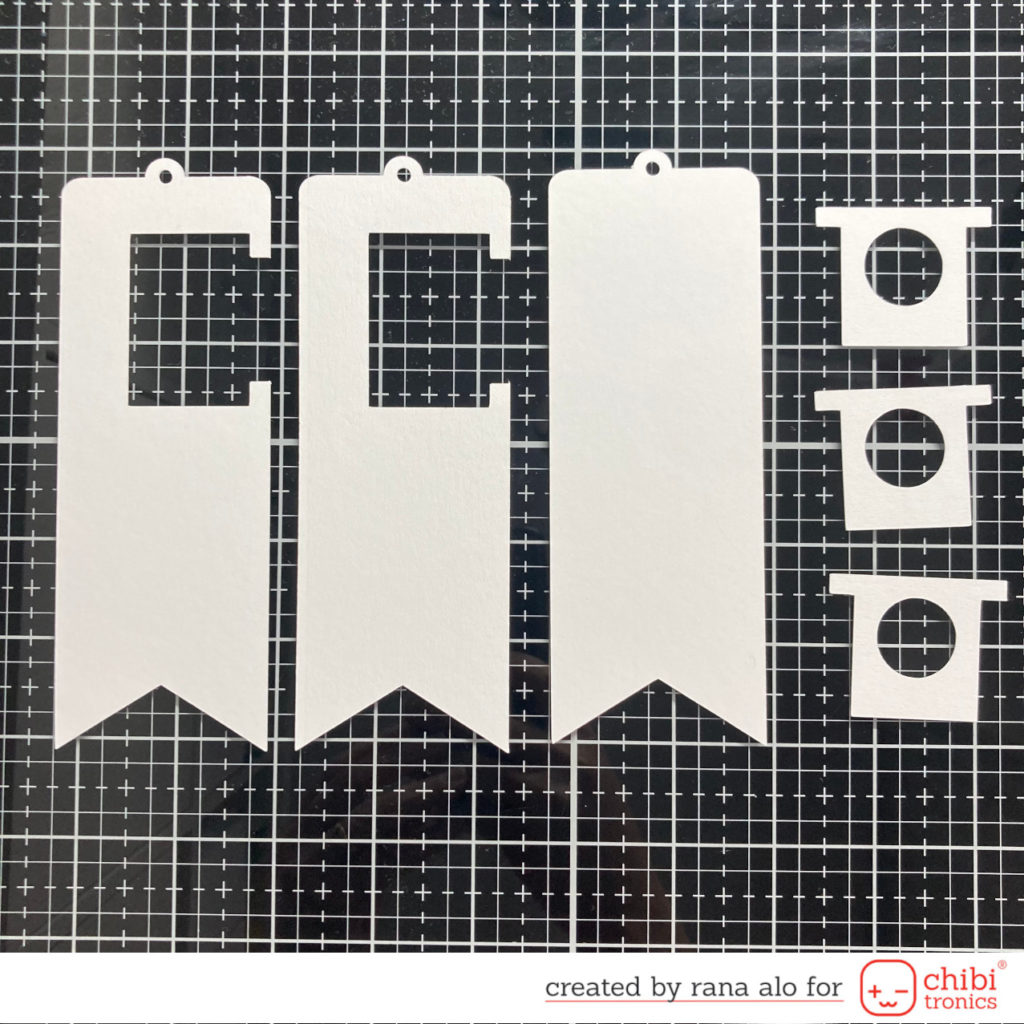
You may noticed that I cut more than one pice for each element and that’s because I wanted to create a thick board to hold the battery and I have a flat finish with the same thickness of the battery.
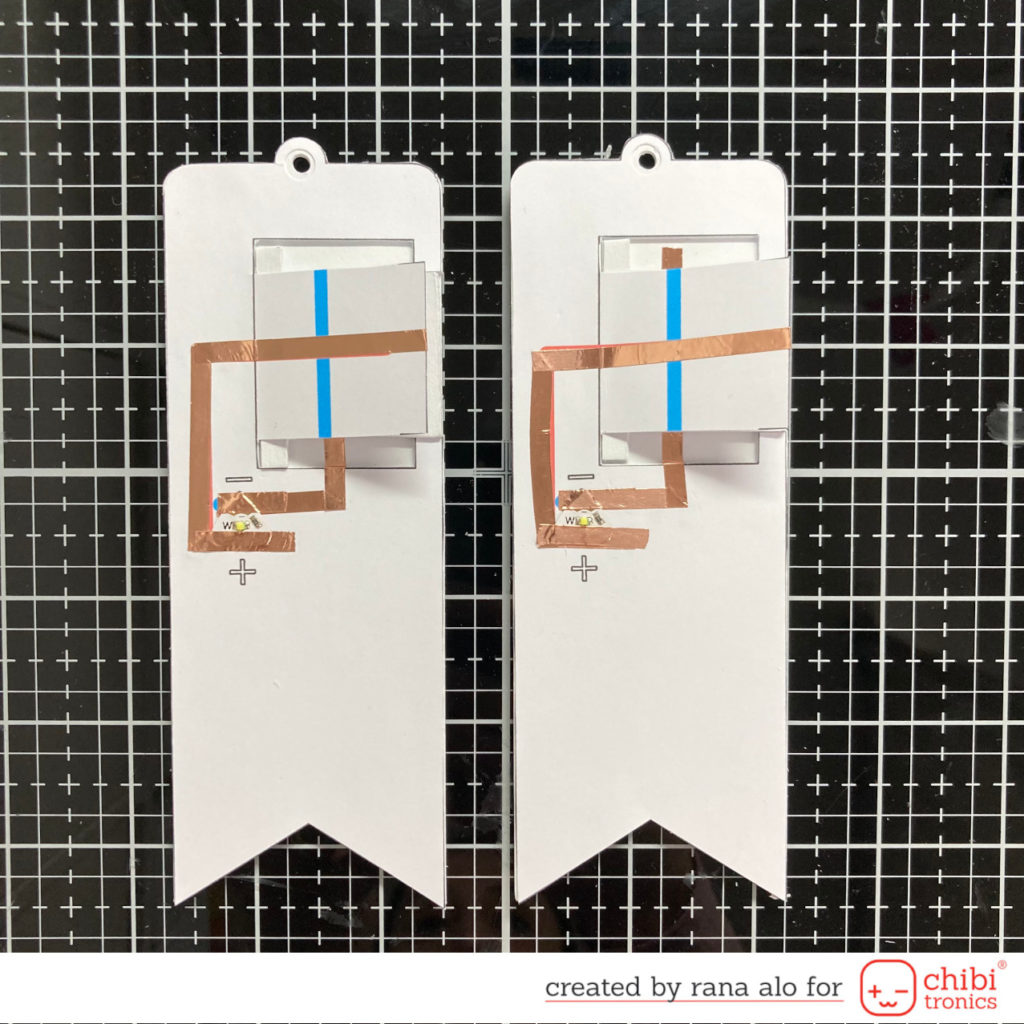
Now it’s time to assemble the circuit and I used for that Chibitronics copper tape and white LED stickers, this is how the circuit looks, it’s very simple but it’s add a lot of magic to the bookmarks:
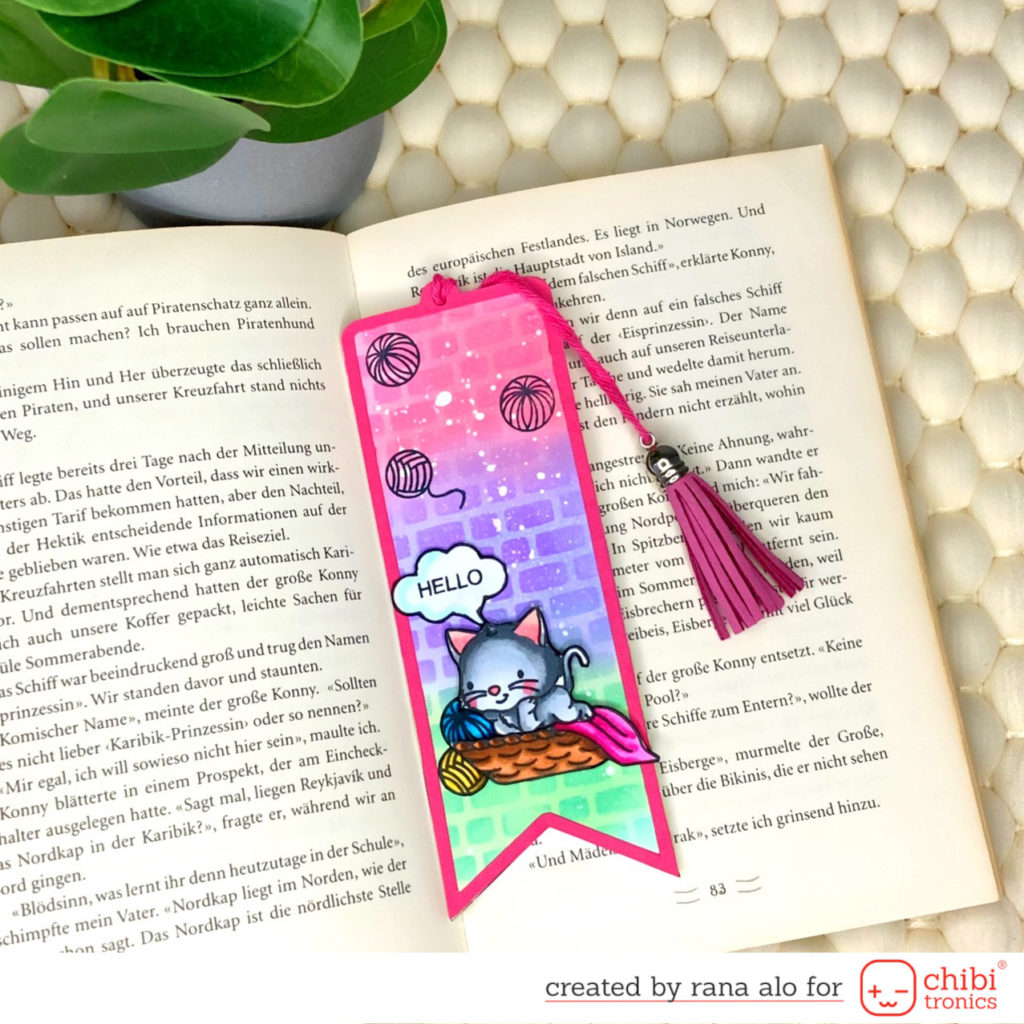
Time to add some colours to the bookmarks, I blended the background with distress oxide inks and as folowing:
For the pink Bookmark:
Cracked pistachio, shaded lilac, worn lipstick then I applied my stencil and blended the background again with peacock feather, wilted violet and picked raspberry.
For the blue Bookmark:
Twisted citron, tumbled glass, wilde honey then I applied my stencil and blended the background with Mowed lawn, salty ocean and ripe persimmon.
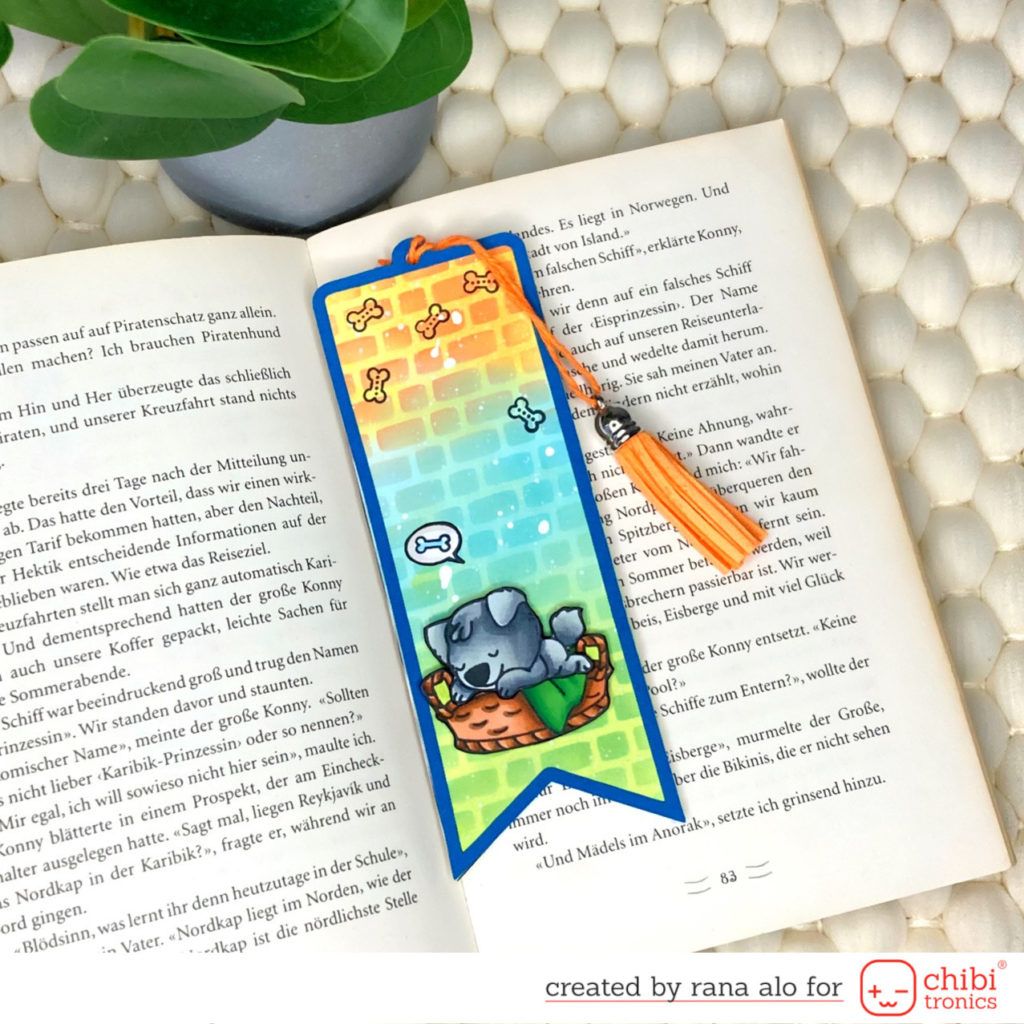
After peeling the stencil I splattered the background with water and dried it with a towel, then I splatters it again with white paint using a small painting brush.
To give the bookmark a nice borders I designed the borders and cut them from a pink a blue cardstock using my silhouette portrait machine.

The stamps that I used are from Magengo designs and you will find the links below, I simply stamped the images using Memento tuxedo black ink and collard them using Ohuhu brush markers.
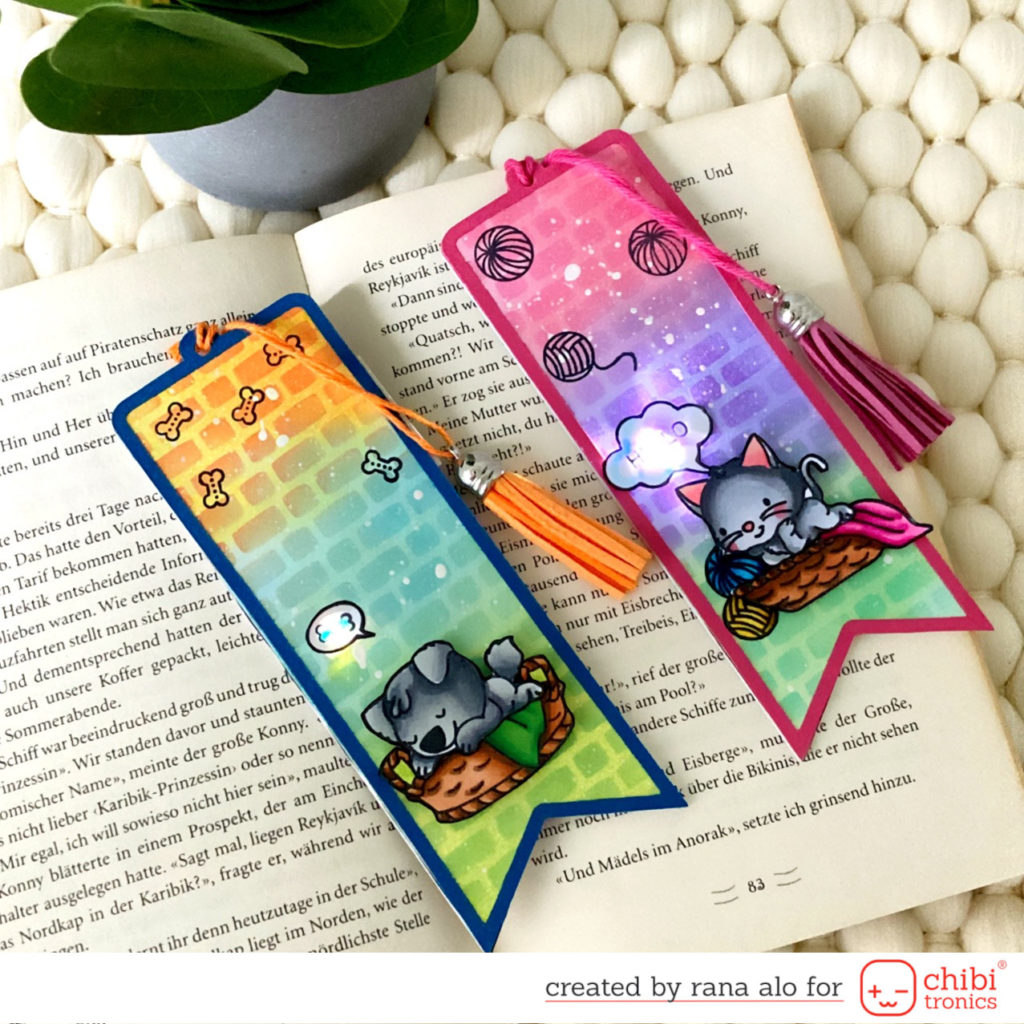
Finally I put my bookmarks together using liquid adhesive and double sided tape.
Product list:
Circuit supplies
Stamps
I hope you like my project for today and you will enjoy recreating it.
Have an awesome day
Rana