Hello Chibitronics friends!
I am happy to see you here today.
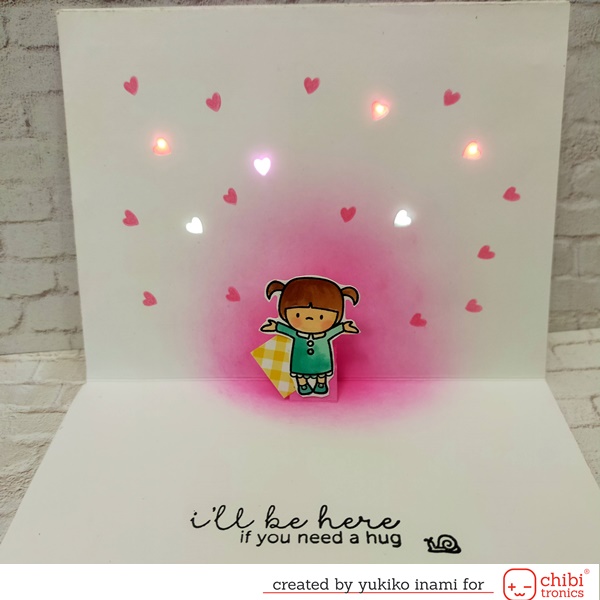
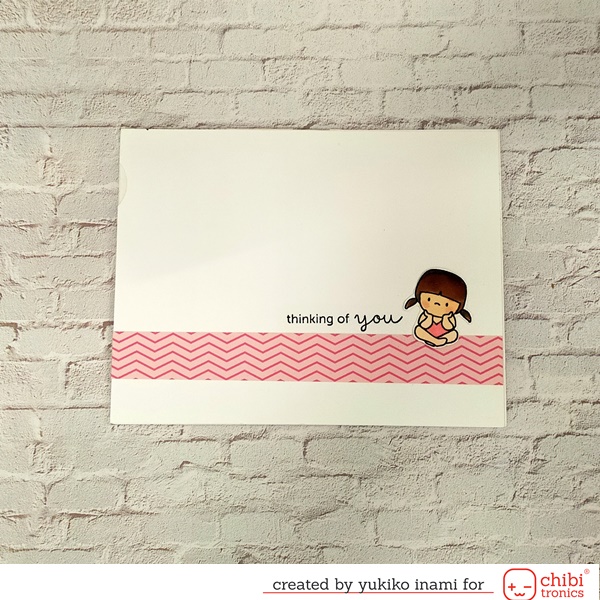
I am showing a pop up card that a adorable girl sending hugs to you!
I am showing a movie how this card works.
When you open this card, the hearts are shining. They have heartbeat effect with Circuit Stickers Effects Add-On.
You can enjoy the effect of the lights.
This card has a battery holder, that’s why you can replace the battery after running out.
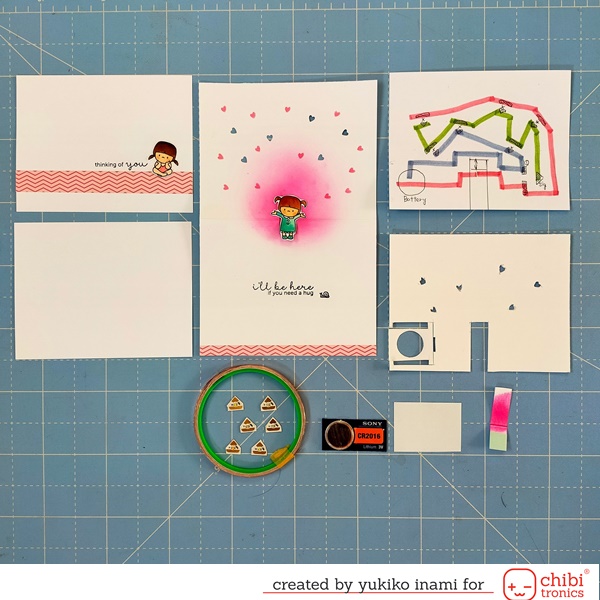
1. Supplies
I prepared these parts shown the below photo.
・Cover; 2sheets ; 4.25×5.5 inch
・Card base; 8.5×11 inch; I colored the background with the distress ink then I cut the heart shape holes for the lights I folded in half and cut two line 0.5 inch length for the pop up basement on the center.
・Circuit panel; 4.25×5.5 inch
・1㎜ thick board; 4.25×5.5 inch
I marked the light and cut out the heart shape, cut out the battery holder and the space for sliding the switch
・Switch Parts ; 1mm thick board ; size 0.5×0.25 inch
・Tab for the switch; 1/4×1 3/4″ I set the switch parts on the end.
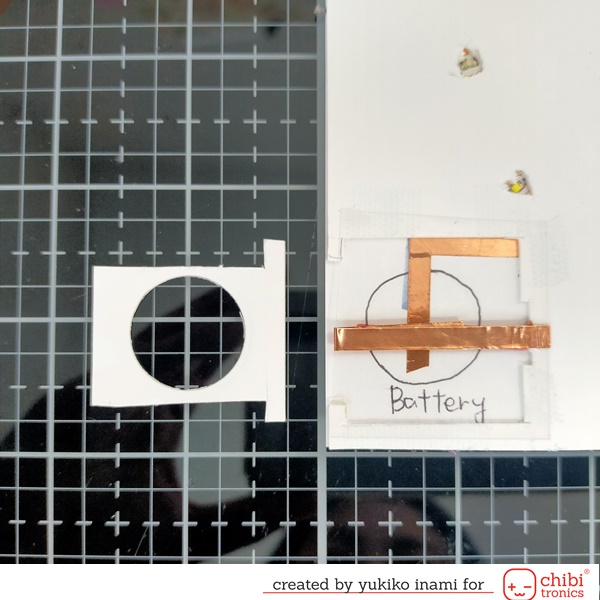
・Battery holder ; 1mm thick board 1.25×1.25 inch square I cut out the circle in the center of it for the battery and the cut the side as shown the photo.
・The lid for the battery holder; copy paper ;1.5×1.5 inch
・The girls parts ; I stamped the girls with IN MY HEART and colored and cut out.
・LED lights ; Red, Pink, and white each two: Lights Sampler MegaPack (30 LED Stickers) Red, Yellow, Blue, Pink, Orange, Green and White
・Circuit Stickers Effects Add-On + Stencil
・Copper Tape
・Cell battery 3V; CR2016
2. Circuit
I made the circuit on the circuit panel.
I planned to use six lights and Circuit Stickers Effects Add-On.
I set the switch site on the lower area.
The positive path run through the switch site from the battery to the effect sticker.
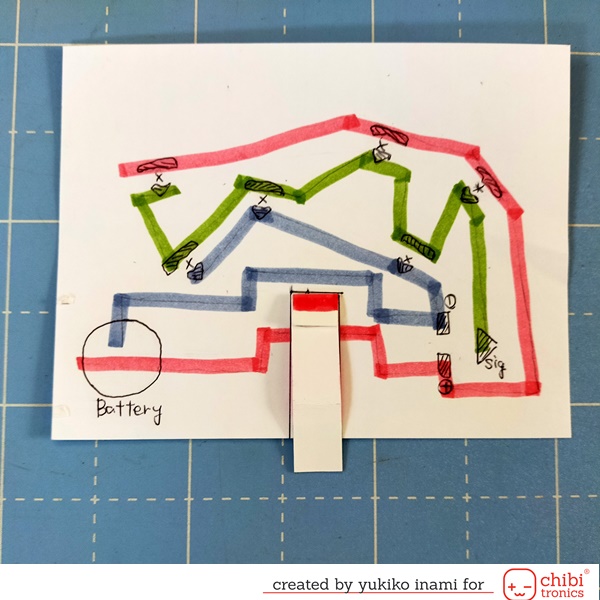
<How to make the circuit with the effect sticker getting the alternative effect>
You can check the detail about the effect sticker here!
・Set the place of the LED sticker and mark with the cross.
・Mark the place of the battery.
・Decide the place the Effect sticker
・Draw the circuit path.
First, connect the battery positive side to the effect sticker’s positive pad and the battery negative side to the effect sticker’s negative pad.
Next, draw the first path from the effect sticker to LED starting from the signal pad of the effect sticker and going through the LED sticker positive and negative pad alternatively. (shown with the green line)
Then the second path starts from the positive pad of the effect sticker and connects the LED positive pad free from the first path. (shown with the red line)
And the third path starts from the negative pad of the effect sticker and goes through the free negative pad of LED. (shown with the blue line)
You can trace the path in the photo showing above.
It looks complicated. But don’t be scared, you can track the path and confirm the pathway of electricity.
This way can make alternating effects with a single effect sticker.
・Stick copper tape on the drawn path.
Remain the 5inch copper tape on the end of the positive path connecting the positive side of the battery.
・Stick the LED stickers, press firmly on the metal pads
・Stick the effect sticker
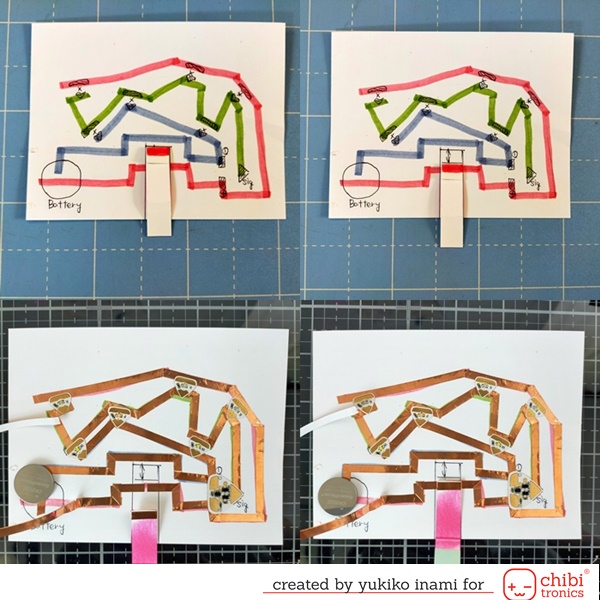
Confirm the circuit works well.
And reinforce the connections of the stickers and circuit by over-layering with the copper tape or the conductive fabric tape.
3. Assembly
I stuck the thick board on the circuit panel showing the below photos.
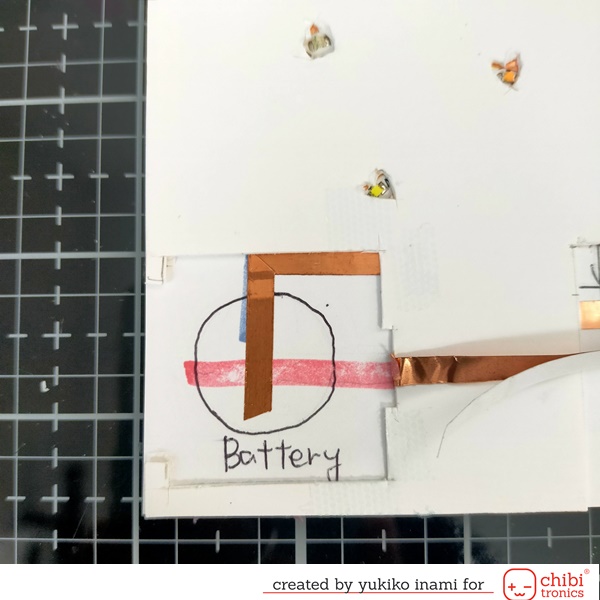
The battery holder
I put the glue on the topside of the battery holder’s lid not to disturb the insert the battery holder.
I stuck the card base on the thick board. Then I put the cover sheet outside.
It’s completed!

Thank you so much for stopping by today!
Have a wonderful week!
Yukiko I.