Hi everyone! this is Rana and I’m so happy to be back here in Chibitronics blog for a new light up card.
Today’s card is very simple to create because I wanted in this card to show you how to create a very simple and basic circuit.

As always I started to create my circuit and the battery holder in the silhouette software and then I sent the templates to my silhouette portrait machen for the cut prossec.
I always like to Create a flat card especially when it coms to the light up card and I need later to insert a battery to turn my card on. for this purpose I cut the battery holder template 3 time from a 200g cardstok and stack all together to a thick board that have the same thickness of the battery and that’s how the battery holder layer looks after attaching it to the card base.

After that I started to build my circuit using Chibitronics copper tape and also the Chibitronics LED stickers.
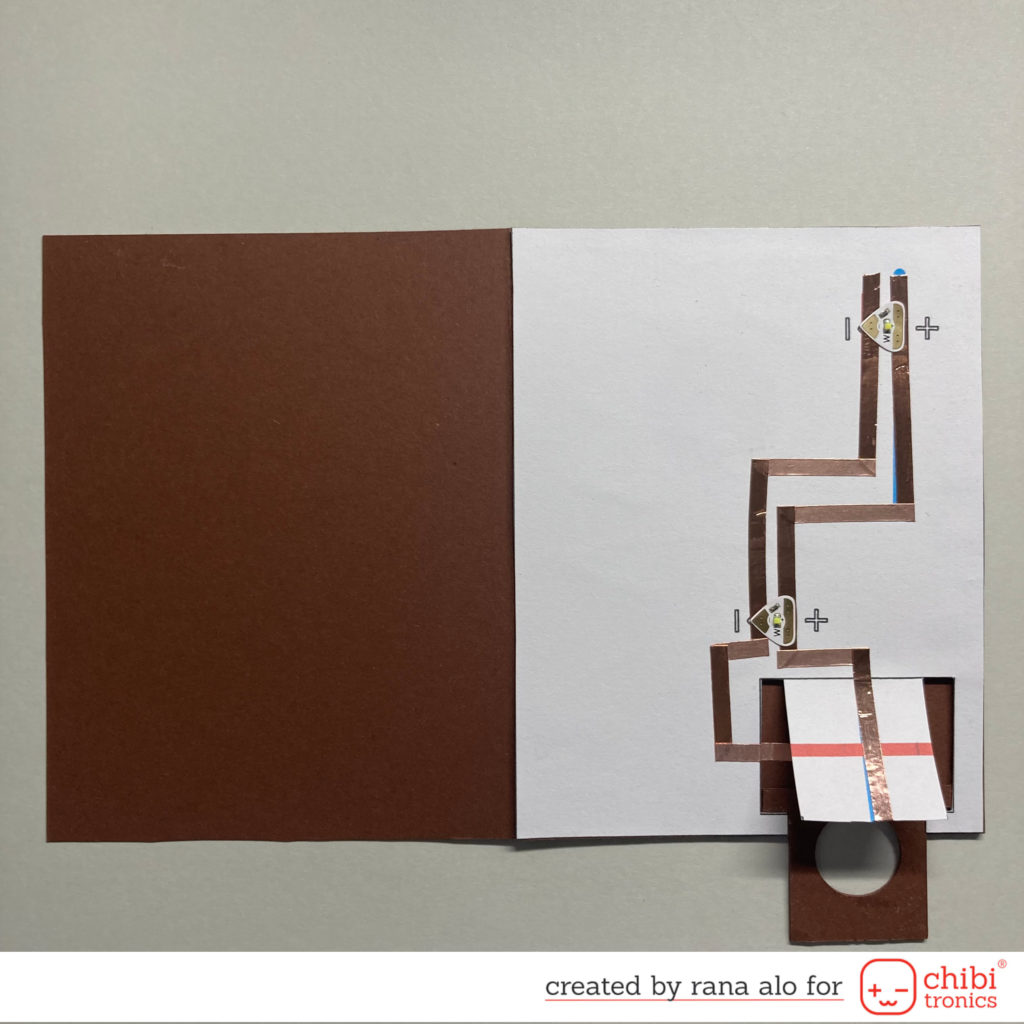
You can see how simple the circuit template is and how easy is to create.
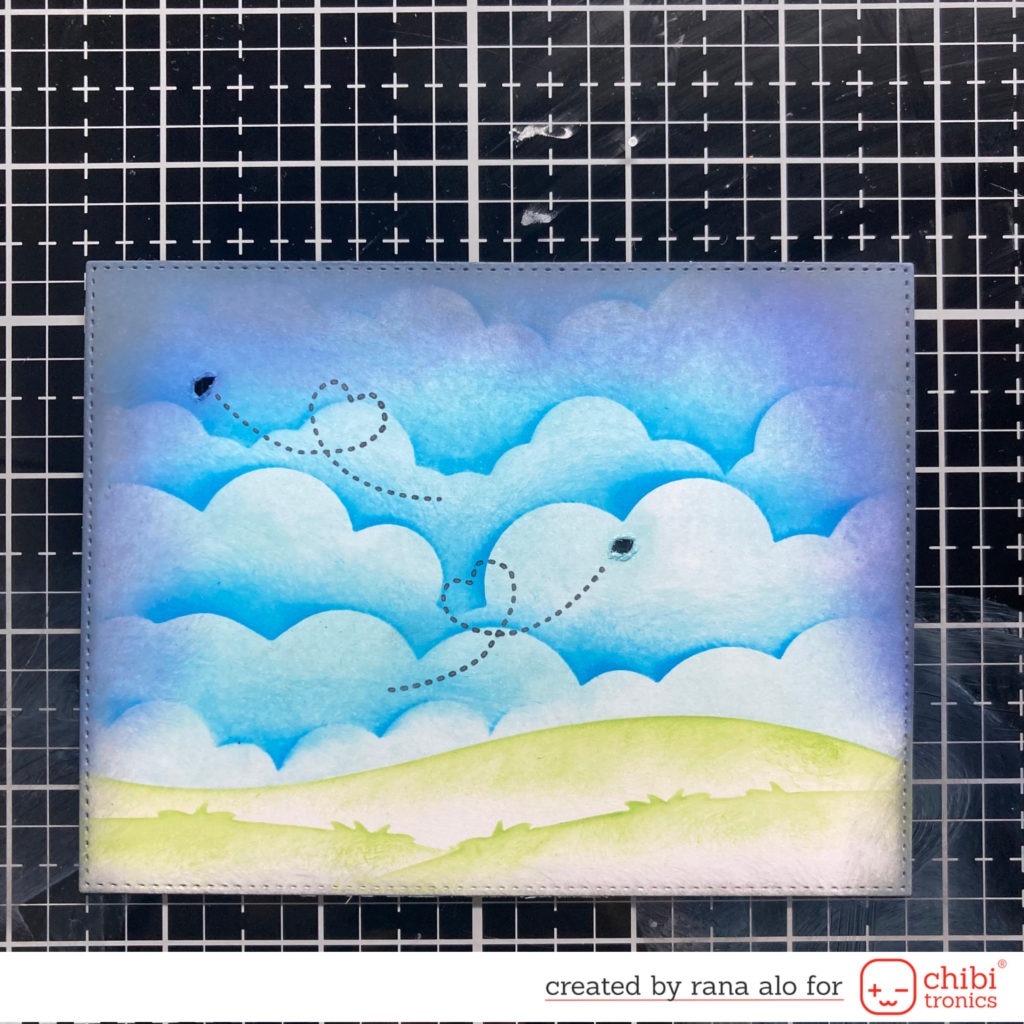
Now it’s time to add some colours and stamps to finish our card and make the LED stickers pop up, for that I started to create the background and I used for Fluffy clouds and wavy hills Magengo Designs stencils and used Mowed lawn distress oxide ink for the hills and salty ocean and Chipped sapphire distress oxide inks to create the sky and the clouds.
All the stamps that Im using today are from Happy mail stamp set by Magengo Designs, I stamped them using Memento tuxedo black ink and then collared them using Ohuhu alcohol markers.
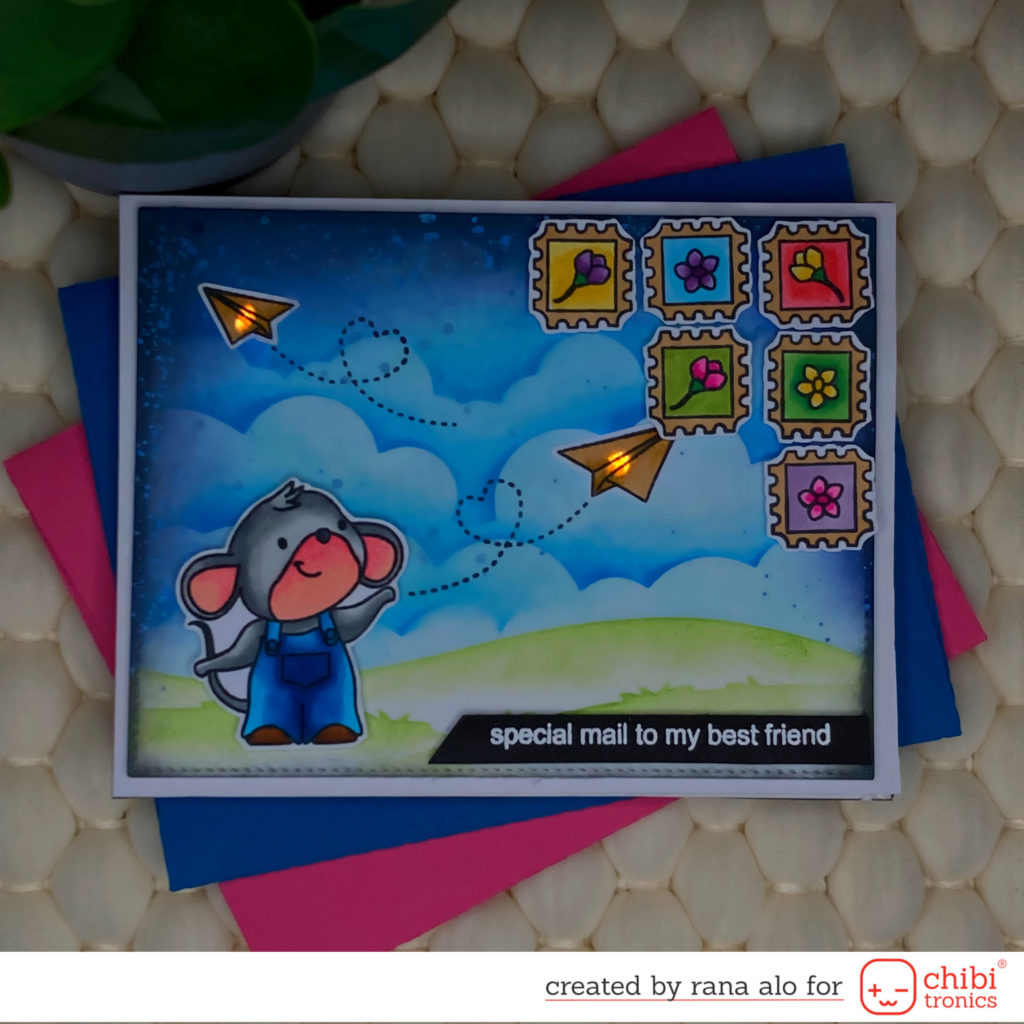
To finish my card I used liquid adhesive and some of foam squares to attach all the stamps on my card.
Products:
- Chibitronics copper tape.
- Chibitronics LED stickers.
- Magengo designs Fluffy cloud stencil.
- Magengo designs wavy hills stencil.
- Magengo Designs Happy mail stamp set.
- Mowed lawn distress oxide inks.
- Salty ocean distress oxide inks.
- Chipped sapphire distress oxide ink.
- Liquide adhesive and fome adhesive.
This was my card for today, I hope you like it and you can easily recreate it.
Please feel free to let your questions in the comments below this post and I will be more Tham happy to help you.
Have an awesome day
Rana