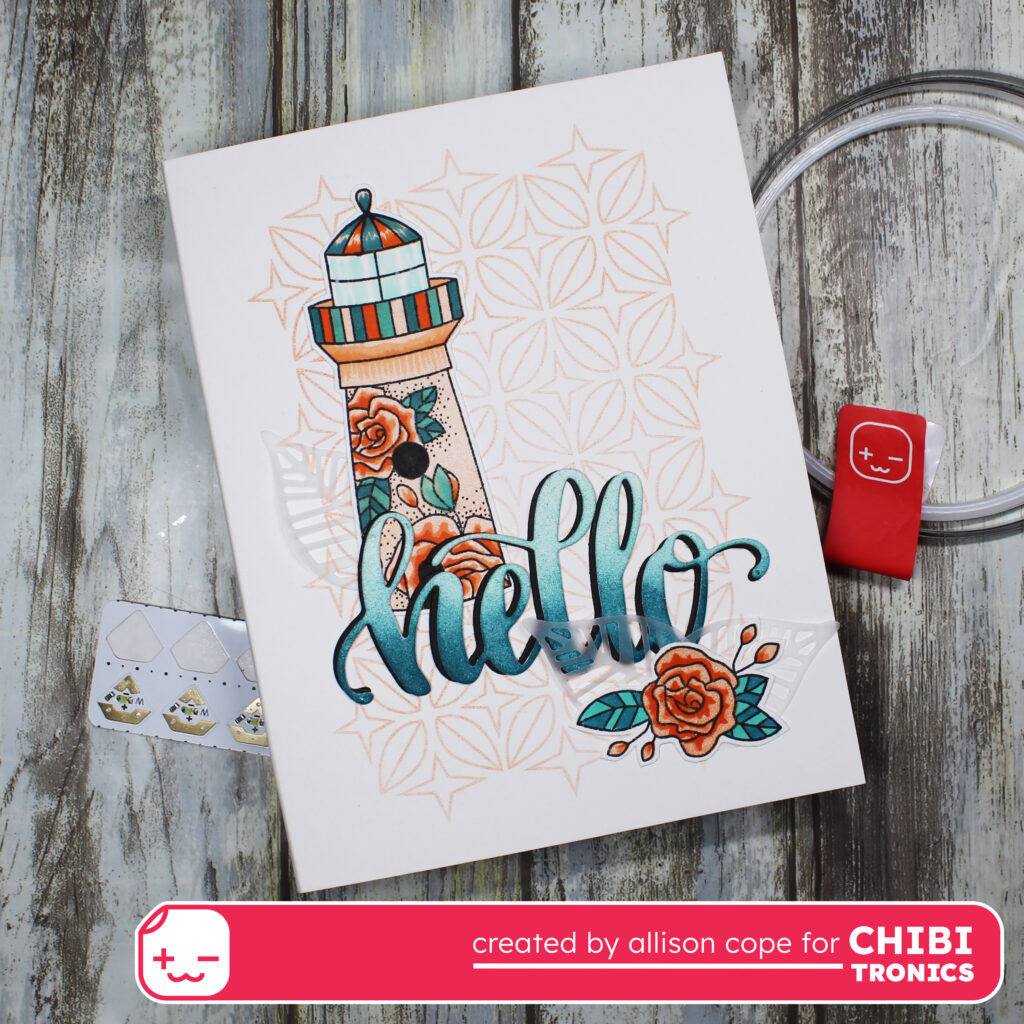
Howdy all! I’m Allison Cope and today we’re going to make blinking light-up lighthouse card!
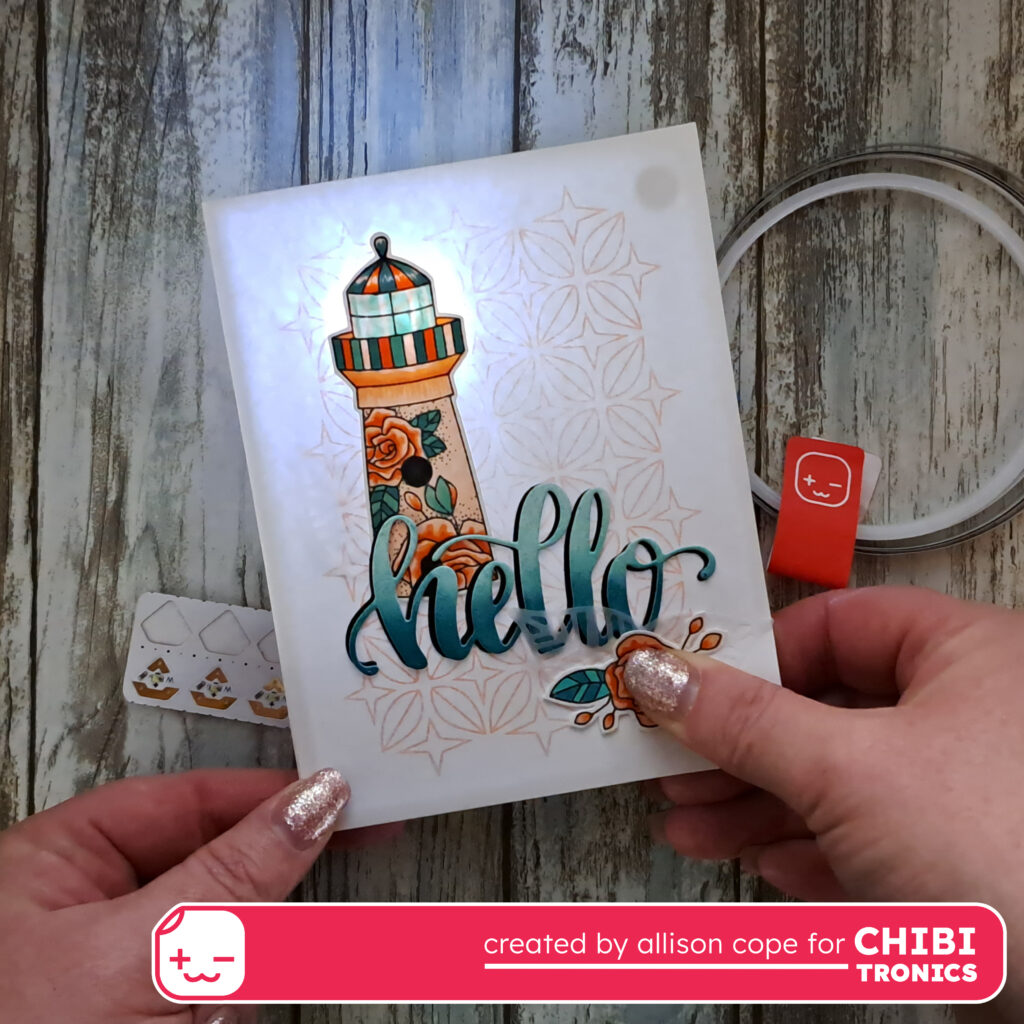
I began today’s card by creating my scene using all kinds of Catherine Pooler Designs products. If you’d like a more detailed tutorial of all of these elements, you can visit my personal blog post here.
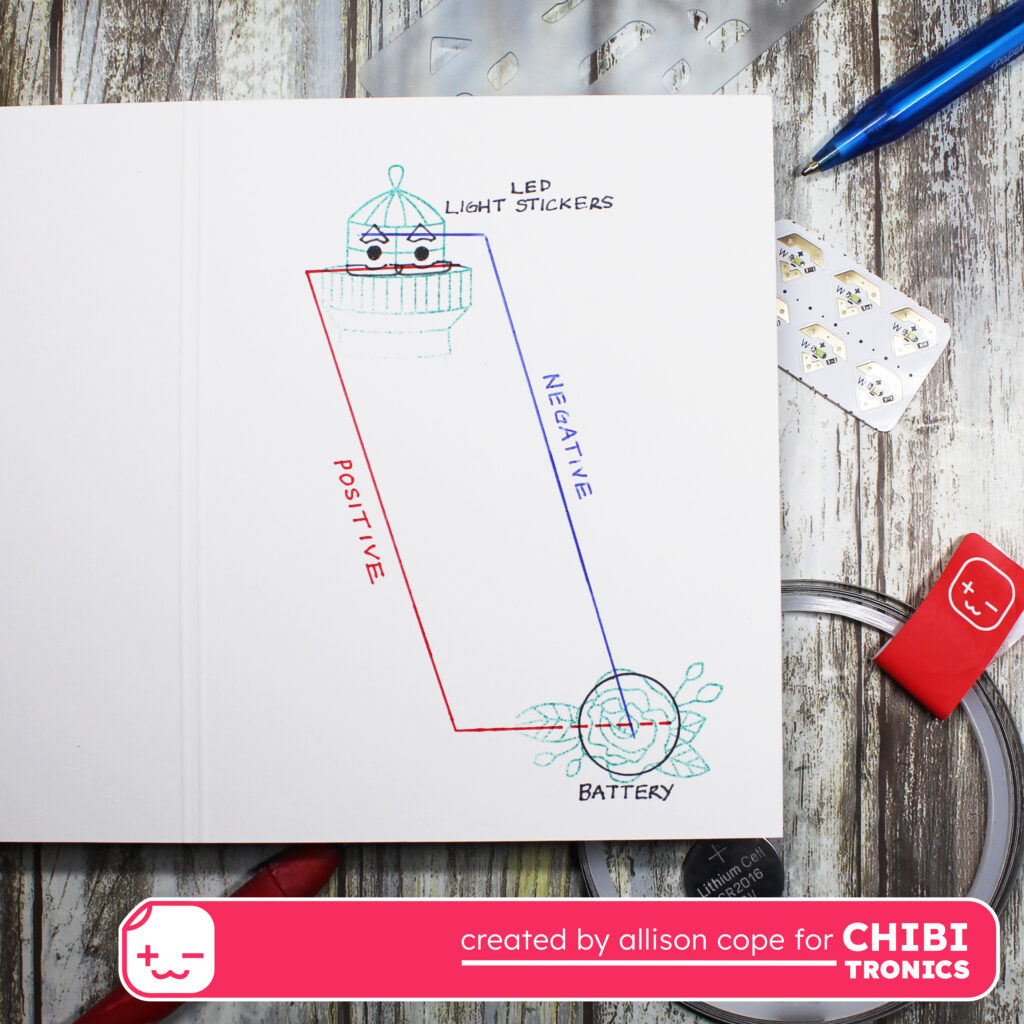
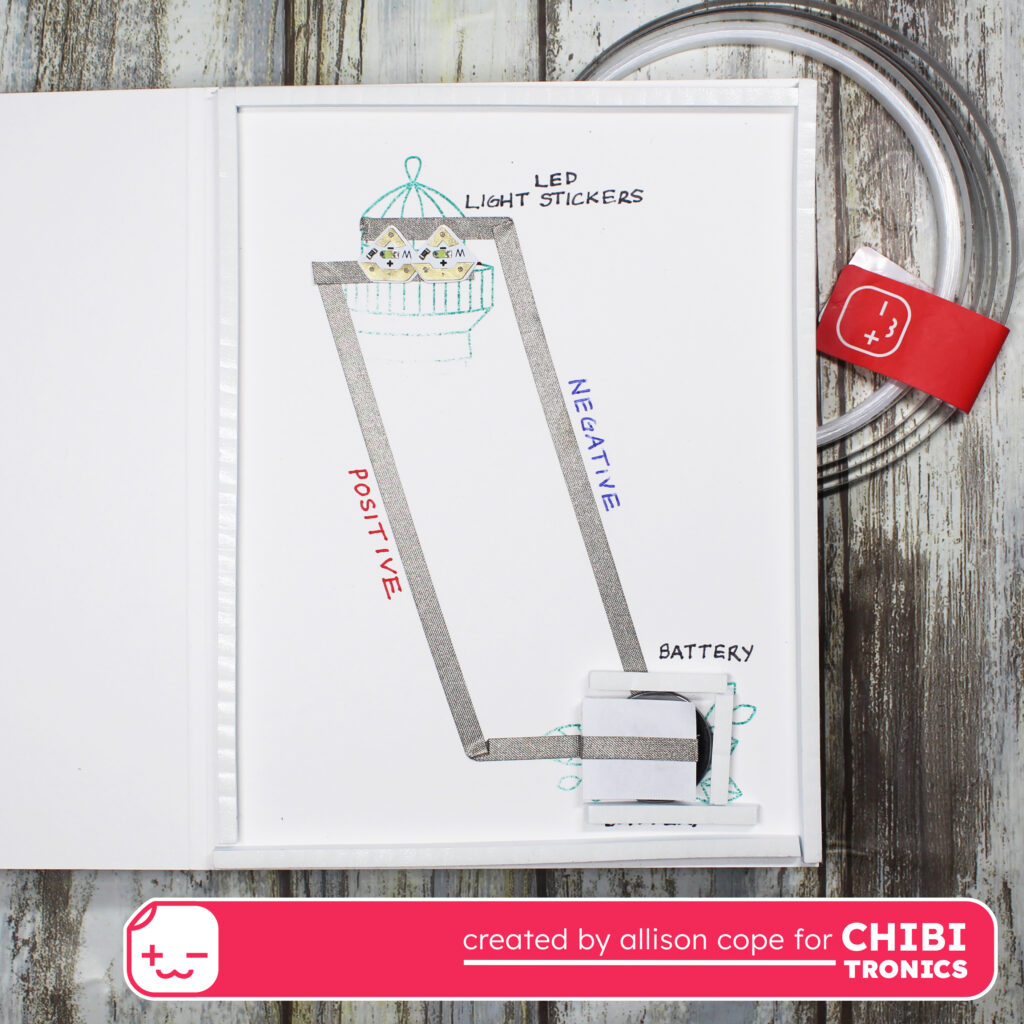
Then I began to plan out my circuit. So on the inside of my 3D folded panel, I partially stamped the light portion of the lighthouse and the roses in the same location they are found on the card front. Next I used my Craft Stencil to map out the location of my 2 Gem Shaped Animating White LED Light Stickers. These stickers are BRAND NEW and will be released sometime around the first week of September. I also laid out the position of the battery and the negative and positive sides of the circuit.
Next I laid my Conductive Fabric Tape down on the negative side of the circuit. Then I framed in my battery housing using some 3D foam in preparation for my battery and the beginning of the positive side of the circuit. I also placed a row of 3D foam adhesive around the outer edges of the panel.
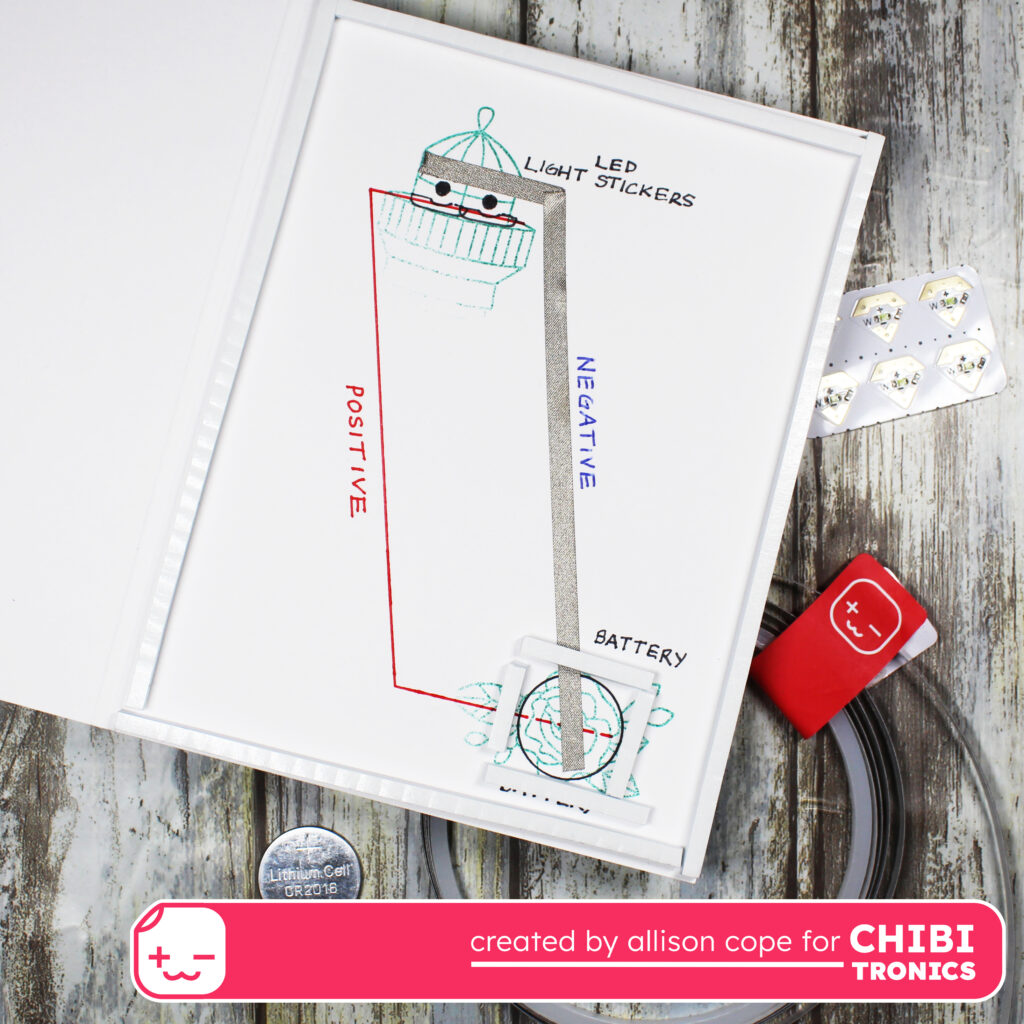
Next, I created a paper flap and begin the positive side of my circuit. I began my Conductive Fabric Tape end under the flap and then proceeded to take the tape up to finish off the circuit.
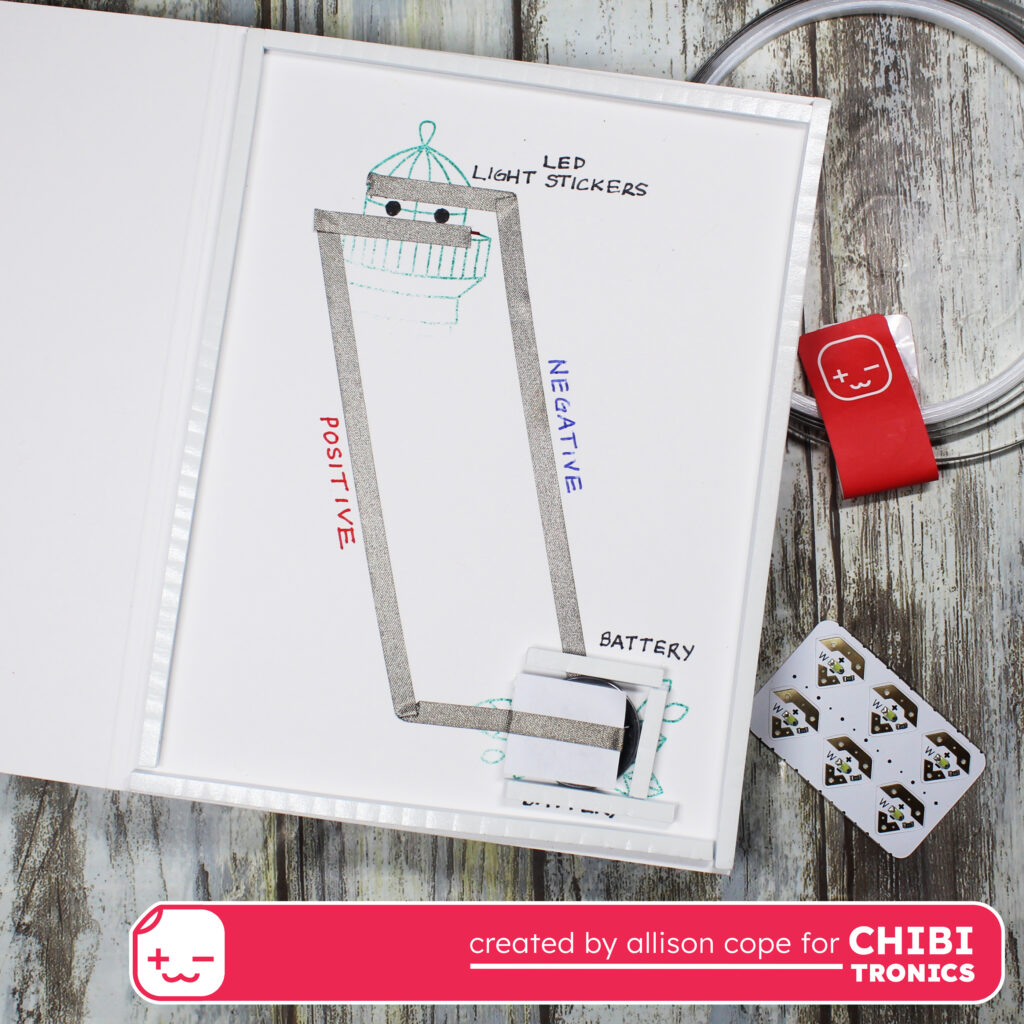
And last of all, I added my 2 Gem Shaped Animating White LED Light Stickers. These lights when activated, the blink on and off! SO cool!
Here is what it looks like all lit up. All you have to do is press on the rose to close the circuit and light up those blinking white LED lights!
Thanks for stopping by! I hope this inspires you too to create a fun and interactive card creation soon!