In case you haven’t heard the news, Chibitronics and We R Makers recently announced a collaboration, and the addition of four new products to our shop: the Foam Adhesive Pack, Starter Pack, 24 White Circuit Sticker Pack, and Conductive Fabric Tape!
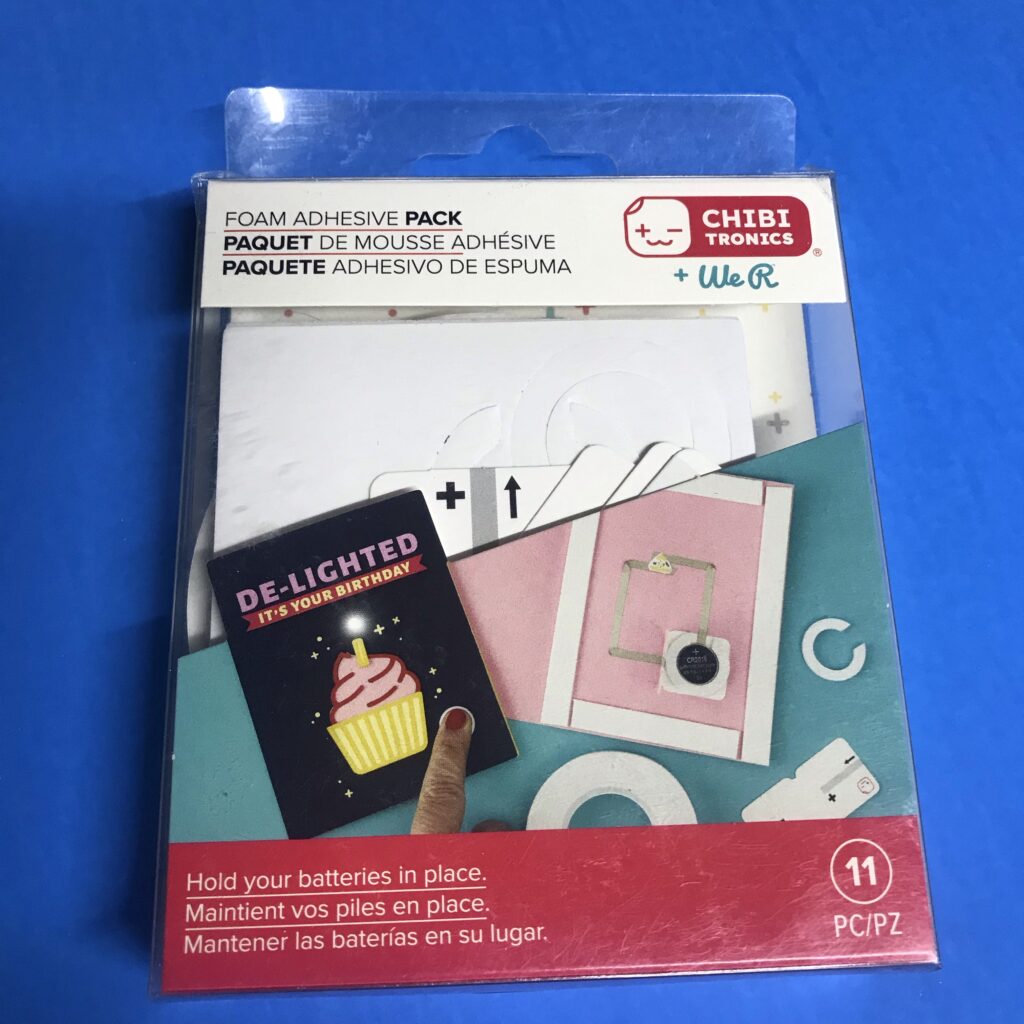
Designed as an add-on, the Foam Adhesive Pack contains enough customized parts to build five battery holders. Also included in the kit is a roll of 1.6mm thick foam tape, which makes attaching your circuit to a card fast and easy. (The Conductive Fabric Tape, batteries, and LED stickers required to create your circuit are sold separately.)
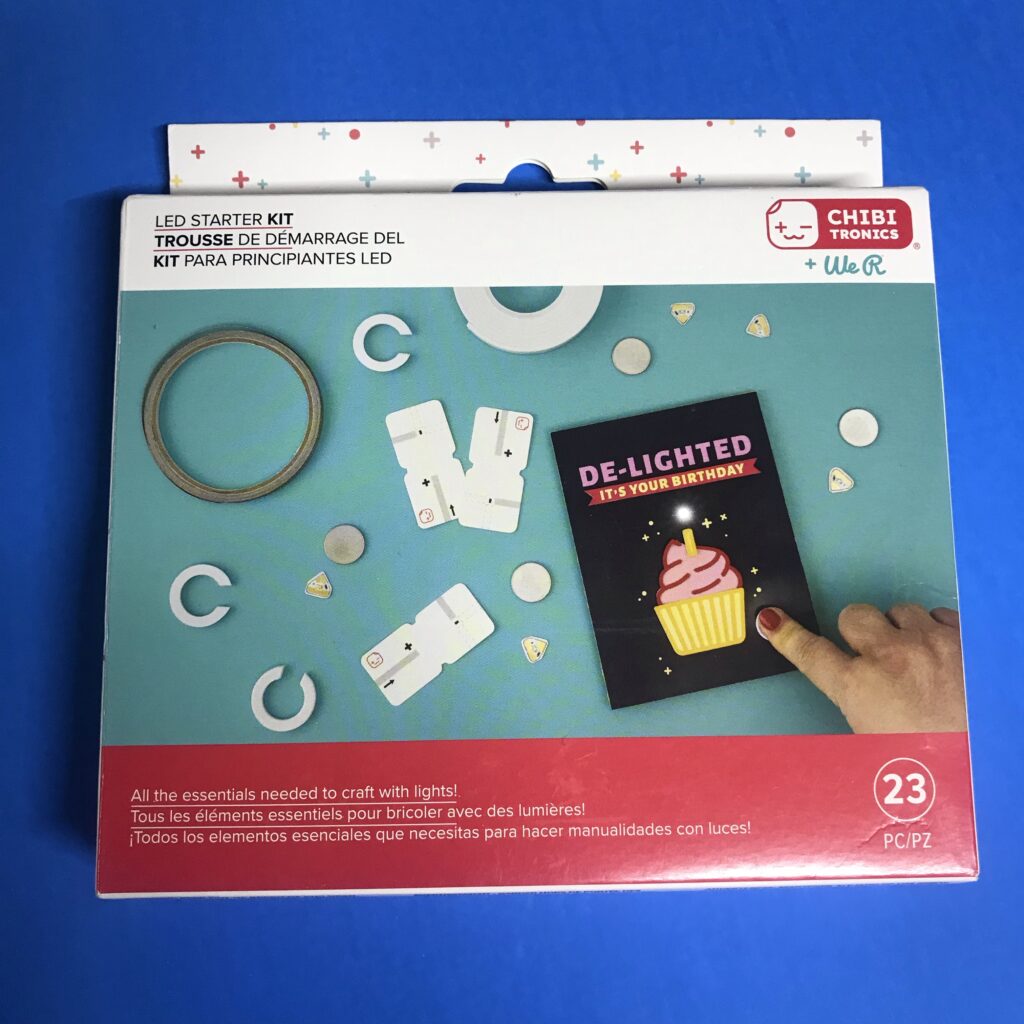
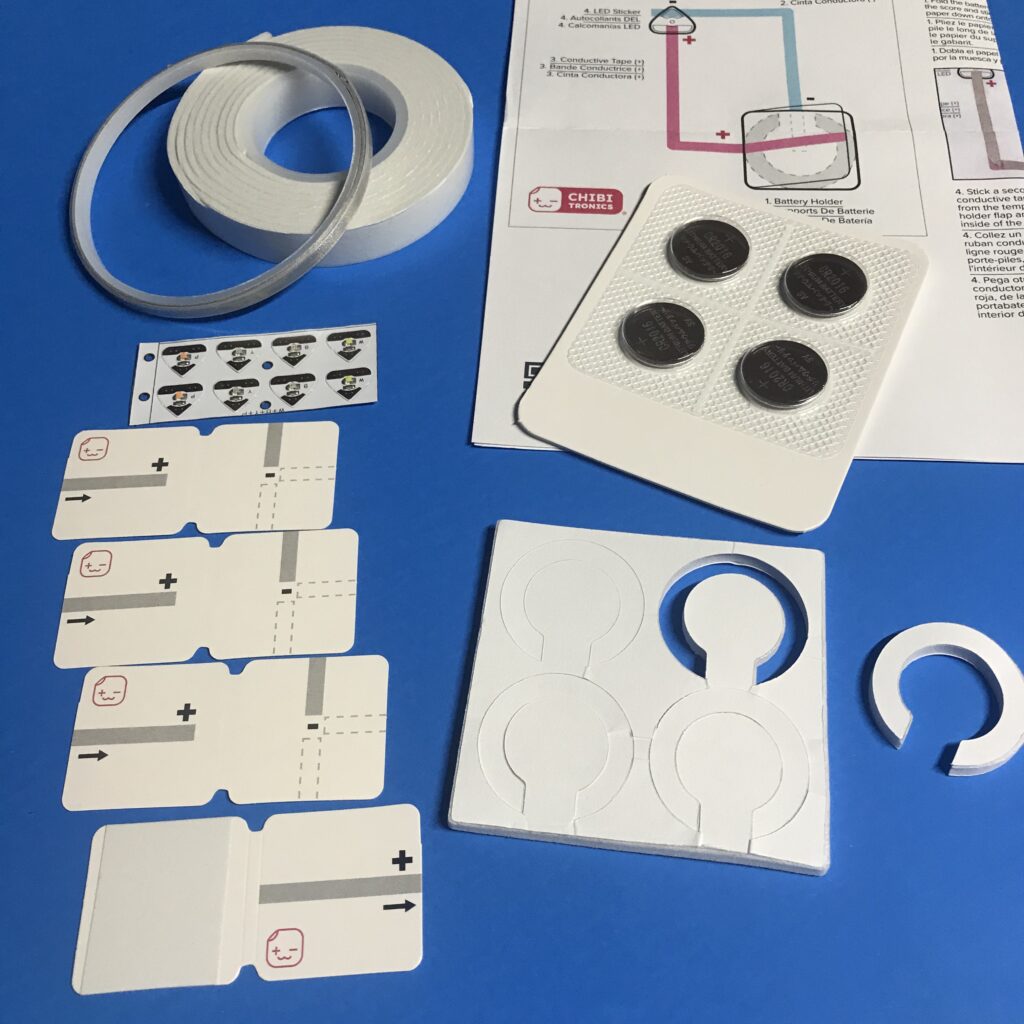
Designed as an all-inclusive kit, the Starter Pack contains enough customized parts for building four battery holders. Also included in the kit are four CR2016 coin cell batteries, a small roll of Conductive Fabric Tape, eight LED stickers, an instruction sheet, and a roll of 1.6mm thick foam tape.
One of the premiere items contained in both the Foam Adhesive Pack and Starter Pack is an innovative new battery holder that is different from others that you may have seen on our blog and tutorials.
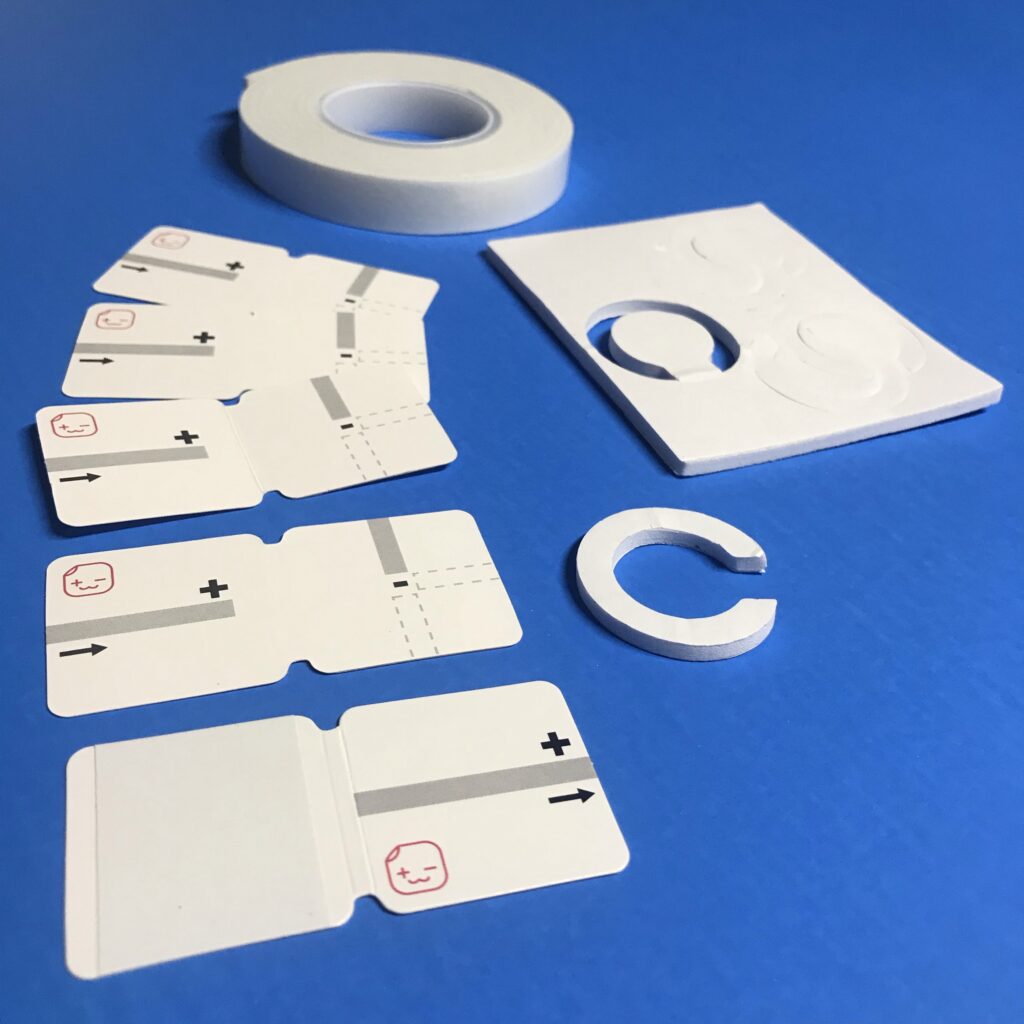
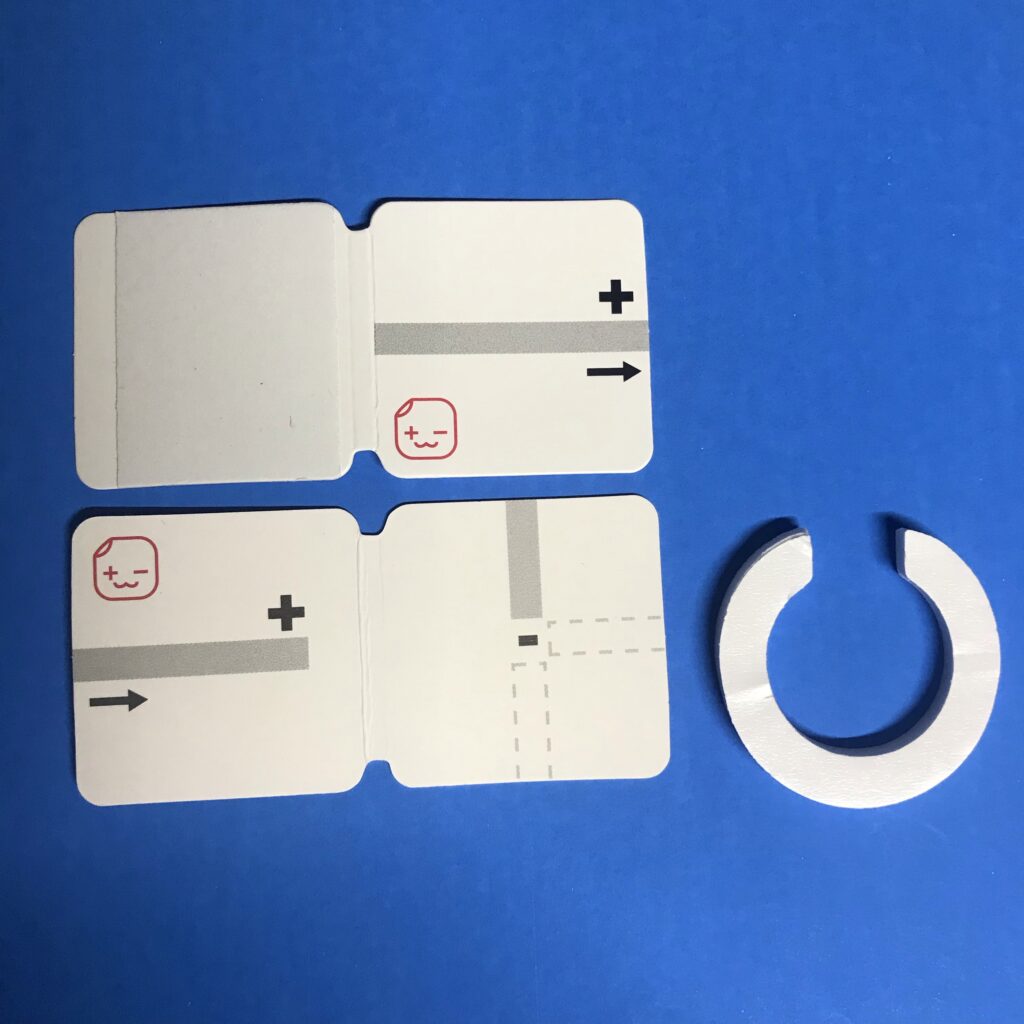
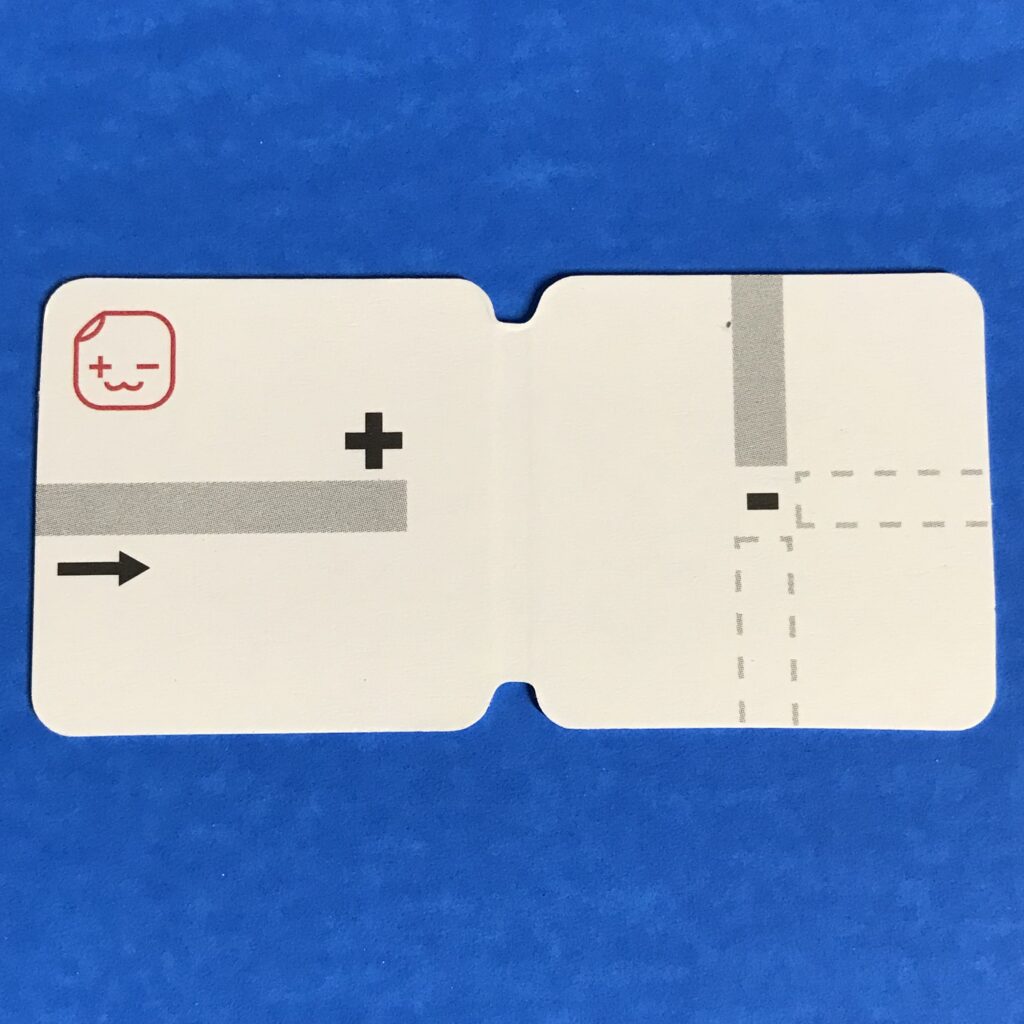
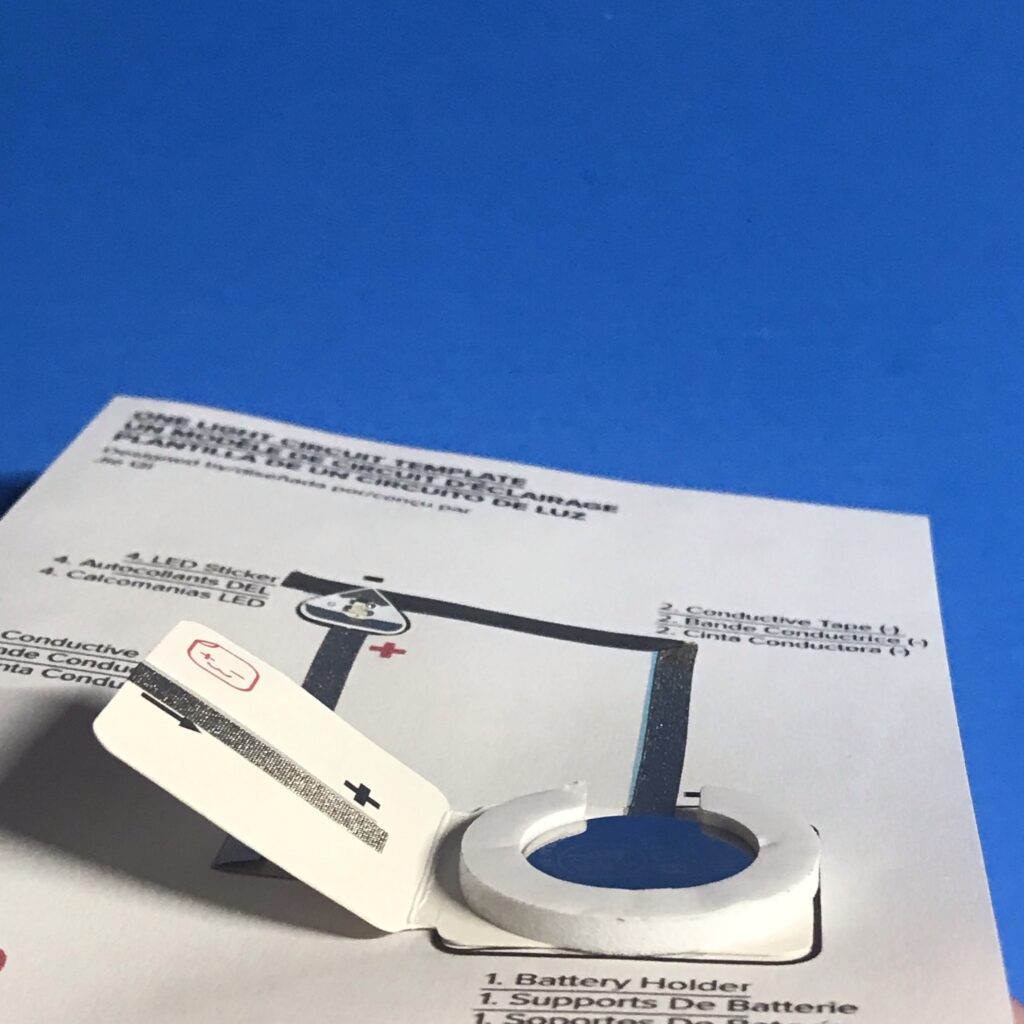
Our new holder consists of two specialized pieces: an adhesive-backed, cardstock template, with clear markings for the positive and negative traces of your circuit, and a C-shaped, self-adhesive, foam insert. Novel in its design, our new battery holder may be assembled quickly, as it deftly wraps around the circumference of a standard sized (3V) coin cell battery.
While our DIY paper battery holders work remarkably well (see 10 Ways to Make a Paper Battery Holder) and address a wide range of paper crafting needs, we recognize that there are times when the need for convenience, expediency, and precision may take precedence. For those who are looking for an easy, quick, and fail-safe battery holder solution, one of our new kits, containing everything you need in one place, was created with you in mind.
What’s so special about our new battery holder?
Our new battery holder has been engineered to save you time, remove guesswork, and ensure stable and reliable power connections in your Chibitronics projects!
Adhesive on the back of the cardstock battery template quickly holds it in place. Gray lines clearly show where to apply conductive fabric tape, to keep the positive and negative pieces from touching, while the dashed lines show optional paths that work equally well.
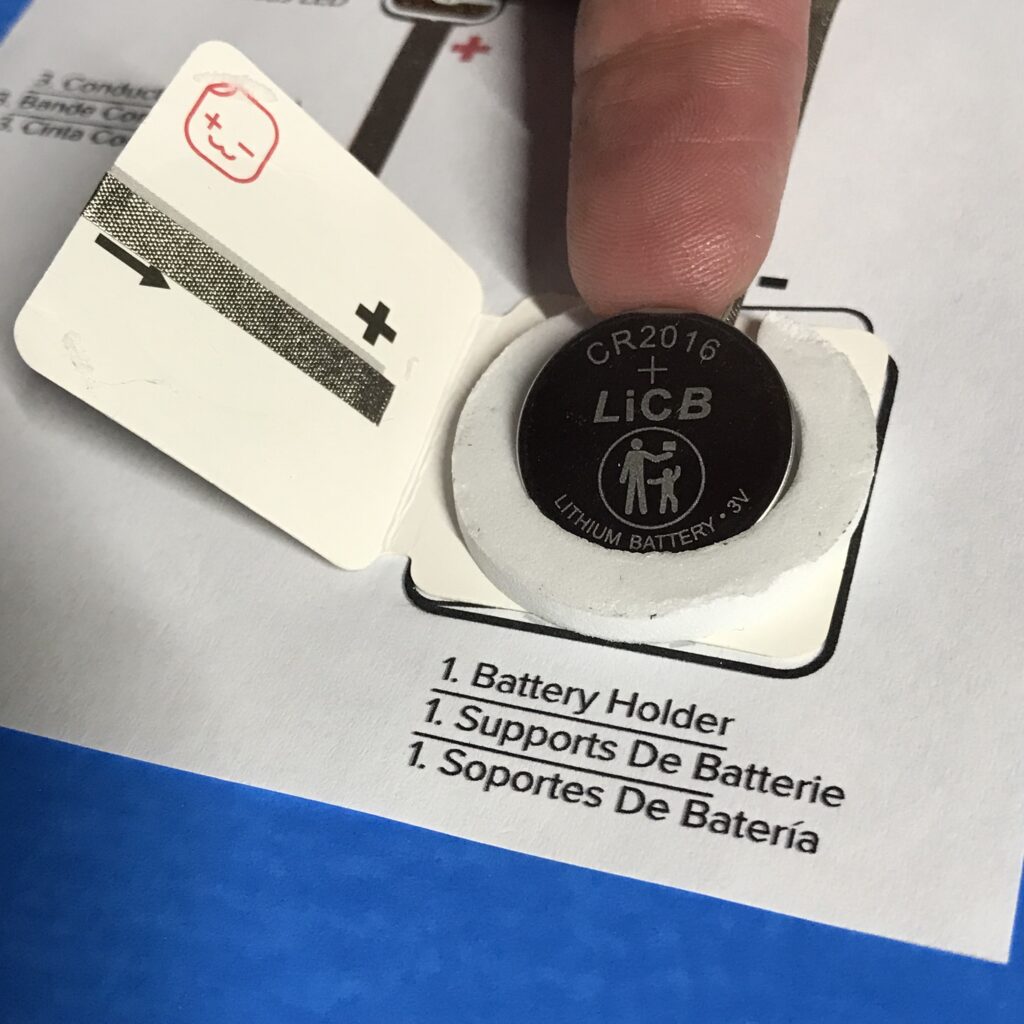
A notch in the foam ring makes it easy to remove the battery with a fingertip, while adhesive on both sides offers choices in how the holder may be used. For example, removing the protective backing from the top of the ring will allow you to quickly secure the flap of the template on top of it. On the other hand, opting to leave it on will allow you to easily access the battery (should you need it) and integrate optional materials (such as pressure sensitive conductive plastic) into your projects.
Tips, Tricks, and Call-outs: To learn more about using pressure sensitive plastic as part of your battery holder, visit this Chibitronics for Papercrafters video tutorial, Add a Simple Pressure Sensor.
Functionality: CR2016 vs CR2032 batteries
While our new battery holder was originally envisioned for use with the sleek and slim CR2016 (often preferred by papercrafters over its chunkier counterpart, the CR2032) it is versatile. As a result, the holder may be easily used with either battery type, although with slightly different functionality.
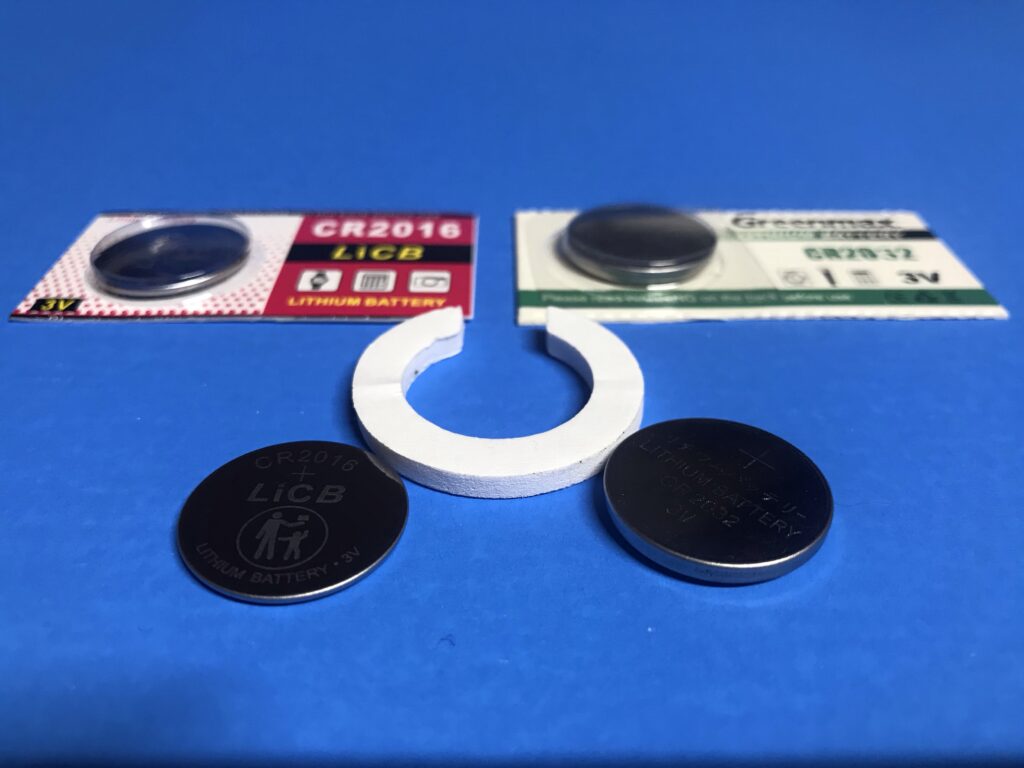
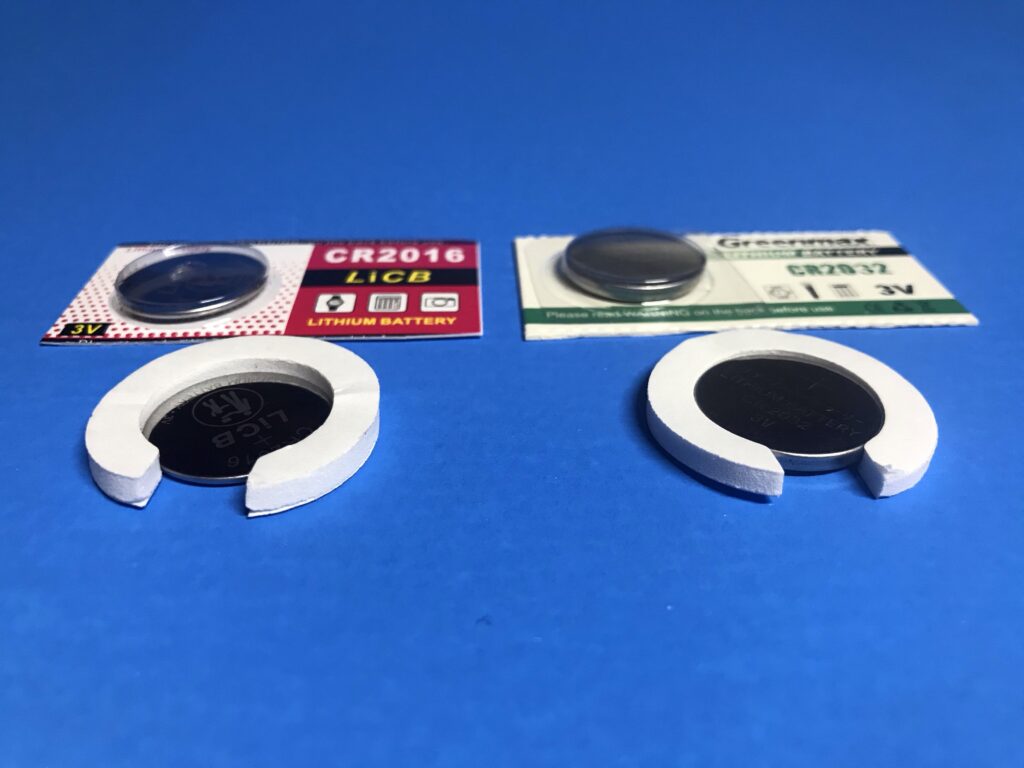
If using a CR2016 (measuring 1.6mm high), the foam ring will be twice the height of the battery. Used in combination with the folded cardstock template that comes in the Foam Adhesive Pack and Starter Pack, a battery holder containing foam that is taller than the battery will enable you to press down on the battery inside of the holder to complete the circuit and turn on the lights. This makes a handy on and off switch that is useful for adding interactivity and conserving battery life, especially when sending your creation through the mail.
If using a CR2032 (measuring 3.2mm high), the foam ring will be the same height as the battery. Used in combination with the folded cardstock template that comes in the Foam Adhesive Pack and Starter Pack, a battery holder containing foam that is the same height as the battery will ensure a robust physical and electrical connection without the need to press down on the battery inside of the holder. This trait is most useful for projects that will remain turned on or have an additional switch integrated into them.
How to Use Our New Battery Holder
The basic steps for using our new battery holder will be the same, whether you are using a CR2032 or a CR2016, and whether you are working with one of our templates (some of which have step-by-step directions for quick reference) or off template.
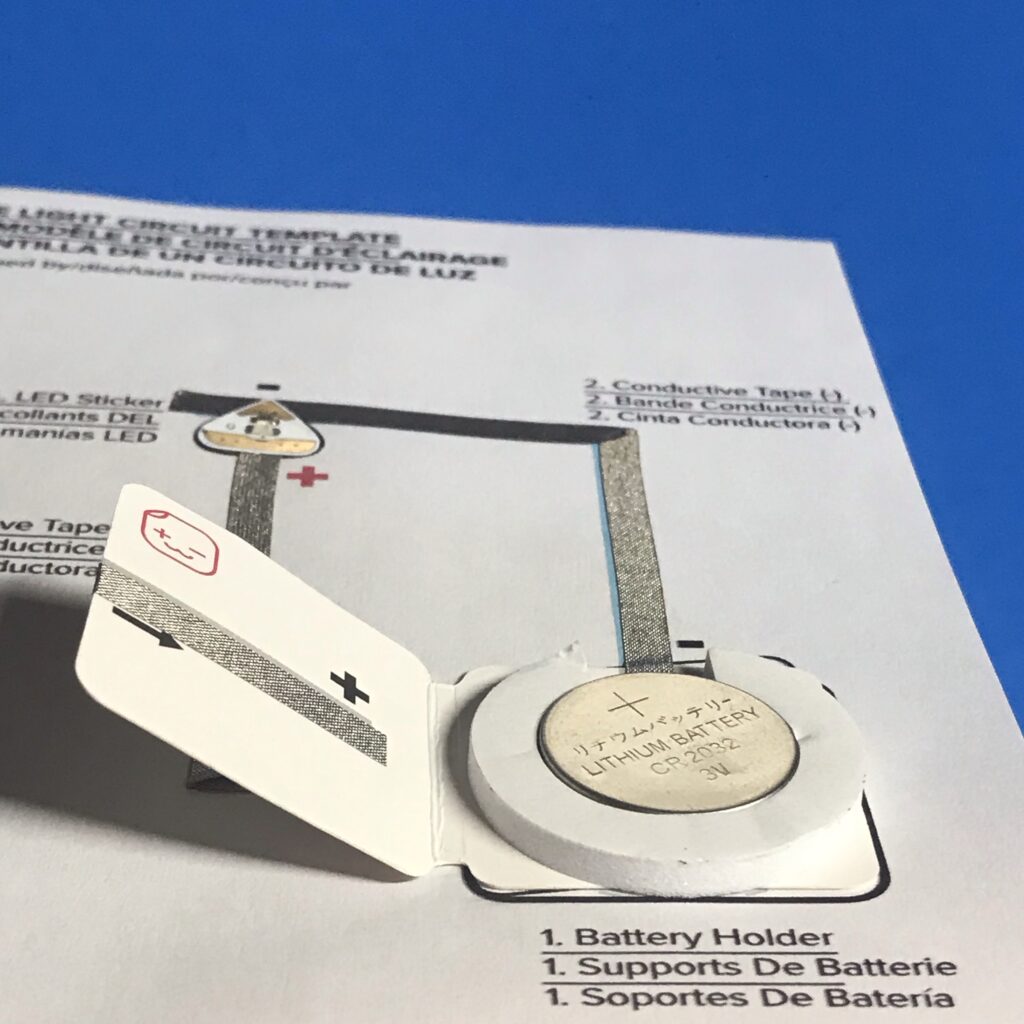
With a CR2032 (on template)
Basic Steps
- Adhere cardstock battery template & foam ring
- Apply negative trace
- Apply positive trace
- Add LEDs
- Insert battery (positive side up)
- Decide whether to tape the battery holder shut or not.
If using a CR2032, taping the holder shut will result in your LED staying turned on, unless you add a separate switch to your circuit.
With a CR2016 (off template)

Basic Steps
- Adhere cardstock battery template & foam ring
- Apply negative trace
- Apply positive trace
- Add LEDs
- Insert battery (positive side up)
- Decide whether to tape the battery holder shut or not.
If using a CR2016, taping the holder shut will allow you to turn the LED on by pressing on the top of the holder.
Leaving it un-taped will allow you to insert a piece of pressure sensitive plastic between the battery and the negative lead, should you wish to add a special effect to your circuit.
Learn More:
To learn more, visit our Chibitronics + We R Makers Getting Started page. There, you’ll find detailed video demonstrations, free downloadable templates, and inspiring projects to spark your imagination.
For a deeper dive, check out Jessica Frost Ballas’ dynamic monthly video series, Chibitronics for Papercrafters.