Coin cell batteries (3V) such the CR2032 and CR2016 are thin and compact, making them an ideal way to power paper circuit projects.
Back in 2016 our founder and CEO, Jie Qi, curated 5 Ways to Make a Paper Battery Holder.
While that information remains useful, and may have already become an established part of your paper circuit tool box, new ideas and materials have prompted us to revisit and revise that classic post.
In addition to reviewing the affordances of some of our earliest paper battery holders, the goal of this post is to introduce a few techniques that you might not have tried, will offering tips and suggestions for selecting the best battery holder for your needs.
Without further ado, here are 10 Ways to Make a Paper Battery Holder!
1. Foam Tape Battery Housing
Foam tape battery holders are super thin and easy to build.
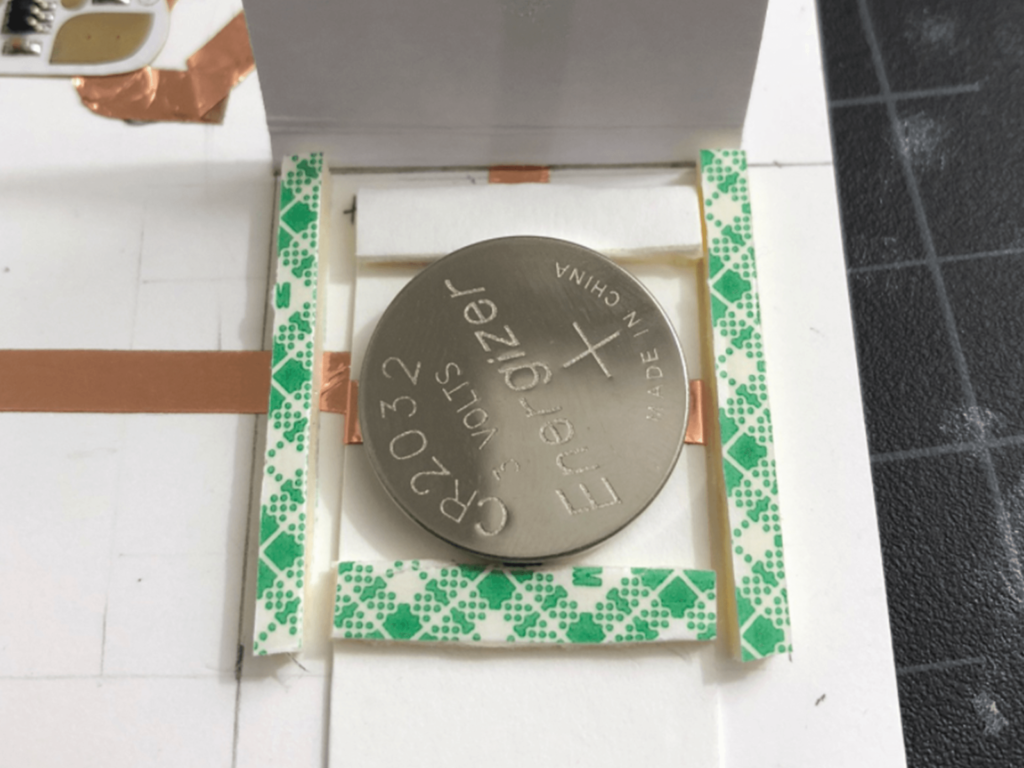
Depending upon their design, however, you may not be able to switch out the battery without taking the holder (and possibly your project) apart.
An advantage of a foam tape battery holder is that one may be made with different thicknesses of foam.
A thinner foam, the same height as your battery, will ensure a robust physical and electrical connection as part of your project, a trait that is useful if your project will remain turned on, or if it will have an additional switch integrated into it.
A thicker foam that is taller than your battery will enable you to press on the battery to complete the circuit and turn on the lights. This makes a handy on-off switch while also helping to conserve battery life!
To learn more about creating your own foam tape battery housing, check out the two tutorials described below.
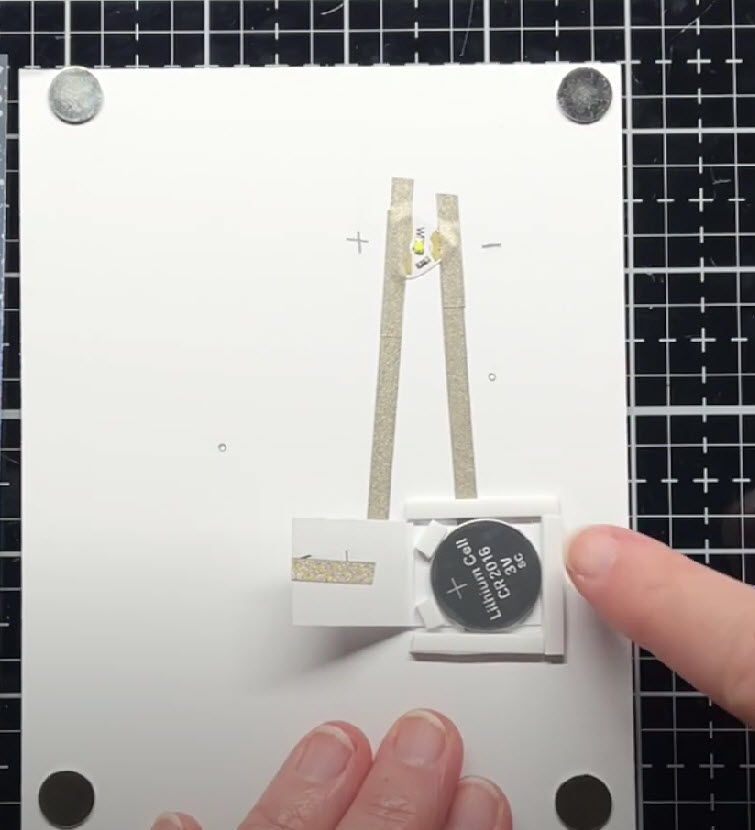
Simple On/Off Battery Holder
In her dynamic new video series, Chibitronics for Papercrafters, Jessica Frost Ballast shows a couple of simple ways to construct an on/off battery holder using a folded flap of paper.
One method, which includes several pieces of foam tape , may also be used as a press-button-style switch.
We R Makers Foam Battery Holder
Chibitronics, in collaboration with We R Makers, has devised yet another innovation upon the traditional foam tape battery housing. This latest iteration features an adhesive-backed, C-shaped foam disk, designed to fit around a coin cell battery. When used in combination with a folded piece of cardstock and conductive fabric tape, it also acts as a switch.
2. Paper Envelope (Now in Two Versions)
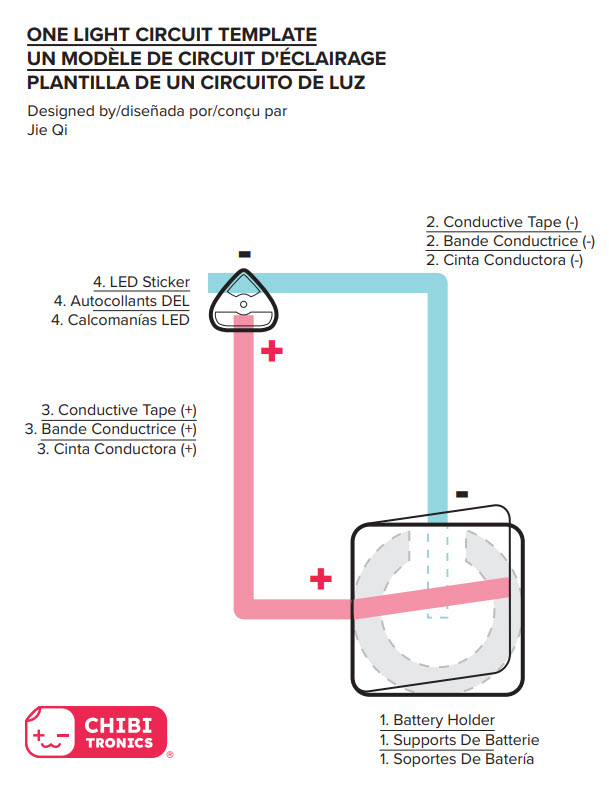
All you need to construct a paper envelope battery holder is some heavy paper (such as cardstock) and circuit tape. While this style of battery holder takes some practice to construct, its compact, repositionable flap design keeps the battery secure and serves as a switch. This makes it easy to change the battery and to turn your projects on or off.
Templates for this popular battery holder, devised by Jie Qi, are now available in two versions.
To learn how to construct a paper envelope battery holder, visit the links to the tutorials described below.
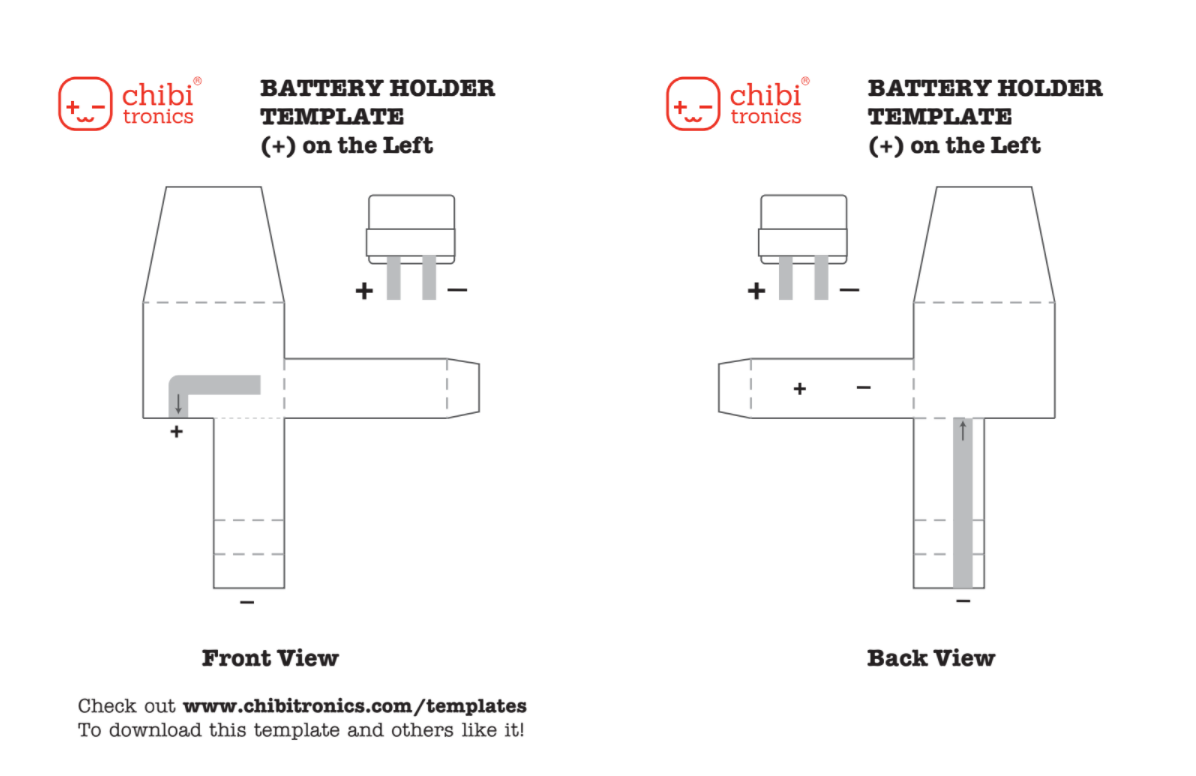
Tutorial for Original Design
The tutorial for the original design uses copper tape and has the positive lead on the left side. While copper tape also works, conductive fabric tape will better resist cracking over time.
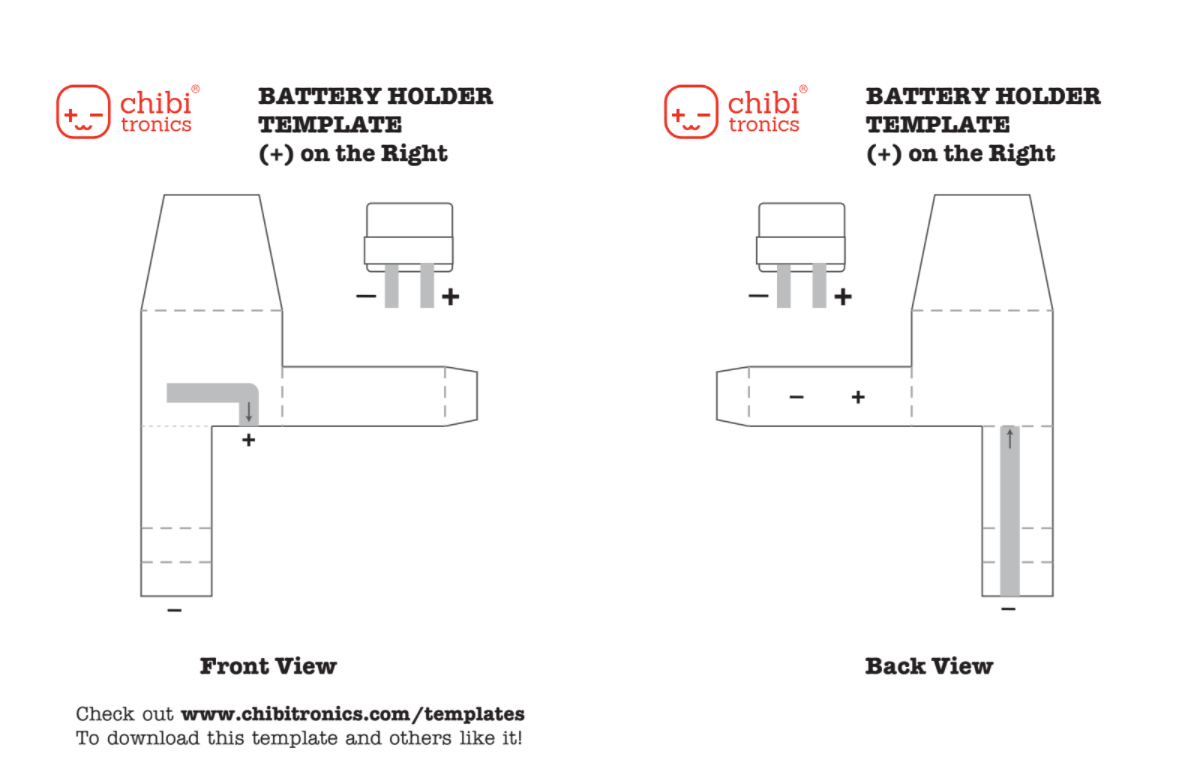
Tutorial for Adapted Version
The tutorial for the adapted version, made for the Chibitronics Accordion Book, has the positive lead on the right and uses conductive fabric tape.
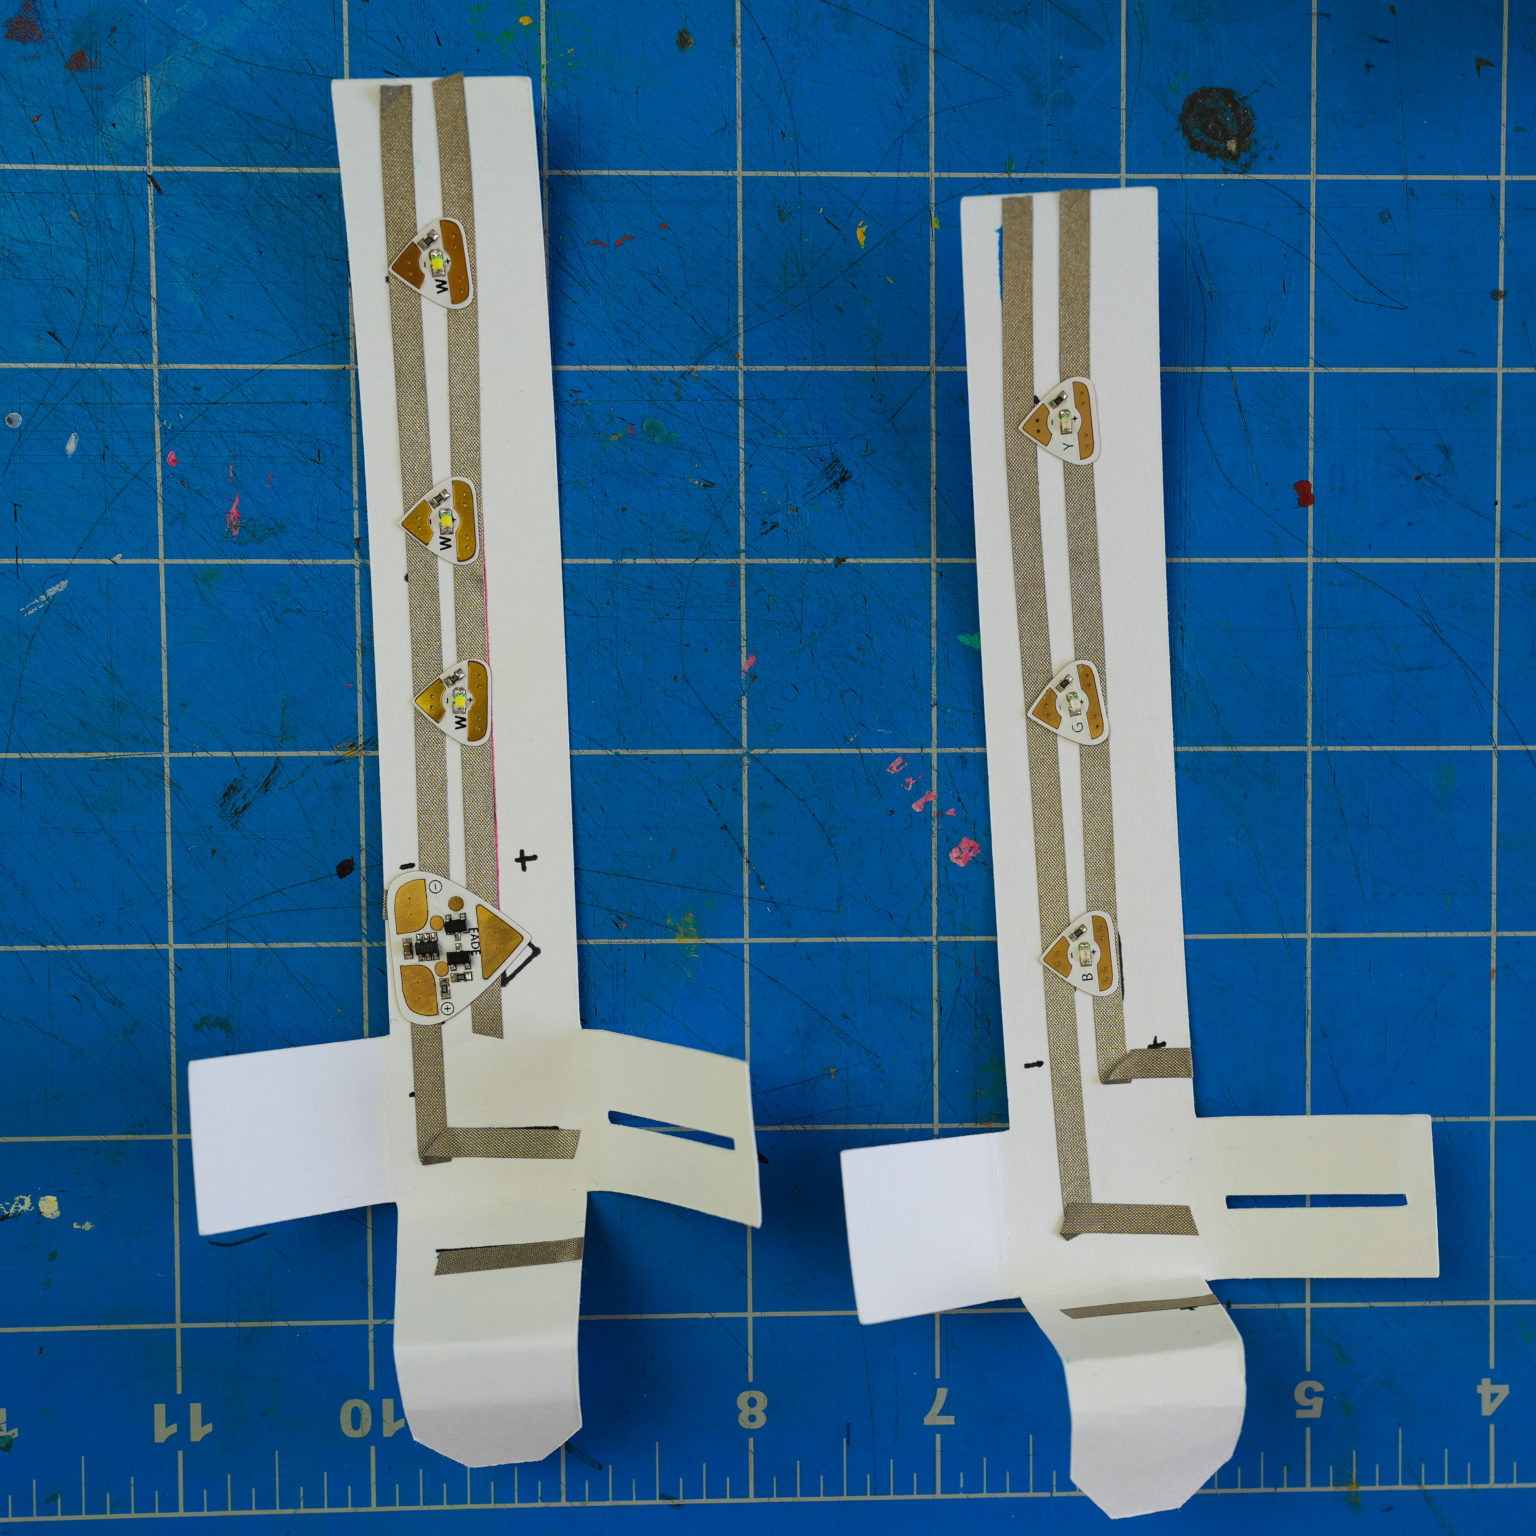
3. Foldable Light Strip
Like the paper envelope above, the circuit attached to Celeste Moreno’s battery holder strip may be opened or closed, depending upon the orientation of an repositionable flap.
And like the paper envelope, which elegantly combines form with functionality, Celeste’s battery holder strip has templates available in two different flavors.
While the tutorial demonstrates how this type of battery holder may be used inside of an elongated paper lamp, the design is easily customizable, allowing it to be applied to a variety of projects.
Foldable Light Strip Tutorial
4. Neodymium Disc Magnets
A battery holder constructed with strong neodymium disc magnets takes advantage of the magnetic property of most coin cell batteries. Because the magnets can actually hold circuit tape close to your battery, this type of holder is particularly good at maintaining a solid physical and electrical connection within your circuit. When working with these magnets, it’s important to keep them out of reach of pets and young children as they can be harmful if swallowed.
To learn how to construct one or both of these magnetic battery holders, visit the links to the tutorials described below.
Disc Magnet Battery Holder Tutorial
While conductive fabric tape may also be used, this tutorial demonstrates how to make a battery holder using copper tape and neodymium disk magnets on the outside of the holder.
Magnetic Battery Holder Tutorial
This tutorial uses conductive fabric tape and neodymium disk magnets on the inside of the holder.
This holder may be adapted, with the addition of a ball of conductive fabric tape, to hold two identical coin cell batteries together in series, providing 6V versus 3V.
5. Sheet Magnets
Just like the disc magnet battery holder, this holder clips your battery in place using its magnetic properties. However, instead of using strong, neodymium disc magnets, this holder uses a rubber sheet magnet. While these magnets aren’t as strong as the disc magnets, they are thinner and have the advantage of being child-safe. They may also be cut into decorative shapes, making it easier to personalize your battery holder.
Of note, sheet magnets also come in handy for making all sorts of magnetic switches, as demonstrated in this switch tutorial.
Tips, Tricks & Call-outs
Have you noticed that we always place coin cell batteries into a circuit with their negative side facing down? We do this, no matter what type of battery holder we are using, to prevent short circuits. If you take a close look at a coin cell battery, you might notice that the positive side, marked with the (+) sign, extends to the sides and wraps completely around the edge of the battery. Since a battery holder often works by wrapping conductive tape around its top side, risking contact with the battery’s positive edge, placing the battery negative-side-down helps ensure that the overlapping piece of tape will also be positive. In addition to preventing short circuits, this practice will also make it easier for you to remember what orientation your batteries belong in whenever you switch them out.
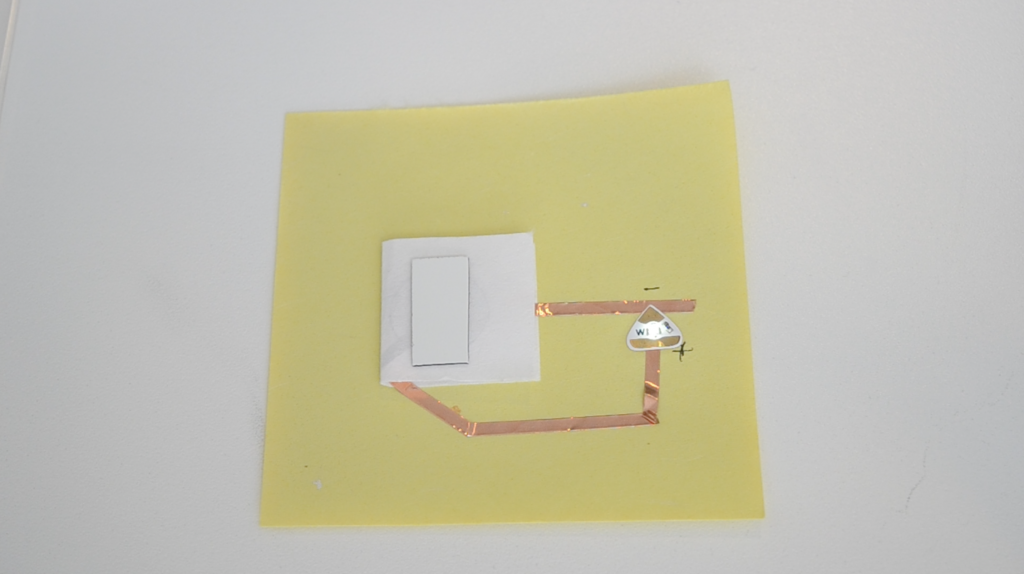
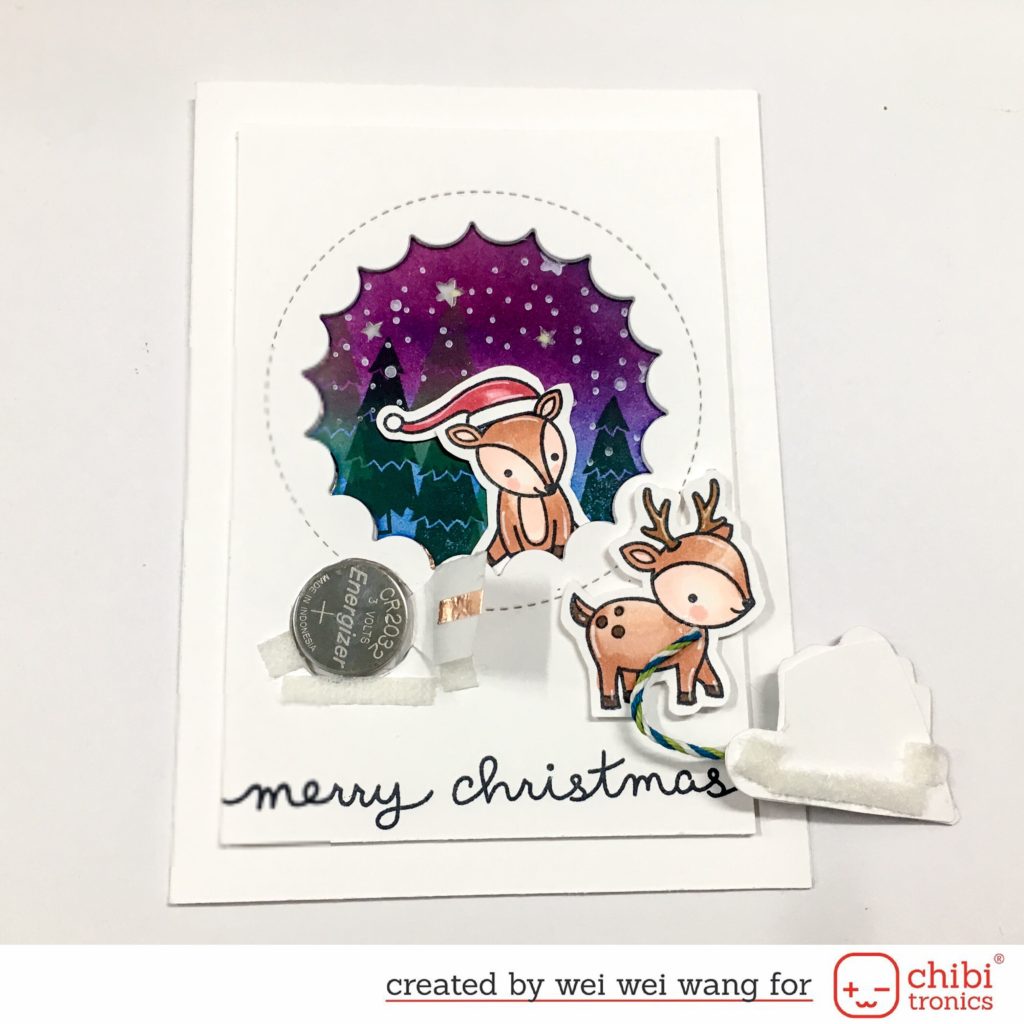
6. Velcro Door
Wei Wei Wang, working on the front of a card panel, uses small pieces of adhesive Velcro to integrate a removable door that she then disguises with a piece of artwork.
This approach makes the battery easy to access, while taking advantage of the battery’s bulk, to add an elevated level of whimsy to a card design.
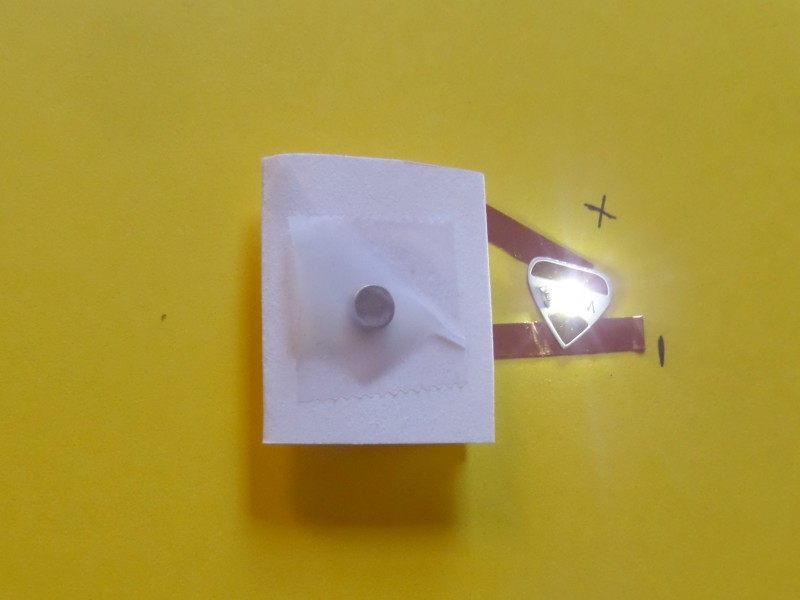
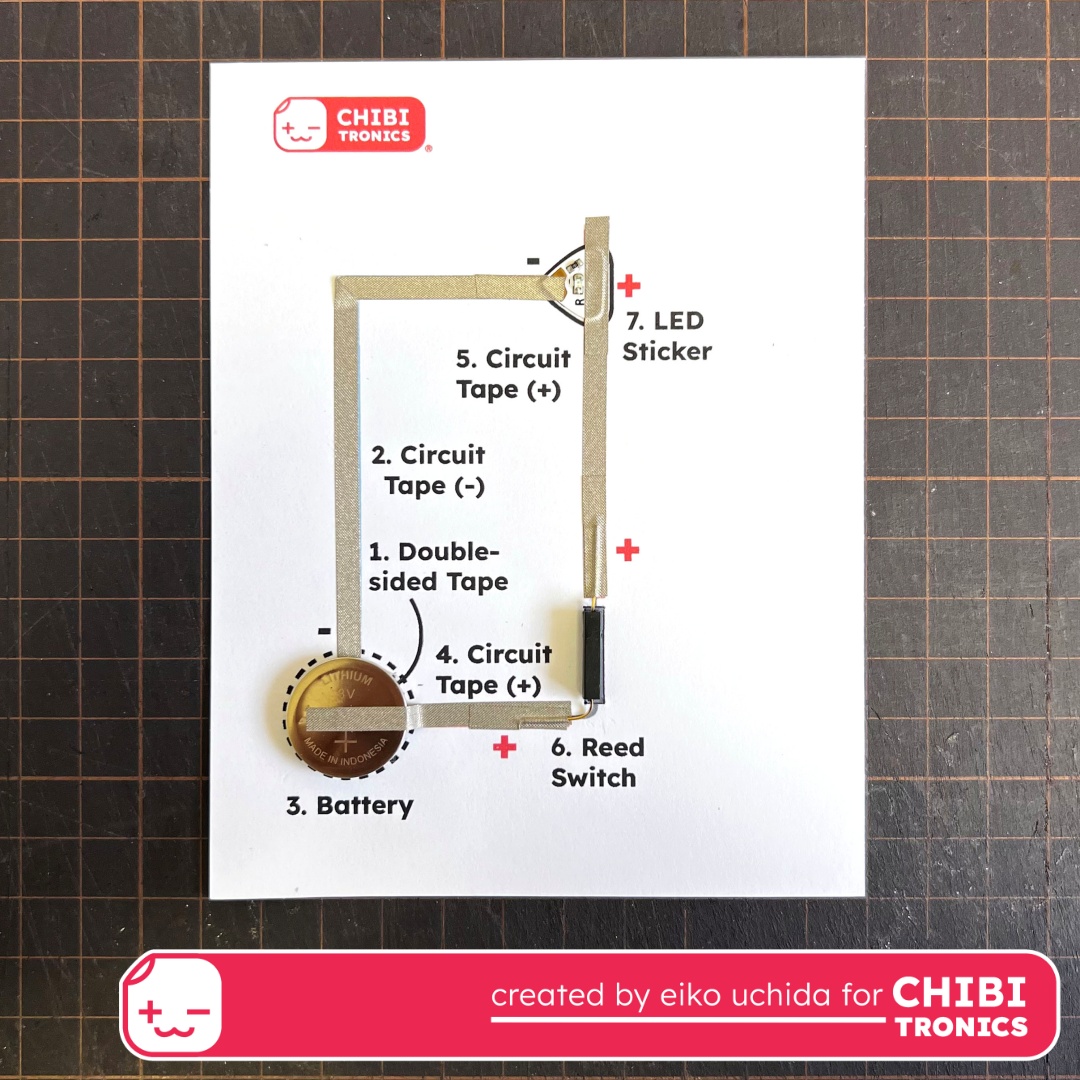
7. Double-Sided Tape
Sometimes, the simplest solution can be the right solution.
In this example, a piece of double-sided tape under the battery does double duty. Not only does it prevent the battery from slipping, it also increases the surface tension between the battery and the negative lead, which contributes to a more solid physical and electrical connection!
To see how Eiko Uchida integrates this circuit and battery holder into a project, visit the tutorial.
8. Flat 6V Double Battery Holder
This clever battery holder, which may be adhered to any paper circuit project, holds two coin batteries side by side in series. That means you will get 6V instead of 3V (twice the voltage) powering your circuit. As a result, your LEDs will shine brighter!
This battery holder style is also great for turning on many differently colored LEDs in parallel. Otherwise with only one battery, some colors may appear dimmer than other colors.
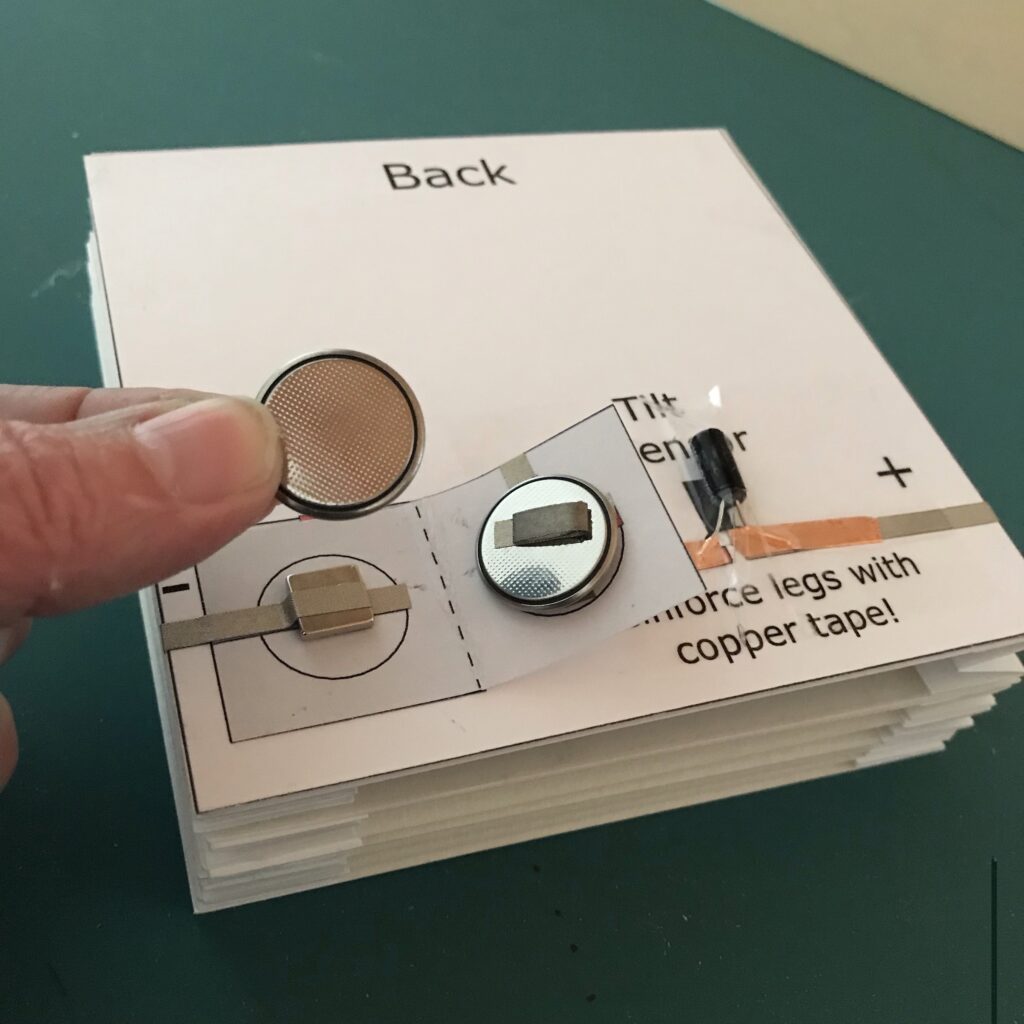
9. Flat 3V Double Battery Holder
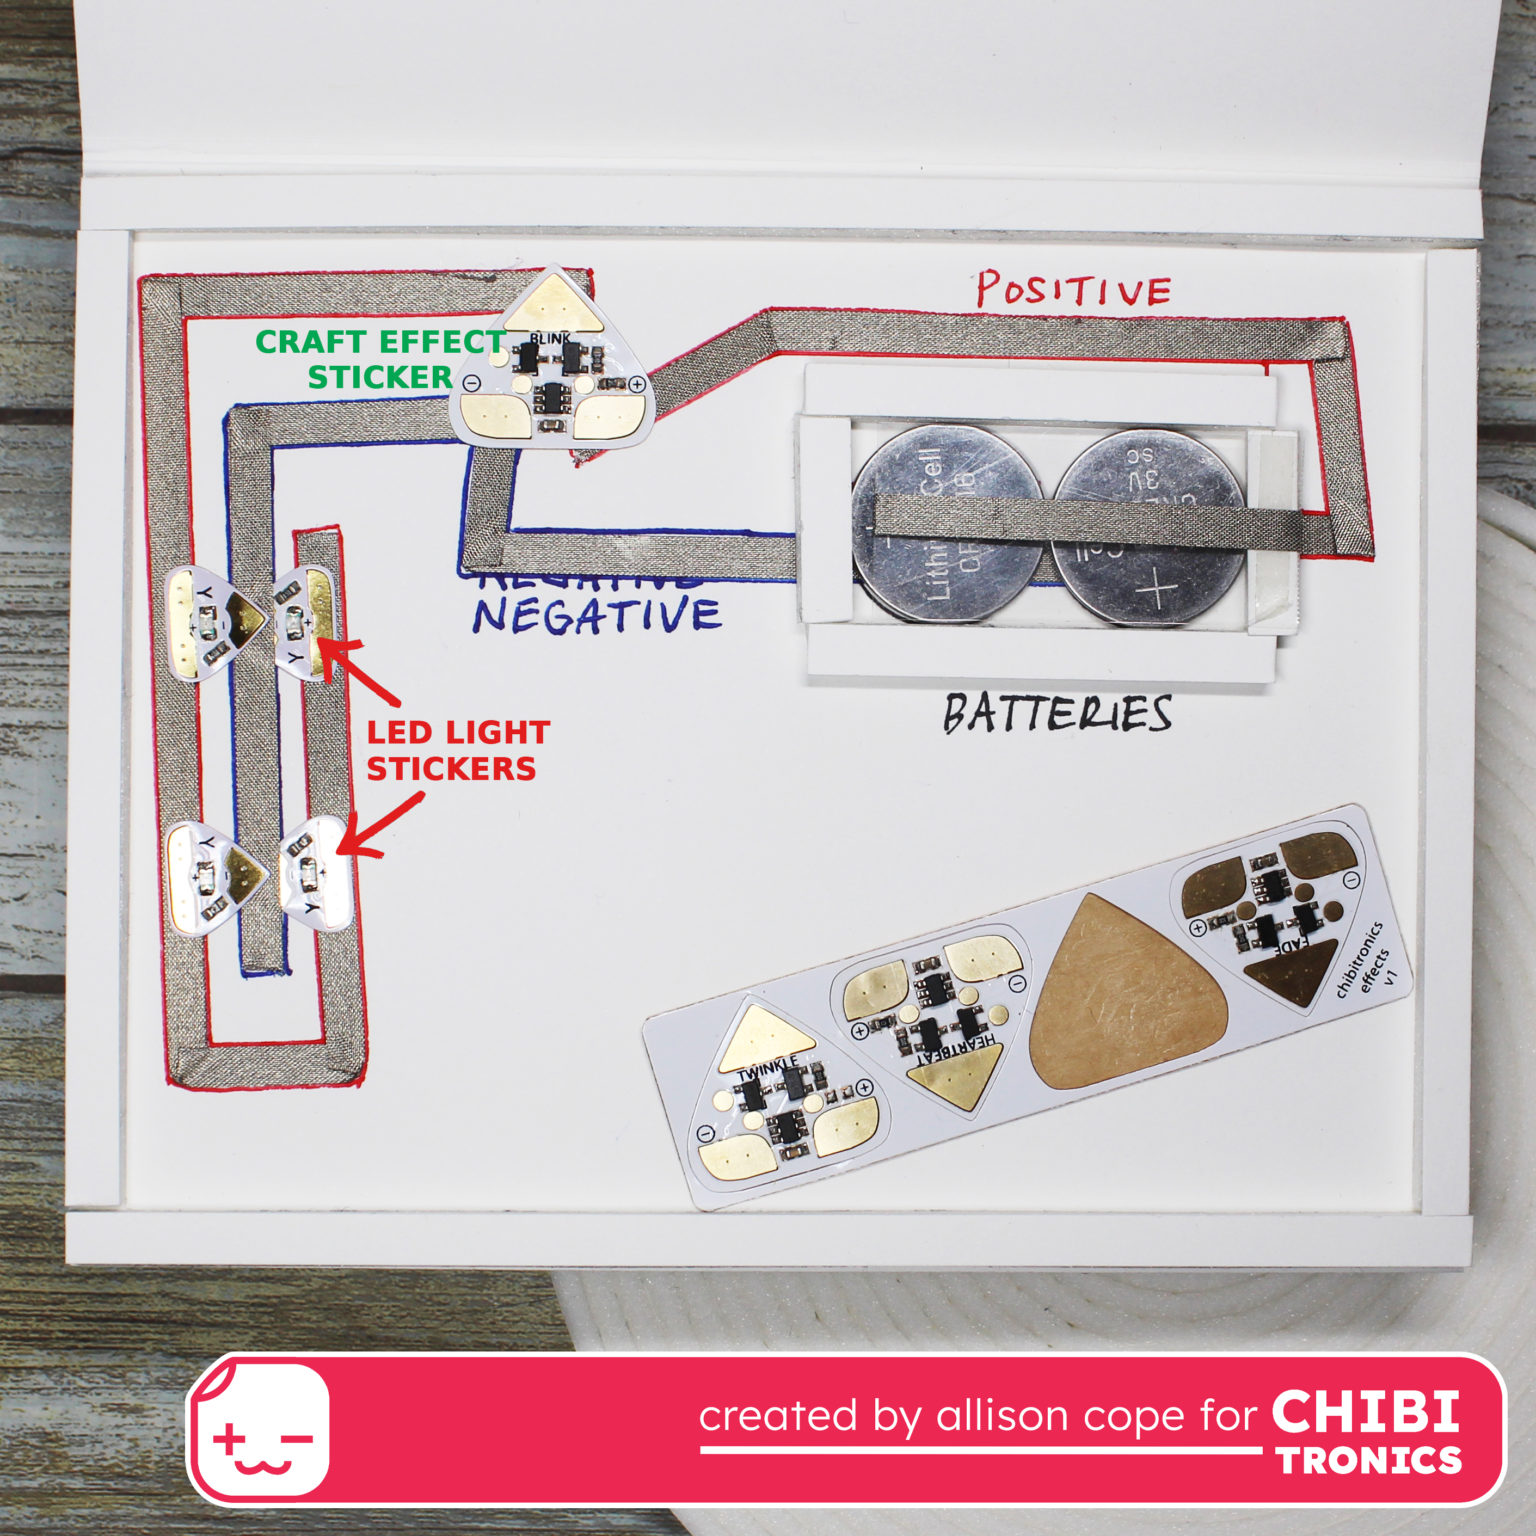
Like the flat 6V double battery holder above, Allison Cope’s 3V double battery holder stands out as clear example of innovative design.
First, it packs more punch over time than a single coin cell battery. By placing two batteries side by side in parallel, they will last longer, even while powering multiple LEDs.
Next, this double battery holder also combines the affordances of a foam tape housing, with the ability to see and switch out the batteries when her cards are opened.
This battery holder is useful for extending the life of a circuit requiring several LEDs, or in combination with a Special Effects Add-on sticker LED.
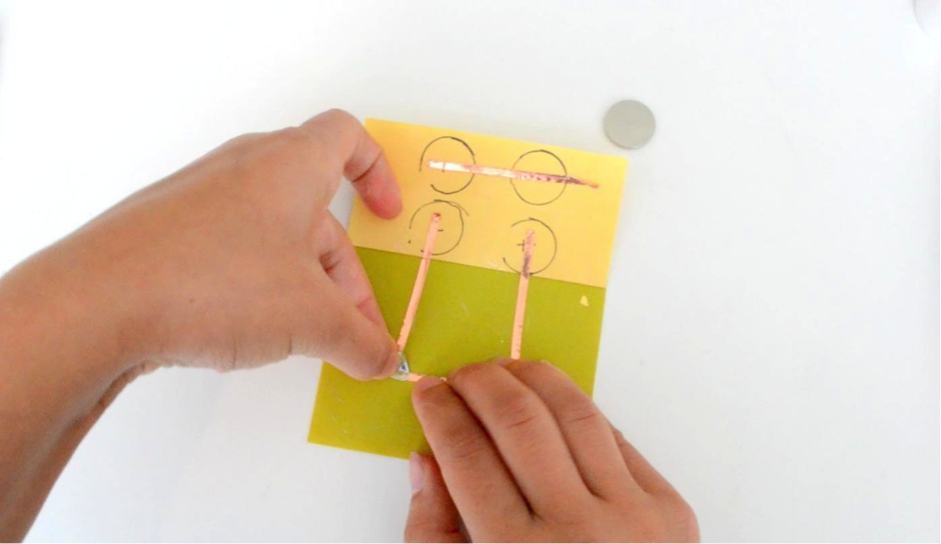
10. Removeable Battery Trays
Removable paper battery trays, usually constructed in layers with help from a smart cutting machine and glue, may also be used to hold a battery in place.
While this style of battery holder has a sleek visual appeal, and the affordance of quickly slipping a battery in or out, their construction can be fiddly and their functionality may become unstable over time.
In my tutorial, I offer tips for adding a battery tray to a project. Because getting and maintaining adequate surface tension between the battery tray and the rest of the circuit can require a bit of trial and error, this style of battery holder may not be the best choice for many makers.

Tutorial for a Project with a Removeable Paper Tray