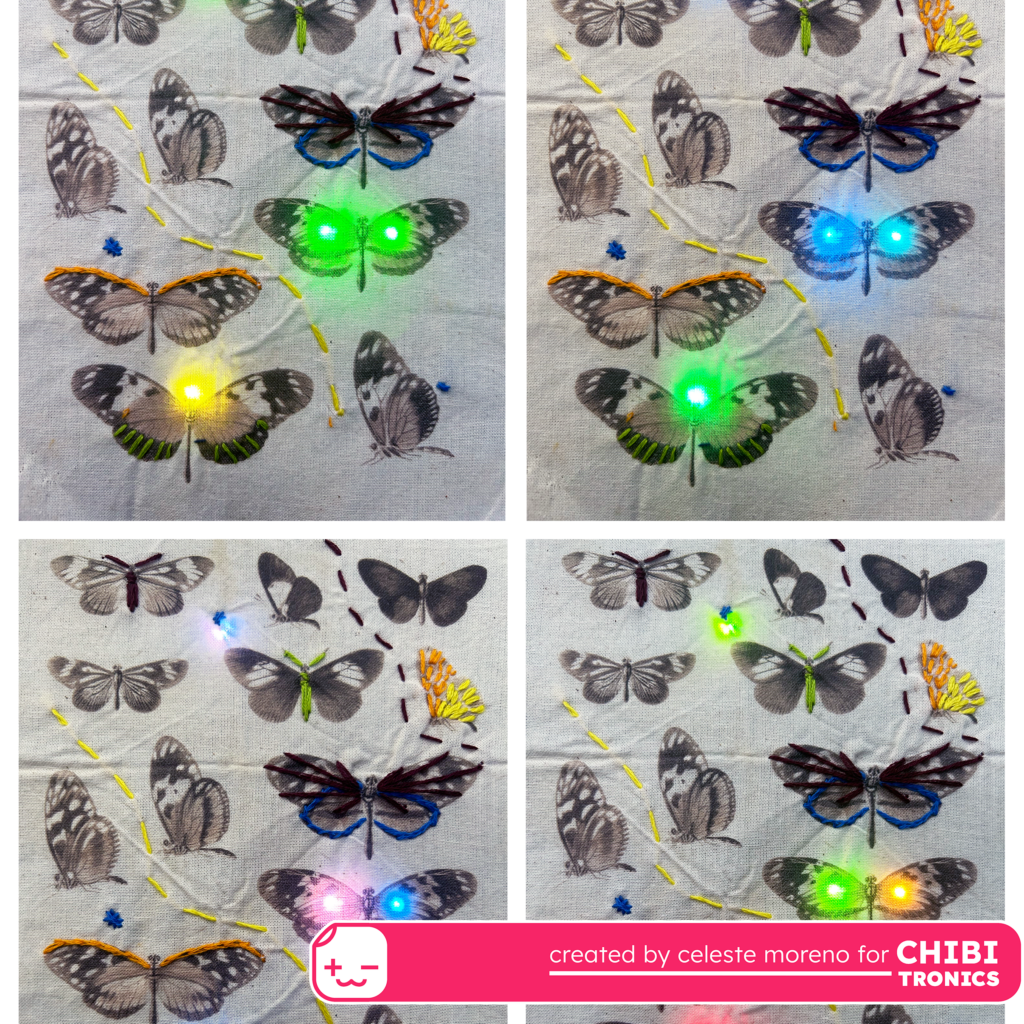
Today, I’m sharing a new exploration of materials with you. I’m a big fan of experimenting and trying out Chibitronics circuit stickers with different materials. Recently, I learned how to print onto fabric using a home inkjet printer and I’ve been playing with embroidering decorative elements onto those printed images. I used one of my practice pieces to try combining embroidered fabric with paper circuit materials. By the way – The printed image in the photo below is an open source image from the Smithsonian archives, check out my previous blog post to see another example of how I’ve used these images in a paper circuit project.
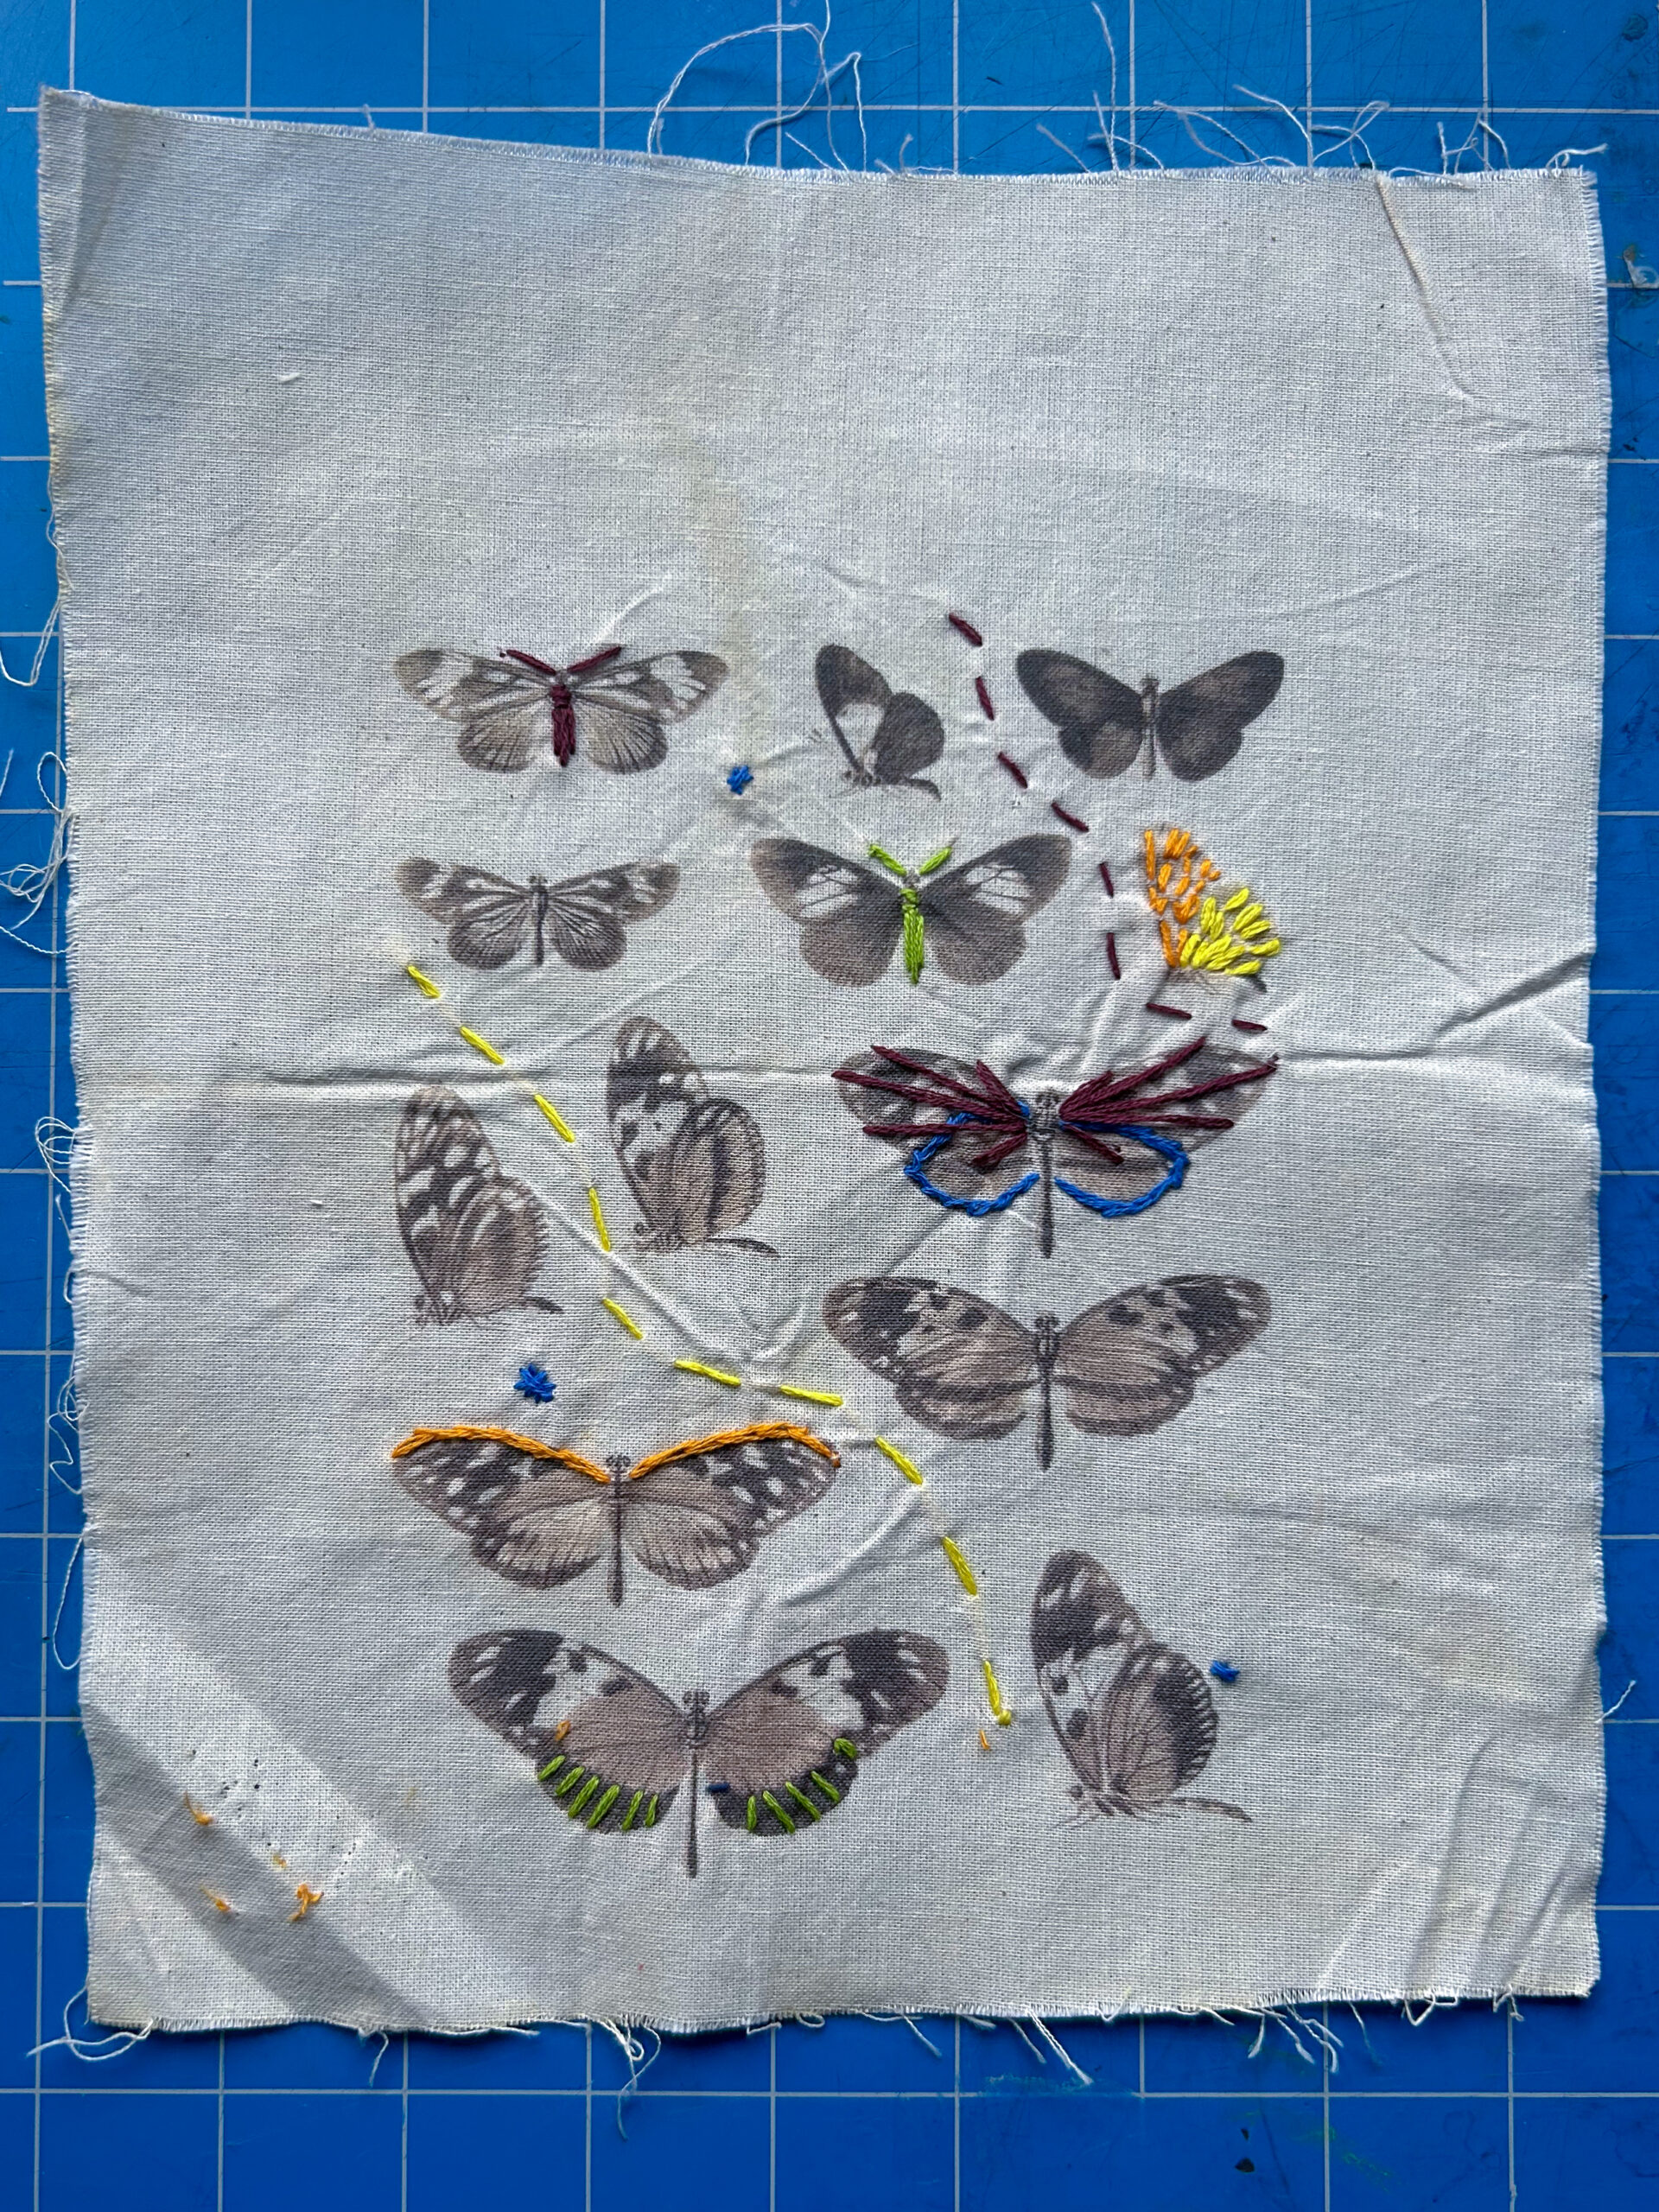
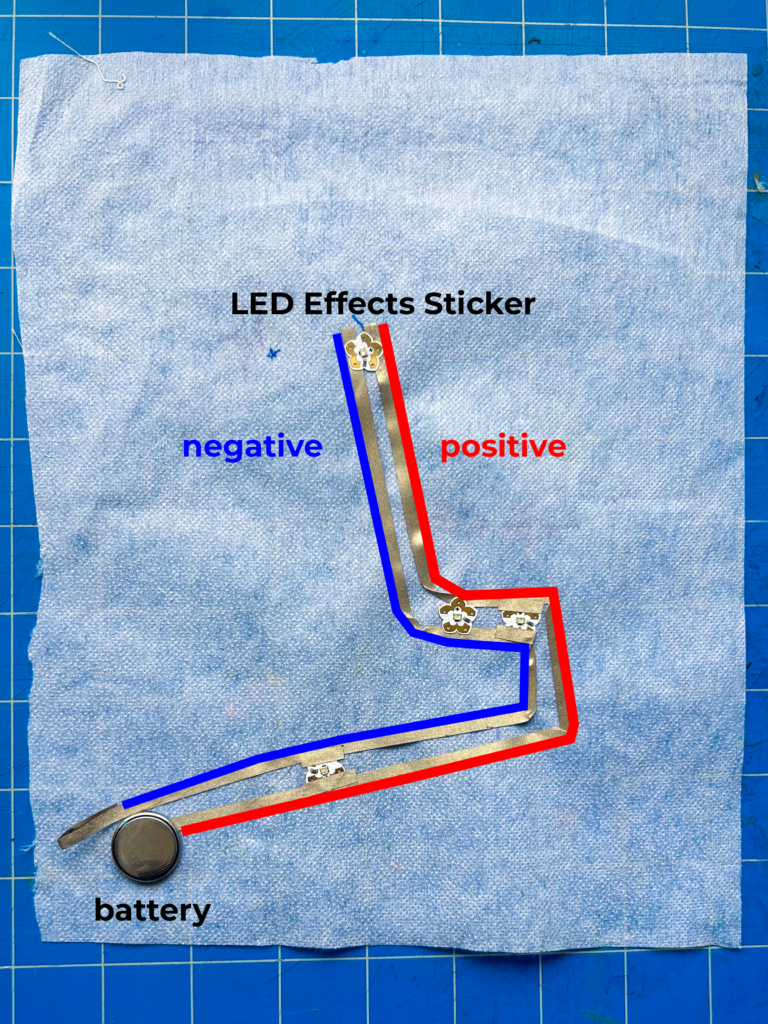
First, I cut a piece of fusible iron-on interfacing to the size of my fabric and marked where I wanted my LED stickers to go. I used fusible interfacing because I wanted to try ironing the fabric and interfacing together, sealing the circuit in between the two surfaces. Next, I placed my conductive fabric tape traces and LED stickers. For this project, I chose to use the Animating Rainbow Fade LED Stickers because I wanted a multi-color effect. Because this was just a test, I didn’t create a robust switch or battery pack. Instead, I folded over a little piece of conductive tape to create a scrappy switch.
I loved the way that the lights looked in combination with the printed fabric and embroidery! In the future, I’d like to try this technique again. I’d also like to try framing the fabric and creating a switch somewhere on the frame to turn the lights on and off.

Supply List:
- Conductive Fabric Tape
- Chibitronics LED Lights
- Coin cell battery
- Printed fabric (make your own or use a pre-made piece of fabric!)