Introduction
Taking inspiration from German custom, this tutorial will show you a way to combine paper circuits with a rolled-up piece of poster board to create a customizable, cone-shaped container, that is synonymous with the first day of school.
Contents
Celebrate the First Day of School
Video Tutorial
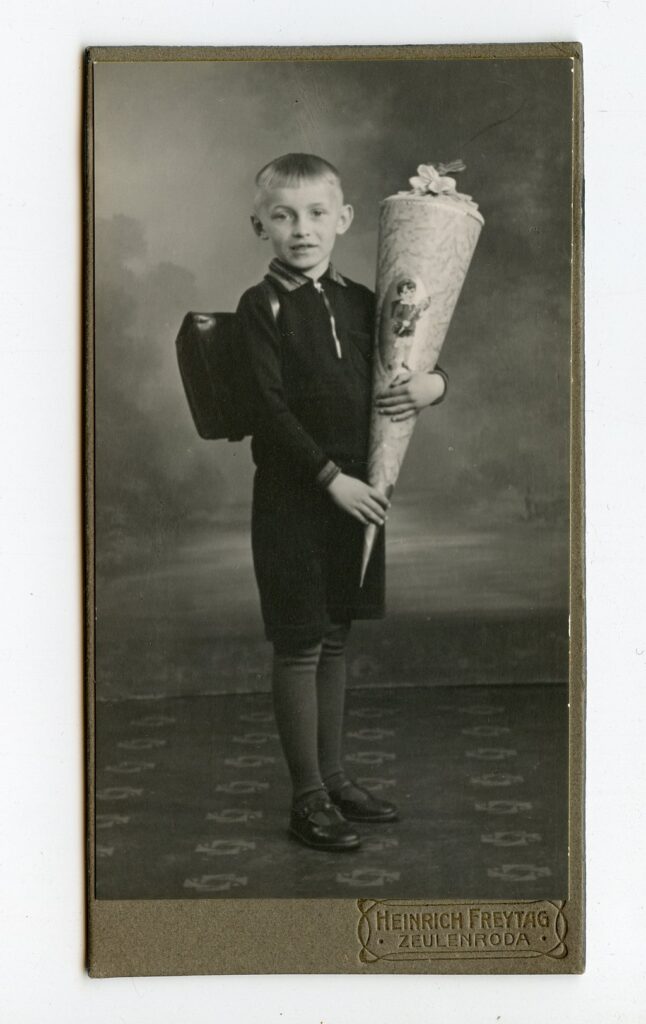
Did you know that it is customary in parts of Germany (and a few bordering countries) for six-year-old children starting first grade to be presented with the gift of a large paper cone called a Schultüte (“school bag”)? A glorified goody bag, tailored to the unique interests of a child, this special container is also referred to as a “school cone” or a Zuckertüte (“sugar cone”), because it is said to help “sweeten” a time of transition as part of an important rite of passage.
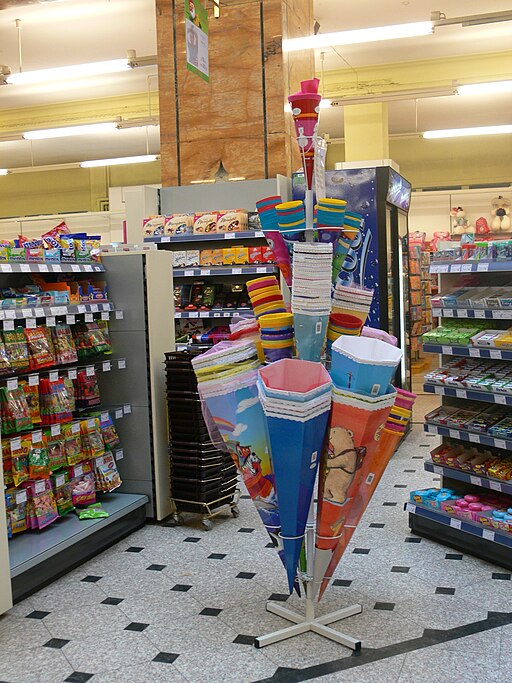
Usually given to a child by their parents, grandparents, or godparents as part of a special ceremony at their school, a Schultüte is symbolic of change and growth. Though each student carries their Schultüte with them during their first day of school, often posing for photos with it, the cones are not typically opened until the child returns home after the school day has been completed. With that achievement under their belts, the children get to feel supported by their families, while experiencing the excitement of opening up their much-anticipated cones. A typical Schultüte, which can be nearly as tall as the child, is filled with stationery supplies, good luck charms, books, and edible treats.
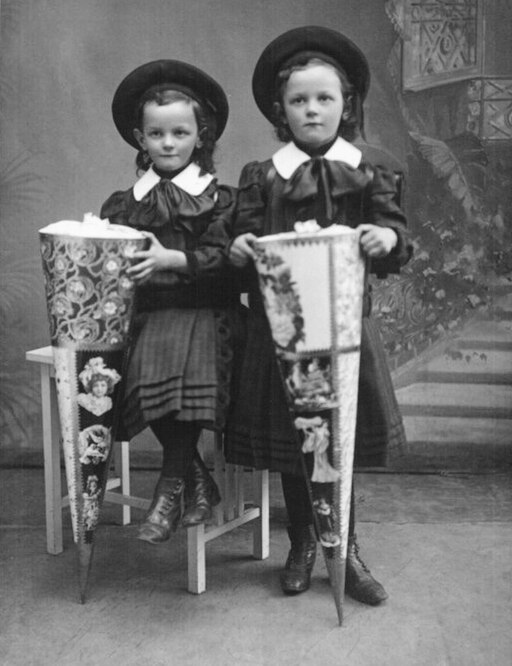
According to Sophie Hardack, in her article Why Germans Celebrate School with a Cardboard Cone, the earliest school cones were probably small paper cones filled with nuts and fruit. Over time, they have grown larger and much more elaborate.
Today, they can measure up to 85cm (33.5in) and feature pictures of cars, unicorns or astronauts, along with flashing LED lights, and even buttons that produce neighing or roaring sounds when pressed. But whether it’s a bag of raisins or a modern super-cone, the essential meaning remains the same.
Sophie Hardack
Though it’s not uncommon for people to decorate a blank cardboard cone or buy a fully kitted Schultüte from a department store or online boutique, many who practice this 200+ year old custom still prefer the process of crafting their own.
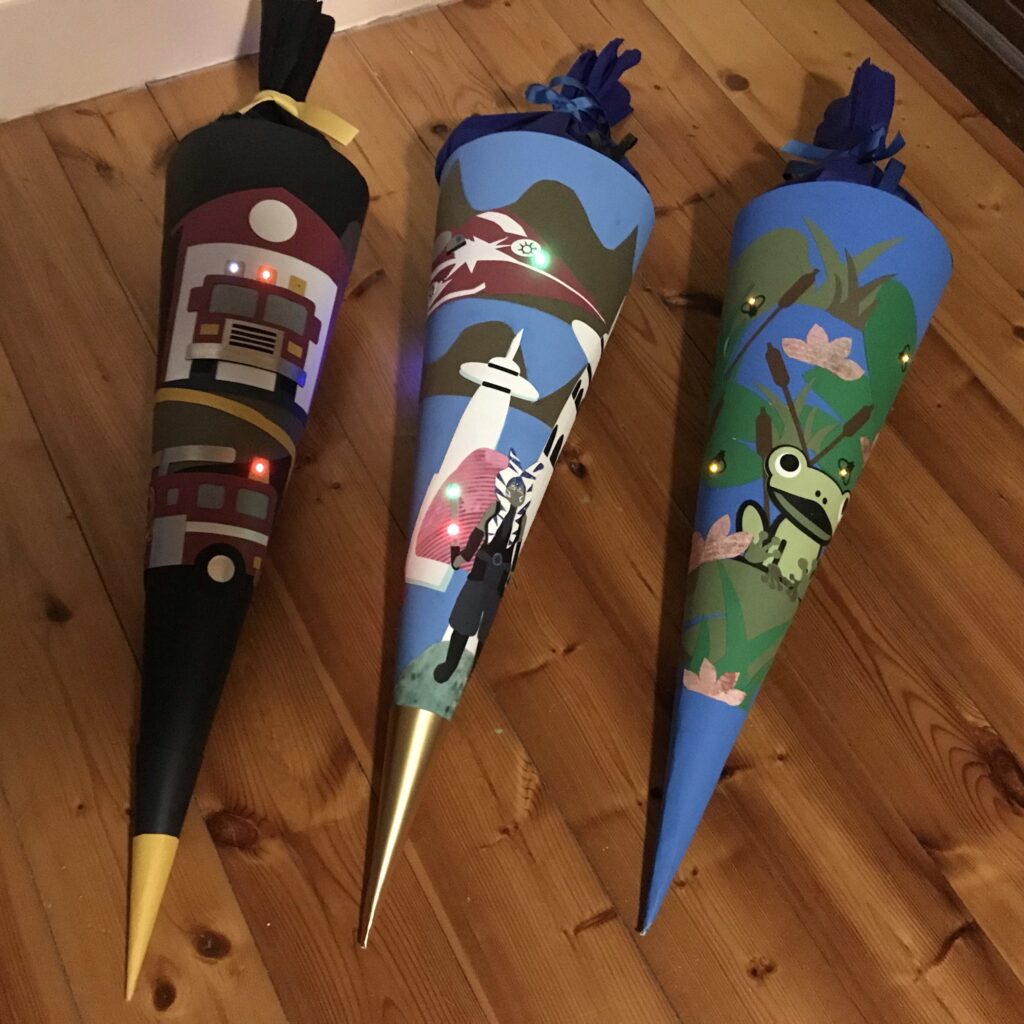
Taking inspiration from this German tradition, I’ll show you a way to create your own Schultüte with glowing LED lights. While the demonstration model is smaller in scale than the school cones that are typically given to students on their first day of school, this project may be adapted to make a larger, more traditionally sized cone.
Who wouldn’t want to receive a glowing cone filled with treats to help celebrate their first day of school, or a new beginning?
Materials & Tools
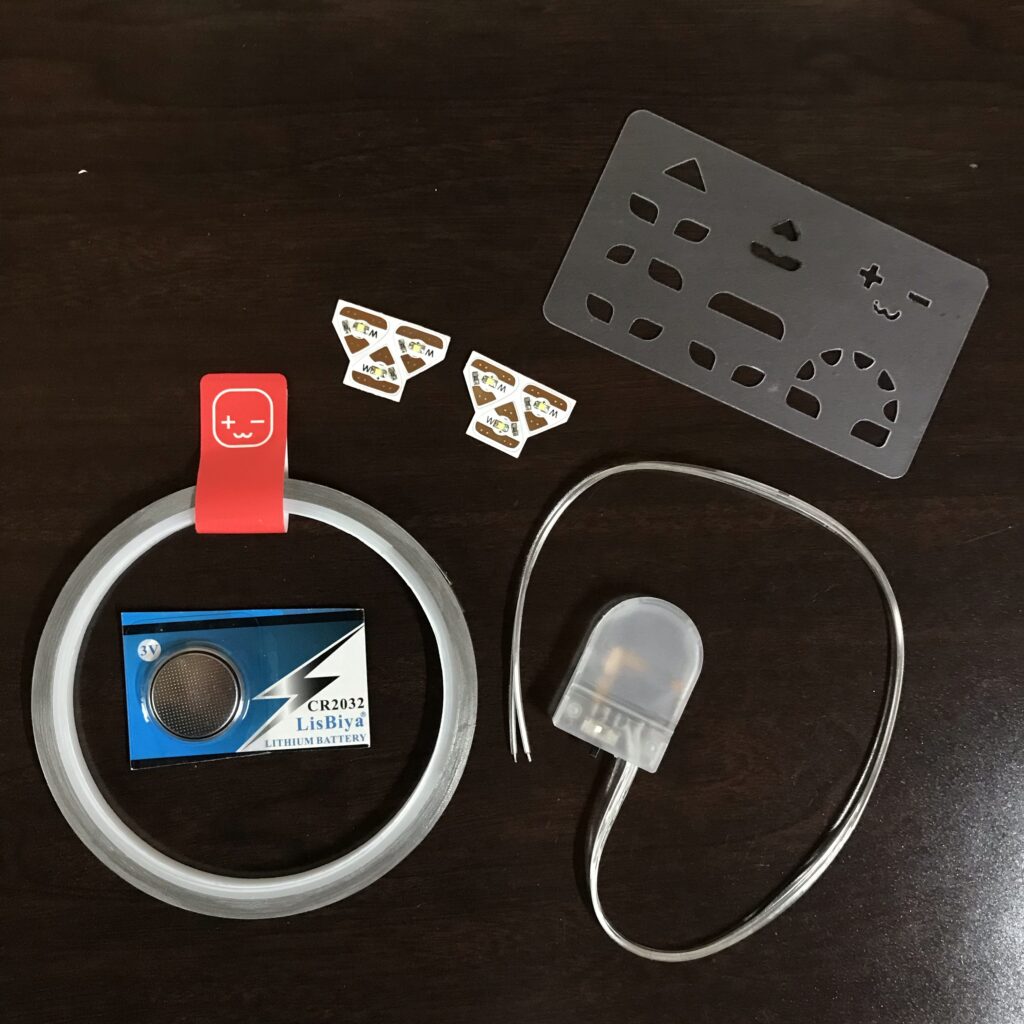
Electronic Supplies
NOTE: A Chibitronics Craft with Light Kit contains most of the electrical components required for making a Light Up Schultüte (school cone).
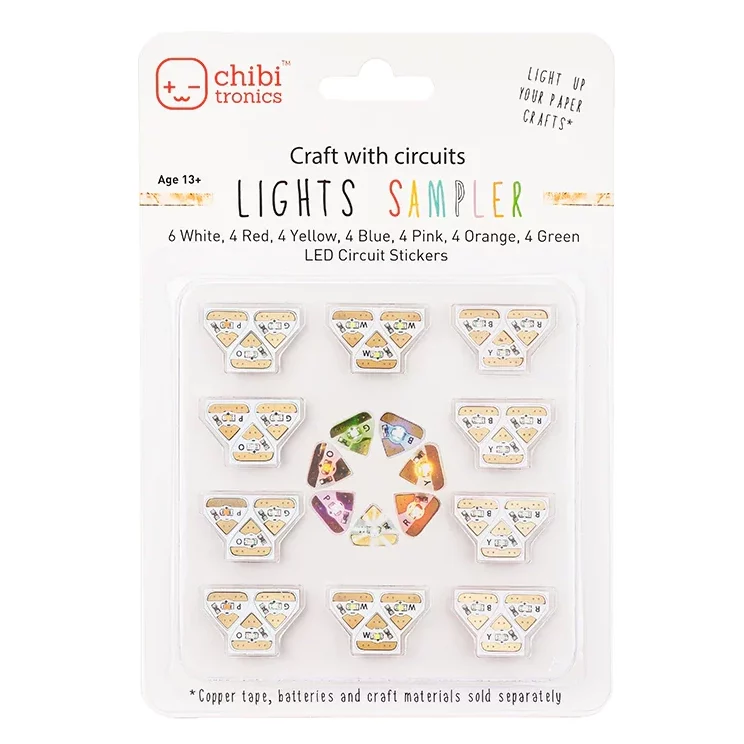
- 1 or more Chibitronics Circuit Sticker LEDs
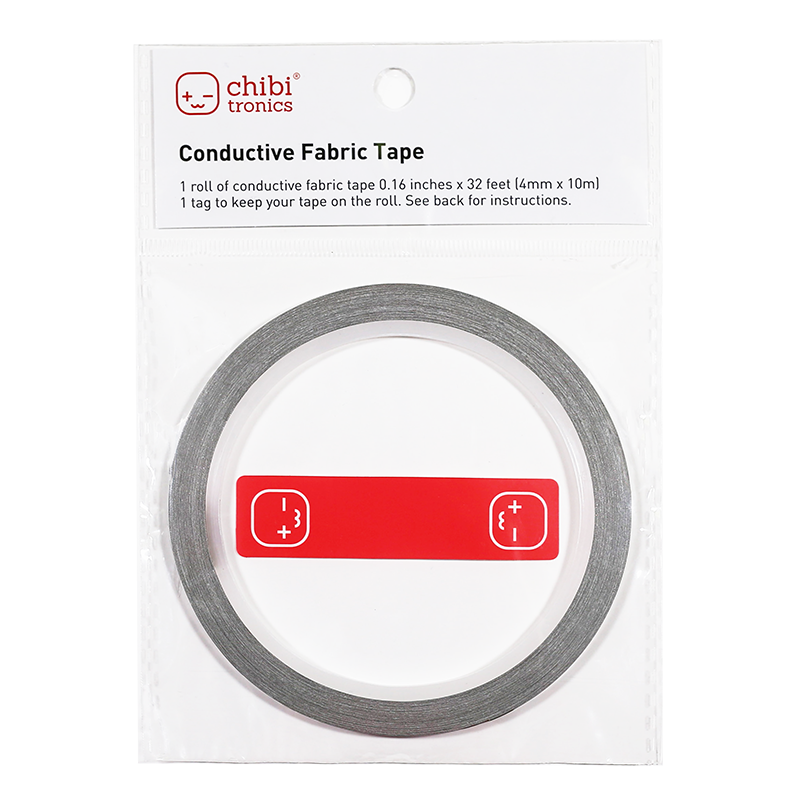
- Conductive Fabric Tape
- 1 CR2032 Battery
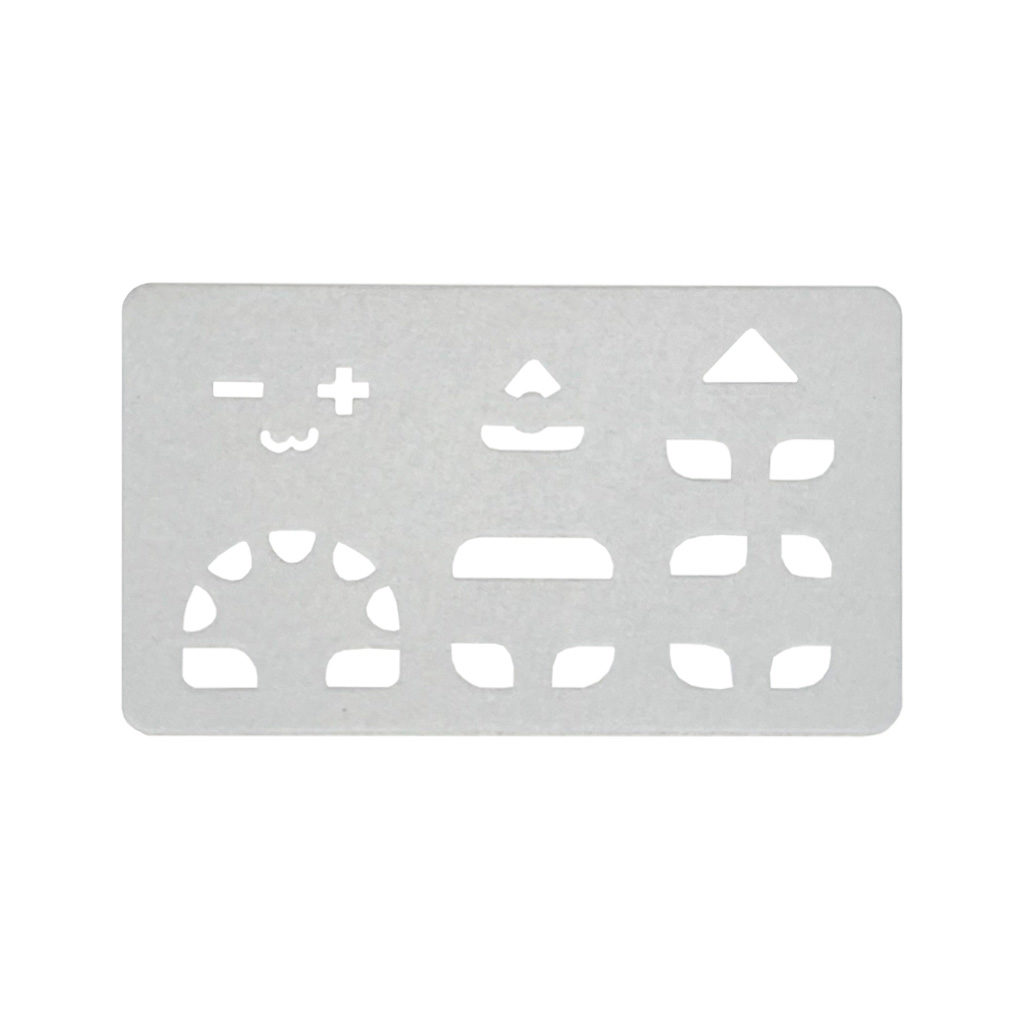
- Chibitronics Craft Stencil
- Battery holder with a switch (safer than a bare battery if giving the cone to a child)
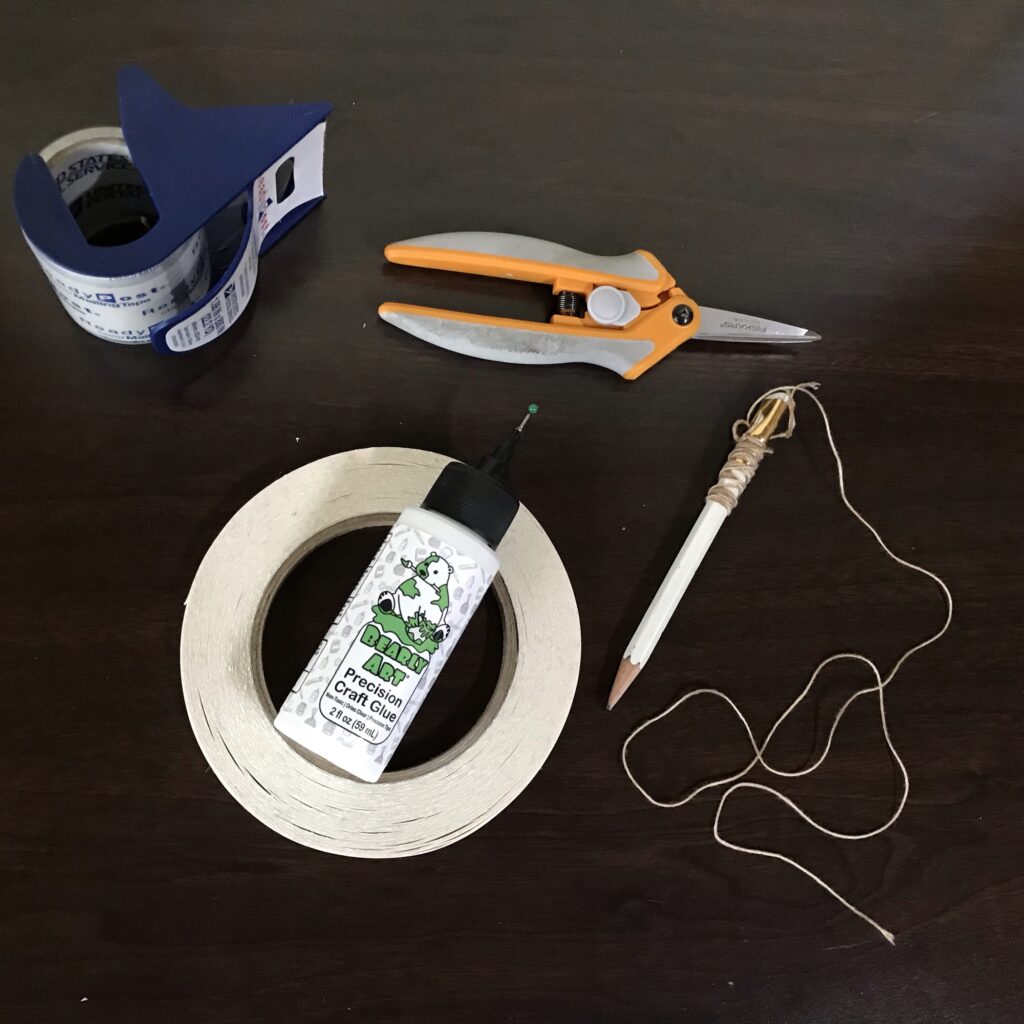
Other Tools & Supplies
- 1 sheet of poster board in a size of your choice
- Traditional Size
- US dimensions (22” W x 28” H) or European size B1
- Medium Size
- US dimensions (18” W x 24” H) or European size B2
- Traditional Size
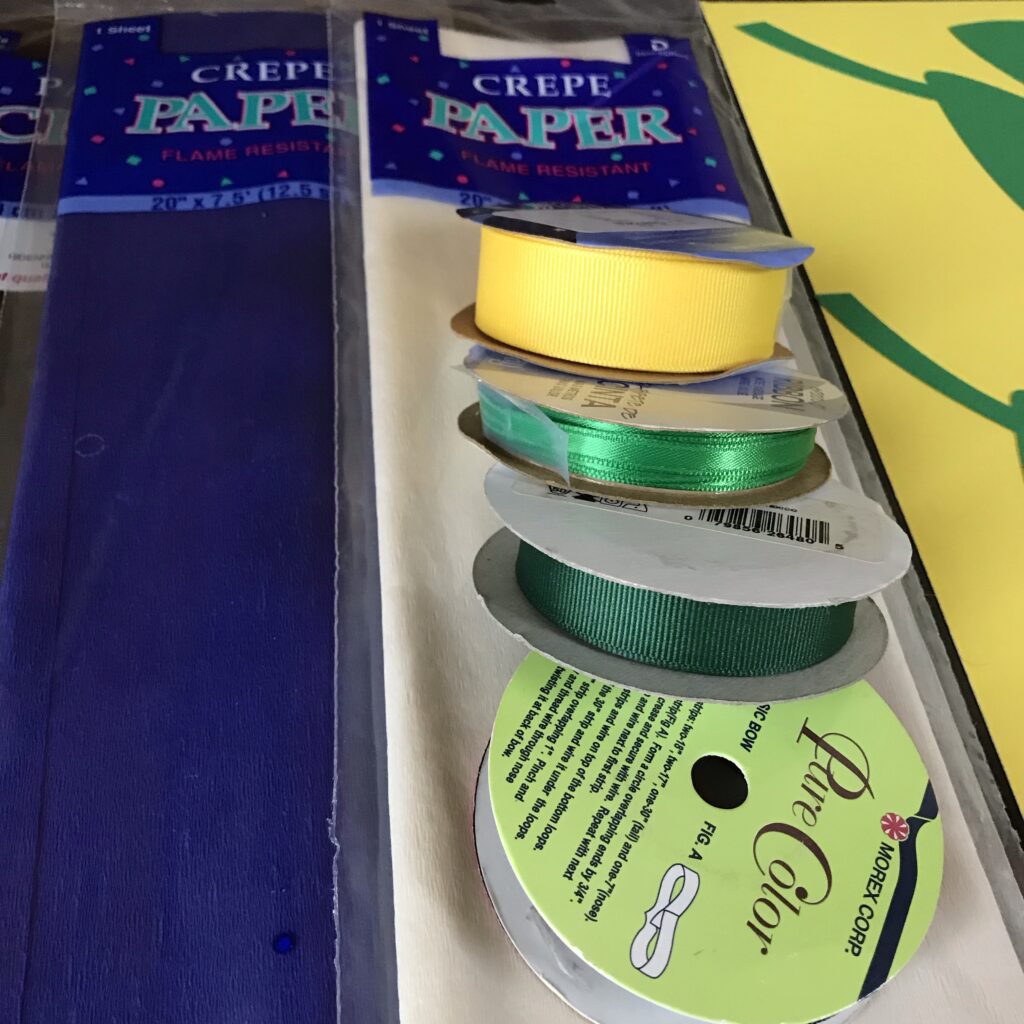
- Cardstock or decorative paper
- Art supplies of your choice (I’m using crepe paper and ribbon )
- Double-sided tape
- Postal tape
- Strong adhesive of your choice (I am using Bearly Art Precision Glue and UHU Universal Adhesive)
- Scissors
- Ruler
- Pencil with eraser
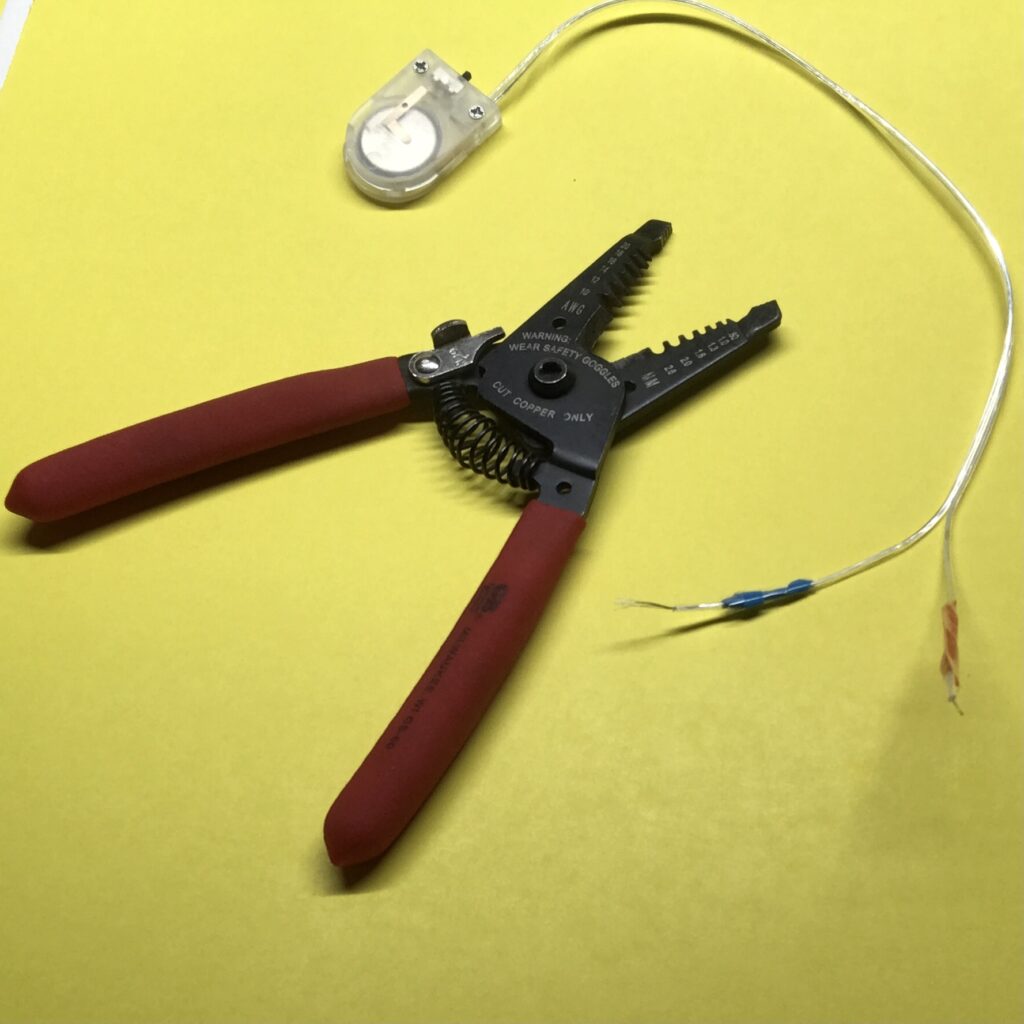
- Wire strippers (useful for prepping the wires on the battery holder)
- Japanese screw punch (useful for making holes through stacked layers)
- Cricut machine (useful for cutting out designs)
Directions
For a full demonstration of how to assemble this project, please watch the video above.
Step 1: Cut Your Pieces
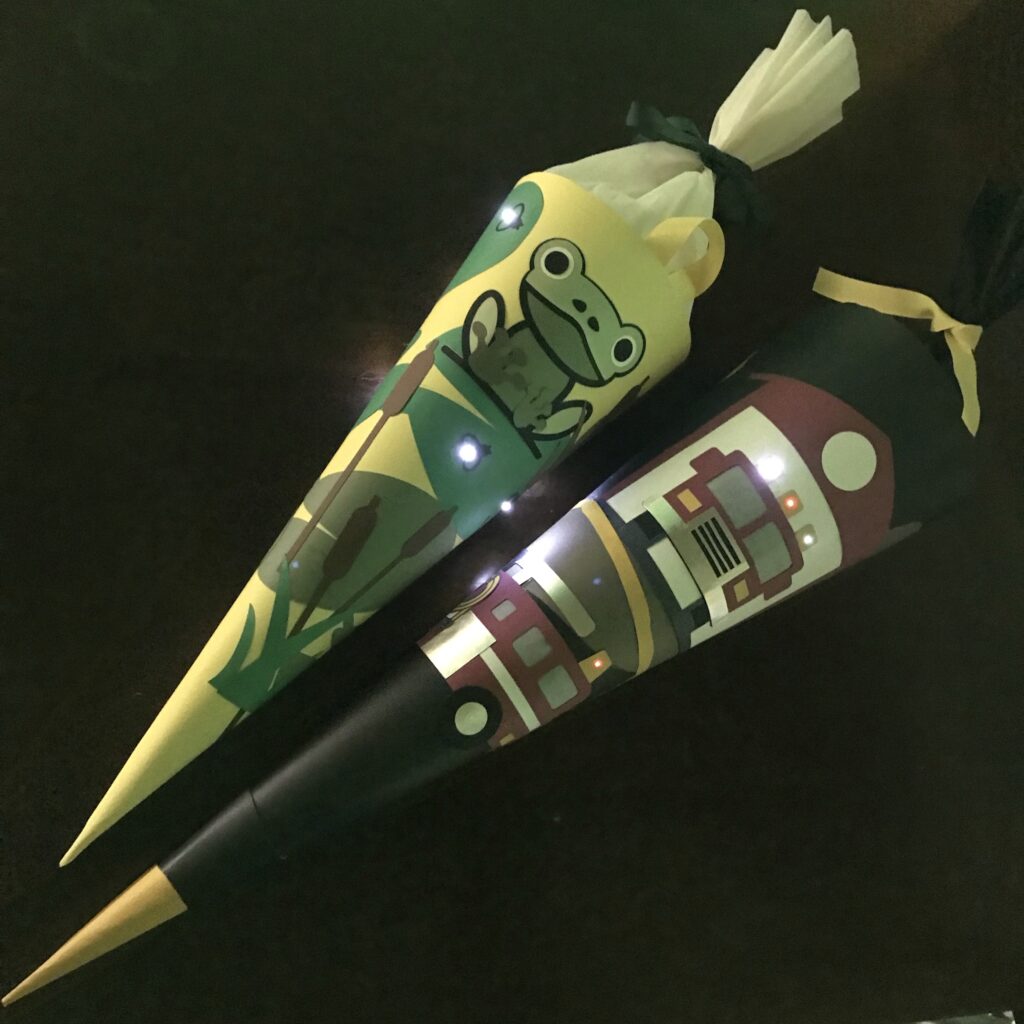
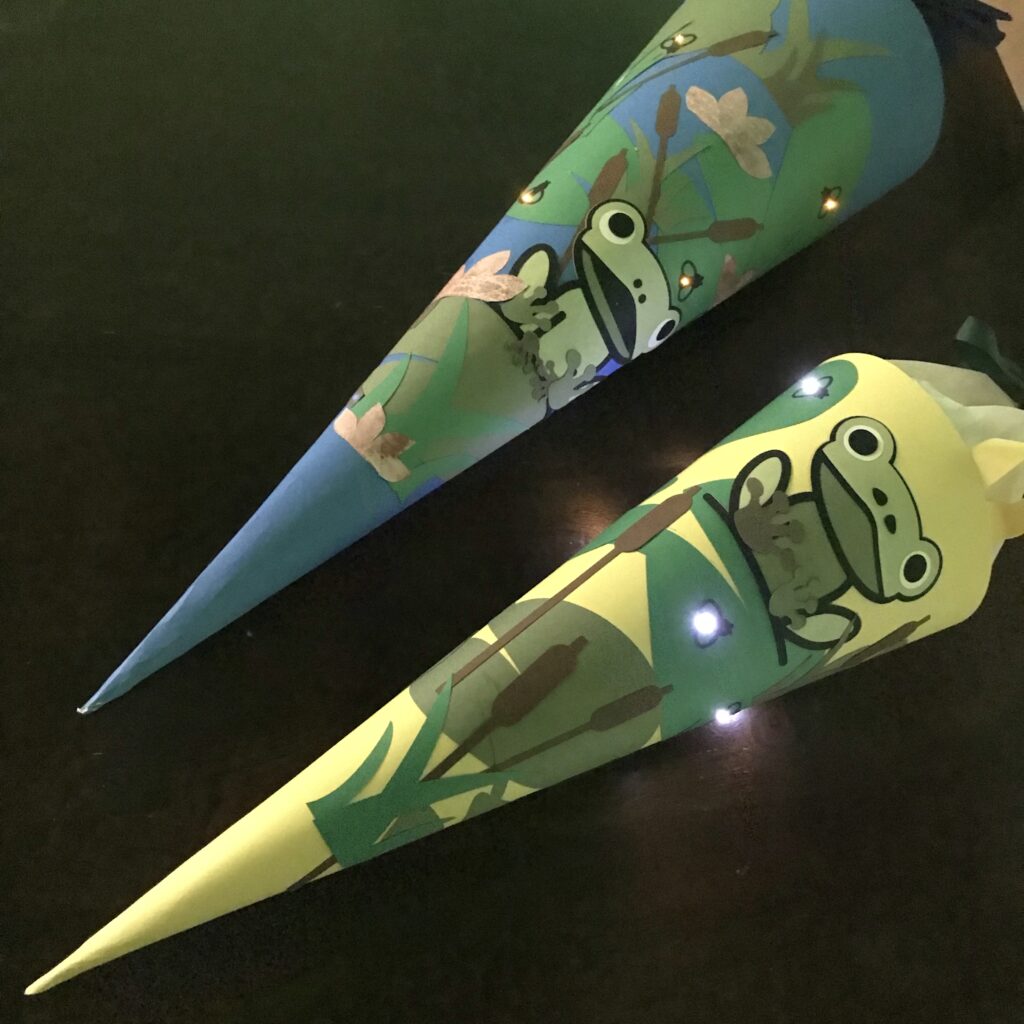
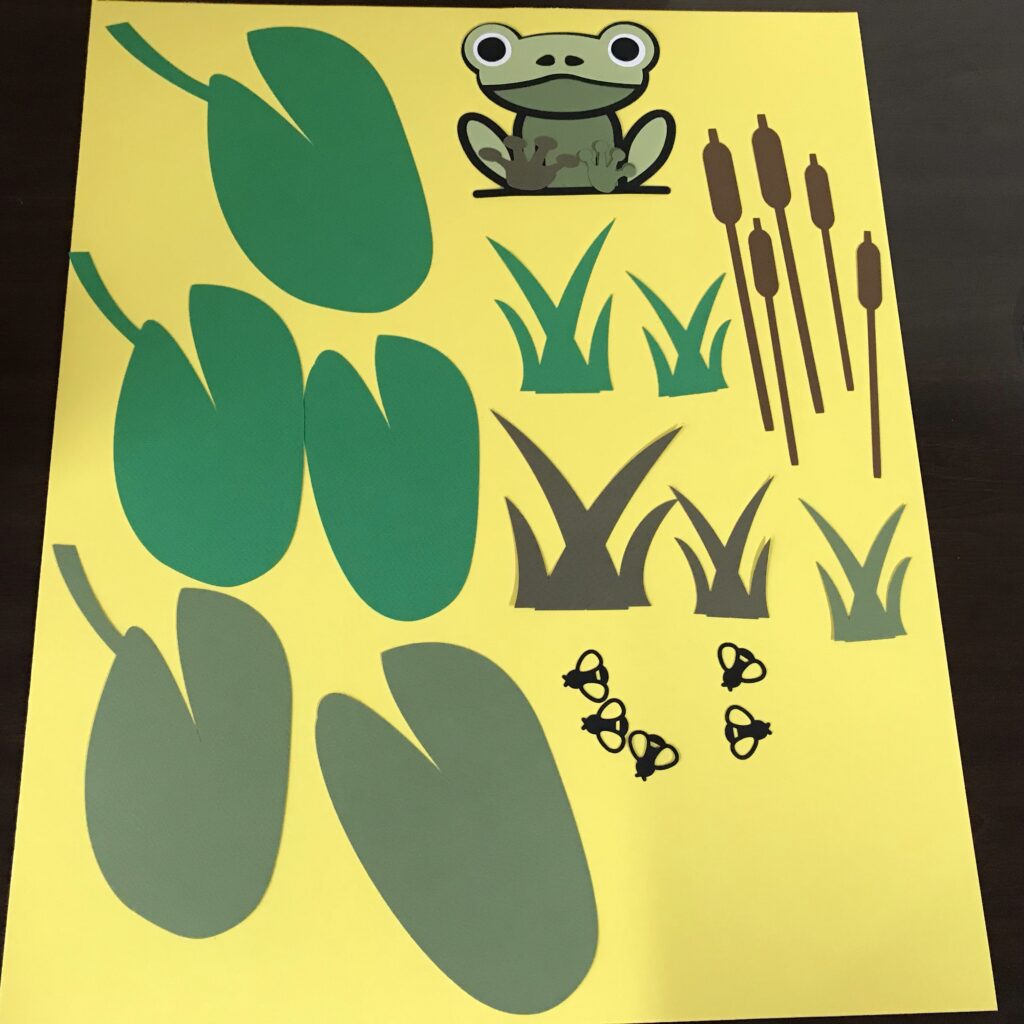
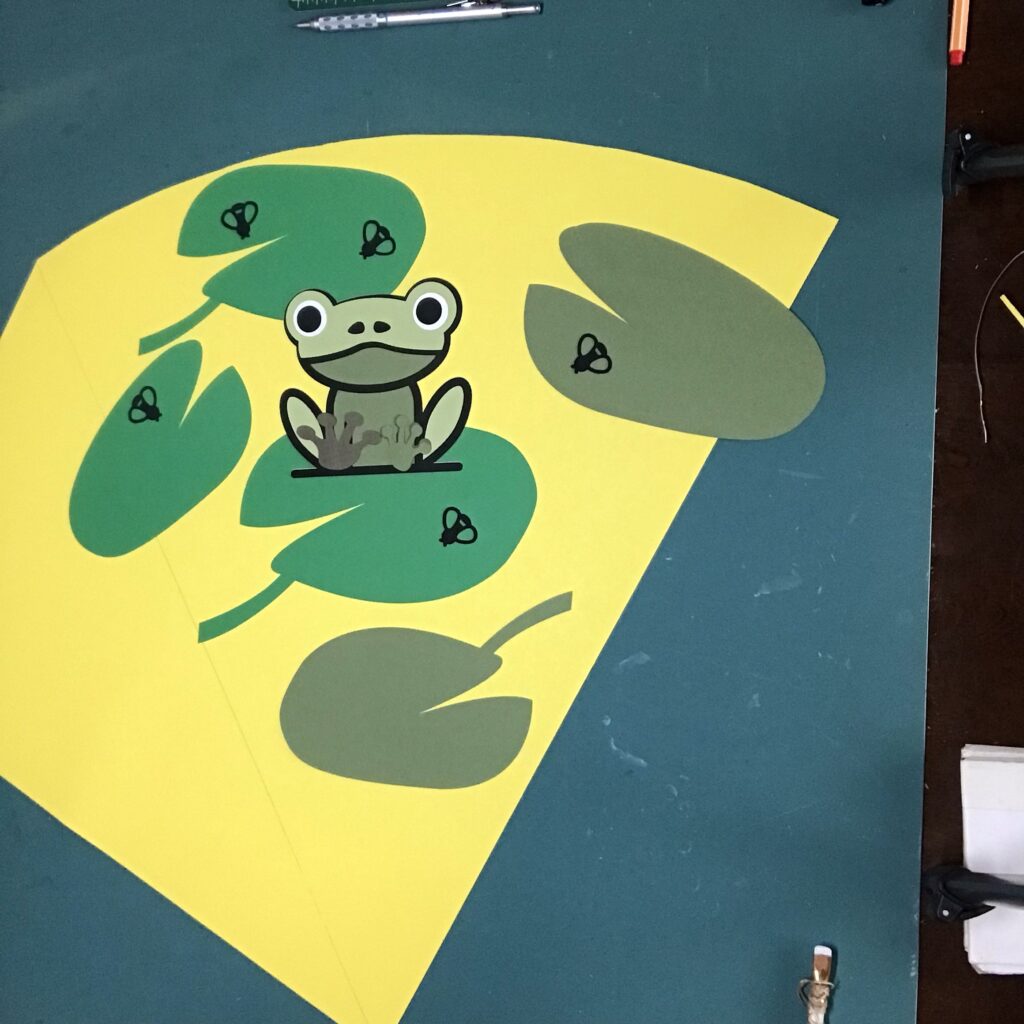
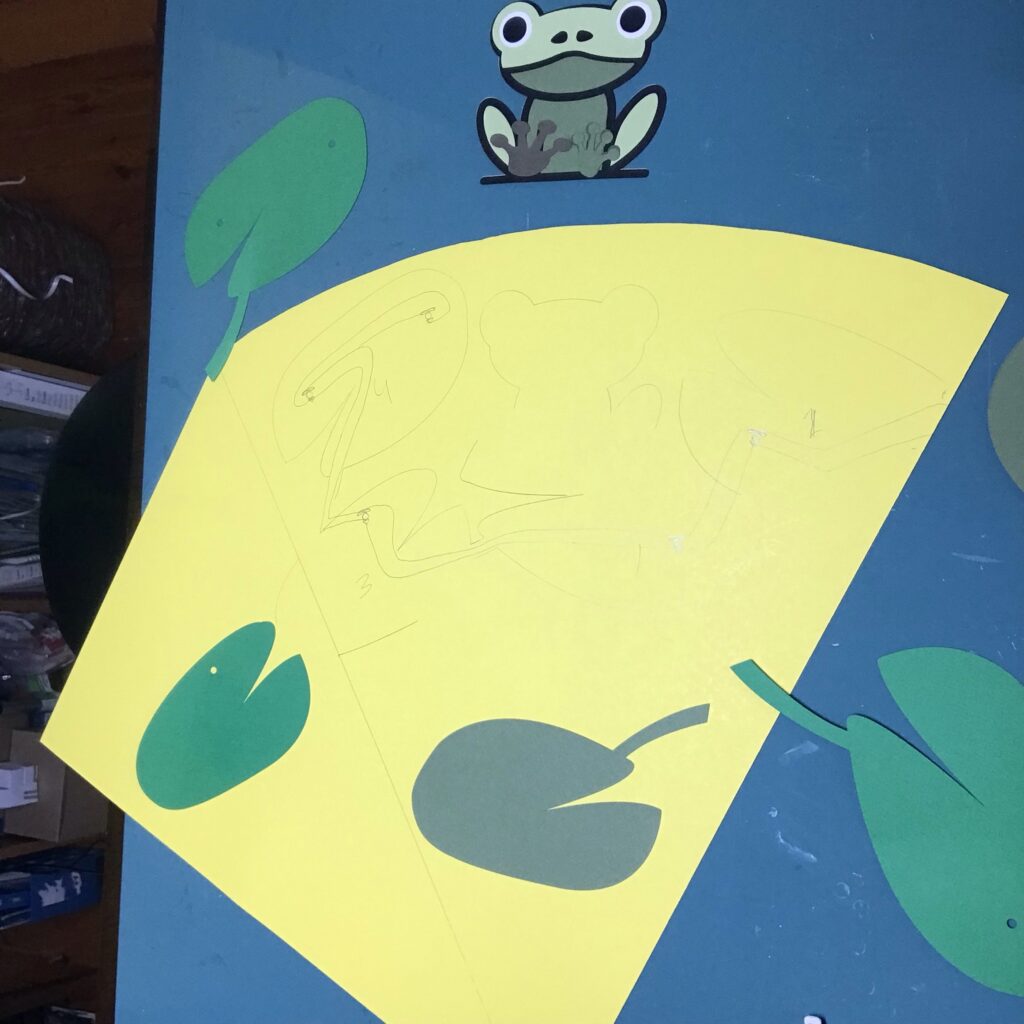
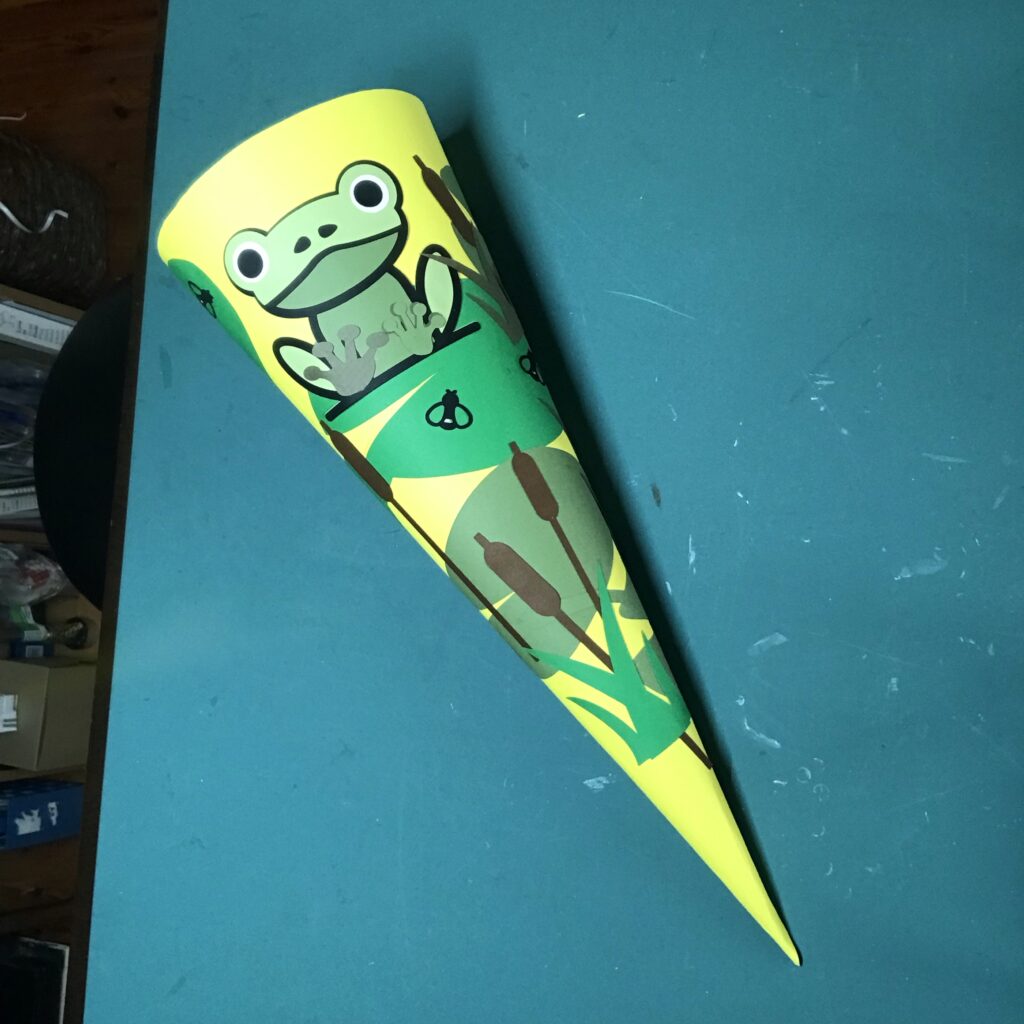
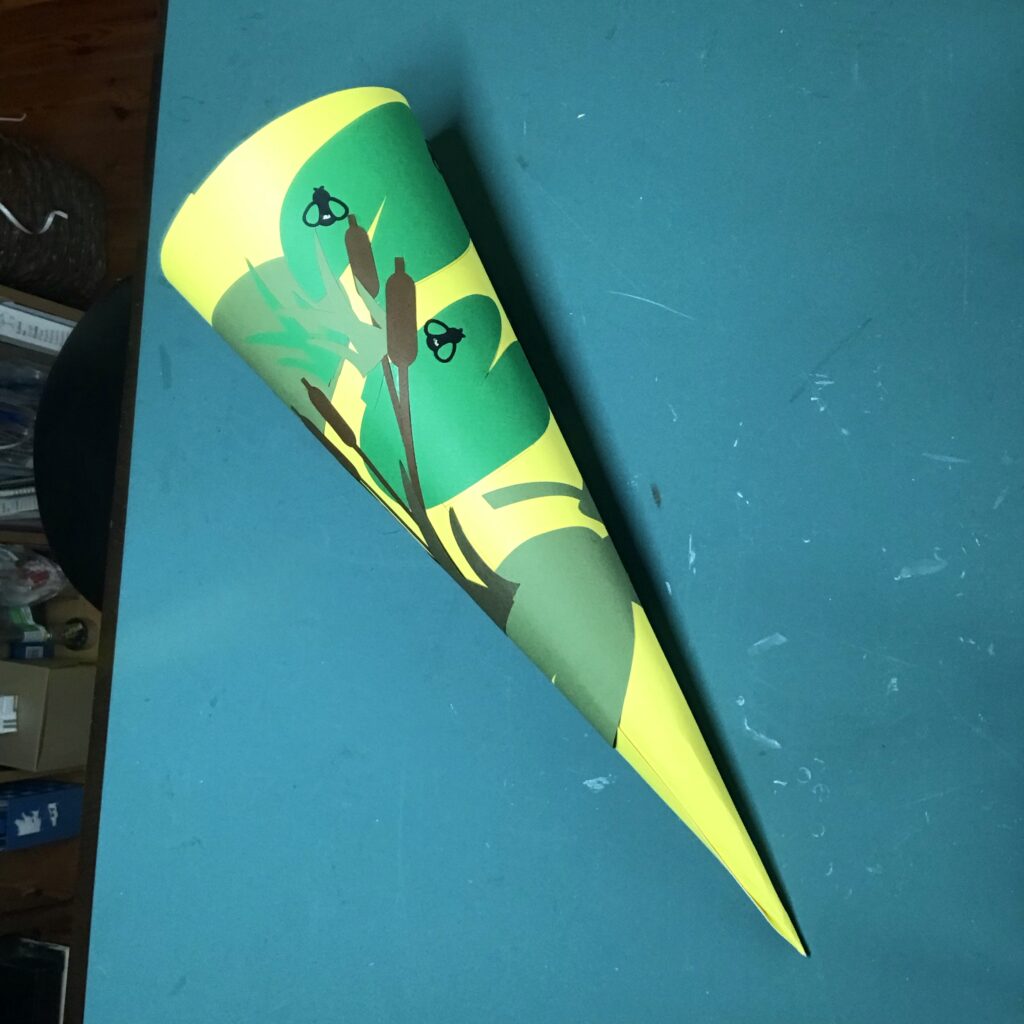
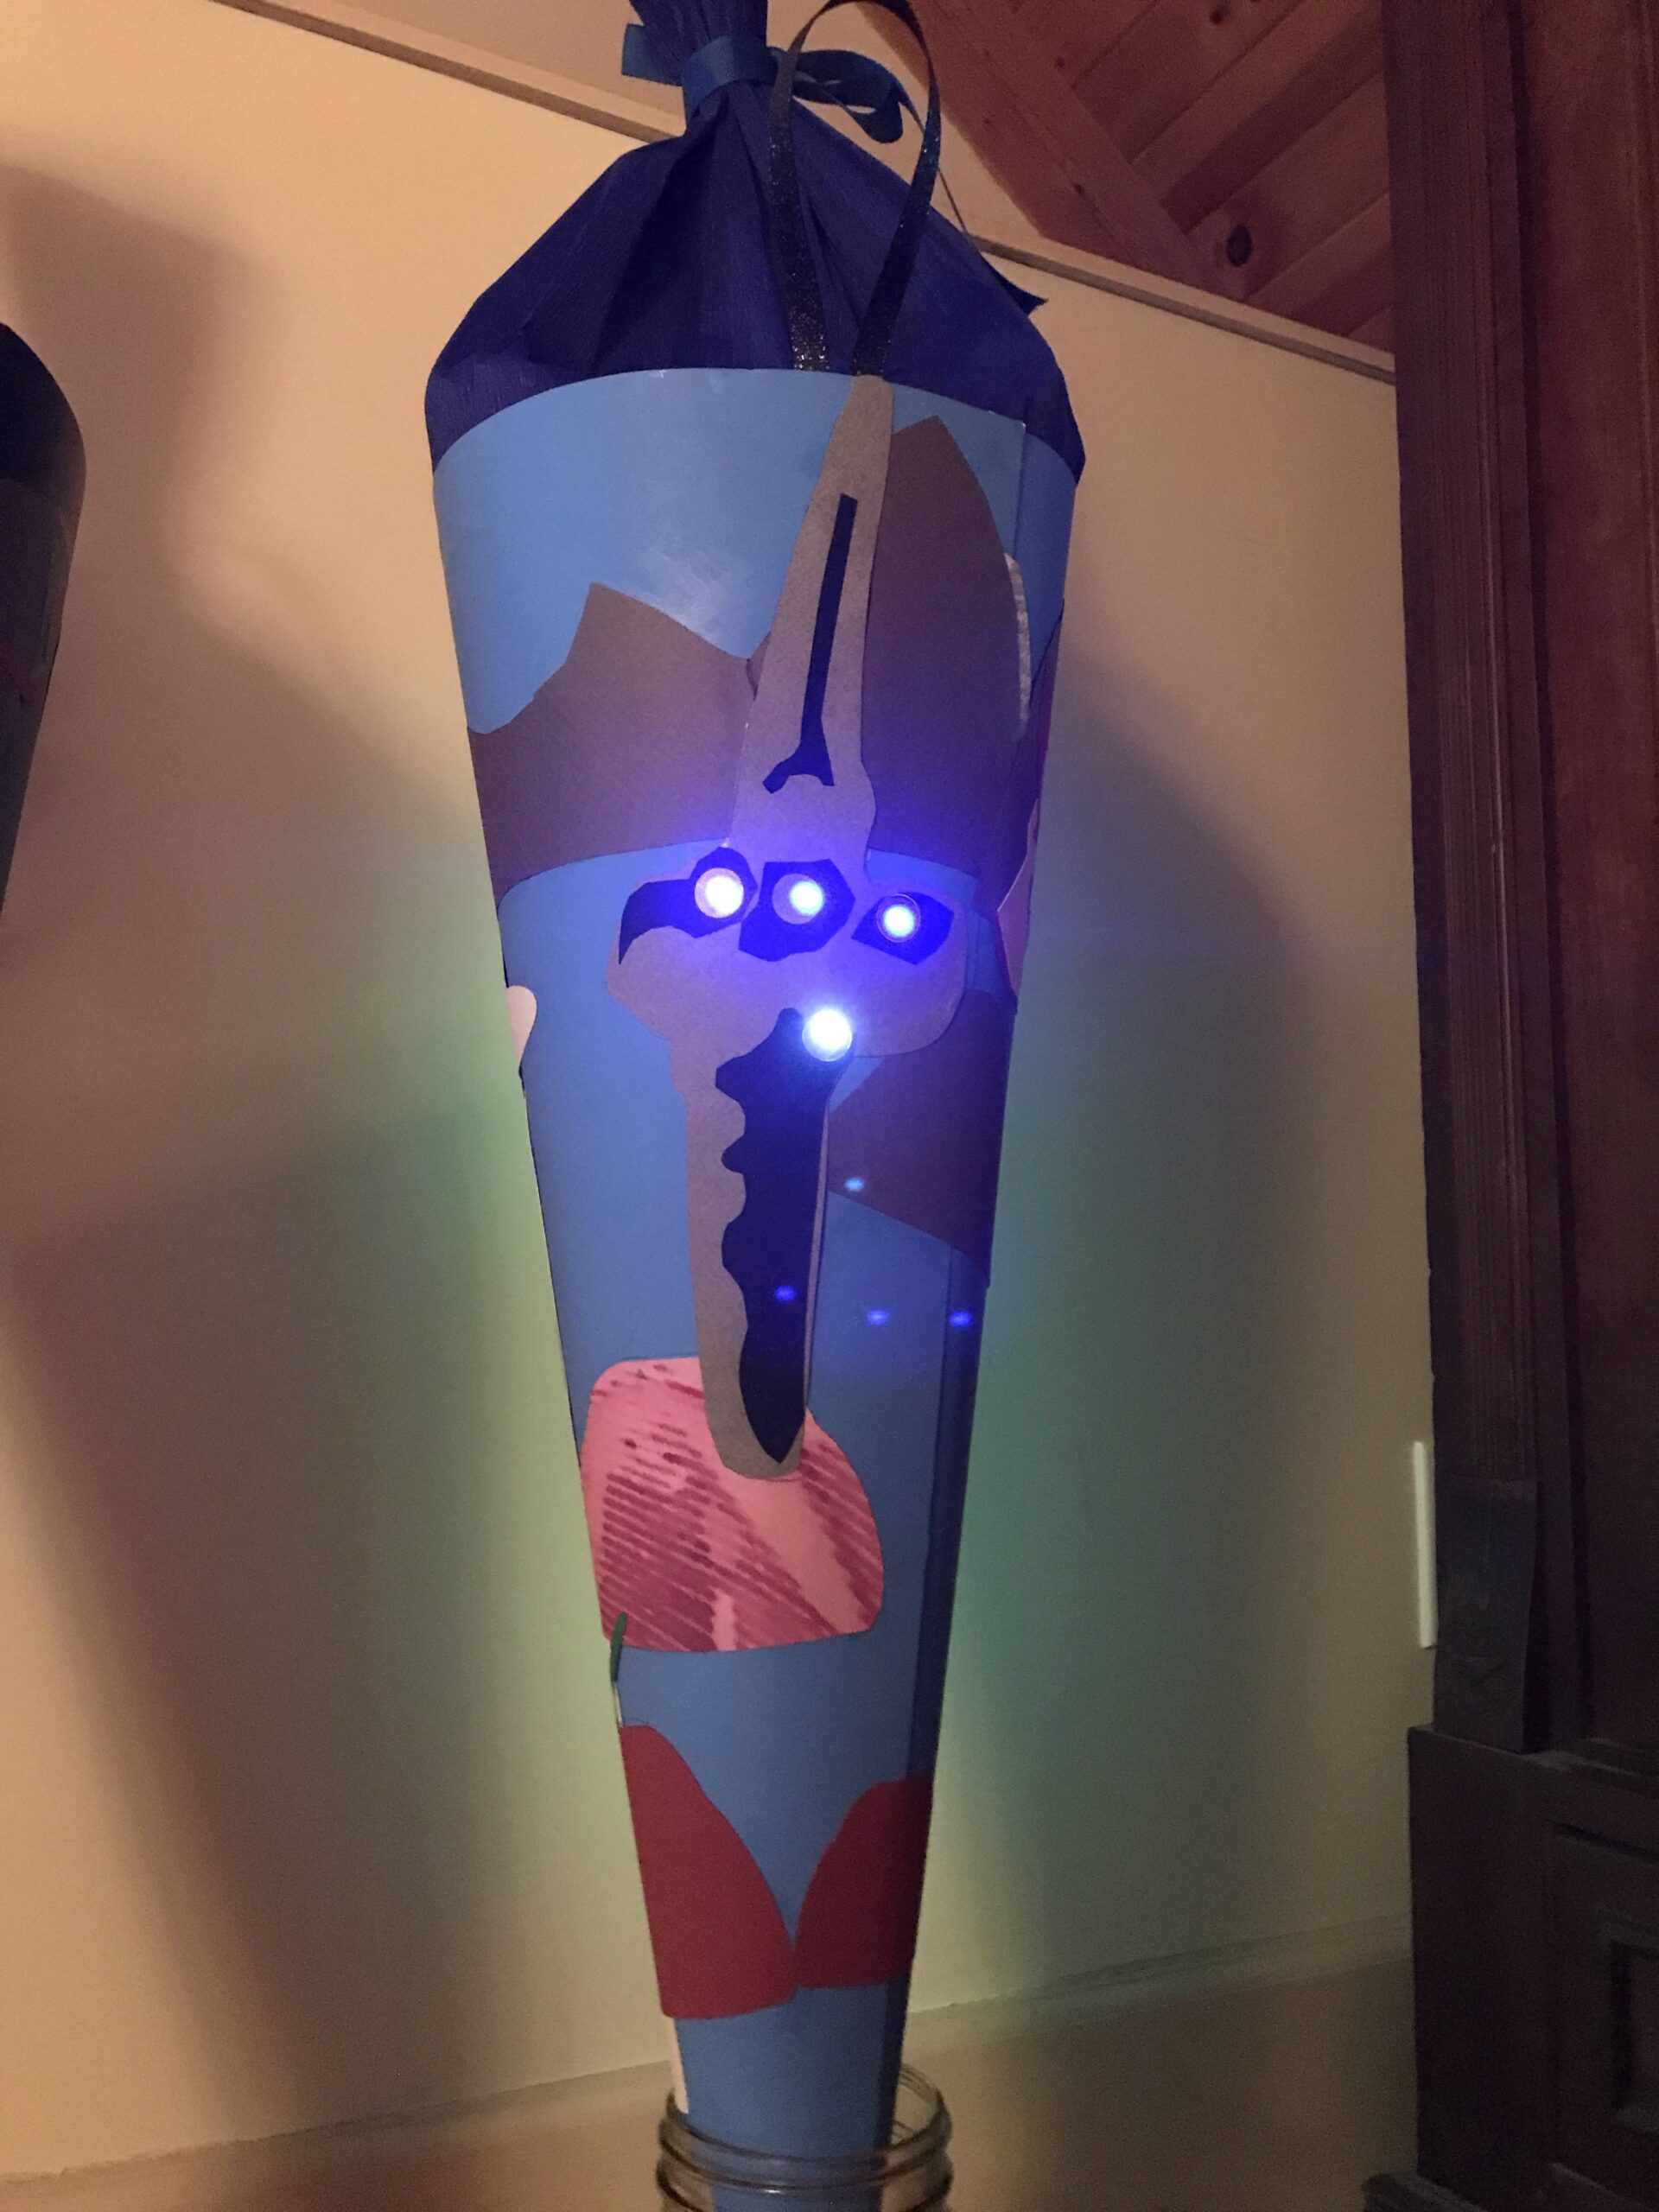
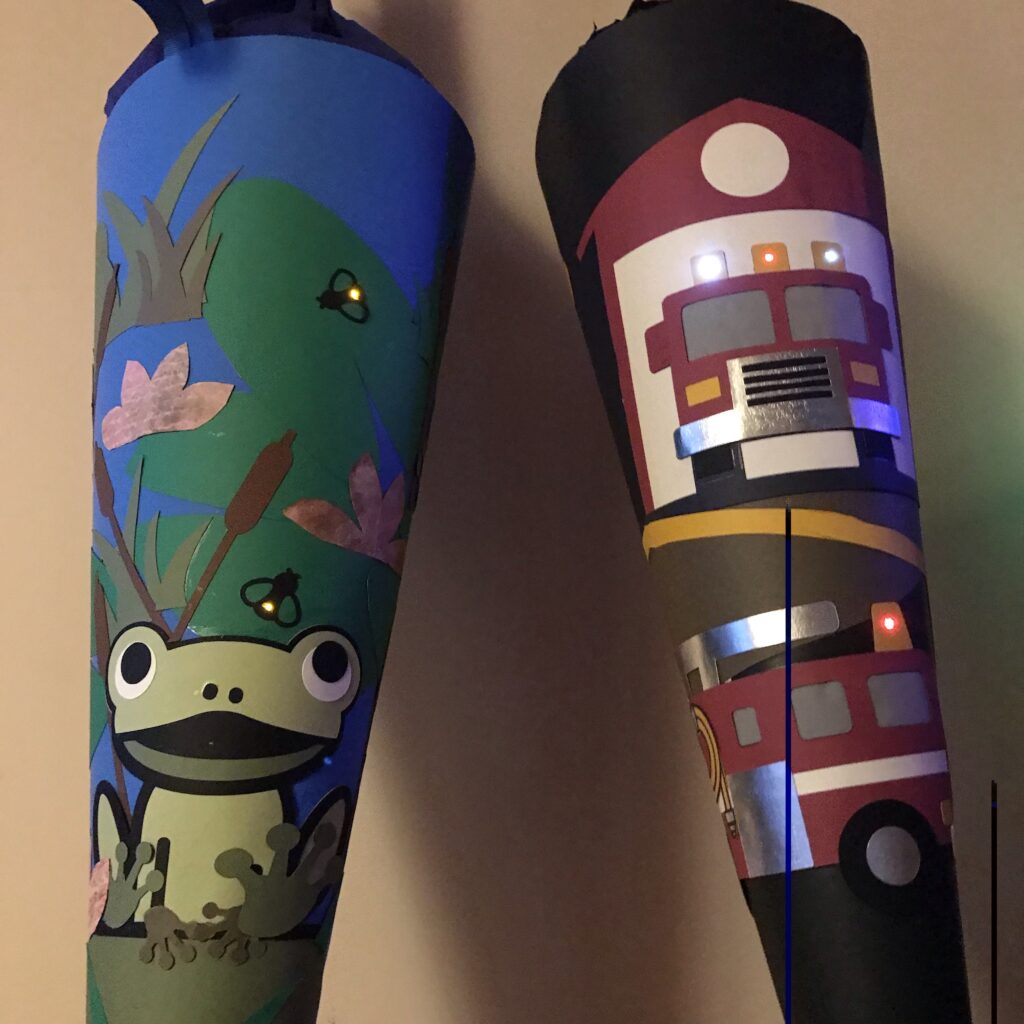
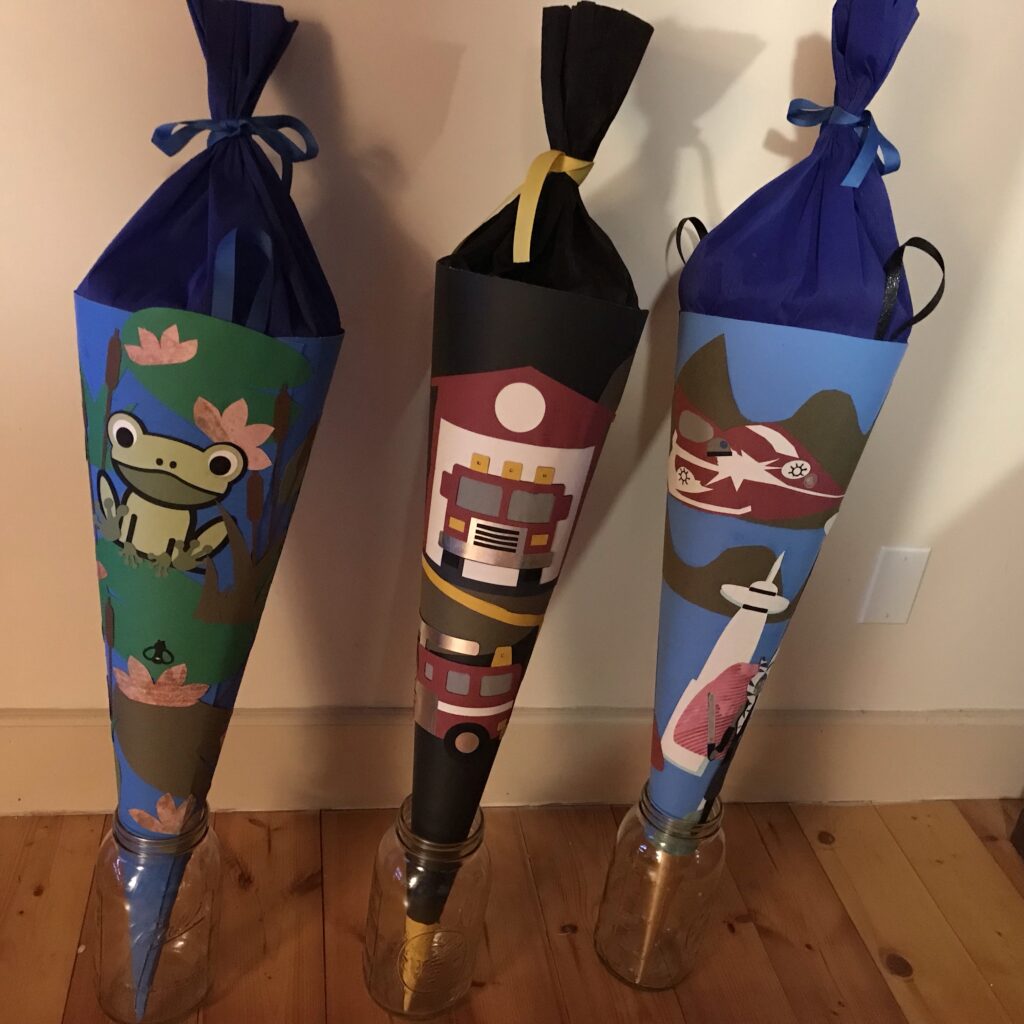
Brainstorm a concept for your Schultüte and cut pieces to help you convey your idea. My daughter requested frogs, so I created a swamp scene with glowing fireflies.
I cut most of my pieces out using a Cricut, but they may also be cut by hand.
Step 2: Prepare Your Poster Board
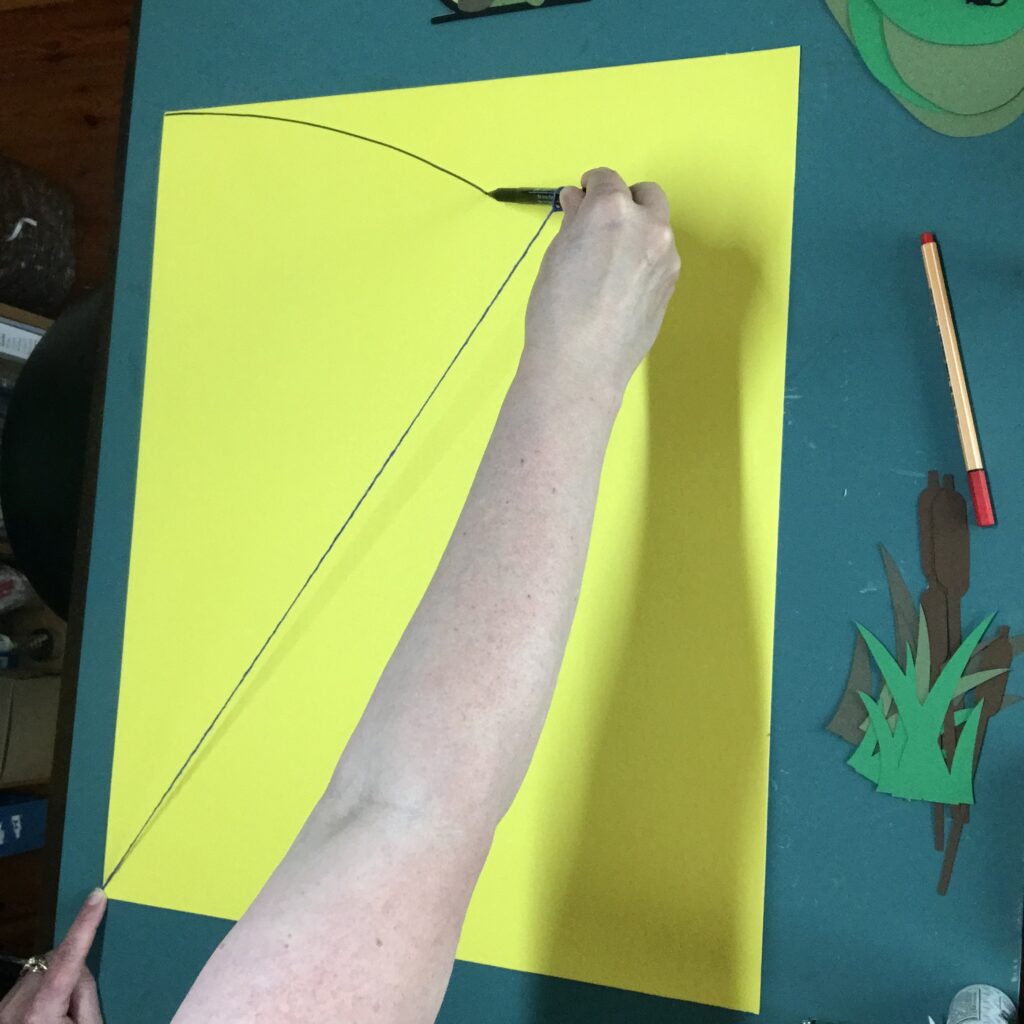
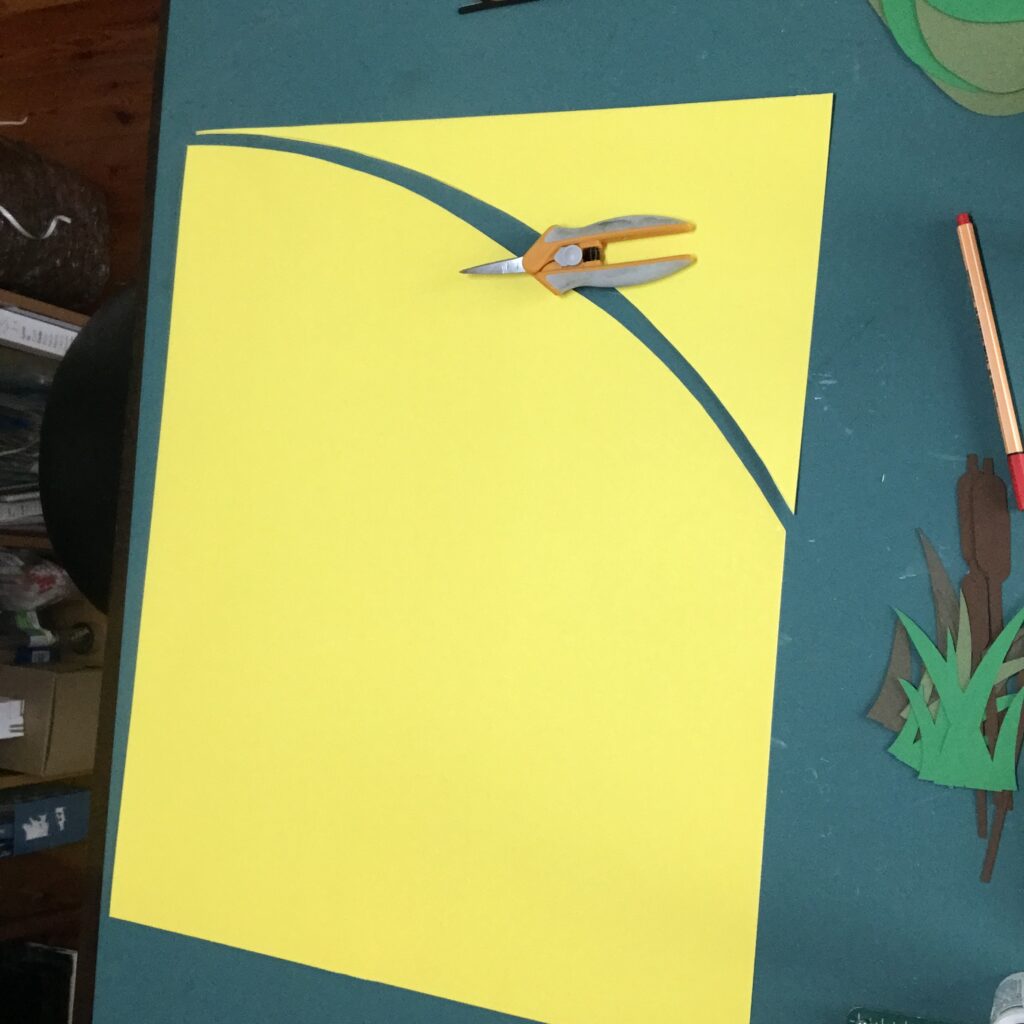
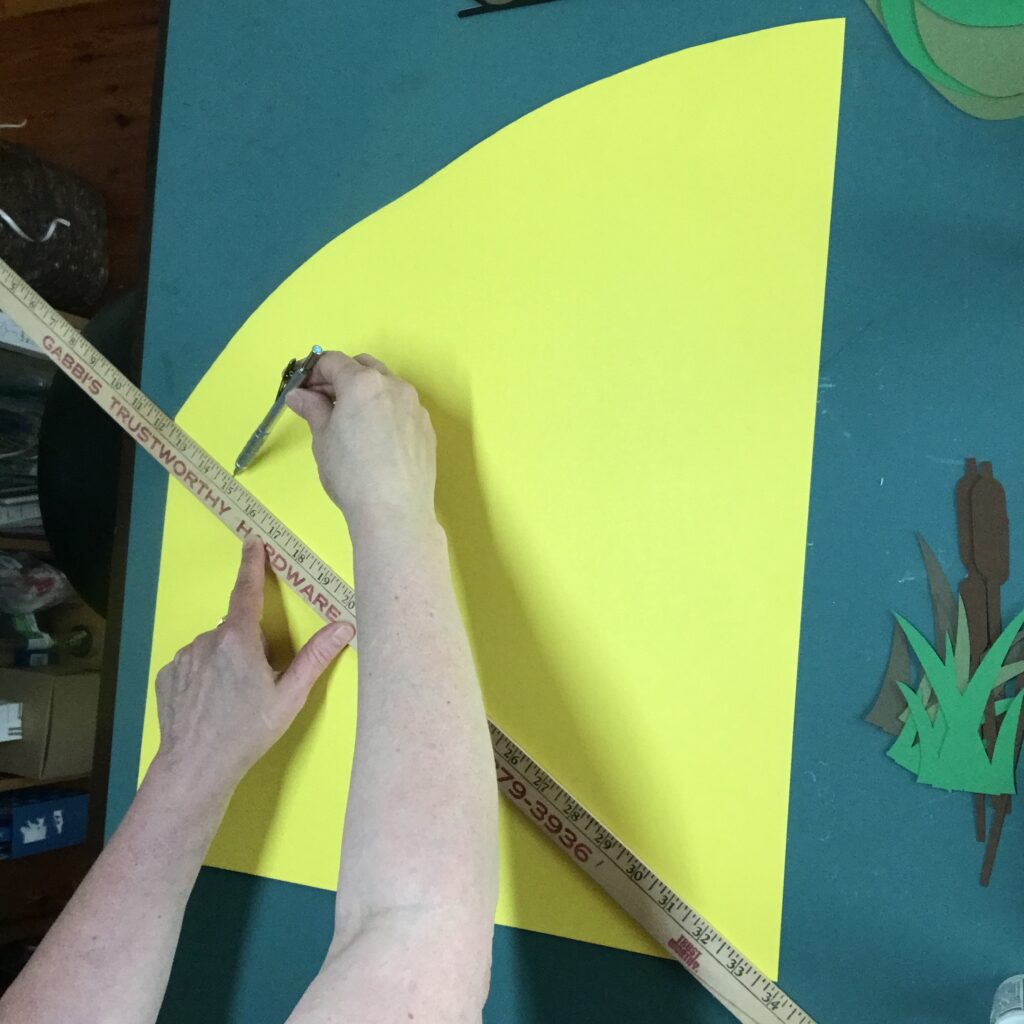
To prepare your poster board, you will need to cut off some excess paper to create the arc for your cone. To do this, tie or wrap a string, slightly longer than your poster board is tall, around the top of a pencil. Then, with the less attractive, back side of your poster board facing up, hold the string down in its bottom left corner, positioning the pencil in the top right corner until the string is tight. Use a pencil to draw an arc by moving it toward the opposite edge of the paper. Cut off the excess.
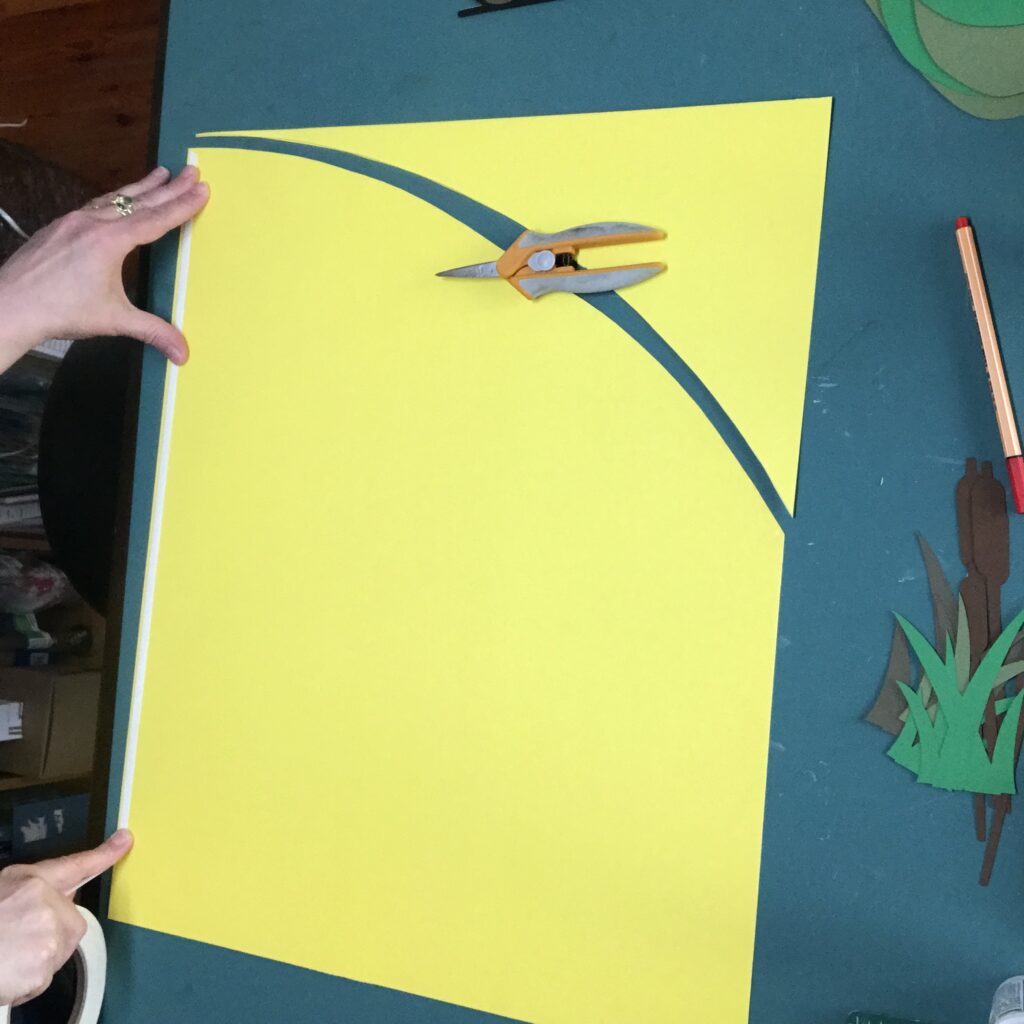
Apply a piece of double-sided tape along the longest, straight edge of the poster board. Do not remove the protective backing yet. The tape will be on the inside and will be used to secure the cone in a later step.
Next, flip your poster board with the good side facing up and the longest edge oriented to your right. Determine the point where the arc that you cut ends. From this point, draw a faint pencil line extending to what will become the corner of your cone. This will help you visualize how much surface area you will have to work with once your cone is taped together.
Step 3: Plan Your Design Placement
Before you fold your poster board into a cone shape, it’s helpful to think about the placement of the pieces in your scene, and how they will look when placed upon a curved surface. You might find it helpful to mold the poster board into a cone without taping it closed to get an idea of how the objects would look in different locations. I usually play with positioning my pieces while the poster board is flat and hope for the best.
While planning your idea, think about where you want your lights to be and try to incorporate decorative elements into your design that will allow you to insulate and disguise the circuit. For example, the circuit in my swamp scene will be covered by lily pads, cattails, and grass.
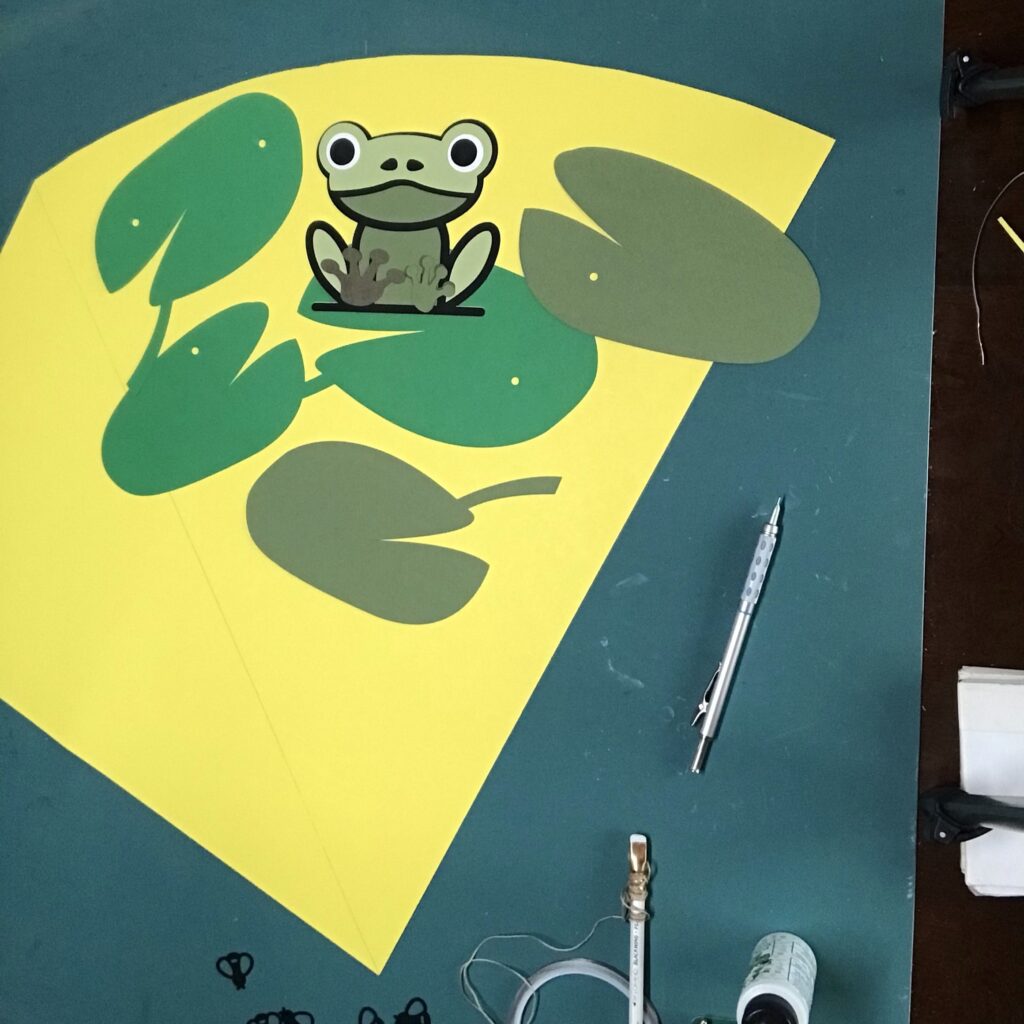
To help know where to sketch your circuit, it’s helpful to poke holes through pieces that will have light shining through them; this also makes it easier to mark the location of the LEDs as you plan your circuit.
Tips, Tricks & Call-outs
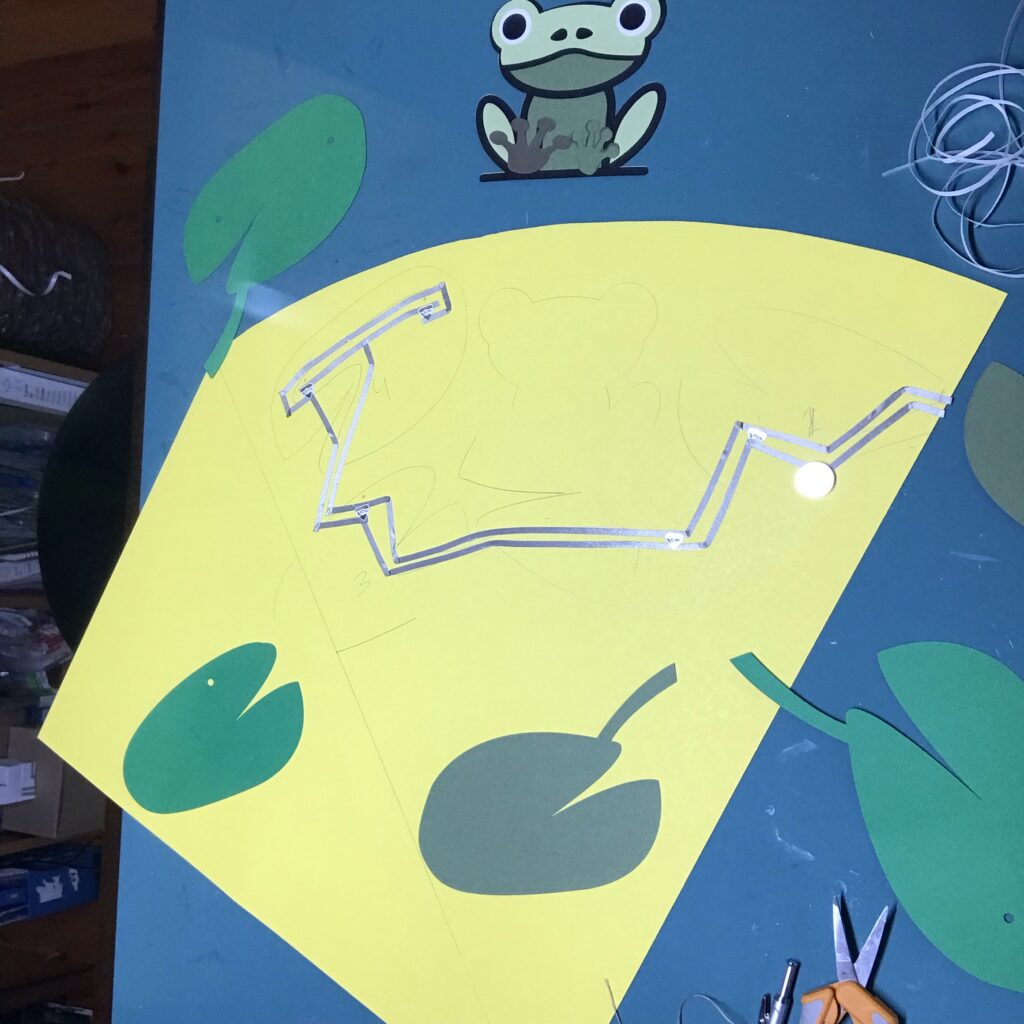
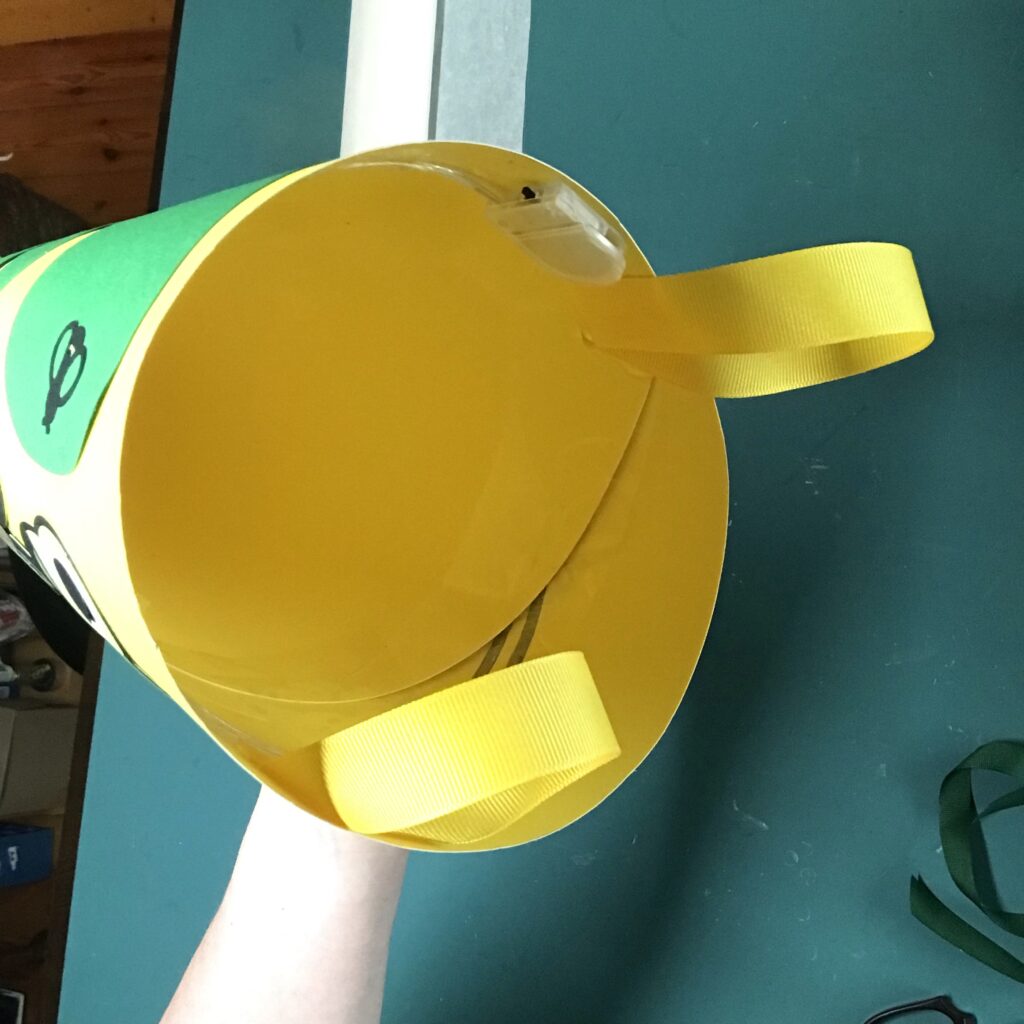
Keep in mind that the circuit you’ll be constructing will need to start near the top, right side of your flat cone piece. The reason for this is to ensure easy access to the battery holder when the cone is formed. In another step, the battery will be concealed inside the top of the cone.
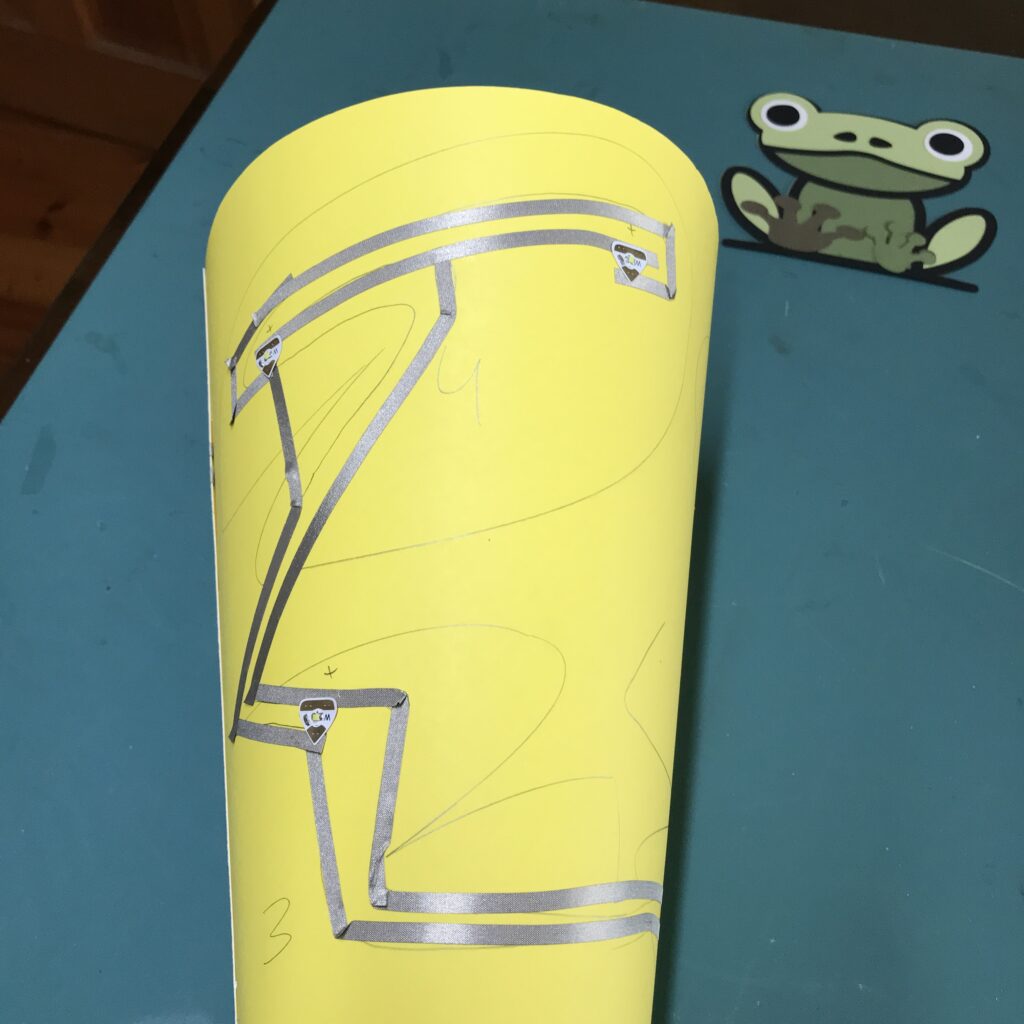
Sample Circuit Diagram
The following circuit diagram is designed as a guide. The placement of your LEDs may vary, so your circuit may not look exactly like this. The part of your circuit with the LED stickers will be on the front side of the poster board (viewed on the outside of your cone). The part connecting to the battery holder will be added to the back side of the poster board (inside of the cone) after it has been formed.
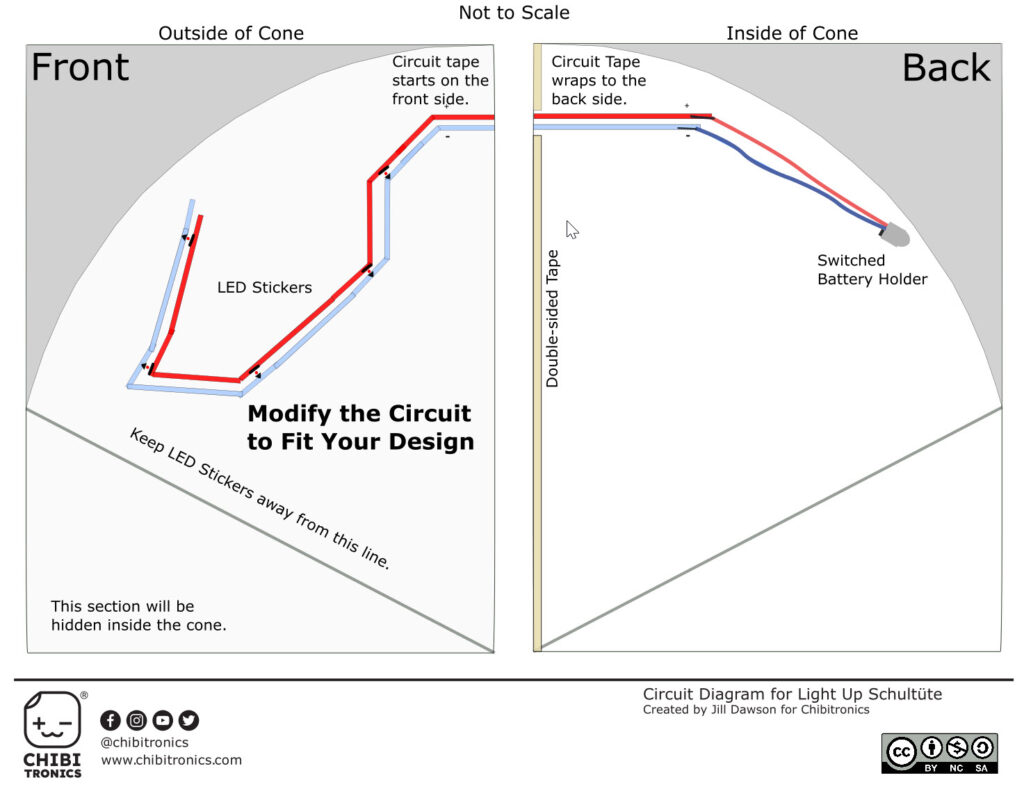
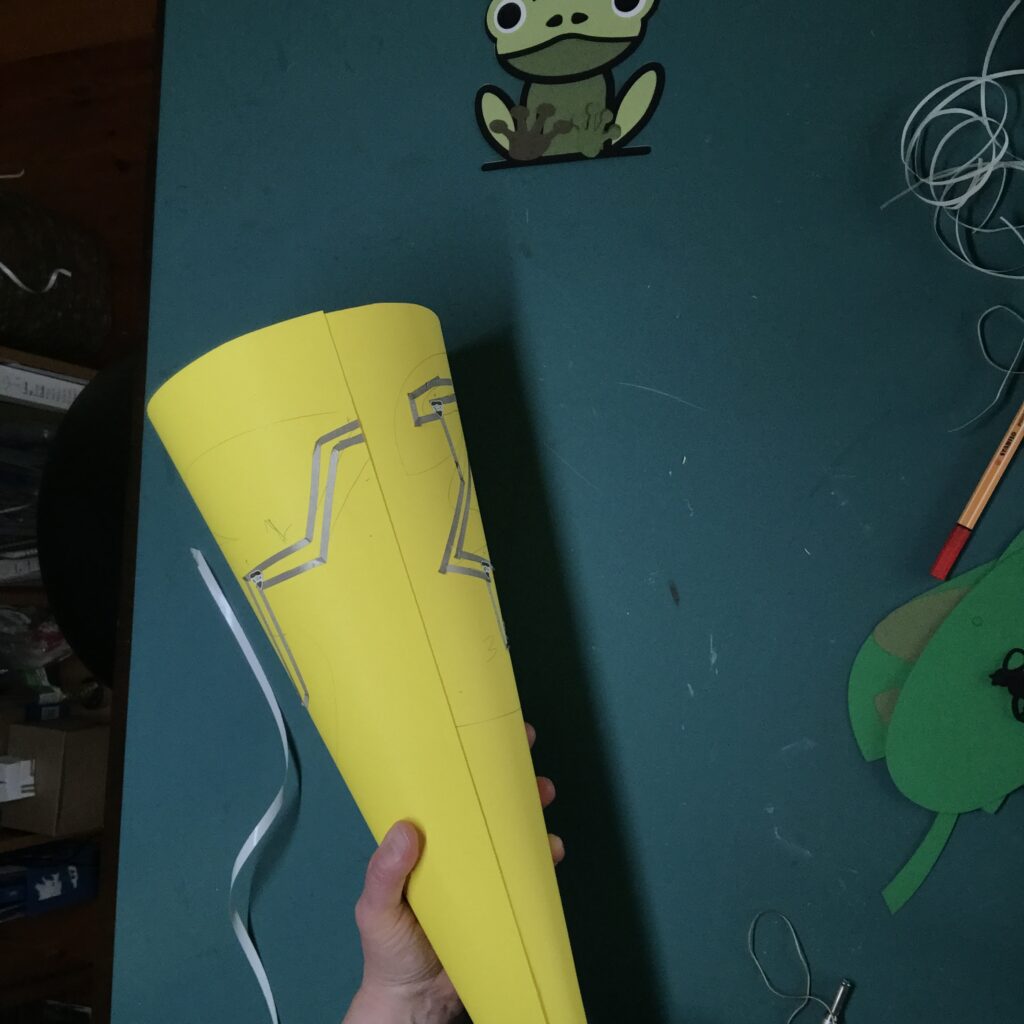
Step 4: Create Your Circuit
Once you know where you want your LEDs to be, mark their locations on the good side of your poster board using a Chibitronics Craft Stencil (if you have one).
You might find it helpful to trace around your paper pieces to make it easier to envision where the circuit traces need to be in order to remain hidden.
Once you’ve come up with a plan, start applying the positive and negative traces of the circuit near the top, right side of the poster board.
Then, apply Circuit Sticker LEDs in the areas you marked, ensuring that the polarity of your LEDs matches the polarity of your conductive traces. The pointy, negative ends of your LED stickers should only touch the negative trace of your circuit, while the broader, positive ends should only touch the positive trace. To prevent a short circuit, the positive and negative traces should not touch.
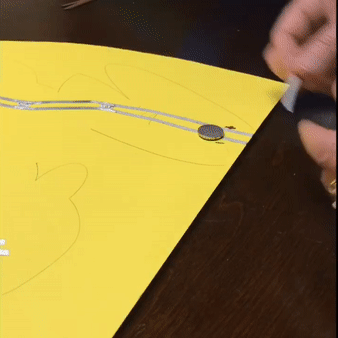
Test the circuit with a coin cell battery and a scrap of conductive fabric tape. If everything works as planned, it is a good idea to reinforce the LED stickers with additional pieces of conductive fabric tape.
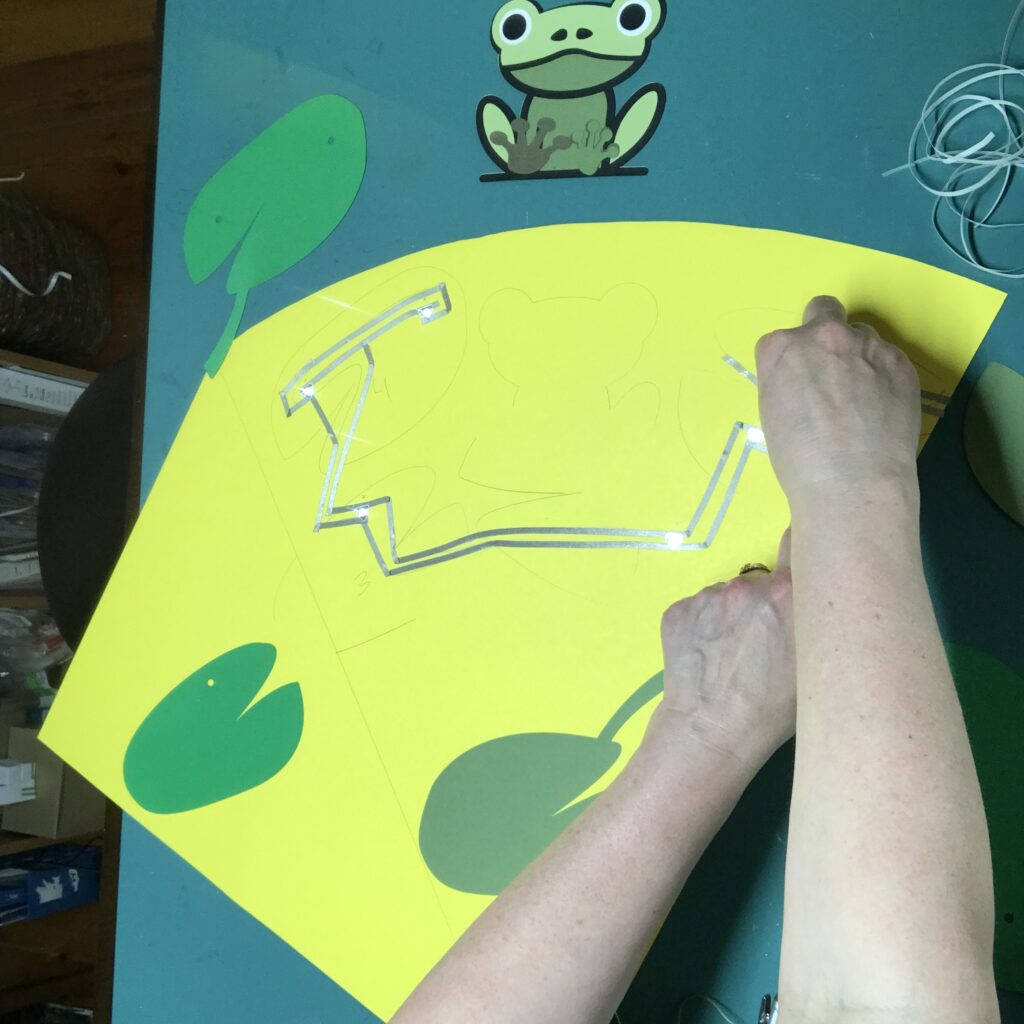
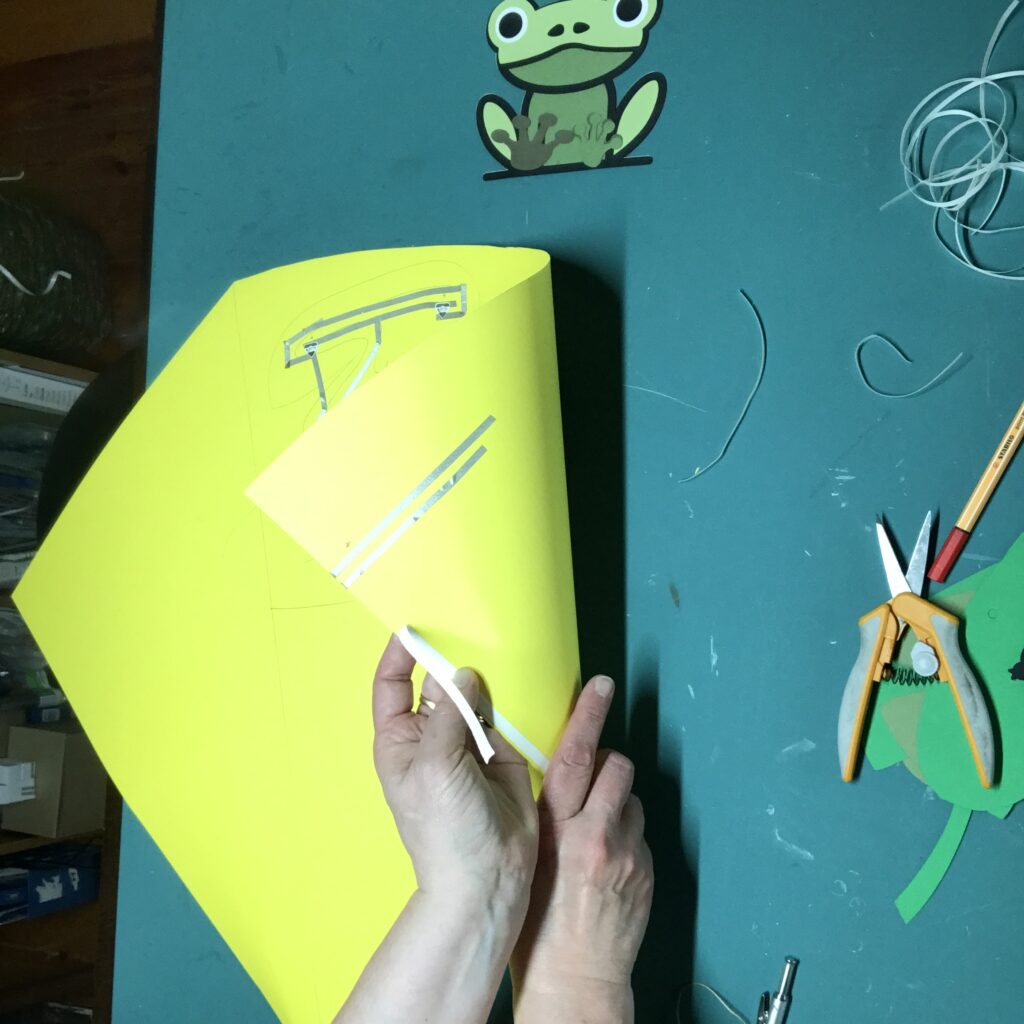
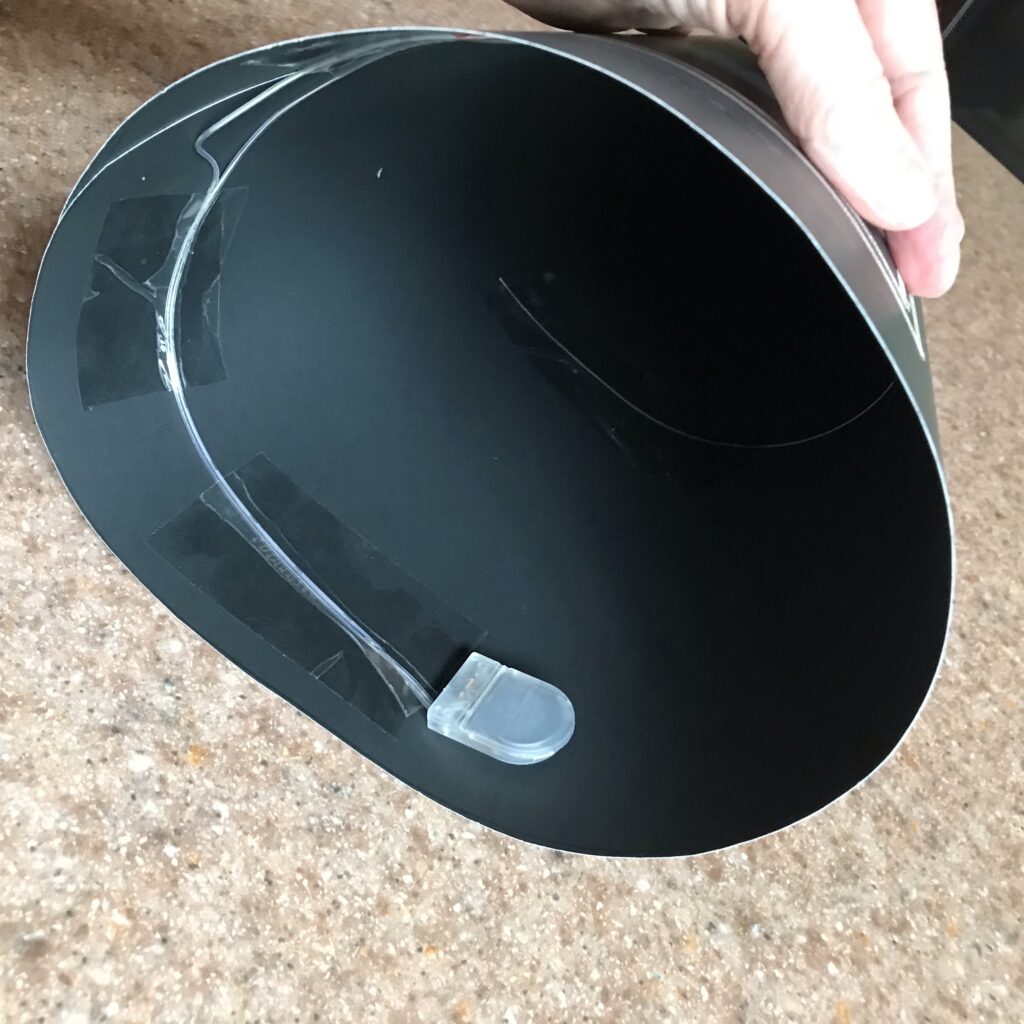
Prior to taping your cone together, you’ll need to create tails of conductive fabric that are several inches long. These tails will extend beyond the edge of the poster board and wrap around to the back side of it. If your tails are too short, the rolled up poster board inside of the cone will make them nearly impossible to access once your cone is taped together. You may see this demonstrated on the video, starting at 4:26:00.
The tails in the first photo below are not quite long enough, which I discovered when I rolled up the poster board. If this happens to you, you can simply extend the leads by adding more conductive fabric tape on top of the ones you’ve already placed.
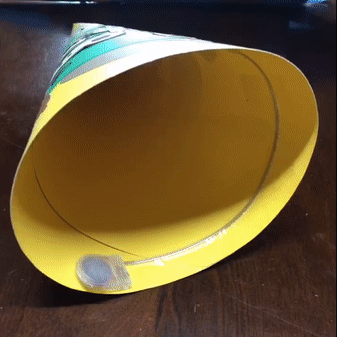
Step 5: Tape the Cone Together
Before removing the protective backing, practice folding the poster board to ensure that the taped edge comes in contact with the faint line you drew, marking the end of the arc.
The trick is to create a nice, pointy tip at the base of your cone, while maintaining a flat, symmetrical opening at the top of the cone. This takes a bit of practice; if you don’t get it right the first time, gently take it apart and try again.
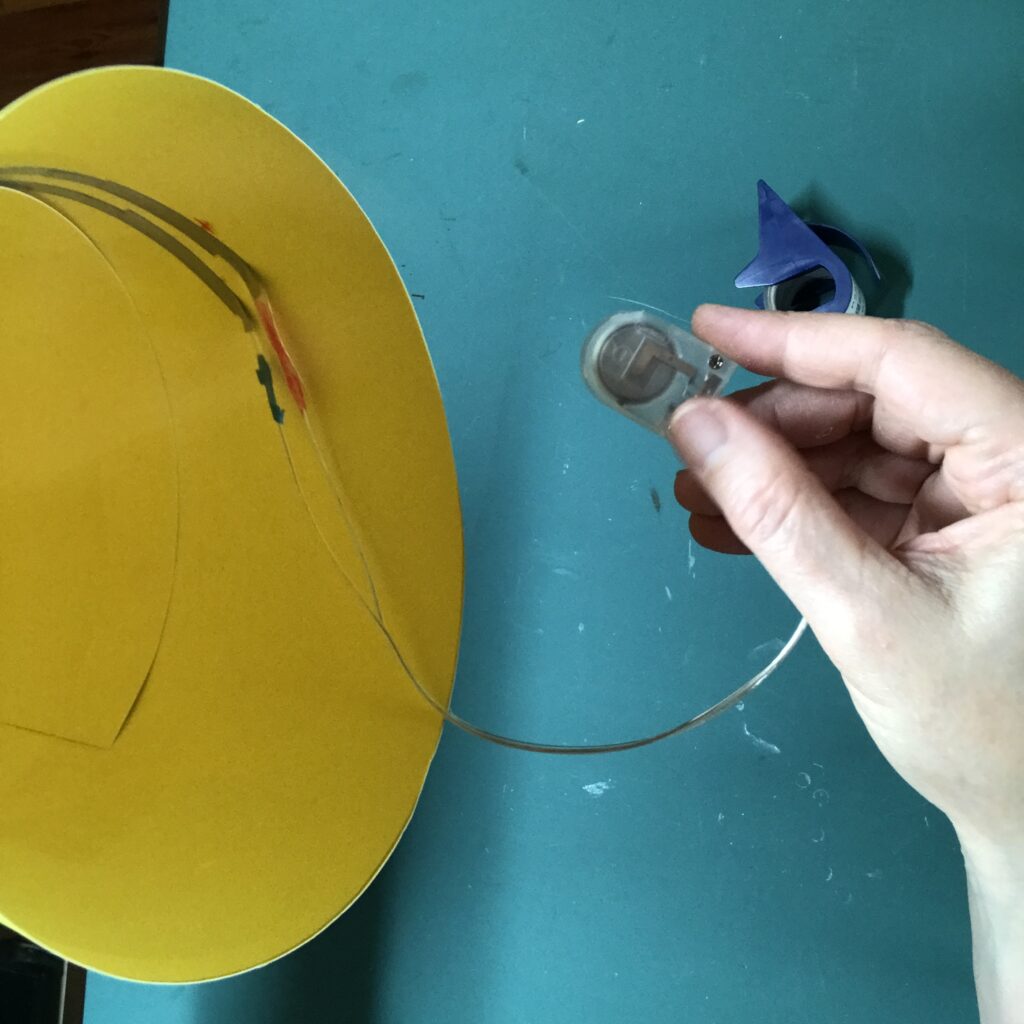
Step 6: Secure the Battery
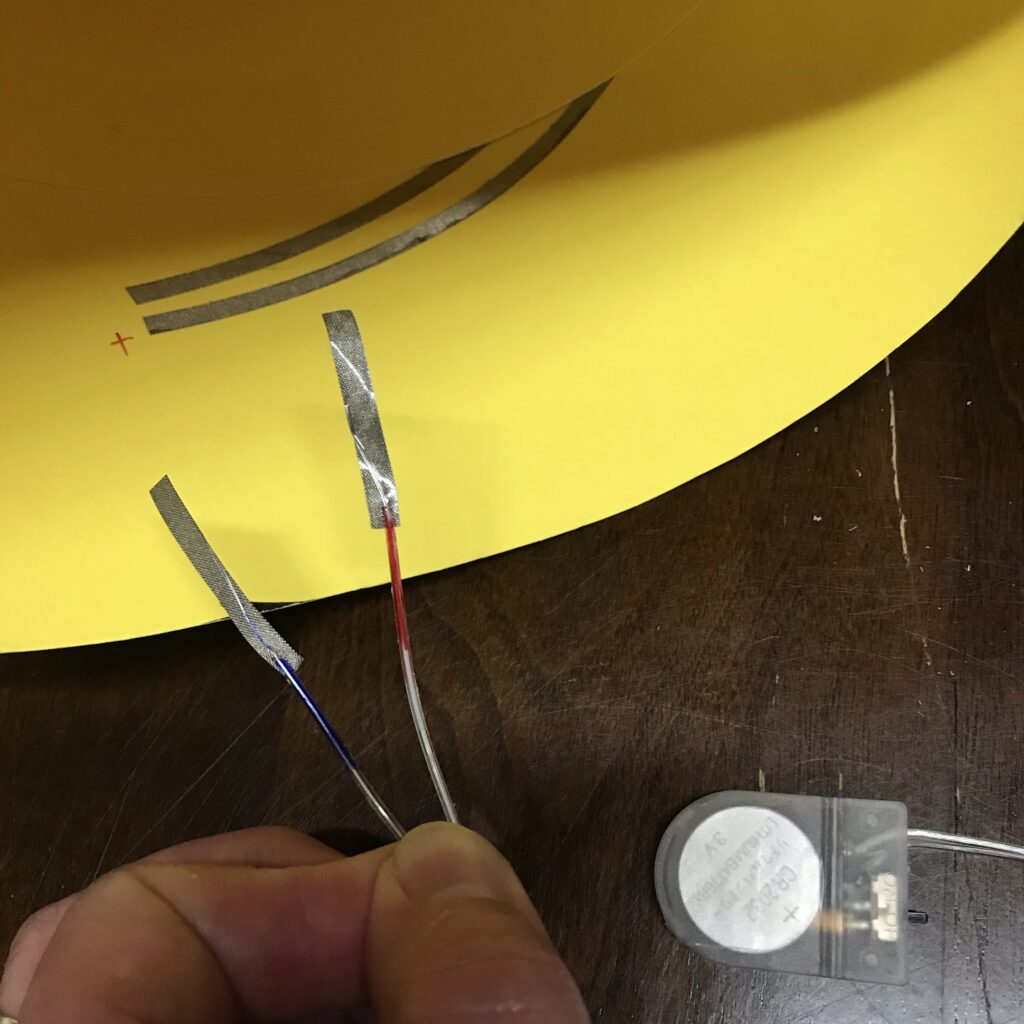
If using a new switched battery holder with wires, you may need to strip the ends in order to attach them to the power and ground leads inside of the cone. To do this, use a wire stripper to remove enough plastic from the tips to uncover the wires underneath. These wires will be adhered to the positive and negative leads of your circuit on the inside of your cone.
The wires extending from the switched battery holder are well insulated, allowing them to cross, but this can make it difficult to tell which wire is positive and which is negative. Typically, the wire closest to the switch will be negative. It’s helpful to mark them with a red or black Sharpie marker, to help you keep track.
As was the case with your LEDs, the positive lead of your battery holder should connect with the positive lead of your circuit, the negative lead of the holder should connect with the negative one, and the two ends should not touch.
Connect the battery holder to the rest of the circuit using pieces of conductive fabric tape and switch the battery holder on to test the circuit. To see a demonstration, watch the video starting at 6:00:00.
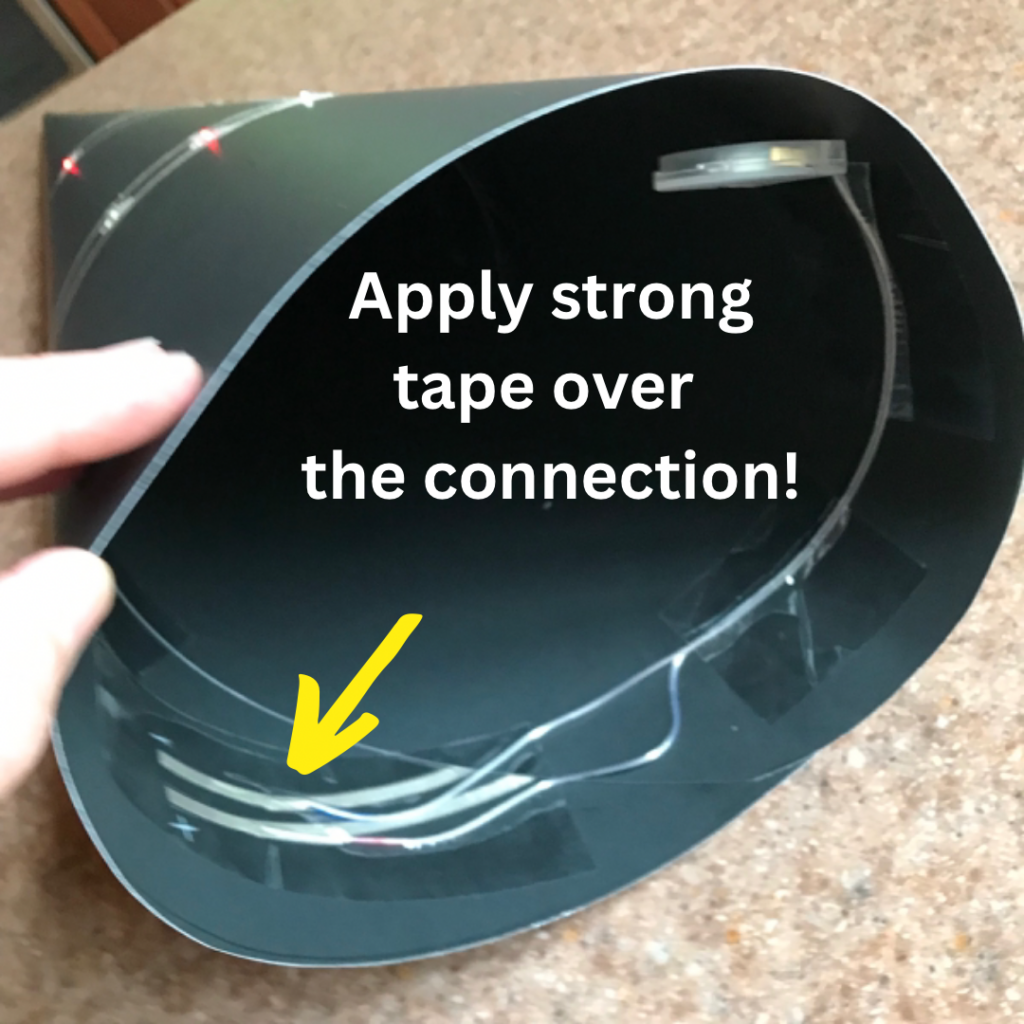
If the circuit works properly, reinforce the connections with a piece of strong tape. Then, secure the wires of the battery holder around the top of the cone so that the switch is easily accessible. Switch it off before gluing your pieces to the cone.
Step 7: Decorate the Cone
Glue your design to the cone. This is your chance to get as creative as you desire!
Consider adding a couple of loops or a carrying strap to make the cone easier to transport. To create the top of the cone, adhere a piece of crepe or tissue paper to the inside using an adhesive of your choice. Remember to leave the battery holder accessible.
A full demonstration of how I do this may be seen in the video, starting at 5:27:00.
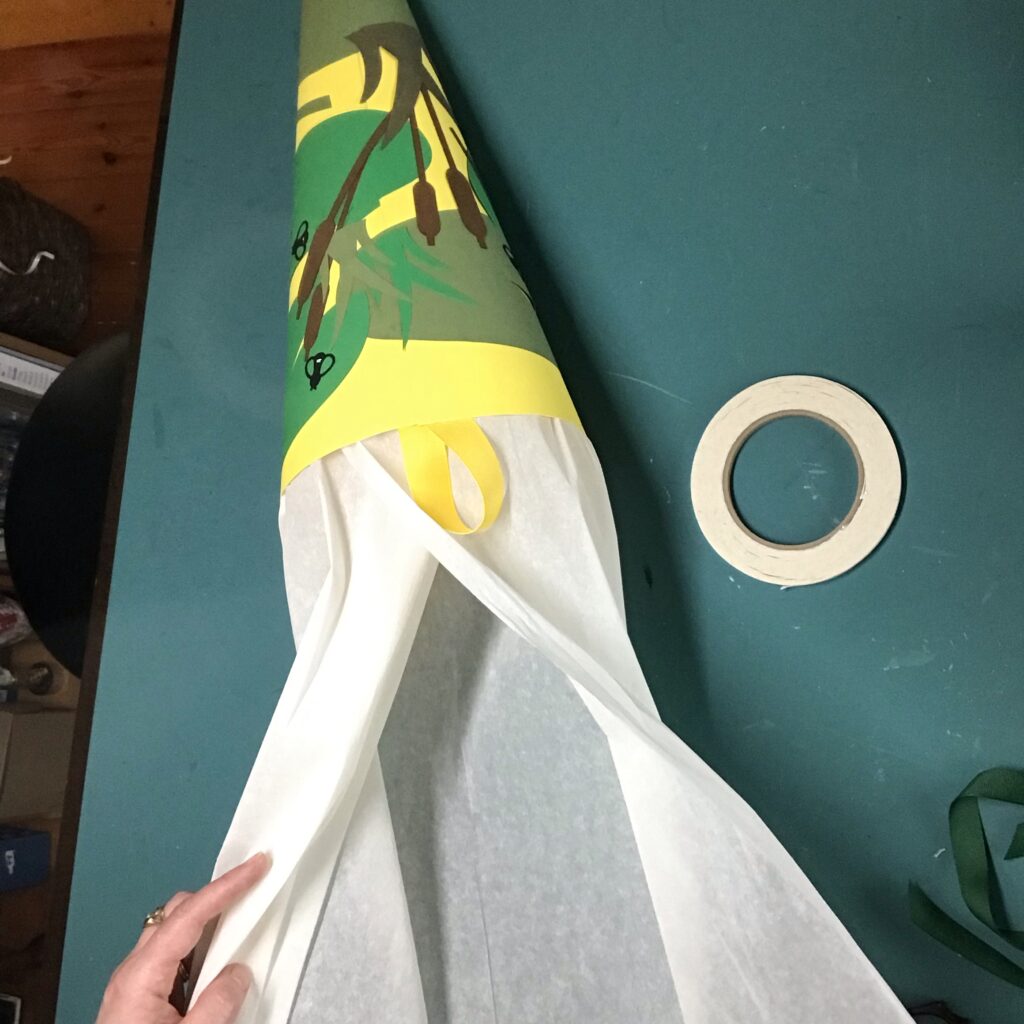
When finished, secure the paper with a ribbon and trim the top.
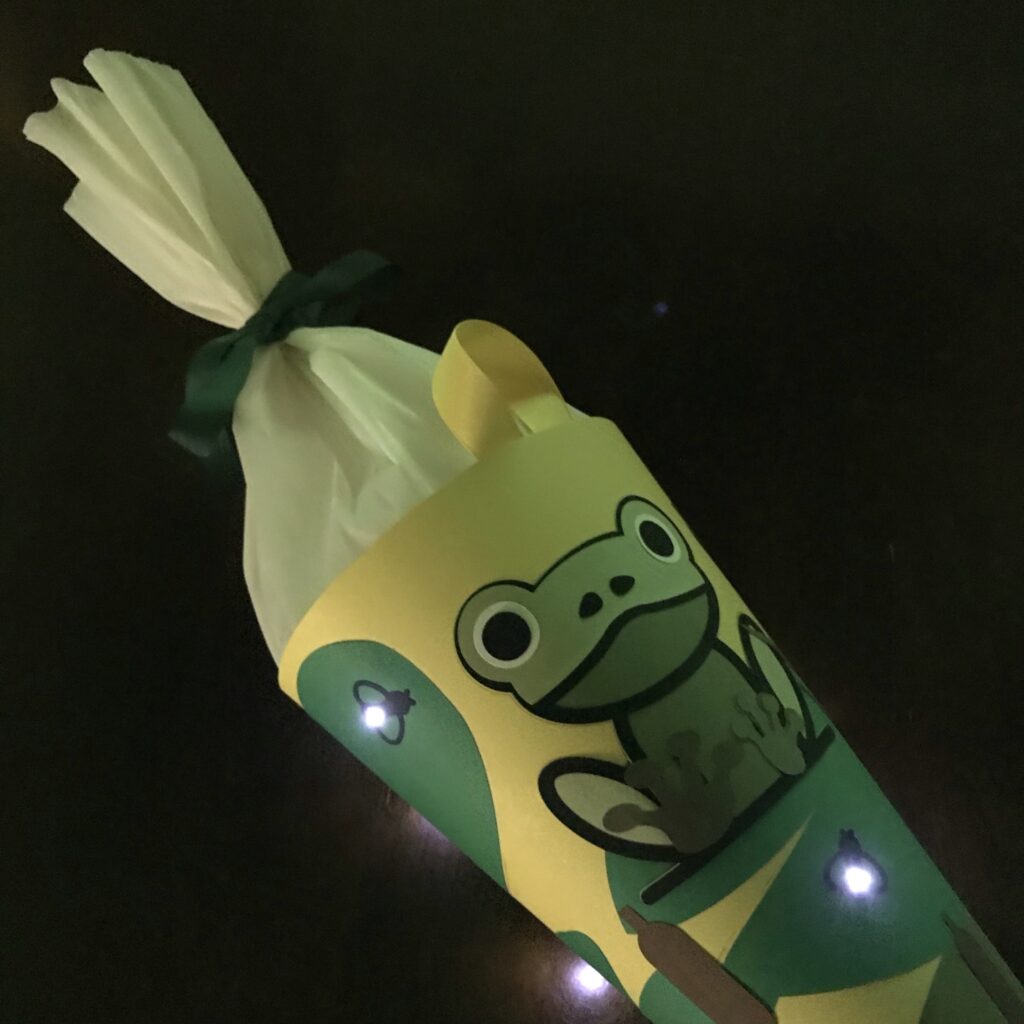
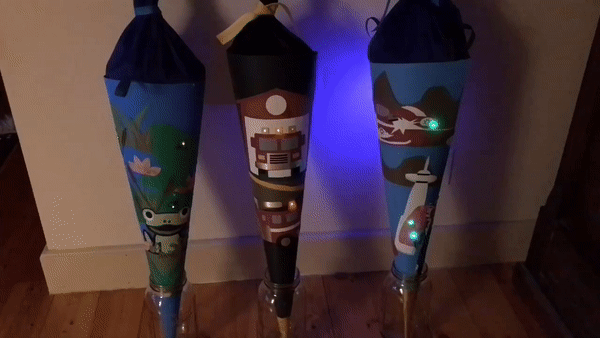
Step 8: Light It! Fill It! Gift It!

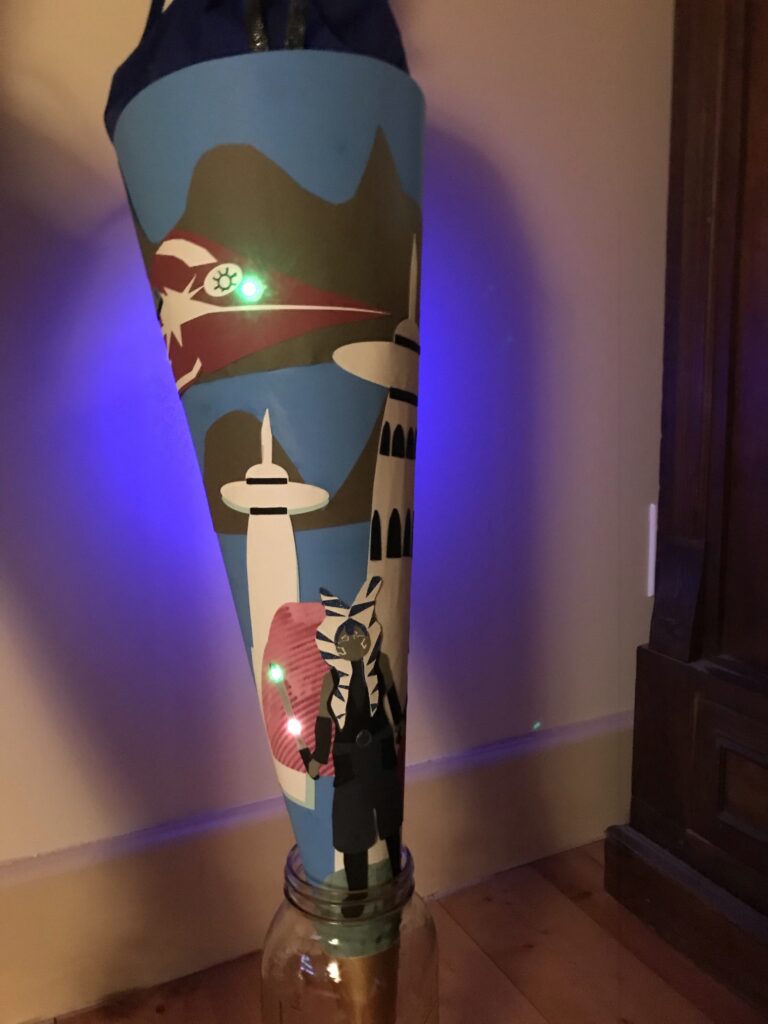
Gallery
Similar Posts You Might Enjoy

Pop Up Card
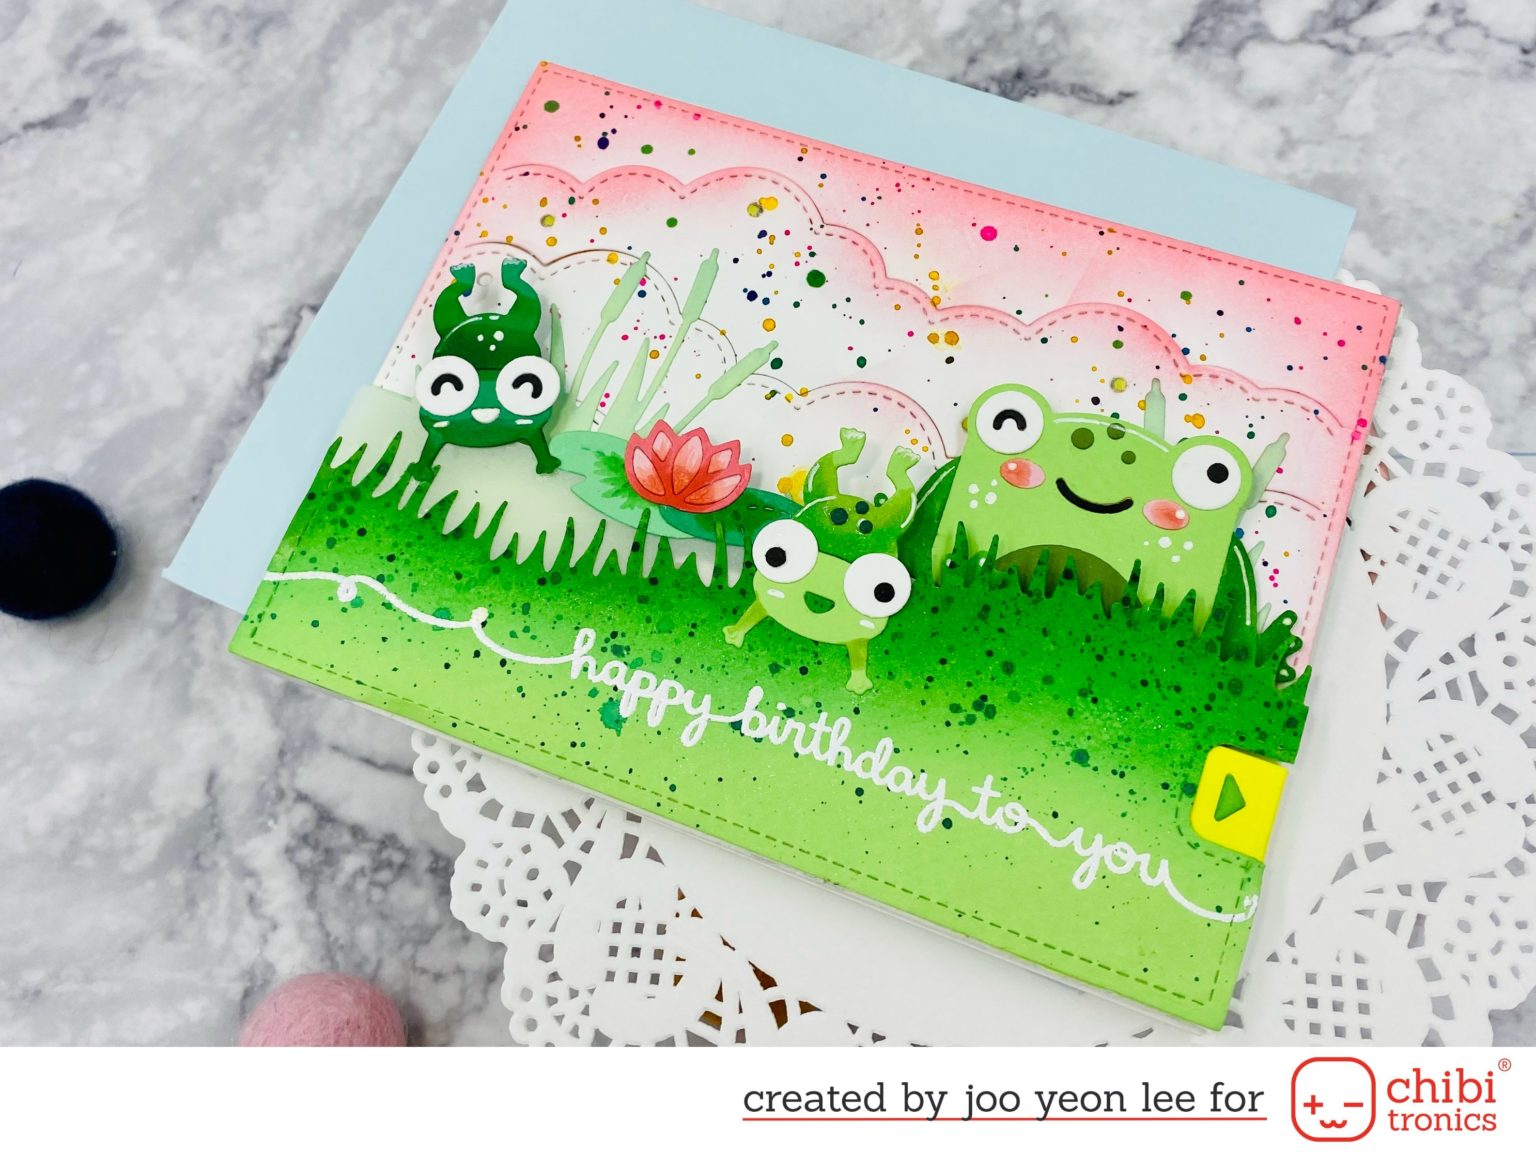
See how Jooyeon Lee creates a surprising swish ‘n pop pull tab card that lights up a froggy scene.
Light Up Flowers
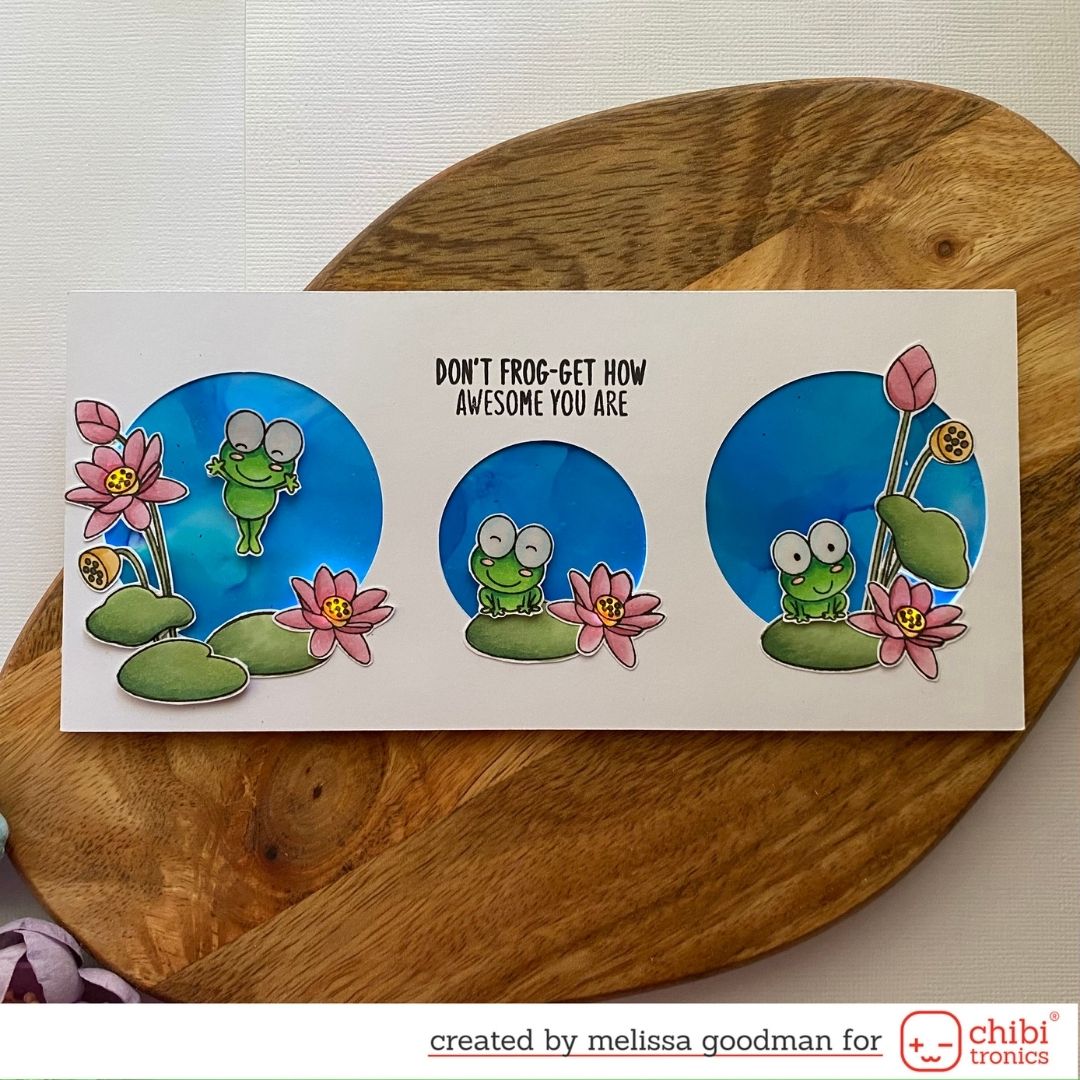
Learn how Melissa Goodman uses a reed switch to light up a lily pad flower in this adorable project.
Featured Products

Craft With Light (Color)
$20.00
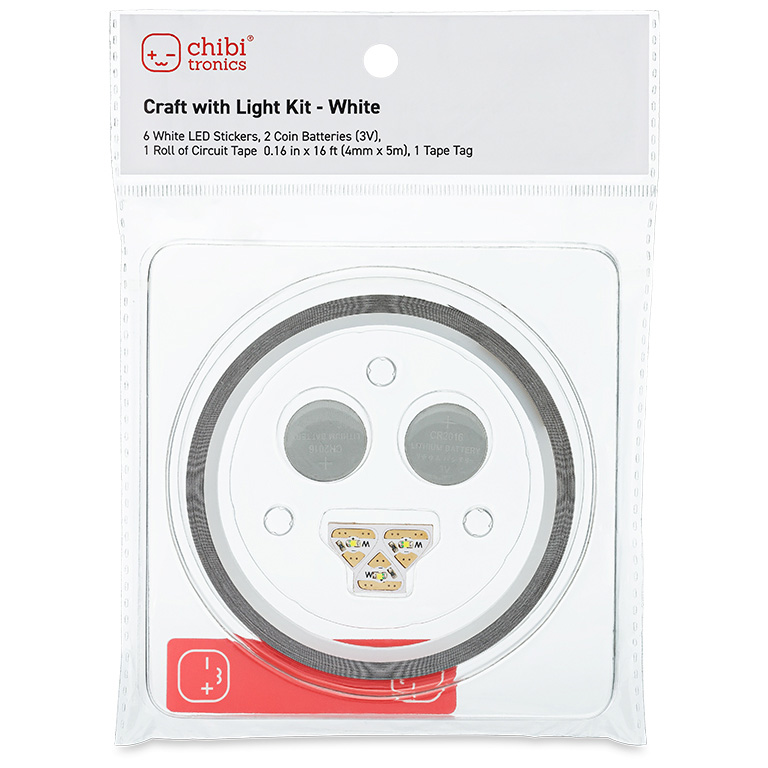
Craft With Light (White)
$20.00
Craft Stencil
$5.00