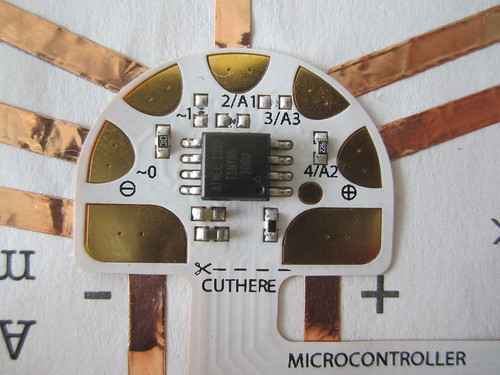
The microcontroller sticker is preprogrammed as a touch sensor with a variety of functions. Similar to the trigger sticker, you can trigger the touch sensor by simultaneously touching the sensor trace and the “-” trace. You can also clip conductive materials to these pads, like in the Makeymakey, and create your own touch sensor interfaces with other materials and objects!
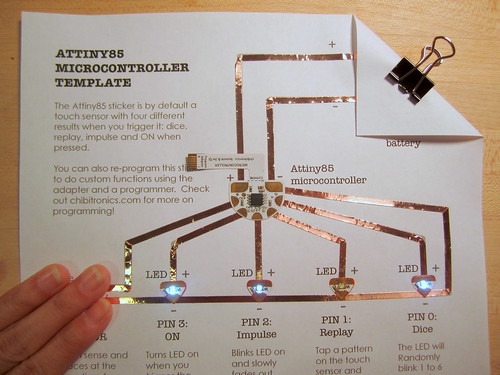
Pin 0: Dice, LEDs will blink one to six times randomly when you trigger the touch sensor. connect your LEDs from pin 0 to ground. Connect the LED from pin 0 to – to make the LEDs blink ON or connect them from – to to pin 0 to make them blink OFF.
Pin 1: Replay, tap a pattern on the touch sensor and wait a few seconds. These LEDs will replay your pattern back on loop until you tap a new pattern.
Pin 2: Impulse, when you trigger the touch sensor, LEDs will blink on and slowly fade out if connected the LED from pin 2 to -, or they will blink off and slowly fade on if you connect the LED from + to pin 2.
Pin 3: ON, the LED will simply turn ON when you touch the sensor if connected from pin 3 to -. Alternatively, if you connect the LED from + to pin 3, the LED will turn OFF when you touch the sensor
For more complex interactions, you can also connect the signal pad of the sound or light sensor sticker to sensor pin 4 of the microcontroller.
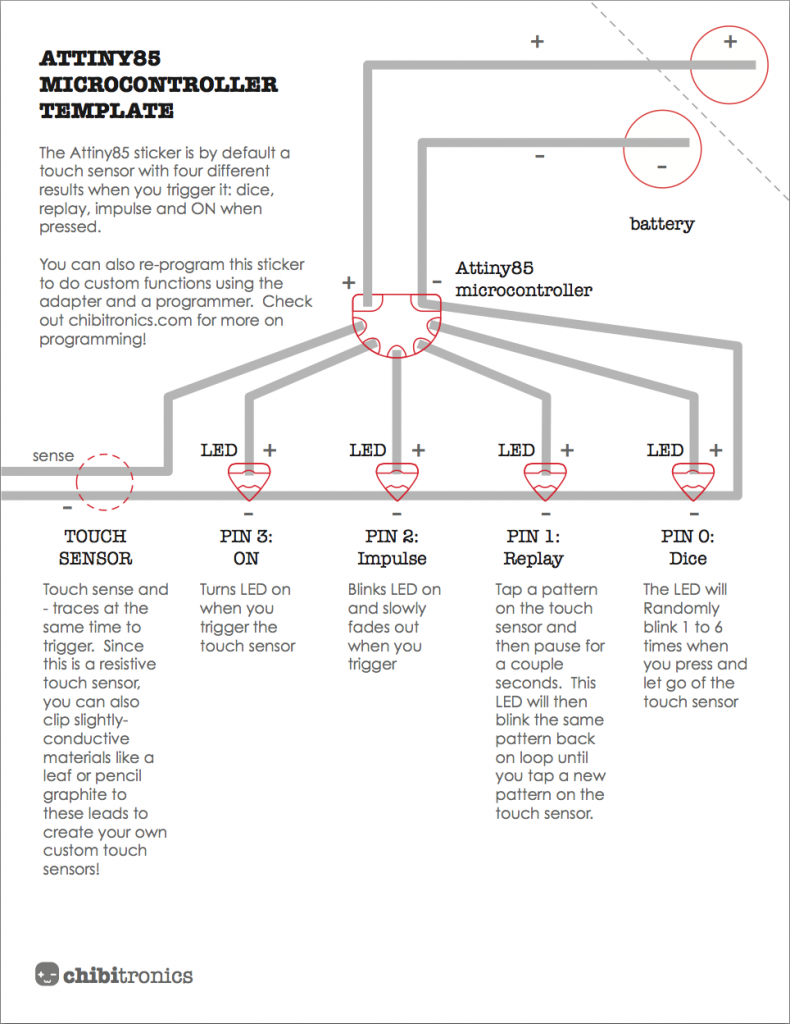
MICROCONTROLLER TEST CIRCUIT
To try out the microcontroller sticker, print and use the Attiny85 microcontroller template below as a test circuit.
MATERIALS AND TOOLS
- microcontroller circuit sticker (in the Sensors add-on)
- circuit sticker programming adapter (also included in the Sensors add-on)
- 5 LED stickers
- copper foil tape
- 1 3V Coin cell battery
- 1 Binder clip
STEP 1: Add copper tape
Place copper foil tape over the gray template lines. Make sure to use continuous pieces of foil and fold the tape during turns (rather than sticking multiple pieces of tape together, which will result in flaky connections)
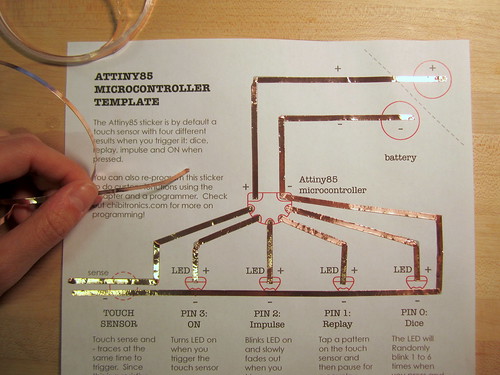
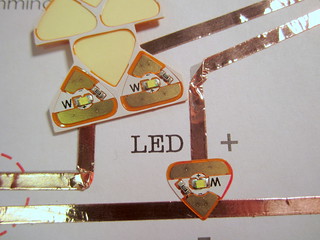
STEP 2: Add microcontroller and LED stickers
Sticker the Microcontroller and LED stickers over the red outline footprints
 |  |
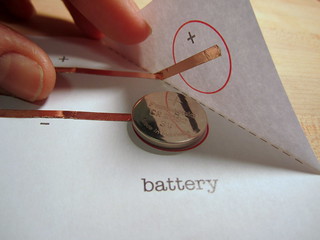
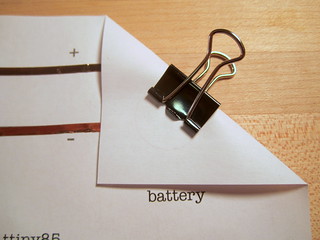
STEP 3: Add battery
Clip your coin cell battery in place
 |  |
DONE!
Try tapping the “touch sensor” area of the circuit. When you bridge the gap with your fingers, the LEDs on pin 3 and pin 2 should light up!
Here is a video of what the default behaviors look like on the microcontroller sticker:
You can also reprogram the microcontroller sticker using Arduino software to create your own custom functions. Want to give this a try? Check out this Programming the Microcontroller Sticker Tutorial !
