Hi, crafty friends!
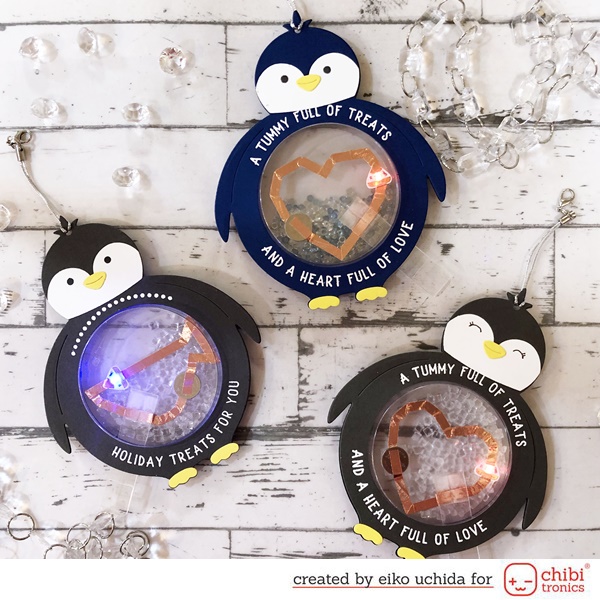
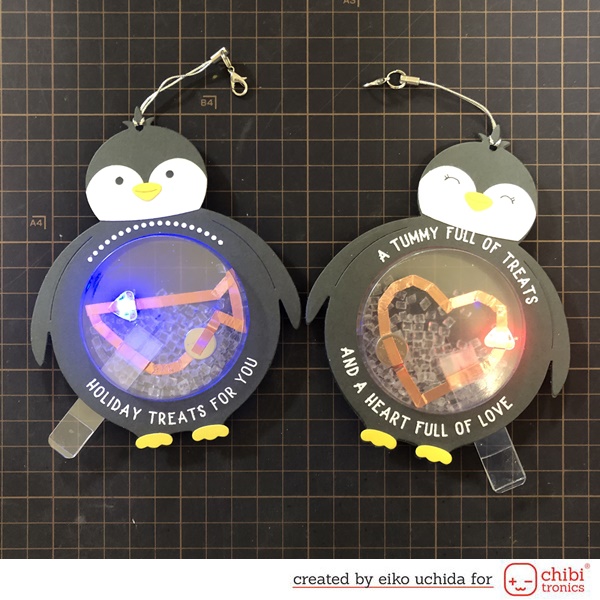
This is Eiko and I make light up see-through circuit potbelly tag using Chibitronics and Papertrey Ink stamps and dies.
You can see the inside circuit from the outside.
I will make the parts referring to the picture below.

- Die cut gray cardstock with penguin die. Stamp the sentiment and heat emboss with white embossing powder.
- Die cut yellow cardstock with beak and foot dies.
- Die cut white cardstock with face die.
- Stick the die cut parts on the penguin body.
- Die cut acetate sheet with 3.25 inches circle die.
- Two acetate pull tab parts size 2.25 x 0.5 inches.
- Two acetate switch parts size 0.5 inch square.
- Two clear bubbles. Place the clear bubble on the acetate sheet, mark the position of the pull tab and cut along the mark with scissors.
- Die cut double-sided adhesive sheet using the 3.25 and 2.75 inches circle dies and stick it on the clear bubbles.
~Make the circuit~
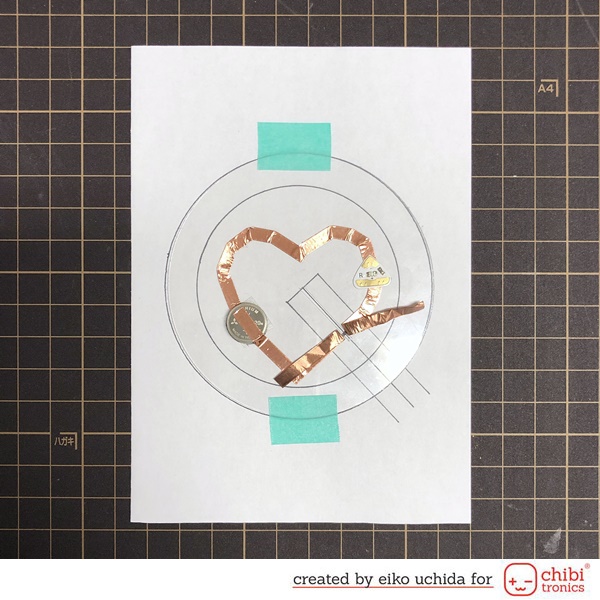
How to make the template is here.
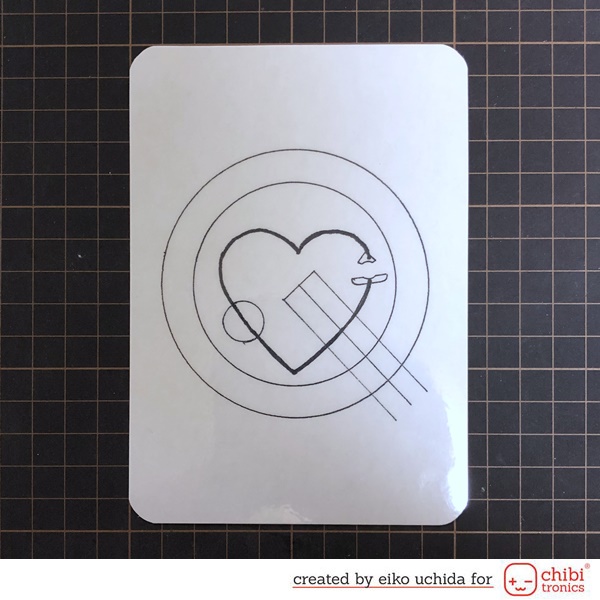
- Draw circles with diameters of 3.25 and 2.75 inches on paper.
- Draw the heart on the paper.
- Mark the position of the battery on the outline of the heart.
- Mark the position of the Chibitronics in the upper right.
- Draw a line at the lower right and draw three lines at 1/4 inch intervals.
- Draw a line at the center of the circle and slightly outside the heart outline.
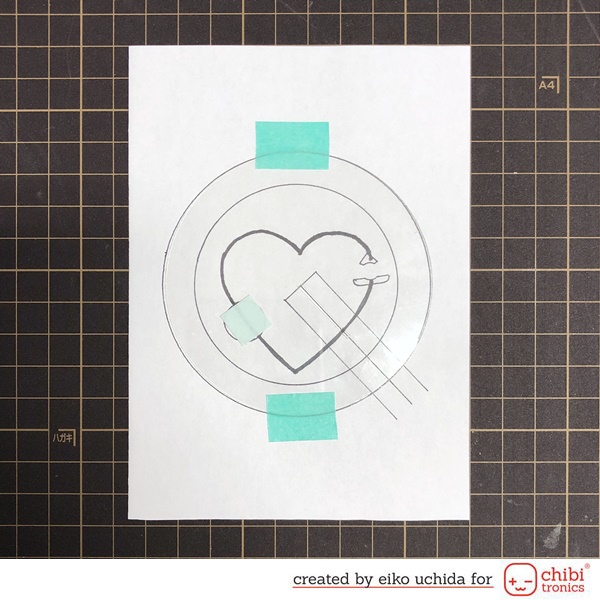
- Put the circular acetate sheet on the paper with washi tape.
- Cut the 1 mm width slit between the two lines with a craft knife.
- Put the double-sided tape on the position of the battery.

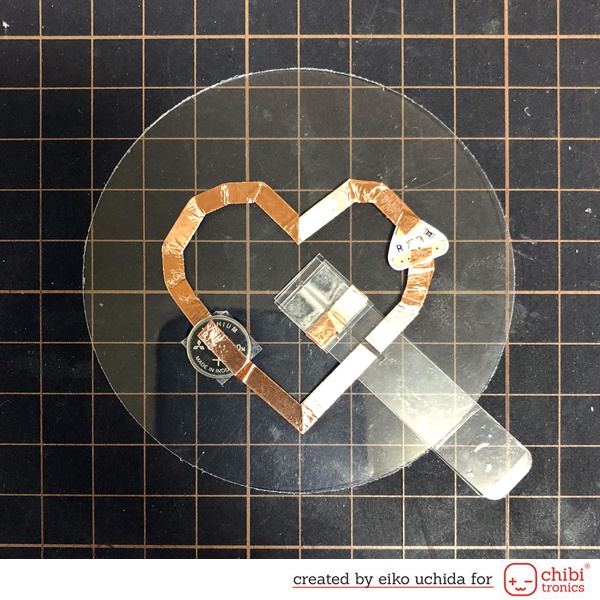
- Stick the copper tape on the pre-drawn path.
- At the position of the battery, peel off the release paper, stick the negative side copper tape, fold it back and cut it.
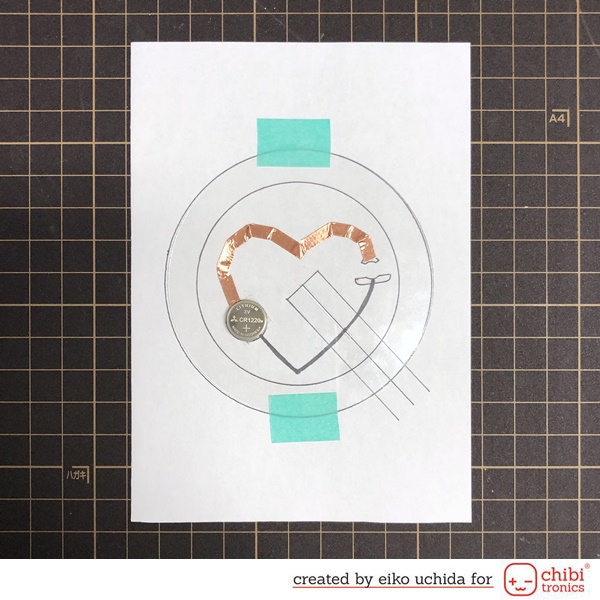
- Place the battery on the copper tape with the positive side up.

- Stick the positive side copper tape on the battery and following the pre-drawn path.
- At the position of the slit leave about 1 inch of positive side copper tape and cut it.
- Then starting from LED position, go back to the slit and do the same on the other side of the slit.
- Attach the LED to the copper tape, over the outline.
- Press down the LED, and make sure the copper tape is smooth with bone folder.
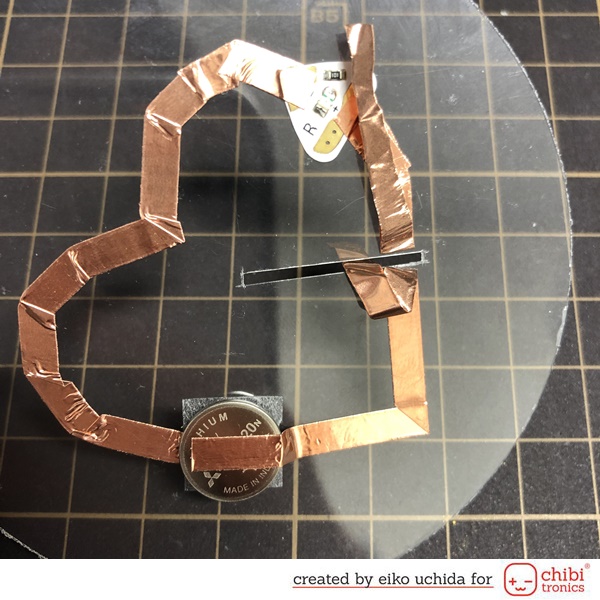
- Stick the short copper tape on the LED to reinforce.
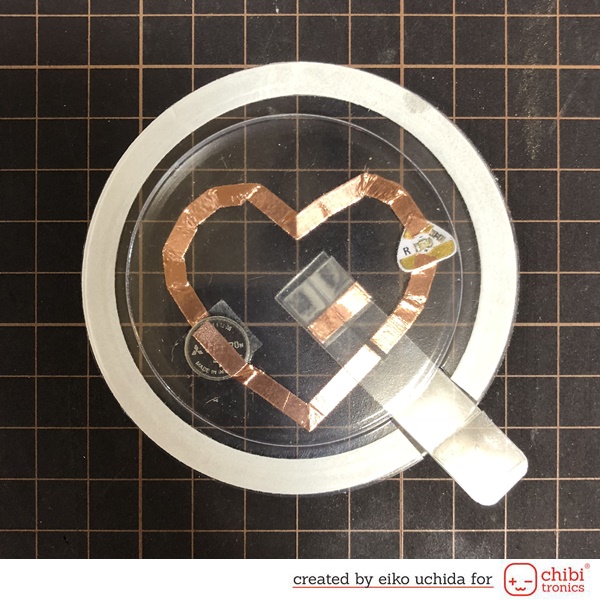
- Remove the circular acetate sheet from the paper.
- Pass both copper tape through the slit.
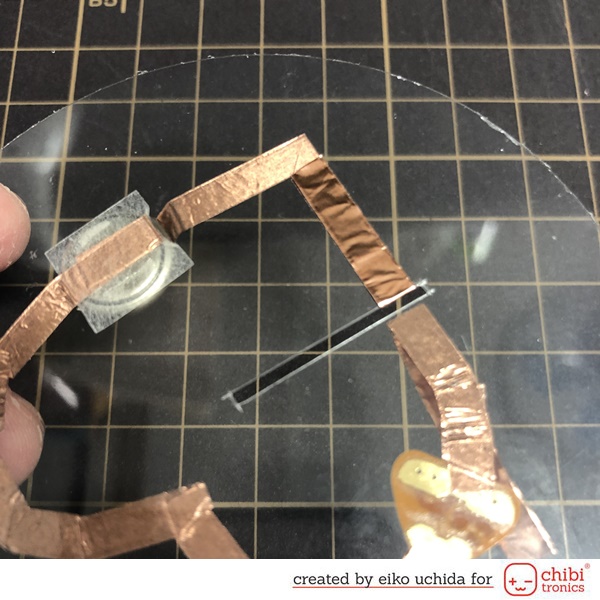
- Stick the copper tape to the backside of the acetate sheet.
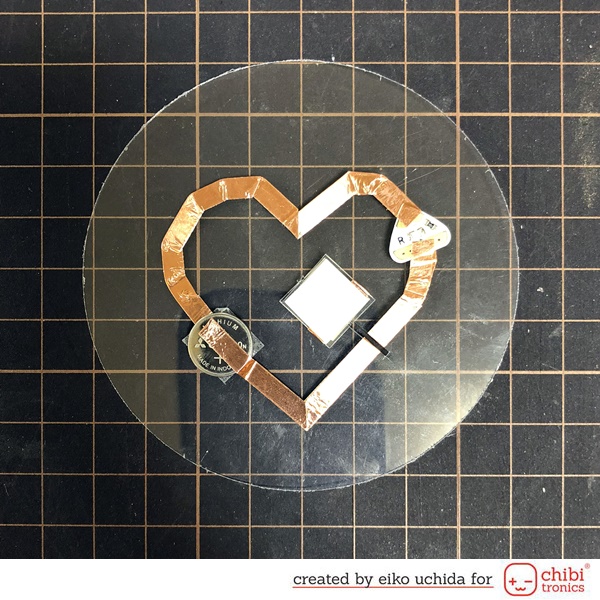
~Make the switch part~

- Fold square parts in half.
- Insert the switch parts into the slit, on both sides.
- Place the switch parts at the right end of the slit and stick the copper tape to the flat surface.
- Then remove the switch parts from the slit and stick the copper tape around the other side of the switch.
- Put a double layer of the copper tape in this way.
Re-insert the switch parts into the slit and test the LED turns on.

Apply the double-sided tape to both sides of the switch parts.
- Apply the double-sided tape to both sides of the switch parts.
- Stick the pull tab parts on the front and back.
- Stick two pull tab parts together with double-sided clear foam tape.
- Aligning the gap with the pull tab.
- Stick the front side clear bubble to the acetate sheet.

- Empty the sparkly jewels into the back side clear bubble.
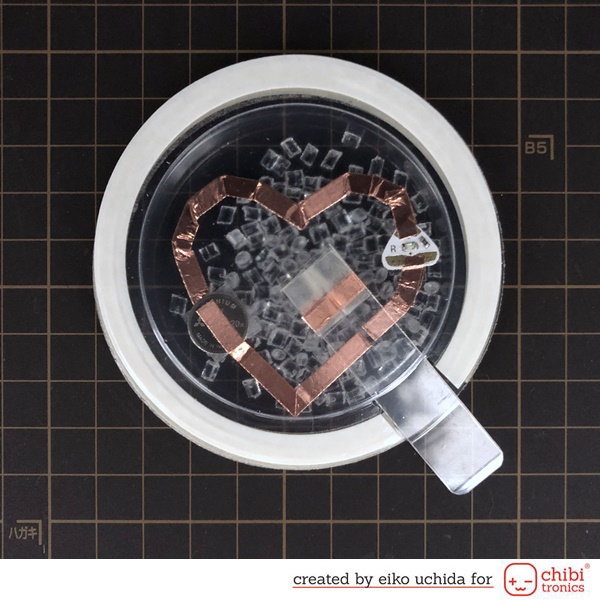
- Stick the back side clear bubble to the acetate sheet.

- Stamp or draw the eyes.
- Stick the penguin body on the clear bubble with double-sided tape and adhesive tape runner.
- Stick two penguin pieces together.
I finished it!
You can see the inside fun shaped circuit from the outside. Please make various shaped circuits and enjoy it.
Be sure to check out the whole video tutorial for more details.
Thank you for stopping by!
Eiko Uchida
~Supplies list~
- Chibitronics Red, Yellow, and Blue LED Sticker Pack
- 3V coin cell battery (CR1220)
- 5mm wide Copper tape
- Papertrey Ink Potbellies Penguin Die
- Papertrey Ink Potbellies Sentiments Mini Stamp Set
- Papertrey Ink Clear Bubbles Large
- Hero arts Nesting Circle Dies
- Hero arts white embossing powder
- Stampin’ Up Window Sheets
- Gray cardstock
- White cardstock
- Yellow cardstock
- Double-sided adhesive sheet
Make and Take for advanced at Creativation 2019