Hi friends, June(Jooyeon Lee) here again!
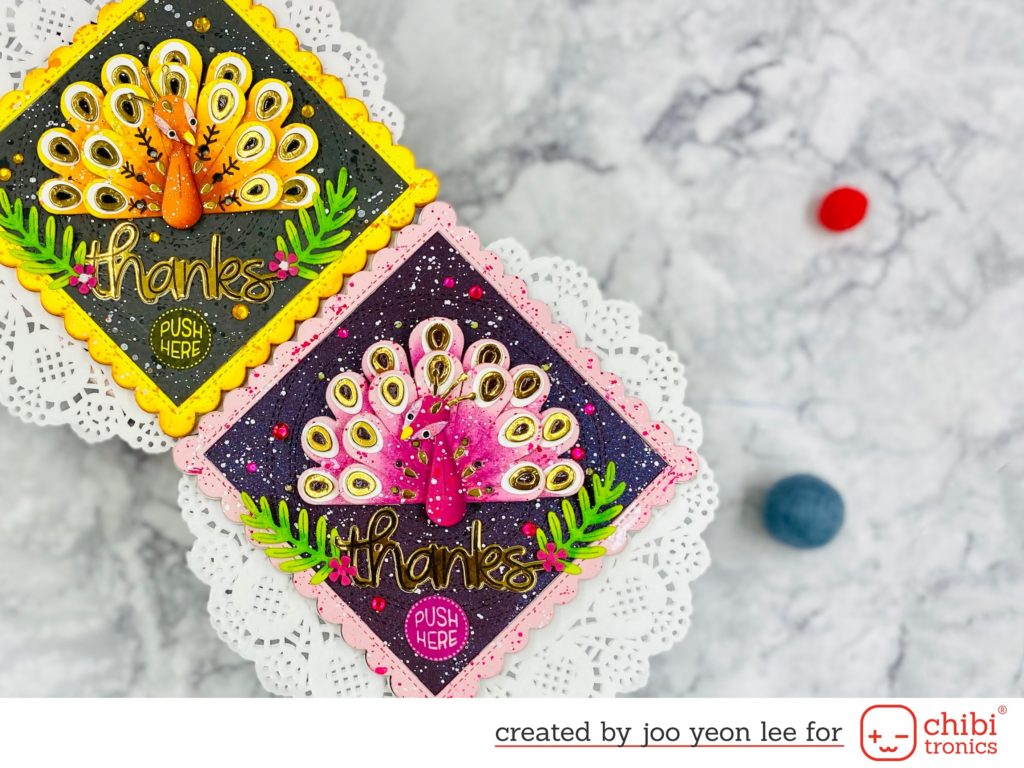
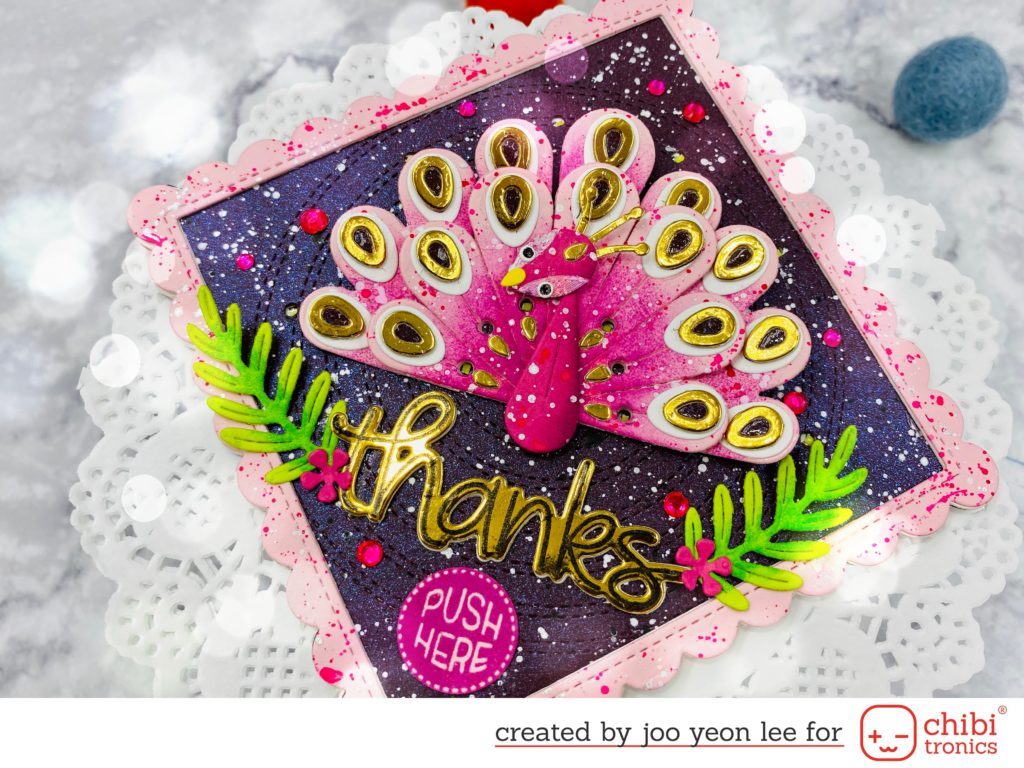
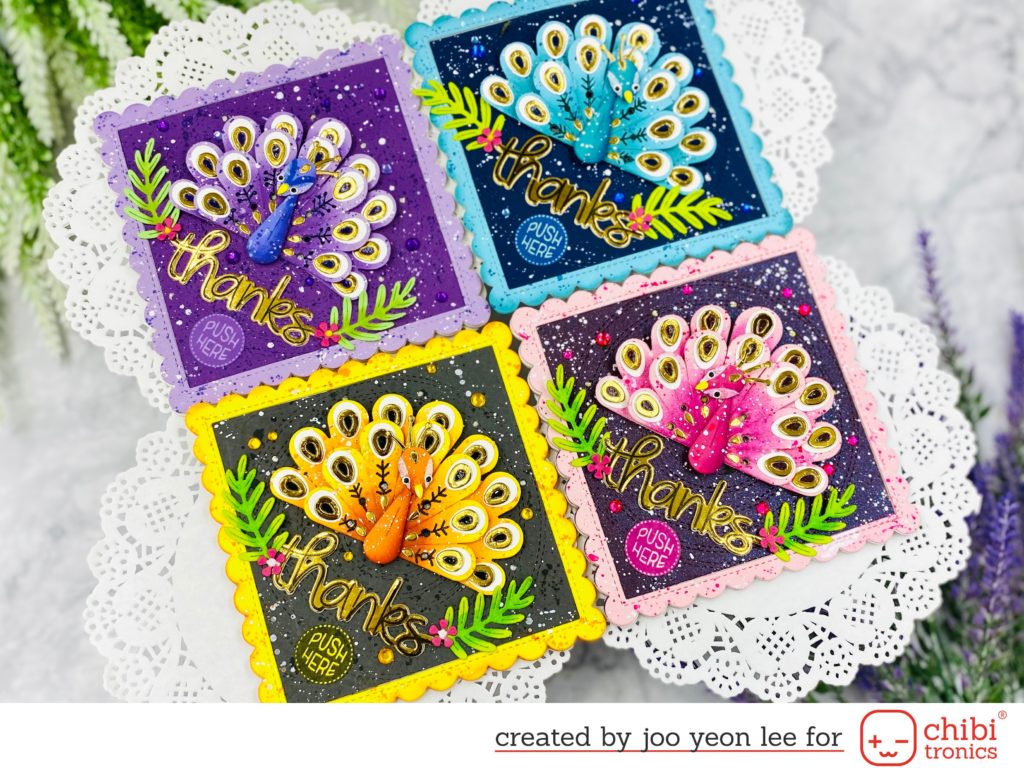
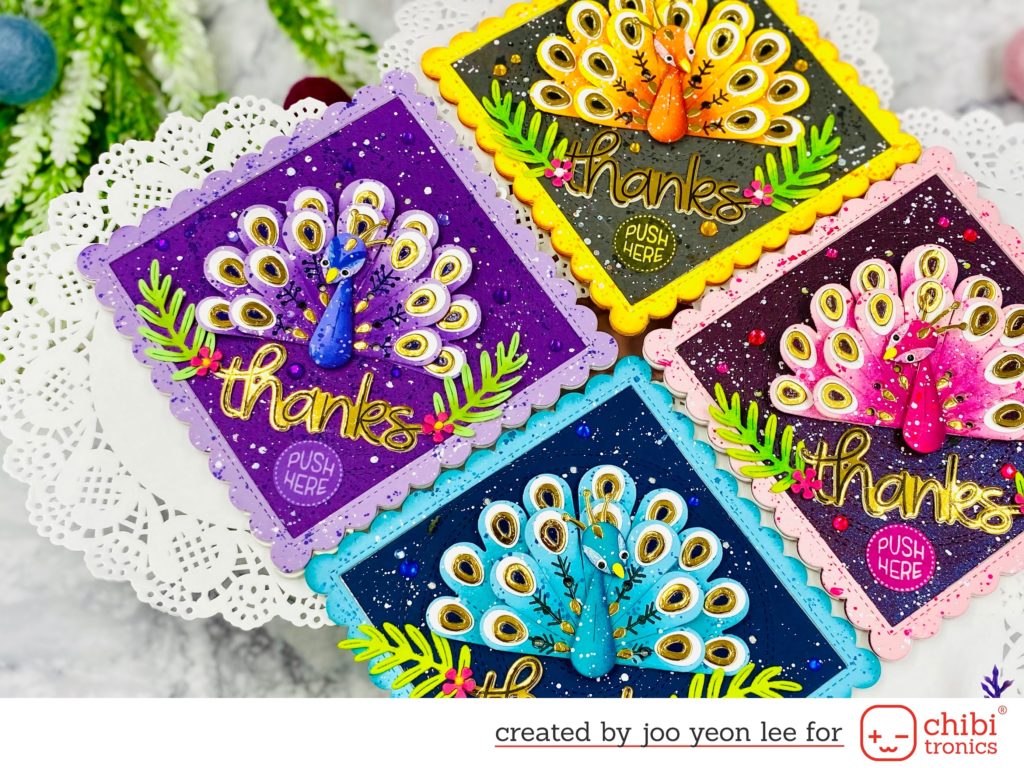
Today I am sharing a beautiful Peacock Thank You Card(Actually this is a post card, not a card.) for Chibitronics monthly project.
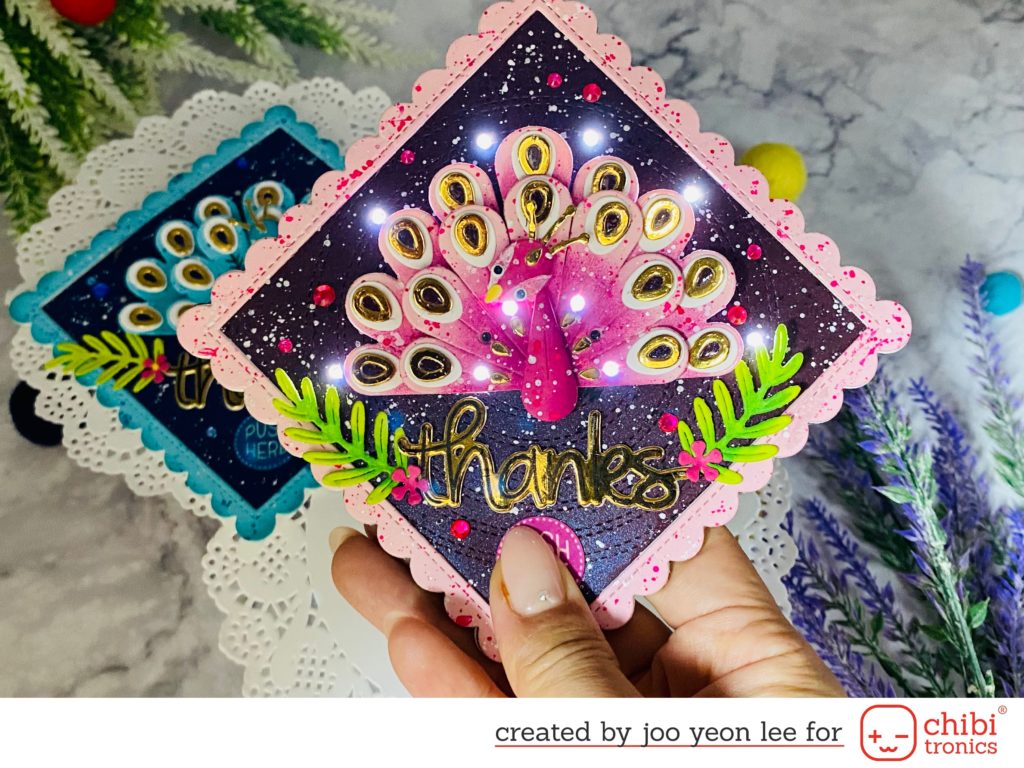
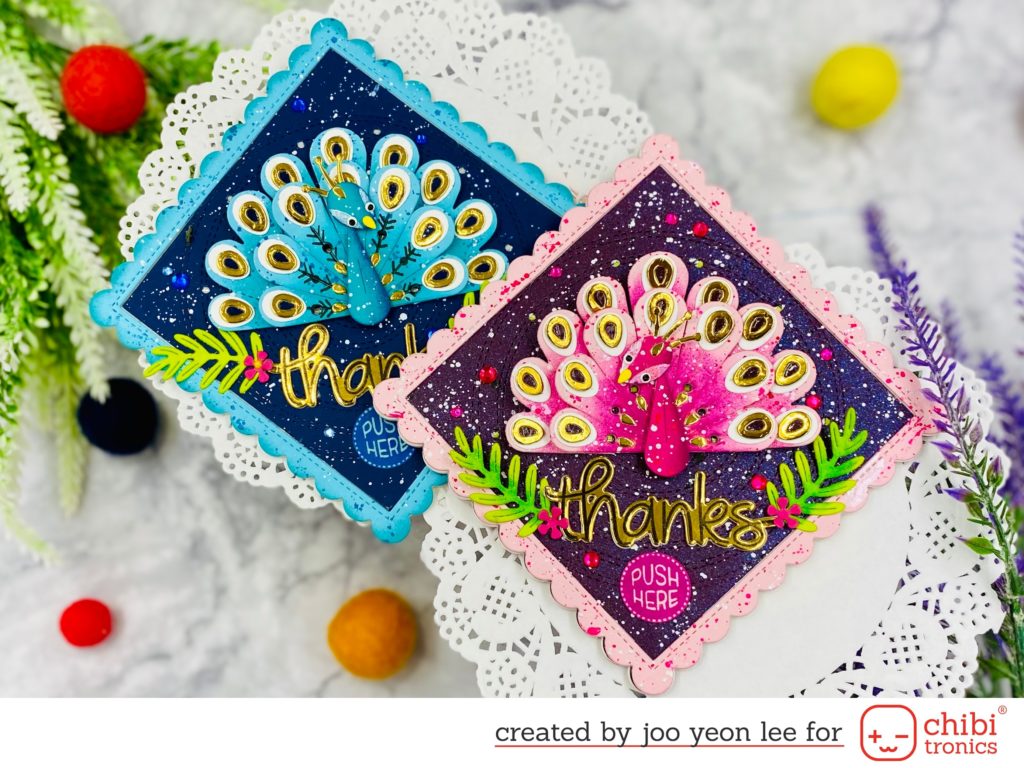
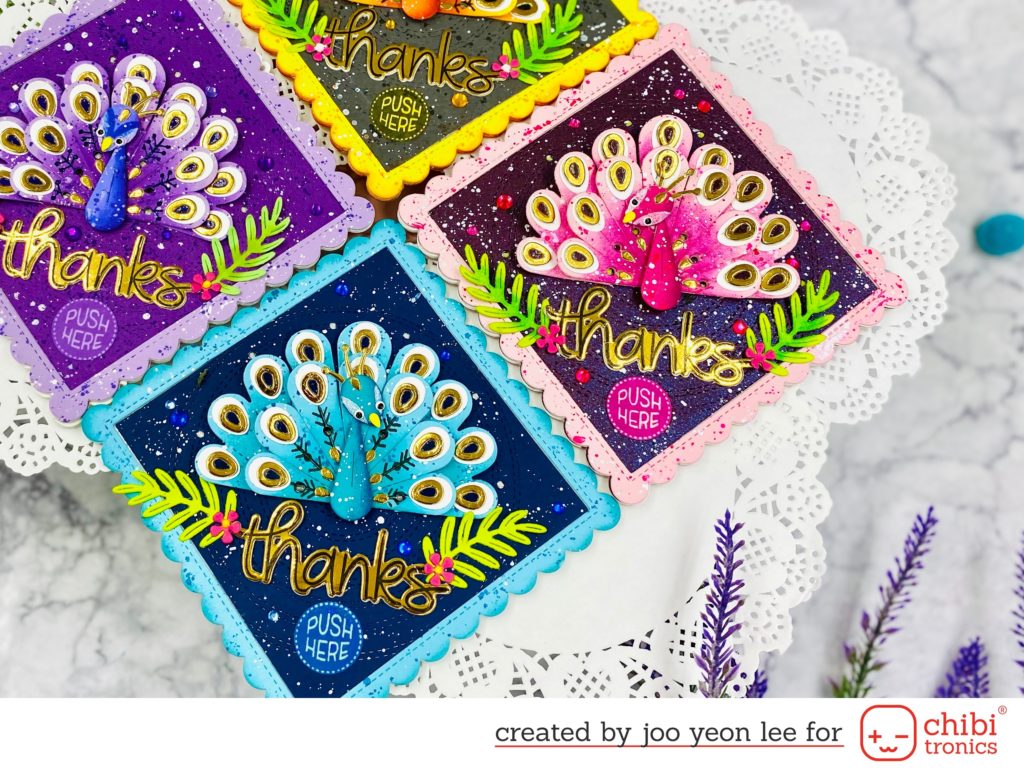
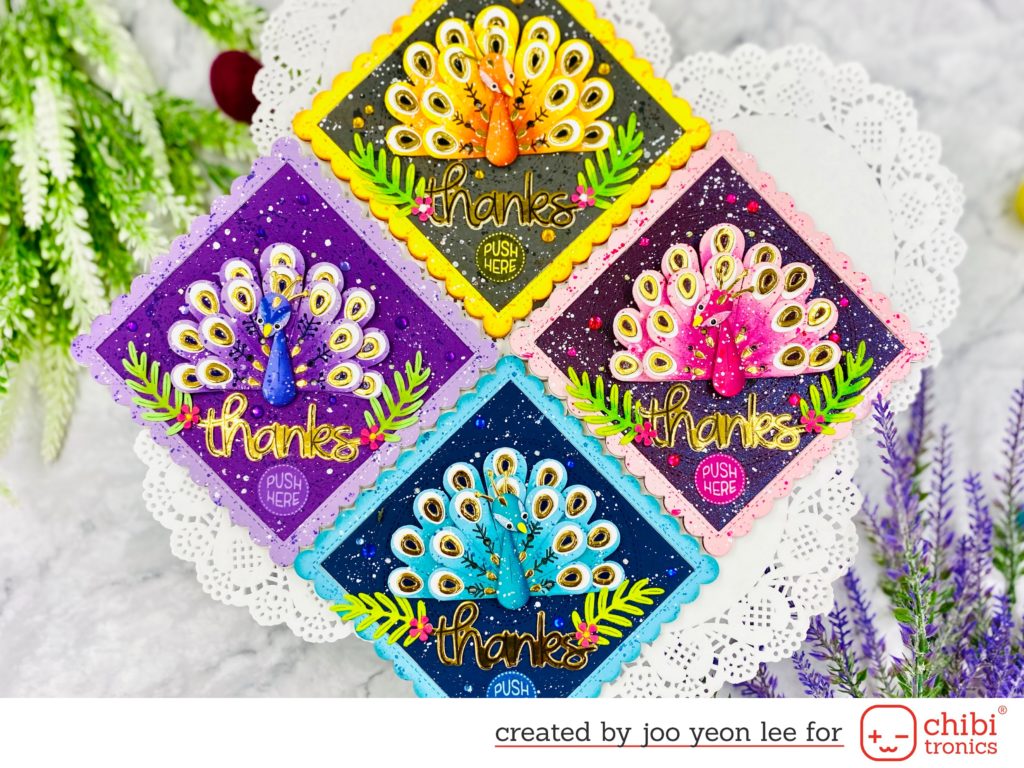
Most peacocks are blueish, but the ones I made have many colors such as yellow, pink, and so on. Which of these four-colored peacocks do you like best? I think blue suits the peacock well. Nevertheless, I still love the pink peacock.
Here, I recorded the process of making a pink peacock. If you want to make this card, please watch my YouTube tutorial about it. And follow these instructions:
In this video tutorial, I will show you how to make the peacock and mechanism about using pressure sensitive conductive plastic.
Below is the list of the supplies required I used for this Peacock Light-up Card.
SUPPLIES
1. Die Cutting

- Lawn Fawn STITCHED SCALLOPED SQUARE FRAMES Die Cuts
- Lawn Fawn JUST STITCHING DOUBLE CIRCLES Custom Craft Dies
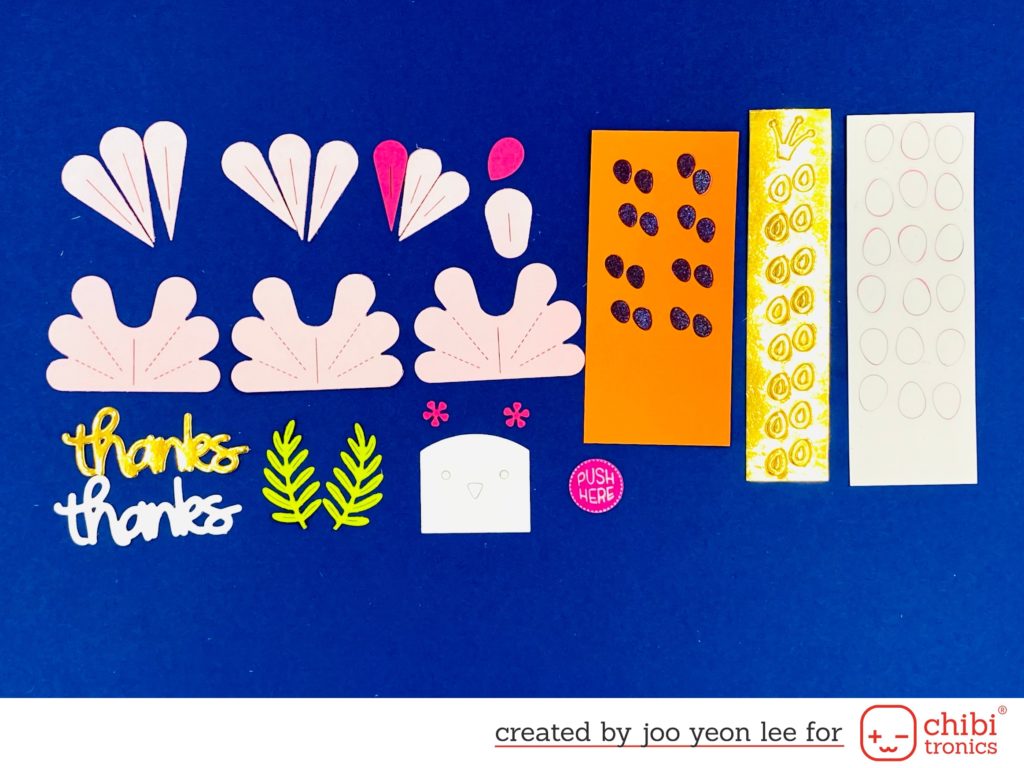
- Lawn Fawn TINY GIFT BOX PEACOCK AND TURKEY ADD ON Custom Craft Dies
- Lawn Fawn TINY GIFT BOX BUNNY ADD-ON Lawn Cuts
- Lawn Fawn TINY GIFT BOX DEER ADD-ON Die Cuts
- Lawn Fawn TROPICAL LEAVES BACKDROP Die Cuts
- Lawn Fawn SET THANKS THANKS THANKS Clear Stamps and Dies
- Lawn Fawn PUSH HERE Clear Stamps
2. Making Peacock
3. Draw Circuit
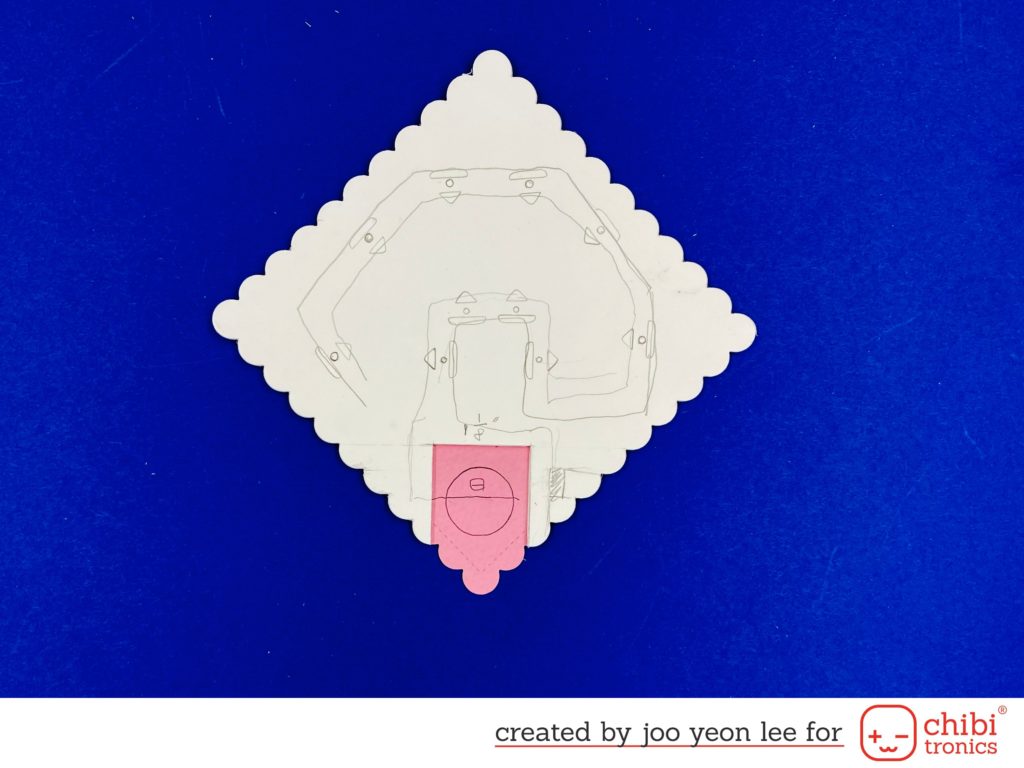
Then mark the positions of LED’s as above and draw a circuit.
3. Circuit Composing

- White LED’s Sticker from Chibitronics
- Copper Tape from Chibitronics
- Chibitronics Conductive Fabric Tape
- Chibitronics Pressure Sensitive Conductive Plastic
- 3V Coin Battery (2016)
4. Assembly
After making the circuit board, attach the front panel to this circuit board then it’s over.
I hope this post inspires all of you and used the Chibitronics products to create new creation!
Thank you for stopping by!
June Lee (Instagram : paperandcircuit)
YouTube channel : Paper & Circuit