Hi, crafty friends!
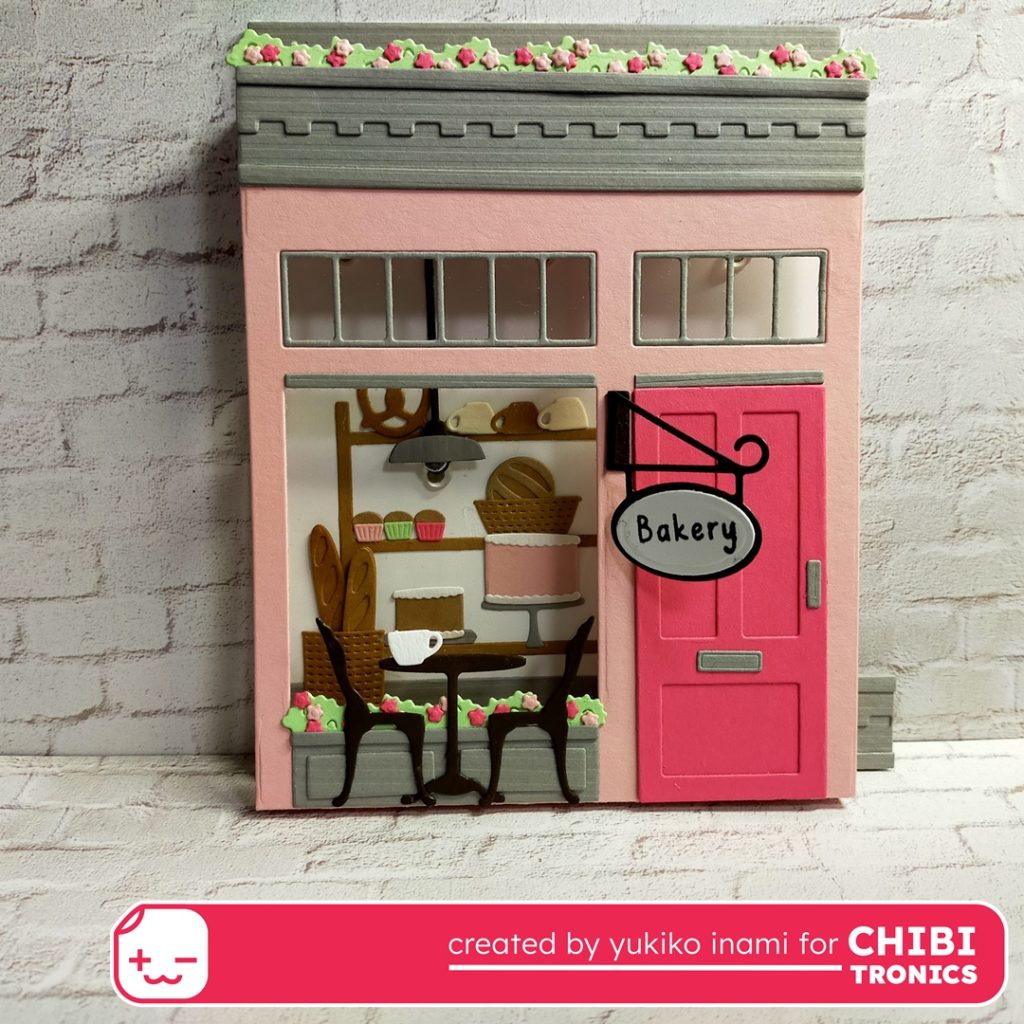
I’m so happy to see you again here. I show you a pop-up shop card today.
When you look inside this shop, you can feel the cozy air.
You will feel like you are a dwarf and would like to get in this shop.

I’d like to talk about @shirarin . She is a very talented crafter.
She had made many miniature shops in the style of pop-up cards for a long time.
She used wired LED lights in her project sometimes. Those are amazing!
I’ve been inspired by her projects since I met her project.
And Concord and 9th released a pop-up base die set, last month.
Oh, it’s now or never! I decided to make a bakery shop card in pop-up style with Chibitronics LED stickers using those die sets!
This circuit is simple and you can make it easily. I hope you enjoy adding some lights to your project by sticking the circuit panel on the backside of the popup base. You don’t need to change the basement structure of your card.
1. Supplies
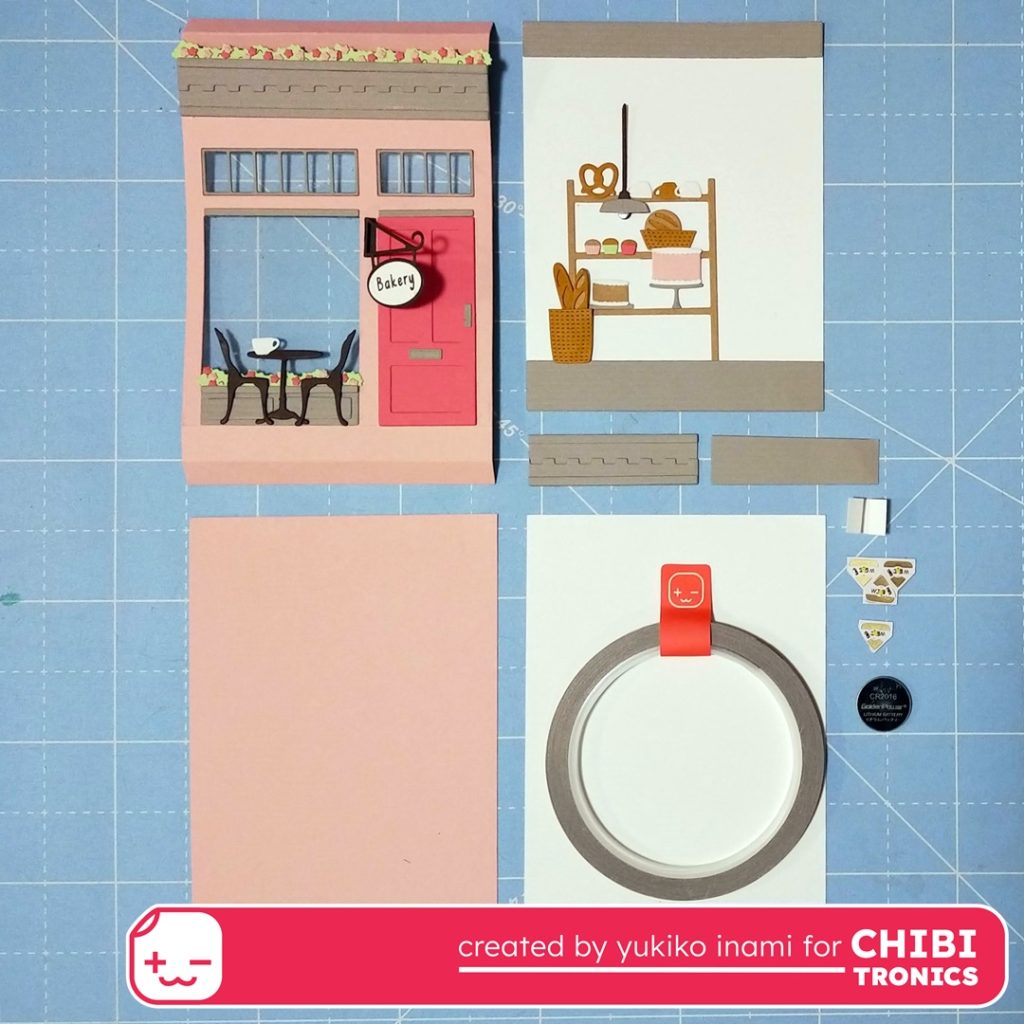
・Front panel of the shop; I die cut with the pop-up shoppe base dies. Then I set the door, shop sign, table, chairs, and plants. The acetate sheet stick on the backside of the panel. This is the window glass.
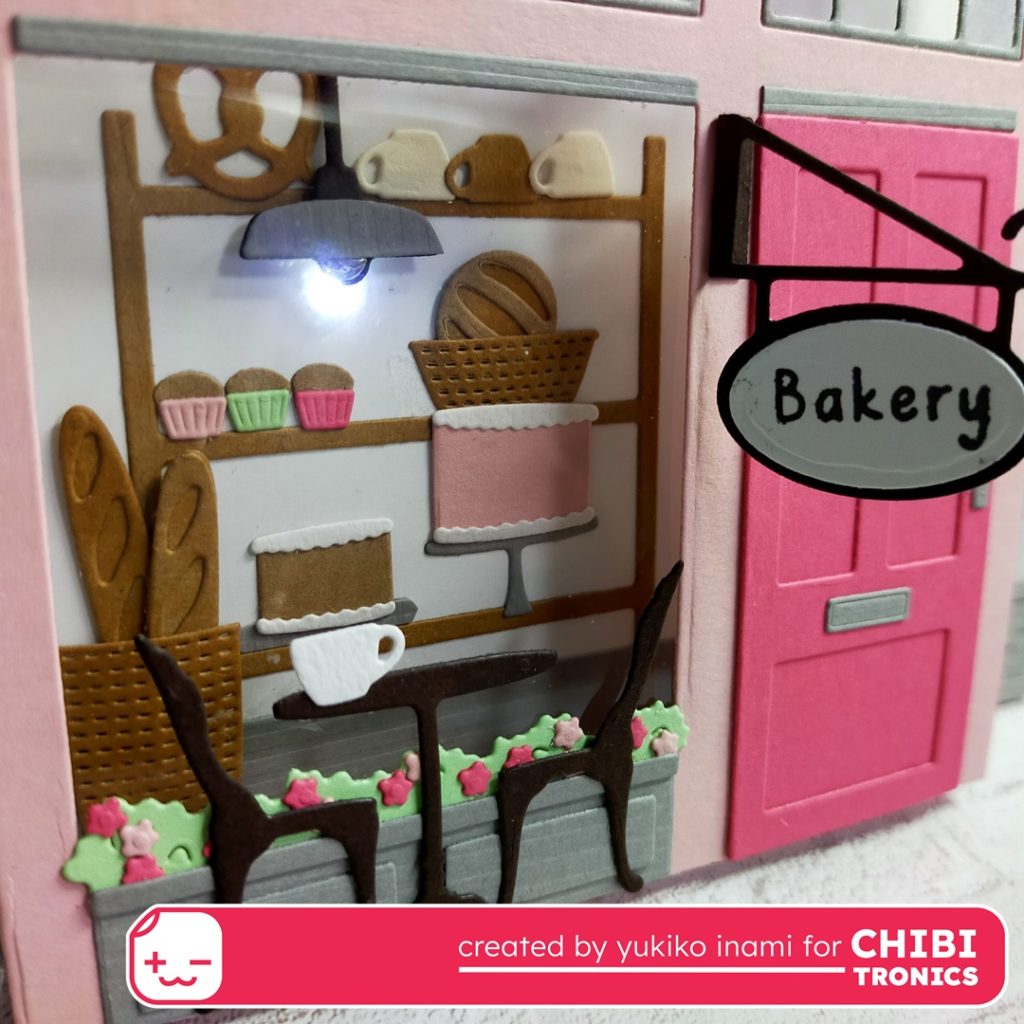
・Background sheet; inside wall of the shop; 4 1/4 x 5 1/2″ I set the interior goods and bread and cakes. I decided where is the place for the lights. Then I made holes for the lights.

・Circuit sheet; 4 1/4 x 5 1/2″
I cut a horizontal slit; the length 1″ starting at the point 1/2″ from the right edge and 1/2″ from the lower edge.
・Back panel; 4 1/4 x 5 1/2 “
・Pull tub for the switch; 2 pieces 3/2x 2 ” I used the diecut for the decoration of the wall.
・Switch part; 1/4×1.5″; I stick the conductive fabric tape then folded on 1/4″montain,1/2″ valley,1 valley,1 1/4 “mountain
・LED stickers; Chibitronics
・Conductive fabric tape; Chibitronics
・Cell battery; CR2016
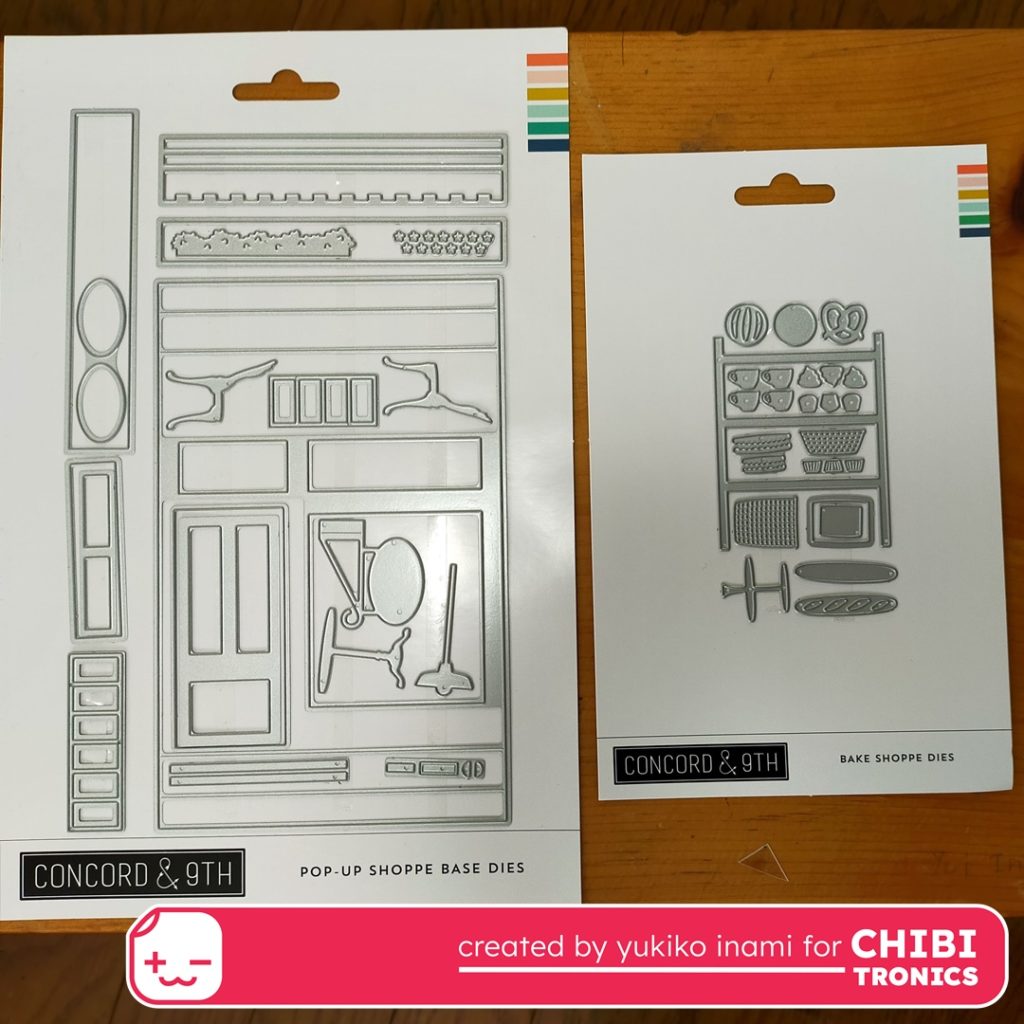
・ the pop-up shoppe base dies;Concord and 9th
・Book Shoppe bundle; Concord and 9th
・Dew Drop Assortment ;Concord and 9th
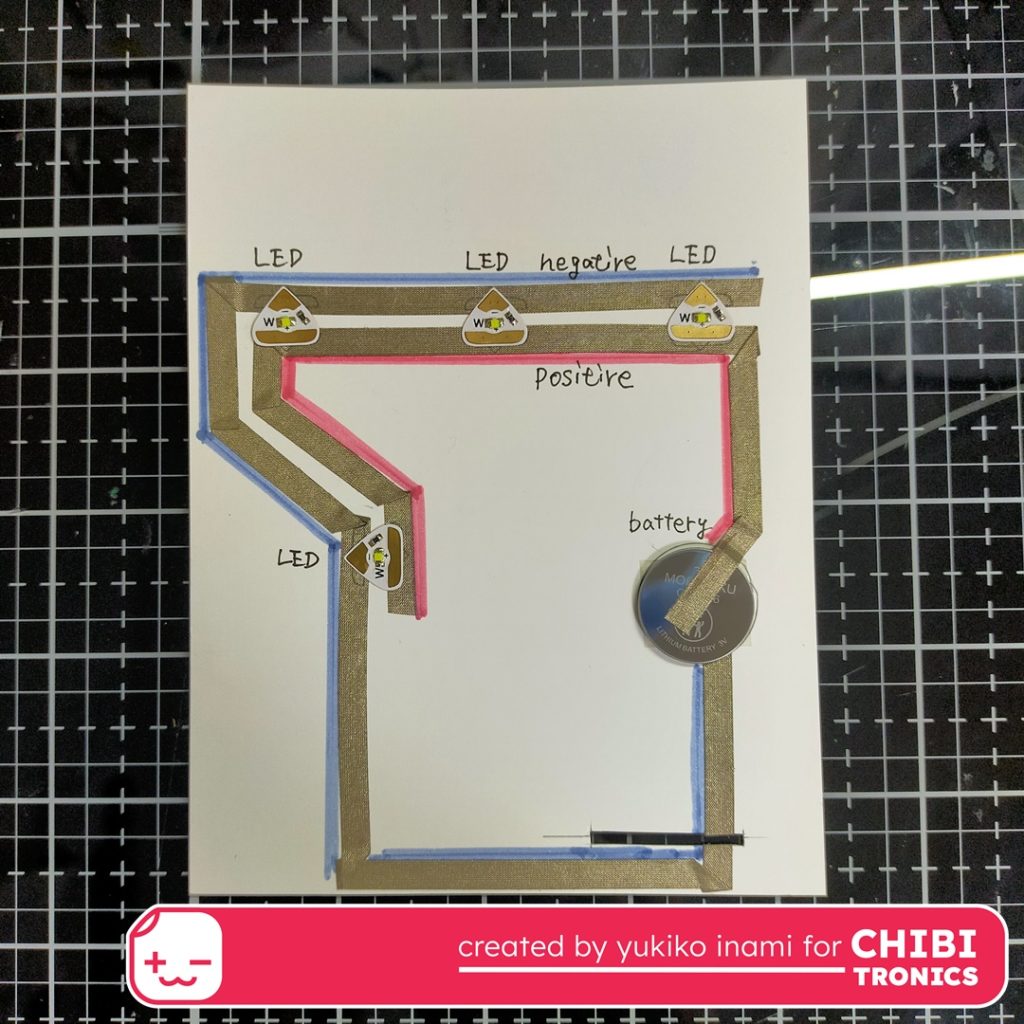
2. The Circuit
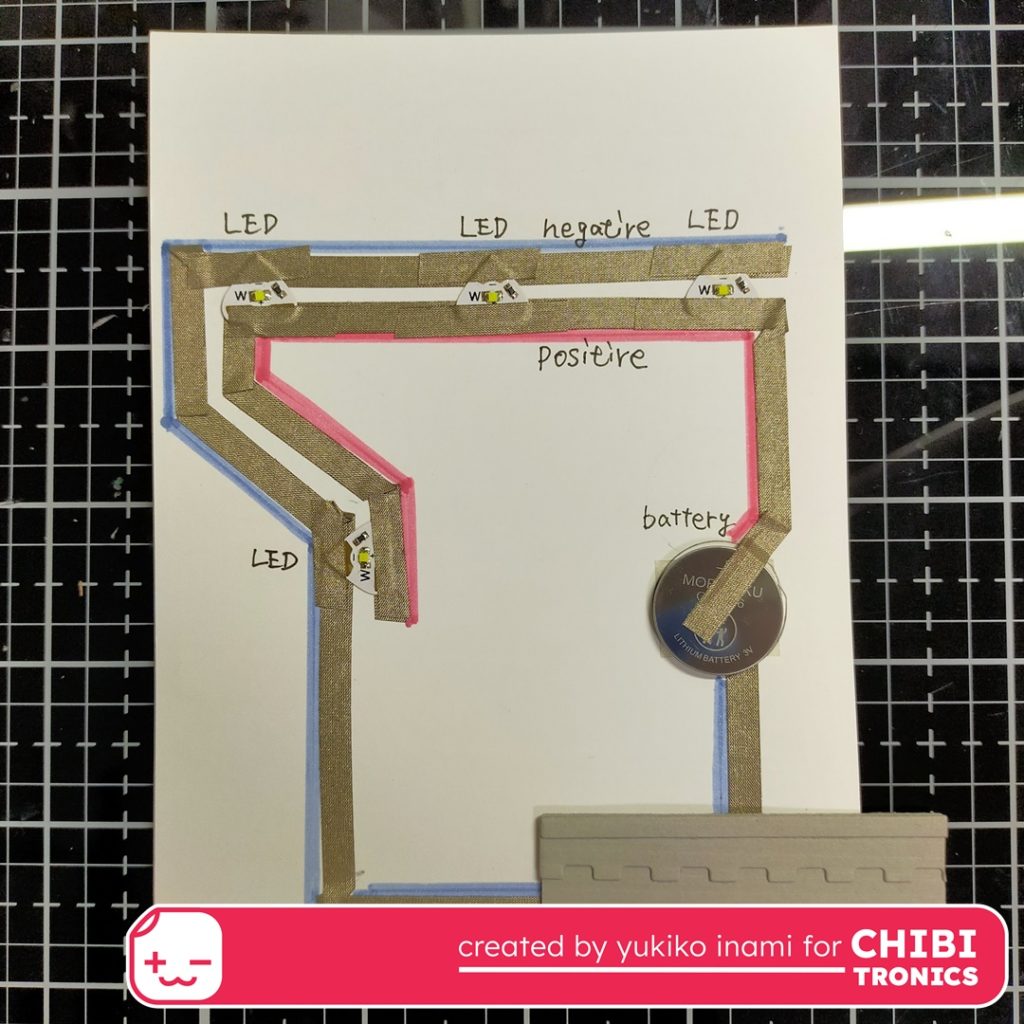
This is today’s circuit. It isn’t a new one for you who follow Chibitronics.
It has a slit on the circuit and the pull tab switch to slide in the slit.
If you are new to this, this movie can help you to know how to make it.
I stuck the conductive tape on the drawing path.
First, I started the negative side of the battery to the lights. Second, from the backside of the slit to the front side and the lights.
Third, starting from the backside of the slit another side to the front side and the battery.
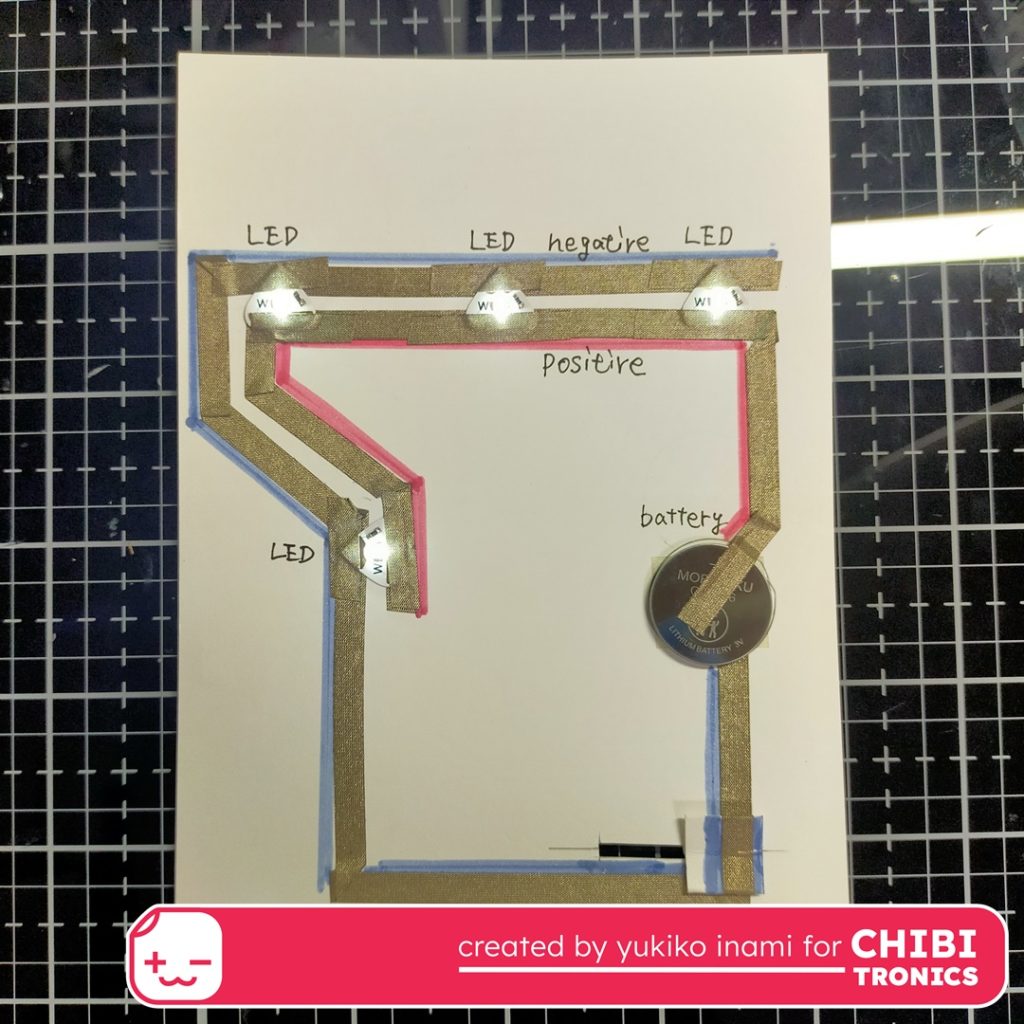
Then I slided the switch part into the slit of the circuit panel.
I slided the switch parts to the right edge and check whether the switch and circuit works well or not.
The switch part is made of a small piece of paper.
It is more stable to slide smoothly, sticking the center part with double side tape.
If your switch sliding is unstable, try it with this way.
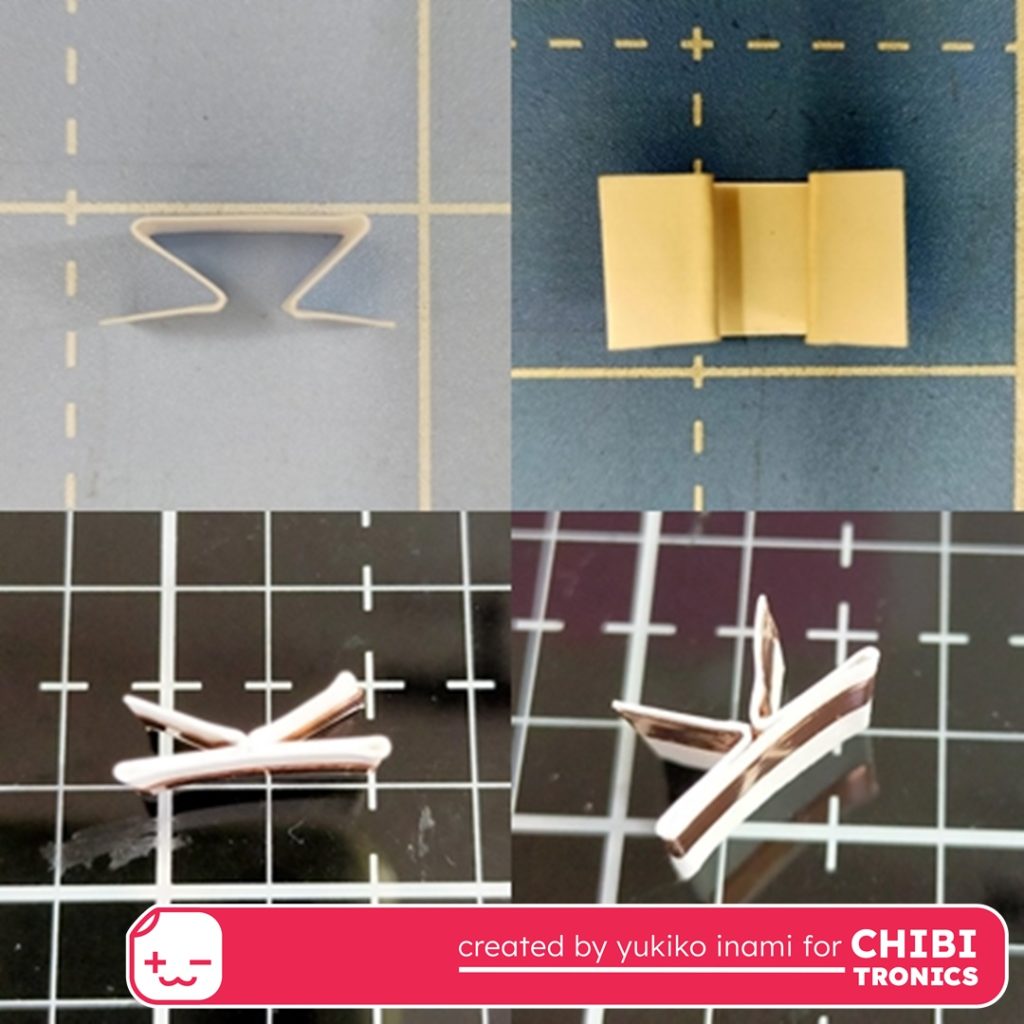
I stuck the pull tabs on the switch.
And I set the sleeve around the pull tab helping the smooth sliding.
I added the conductive fabric tape on the lights to make a secure contact.

I put the foam tape on the all edge of the circuit sheet except the pull tab area.
I stuck another pull tab part on the backside of the switch.
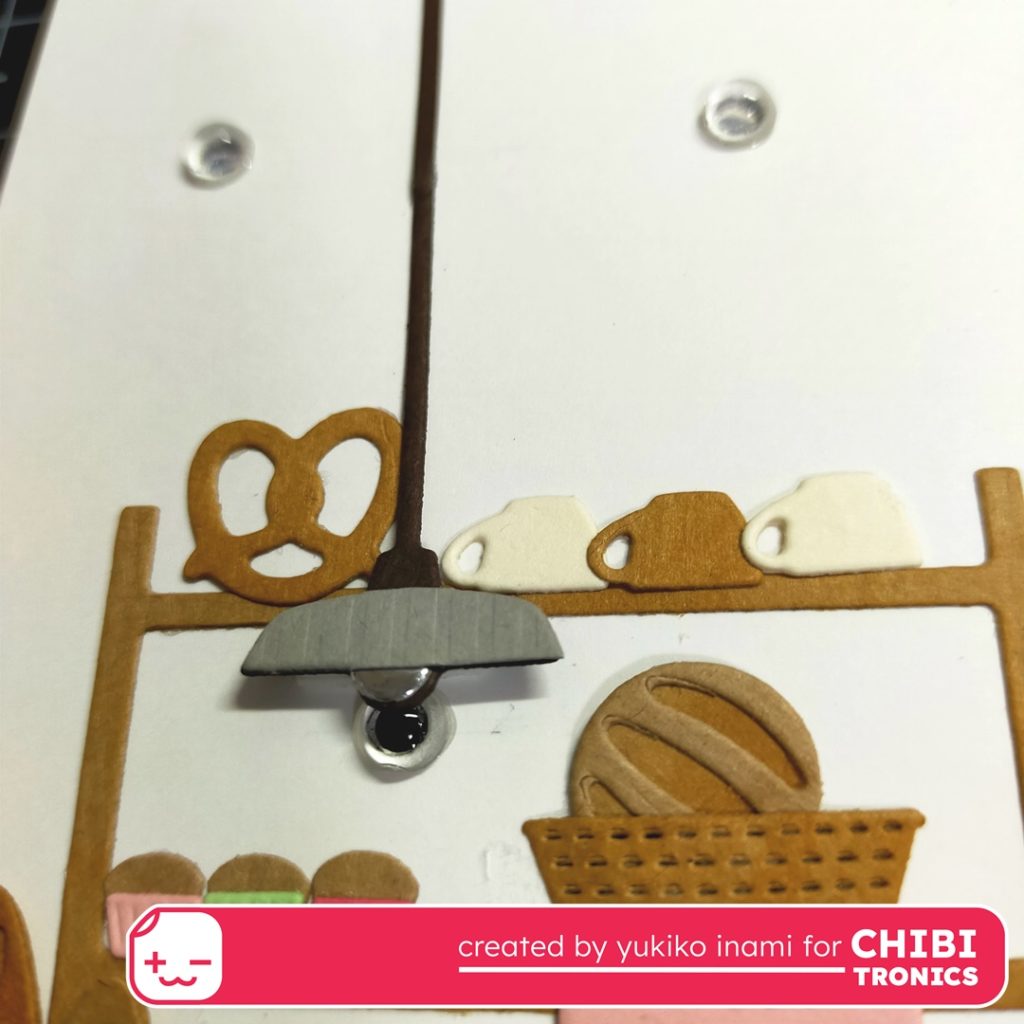
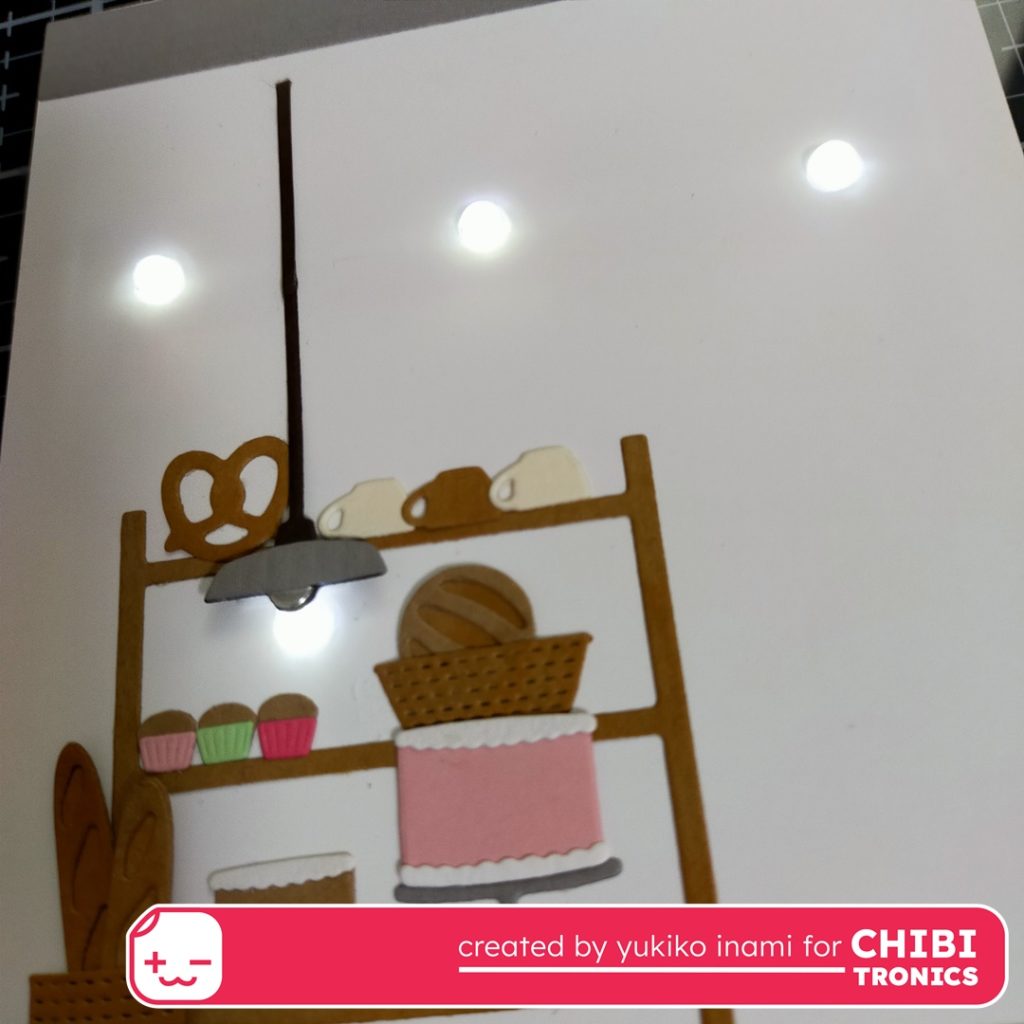
I need the light diffusion for the inside of the shop. So that I added the dew drop assortment on the light. This clear dome makes the light diffuse.
It worked well!
3. Assembly
I glue the front panel on the background sheet, then I set the circuit panel on the backside of the pop-up basement. Then I glued the back panel.
It is completed!
Um, I feel the smell of freshly baked bread and I can’t stand but walk into this shop in my fantasy world.
When you pull the tub, the lights turn on and it is so attractive.
Thank you so much for stopping by today!
Have a wonderful day!
Yukiko I.