Paper Circuit Chandelier

Paper Circuit Chandelier

Project Design & Tutorial by: Jill Dawson

Celebrate with a Chandelier

In this tutorial, you’ll learn how to create a glowing paper circuit chandelier that you can turn on and off with help from a magnet and reed switch. 

Materials & Tools

Directions

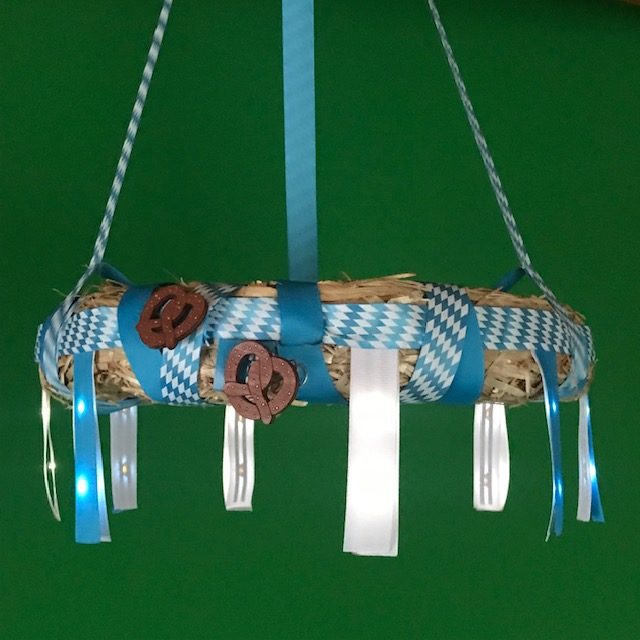
Make an Oktoberfest Wreath Light

This video is an overview of what you will be making in this tutorial. If the video controls are not visible, please try another browser.
A straw wreath form wrapped in blue and white ribbon is suspended from a wooden ceiling.  Nine ribbon "flags" containing glowing Sticker LEDS hang from the outer perimeter of the wreath.
Paper Circuit Chandelier: Oktoberfest Wreath Light
A straw wreath form, wrapped in blue and white ribbon, is suspended from a wooden ceiling.  Nine ribbon "flags" hang from the outer perimeter.  A hand grabs a wooden pretzel on string, a pretzel with a magnet on the back of it, and flips the pretzel over.  The magnetic pretzel causes the LEDs to glow.
Paper Circuit Chandelier with Magnetic Reed Switch

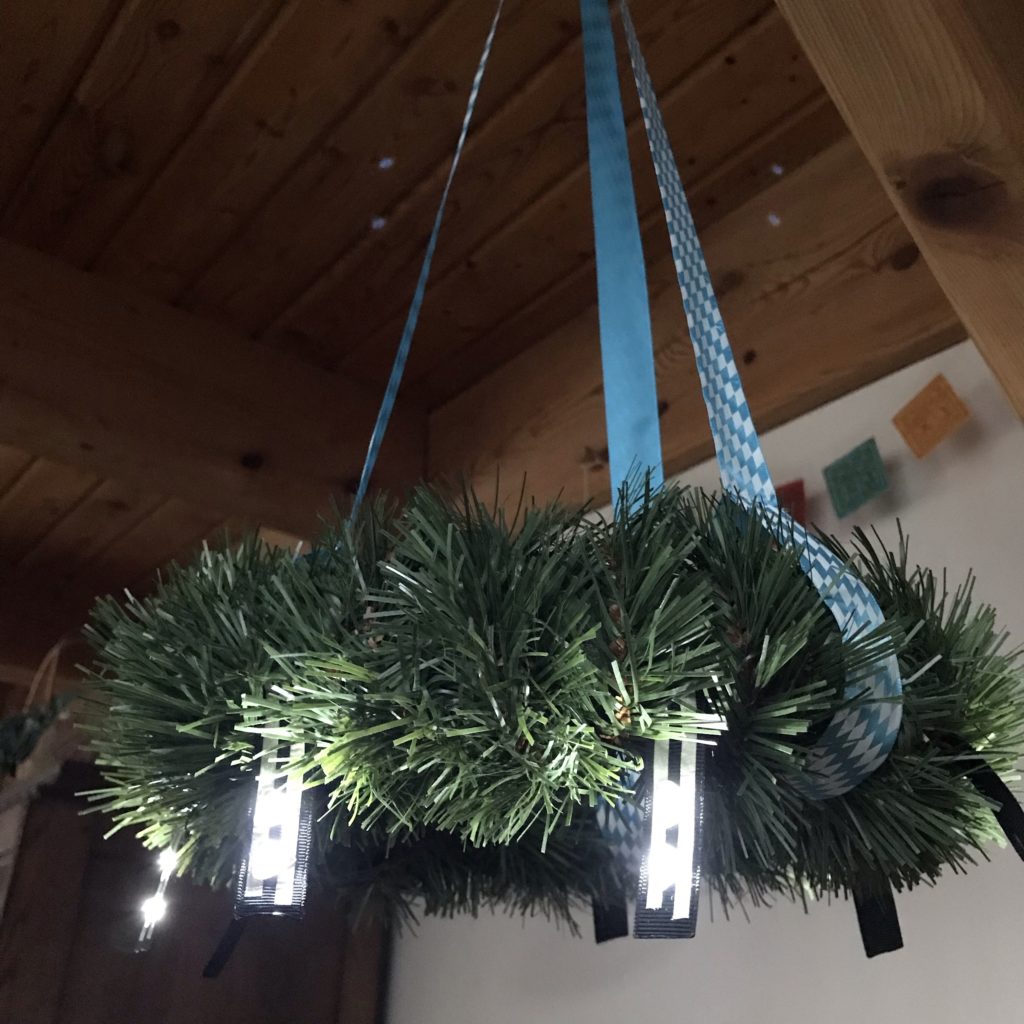
Autumn in New England is my favorite time of the year, filled with harvest markets, trips to a local apple orchard, and fiery foliage that brings tourists from all over the world. In our home, it’s also a time of music, food, and festivities inspired by Germany’s world class celebration of Oktoberfest. Since we aren’t able to travel to Germany each September to participate in the authentic event, I thought it would be fun to create an Oktoberfest inspired paper circuit chandelier to help us celebrate at home!

A straw wreath wrapped in blue and white ribbon hangs suspended against a green background.  Two wooden pretzels are attached to the front side of the wreath.
This Paper Circuit Chandelier, inspired by Oktoberfest, is designed for a porch celebration.

While authentic Oktoberfest chandelier lights are enormous to help illuminate tents accommodating up to 10,000 people, this Oktoberfest-inspired chandelier will be built on a scale more suitable for a porch celebration. 

Oktoberfest2, by Michael.Chlistalla, CC BY-SA 3.0 ,
via Wikimedia Commons
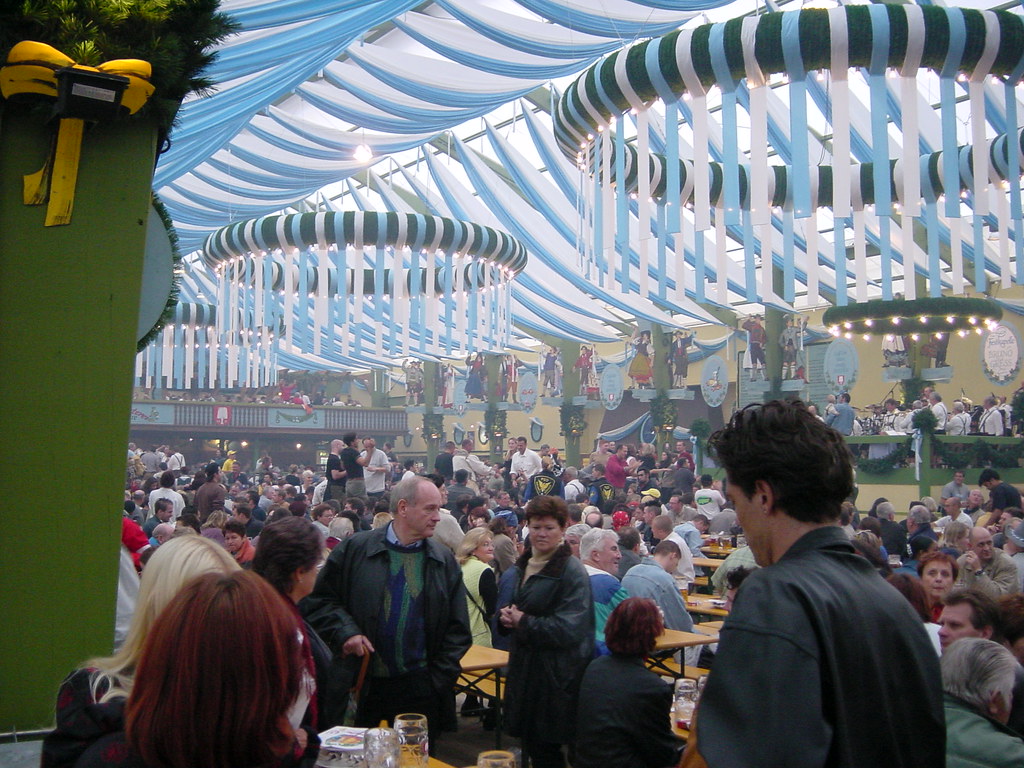
2001-09 München 052
2001-09 München 052 by Allie_Caufield, CC BY 2.0 ,
via Flickr

Although the model for this tutorial was designed to celebrate the annual German tradition of Oktoberfest, paper circuit chandeliers may be easily customized to fit any theme of your choice!

Categories

paper circuit techniques, lamp, nightlight, home décor, holiday, decoration, paper craft, STEAM Education


Materials & Tools

Electronic Supplies

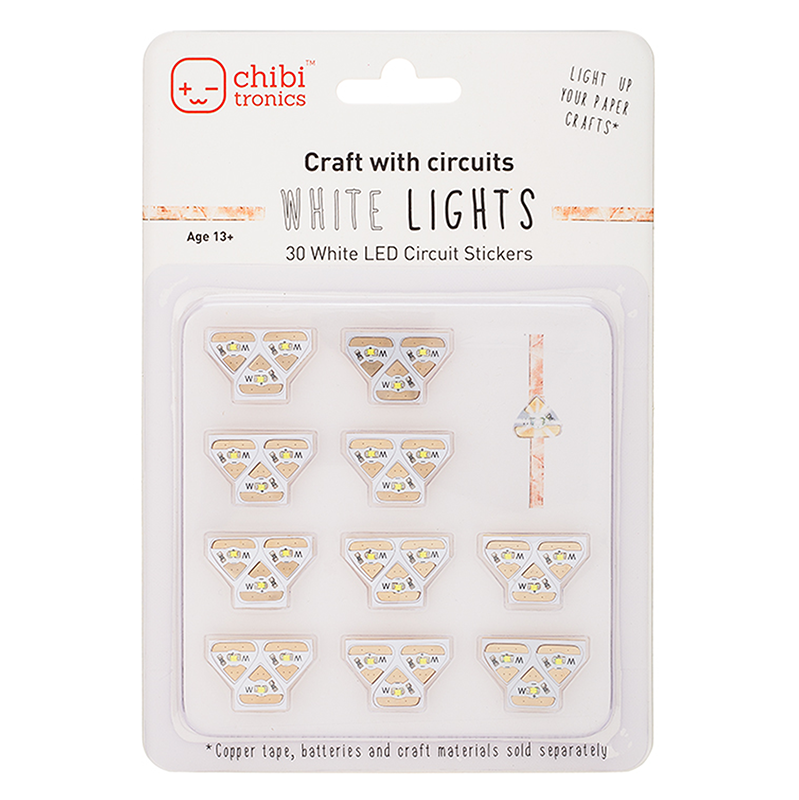
  • 6 or more Chibitronics circuit sticker LEDs
  • Conductive fabric tape
  • 1 – 2 coin cell batteries (depending upon the number of LED stickers you end up using)
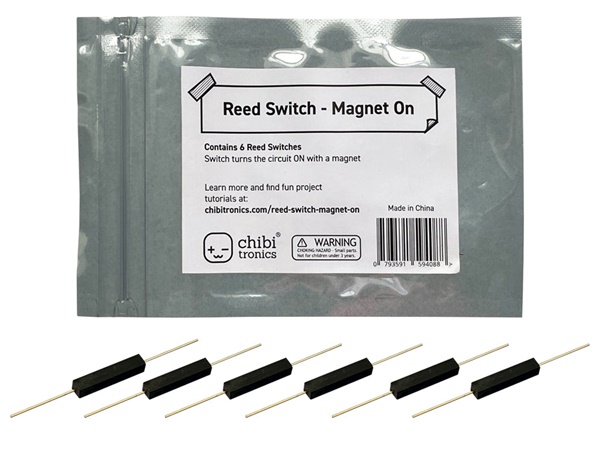
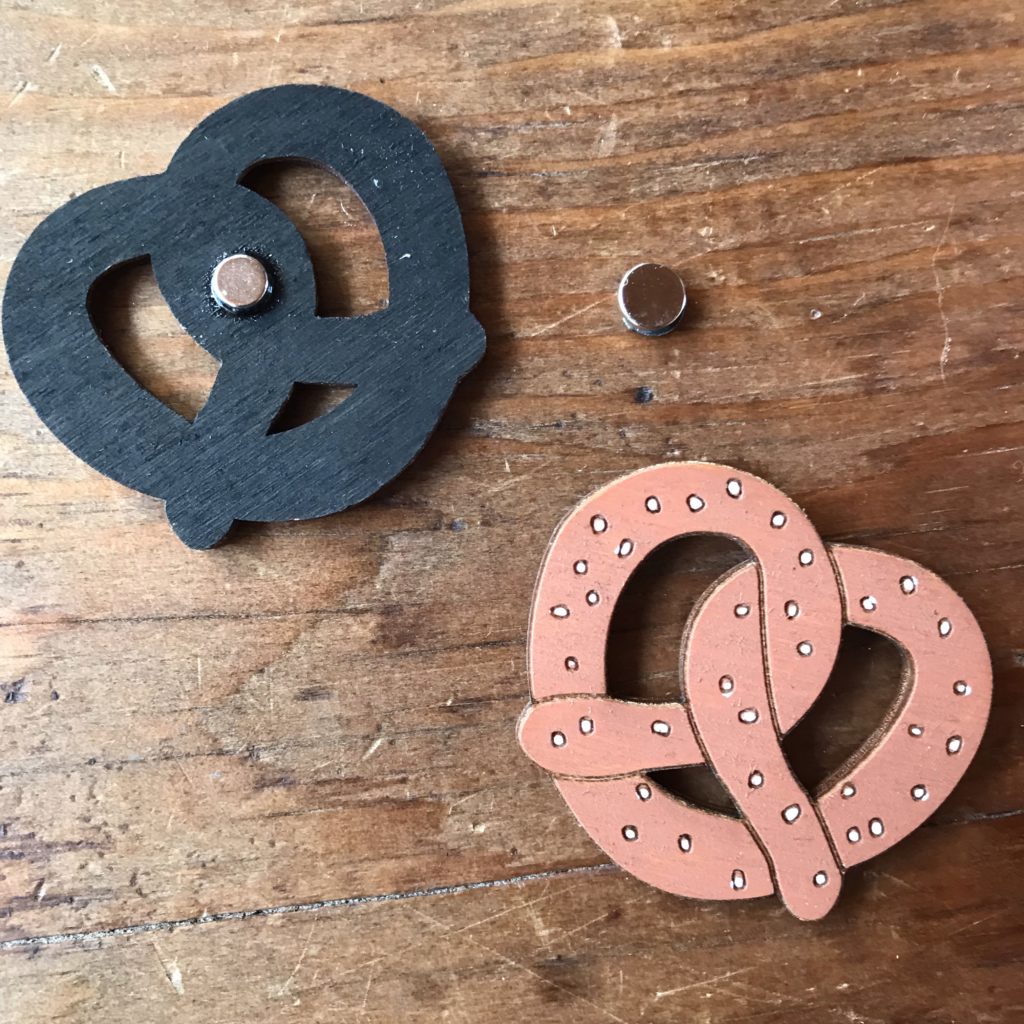
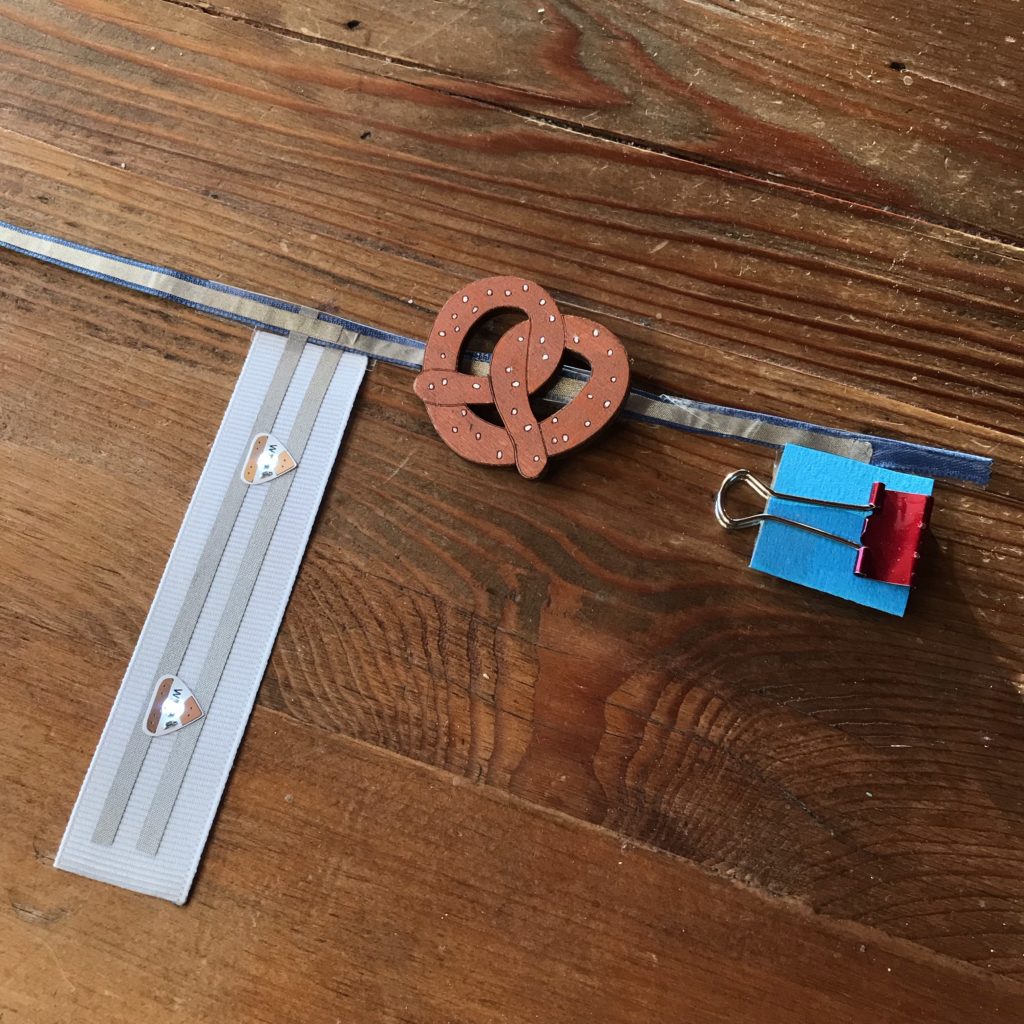
  • Reed switch (magnet on) & a magnet (useful as a switching mechanism)

Other Supplies

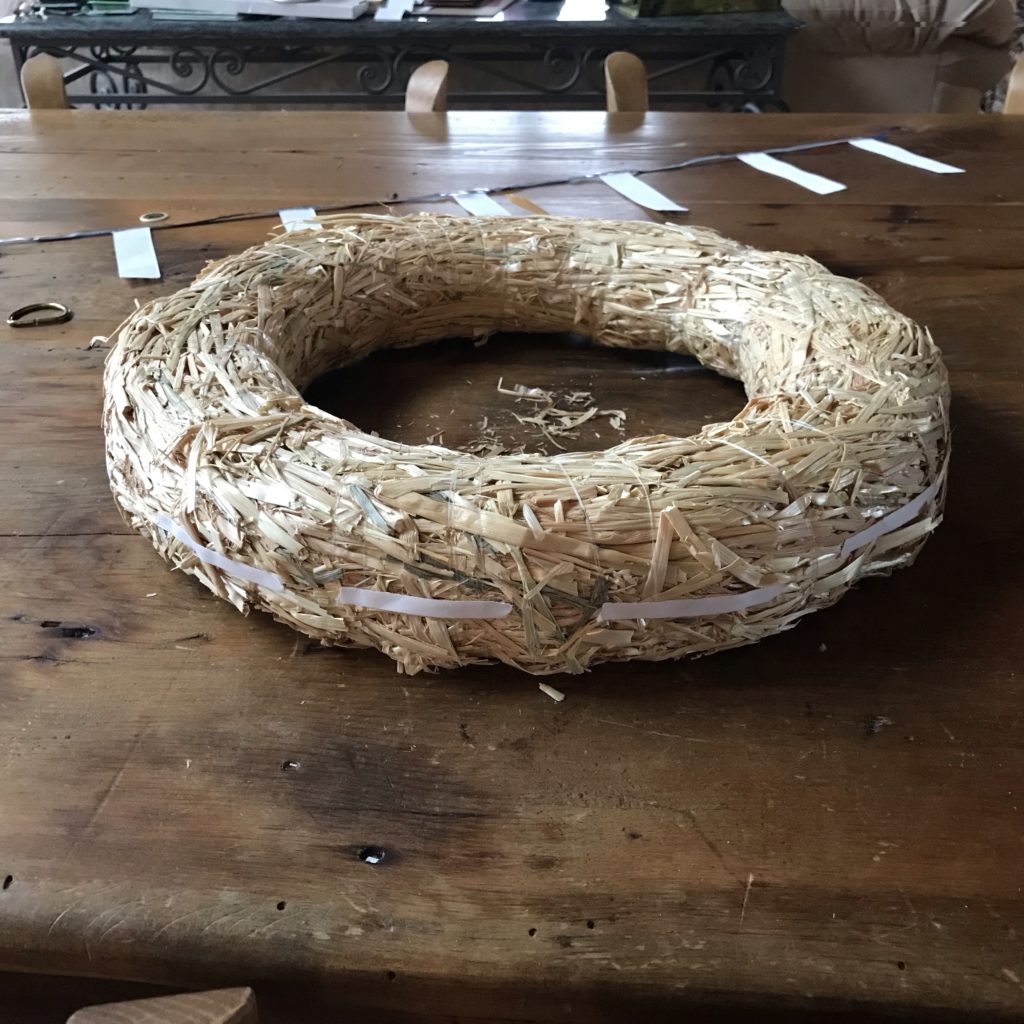
  • 14” Straw wreath or 10” floral foam wreath 
  • Magnet (I used this Magnetic Pretzel) to trigger the reed switch
  • Binder clip (to secure the battery/batteries in a paper holder)
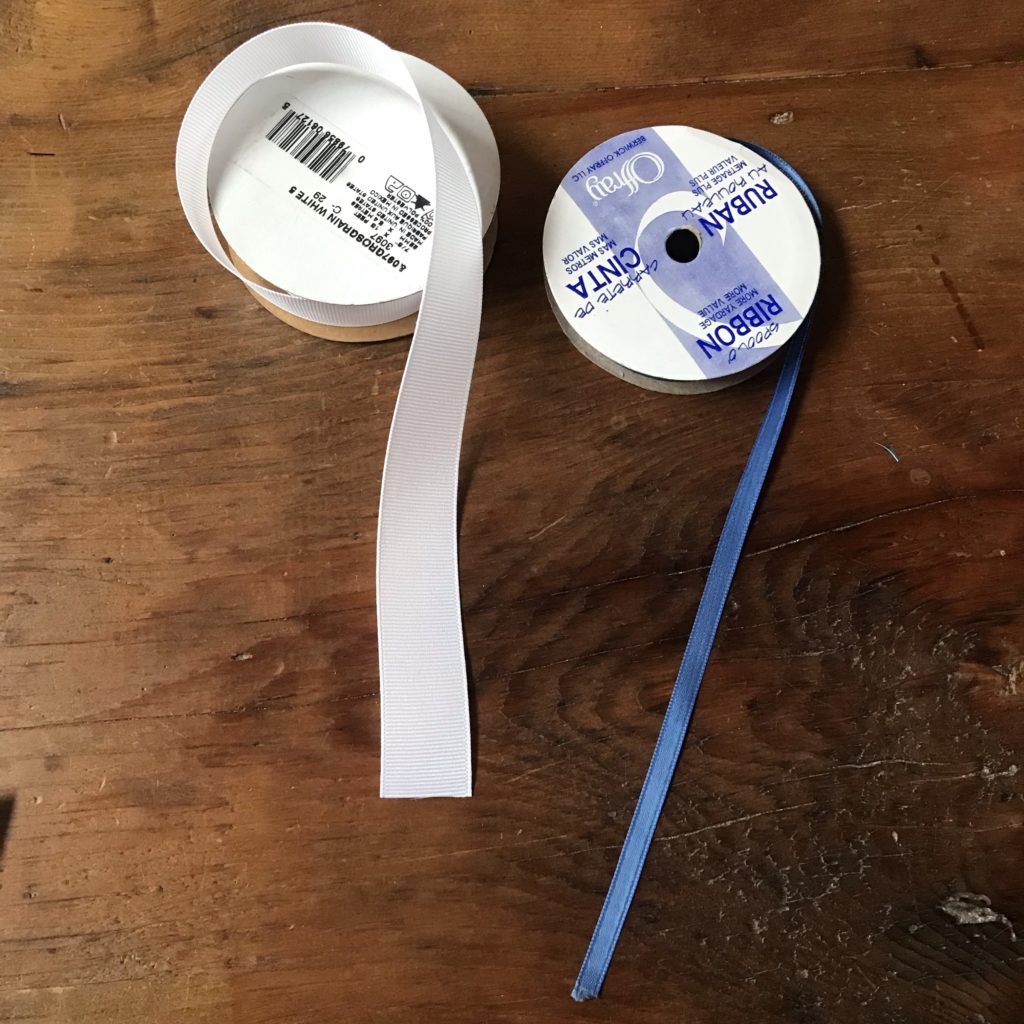
  • 1/4″ ribbon for the power/ground rail
  • 1/2″ – 1″ ribbon for the LED branches
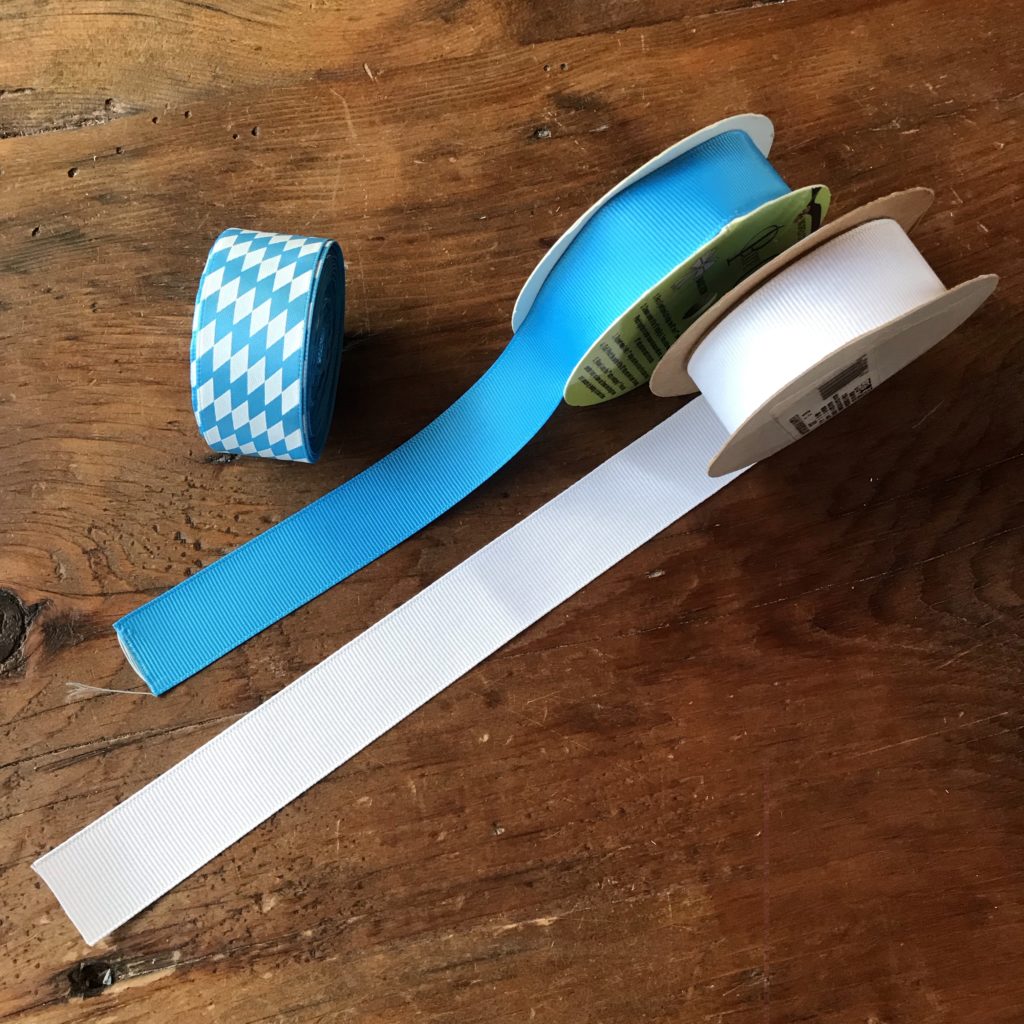
  • Decorative ribbon (I used blue, white, and Oktoberfest Ribbon)
  • Round or D-shaped metal hanging ring
  • Double-sided tape
  • Scotch tape
  • Needle & thread (or 4 safety pins)
  • Scissors

Optional

  • Faux evergreen garland (or decorative elements of your choice)
  • A lighter or matches (useful for melting frayed ribbon ends)
  • Fishing line (for securing the magnet)
  • Art supplies of your choice
  • Tape measure
A large straw wreath form sits to the left of smaller, green, foam wreath form
Wreath forms
Two magnetic pretzels made of wood
Magnetic pretzel decoration
A wrapped coil of faux evergreen
Faux evergreen
Brass D ring on a wooden table
Brass D-ring
Three rolls of 1" wide blue and white ribbon sit side by side on a wooden table.  The first one has a blue and white diamond motif.
Decorative ribbon
Two rolls of nylon based ribbon sit on a wooden table
Ribbon for constructing the circuit

Directions

Step 1: Create & Test the Circuit

To form a paper circuit chandelier, you’ll be wrapping a branching circuit around the circumference of a wreath form, allowing the illuminated branches to hang down all around it. Keep in mind that the positive and negative lead must not touch one another, or you’ll end up with a short circuit and your LEDs will not light up.

Annotated image of the 1/4" ribbon lying in an open circle. The negative lead in blue is on the back side, and the positive lead, in red, is on the front side. Nine branches made of 1" wide ribbon are spaced out along the inner perimeter of the circle. Each branch has each two parallel circuit traces (color-coded positive and negative) and two lit LED stickers adhered between them. A magnetic pretzel decoration is shown sticking to the top-left side of the ribbon rail. A concealed reed switch, placed on the back side of the ribbon rail,  is closing the circuit. A battery holder (blue paper and a small binder clip) is at the far end of the ribbon rail.
This branching circuit is based upon the same circuit introduced in the Glowing Garland tutorial.

First, measure the circumference of the wreath you plan to use and add a couple of inches to the measurement. 

Then, cut a piece of ¼” wide ribbon to that length so that it will be long enough to wrap completely around the wreath, with a little wiggle room for adding a paper battery holder. 

To construct the power and ground rails and illuminated branches, you’ll be building the same type of branching circuit that is introduced in the Glowing Garland project. 

To serve as a visual reference, you may download a copy of the circuit diagram below.

This circuit diagram is shaped like an open circle and has seven flags protruding from the inner perimeter. Each flag has a red line on the left side marking the positive lead and a blue line on the right side marking the negative lead.  A triangular outline representing the placement of Sticker LEDs is marked in between.
This circuit diagram is not to scale. For more details, please download the circuit diagram linked below.

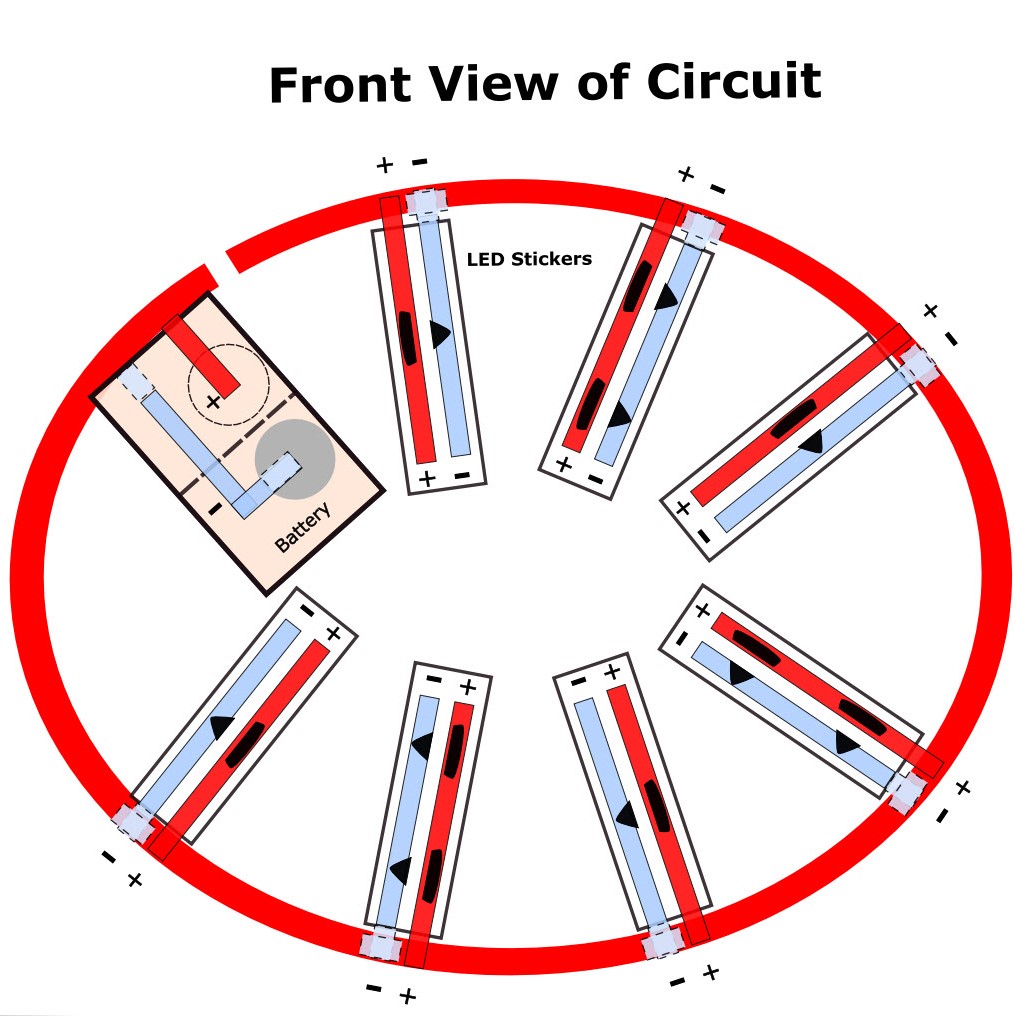
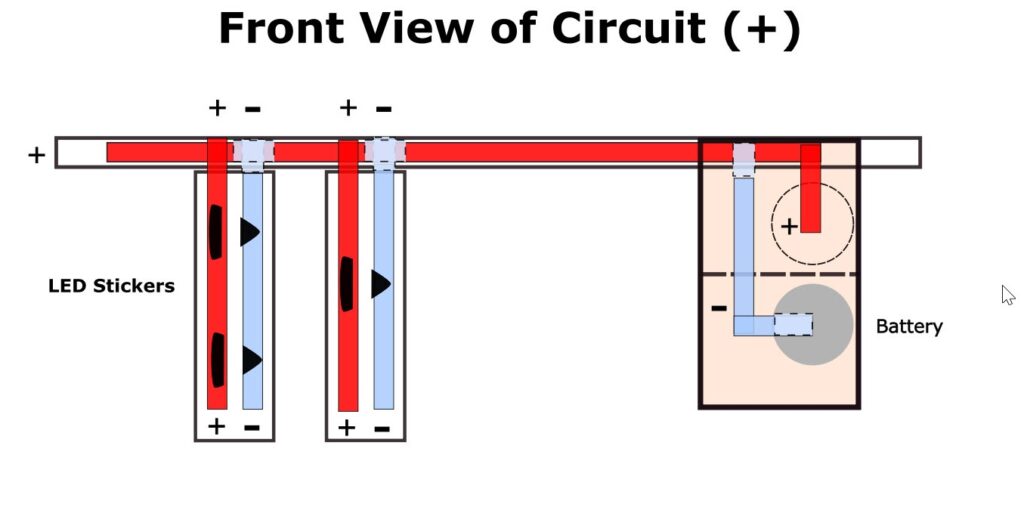
To briefly recap how to make the circuit in the Glowing Garland project, you need to apply conductive fabric tape to both sides of the ¼” ribbon. The positive lead will be on the front side and the negative lead will be on the back side.

One end of a 1/4" thick ribbon rail with two branching circuit flags (each illuminated with white LED stickers) lays upon a wooden table.  It is bent in the center to depict the positive lead on the front side.  At the bend, the negative lead on the back side faces up.  On the far left end of the ribbon, a paper battery holder is held closed with a binder clip.  A magnetic wooden pretzel is positioned to its right, concealing a reed switch.
The positive lead will be on the front side and the negative lead will be on the back side of the ribbon.

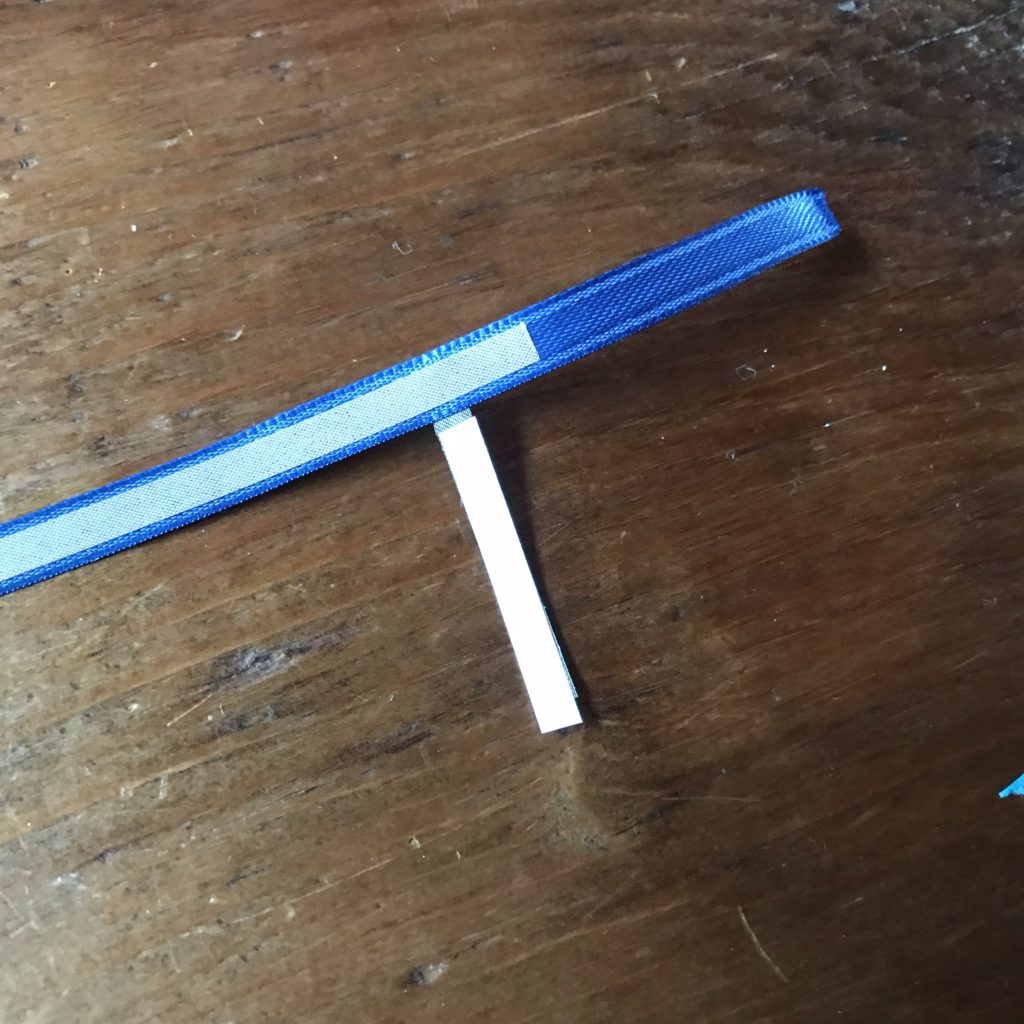
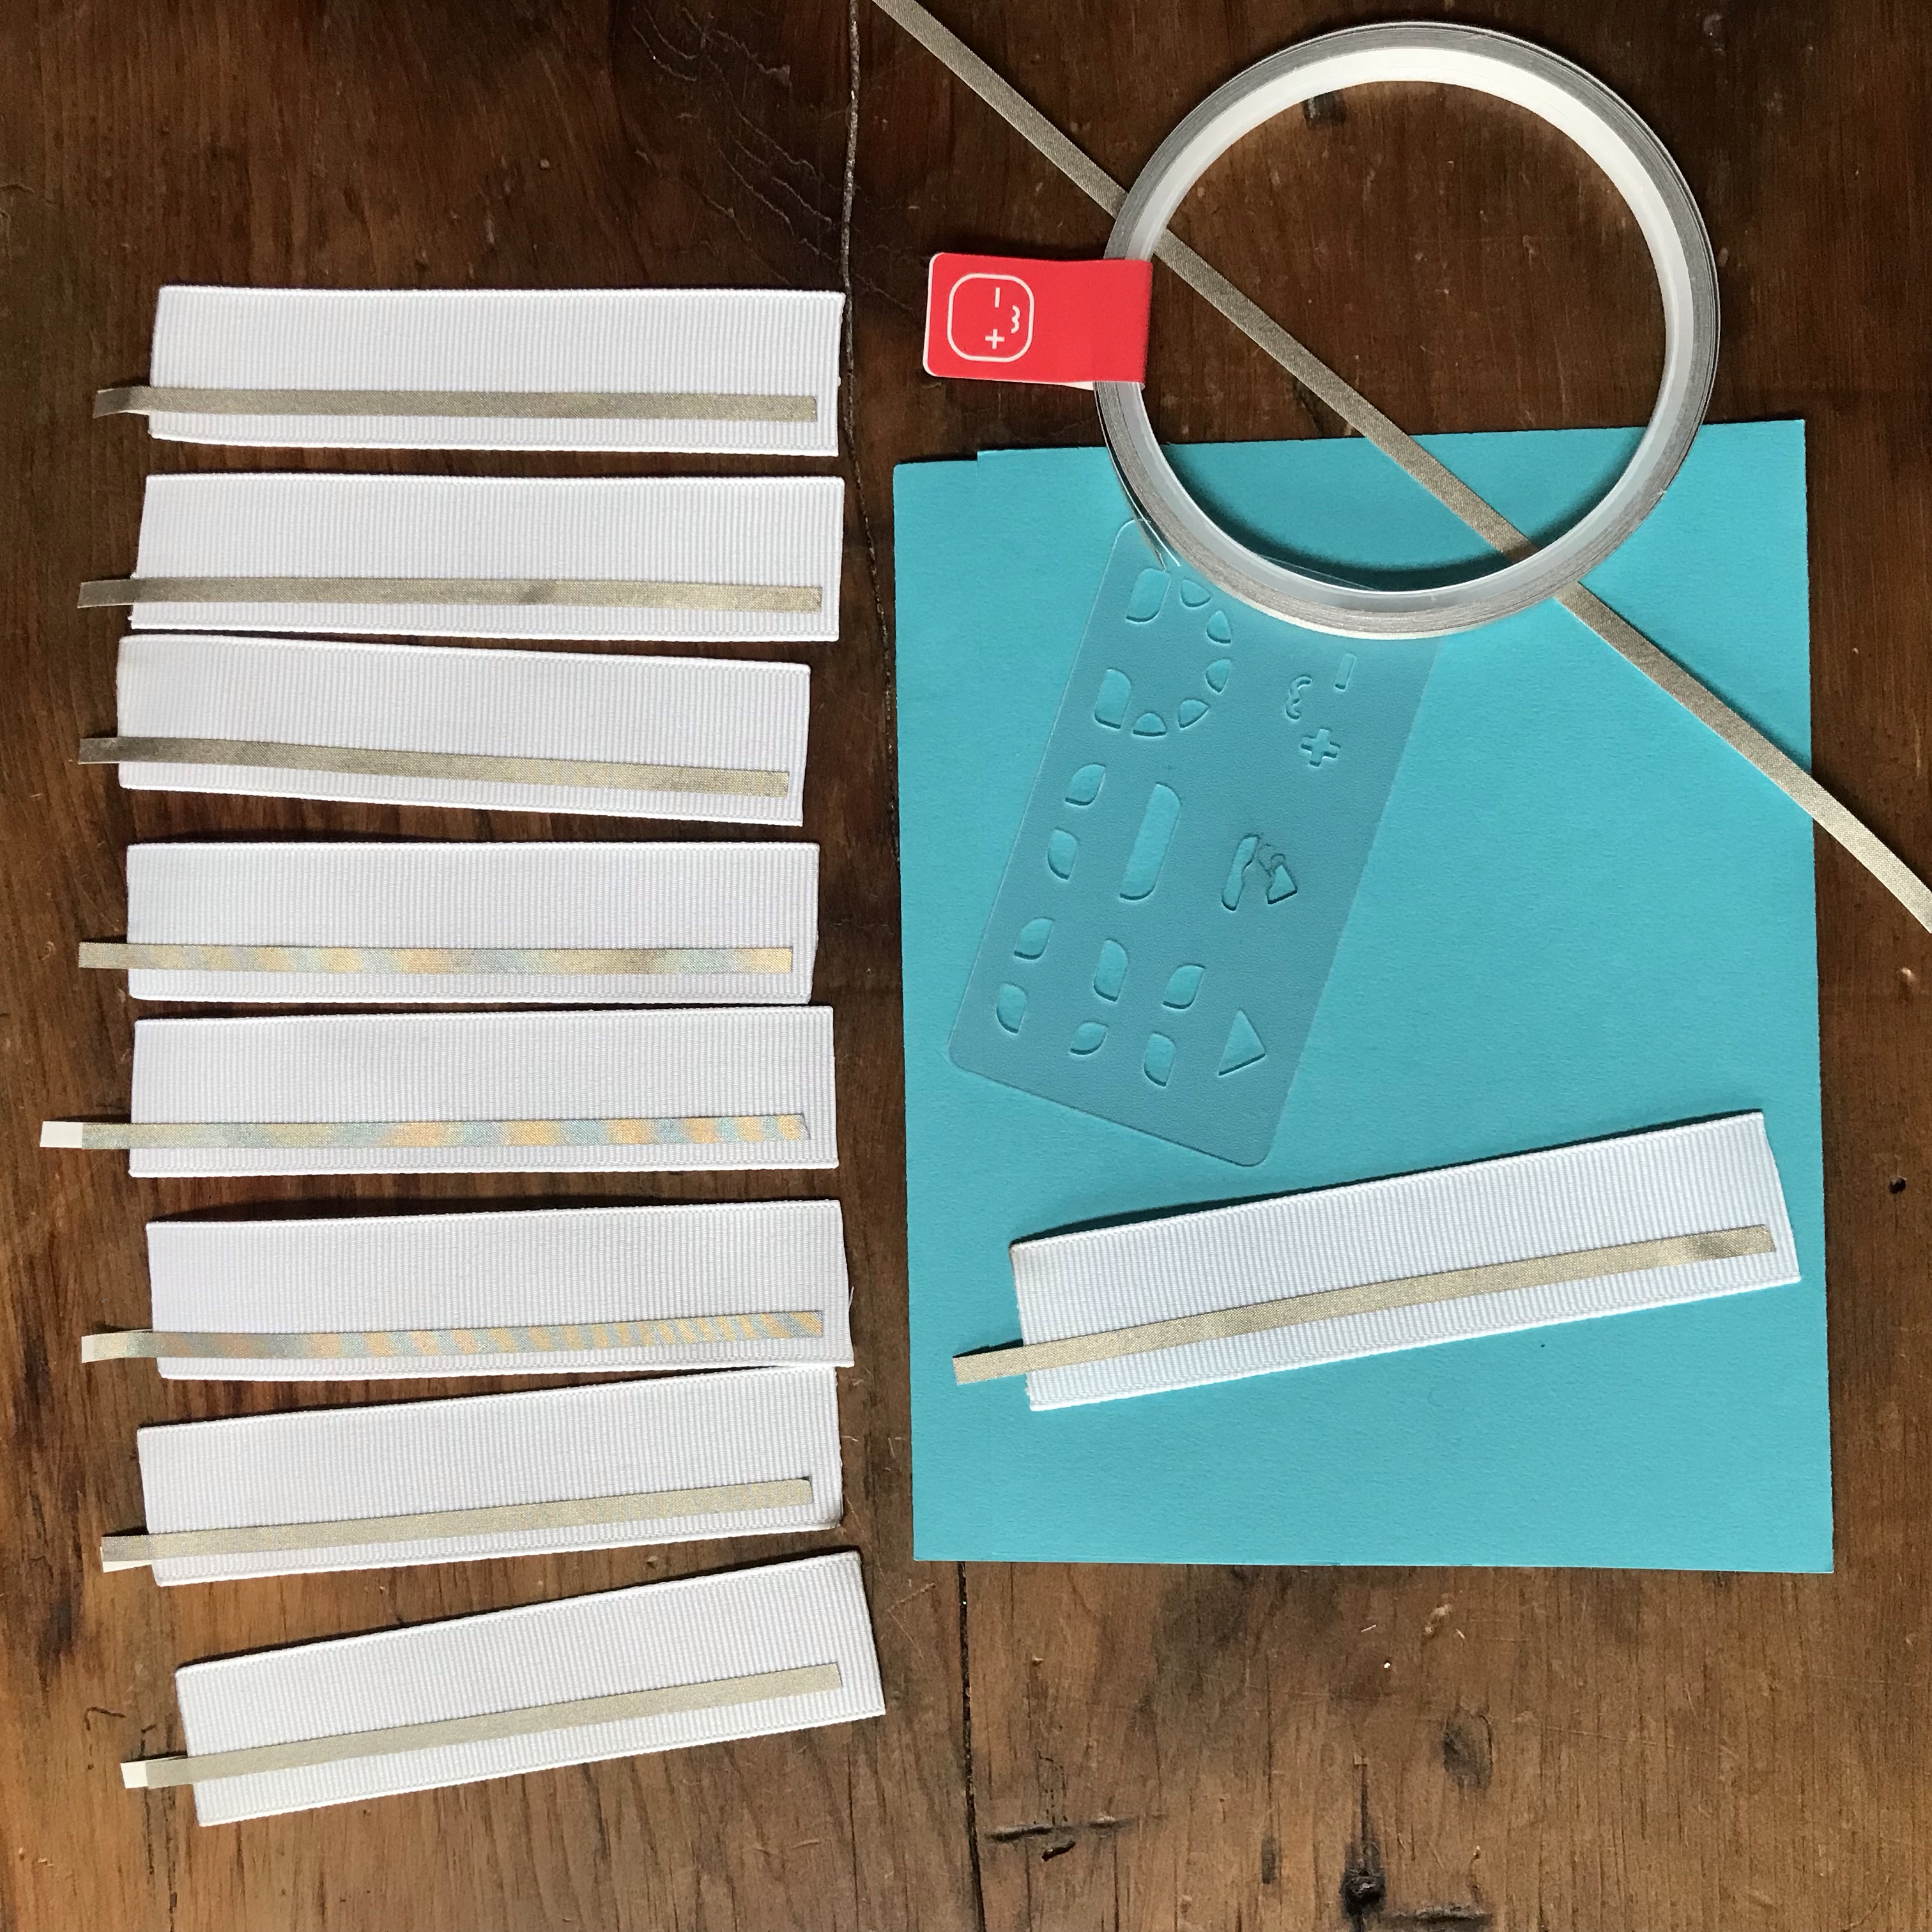
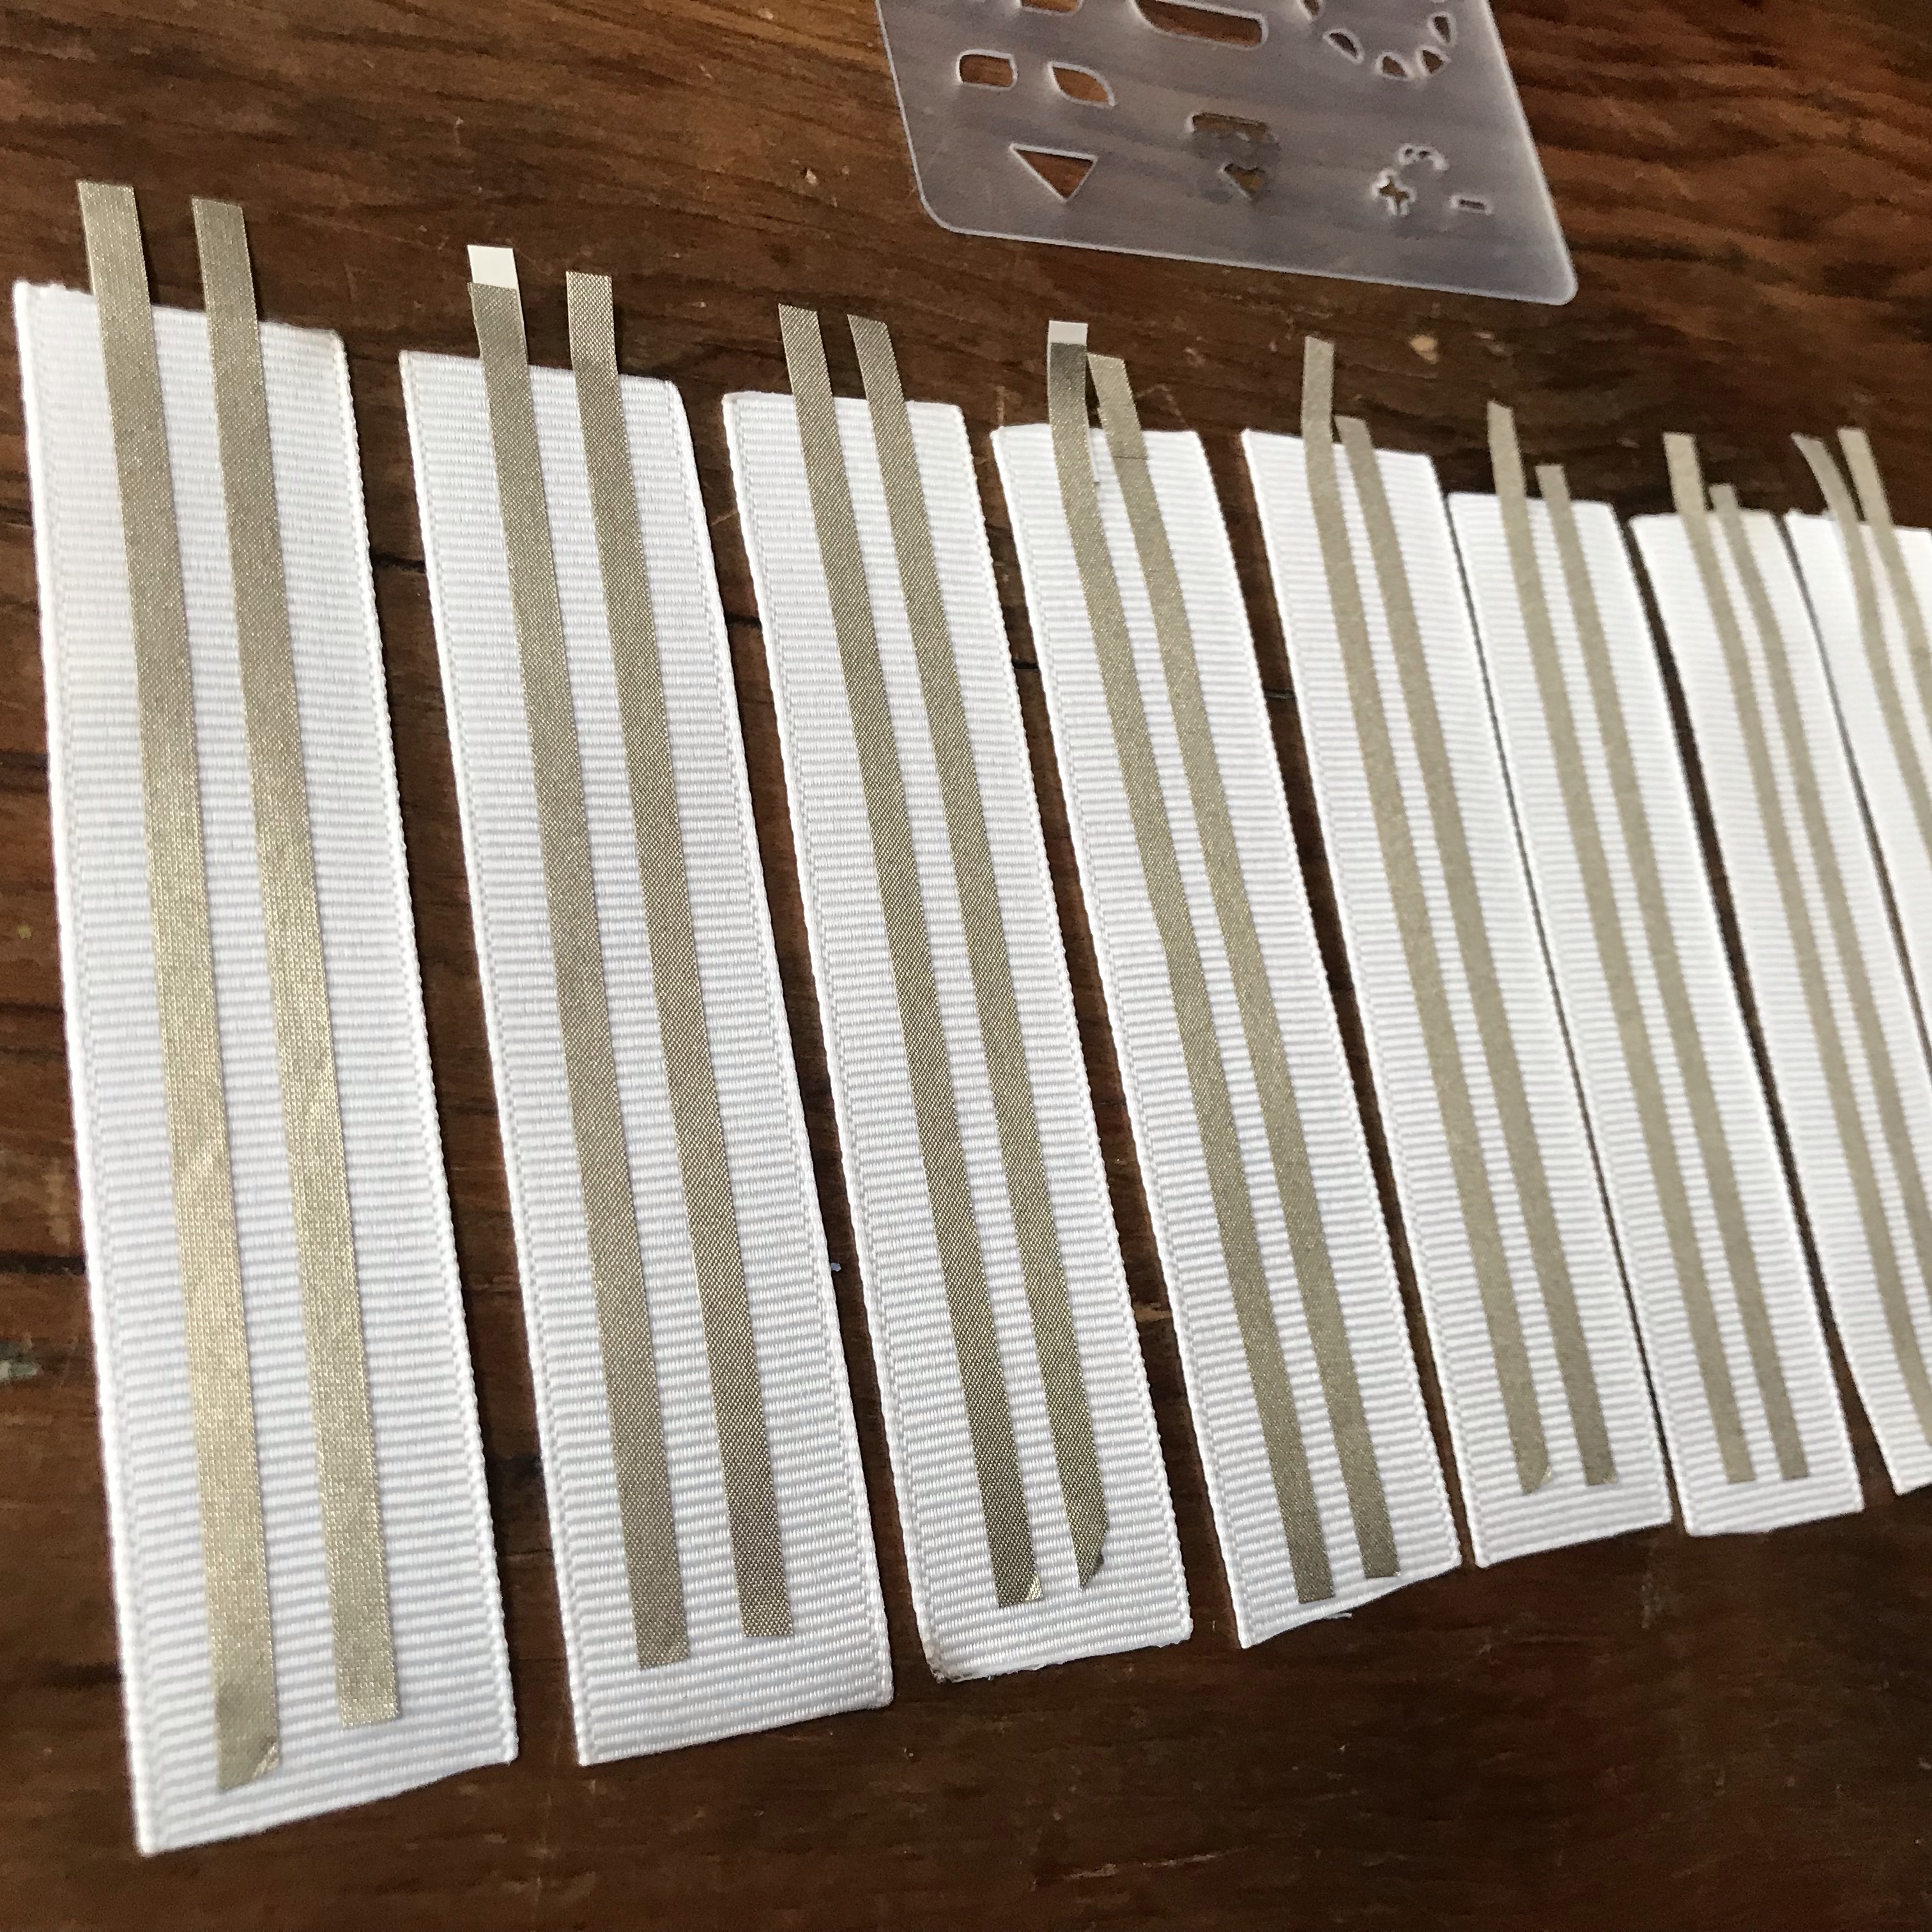
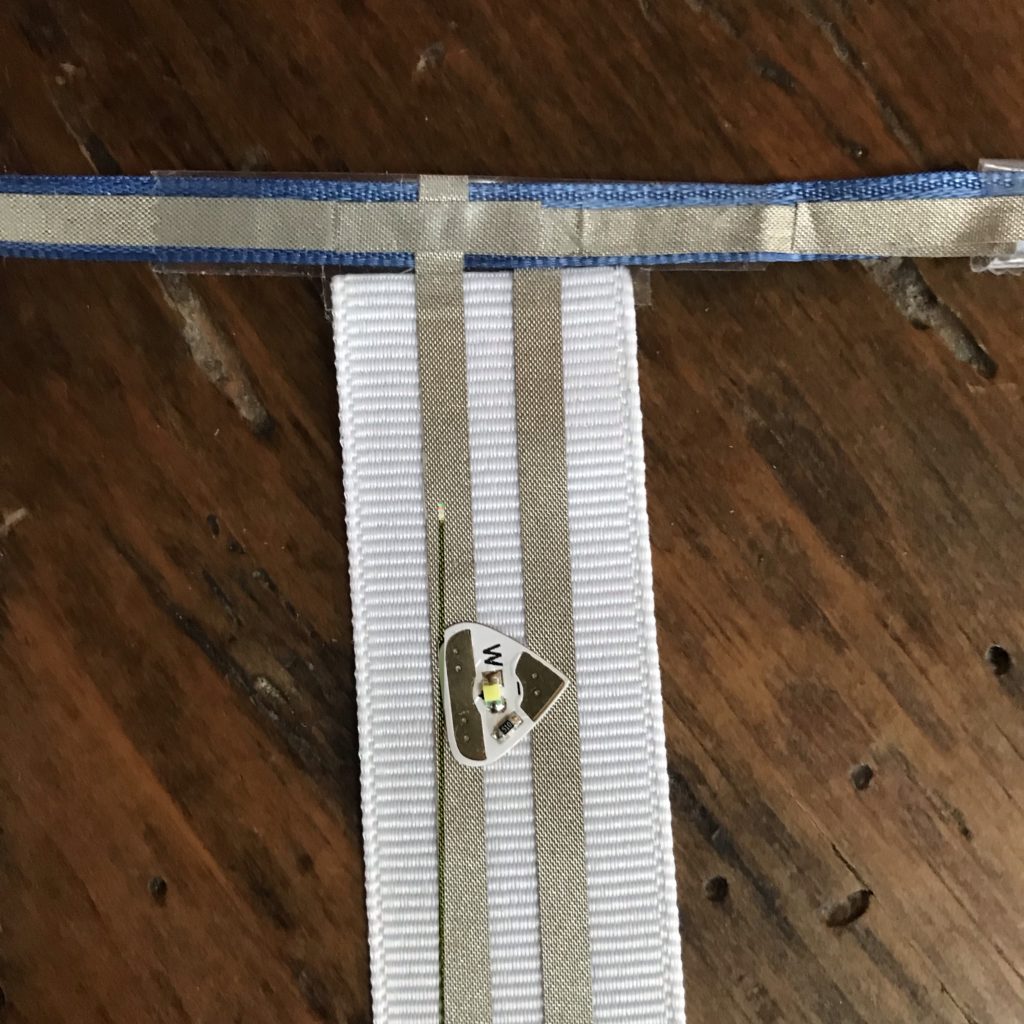
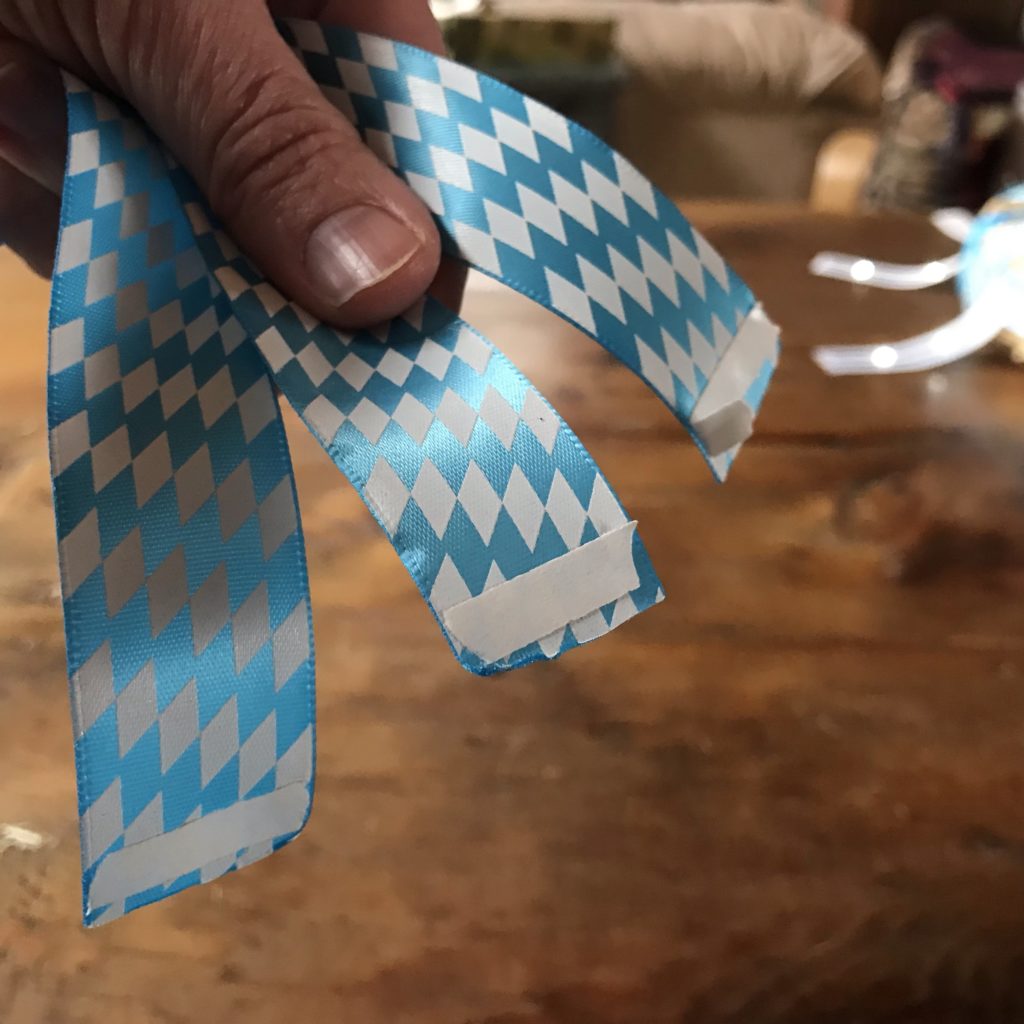
To create the glowing branches that will hang down from your chandelier, you need to cut pieces of ribbon (or sturdy paper) to your desired length, adding parallel lines of conductive fabric tape down their centers, leaving a gap to accommodate Circuit Sticker LEDs.

Front view of a circuit diagram shows the positive lead of a ribbon "rail" color coded in red.  Two ribbon flags with color coded circuit traces run parallel along the length of each flag.   
The traces on the left, in red, connect with the positive ribbon rail.  The traces on the right, in blue, connect with the hidden, negative ribbon rail on the back side of the ribbon.   LED stickers bridge the gaps between to two traces.  The placement for a paper battery holder is shown.
Back view of a circuit diagram shows the negative lead of a ribbon "rail" color coded in blue.  The placement for a paper battery holder is shown. on the left side.  To the right of the battery holder, a reed switch is placed in a gap made in the negative lead.  To the right of the reed switch, two ribbon flags with color coded circuit traces run parallel along the length of each flag.  The traces on the left, in blue, connect with the negative ribbon rail.  The traces on the right, in red, connect with the hidden, positive ribbon rail on the back side of the ribbon.

Tips, Tricks & Call-Outs
To prevent the ribbon from fraying, it’s a good idea to singe raw edges before adding the conductive fabric tape. This includes the power/ground rail ribbon and the LED branches that will attach to it; this may be done carefully with a lighter or matches. To learn more, visit the Glowing Garland tutorial.

A 1/4" piece of ribbon with conductive fabric tape adhered to its front side and a second piece of conductive fabric tape adhered to its back side
Apply conductive fabric tape to both sides of the ¼” ribbon.
Eight 1 inch X 3 inch pieces of white ribbon lay side by side upon a wooden table.  Another is placed upon a green piece of paper next to a plastic craft template and a roll of conductive fabric tape.  Each piece of ribbon contains a single parallel trace  on the left side which protrudes from the tops of the ribbons.
To create branches, cut ribbon to your desired length.

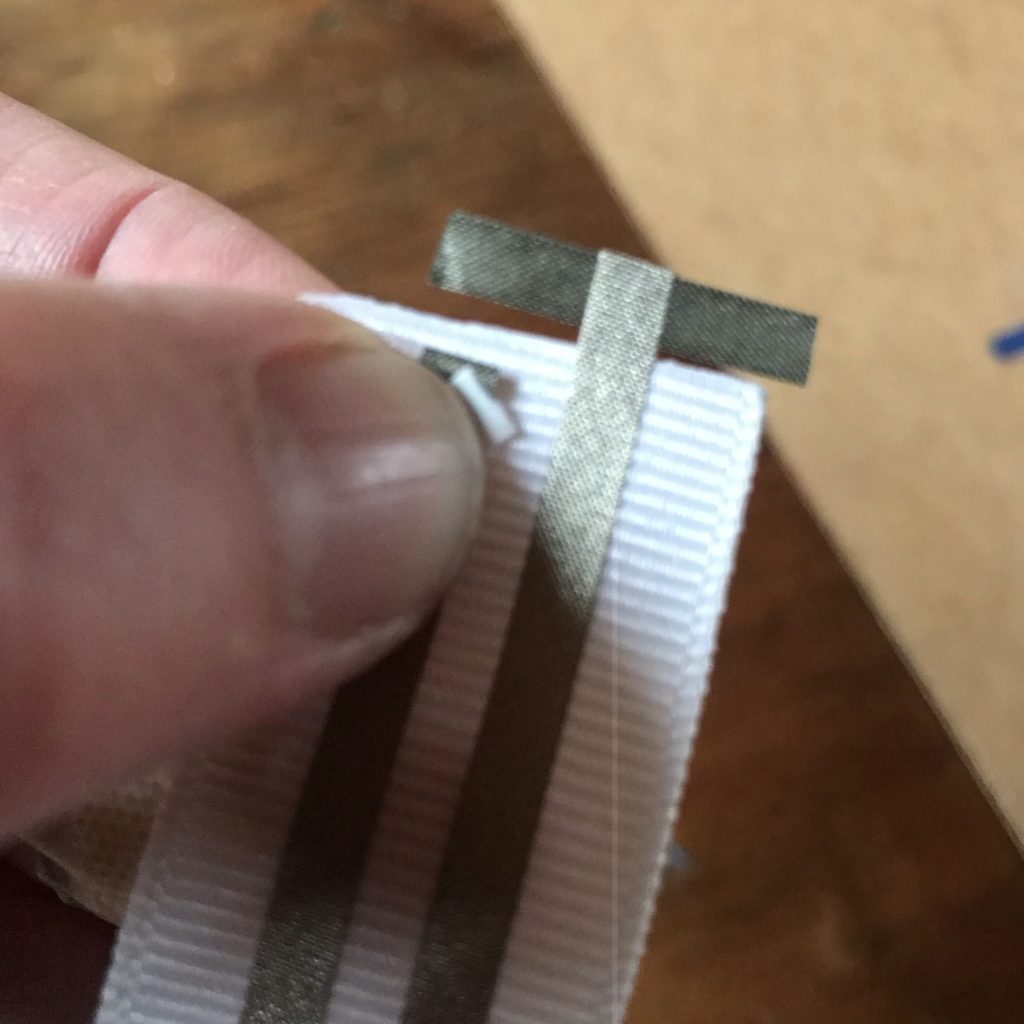
Each of your branches will need to be connected to the power/ground rail.

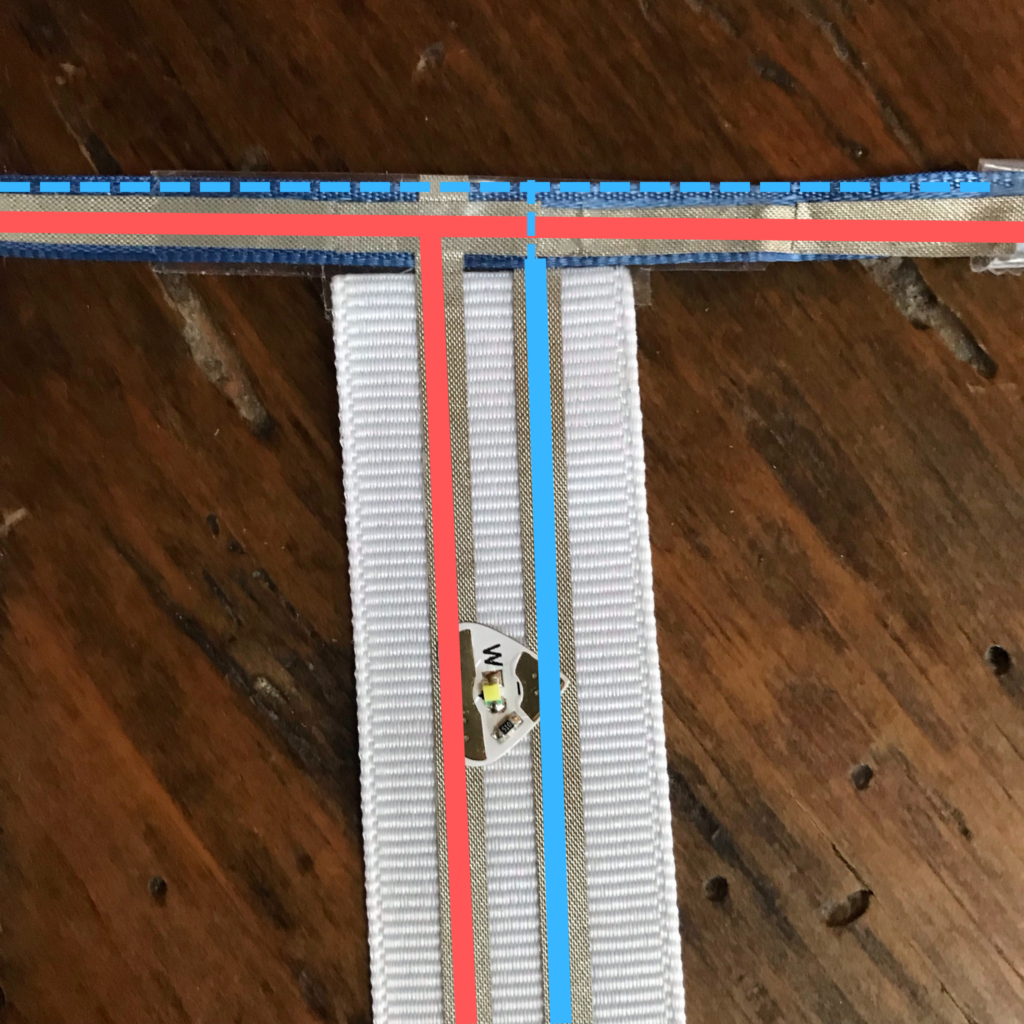
The left, positive trace of each branch will adhere to the front, positive lead of the ribbon.

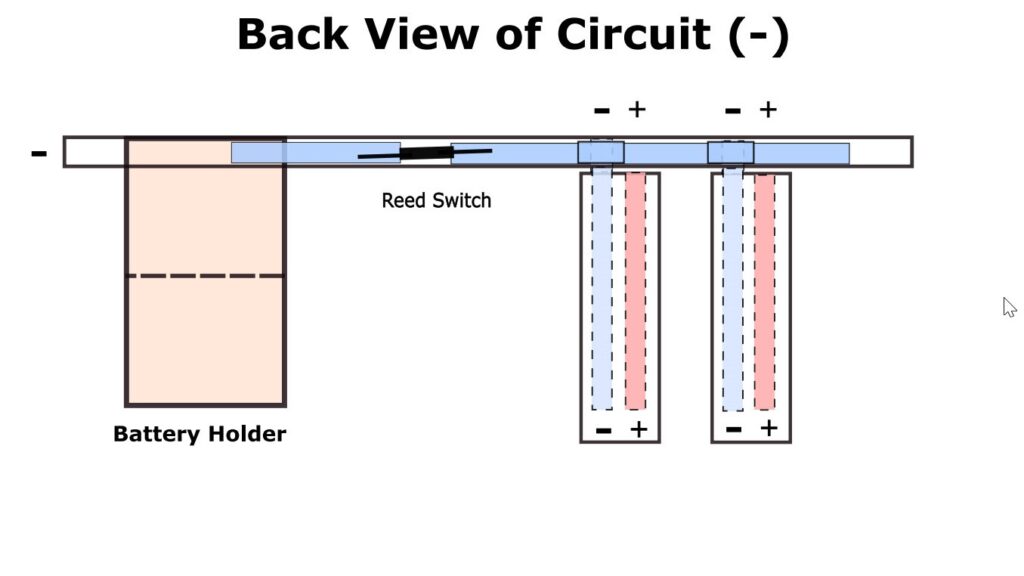
The right, negative trace of each branch will adhere to the back, negative lead of the ribbon.

Seven pieces of 1 inch wide X 3" long white ribbon lay side by side upon a wooden table.  Each has two parallel traces of conductive fabric tape adhered in the center, with enough space between the leads for a Sticker LED.
Each branch will connect to the power/ ground rail.
A 1 inch wide piece of ribbon with two parallel leads made of conductive fabric tape.  The negative lead on the right has a perpendicular piece of conductive fabric tape adhered to it with the sticky side up, to allow it to attach to the back, negative lead of a ribbon rail.
To attach the negative leads to the ground rail, adhere a conductive fabric patch sticky side up.

You will also need to add Circuit Sticker LEDs to each branch and create a paper battery holder on the right-most end of the ribbon. (To learn more, visit the Glowing Garland tutorial.)

Annotated image that shows the front, positive lead of a ribbon rail in red.  The back, negative side is implied with a dashed blue line, but is hidden from view .  A ribbon flag with two parallel leads of conductive fabric tape (the positive on the left and the negative on the right) connects to the ribbon rail.  The negative lead connects with the ground rail on the back side of the ribbon without touching the power rail on the front side.  A paper battery holder with positive and negative traces connects with the ribbon rail on the right-most end of the ribbon rail.
The negative lead on this LED branch (blue) connects with the ground rail (blue) on the back side of the ribbon, without touching the power rail on the front side (red).
Close up photo of the positive side of a ribbon rail and a ribbon flag with two parallel traces running down the center.  A single Sticker LED bridges the gap between the positive (left) and negative (right) traces.  The positive and negative traces do not touch one another.
The positive and negative traces should not touch one another.
Color coded photo of the positive side of a ribbon rail marked in red. 
A 1inch wide ribbon flag has two parallel traces running down the center.  The left, positive trace is red. 
The right, negative trace, is blue.  Two Sticker LED bridge the gap between the positive (left) and negative (right) traces.  The positive and negative traces do not touch one another. Color coded connections for a blue paper battery holder are also shown.
Use sturdy paper to create a folding battery holder to the right-most end of your ribbon.

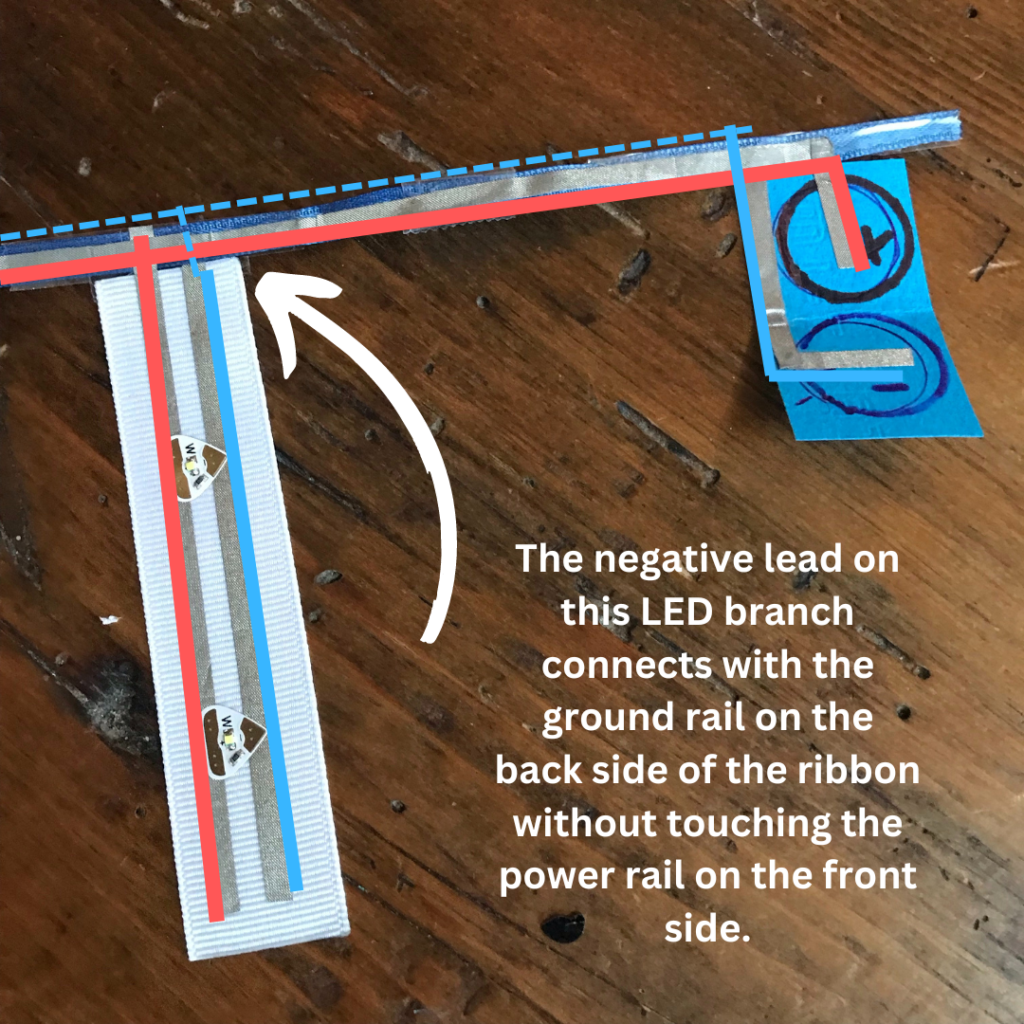
When adding the reed switch, you’ll need to create a gap in the negative lead, on the back side of the ribbon, between the battery holder and the first light-up branch. (Please refer to the back view of the circuit diagram for a clear representation.)

Before moving on to the next step, test the circuit by inserting a coin cell battery into the battery holder and hold a magnet up to the reed switch.

Close up of the backside of the battery holder (on the left this time) and the negative 1/4" ribbon rail. The battery holder is open and no conductive tape is shown on the holder itself, except at the very top where it attaches to the rail. A break in the rail tape is bridged by a reed switch.
Adhere the reed switch to a gap in the negative lead, between the battery and first light-up branch.
Close up of the positive side of the ribbon rail. A flag with two lit LED stickers is shown, and the magnetic pretzel decoration is shown activating a concealed reed switch to test the circuit. The battery holder (now on the right) is held closed with a small red binder clip.
Test the circuit by inserting a battery and placing a magnet over the reed switch.

Step 2: Reinforce the Circuit

If everything is working correctly, and you are pleased with the spacing of the branches, lay the circuit flat and apply Scotch tape on top of each branch at the points where they connect to the power and ground rails. This will add strength and durability to the connections, which will be important when you start decorating your chandelier. 

Close-up, color coded LED branch attached to the ribbon rail. The positive lead on the front side of the ribbon is red.  The negative lead on the back side of the ribbon is blue. S single LED sticker bridges the gap.  The positive and negative traces do not touch one another.
Reinforce the connections where they connect to the power and ground rails; do this for the reed switch as well.

Do the same with the the reed switch connections. Adding clear tape on top of the reed switch connections will keep all of the connections secure, preventing a short circuit.

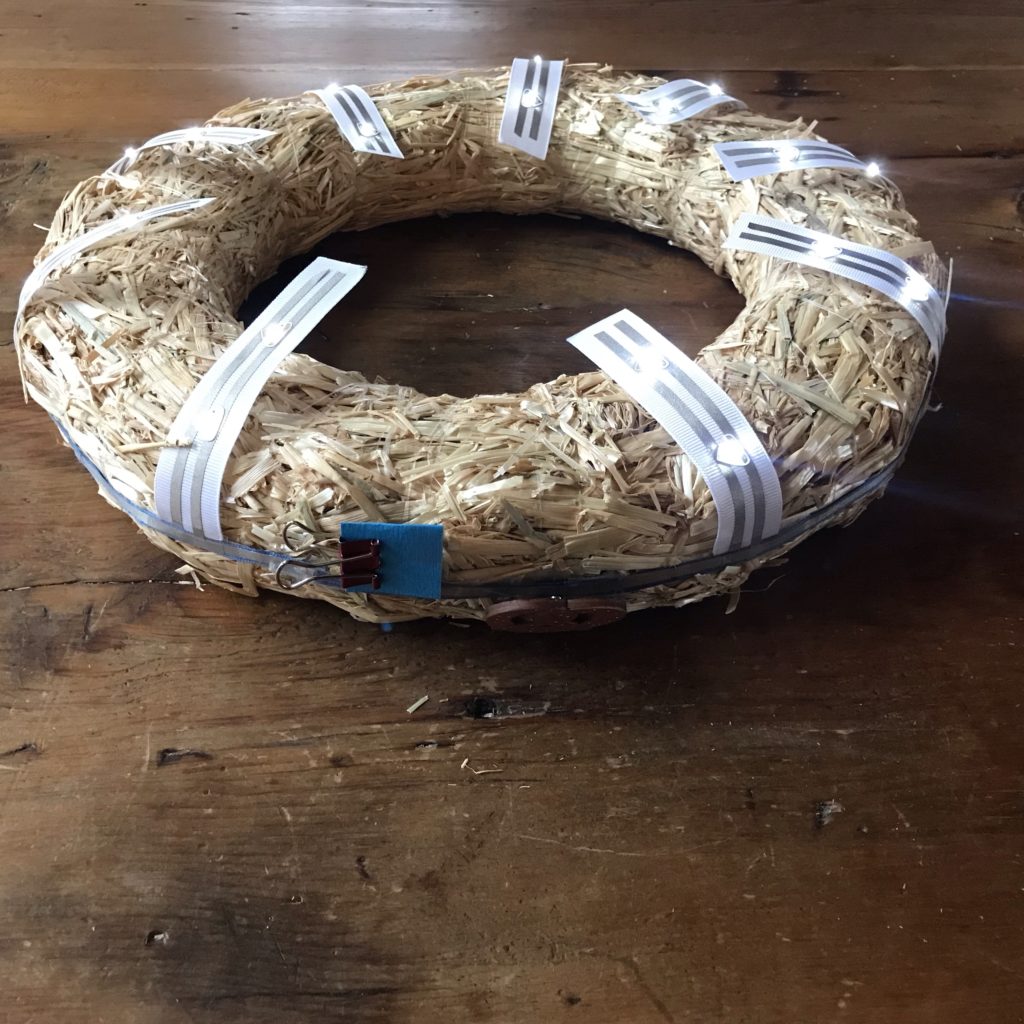
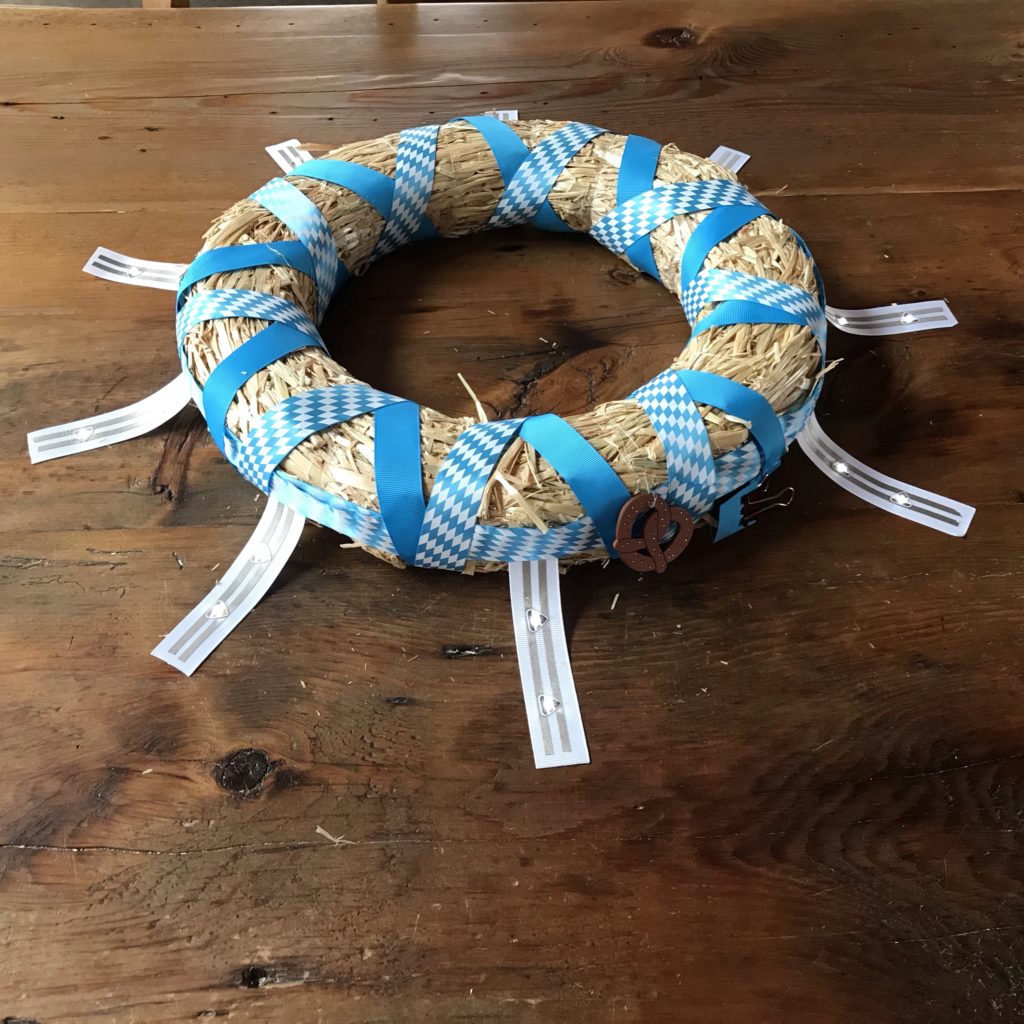
Step 3: Attach Circuit to Wreath

To attach the branching circuit to the wreath, apply pieces of double-sided tape all around the center of the wreath. This will be a bit messy if you are using a straw wreath. 

A straw wreath with double-sided tape around its circumference sits upon a wooden table.
Apply pieces of double sided tape all around the center of a wreath.

Then, starting from the battery and reed switch end of the circuit (the right side), adhere the circuit to the wreath bit by bit, keeping it as centered as possible. 

A blue paper battery holder hangs down from a ribbon rail that has conductive fabric tape on both sides of it.
Starting from the battery holder, adhere the circuit to the wreath bit by bit, keeping it as centered as possible.

Once the circuit is attached all the way around, turning the wreath upside down upon a flat surface can make it easier to keep the branches from twisting. Test the circuit again. If you need to trim any excess ribbon, do so now.

A straw wreath form with a  1/4" ribbon rail adhered to its outer perimeter, is placed upside down upon a wooden table.  Nine glowing ribbon flags, are draped over the wreath.  A paper battery holder is held shut with a red binder clip.
Turning the wreath upside down upon a flat surface can make it easier to keep the branches from twisting
A green foam wreath with a ribbon rail wrapped around its outer perimeter has seven glowing, ribbon flags attached like the rays of the sun.  The LEDs turn on each time a hand moves a magnetic pretzel over a spot on the ribbon rail that is concealing a reed switch.  When the hand moves the pretzel away from the ribbon rail, the LEDs turn off.
Test the circuit using the magnet before moving forward.

Step 4: Conceal or Disguise the Circuit

For my first Oktoberfest-inspired paper circuit chandelier, I wanted to mimic the look of the chandeliers I’ve seen hanging in a German fest tent. To achieve this look, I wrapped a strand of faux evergreen around a thin, floral foam wreath to add body and conceal the circuit. 

A green foam wreath form, with seven glowing ribbon flags protruding from its outer perimeter, sits upon a wooden table.
Test the circuit after adhering it to the wreath.
A strand of pine tinsel if wrapped around the green foam wreath form to disguise the location of the ribbon rail.
To conceal the circuit, you can use faux greenery to wrap around a thin foam wreath.

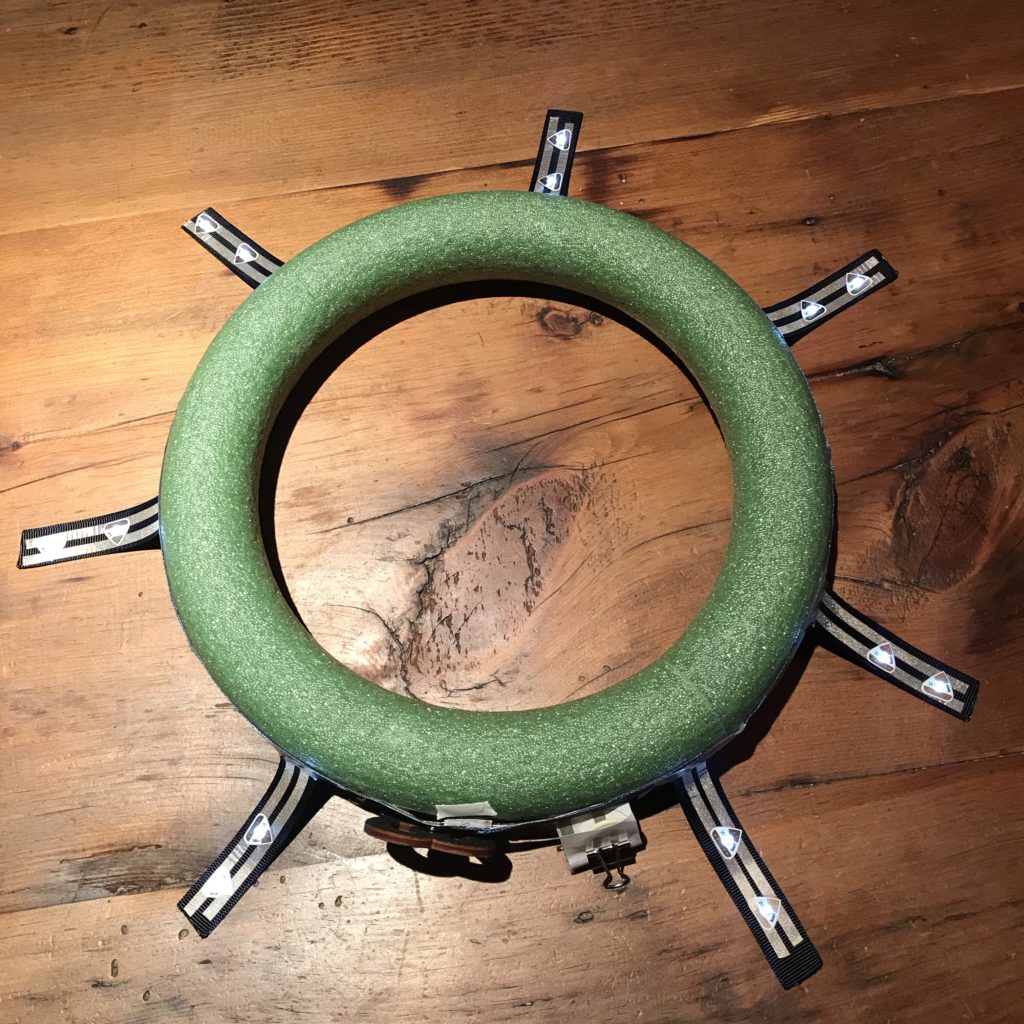
Be careful during this step to keep your branches from getting pinched underneath as you wrap. Since I used short branches for my Circuit Sticker LEDs, I opted to leave them uncovered.

A wreath form completely wrapped in fake pine tinsel lays upon a wood table.  Seven glowing LED flags extend from the outer perimeter of the wreath.  A magnetic pretzel made of wood has been tied to the wreath near a concealed reed switch, to keep it from falling off.
I tied a magnetic pretzel around the wreath, near the reed switch, to keep it from falling off.
A wreath form wrapped in fake pine tinsel is shown in front of a Bavarian flag.  Glowing ribbon flags extend from the wreath's outer perimeter.  Sticker LEDs bridge the gap between parallel leads running down the center of each flag.
I left the branches uncovered, because they were short enough to look good that way.

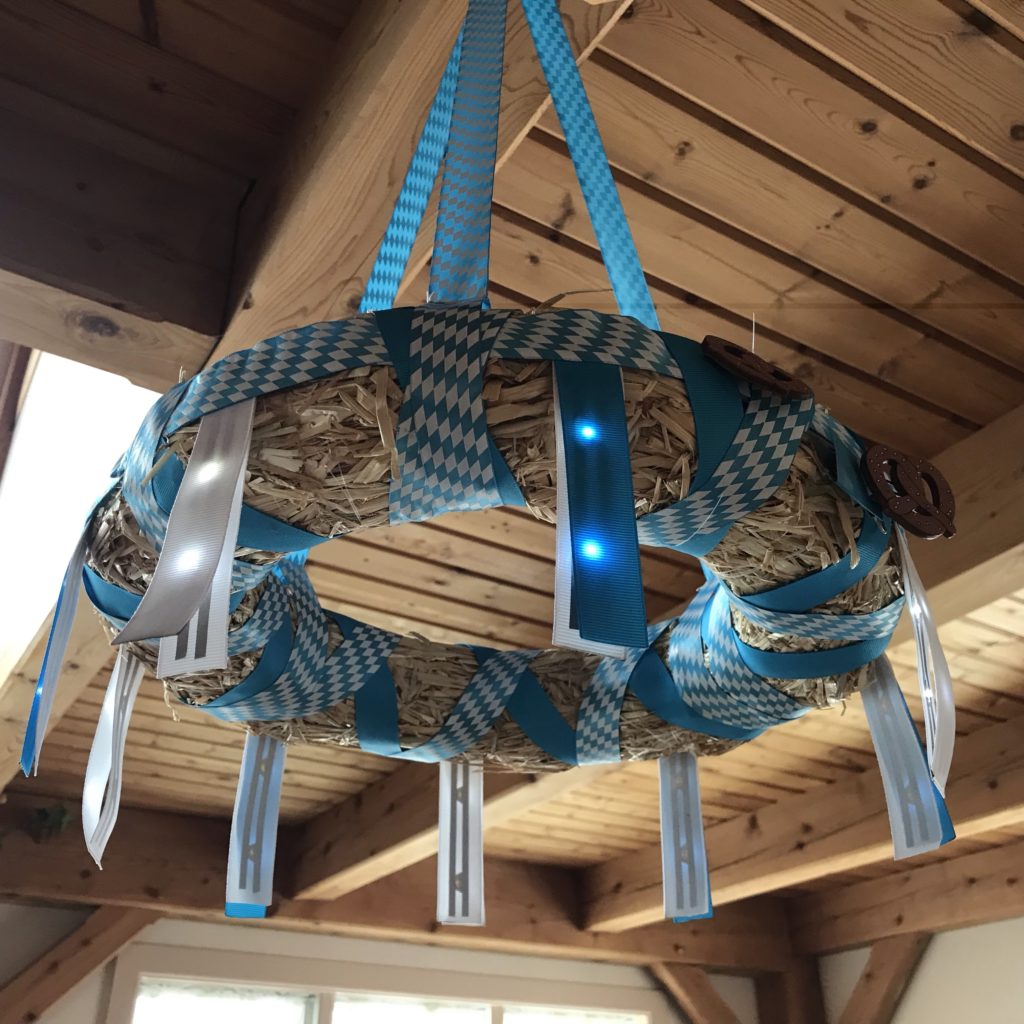
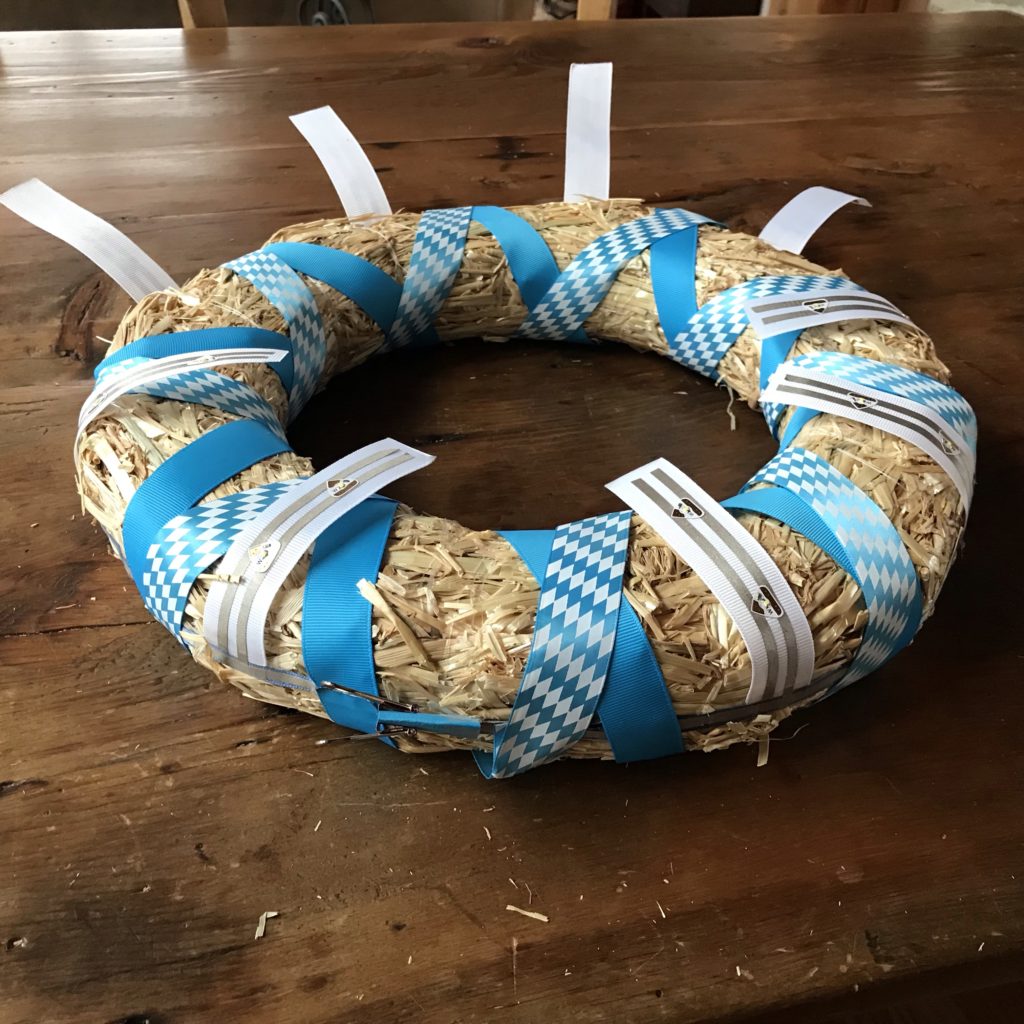
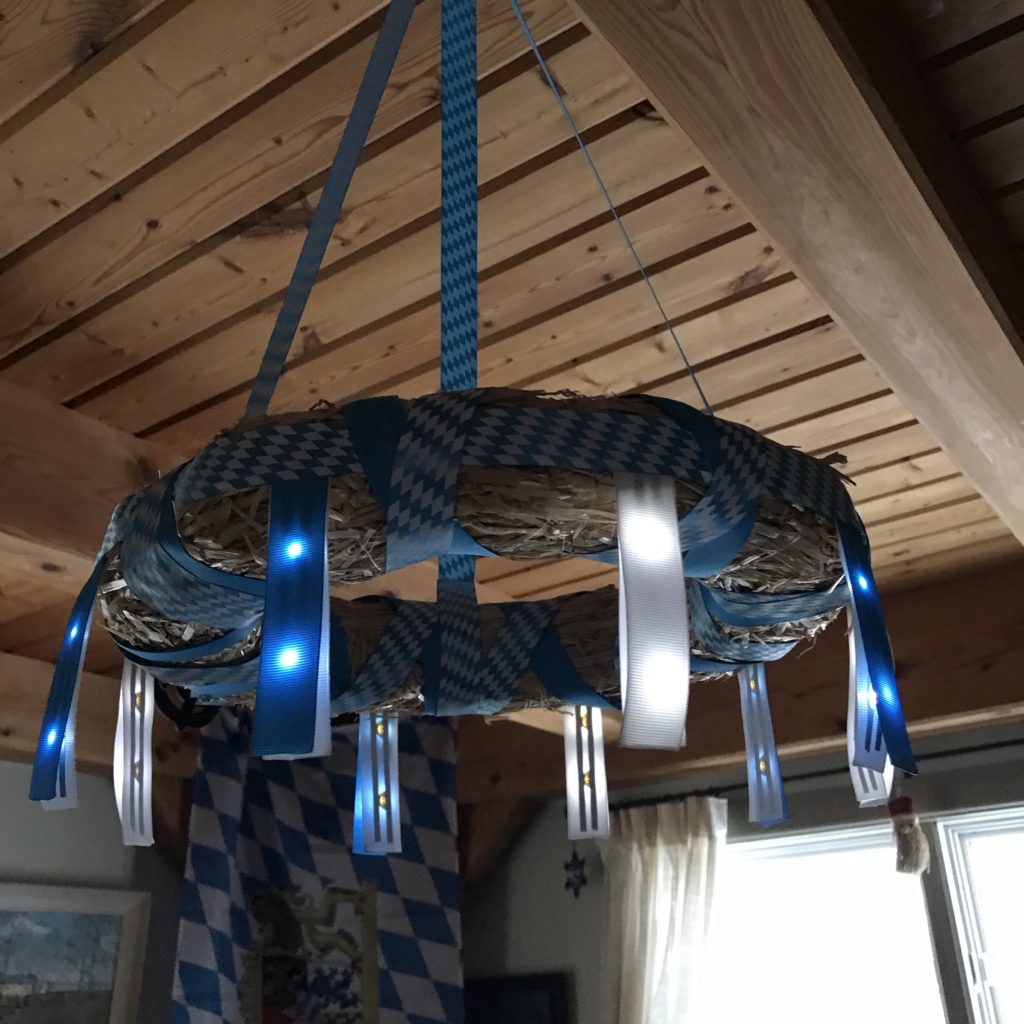
For my second chandelier, I used a larger straw wreath, wrapping ribbon around it to disguise the circuit and add decorative detail. For this chandelier, I used longer branches, which I ended up covering with ribbon in alternating colors, for a more diffused lighting effect.

Paper Circuit Chandelier
Starting near the battery, wrap decorative ribbon all the way around the circumference of the wreath.
Paper Circuit Chandelier
Use double sided tape to seamlessly connect the wrapped ribbon on one end.

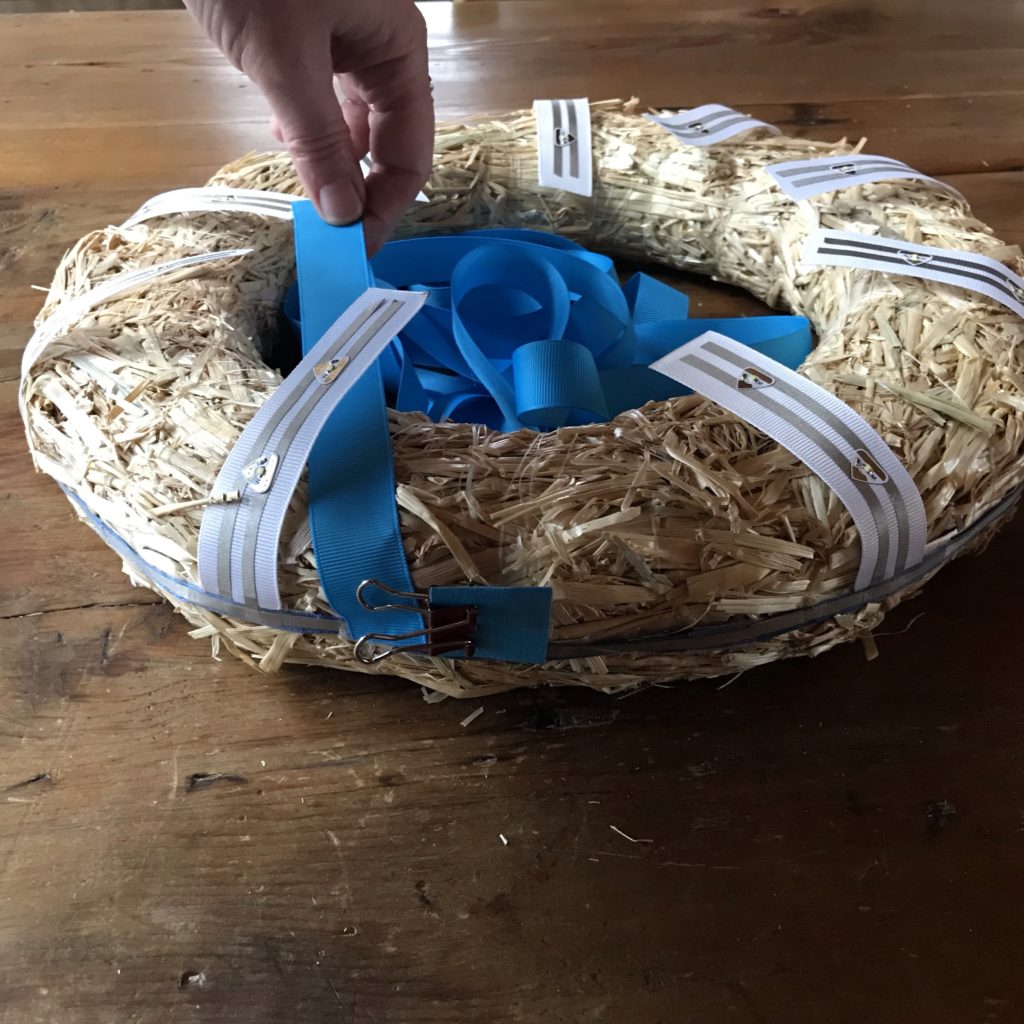
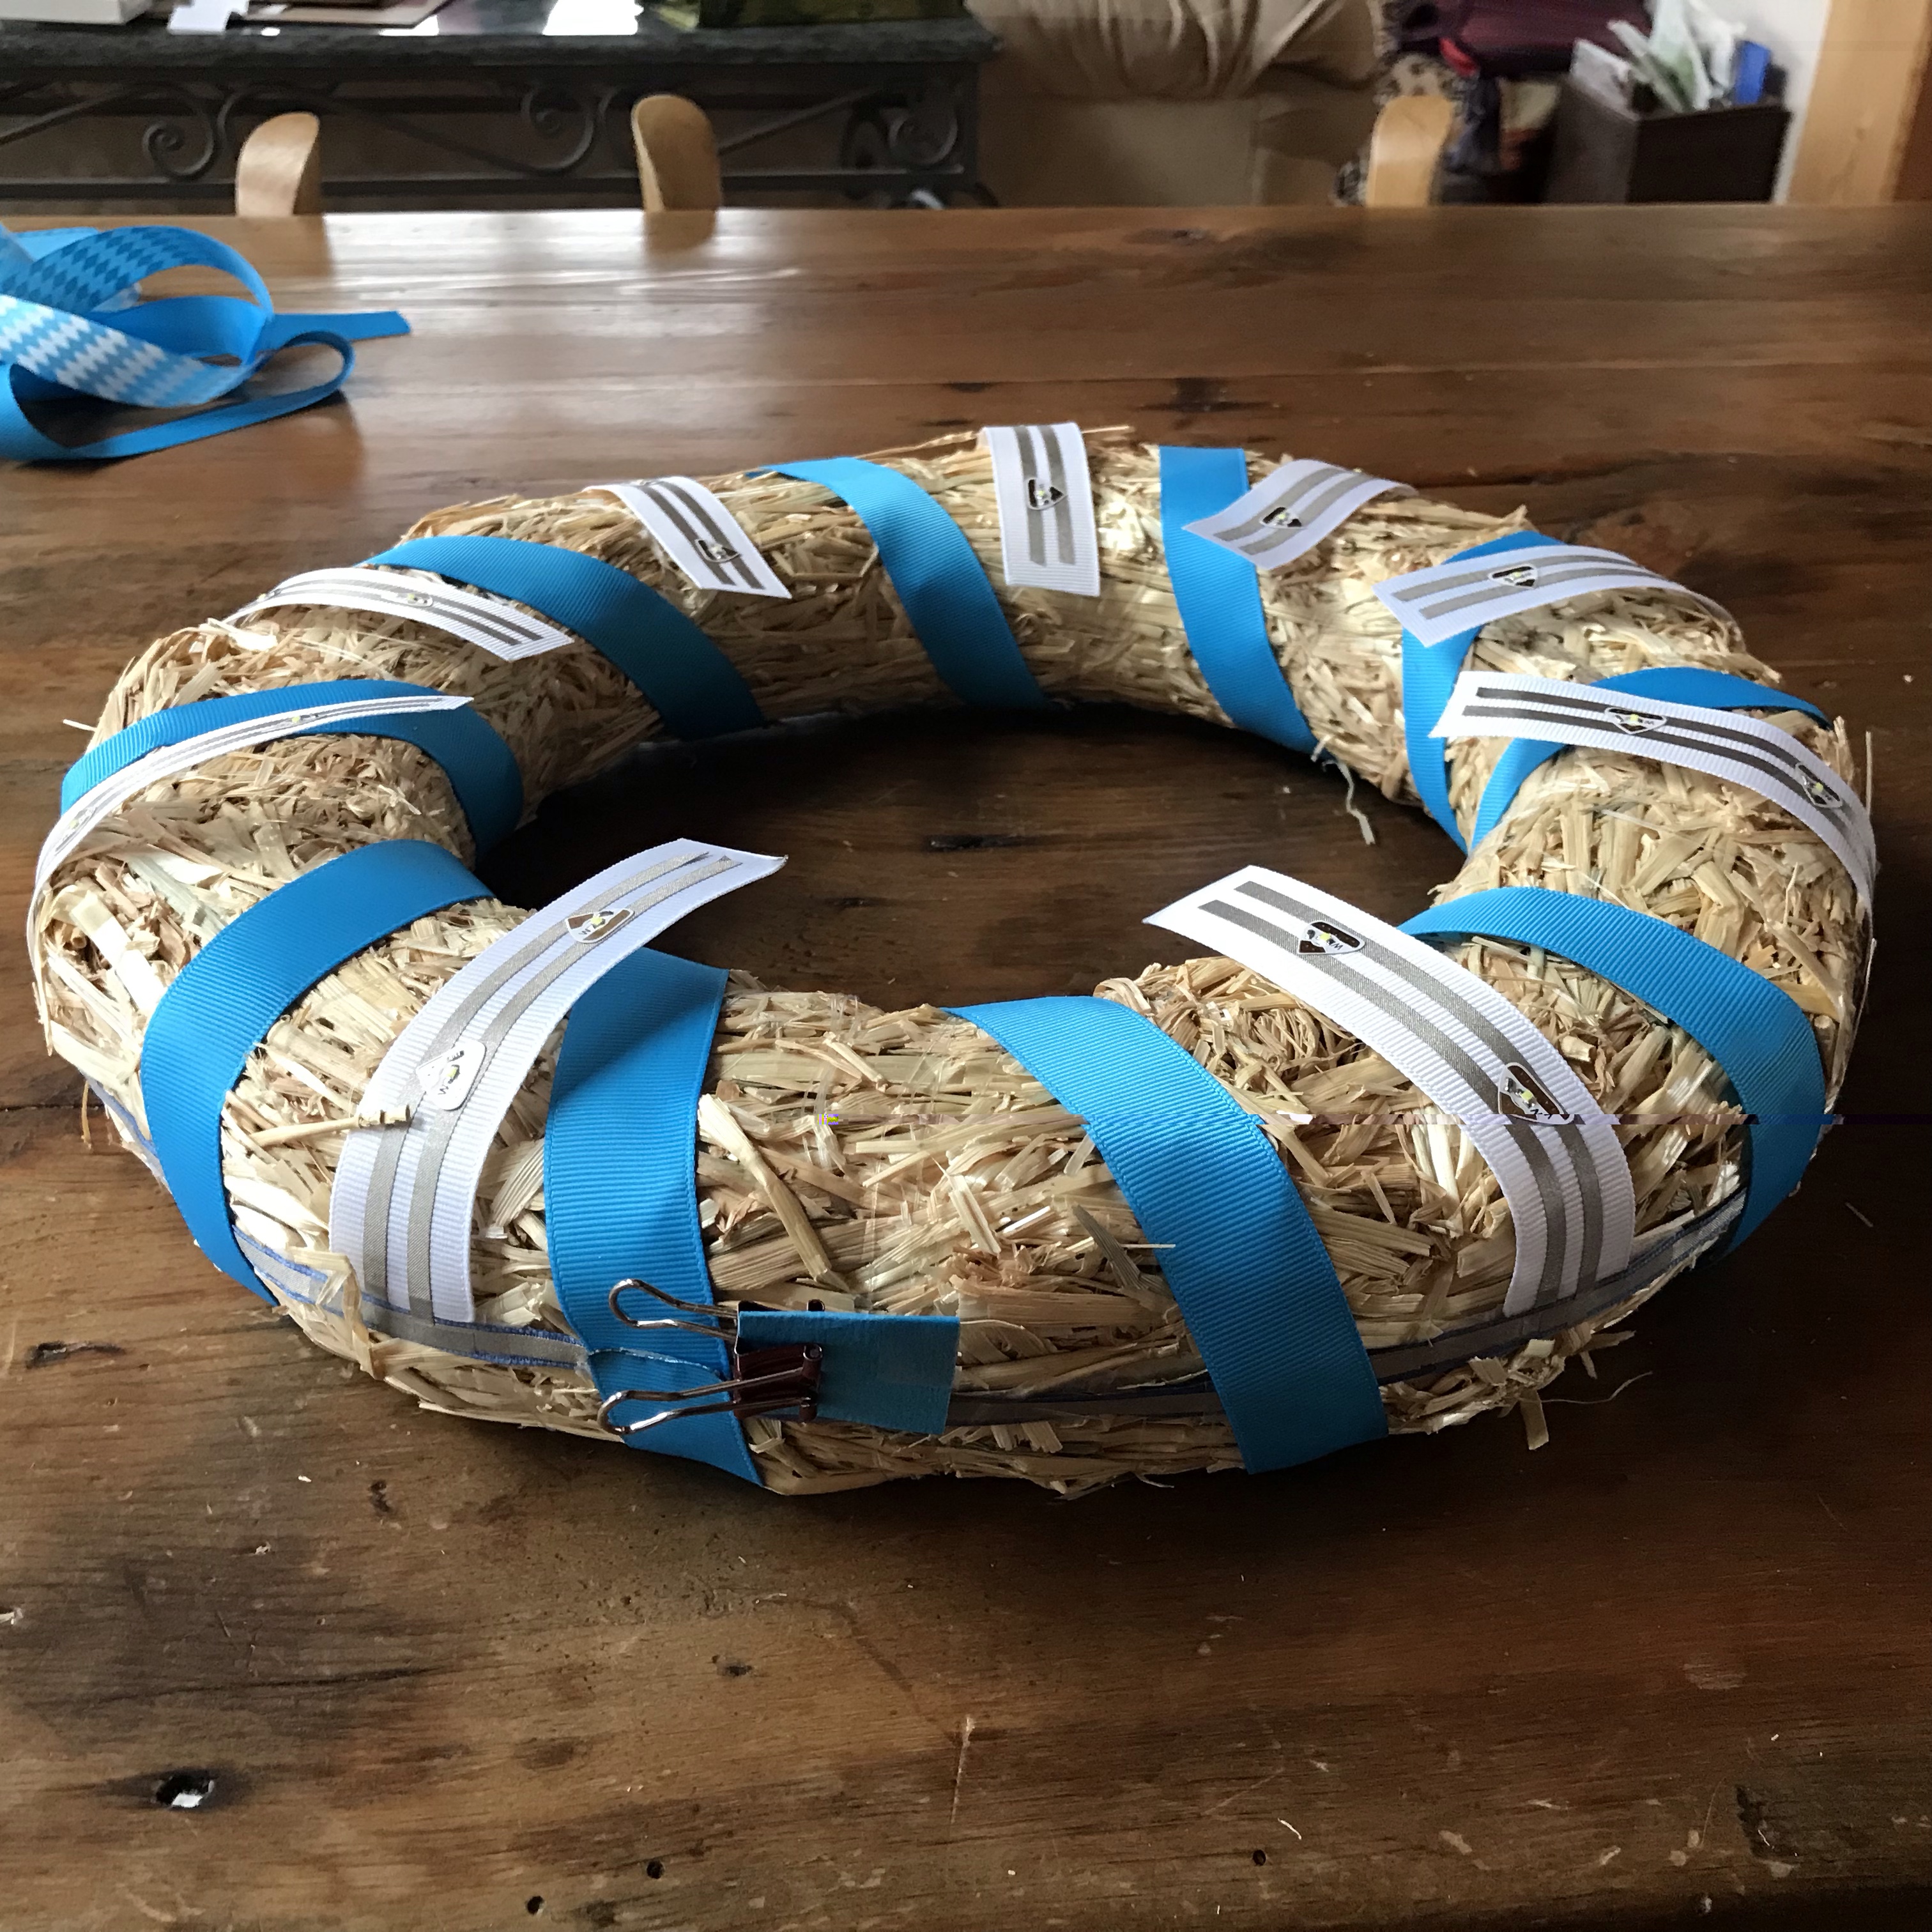
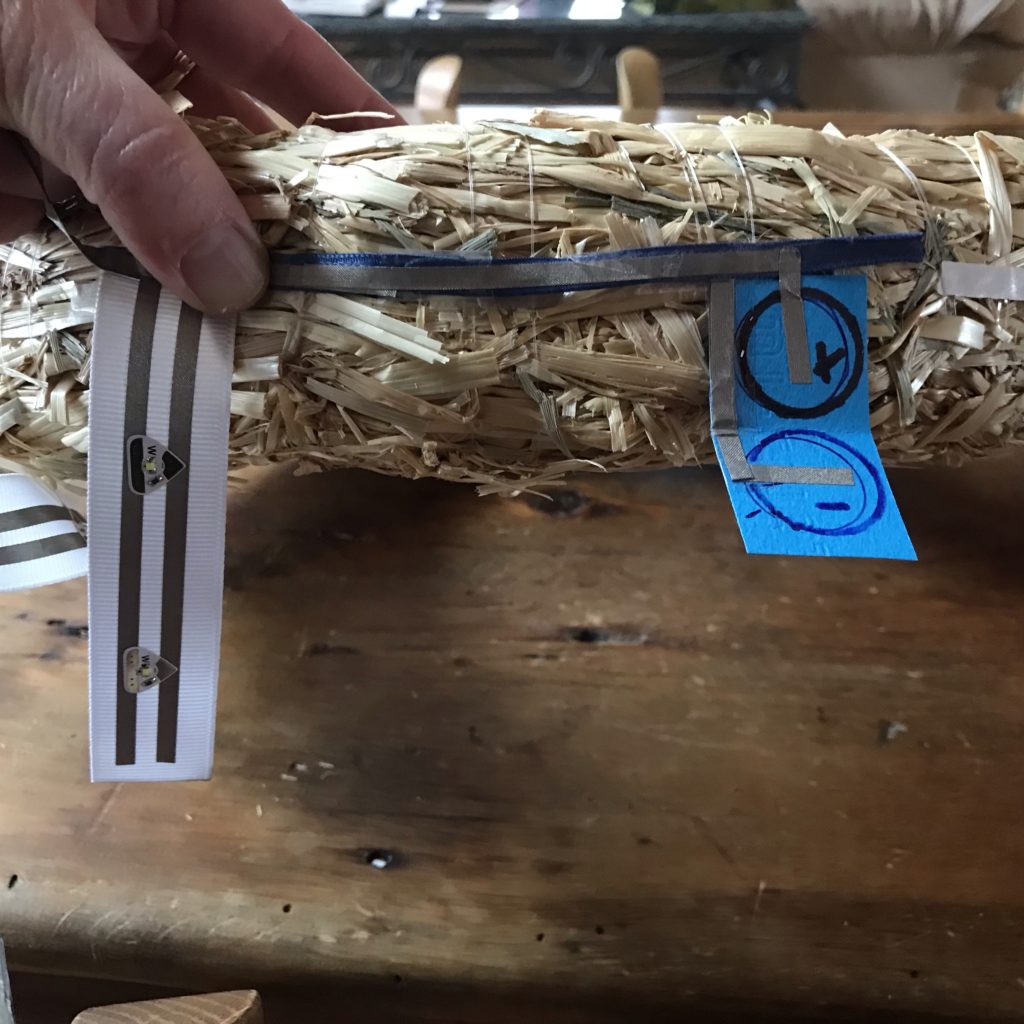
After wrapping the decorative ribbon around the wreath, I went back and added another piece under the wrappings and over the power/ ground rail.

Paper Circuit Chandelier
Cover the power/ ground rail by wrapping a decorative ribbon over it.
Paper Circuit Chandelier
Tie the magnetic embellishment (I used a magnetic pretzel) to the wreath with fishing line or string to keep it secure.

To keep the magnet from falling off of the wreath, I used a piece of fishing line to tie it to the wreath, near the reed switch. This added a decorative element and made it easier to quickly turn the wreath lights on and off.

Step 5: Add Hangers

Once the base of your chandelier is complete, it’s time to add the ribbon you’ll be using to hang it. First, determine how long you want your chandelier to be and then cut 3 pieces of ribbon long enough to fully wrap around the base, accounting for a little extra to fold around a metal D-ring.

Next, fold about an inch of each piece of ribbon over the D-ring and secure it with a safety pin or a needle and thread.

Paper Circuit Chandelier
Fold an inch of each piece of ribbon over the D-ring and secure it.
Paper Circuit Chandelier
You can use a safety pin to keep the layers together.
Paper Circuit Chandelier
You can also sew the pieces together using a needle & thread.

Once the D-ring is secure, apply double sided tape to the ends of the ribbons on the top side.

Three pieces of 1 inch wide decorative ribbon have strips of double sided tape adhered to one end.
Once the D-ring is secure, apply double sided tape to the ends of the ribbons on the top side.

Starting on the outside of the wreath, bring each piece of ribbon up through the center of the wreath, wrap around it to meet the rest of the ribbon, and attach the sticky ends to form equidistant loops around the wreath.

Paper Circuit Chandelier
Three equidistant loops of ribbon wrap around a green wreath to help secure the ribbons to a brass D ring.
Paper Circuit Chandelier
Three equidistant loops of ribbon wrap around a straw wreath to help secure the ribbons to a brass D ring.

Secure the connections with small safety pins or a needle and thread.

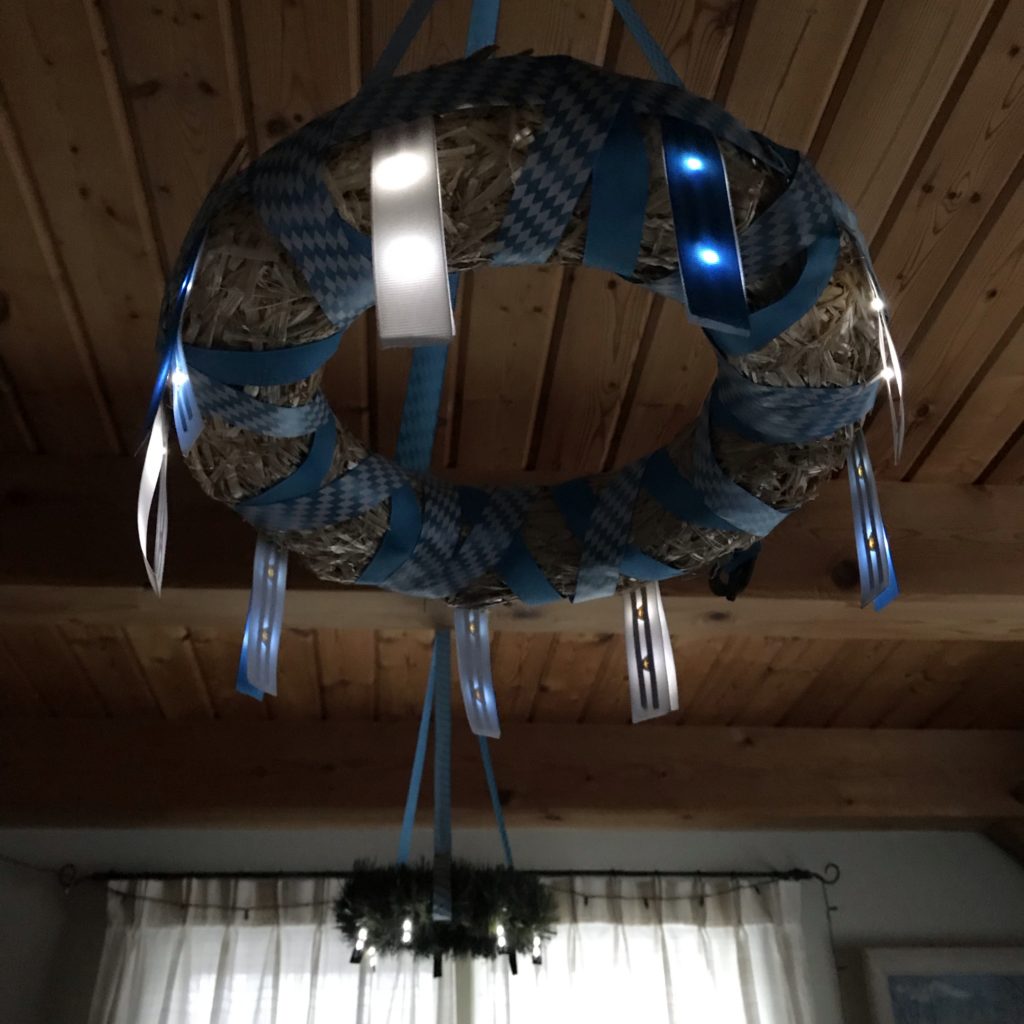
Step 6: Hang the Chandelier

Once you’ve put it all together, hang it up and enjoy!

A wreath wrapped in fake pine garland is suspended from a wooden ceiling.  Two glowing LED flags hang down from the outer perimeter of the wreath.  A wooden pretzel decoration is attached to the center of the wreath.
A glowing paper circuit chandelier, wrapped in fake pine garland, hangs from a wooden ceiling.

Ideas for Remixing this Project

Your only limit is your imagination!  

Lighting like this could be a fun and easy way to add whimsy to a child’s bedroom, a holiday celebration, or a classroom reading nook. 

Imagine a book-lover-inspired chandelier, or one reflecting the setting or characters of a beloved story book? 

Or what about a music-lover-inspired light, decorated with music notes or song lyrics?

How might you adapt and remix this project to make it your own?

Gallery

Similar Posts You Might Enjoy

Pop Up Book

Munich Pop Up Book

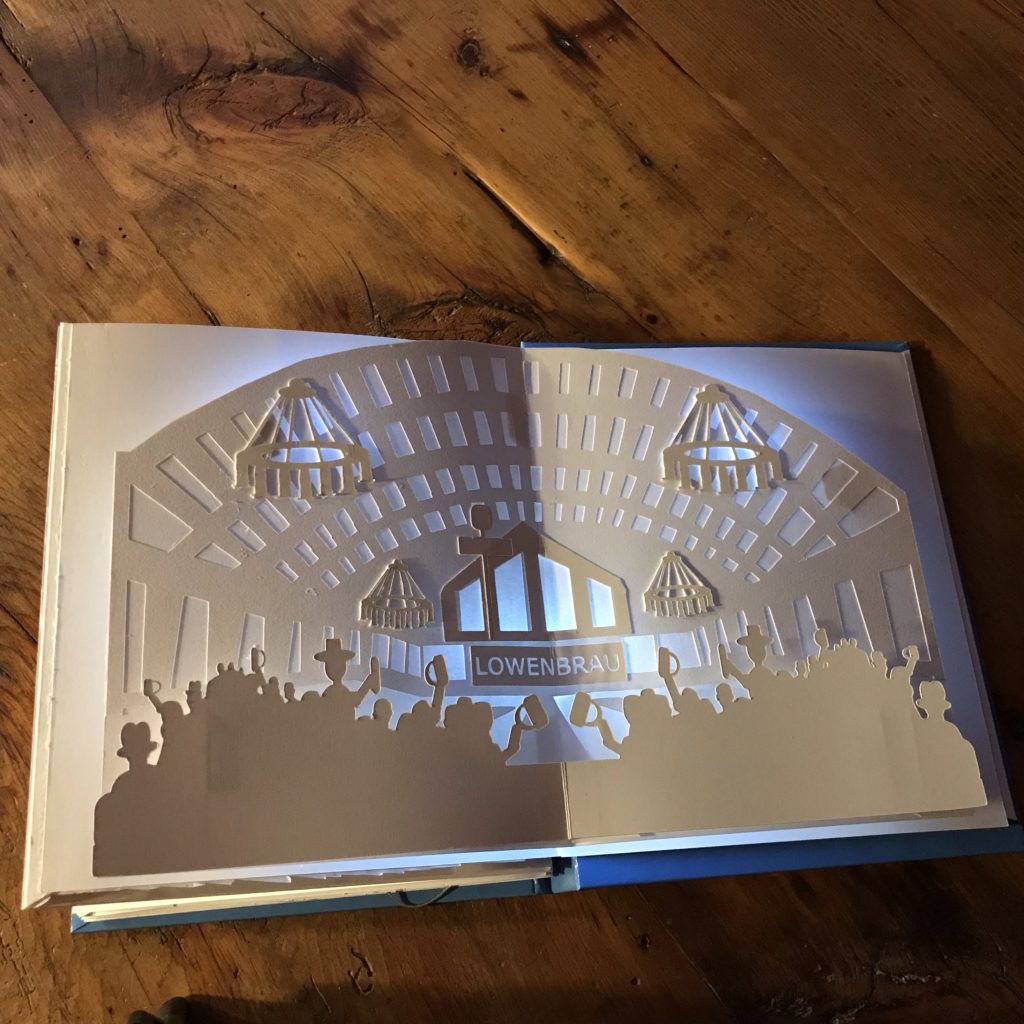
See how Jill Dawson adds Circuit Sticker LEDs to light up a pop up book inspired by the German city of Munich.

Solar House

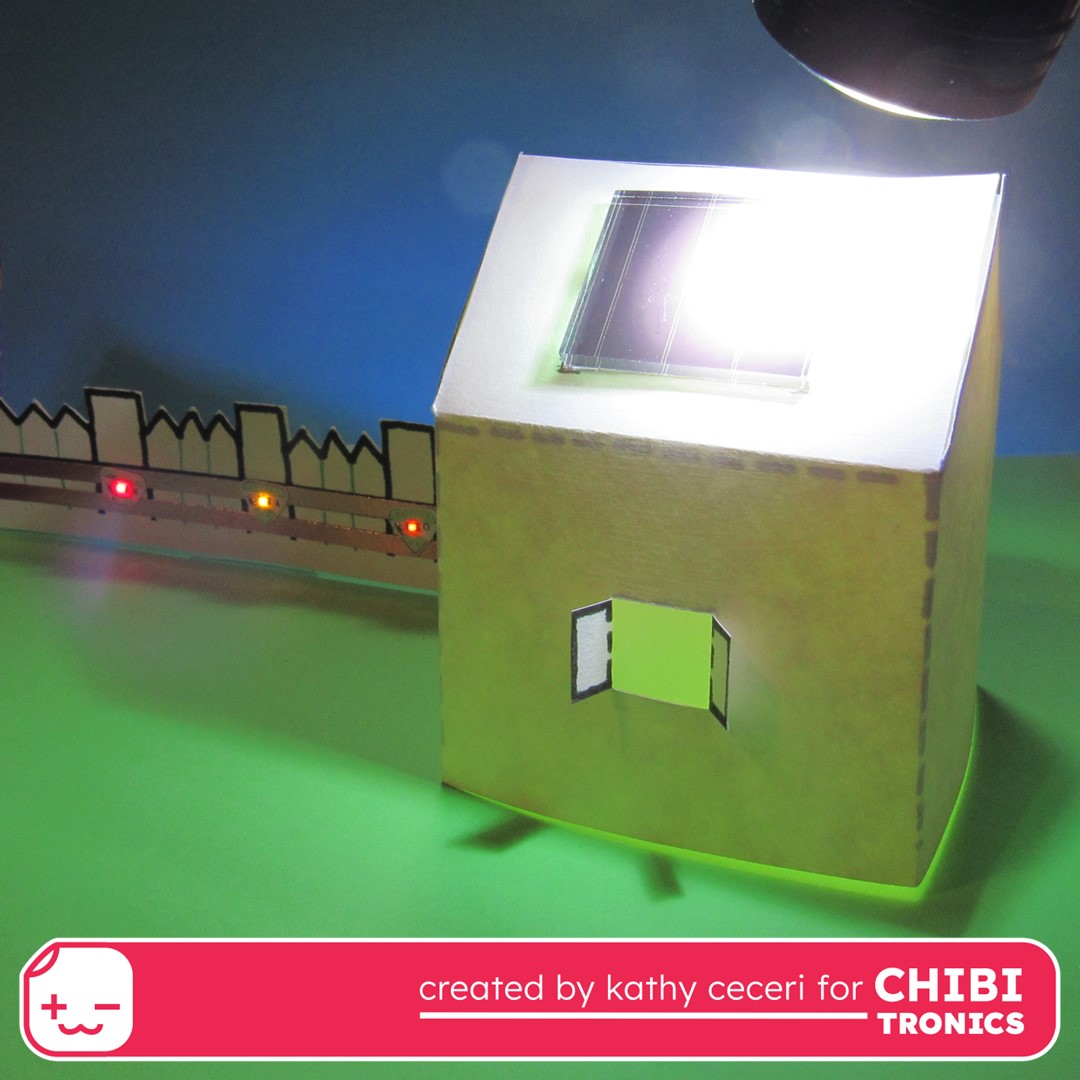
See how Kathy Ceceri uses a solar panel and Circuit Sticker LEDs to light up a paper house and garden, without batteries.

Glowing Garland

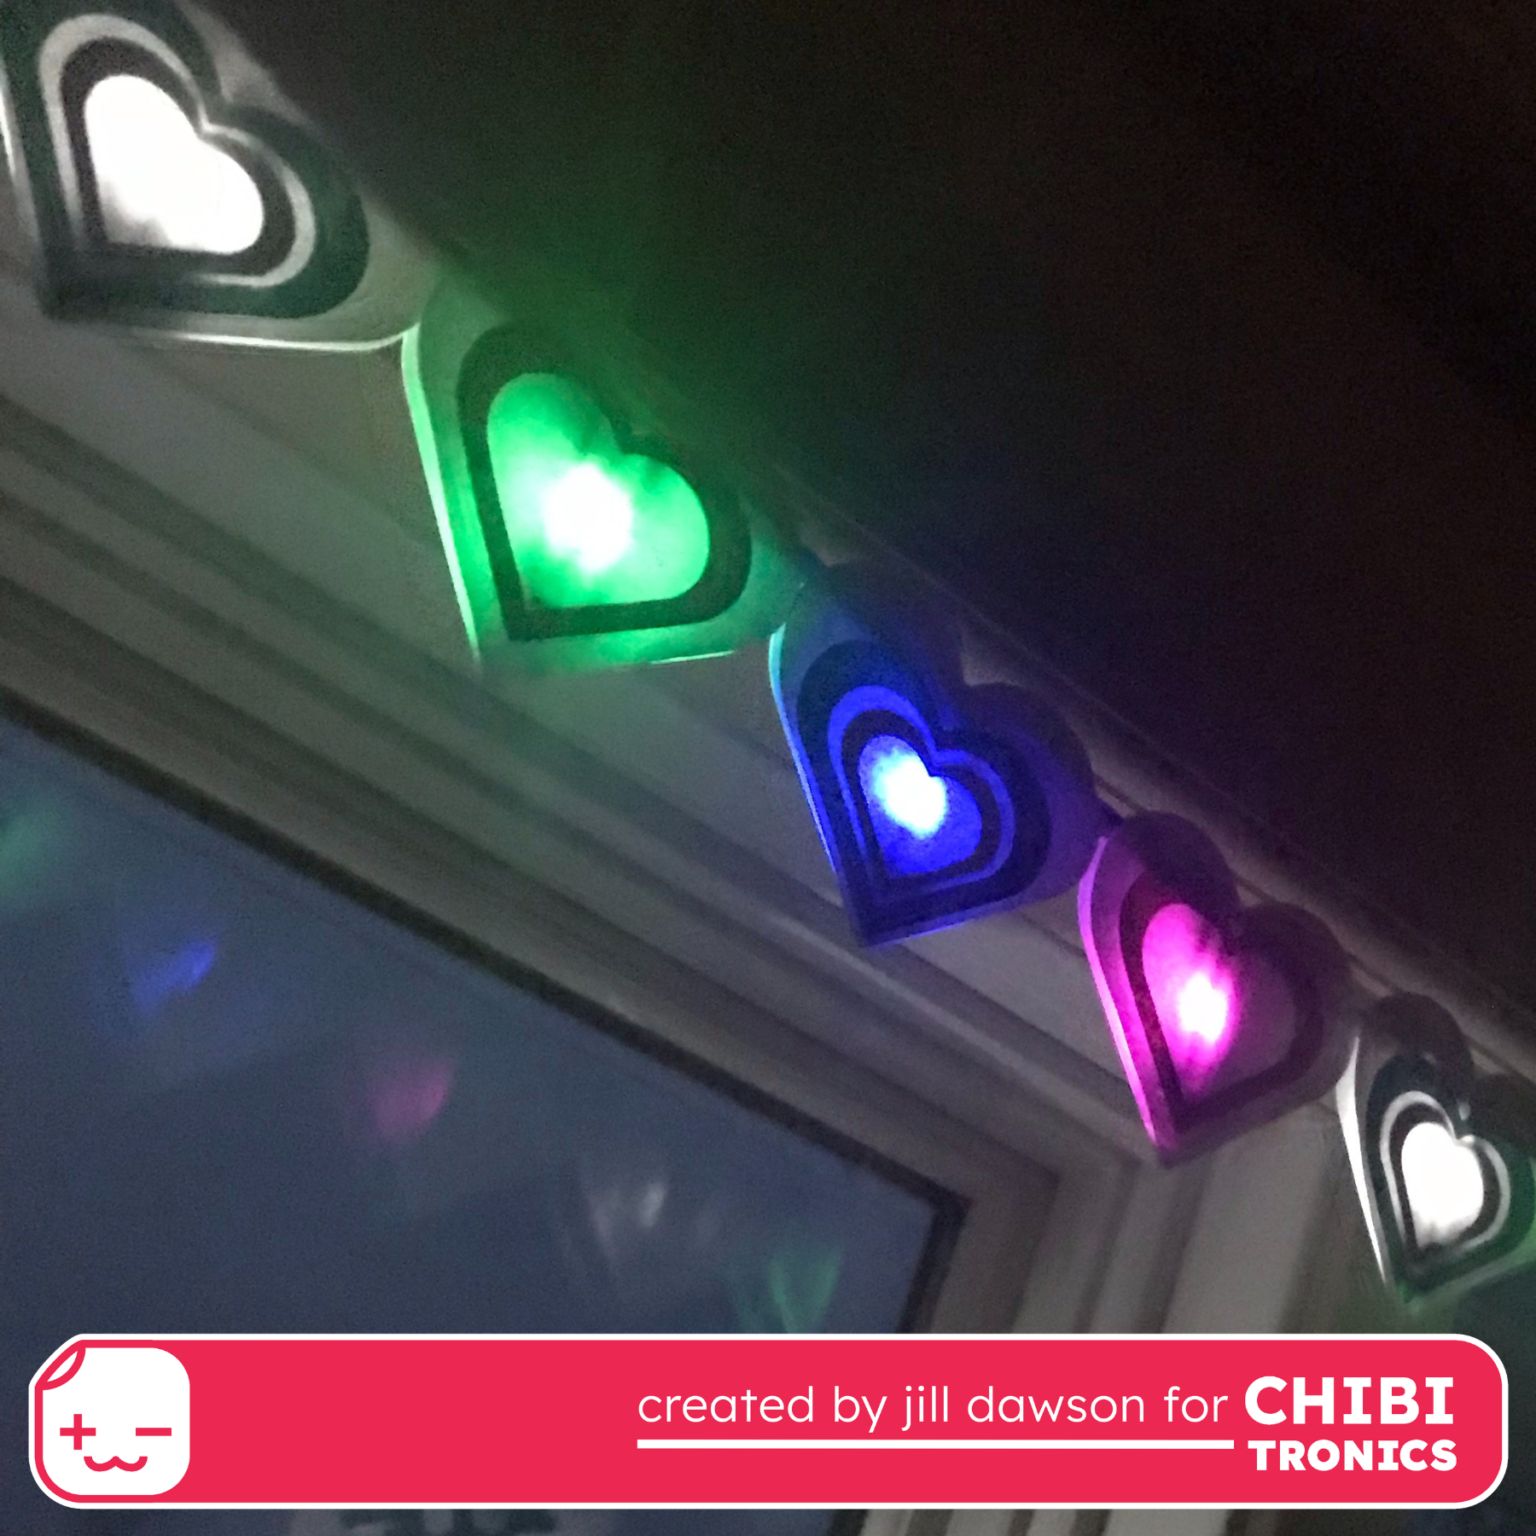
See how Jill Dawson adds a reed switch and magnet to create a glowing garland you can quickly turn on and off.

Scroll to top