Garland That Glows!
In this tutorial, we’ll show you how make Glowing Garland (yes, a paper circuit streamer that lights up) with a little help from Circuit Sticker LEDs and conductive fabric tape!
Video
Related
Categories
paper circuit techniques, holiday, decoration, paper craft, STEAM Education
Have you ever made a paper chain to count down the days to a special occasion, strung popcorn on a string as a decoration, or draped streamers around a room to help celebrate a birthday? All across the world, spanning culture and time, garland has gone hand in hand with celebration! For example, floral and foliage garlands have been depicted in artwork spanning thousands of years. And colorful punched paper (papel picado) flags, lavishly strung over the streets, have long been a mainstay of Central and Latin American celebrations.
What kinds of images spring into your mind when you consider ways that garland has been made or displayed?
Do you imagine daisy chains or origami cranes? What about festive fish, cosmic stars, or gnomes holding hands?
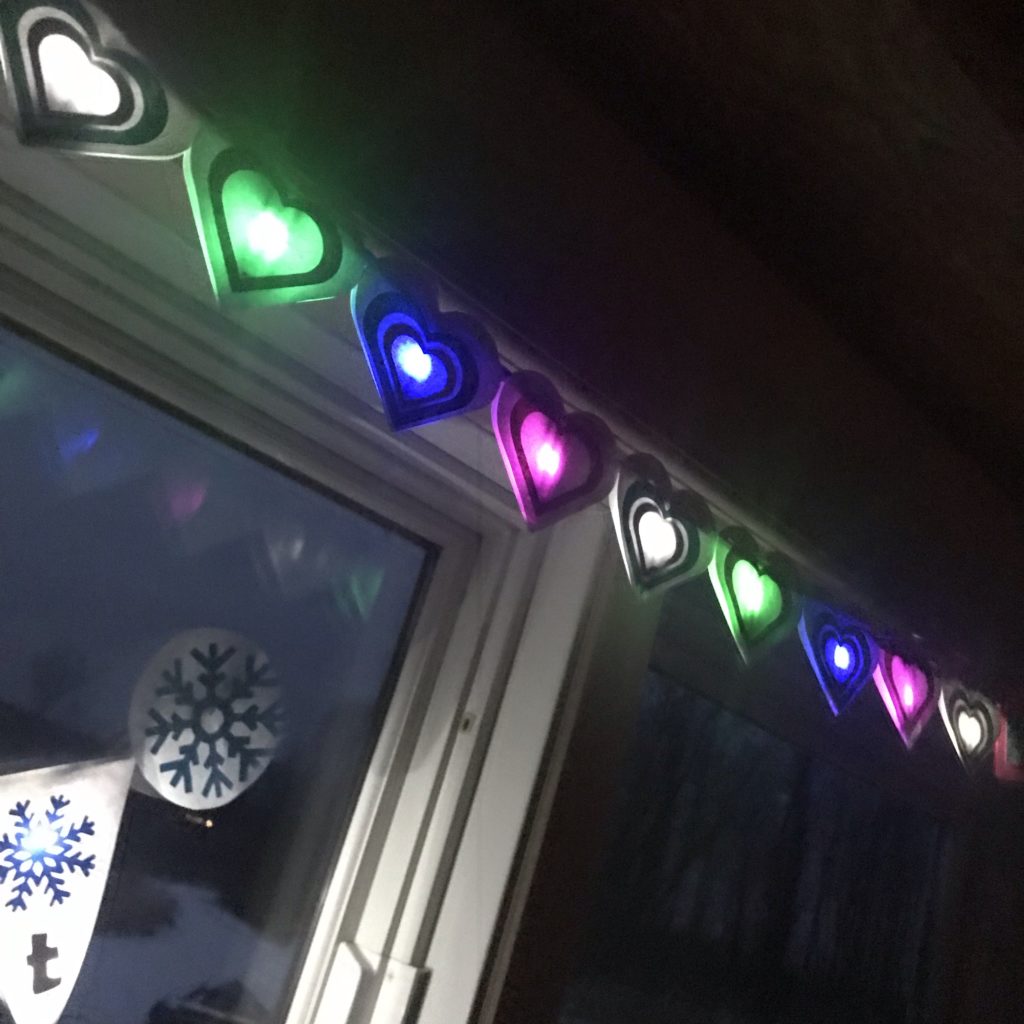
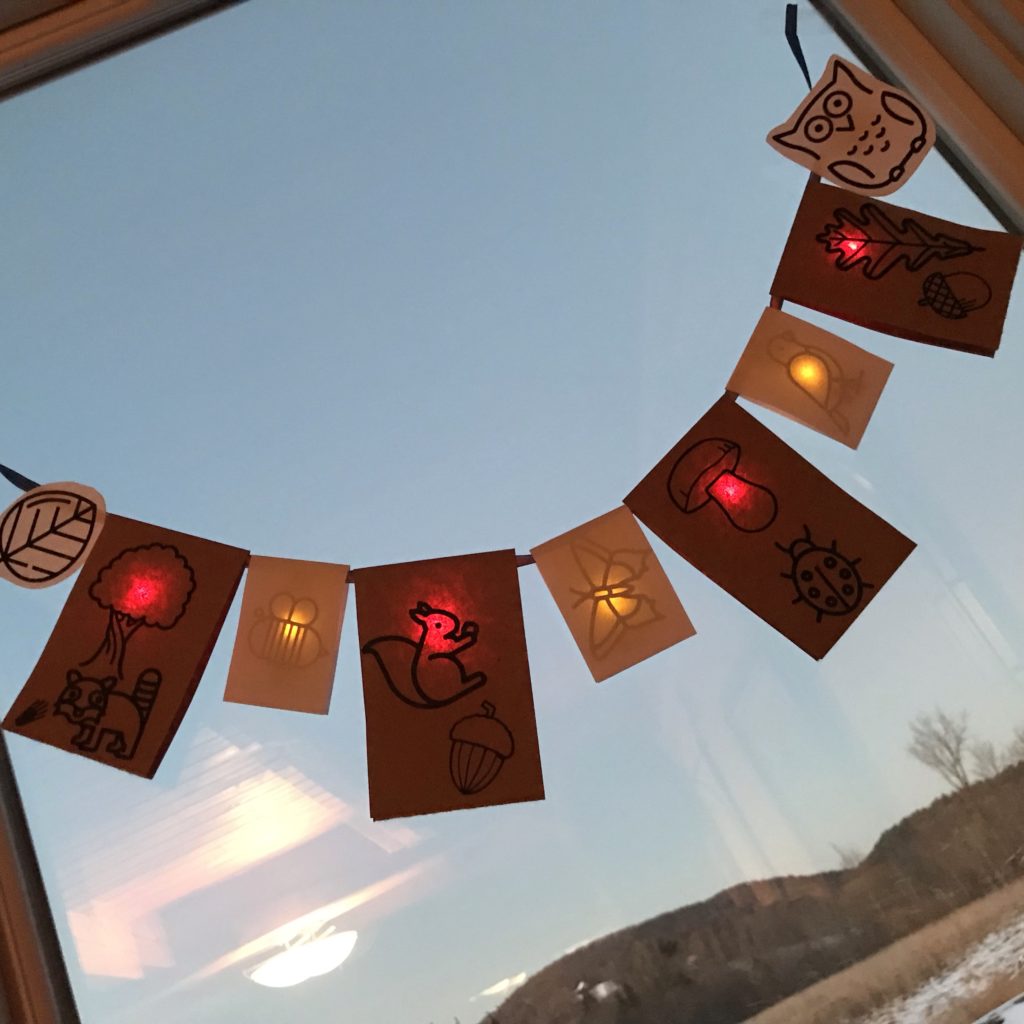
In this tutorial, we are going to show you a quick and easy way to make your own garland that lights up – glowing garland! Once you understand how to create the circuit, you can customize your glowing garland to celebrate your way!
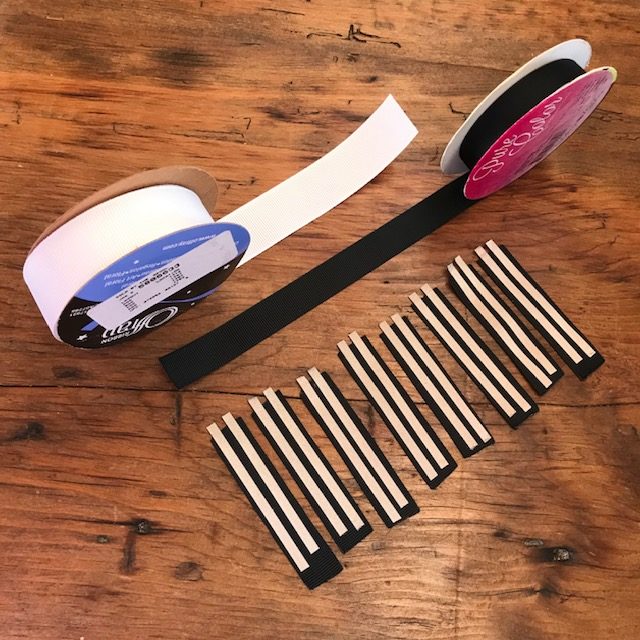
Materials & Tools
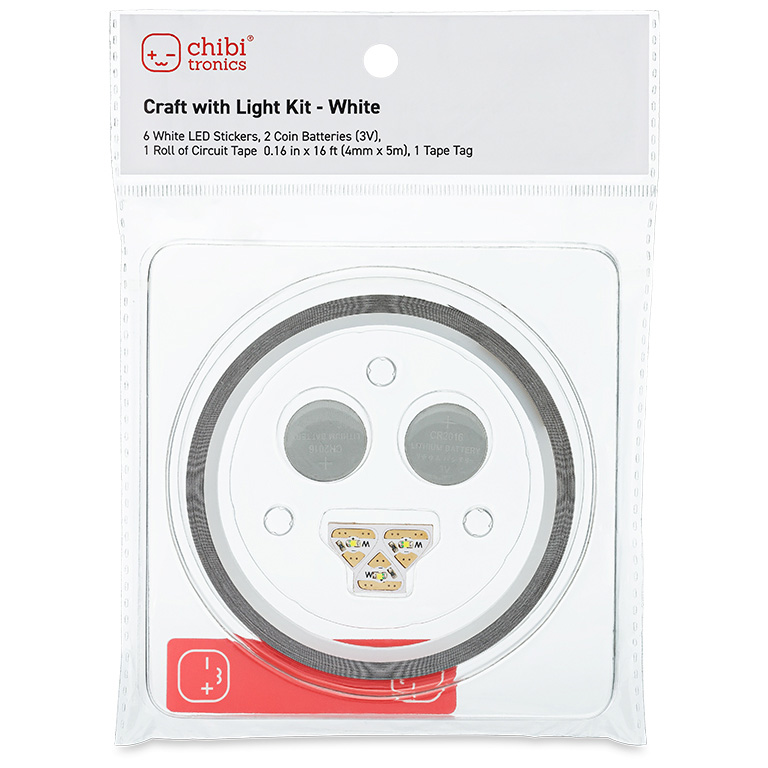
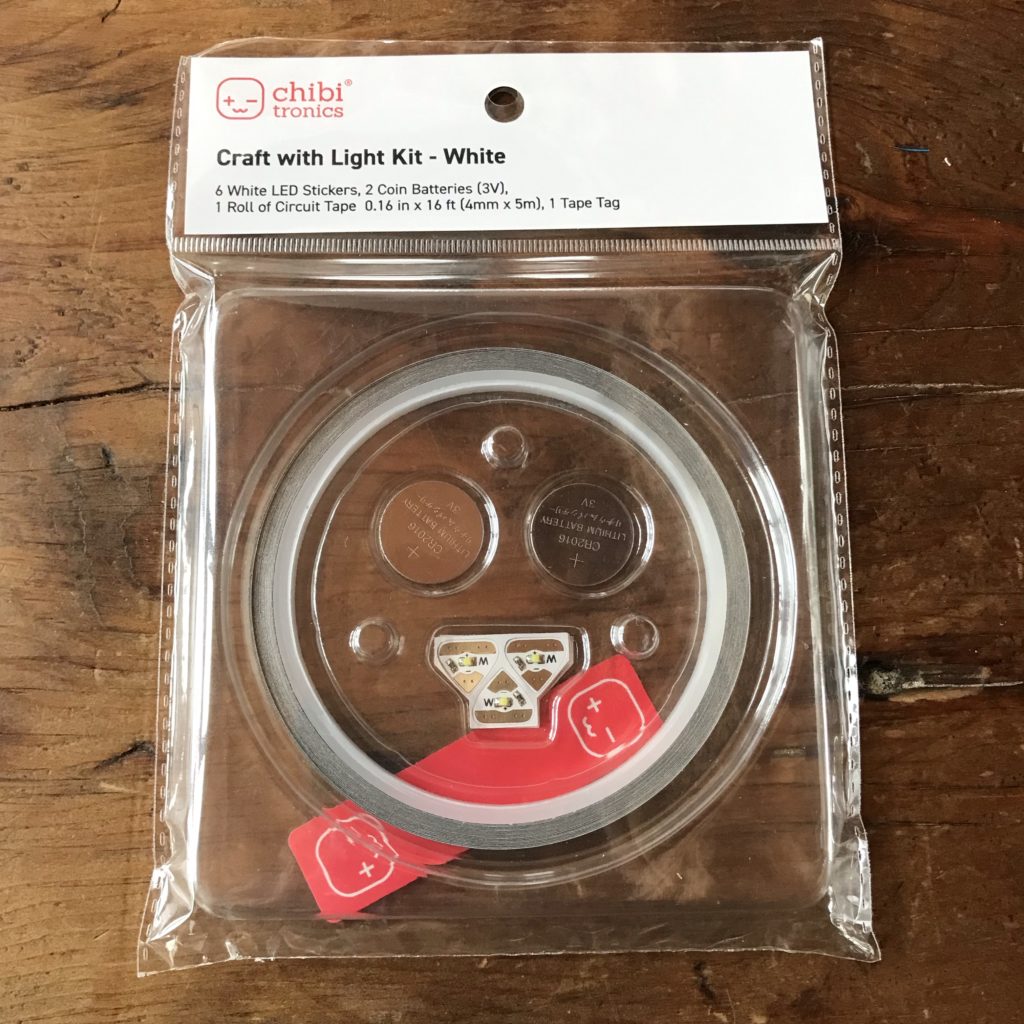
NOTE: A Chibitronics Craft with Light Kit contains all of the electrical components required for a glowing garland with up to six Circuit Sticker LEDs.
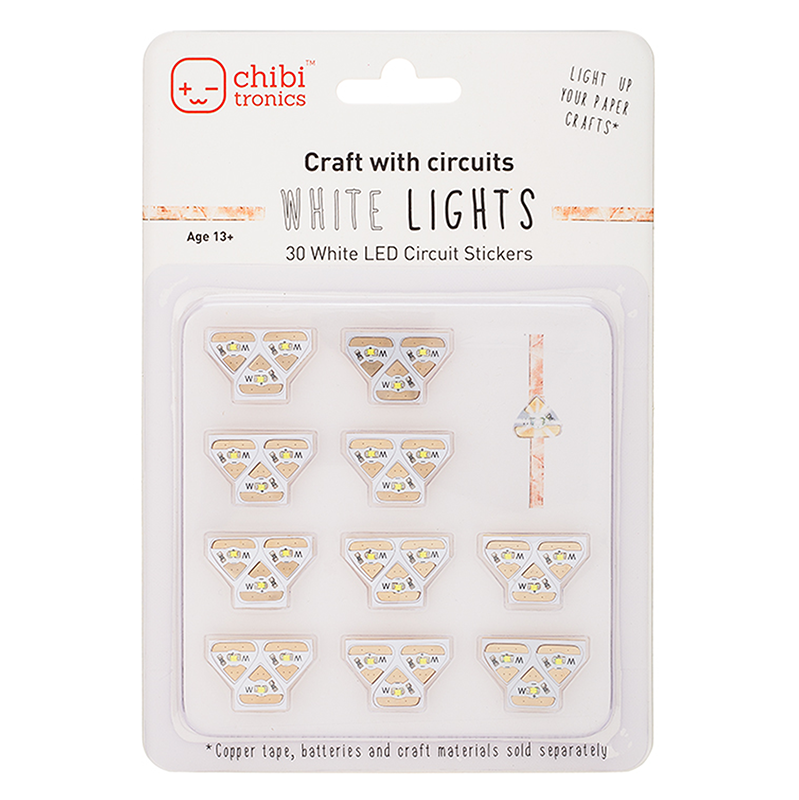
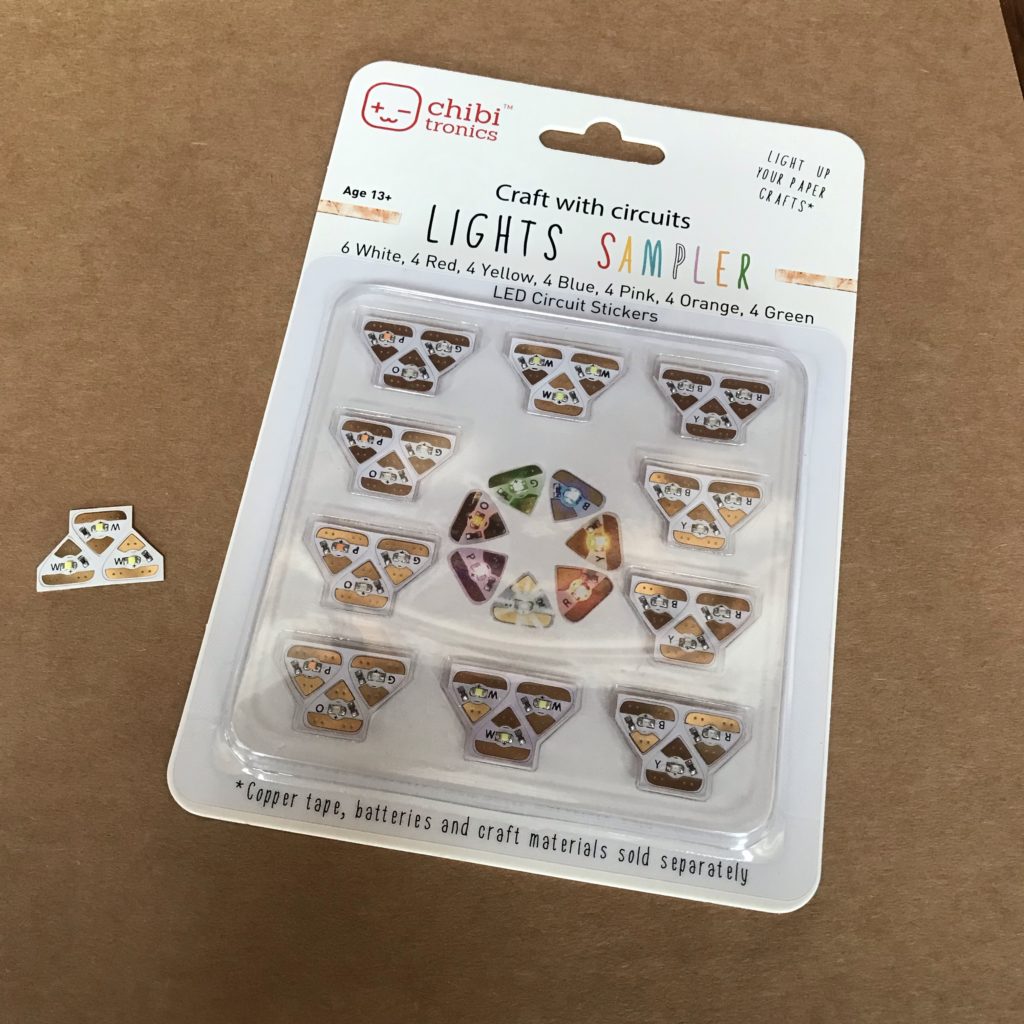
- Chibitronics Circuit Sticker LEDs
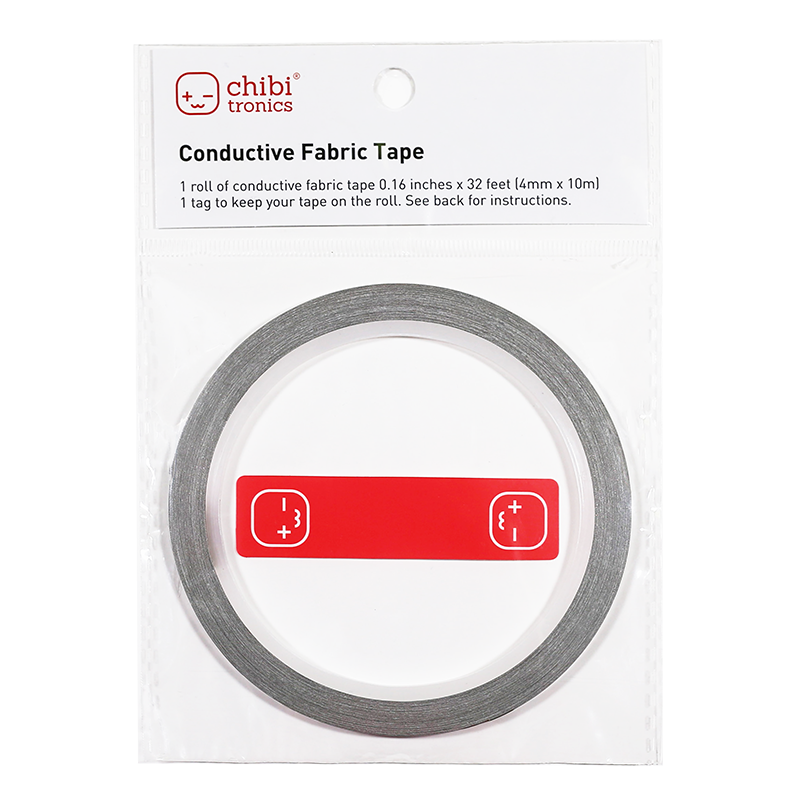
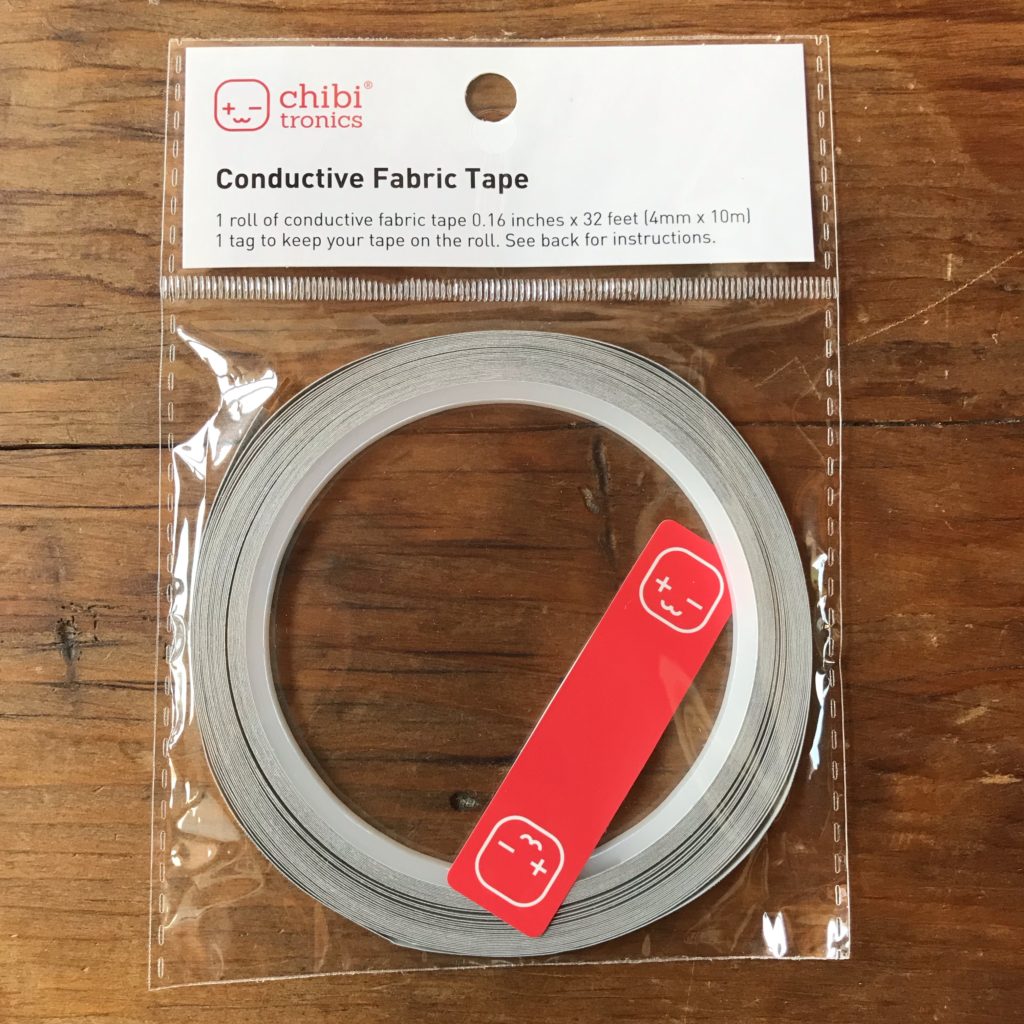
- Conductive Fabric Tape
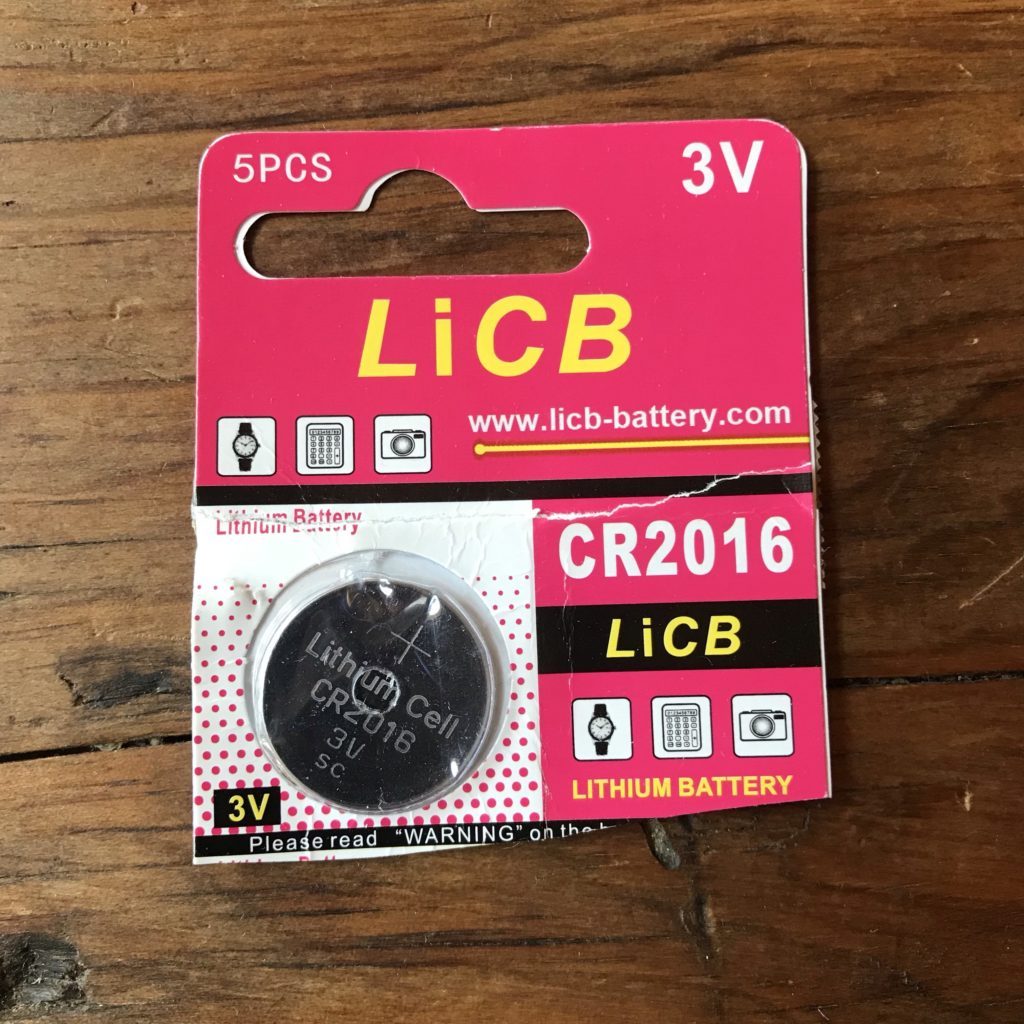
- CR 2032 or CR 2016 Coin Cell battery (1-2 per strand of garland)
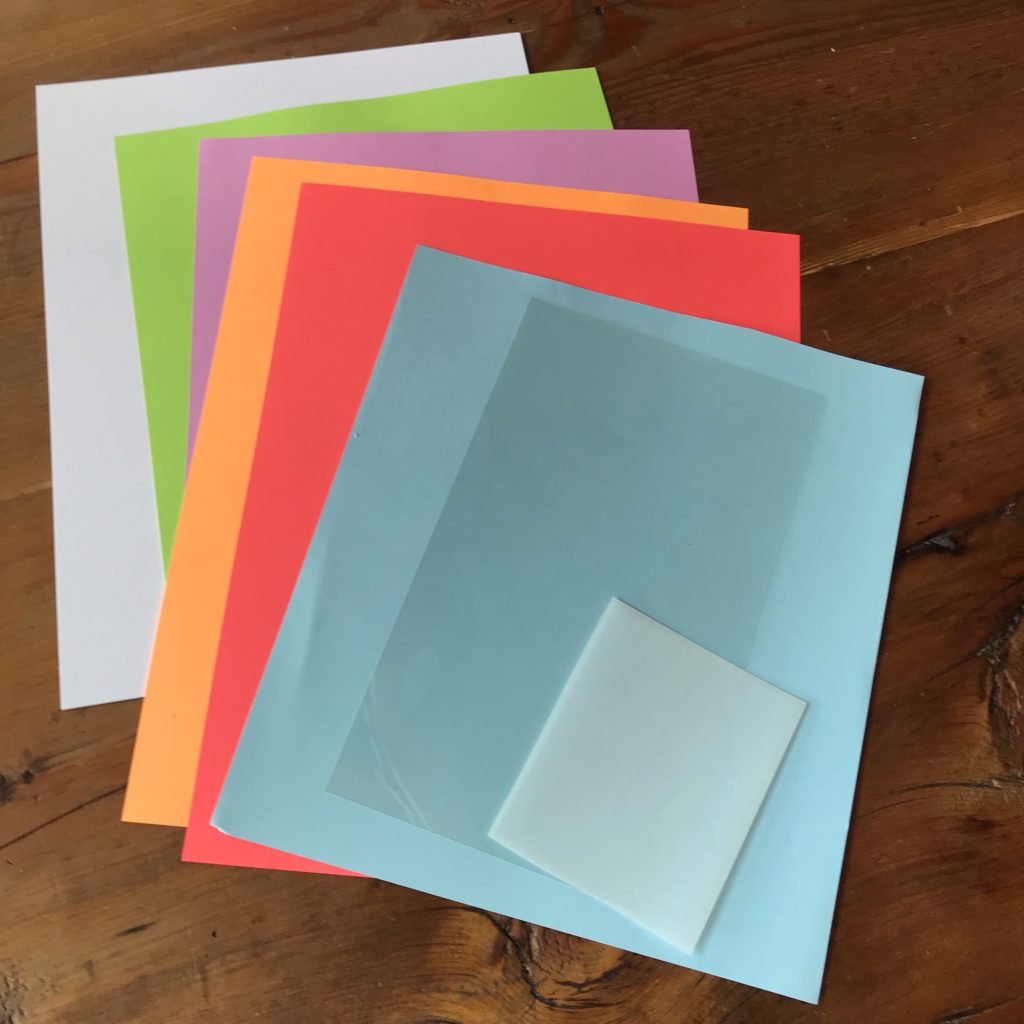
- Paper of varying colors and weights (white copy paper works well)
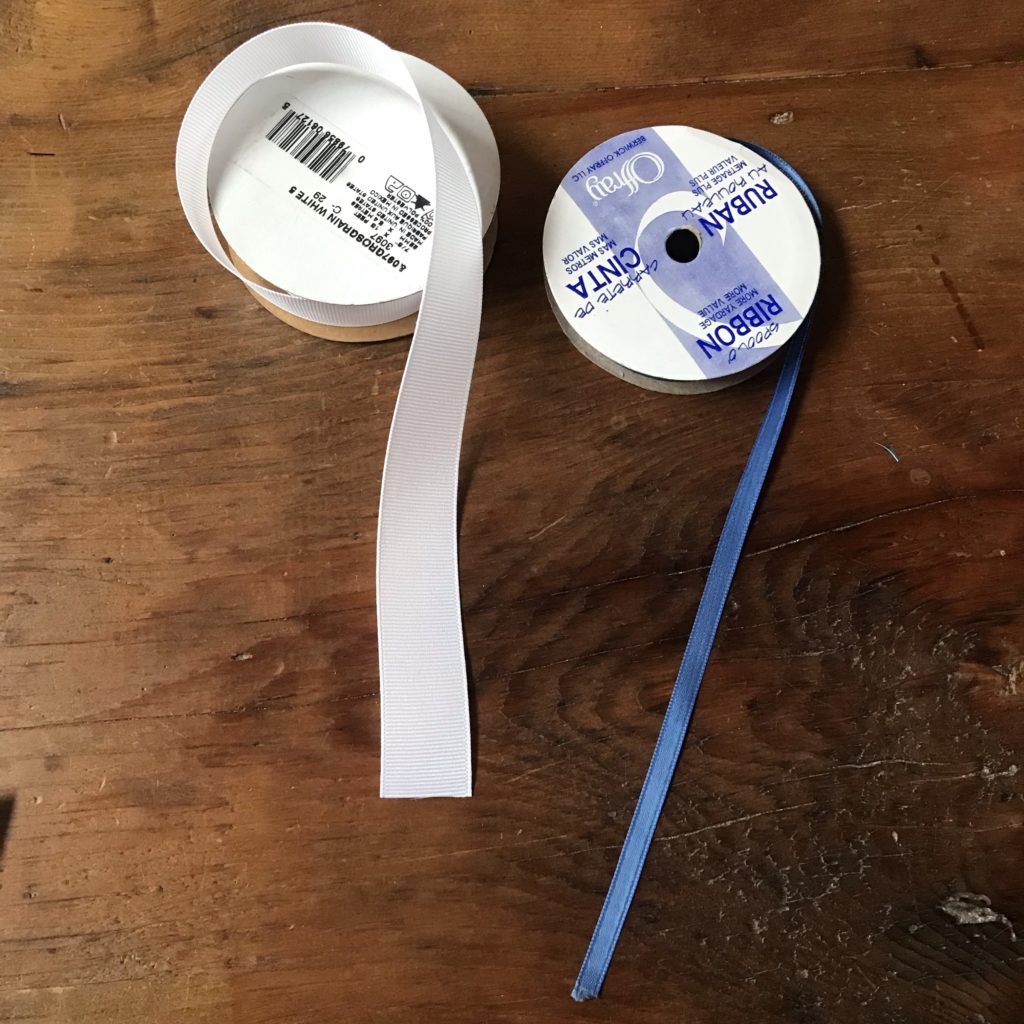
- 1/4″ ribbon for the power/ ground rail
- 1/2″ – 1″ ribbon for the LED Light Strips (flag supports)
- Glue Stick
- Scotch tape
- Scissors
- Pencil
- Ruler
- Optional:
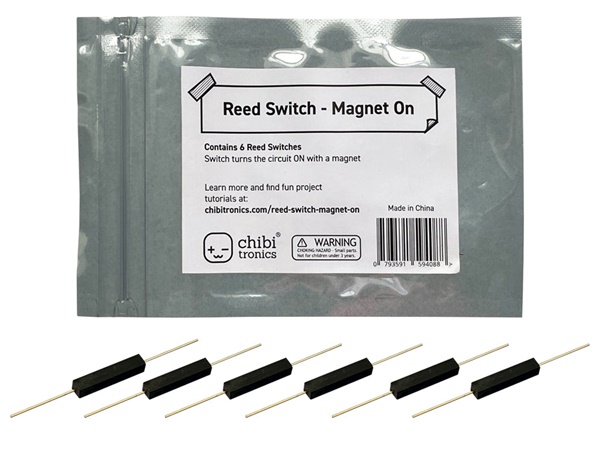
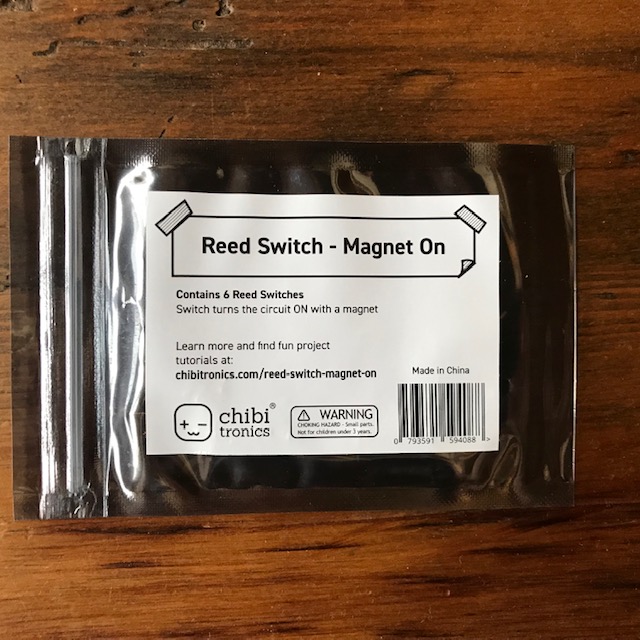
- Reed Switch Magnet On & a Magnet (useful as a switching mechanism)
- A lighter or matches (useful for melting frayed ribbon ends)
- A home fabrication tool such as a Cricut or Silhouette (useful for cutting shapes)
- Art supplies of your choice
- Small binder clips (useful for holding a battery in place)


Directions
Step 1: Brainstorm
Before diving in, it’s often helpful to brainstorm a theme for your garland and take time to imagine what it might look like when the lights are turned off as well as turned on.
To View a List of Things to Consider (Click on the +)
Think about Location
Where will you be hanging your glowing garland? Will it be taped to a window or tacked to a wall?
Think about Length
How long do you want your strand/ strands to be? Would you rather have one long one or several smaller ones?
Think about Color
How might you use paper and light to compliment one another? Will you rely upon the LEDs to add color, or take advantage of different colored papers?
Think about Shape
What shapes will work best for your flags, considering that they will need to conceal a circuit? Do you want to repeat a shape or mix and match them?
Think about Size
Do you want all of your flags to be the same size, or would you prefer a little variation?
Think about Backlighting
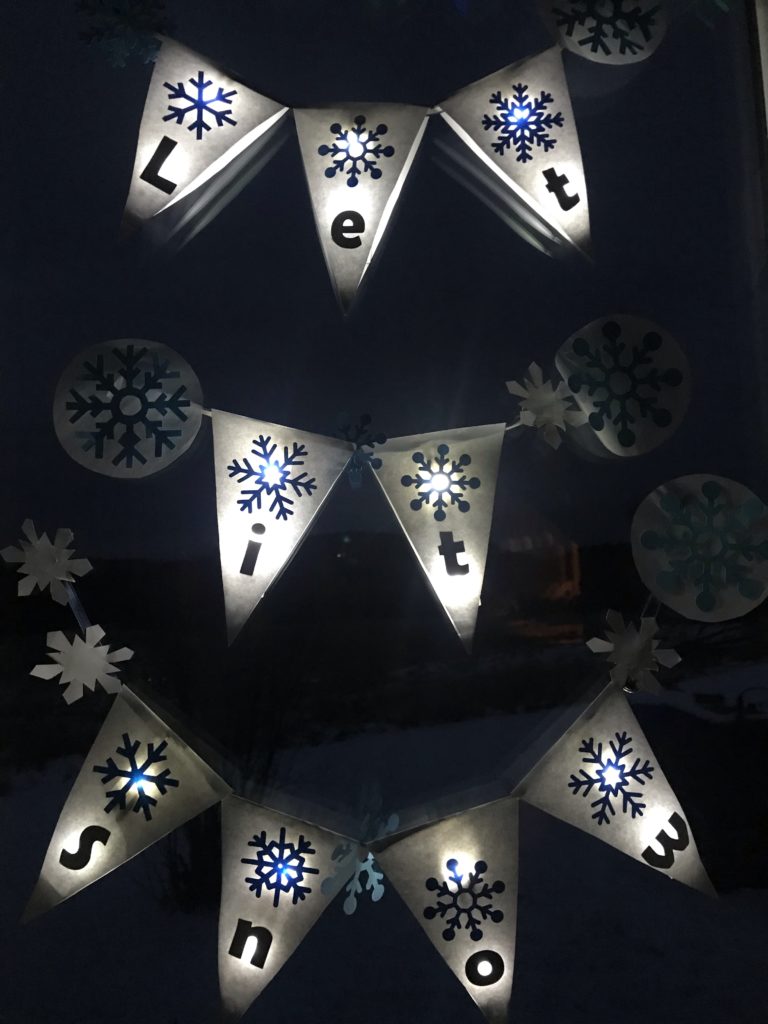
How can you take advantage of opportunities to use backlighting to add surprise elements to your flags that may only be viewed when the lights are turned on? Is there a secret message you wish to convey?
Step 2: Make Your Flags
Before settling upon a shape for your flags, experiment with different paper and shapes, to get a feel for what works best for you!
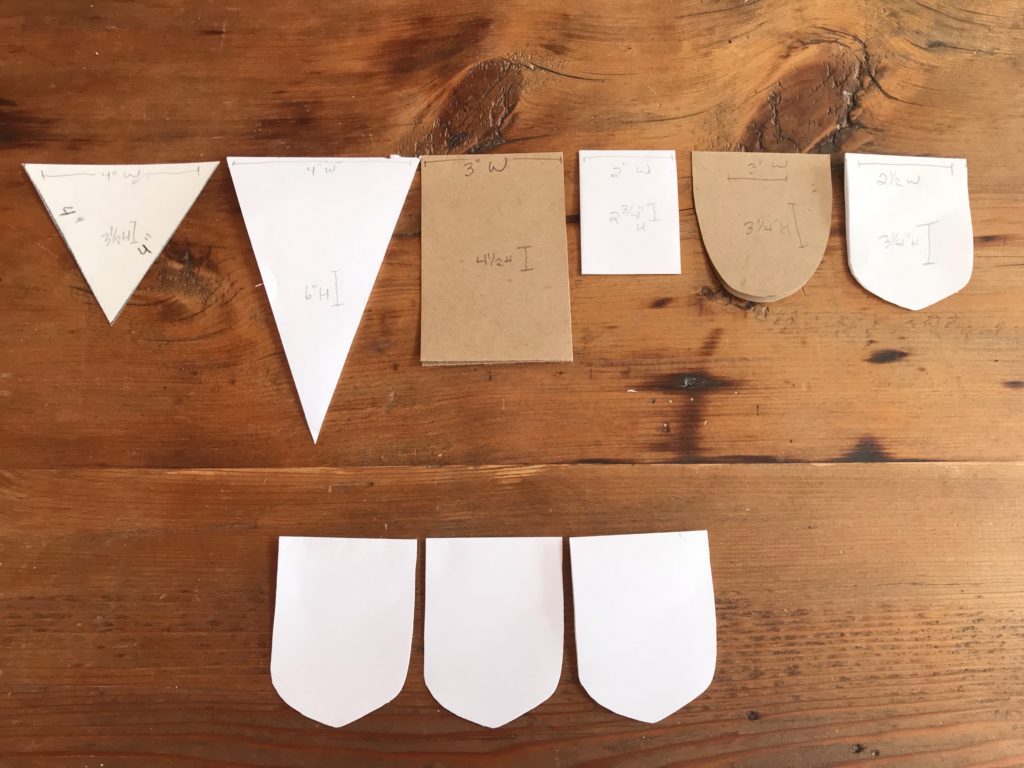
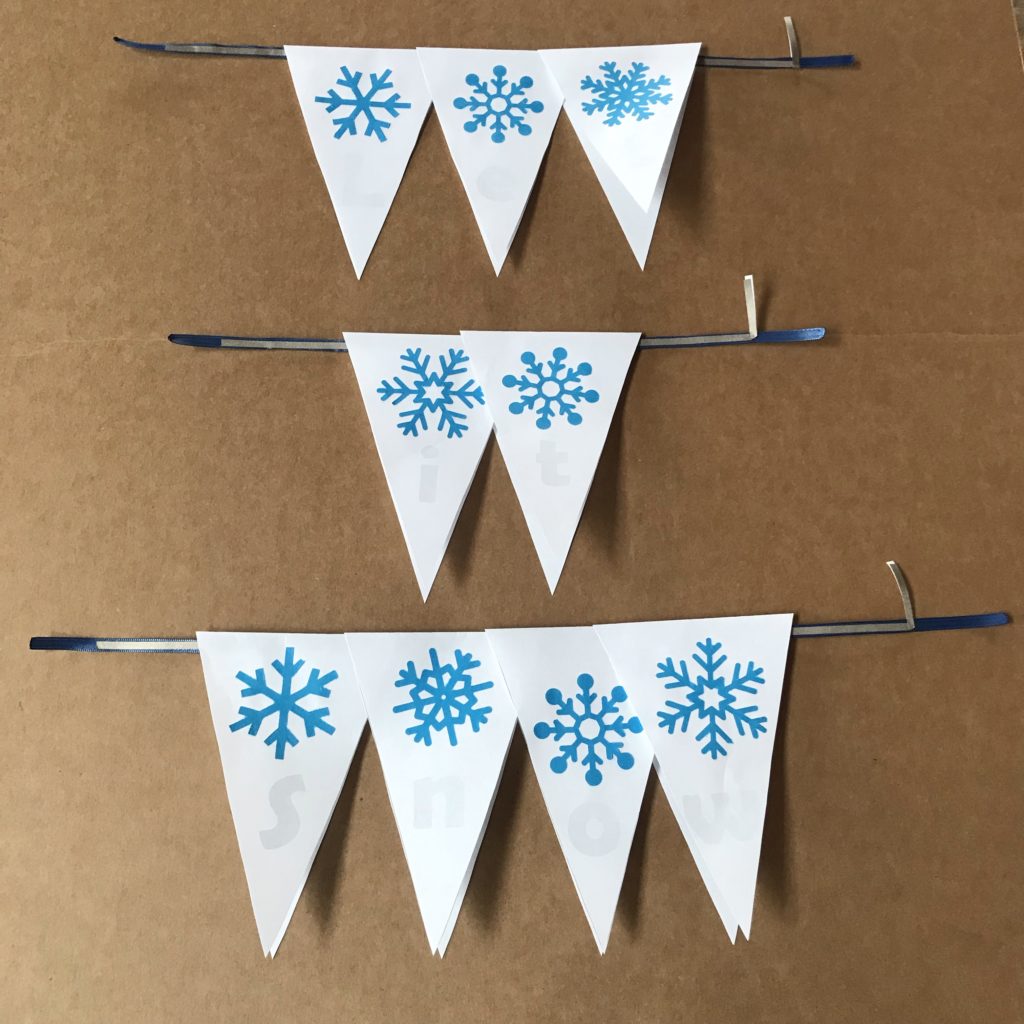
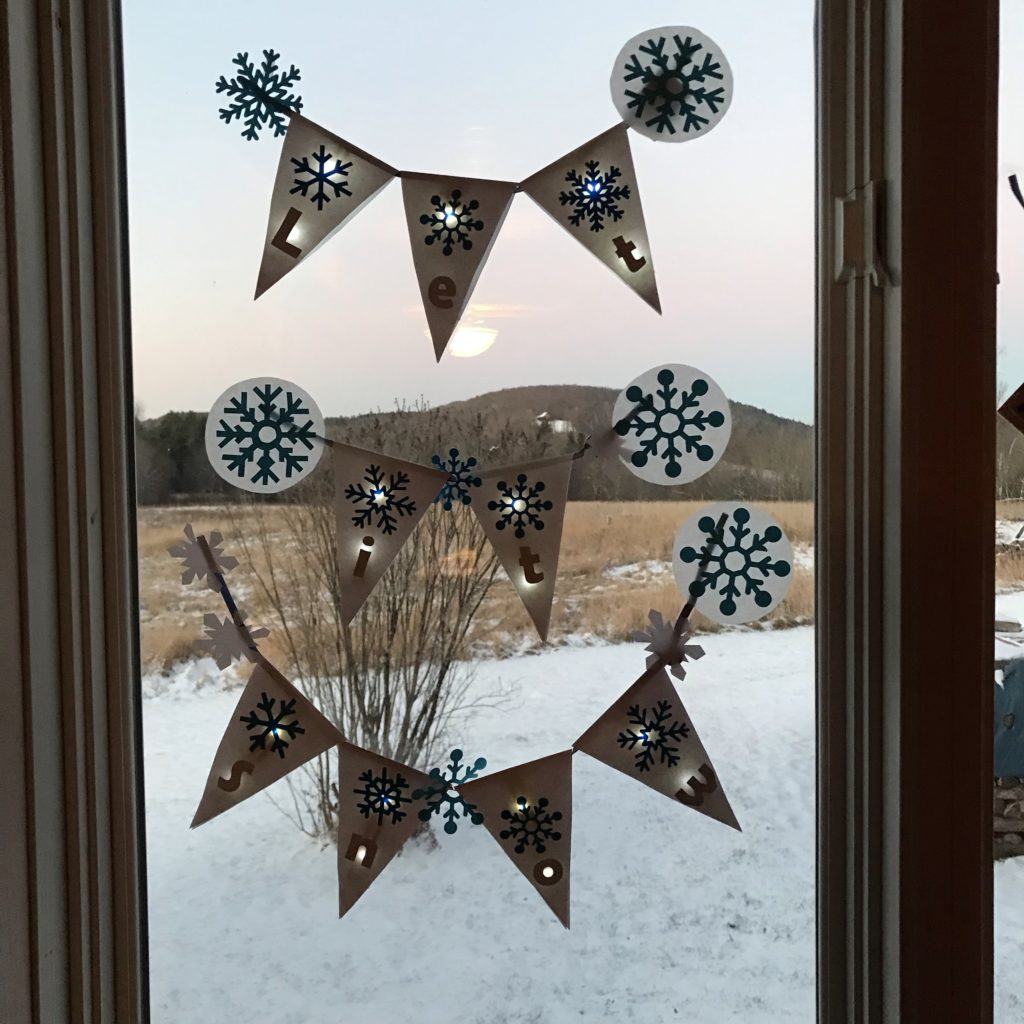
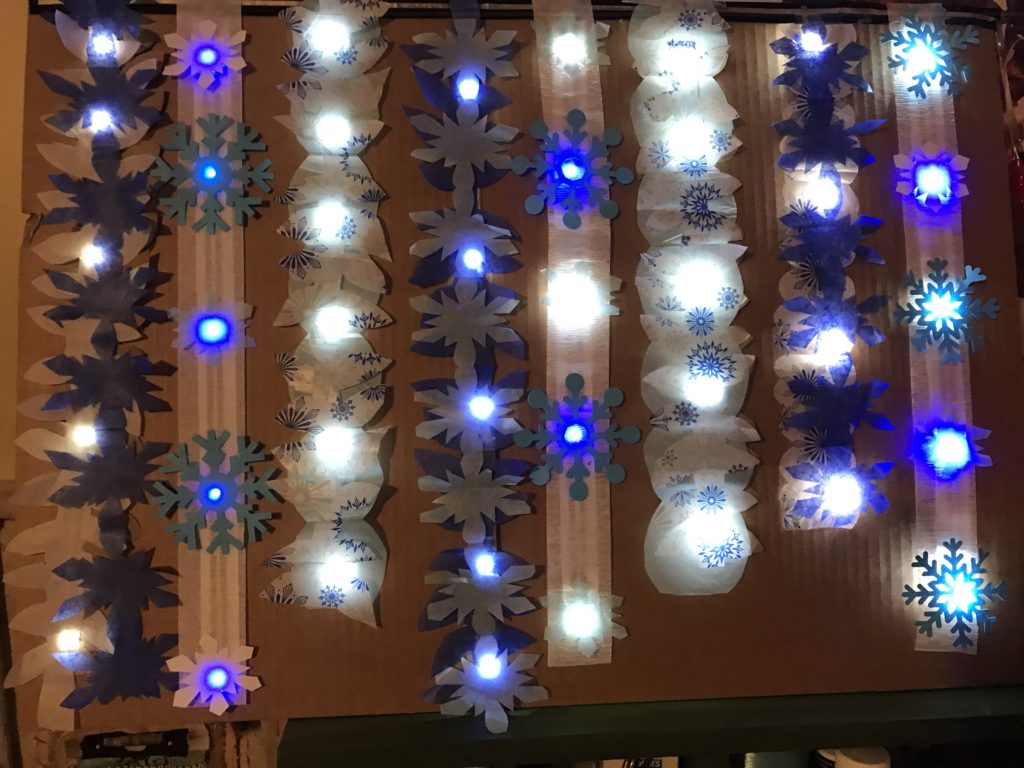
The first shape that I tried was a white text weight triangle (4” wide at the hinge and 6” long from hinge to tip). I chose this shape because I wanted my flags to be wide enough at the top to glue on a paper snowflake, and long enough to accommodate two LEDs underneath, so that I could hide a secret message near their tips.
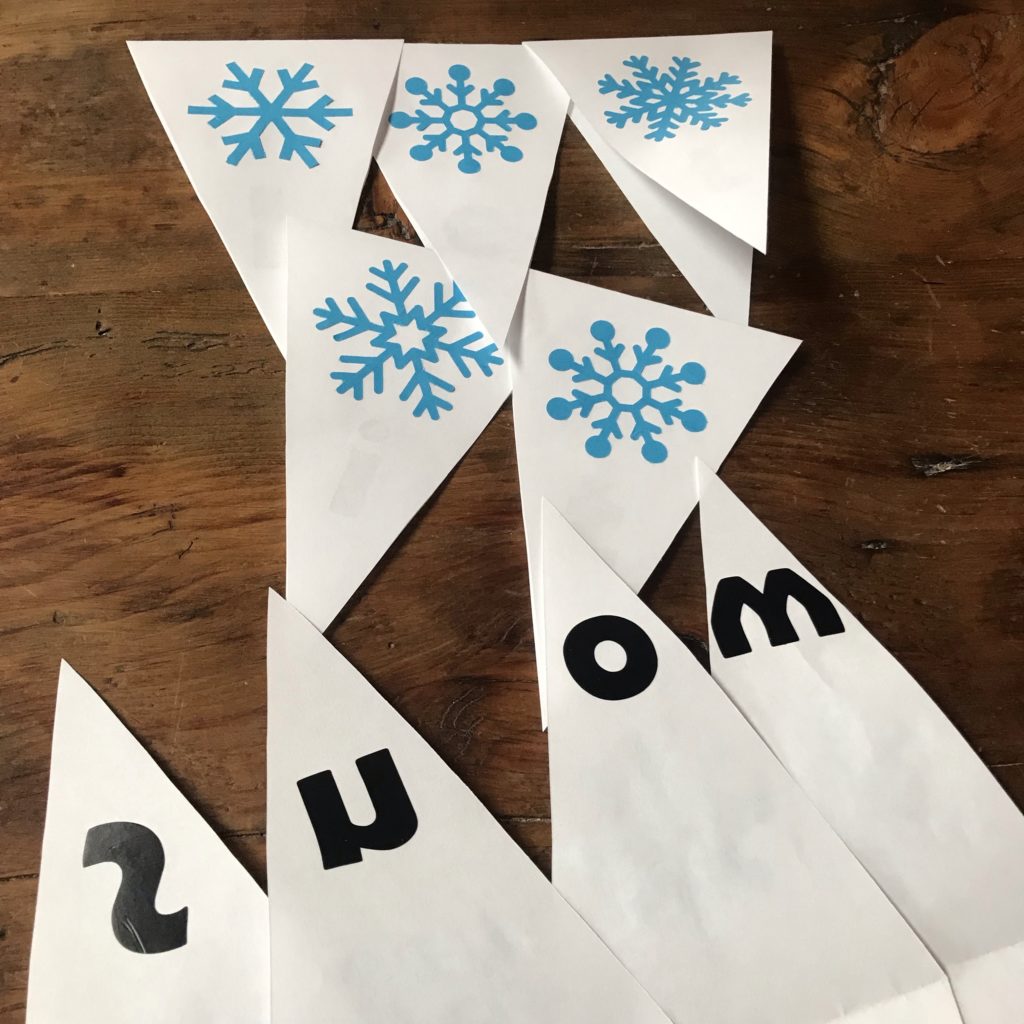
I used the “mirror” feature on a Cricut machine to cut out the letters, “Let it Snow,” allowing me to adhere them to the inside of the top layer of the flags. That way, the letters would be correctly oriented and visible with backlighting.
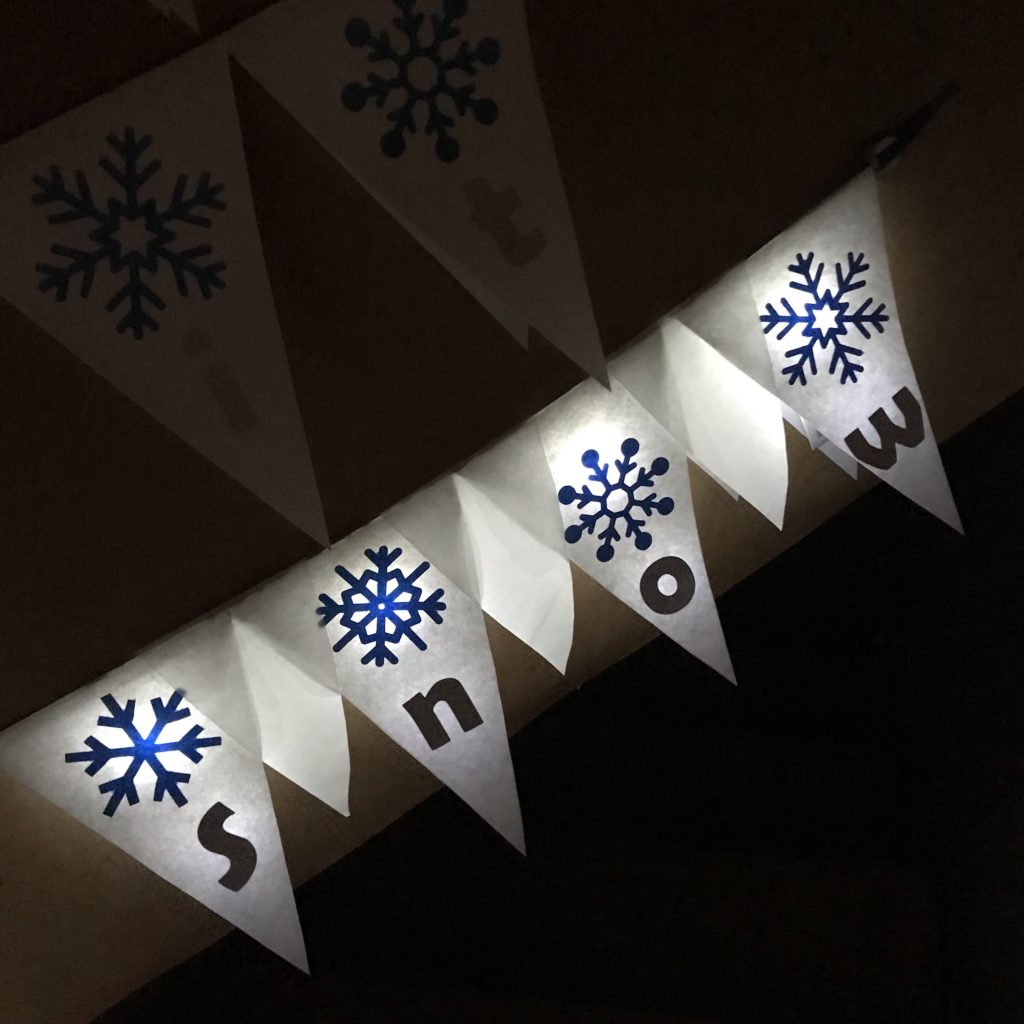
While I really liked the length, and the large amount of surface area that I had to work with, I learned that the 4” wide triangle tops were a bit too wide to drape well over the power/ground rail I’d constructed. As a result, I ended up needing to extend the length of my ribbon on both sides to allow it to curve more. Another solution would have been to create a new set of flags with narrower tops.
The next shape I tried was a brown craft paper rectangle (3” wide at the hinge and 2 ¾” long from hinge to base). I liked this shape, because it was easy to cut. To add variety, I placed smaller (2” W X 2 ¾” H), white text weight rectangles between them. Once again, I experimented with hiding an image on some of the inside flaps.
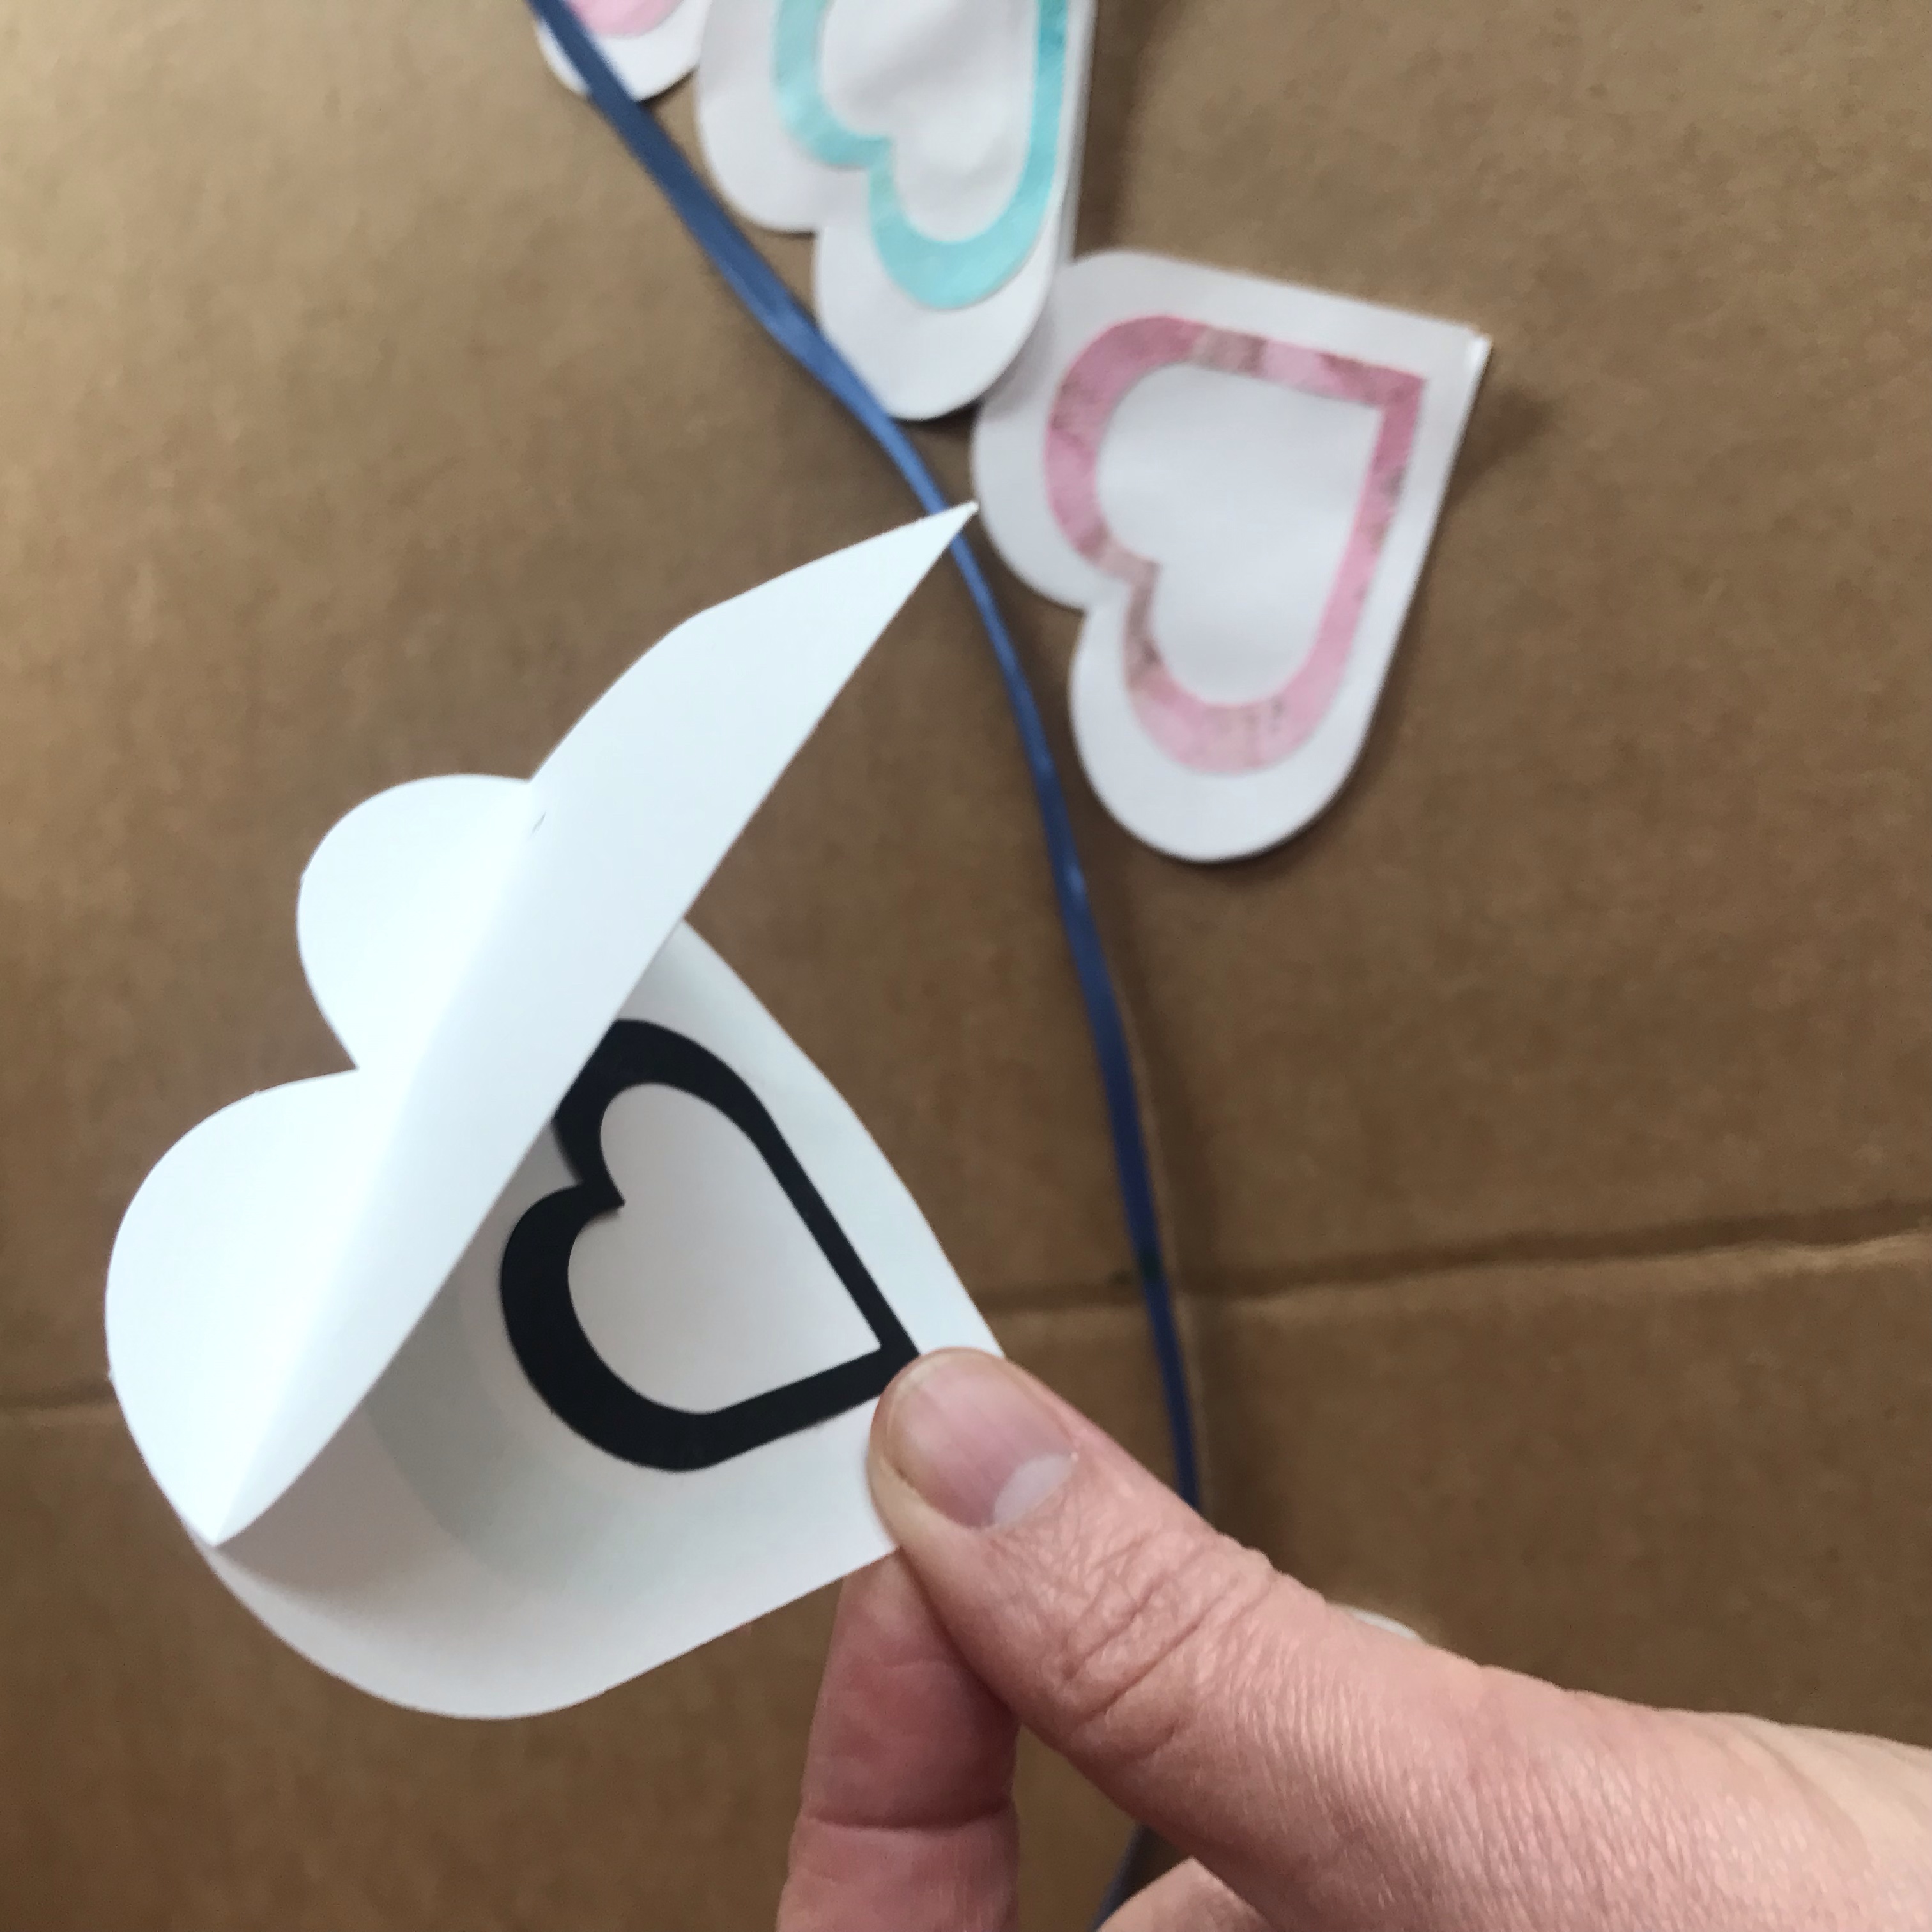
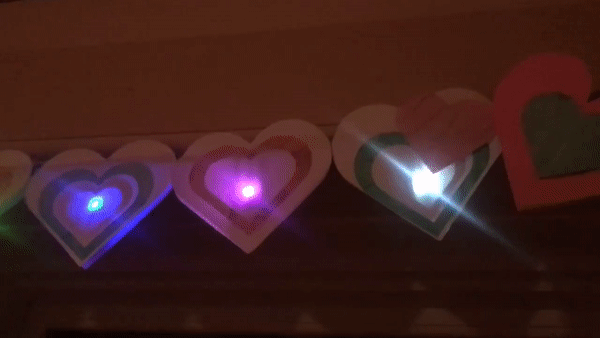
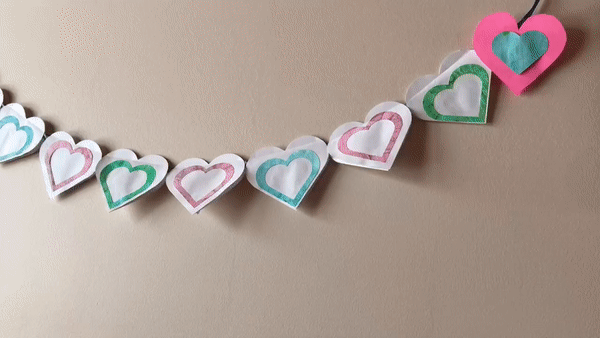
I also experimented with hearts, which required some gluing near the top in order to prevent the circuit from peeking through. (You may access, use, and or modify the free Cricut cut file here.)
Step 3: Prep the Power & Ground Rails
For my power/ ground rails, I used a ¼” satin ribbon. While prototyping, I discovered that a thicker ribbon does not drape well.
Because the garland needs to be thin enough to curve when it’s displayed, you’ll be using both sides to construct your power and ground rails.
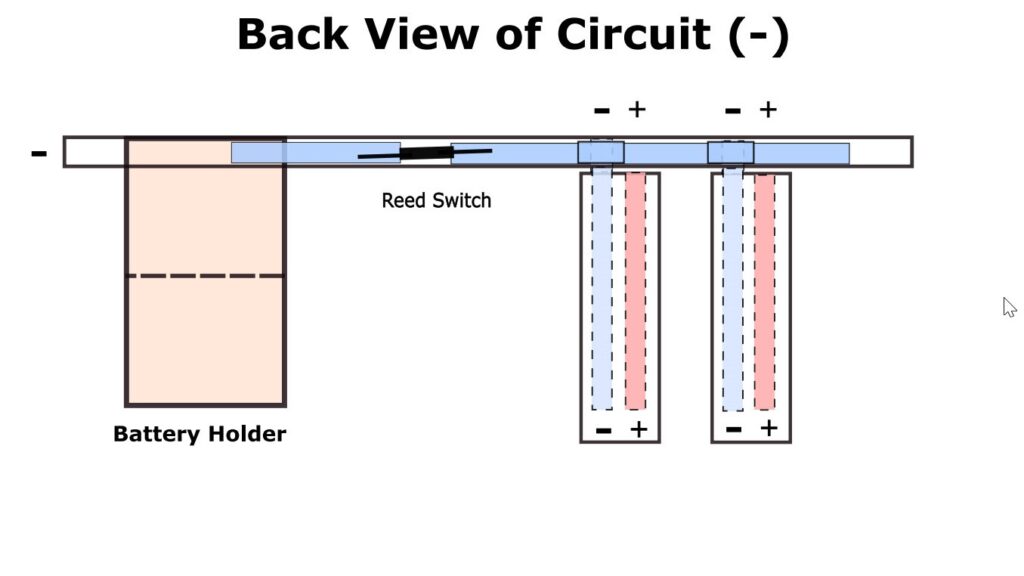
Circuit Diagram
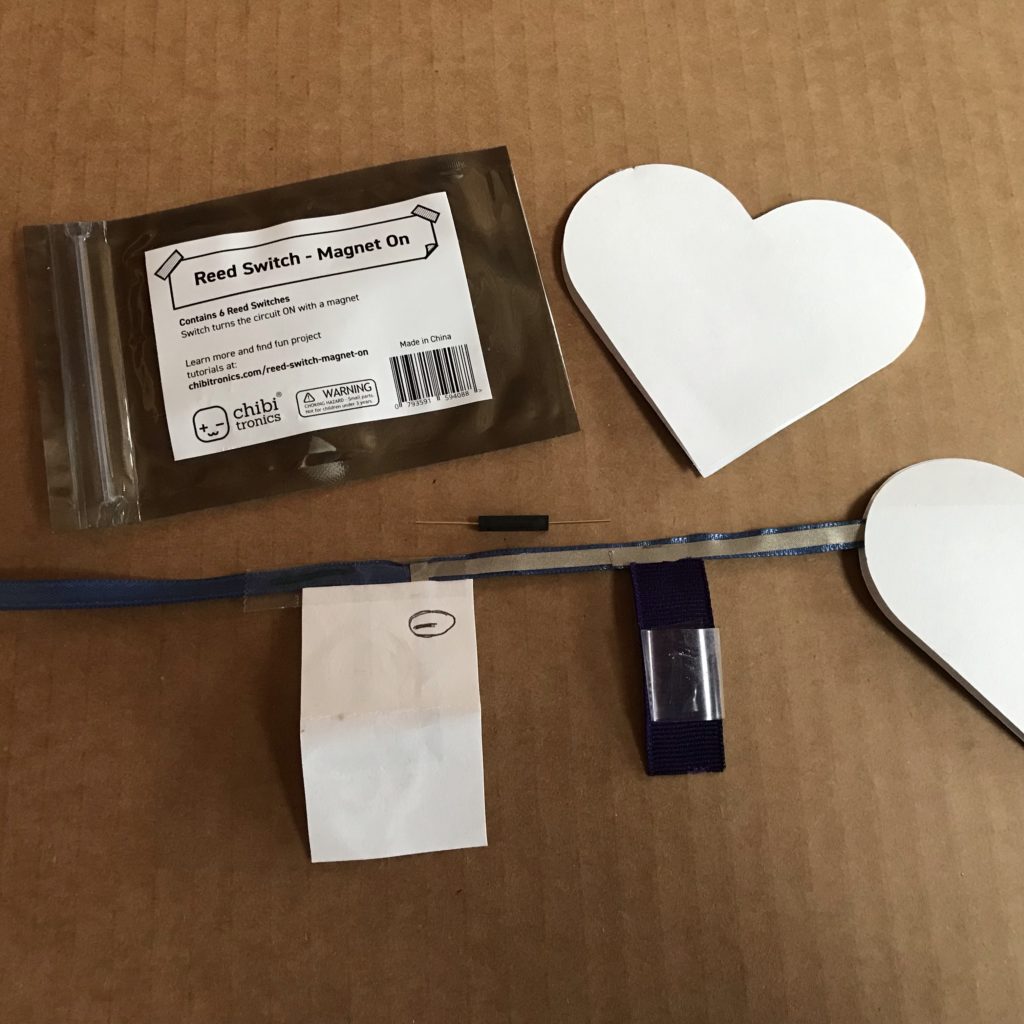
Here is a circuit diagram to help you get an idea of how the circuit will be constructed. If you plan to use a reed switch, you will need to leave a gap for one in the negative lead. Learn how.
Your ribbon needs to be long enough to accommodate all of your flags, while leaving enough room to hang the garland with some curve. Please remember to account for a few extra inches of ribbon on both ends that will not have any conductive material on them. The example in the photo above ended up being too short, so I had to extend the ribbon on both ends with a piece of tape.
To help determine how much ribbon you’ll need for your power/ ground rail, it’s helpful to position your flags loosely upon the ribbon to determine where the circuit should begin (where you want to see your first LED) and end (where the battery will be located).
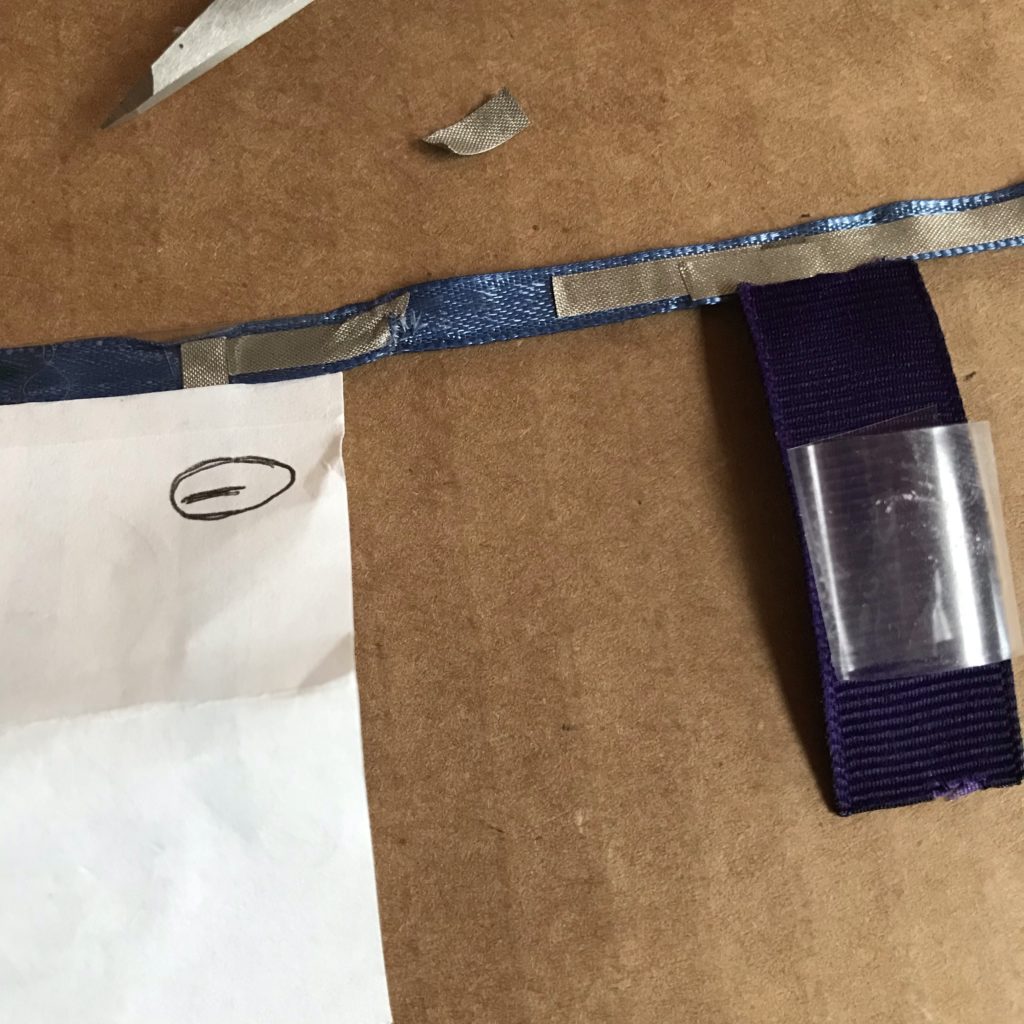
Once you know how long you need your power/ground rails to be, apply conductive fabric tape to both sides of the ribbon. It’s helpful to leave a one inch tail of conductive fabric tape for the battery holder (although you can always add it later). I found that placing my work upon a piece of cardboard, and taping the ends of the ribbon down worked well for the next step.
Tips, Tricks & Call-outs
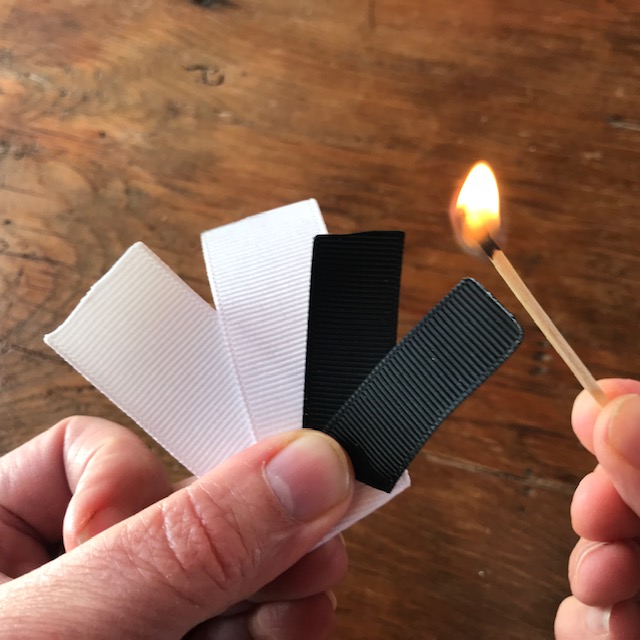
If you want for your Glowing Garland to be more easily reusable from year to year, it’s a good idea to singe the raw edges of your ribbons to keep them from fraying, before you add the conductive fabric tape. This includes the power/ ground rail ribbon and the LED strips that will attach to it. This may be done carefully with a lighter or matches.
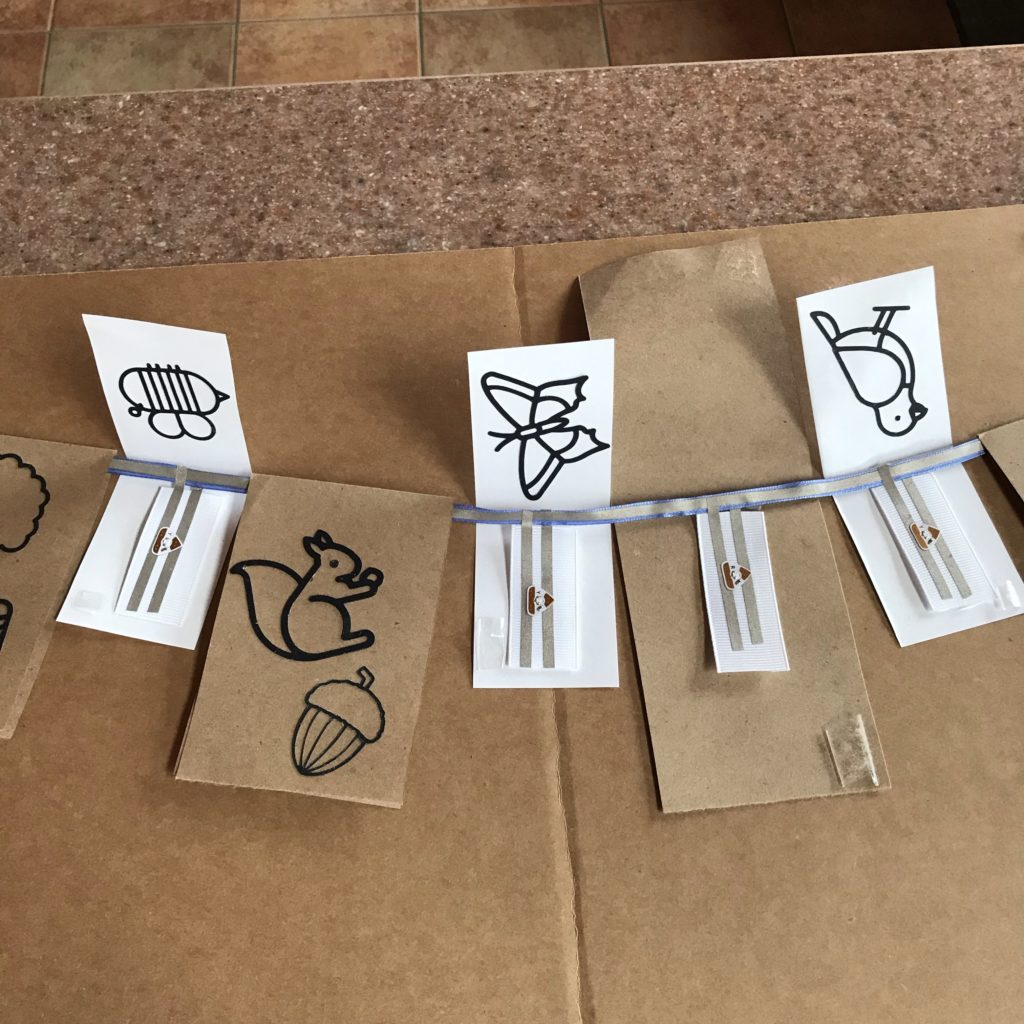
Step 4: Prep the LED Strips (Flag Supports)
Once your power/ ground rails are complete, it’s time to add the LED strips/ flag supports that will be concealed underneath your flags. The LED strips are pieces of ribbon that will attach to the power/ ground rail and allow you to complete the circuit and add Circuit Sticker LEDs. They will support and be concealed by your flags.
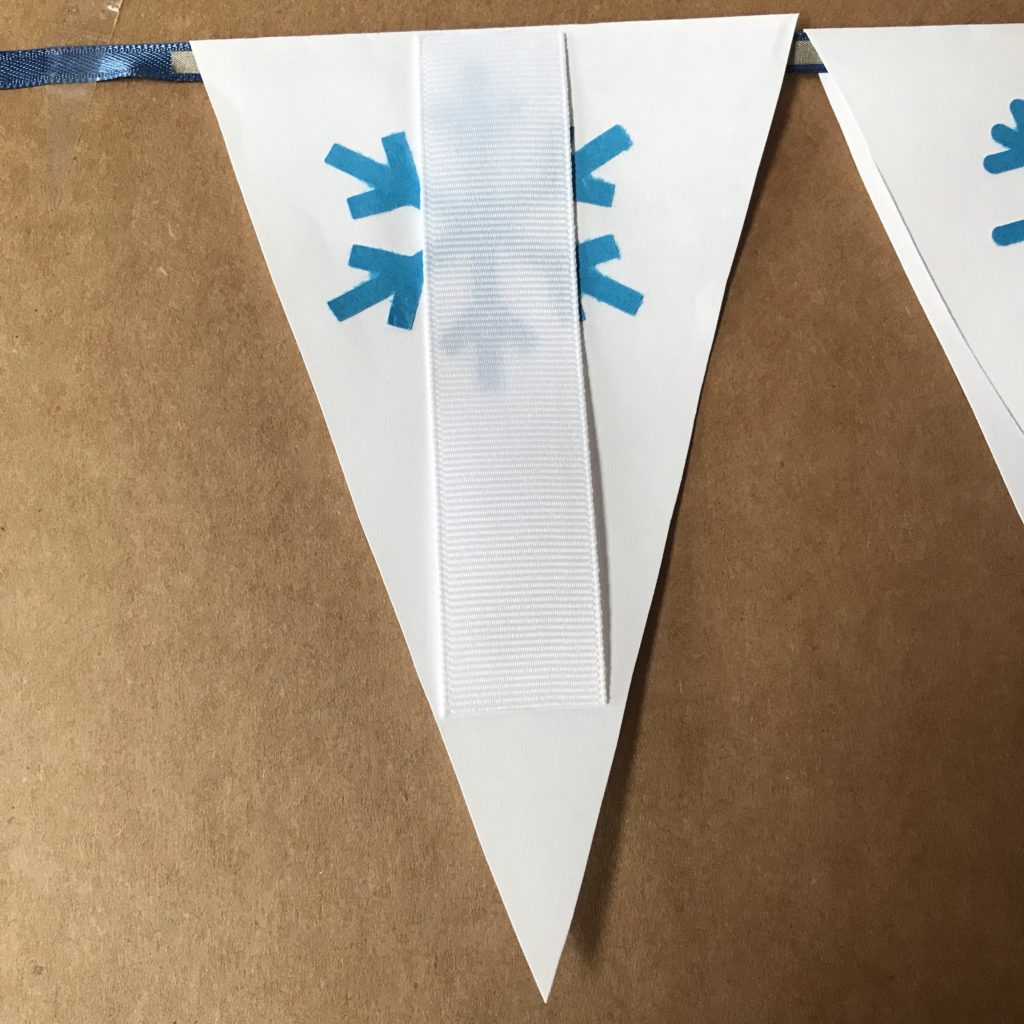
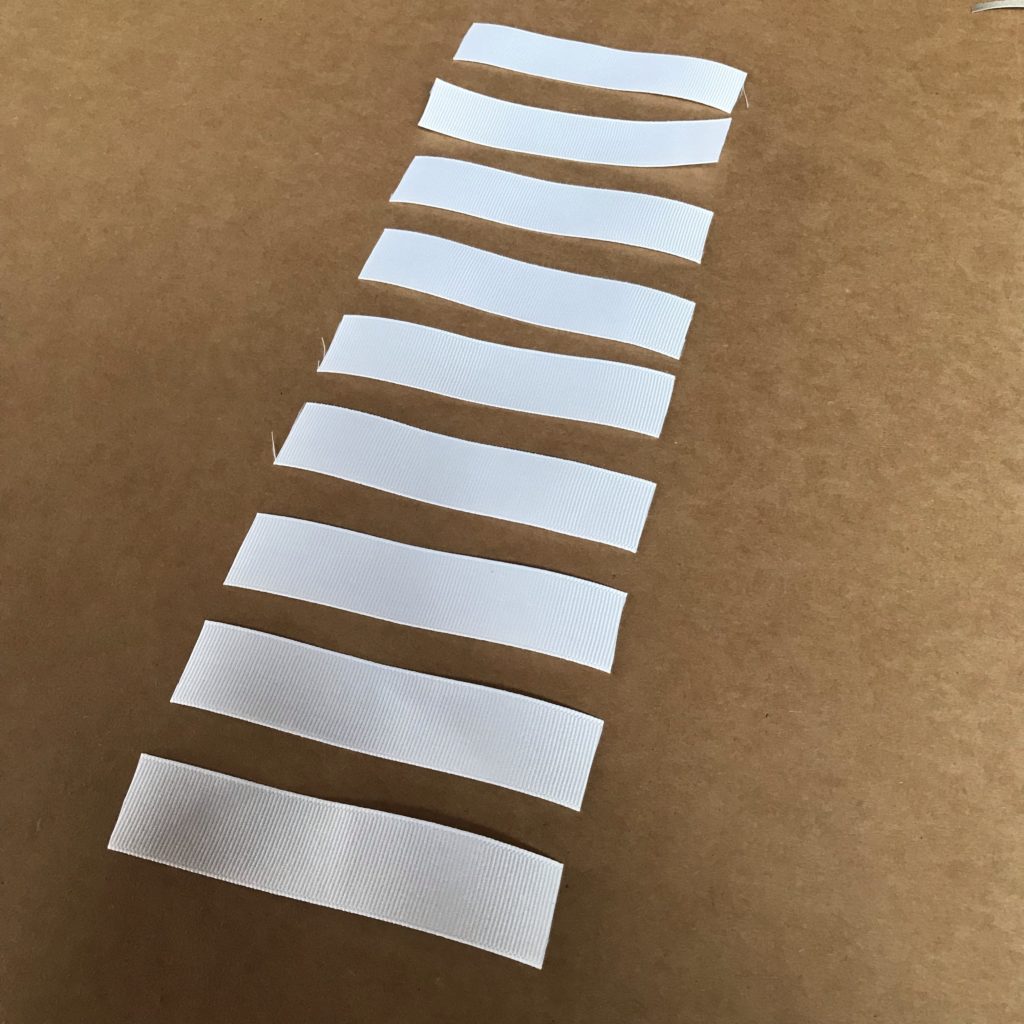
While it’s possible to use a 1” thick ribbon for the LED strips, I found that a ½” ribbon worked better for shapes that taper at the bottom. Originally, I used strips of paper for the LED strips. I switched to ribbon, because I found it draped better, didn’t hold unintentional creases, and was easier to reposition or change out the LEDs. Cut as many LED strips as you need. If you choose to singe the edges, do so prior to adding the conductive fabric tape.
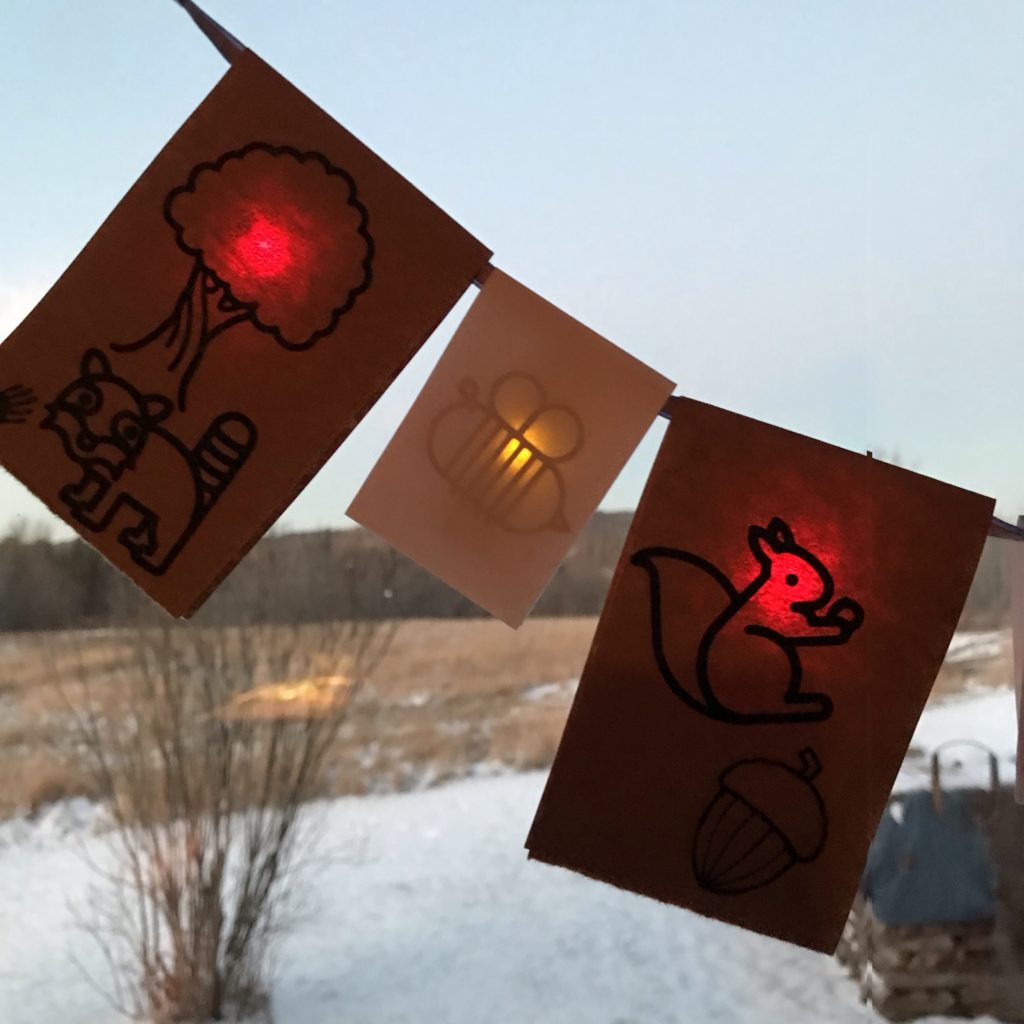
Each of the LED strips, when added to the power/ ground rail, will form a parallel circuit.
The advantage of this design is that you’ll only need one or two coin cell batteries to power each completed garland strand. The number and color of LEDs and the length of your power/ground rail will be the determining factor. While I was able to light up my entire heart garland with a single battery, using two resulted in the brighter effect that I preferred.
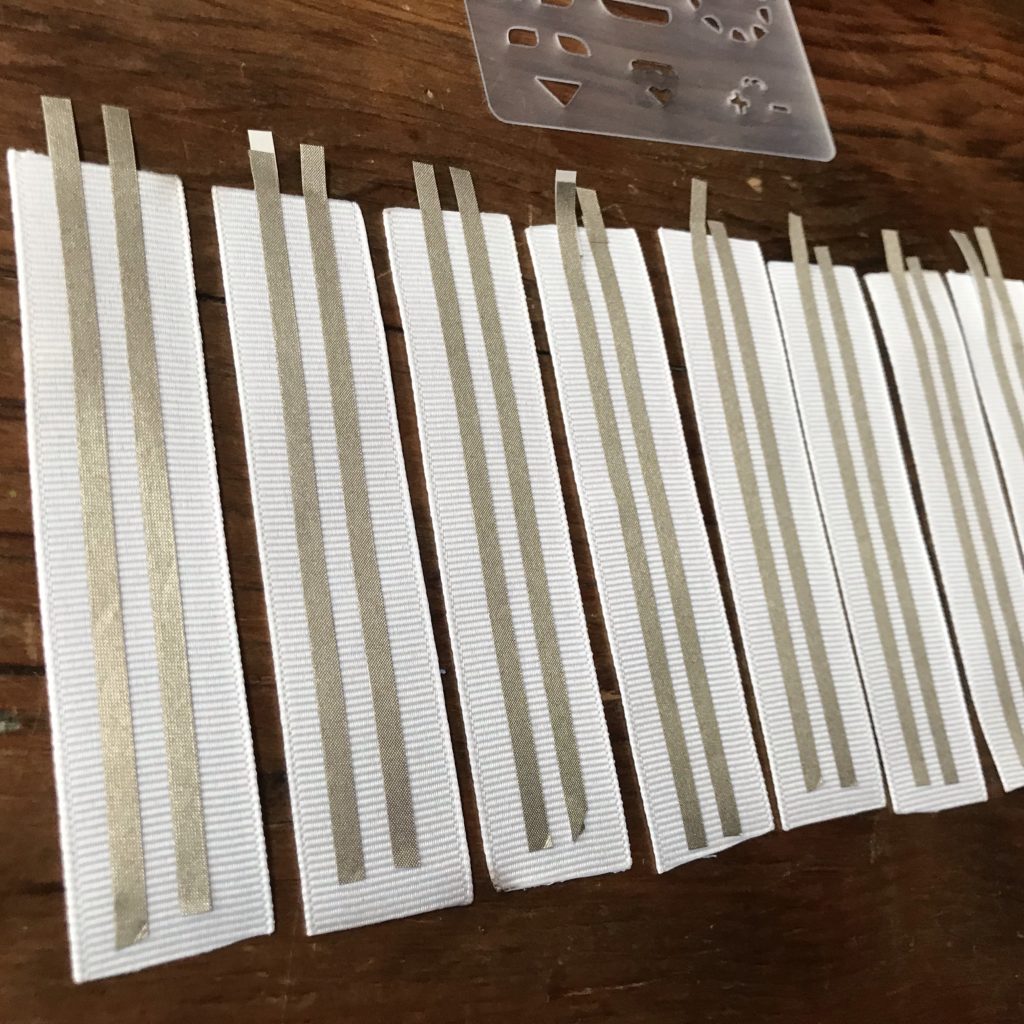
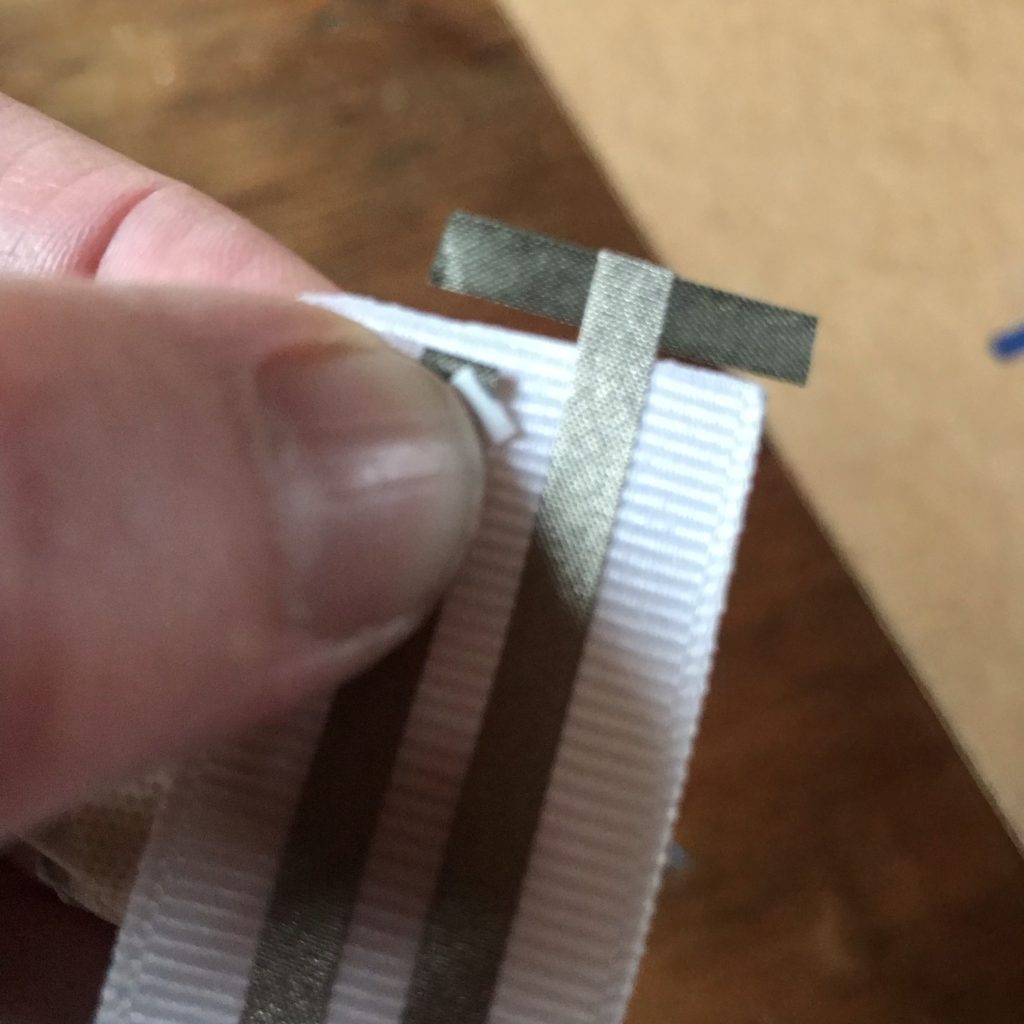
Once your ribbons have been cut and singed, create the positive leads by adhering a piece of conductive fabric tape along the left side of each ribbon, leaving about ⅛” tab peeking over the ribbon’s top edge, which will allow you to easily connect it to the power rail.
Repeat this process for the negative traces, leaving enough space between them and the positive traces to add a Circuit Sticker LED (you may use a template to guide your spacing). Once again, leave a ⅛” tab peeking over the ribbon’s top edge.
Starting at the center of your power/ ground rail, begin adding the LED strips one at a time by adhering the negative tabs to the back side of the ribbon and reinforcing them with a piece of conductive fabric tape.
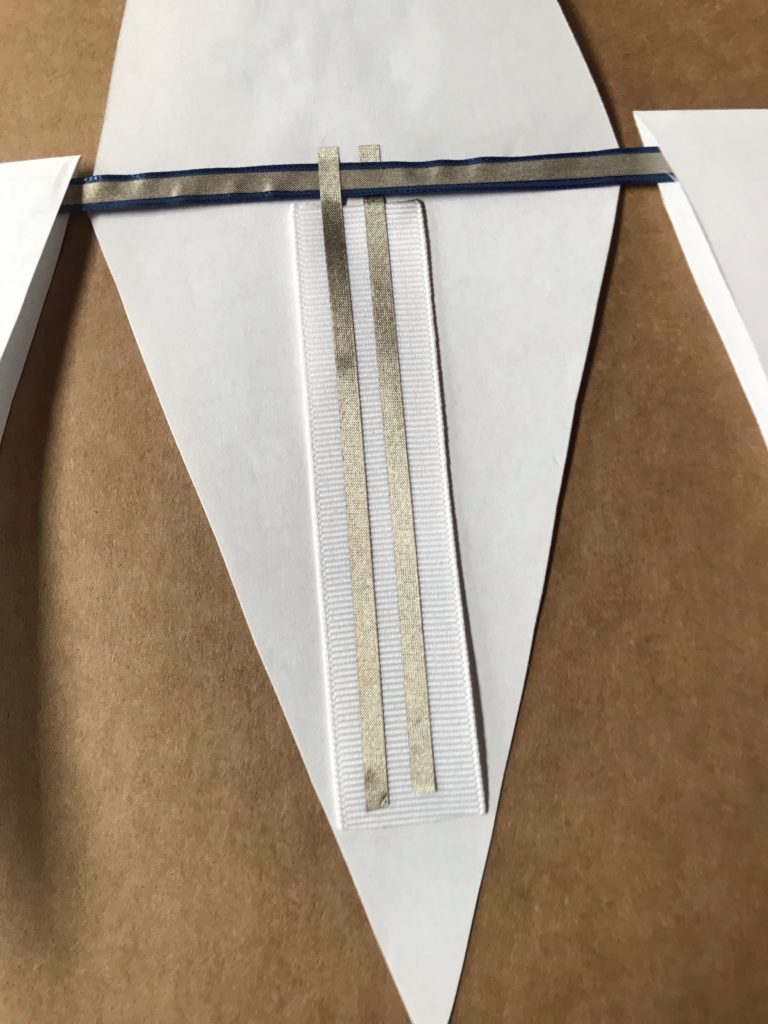
Secure the negative tabs to the ground rail (the back side of the ribbon) with a piece of conductive fabric tape. You might find it helpful to bend the positive trace down out of the way when adding the LED strips to the ground rail.
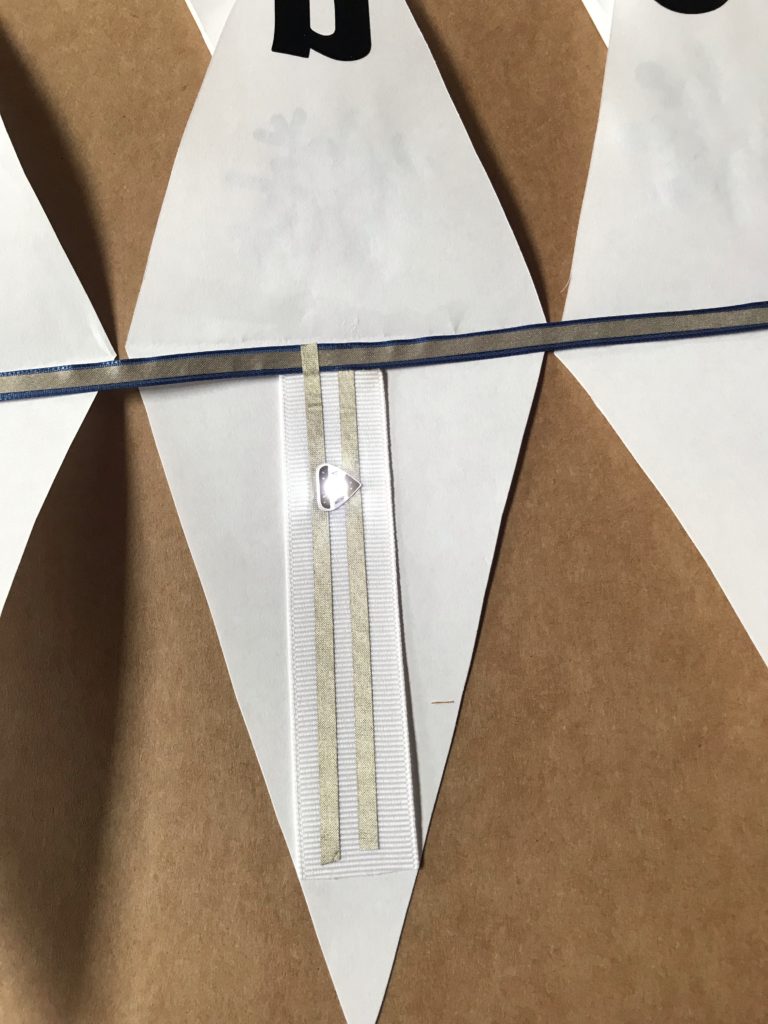
Add Circuit Sticker LEDs in colors of your choice.
Step 5: Test the Circuit
To test the circuit, add a battery to the right side of the power/ ground rail and ensure that the Circuit Sticker LEDs shine the way you want them to behind your flags. If any of the LED strands fail to light up, or appear to flicker, press down on each of the contact points, adding reinforcements of conductive fabric tape if needed. Also ensure that the Circuit Sticker LEDs have been adhered correctly. If your circuit doesn’t glow as brightly as you like, which can happen with very long circuits or old batteries, you may need to add a second battery.
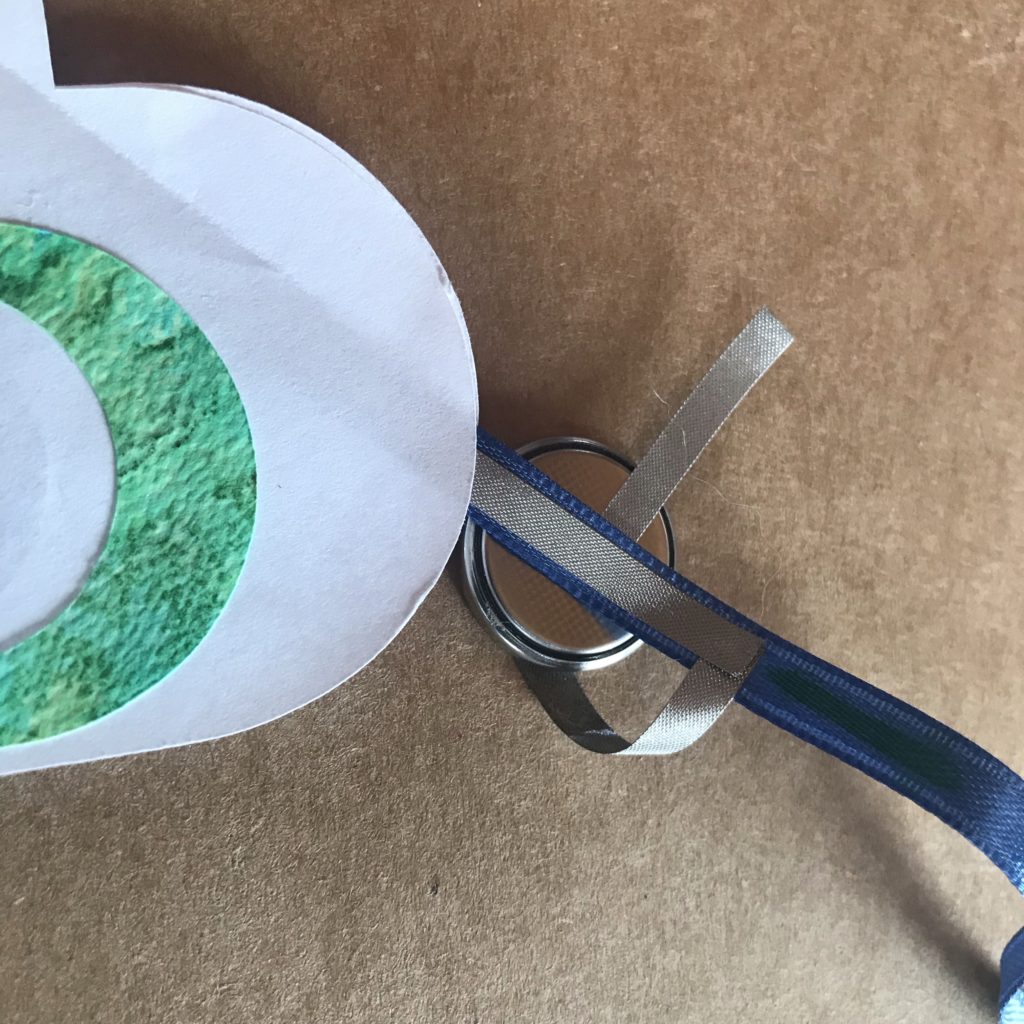
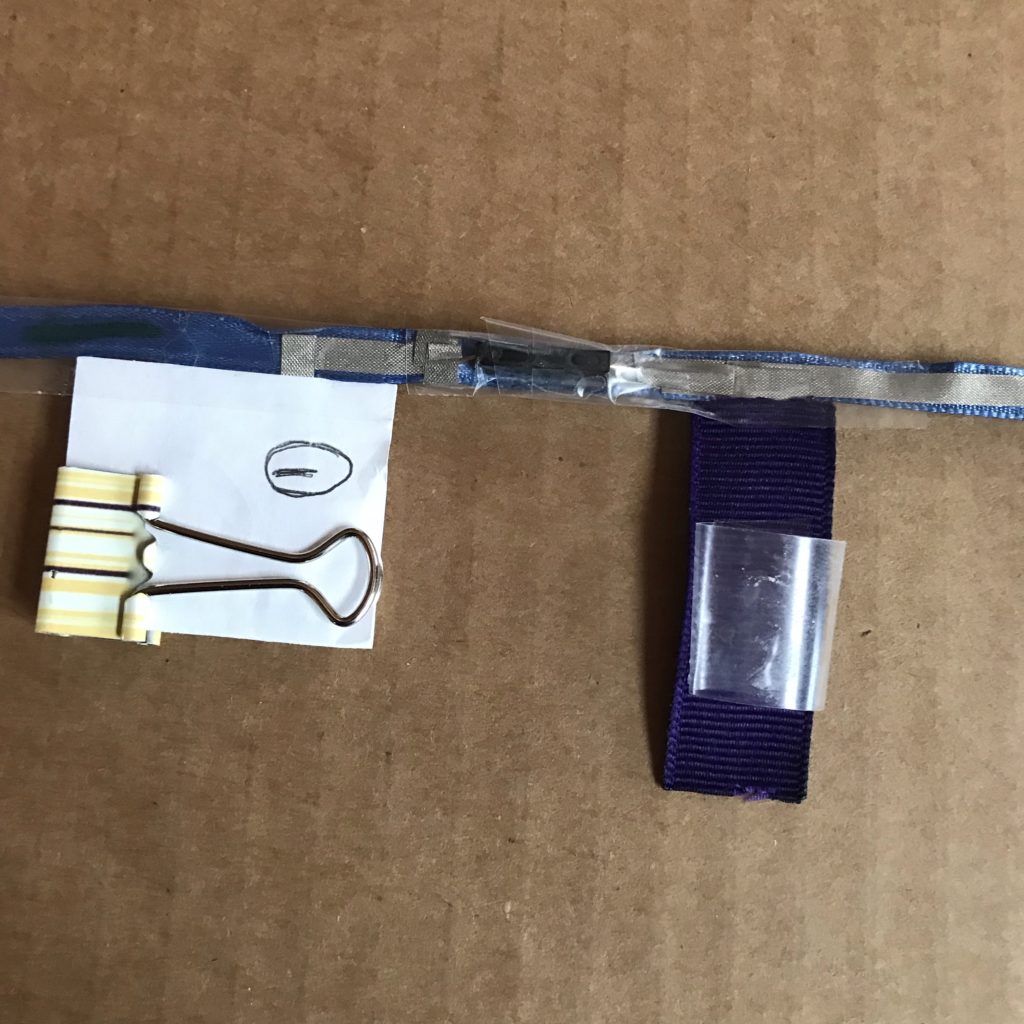
One way to hold your battery in place is to use a ball of conductive tape to secure the negative side of the battery to the back side of the ground rail, wrapping the flap of positive tape around to the positive side. An advantage of using this method is that it’s quick and discrete. A disadvantage is that you’d need to detach the conductive tape to disconnect the battery, and use a fresh piece of conductive tape to reconnect the battery each time.
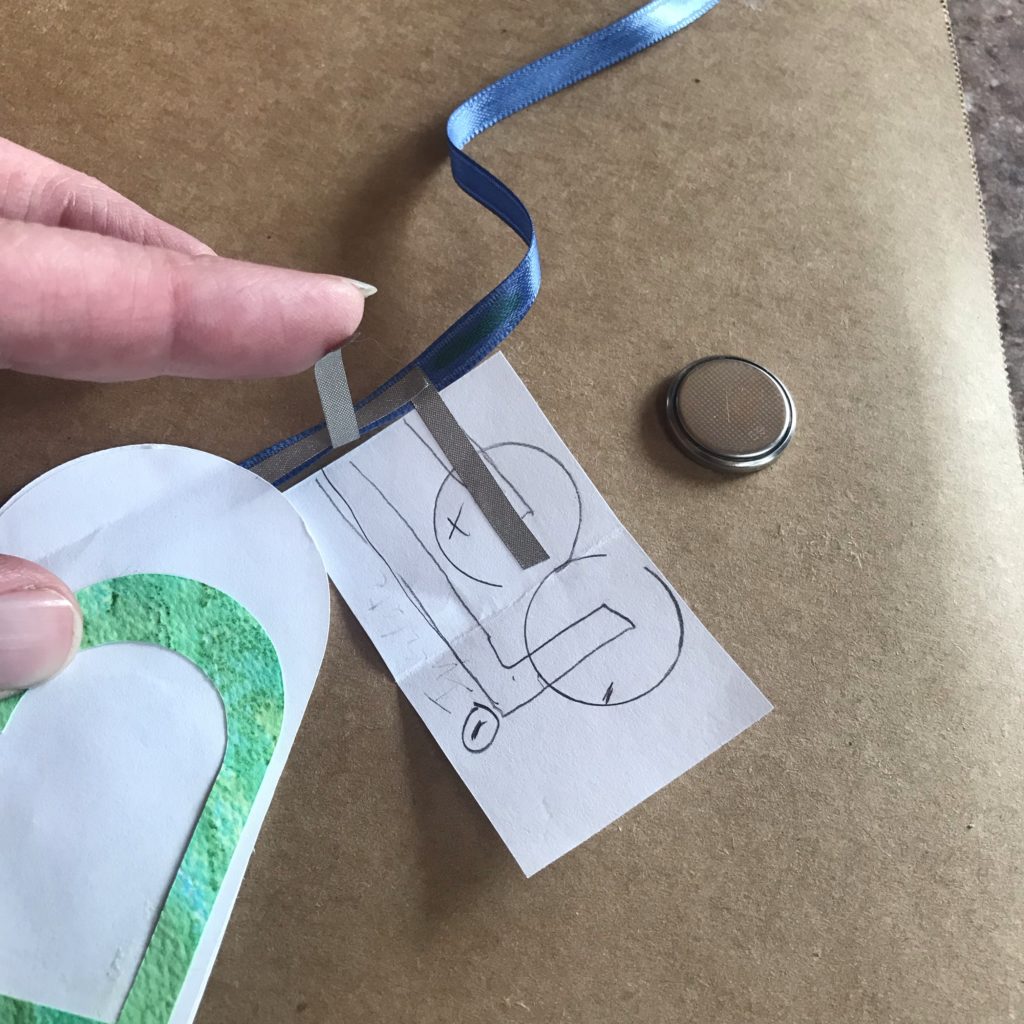
A second way is to use a piece of folded paper held together with a small binder clip. An advantage of this method is the ability to quickly switch the circuit on or off by clipping or unclipping. A disadvantage is that the clip may protrude somewhat from the surface it’s hanging upon. This style of battery holder needs to have insulating bridges added with Scotch tape, to prevent the positive and negative leads from touching.
Step 6: Assemble & Hang
While adding the flags to the circuit portion of the garland, I found that adding a ball of Scotch tape to the underside of the LED strands is a good way to keep the flags from shifting. I also use a small ball of Scotch tape to secure the openings of each flag.
No matter which method you’ve chosen for holding your battery in place, it’s a good idea to tape a decorative element over the battery to make it blend in with the rest of your garland.
Ideas for Adapting this Project
Variation 1: Add a Reed Switch
An optional upgrade to your glowing garland strands would be adding a reed switch. Incorporating a reed switch, triggered by a magnet, would allow you to control whether the lights are on or off without needing to disconnect your battery each time. For more details about how to do this, visit How to Add a Reed Switch (Magnet On) to Glowing Garland.
To learn about reed switches in general, visit Magical Magnetism: Intro to Reed Switches (Magnet On).
NOTE: The ideal place to insert a reed switch (magnet on) is on the back, negative side of the ribbon, between the battery and the first LED.
Variation 2: Icicle Lights
If you would prefer a more opulent display, one requiring more LEDs (and the power to keep them lit for longer), you may wish to apply the techniques we used to make the glowing garland to make a more structured version.
Similar to holiday icicle lighting, which has less of a drape than a garland, adding a cardboard support behind your power and ground rail will allow you to add longer, more elaborate, streamers of light.
Keep in mind that while each of the glowing garland strands has its own battery, operating as a stand-alone parallel circuit, icicle lights require a single power source to light up all of the strands at the same time. The main advantage of this design variation is that you can add a lot of different streamers to the power/ground rail, easily mixing and matching LED colors as you go. On the other hand, since this design requires more power to work properly, we suggest using a dedicated 5V power source such as a Chibi Chip or USB cable to keep it shining brightly. To learn more about powering your paper circuit projects with USB, visit USB Powered Paper Circuits: An Alternative to Coin Batteries.
Gallery

Similar Posts You Might Enjoy
Holiday Decor
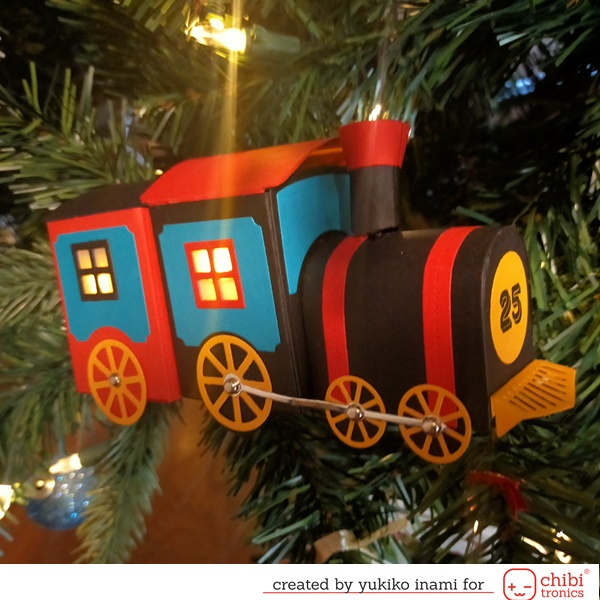
See how Yukiko Inami uses Circuit Sticker LEDs & a reed switch to create magical holiday decorations!
Gift Wrap
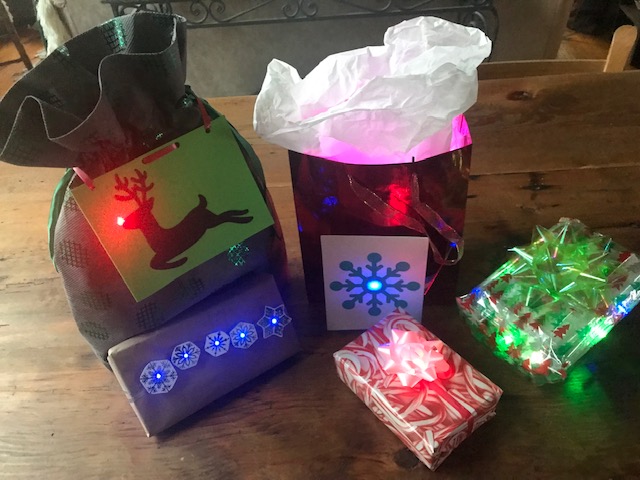
See how Jill Dawson uses five different techniques for adding light to holiday gift wrapping.