Hi, crafty friends!
I’m happy to share my project for this month here.
I loved treehouses when I was little.
I read fairy tales and dreamed of meeting a gnome living there.
Do you have good memories with your treehouse?
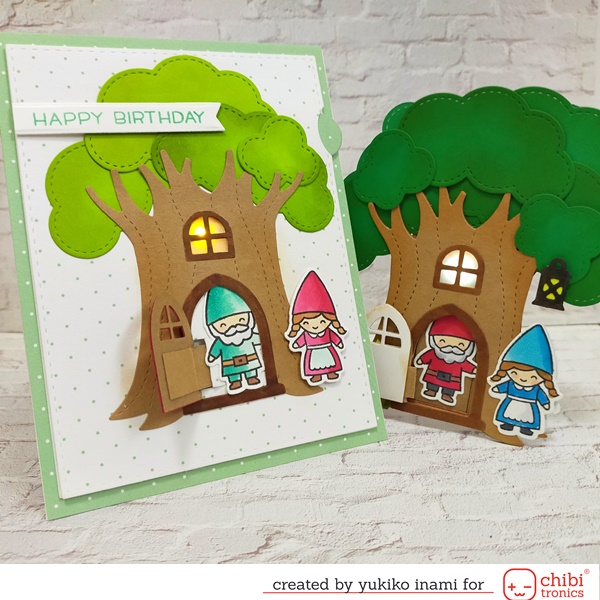
A gnome girl visits the treehouse. Ding-dong! Her grandfather comes out to welcome!
When the door is opened, the window is lit.
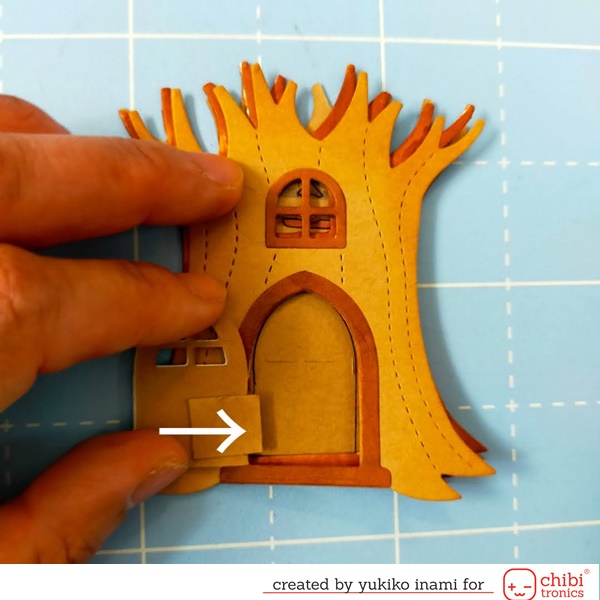
When you open the door, the tab switch is linked with the door moving to slide.
The end site of the tab is stuck on the backside of the door.
There is a small difference with the folding point of the door and tab. It makes the tab movement.
We used this switch mechanism in many ways.
There are many projects in this blog. *Eiko *Joo *Yukiko *Weiwei
Check out them and try this switch.
1. Supplies
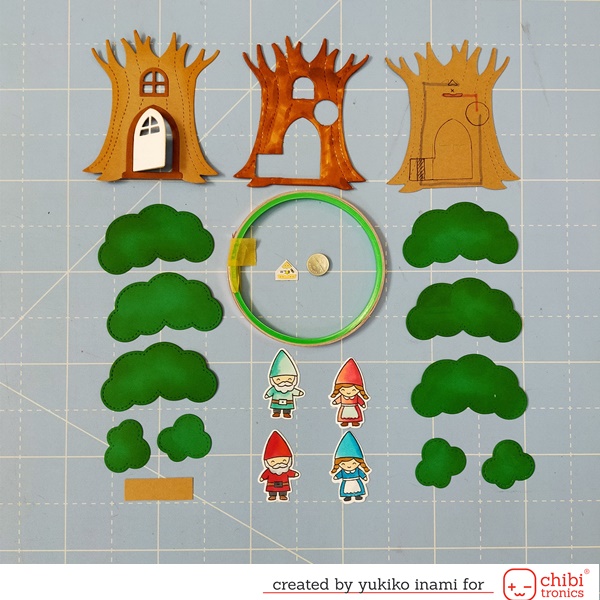
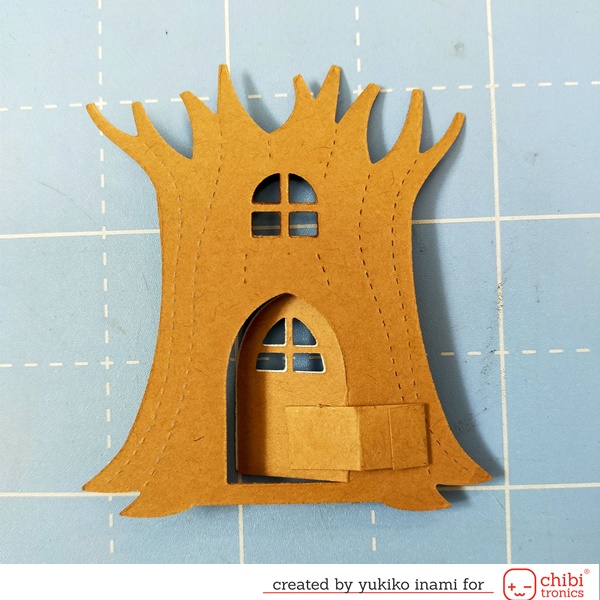
・Tree trunk; 3 1)top parts ;cut out with the die 2) chipboard cut the chipboard 2mm thick and color it with brown 3) circuit panel; cut out just the edge using the partial die cut. Don’t cut out the door and window
・tab 1/4x 1 1/4″
・Leaf; Cut 6 big leaf clusters and 4 small cluster and color the edge with green using blending tool
・Gnome ; 2 girls and 2 boys
・Door ;2
・Door frame
・Window frame
・Cell battery; CR1220
・Copper tape
・LED stickers; Chibitronics
・Tree house : Lawn Fawn
・Oh gnome! ; Lawn Fawn
2. The Mechanism of the Tab Switch Parts
I will show you the details of the switch tab on the backside of the door .
This is the view from the backside of the top panel.
You can see the switch tab is on the backside of the door.
We need to shift the position of the folding point of the tab to 2 mm outside from the point of the door. It makes the tab movement.
This is the view from the front side. The door is opened, then the tab is pulled to the right.
The tab has a fold then the switch pulls in the opposite direction from the door.
3. The Circuit
This is the circuit wiring.
It has one LED light and one cell battery, and a pull tab switch.
It’s very simple!
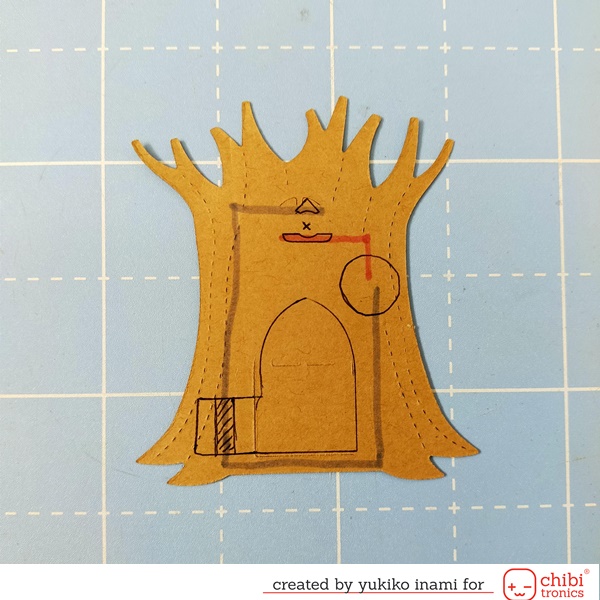
I cut the slit in the circuit at the point for the switching.

When the tab slides on the gap point, the circuit is completed and the light shines.
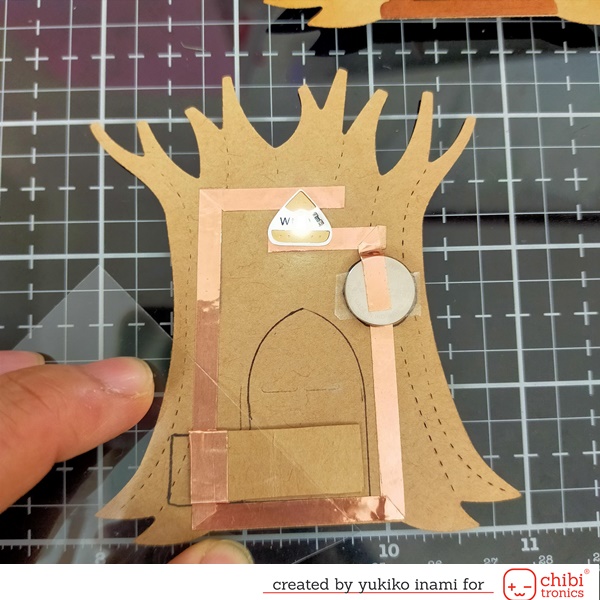
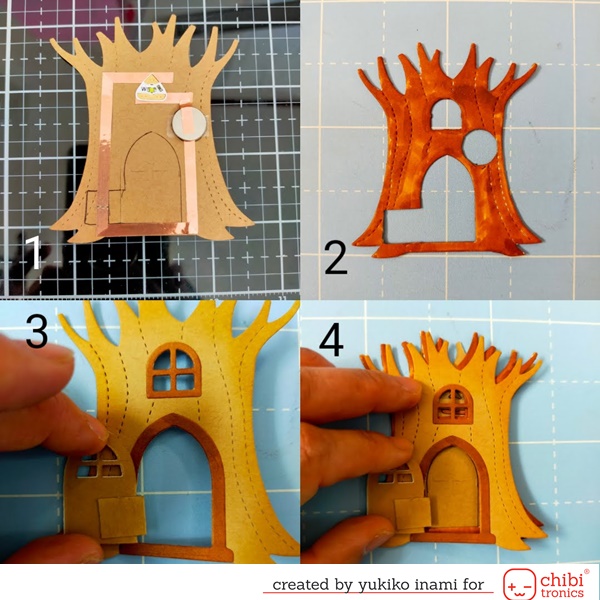
4. Assembly
I layered the panel as shown in this picture. And stuck them with glue tightly.
I show you the layering order in the picture below.
First layer(the bottom layer); circuit panel , Second layer; chipbord, Third layer; front panel
5. Making the Scene
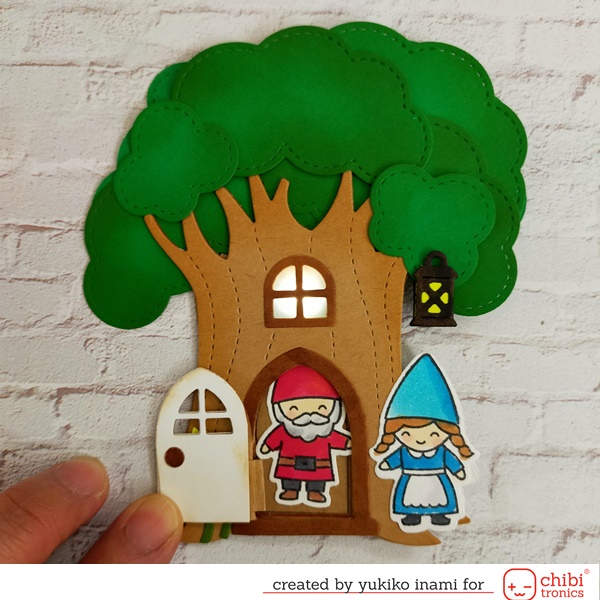
I made the scene in the woods. This is a happy gathering time.
Front side; The gnome girl rings the bell.
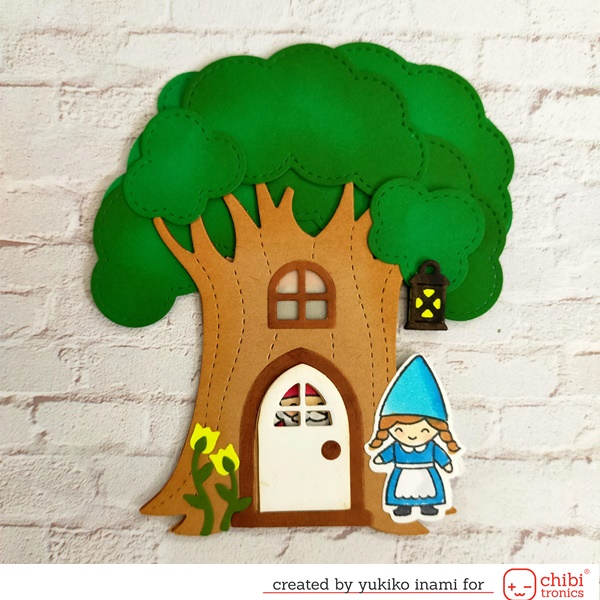
Front side; the door is opened. Then the window light shines!

Back side
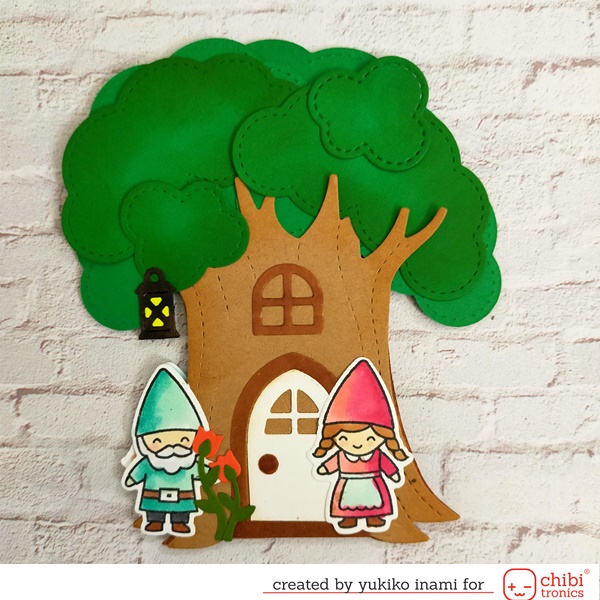
I show another pattern treehouse card to you. It is easy to make because this has more space for its circuit.
And the tab pulls in the same direction of the door movement.
Thank you so much for stopping by today!
I hope you have a wonderful summer with your family and friends.
Yukiko I.