Exploring Different Light Effects
Lesson Plan
Overview
Materials, Tools & Template
Key Concepts
Instructions
Wrap-Up
Project Gallery
Education Standards
Overview
Grades: Middle School
Estimated Time: 90 mins
Lesson Objectives: Be introduced to microcontrollers and tangible programming. Design a light-up project with different light effects. Learn how effect stickers works.
This activity introduces programmed light behaviors using Chibitronics effect stickers. Effect stickers are pre-programmed light stickers that make your LEDs shine with different patterns, depending on which sticker you choose: blink on and off, fade in and out, pulse in a heartbeat and twinkle like a star.
This activity is great for students who have some experience in creating simple circuits and are looking to explore aspects of more complex circuits and creative opportunities enabled by dynamic light patterns.
Materials
- Effects sticker
- LED stickers
- coin cell battery*
- copper foil tape**
- binder clip
Chibitronics Products
• Classroom Pack of Red, Yellow and Blue LED stickers
• Classroom Pack of White LED stickers
• Effects Stickers
Tools
- Scissors
- Drawing supplies
- Glue
*Store your batteries separately, and away from other bits of metal. This avoids accidental connections that can drain the batteries.
**The edges on the copper tape can be sharp. Watch your fingertips!
Template

Key Concepts
Microcontrollers:
A microcontroller is a tiny computer that is used to do simple tasks, like making sure your microwave doesn’t overcook your food, or helping you change channels on your TV.
When you make a simple circuit with an LED light, the LED can only turn on when you connect power (a battery). You could manually control this by connecting and disconnecting the power using a switch, turning the LED light on and off when needed. By adding a microcontroller to your simple circuit, your LED can now be automatically controlled by a program that turns them on and off in different patterns, as well as interact with the world around it through sensors.
The Effects sticker is the simplest kind of microcontroller. It runs a fixed internal program that creates different behaviors, making LEDS connected to them automatically blink on and off, fade in and out, flicker like a candle, and so forth.
Although microcontrollers don’t make light, they still need power to run. An important concept to learn from this exercise is how to power a circuit element that can perform computation. Improper power to a computing element will read to a malfunction of the program, so the student must pay attention to the polarity (+ or -) of the power as well as the integrity of the connection. In a simple circuit, an LED might glow dimly or intermittently with a poor connection, but a microcontroller may fail to operate at all if the power connections are not solid.
The microcontroller in the effects sticker create an output signal which can then be connected to LEDs. The signal output is a single wire. As the students learned in previous lessons, electricity must always flow in loops, and thus there is a choice they have to make: do we connect the LED to the (-) power line, or the (+) power line to complete the loop? A student can even choose to put two LEDs on a single signal wire, one to (-) and one to (+), and observe the effect of polarity in electronic circuits.
Unlike other systems, the microcontrollers in chibitronics Effects stickers are designed with special signal amplifiers which allow the microcontroller to drive many LEDs in parallel, so students can continue to explore series and parallel circuits using Effects stickers.
Tangible programming:
When programming on a computer, you write a sequence of instructions in code, telling the computer what to do. In tangible programming, the instructions aren’t code; they are instead physical objects that are assembled together to create the desired behavior. The effects stickers are simple tangible programming elements that can be slotted into a common circuit layout to create different effects. Thus within the variety of physical primitives available, students can program the behavior of their LEDs.
How an effect sticker works:
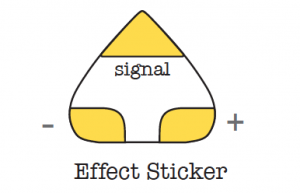
The effect sticker has three pads: + and – for power and a signal pad that generates the pattern.
The signal pad is pre-programmed to switch between + and -, which causes the lights connected to it to turn on and off automatically. Varying the amount of time spent on and off creates the different light patterns. Signal pads are how circuits talk to each other. They consist of two types, inputs and outputs.
- Input: An input is how a circuit listens to other signals. Just as many students can listen to a teacher, you can have many inputs listen to a single output.
- Output: An output is how a circuit tells other circuits what to do. You should have only one output in every circuit. If you have two people talking at the same time, nobody can understand what’s going on!
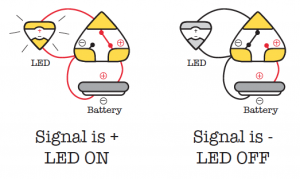
To use the effect sticker, first you need to connect the + and – pads of the effect sticker to the + and – of the battery, respectively. This provides power to the effect sticker. Then you can control your LEDs by connecting them between the effects signal pad and “-” or “+” of the battery. For example, connecting the “+” of the LED to the signal and “-” of the LED to – of the battery will cause the light to turn on when the signal is + like in this circuit:
We encourage you to first let the students try making these circuits. You could introduce these concepts as they are making their projects, explain while you are helping them troubleshoot or revisit them at the end of the session.
Instructions
0. Create an example of your own projects with different light effects. Share your projects with your students.
1. Revisit basic circuit and switches. Ask the students to share their experiences of creating projects with circuits.
2. Share your project examples with them that demonstrates different light patterns with the effect stickers. Discuss different light effects (blink, fade, heartbeat, twinkle).
Creative prompt:
Encourage the students to make a list of objects and phenomenon that reminds them of different light patterns generated by effect stickers. For eg. Twinkling of stars, flickering of a candle, blinking fairy lights etc.
3. Ask them to choose one object/phenomenon and make sketch on paper. Fold to make a card.
4. Have the students quickly share their sketches with the person sitting next to them.
5. Ask them to identify and mark the part in their sketch that they want to light-up.
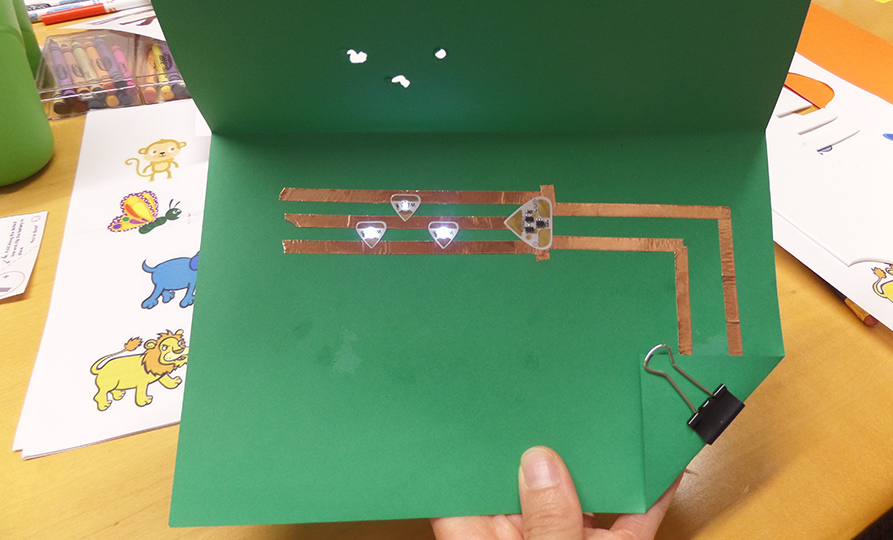
6. Pass around the effect sticker template , copper tape, battery, LED light sticker and binder clip. Refer to this tutorial to make the circuit with light effects.
7. Once the circuit is complete and working, have the students place their circuits underneath their drawing, aligning the light with the part they want to light up.
If their circuits are not working, give students opportunities to troubleshoot. Ask them to check if their connections are strong enough.
8. Have the students quickly share them with each other. You could use this step as an opportunity to provoke questions and also encourage the students to share their questions with the group.
Question Prompts:
• Describe what… ?
• What would happen if …?
• Why do you think that …?
• How would you…?
• Remember to ask, “What questions do you have?”
Wrap-Up
9. Encourage students to share their creations with a group and give each other feedback.
Make sure to notice children’s engagement and process while doing this activity. Listen to their ideas and ask them questions about their creations.
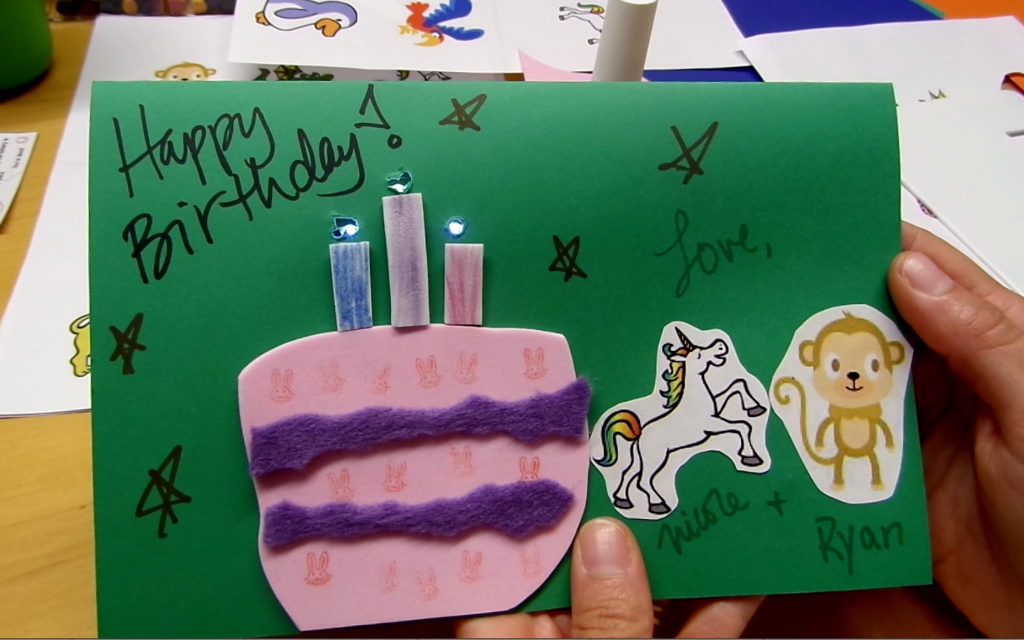
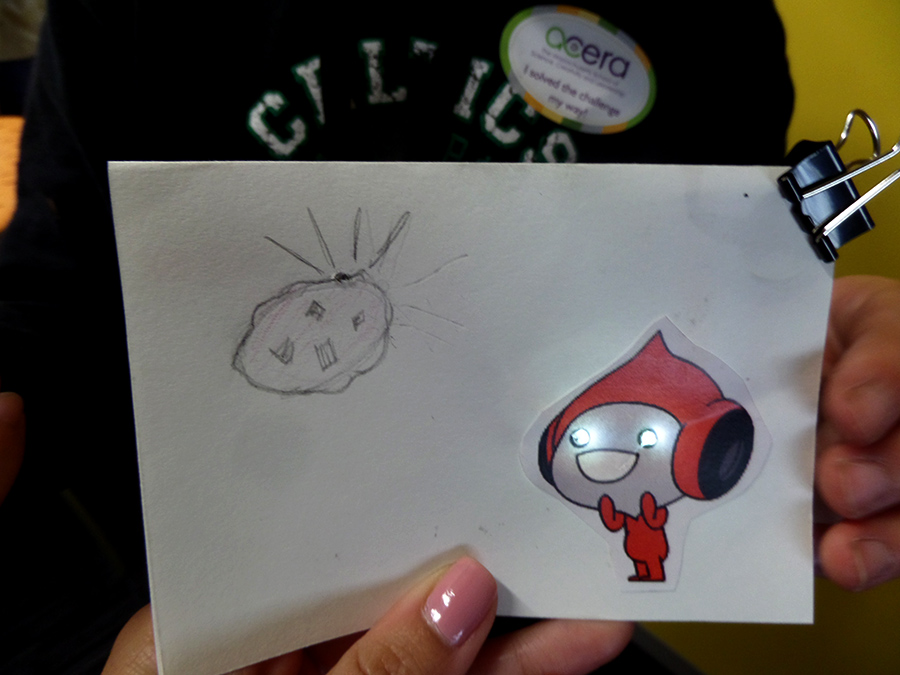
Project Gallery
Alignment to Standards
We think the following standards are most relevant to this activity. You could adapt this list for your class session. The complete list of all the standards can be found on the respective websites of each framework.
- Creativity and innovation- Students demonstrate creative thinking, construct knowledge, and develop innovative products and processes using technology.
a. Apply existing knowledge to generate new ideas, products, or processes
b. Create original works as a means of personal or group expression - Technology operations and concepts- Students demonstrate a sound understanding of technology concepts, systems, and operations.
c. Troubleshoot systems and applications
- Practice 1 Asking questions and defining problems
- Practice 6 Constructing Explanations and Designing Solutions
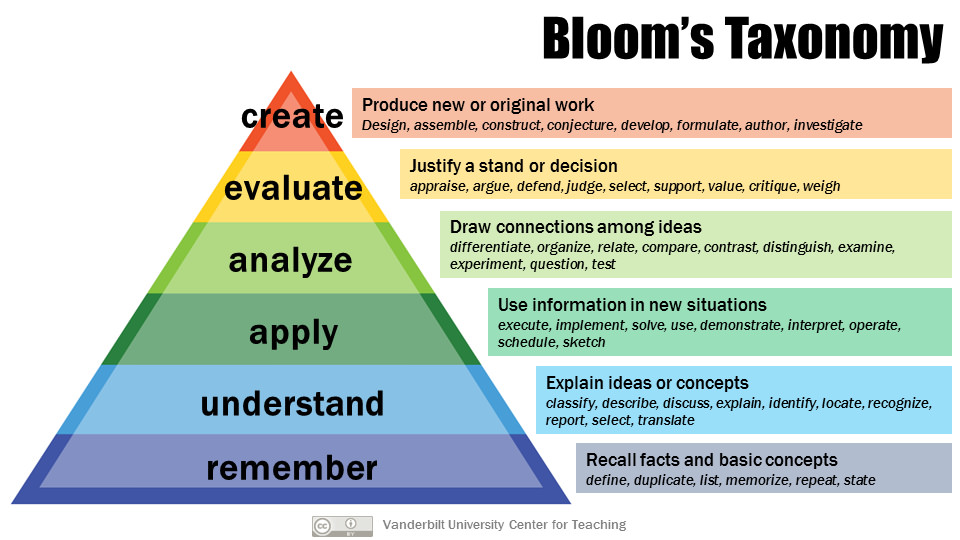
You could also refer to Bloom’s Taxonomy as part of your classroom assessment.